

Beck
-
Posts
1,707 -
Joined
-
Last visited
-
Days Won
4
Content Type
Forums
Profiles
Gallery
Blogs
Downloads
Events
Posts posted by Beck
-
-
70 punds off?? I don't think the 4th gen bodywork and all it's related hardware could weigh that much? :blink: :huh: So you're saying you found a whole bunch of boatanchors hidden in the bike?? I can believe maybe 20+- pounds off , but 70? We need to know how that's done.
Beck
95 VFR
Well, the stock slip-on weighs 11-13lbs by itself...
Yes, you typically knock it down to half (with an SS Staintune and a little less for a super lightweight CF can system. But there's still about 60 hard get rid off. pounds to go....
Beck
95 VFR
-
I seriously admire the dedication and the workmanship that has gone into this project, but I have to ask myself, why? Why would you want to junk the very distinctive and attractive 4th Gen bodywork and turn the bike into one that looks like every other sportsbike on the road? To me, it just doesn't make sense.
We didn't buy the bike wrecked. The bike was perfect and had 6k miles on it when my dad purchased it. At one point or another we both laid the bike down on the same side, so after a while we started sourcing body panels for it. And while sourcing panels, we decided to get rid of all that weight and transform the look of the bike too. The weight reduction idea started with the all-in-one gauge and it exploded from there. In the end we took off close to 70 lbs from stock trim (most of it was reduced up top, which makes a huge improvement in the handling). I also don't think it looks like "every other sportsbike" either. Single sided swingarm, hidden lights, solid paint job, and lets not forget the sound! :) It handles great and sounds like no other sports bike out there.
70 punds off?? I don't think the 4th gen bodywork and all it's related hardware could weigh that much? :blink: :huh: So you're saying you found a whole bunch of boatanchors hidden in the bike?? I can believe maybe 20+- pounds off , but 70? We need to know how that's done.
Beck
95 VFR
-
IIRC, there were some people out there modifying Honda Civic aluminum wheels to bolt on to SSS rear ends like the VFR at one time. Can't remember if they sold it to the public or if they were just one-off projects, but this is not the first time that aluminum car wheels were modified for motorcycles.
Don't agree with the 3 spoker request though, I always thought that three spokers looked kinda weird and unbalanced. Ideal (aesthetic-wise) number of spokes had always been 5. 4 might be nice too. 8 is always appreciated here!
Beck
95 VFR
-
Clicky picky...
Over 3 years and no heat or other issues, :cool:
Greg :fing02:
I always say, do it the best way you can if possible. If putting it next to the hottest parts of the bike is a good place, then already we've seen many bikes with that setup.....but we don't.....Don't we have enough problems with heat buildup damage to our RRs with Honda also locating it in the least ideal area under the seat fairings??....
Beck
95 VFR
-
As I noted, the best mounting locations for horns is an area as high and dry as you can find under the fairing, for lngest life and reliability. I believe that if you look hard enough, you can find spaces in the upper fairngs on most VFR models that should work out. I too had to experiment and go through a few less than successful installations for my Fiamm low tone snail horn on my 95. Tried it first at the stock location in front of the radiator, but found out the front fender kissed it on bigger bumps ended up finding a space to the left of the upper radiator mount and the horn had been happily living there for at least eight years now.
Here's a pic:
MVC-010F.JPG
See it peeking out of the faring on the left side, below the left handlebar. I think a few 6th gen owners have mounted their Stebels near the same area under the faring, right next to the radiator.
Beck
95 VFR
-
GPM, that low location next to the headers does not look to be a good idea because it's like the harshest environment you can find on a bike. Those header pipes get hot enough to actually glow red hot in the night and it could spell disaster for the plastic material the horn body is made of, That area also get the most rain splash, moisture and muck from the road kicked up from the wheel. The higher and cooler place on the bike you can find the better it would be for the life of the horn.
Beck
95 VFR
-
That looks like a better/tighter fit than the old Wolf system and without all the crazy tire clearance problems that came with it!
Congratulations on the great job on the undertail! Weird thing is, current "bike fashion" now dictates that thelatest motorcycles have the old conventional low mount right side exhaust routing :biggrin: . I still prefer the high right and undertail systems though. the ginormous low right system on the new 1200 is not looking good to me at all. :squid:
Beck
95 VFR
-
Just thought i'd let you guys know what's happening...
I've had a couple of email communications with Norman Hossack which has been quite usful.
Norman stated in one of his emails that he wouldn't build one of his designs with less than 24 degrees rake.. i'm still waiting for a reply as to why he thinks that - will have to wait and see.. seams to have the opposite opinion to others.
Based on this and my own thoughts I've decided to relax the rake angle on the design from 17 to 20 Degrees, mainly this will allow the handlebars to be nearer the rider and give the bike a more conventional look overall. (standard fairings should fit better) i'm still on the look out for a used cbr600rr top and middle panels but tempted to buy a race fairing because the're cheap and available.
As to frame material 4130 now seams the best choice. my welding grasstrack friend tells me that he's found that it doesn't distort as much as T45 or CDS5 tube.
Currently i'm calulating how much tube/steel i'll need to buy.. crunch time's here. Hand over the money!
Red
4130, fantastic! it should come up to be a fine, strong and light frame for the bike. A "Reynolds TI" sticker on it might look good too, if that's what you will be using.
Are you planning to powdercoat or polish/nickel chrome the frame..ala Harris??
I vote for powdercoat...red would be nice, but I've seen some black powdercoated frames on late model KTMs that also look great.
Beck
95 VFR
-
Cool. Thanks for the tip.
I'd like to see the Vitus when you are done too. My first decent road bike was a used Vitus 979. It was white and damn clean. It little whippy but a nice ride and a light bike. I still have a 25.0 Campy post laying around for it that replaced it was dug into but that kooky Vitus seatpost binder. I've had a lot of nice bikes since then, a couple of Serottas a couple of Fausto Coppis and now a Klein and a Merlin. I wish that I still had all of them... Including the Vitus.
It's a 1985 Vitus Carbone Plus 7 I just got off an auction a couple of months ago. It's an interesting frame with carbon fibre wrapped saluminum frame tubes. I'm kind of a Francophile when it comes to bikes, since my college "serious" bicycle riding days, in the era of Hinault, Sean Kelly, Fignon and LeMond, when IMO, bikes were most beautiful.
I'm currently cleaning/polishing up the aluminum head, bottom bracket and seat cluster "lugs" on the bike and working to put together Frech period components to replace the original Shimano dura Ace BL7400 series gruppo. This resto will be a full French one, because IMO, a classic French bike whoudl have French components.
Goodies that I have put together for the transplant, so far:
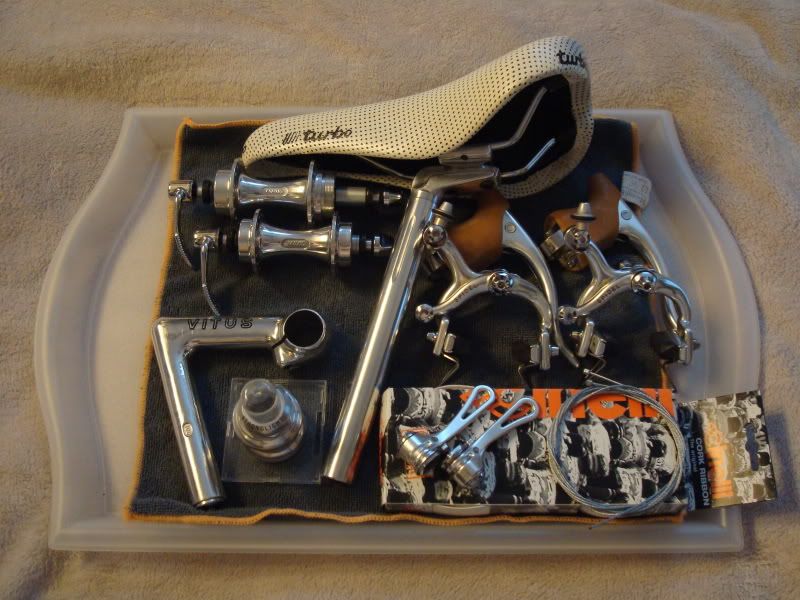
Ingeredients for a two wheeled French Souffle??
It's gonna be a long winter project, but I'll make sure to post up the final results, by spring, most likely.
Beck
95 VFR
-
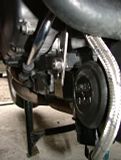
After weeks of struggling with my winter classic bicycle restoration project, with stem, bottom bracket and steering head races all siezed with corrosion that usually occur between the dissimilar metals involved, Soaking in Liquid Wrench. PB Blaster and pounding continuously with a deadlow hammer, nothing was budging. in desperation I started looking for ammonia which was recommended by the big bicycle forum I am a member off, as a last resort solution to dissolve the siezing aluminum oxide and hopefully release the parts. Couldn't find the recommended strong solution of ammonia when I bumped into the CRC made product in the auto parts store (Kragen) called "Freeze-Off" I was so frustrated that I bought it on impulse and did not really have to much high hopes for the product working to release my parts of my bicycle frame.
Boy, was I wrong, In literally 5 minutes, I was able to remove the very tightly stuck stem from my fork as seen here in these pics. It came off so easily with a few hits with the dead-blow hammer that it felt like it literally fell off the bicycle fork steerer tube.
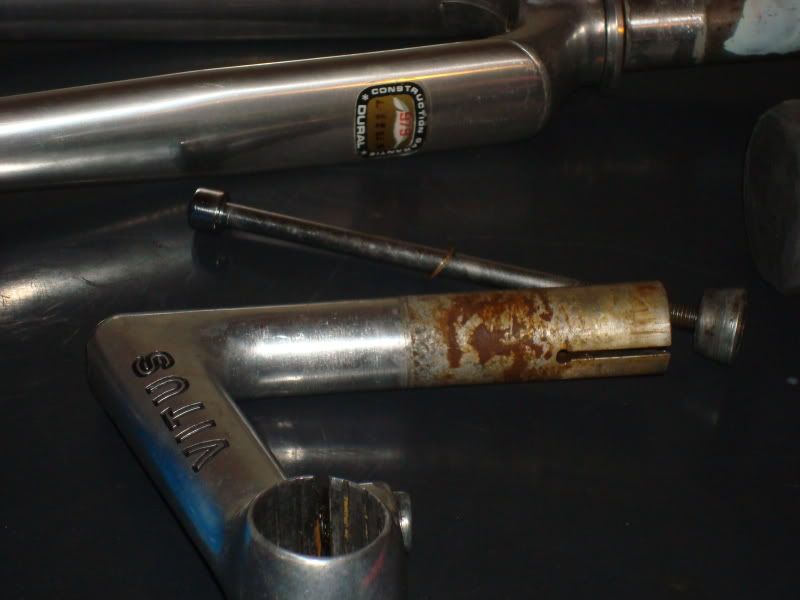

I was pounding and soaking these parts for over two weeks without any success! I was so elated and surprised how well the Freeze-Off worked. Have since removed the also seized bottom bracket and head races from the frame and fork. Even experimented to see if the other supposedly super penetrant products I used didn't work for sure by trying them first. Again no success, but after using the Freeze-Off on these other parts, they came off easily in a couple of minutes at most with minimum persuasion from my tools!
Trick is to use it liberally and analyze where you should blast the part or fastener with the Freeze-Off to properly shrink it away with the freezing effect and "crack" the Ferrous and aluminum oxide material to let the penetrant oils in the spray dissolve the corrosion, thus releasing the part. Make sure you use it liberally, because you really have to frezze the part for it to work. Hope others here can take advantage of this product as I did when working on seized parts and fasteners from your motorcycles or anything else around your house. I better buy a case of this stuff lest the Feds find something in it to ban it one day!!
Beck
95 VFR
-
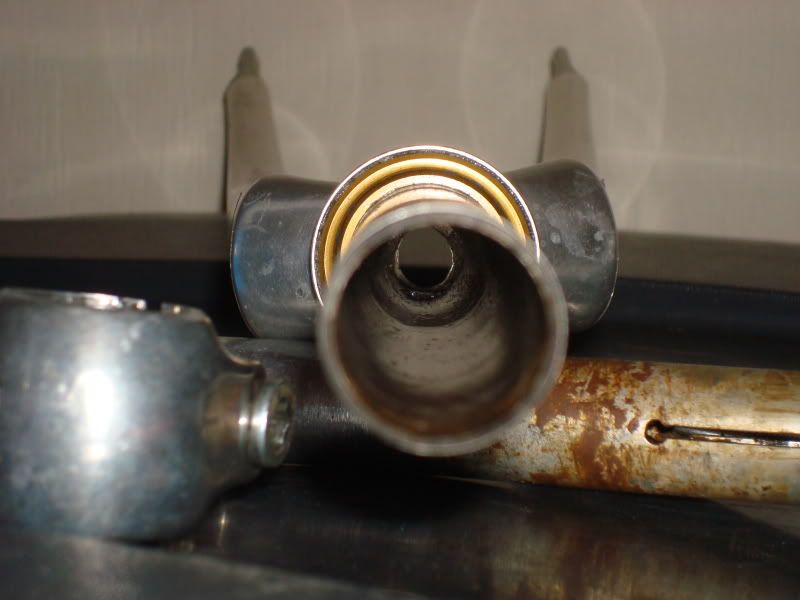
basically I was trying to point out that the drainage bolt isn't in as convenient a location as on the F4i forks, which have it on the outside of the fork lower, no removal of axle required...
No, that's the point. There is no drainage bolt per say on either fork, it's just the bolt that holds the cartridge in place. The bolt location is identical, in fact every conventional fork has to have the same set-up to hold the cartridge assembly in the bottom of the fork tubes and the axle would be in the way one each one. Don't know if it's my picture or what making you believe there different because there is NO drain bolt on the side of the F4i fork?
Now there are some forks, usually older one's that have extra drain bolts on the bottom sides of the forks, but VFR & F4/f4i's are not one's. :fing02:
I hope I've clarified what I'm saying this time. :unsure:
:blush:
BR
BR, please note that the 95 4th gen and earlier did have a fork oil drainbolt at the bottom aft side of the lower fork tubes. I think the 3rd gen bikes had them too. They decided to save some money and blank out that bolt with the 96 VFR and later...........VFR de-evolution or simply just an attempt by Honda to force fork oil replacement towards the dealerships??....Kachinnnggg!!
Beck
95 VFR
-
Coming from steel racing bicycles background from my college days, much was made of CrMo (by Reynolds, Columbus, Ishiwata, Tange, Vitus...etc) tubing for the best quality steel bicycle frames. Maganese steel alloys covering the middle part of the market and 1020 high carbon, high tensile, seamed steel tubing was the material expected for the cheapest "department store" bikes. I guess 1020 is certainly good enough when you are putting together frames or roll cages with many tubes that can help spread the loads, but the thinking in the bicycle frame builder's world was, you are depending on 3 main tubes for the bike frame's structure/stregnth plus you are trying to minimize weight as much as possible and compromises cannot be taken at the competition levels for safety and performance. I would think that a custom steel bicycle frame builder will cringe if he hears your mantra of "You can't go wrong with 1020 DOM!"
Doesn't Ducati also use CrMo seamless tubing for their bike frames, and shouldn't that be sort of the modern benchmark for building sportbike tube spaceframes if they do??
JMOs
Beck
95 VFR
Beck I agree with your opion on 1020 DOM tubing it's not suitable for motorcycle chassis.
ERW Electric resistance welded (seamed) and (DOM) Drawn Over Mandrel to increase it's tensile strength.
I believe that Ducati use 4130 for there production frames.
interesting facts:
Reynolds 753 tubing is heat treated 531!
531 Reynolds tubing was used on the legendary norton featherbed frames.
Reynolds 531 tubing has had an illustrious history in sport and motorsport.
It was even used to build up the spaceframe on Richard Noble's Thrust SSC Land Speed record car in the 80's, which is a testament to how engineers trust the tubing's stregnth. Noble's LSR car wore the big "Reynolds TI" decal on it's nose with pride.
Another ineresting CrMo steel tubing brand is the French "Vitus". They actually came up with tubing even lighter than the much vaunted Reynolds 753 and 531SL tubing with their "Extra Legere Super Vitus 980" tubing. The tubing built up to bikes that challenges aluminum frames for lightness but still keeping the lively characteristics and stregnth of CrMo steel tubing.
Beck
95 VFR
-
I went on Google to get you some info on seamless DOM tubing and found this...
Freshly plagiarized from a plagiarism on a 4x4 forum thread- (sorry for the length, but very informative!)
Steel TubingIt is impossible to go into details about every type and shape and grade of steel product available or that we might be interested in. There are far too many, and availability will vary greatly depending on location and manufacturer/supplier.
That said, one of the most often used, most often asked about, and most often misunderstood products we use is the venerable round steel tubing.
Round steel tube is commonly available in a number of industry standard sizes. For an idea of the common industry sizes (inside diameter (ID), outside diameter (OD), and wall thickness) browse the supply catalogue of your local supplier or check the Pirate4x4.com tech database HERE and especially HERE.
Note that round steel mechanical tubing is NORMALLY ordered and supplied based on a specified OD and wall thickness. The ID is the result of these former 2 specs. There are however some exceptions to this - most notably in true seamless tubing.
Here are some Flash™ graphics of the different steel tube forming processes that I snagged from the excellent Steel Tube Institute of North America website.
Contnuous (butt welded) pipe process.
The continuous process produces a full range of pipe sizes from only a few different widths of skelp. The coils of skelp, or strip, are fed into the mill and their ends welded together to provide a continuous flow. The strip passes through a pre-heater and into a furnace. The heated strip is shaped into an arc of about 270° in a forming stand before passing into the welding stand. There a nozzle applies oxygen to the edges to further heat them as they are pressed and welded together. The pipe's OD and wall thickness are reduced in a stretch-reducing mill. Pipe is then cut to length, reduced to the required size in a sizing mill and water-cooled before being straightened. It is then ready for finishing
Typical Electric Resistance Welded tube process
Steel strip is unwound from coils and side-trimmed to control width and condition the edges for welding. The strip then passes through a series of contoured rolls which progressively cold-form it into a circular shape. The edges are forced together under pressure and welded by heating the steel to temperatures between 2200° F and 2600° F using copper contacts or coil induction. Weld flash is removed from the the inside and outside surfaces of the newly-formed pipe, and the weld zone is heat treated to ensure homogeneity between the base metal and weld. The weld is subjected to in-line nondestructive testing, and the tube then passes through a series of sizing rolls to attain its precise finished diameter. It is then straightened and cut to the desired finished length.
DOM tube being constructed, starting as ERW and then being drawn over a mandrel.
The manufacturing process for DOM tubing begins with coils of steel, which are slit to the proper width for the desired tube size. The strip is cold formed and passed through an electric resistance welder which joins the edges together, under pressure, to complete the tubular shape. After testing the weld's integrity, the tubing is cut to length for further processing
Seamless tube construction
The production process for seamless tube begins by heating a steel billet to about 2250° F. The red-hot billet is rotated and drawn by rolls over a piercing rod, or mandrel. The action of the rolls causes the metal to flow over and about the mandrel to create a hollow tube shell. After reheating, the shell is moved forward over a support bar and is hot-rolled in several reducing/sizing stands to the desired wall thickness and diameter. The tube, which has grown significantly in length during the piercing and sizing processes, is then cut into sections and conveyed across a cooling bed to cool slowly in the air. It then receives whatever finishing processes are needed to meet customer requirements.
Steel tubing is usually supplied in one of the following forms:
Seamless Tube.
This is expensive and specialized stuff. It IS NOT the commonly used (and misreferenced) DOM tubing, as DOM tubing does indeed have a seam (albeit, almost invisible - more details below). True seamless tubing is uncommon in 4x4 and automotive use. It is seamless because it is manufactured by a process know as "extrusion" where a solid bar of steel is pierced down the center with a die, at unthinkable pressures, to form a tube. The process looks similar to how hollow pasta (macaroni etc) is made. There are 2 sub-types of seamless tube:
Cold Drawn Seamless (CDS) Tube is normally drawn to O.D. and I.D. dimensions and produced to standard dimensional tolerances (this differs from most other types of tubing except DOM) . It is normally made from SAE 1018 and is considered good quality.
Hot Finished Seamless (HFS) Tube is lower in cost than cold drawn and most applicable where precise dimensions and surface quality are of secondary importance. It is manufactured to O.D. and wall dimensions from SAE 1026 steel and is scaly, less dependable and not as strong as cold drawn tube.
Electric Resistance Welded (ERW) Tube
ERW is the most economical and readily available type of mechanical tuning. It is produced by taking a flat bar of steel and rolling it into a tube shape (picture rolling up a newspaper - but without any overlap) and then welding the seam - by, you guessed it - electric resistance - hence the name. Electric resistance welding is somewhat like a long, continuous spot weld. It's often computer controlled and extremely consistent. ERW is normally SAE 1010 (for wall thickness < 16 ga) or SAE 1020. ERW tube comes in 2 flavours:
Hot Rolled ERW (HREW)
HREW is rolled into a tube at elevated temperatures, usually way above room temperature. This produces a tubing that is more malleable and therefore easier to form but that is also not as strong, is supplied covered with scale, and not as uniform in dimension as cold rolled. It is also quite a bit cheaper than cold rolled.
Cold Rolled ERW (CREW)
CREW is manufactured by a process in which a steel bar is rolled into a tube and the seam welded, usually at room temperature. Compared to hot rolled, CREW is stronger - (greater yield strength) - because of the improvement in the crystal lattice structure from improved grain size, shape, and orientation imparted by being worked at cold (room) temperatures), straighter, has a much smoother and more uniform surface finish, and is made to much tighter, more consistent dimensions. It is the best economical choice for tube work, and because of the better surface finish and tighter dimensional tolerances it is much nicer to work with than HREW.
Drawn Over Mandrel (DOM)
Strong and well-finished DOM is an electric resistance welded tube tested for soundness of weld and drawn through a die and over a mandrel. This process imparts significantly improved mechanical properties to the tube, due to the cold working process. It is considered a high quality tube, and is normally constructed from SAE 1020 or 1026 steel. Note that, technically DOM refers to the process by which the tube is finished after having started as an ERW tube. Technically, DOM is not a type of steel tube, but rather a process. As so often happen though - in common use the term has become accepted to mean a specific type of tubing rather than a process. In this case, when people say "DOM" they normally mean an ERW tube drawn over a mandrel at (close to) room temperature and made from SAE 1020 steel. It is normally drawn to O.D. and I.D. dimensions. Here is what the Steel Tube Institute of North America has to say about DOM:
The DOM Manufacturing Process
The manufacturing process for DOM tubing begins with coils of steel, which are slit to the proper width for the desired tube size. The strip is cold formed and passed through an electric resistance welder which joins the edges together, under pressure, to complete the tubular shape. After testing the weld's integrity, the tubing is cut to length for further processing.
The cold-drawing process creates a uniform, precision product with substantially improved tolerances, surface finish and tensile strength, increased hardness and good machinability. In this process, the tube is cleaned and annealed, and one end of each length is squeezed to a point so it can be gripped by the drawing mechanism. The tube is then drawn through one or more dies and over mandrels. This reduces the diameter of the tube and thins its walls to the required dimensions in a controlled fashion to provide the qualities desired in the finished product. Metallurgically, drawing improves the tube's concentricity, tensile strength, hardness and machinability. Close dimensional accuracy is achieved through tight control of both outside and inside diameters.[10]
Alloy Steel Tubing
Is not really a different type of tubing, as it will be manufactured by one of the above described methods, usually by extrusion, but from alloy steel instead of mild steel. It is generally available in either the normalized or the annealed condition. Commonly referred to as chrom-moly tube - it has very strict welding process and post-welding heat treatment and stress relieving requirements. It is my opinion that it can (should) only be TIG or Oxy-Acetylene welded, and then only if proper stress relieving will be done post welding. Sure people MIG weld it all the time, and you can safely do so - BUT - what you have in the end is a superior tube with an inferior weld joint which reduces the overall strength of whatever you fabricated to the weakest link (the weld in this case) and so you have a very expensive structure that is no better overall than one made from 1020 DOM.
Exact chemical content, heat treatment, physical properties, production method and therefore mechanical properties will vary from one supplier to the next, even for seemingly similarly named products - the wise fabricator double-checks all assumptions carefully before building anything. Different suppliers will also have available different products. For example, Ryerson-Tull, one of North America's largest suppliers list in their catalogue of steel tubing between 1" and 2' OD, the following types (not all available in all sizes):
CDS, HFS, DOM, ERW, and a proprietary product they call "Ry-Star 512 Extra".
Many suppliers will have such special proprietary products - you will have to check with your supplier for its proprietary product properties and specs.
One thing that has to be watched out for is that the industry bends a lot of carbon steel tubing to make lots of things and so most carbon steel tubing is available in the annealed condition—woe to him who does not detect it before he builds the part. I have a very good friend who once got an entire roll cage cut, bent, fitted and tacked before he realized that his merry men were working with annealed boiler tube. The other thing that we don't want is "free machining tubing." I currently use round carbon steel DOM mechanical tubing for most things other than suspension links (there I use E4130N and stress relieve and heat treat after welding). For roll cages I use either 4130 or DOM 1020. I do not want to know about hot-finished tubing because I do not want to clean it. I am old enough to remember the days when English ERW tubing was liable to split along the weld seam. As a matter of principle (or, possibly, stubbornness) I do not use ERW or butt welded tube on the race car; although, since it is a lot cheaper, I use it all over the trailer and the shop.[11]
My personal mantra on the subject of steel tubing choice for 4x4s and rock crawler's is:
"You can't go wrong with 1020 DOM!"
Coming from steel racing bicycles background from my college days, much was made of CrMo (by Reynolds, Columbus, Ishiwata, Tange, Vitus...etc) tubing for the best quality steel bicycle frames. Maganese steel alloys covering the middle part of the market and 1020 high carbon, high tensile, seamed steel tubing was the material expected for the cheapest "department store" bikes. I guess 1020 is certainly good enough when you are putting together frames or roll cages with many tubes that can help spread the loads, but the thinking in the bicycle frame builder's world was, you are depending on 3 main tubes for the bike frame's structure/stregnth plus you are trying to minimize weight as much as possible and compromises cannot be taken at the competition levels for safety and performance. I would think that a custom steel bicycle frame builder will cringe if he hears your mantra of "You can't go wrong with 1020 DOM!"
Doesn't Ducati also use CrMo seamless tubing for their bike frames, and shouldn't that be sort of the modern benchmark for building sportbike tube spaceframes if they do??
JMOs
Beck
95 VFR
-
Fantastic job! Could be the best looking VFR street fighter posted on this forum yet! :biggrin: :fing02:
BTW, correction on your title. You have a rd gen VFR, I believe.
Beck
95 VFR
-
Holy Cow Doug!, This is real bad news but I'm very glad you are OK! Hope that those bumps and bruises will heal fast to get you up an going again. The great RCBVFR might not rise up again from this bout, but I'm sure you will come up with yet another fantastic project bike or even a new one (Maybe some new Italian V4...maybe...hint..).
Beck
95 VFR
-
What bugs me about my voltmeter that's run through an existing circuit (former license plate light) is the wiring and relays along the way that switches the power on and off with the ignition, will most likely cause a voltage drop, so the numbers I am seeing isn't exactly what the voltage is at the battery. Not as critical with analog meters, but the digital ones tend to see thsi discrepancy more.
Beck
95 VFR
-
I suspect it's something like "Post traumatic shock syndrome". I can relate to the feeling. I never crashed my motorcycles since I started riding as a kid, but I did crash badly on a racing bicycle (lowsided going at least 30MPH on a curve). Got real bad roadrash on my right side and arm and had to heal/treat myself, foolishly avoiding the doctor because I was a poor college kid. I tell you, the trauma I went through scrubbing the debris away by myself from my road rash was some of the worst pain I have ever felt and it affected my racing bike riding from them on in a major way and surely continued to affect me many years after on my motorcycles. I don't feel as invincible as I felt back then before I had that bicycle crash (before when I dove through turns so agressively and without much fear or calculation), which in someways must have saved my life as a motorcycle rider, because I try to use my head to ride as smartly as I can every minute I spend on the saddle since that fateful crash many years ago. You'll surely get more comfortable later, it just takes time, but your riding will definitely change to most likely many better ways. Do change out that awful cupped Dunflop 208. I'm 100% sure it's not helping out and making that front end nervous feeling. Spoon on some smooth handling Michelin PR2CTs on that bike and it will be night and day difference for the better...I guarantee!
Beck
95 VFR
-
BTW, are you also doing a rear brake caliper flip??
Might as well do it now while you're deep in there!!
You will avoid ride height reducing effect when you tighten the chain.
Beck
95 VFR
I'm not quite sure what you're talking about here, I ended up putting the rear caliper back at the 12 oclock position again since that is how long the brake line is. Also, anywhere between 1 and 9 the caliper bolt heads would hit the swingarm, I didn't want to try to make a whole new caliper bracket and just used the Triumph one.
(and now its too late, I just put everything back... getting to know every screw very well...)
When you tighten the chain on a 4th (and maybe also 3rd) gen VFR, the eccentric makes the rear end drop down a little, slightly changing your bikes chassis geometry. If you flip the eccentic and relocate the caliper to the bottom of the disc, the effect will be reversed, so you raise the tail (which the VFRs can all use anyway to improve handling/response) when you tighten the chain on the bike. It's been done by some here, but does involve countersinking a couple of bolts for clearance. You can do a search on the site. I'm sure a few threads must have been saved on the topic.
Beck
95 VFR
-
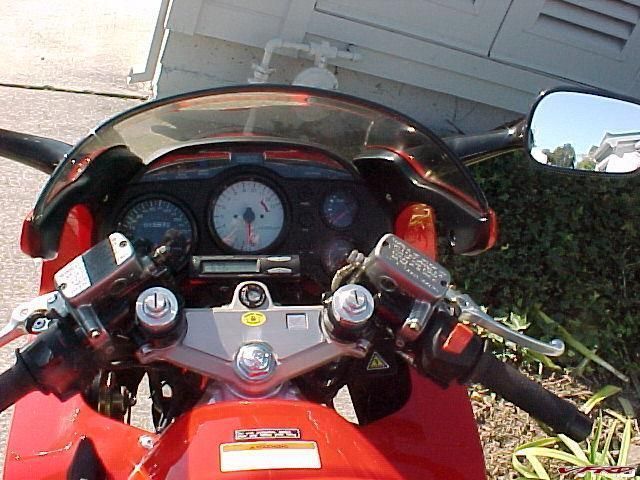
Oh - and "those ugly stickers" DougFromIndy was referring to are the ones for tire pressure, chain wear, etc. You don't need those; the chain wear one is useless (you should be able to tell when your chain is worn, and in any case, it won't work now you have a bigger sprocket on), and the tire pressures you should know. In fact, many owners use different pressures anyway. For a Clean Look, the only stickers/decals you need are the Honda logo, and maybe the VFR one. All warning stickers are teh ghey, and tire pressures etc belong in the owners manual.
Ghey??!! maybe you're just getting too "anal" about those stickers
 .....they don't bother me none....
 Beck
95 VFR
Those warning stickers on bikes are terrible, DO NOT PUT YOUR TOES UNDER A RUNNING LAWNMOWER :excl: duhhh...
My Polaris snowmobile was the worst, DO NOT HIT A TREE AT 80 MPH, IT COULD HURT OR KILL YOU :excl: duhhh..in French and English
and those damn stickers are a PITA to remove, I have a v-strom, its not mine, but I dont think I can ride it again with all those damn warning stickers, DO NOT READ THIS STICKER WHILE RIDING :excl: duhhh...
I hate them, really I do, lol :goofy:
Doug, I got more just for you!
MVC-010F.JPG
Courtesy of the Honda safety police! :fing02:
Too bad I didn't catch the "Unleaded fuel recommended" sticker in this pic!
Ooohh...get a load of my little Kryptonite "take off your disc lock before you ride...dummy!" sticker too! :excl:
Beck
95 VFR
-
Didn't take as much off when I did it a couple of months ago....
but it's the same idea. I might take some more off right next to the peg, but I think I'm generally happy with what I already took off, as long as it lightens the look of the OEM guard enough.
This could become one of the most common mods, next to the "fenderectomy"
Beck
95 VFR
Beck,
After seeing your I also had to do it. Simple cheap, clean mod.and CHEAP!
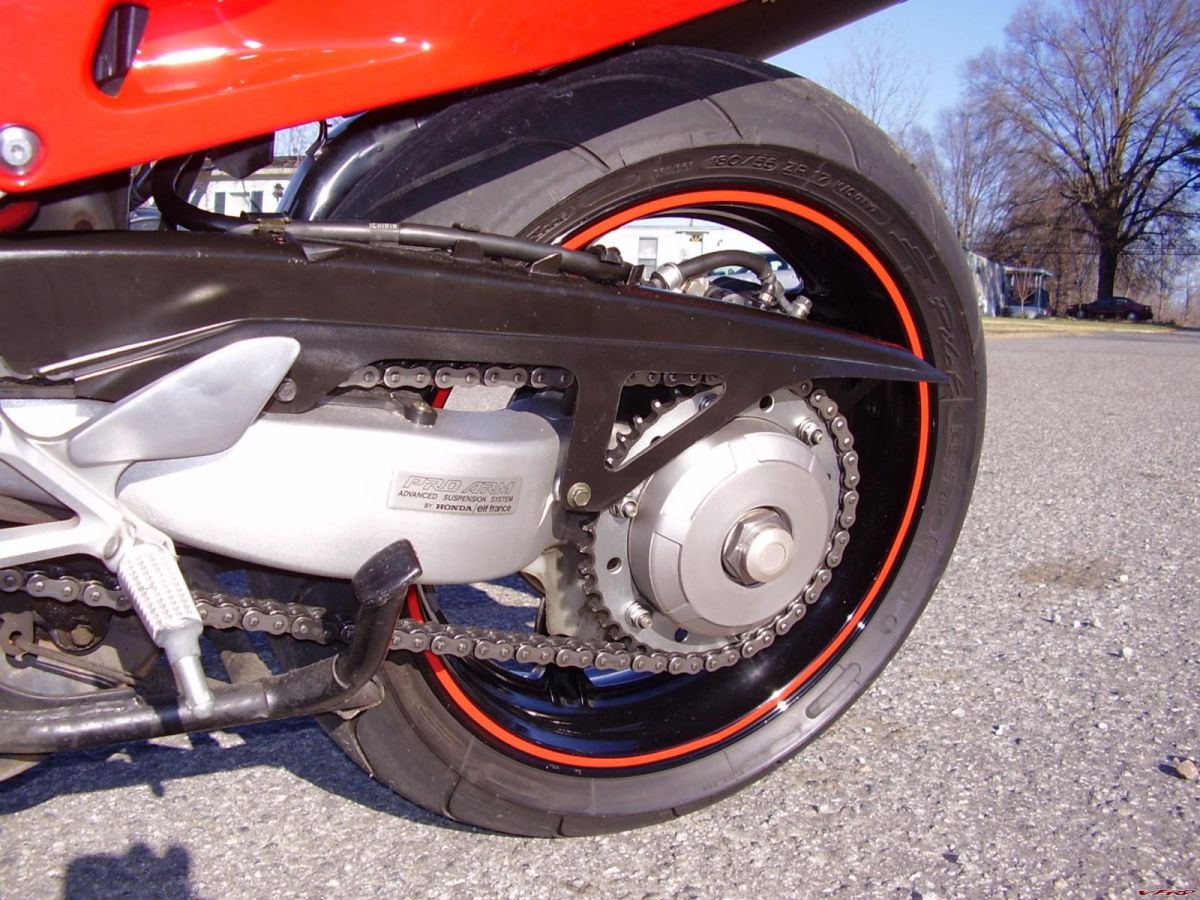
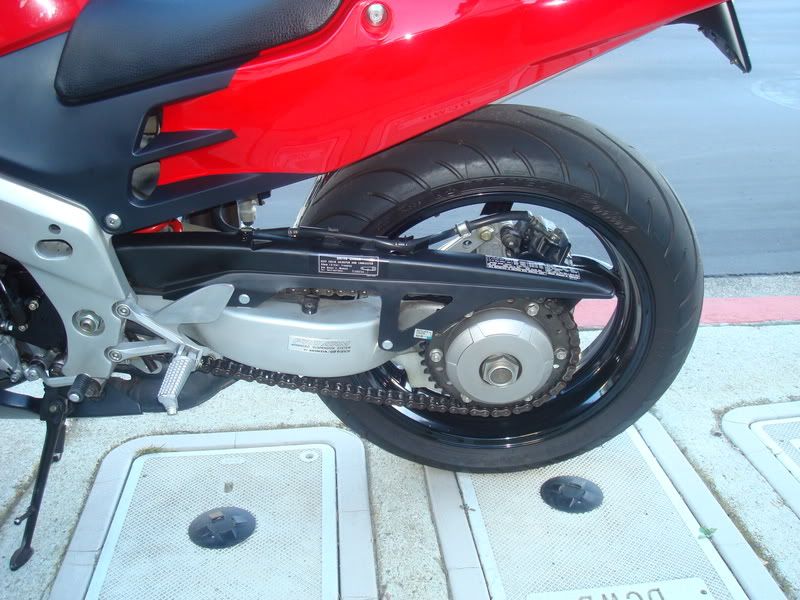
Picture 094.jpg Chain Guard Mod.
and yes I gained 5 hp.
Looks great! You can gain 1 more HP if you will take off the plastic end cap on the axle like I did. It will get rid of just that little bit more of unsprung/reciprocating weight from your 4th gens rear end and make squids think twice before challenging you to any race. :fing02: Seeing through the axle gives the rear end a racier look!
Beck
95 VFR
-
Oh - and "those ugly stickers" DougFromIndy was referring to are the ones for tire pressure, chain wear, etc. You don't need those; the chain wear one is useless (you should be able to tell when your chain is worn, and in any case, it won't work now you have a bigger sprocket on), and the tire pressures you should know. In fact, many owners use different pressures anyway. For a Clean Look, the only stickers/decals you need are the Honda logo, and maybe the VFR one. All warning stickers are teh ghey, and tire pressures etc belong in the owners manual.
Ghey??!! maybe you're just getting too "anal" about those stickers
.....they don't bother me none.... Beck
95 VFR
-
BTW, are you also doing a rear brake caliper flip??
Might as well do it now while you're deep in there!!
You will avoid ride height reducing effect when you tighten the chain.
Beck
95 VFR
-
Didn't take as much off when I did it a couple of months ago....
but it's the same idea. I might take some more off right next to the peg, but I think I'm generally happy with what I already took off, as long as it lightens the look of the OEM guard enough.
This could become one of the most common mods, next to the "fenderectomy"
Beck
95 VFR
-
You also use that extension on the end of the tire lug wrench (insert the rounded end on the wrech handle) to get more leverage. The flattened part makes for a comfortable area to push pressure from your hand/palm on You can even put you boot sole on it for removing stubborn tight lug nuts.
Beck
95 VFR
Is anyone making spacer plates for a 4th Gen Shock Swap?
in Modifications
Posted
It's really frustrating that the long 4th gen rear shock do not have a plug and play equivalent out there from other bikes, but don't these spacer/extender plates adversely affect the function of the rear suspension as it might shorten the stroke of the swingarm with the shorter shocks??. Wouldn't you end up bottoming out earlier with these shorter shocks??
Beck
95 VFR