

expvet
-
Posts
165 -
Joined
-
Last visited
Content Type
Forums
Profiles
Gallery
Blogs
Downloads
Events
Posts posted by expvet
-
-
Hi expvet,
Thank you for your donation of 25.00 USD. We look forward to improving the forums with your donation.
Thanks VFRDiscussion
-
There is a push rod that is pushed in when the slave piston is extended. Might want to check that it is moving freely since that is what engages and disengages the pressure plate.
-
The master/slave on the clutch can be tricky to bleed properly. When I rebuilt both on my 6th gen it seemed as if the typical master to slave bleed had gone well but I was getting poor disengagement with the plates. Finally resorted to a slave to master fluid push with a syringe and that dislodged whatever air pocket was trapped.
-
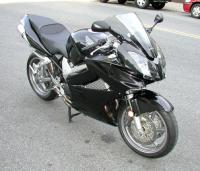
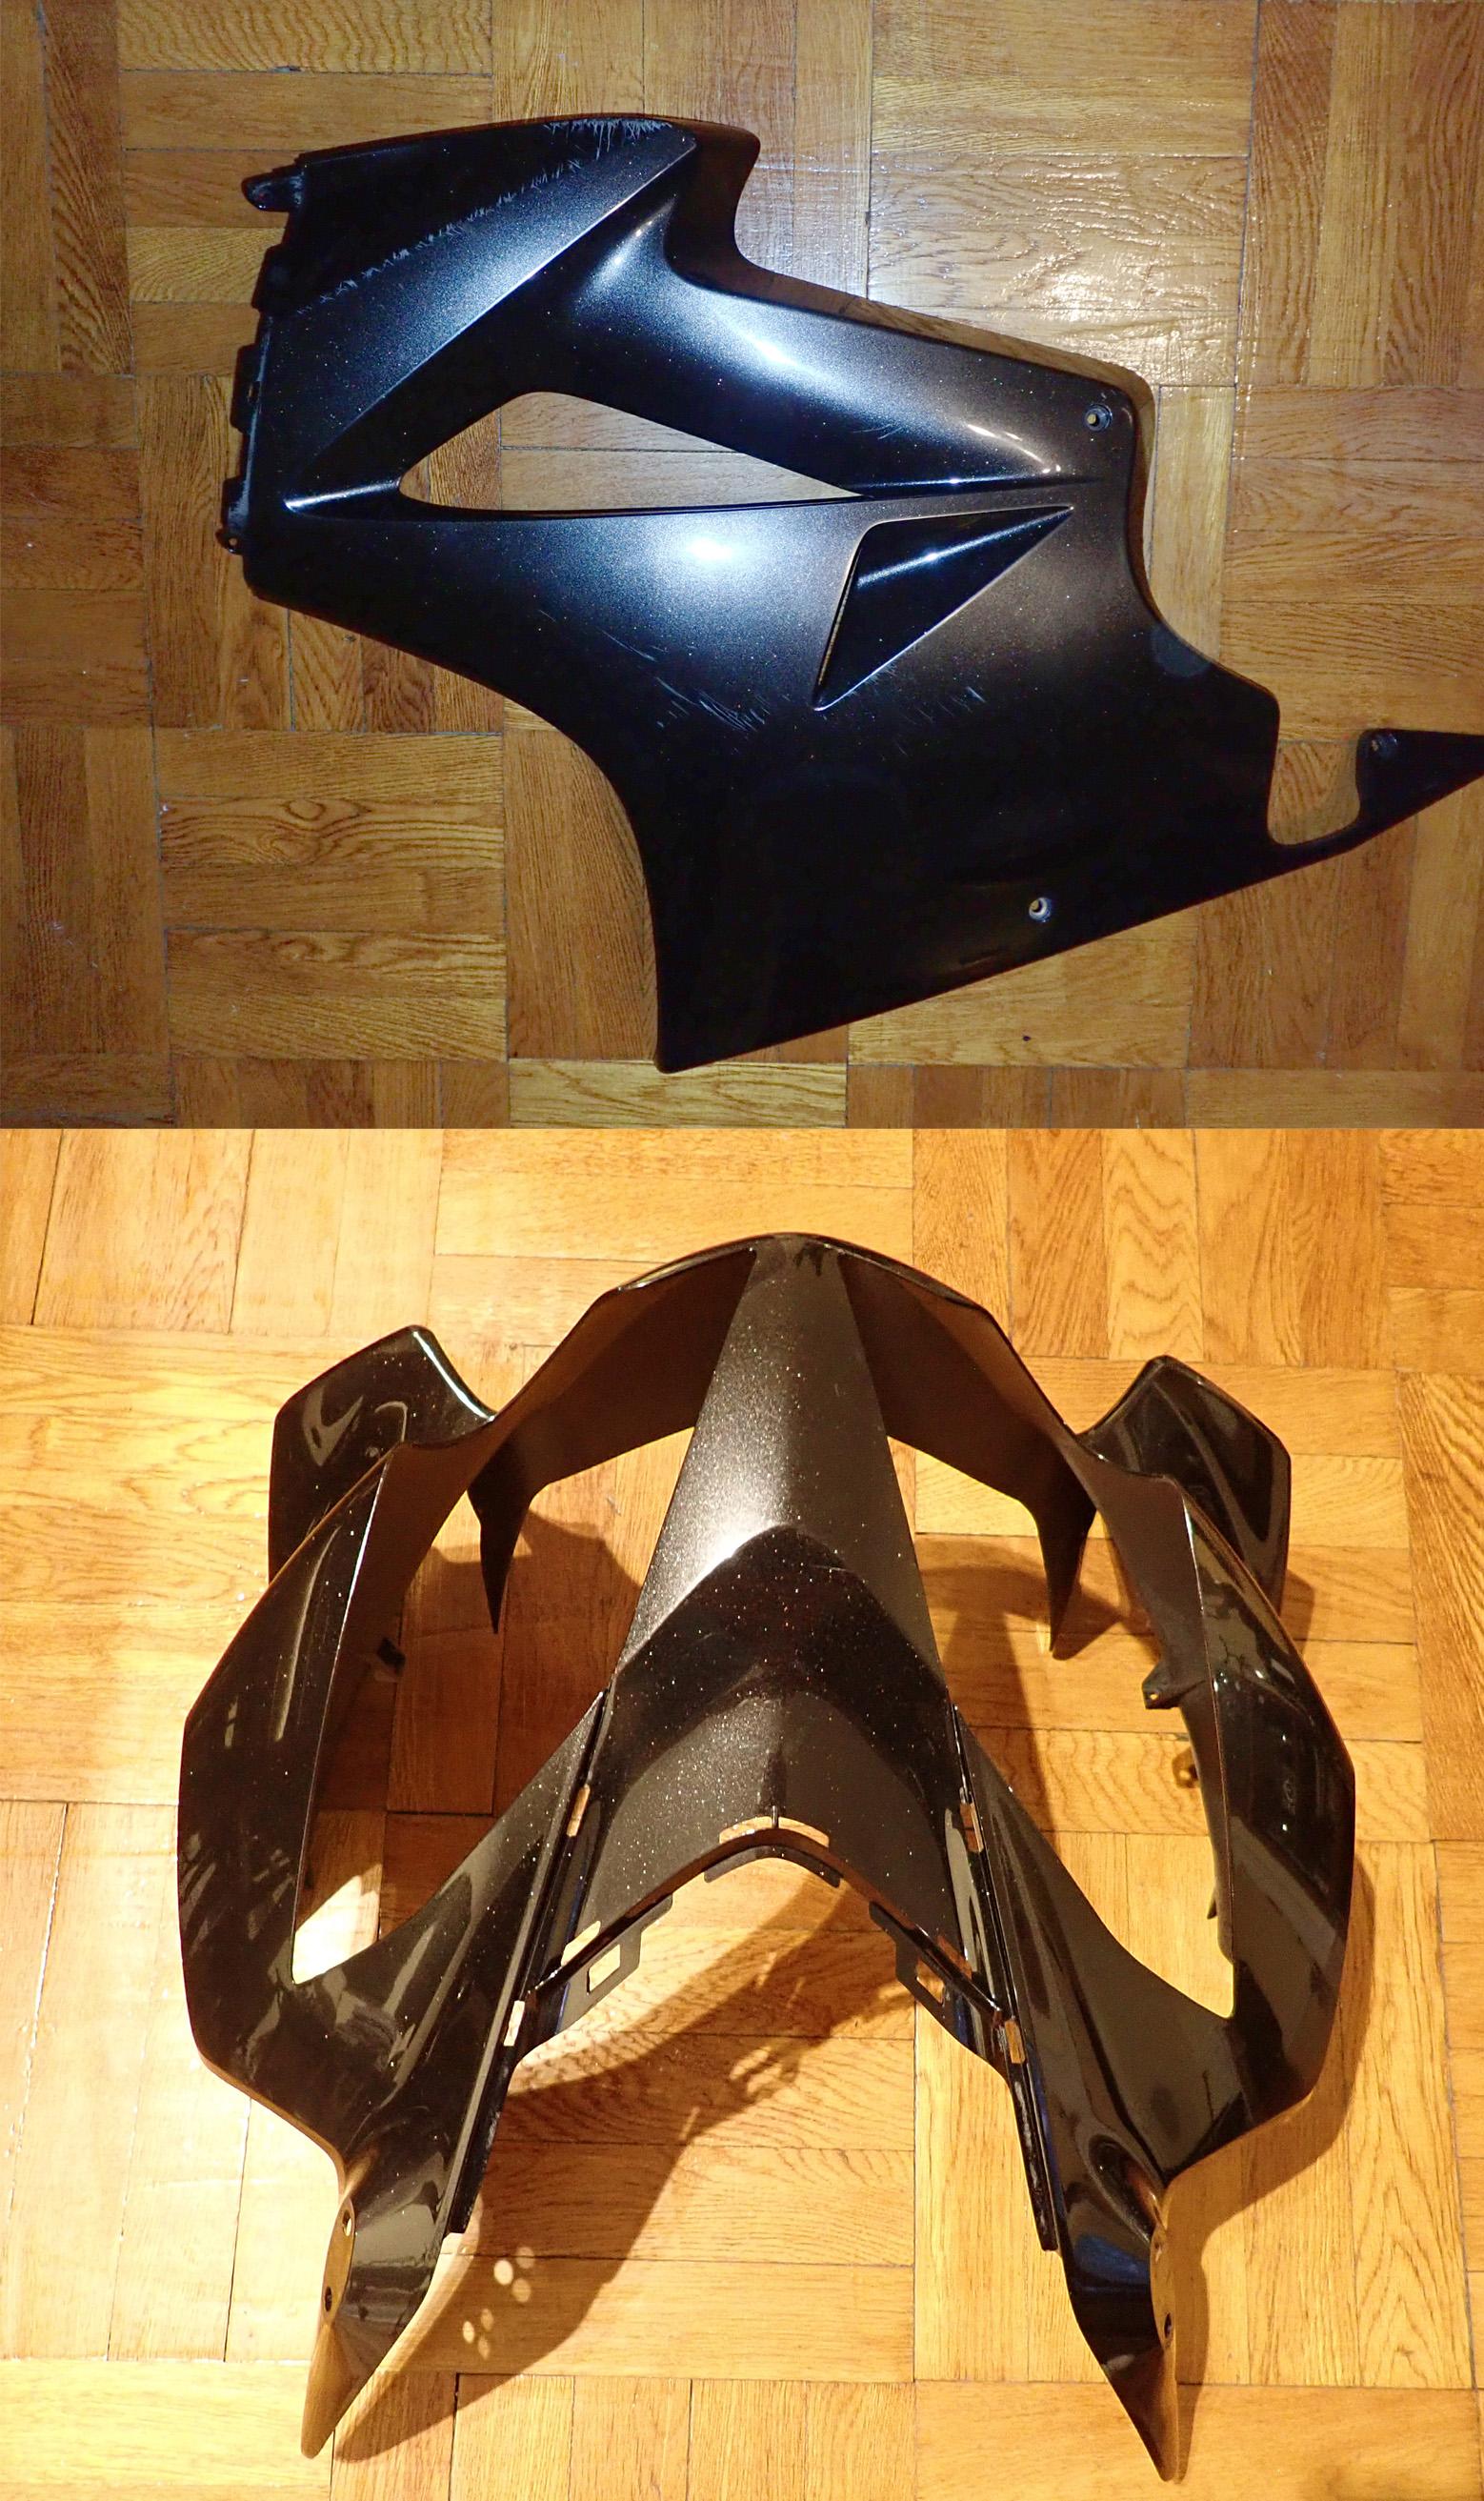
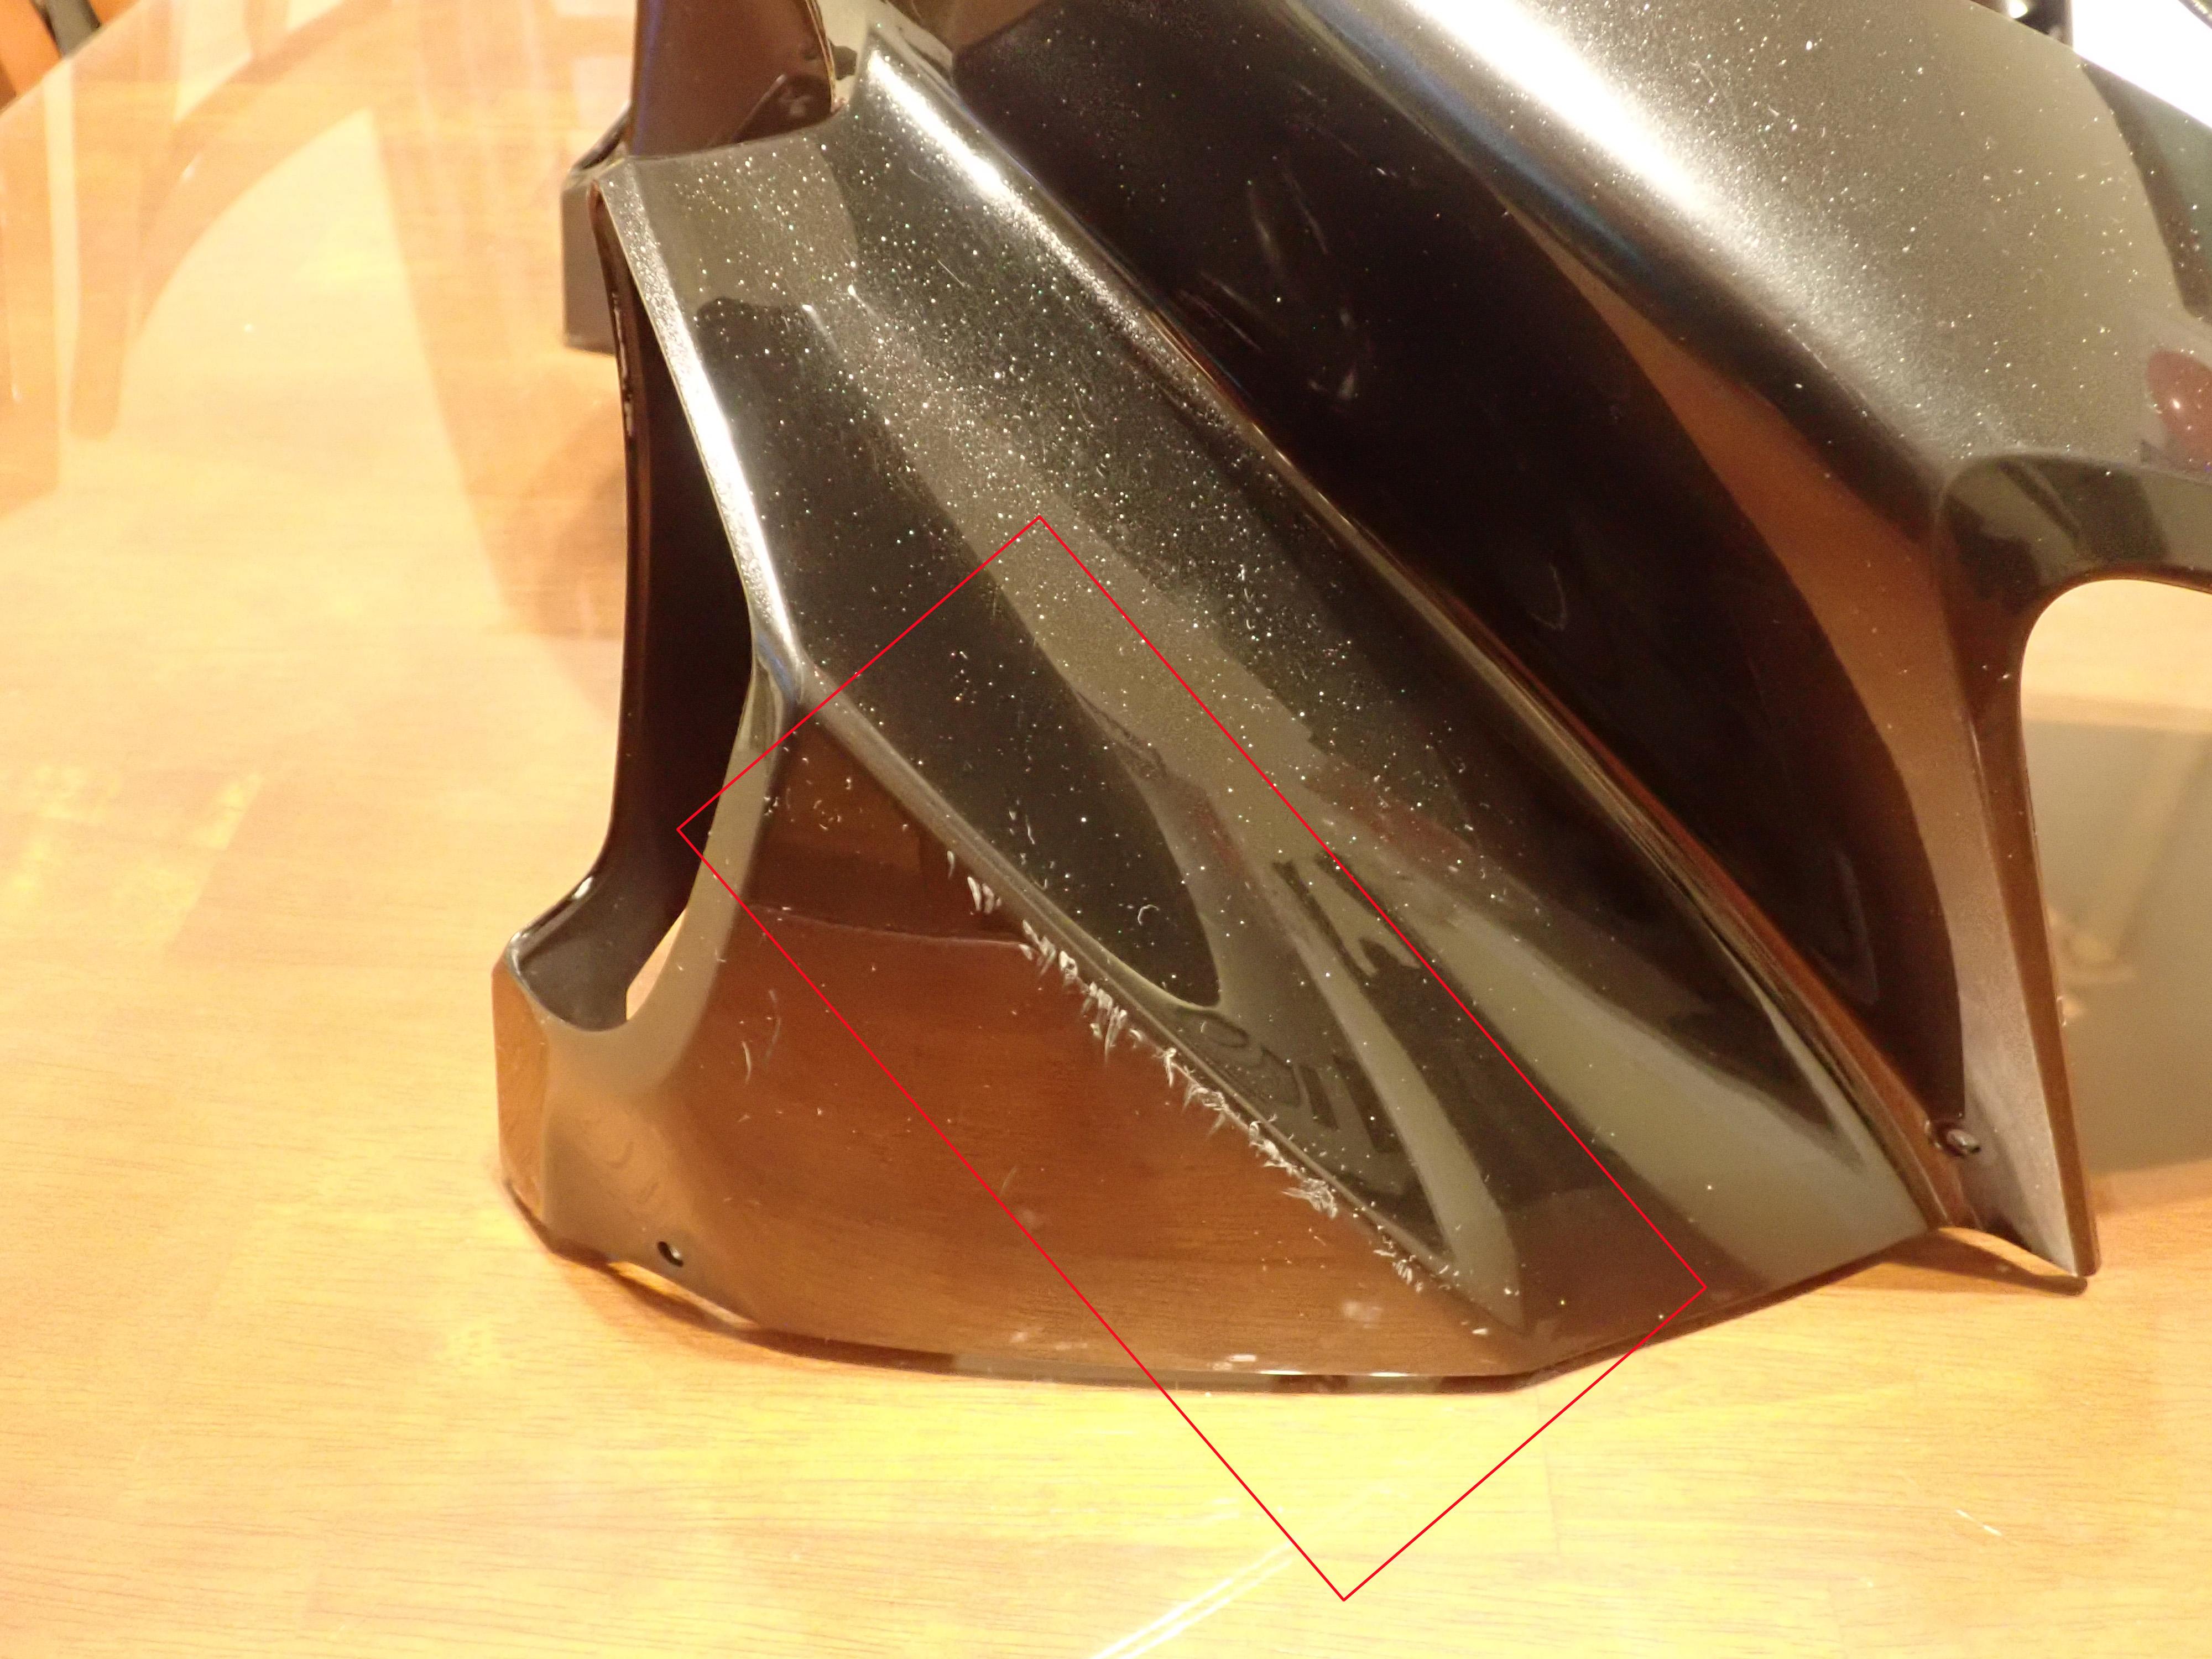
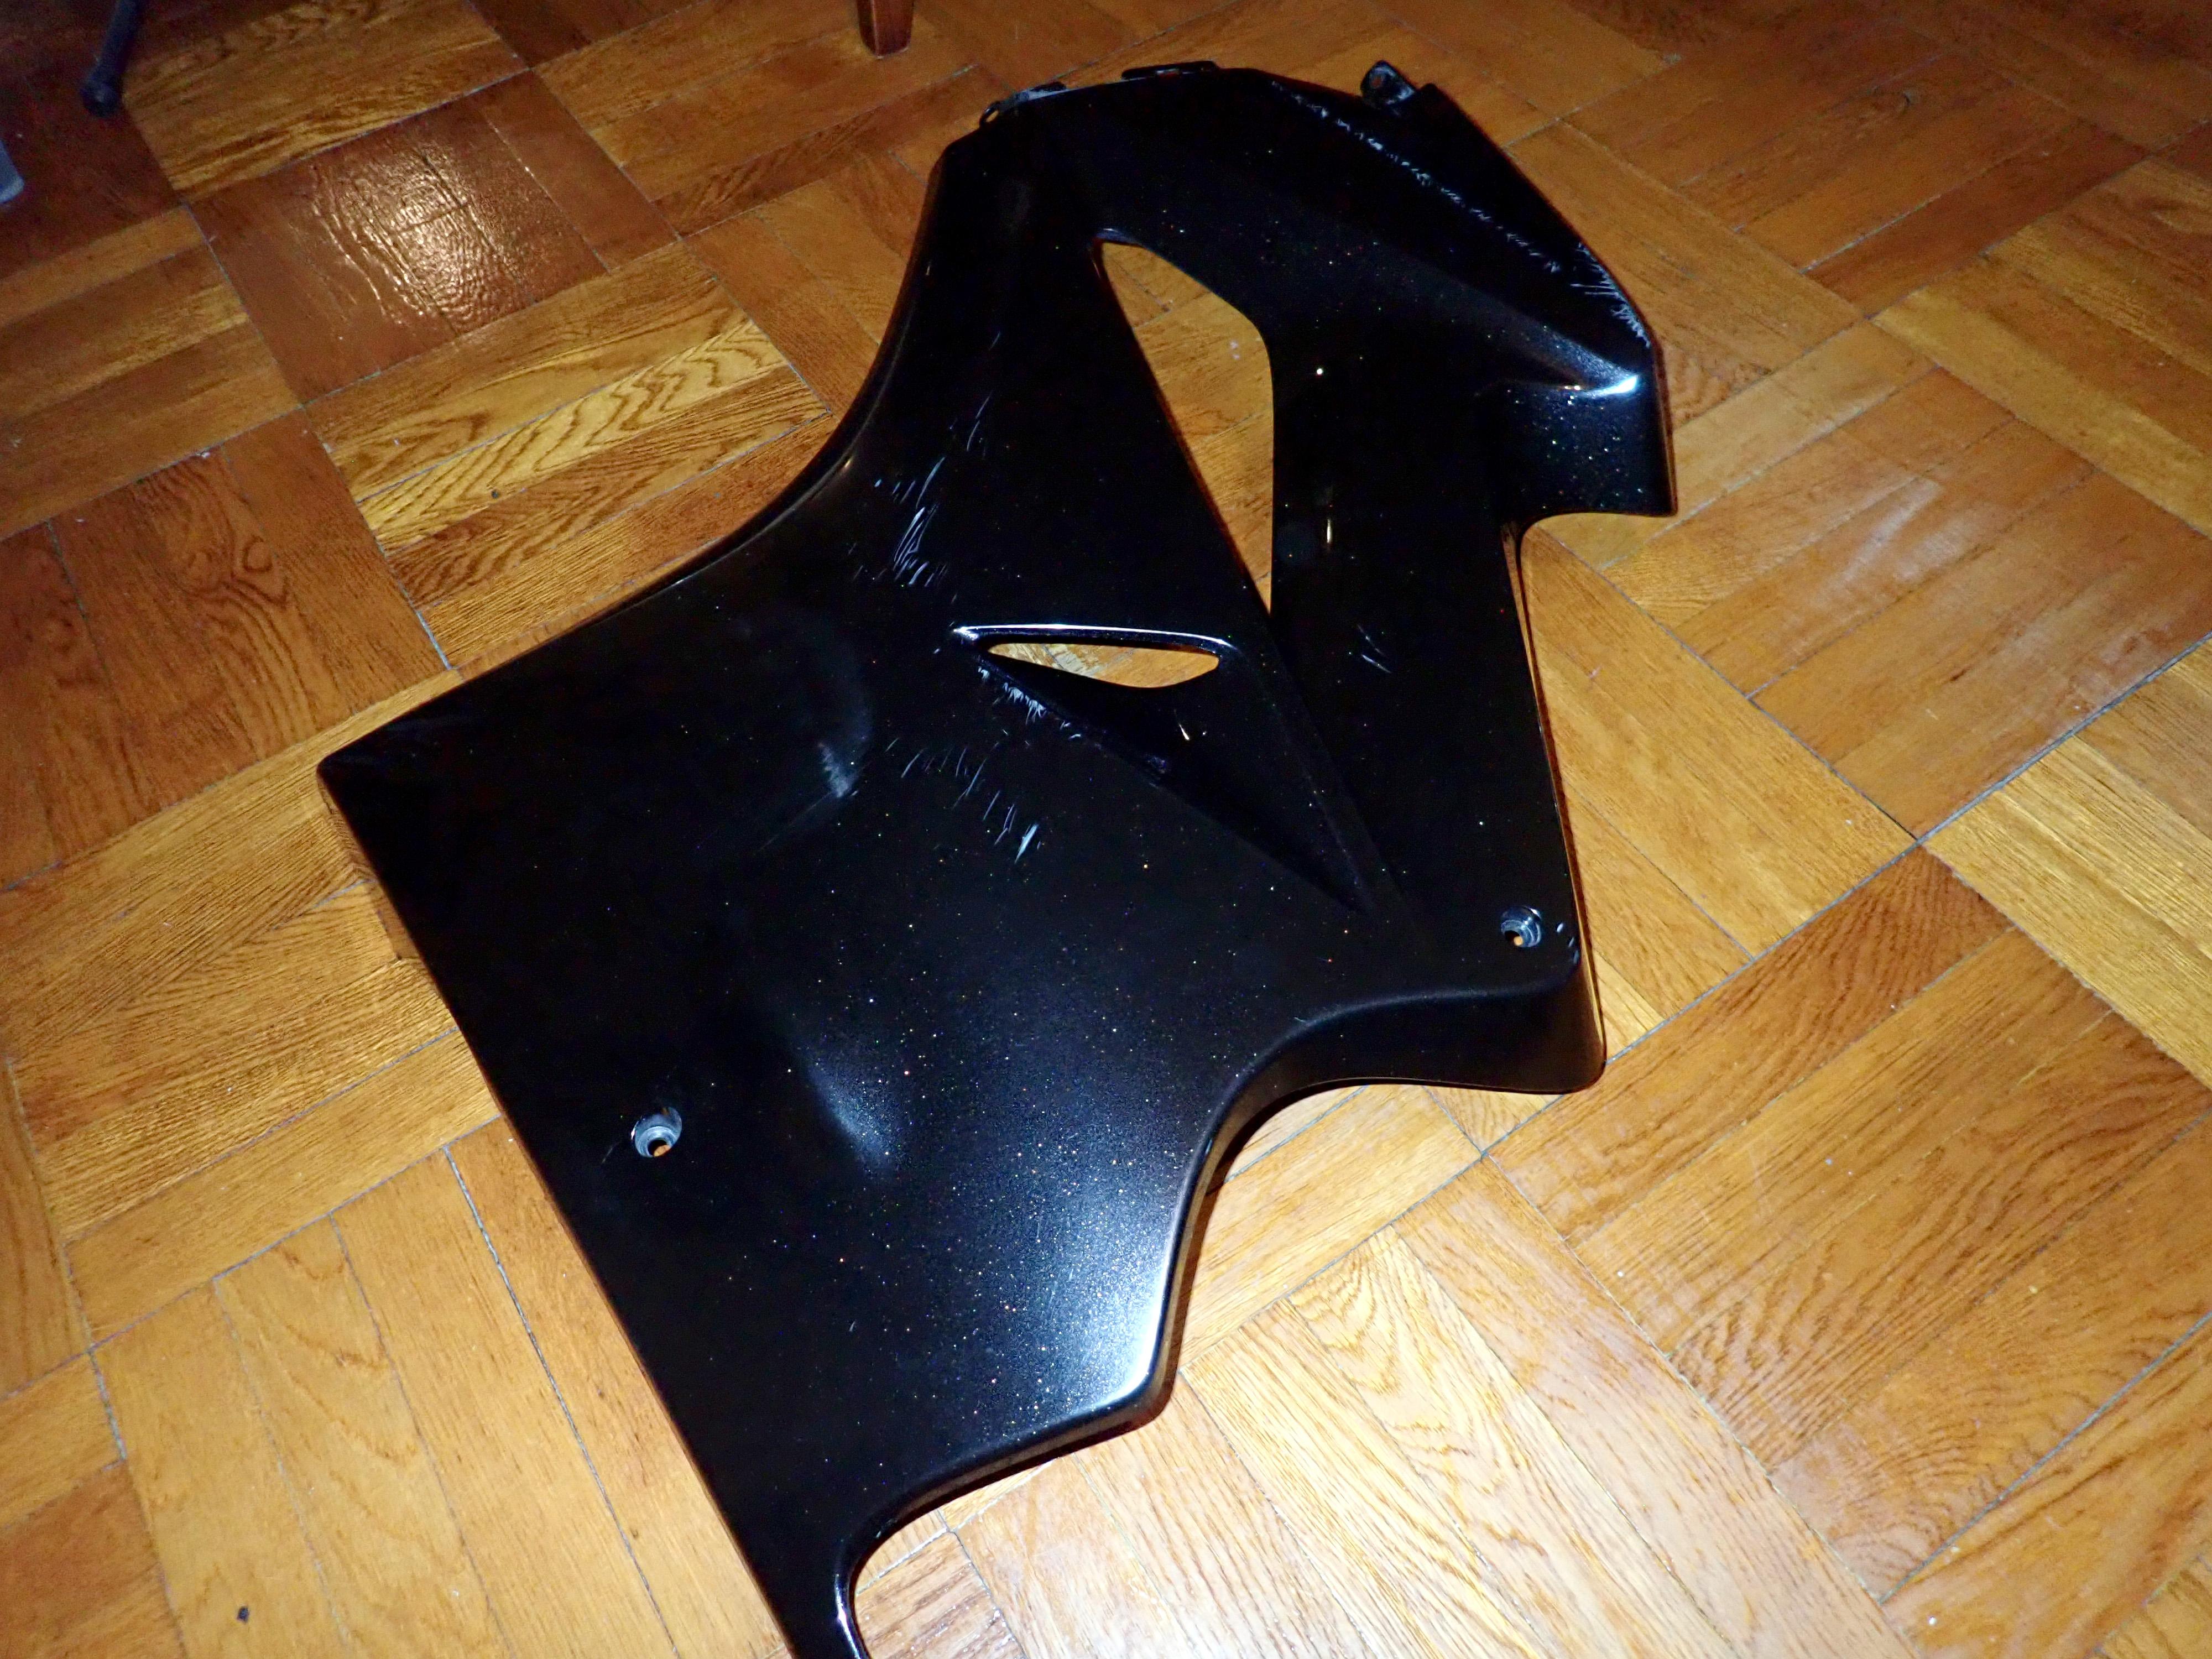
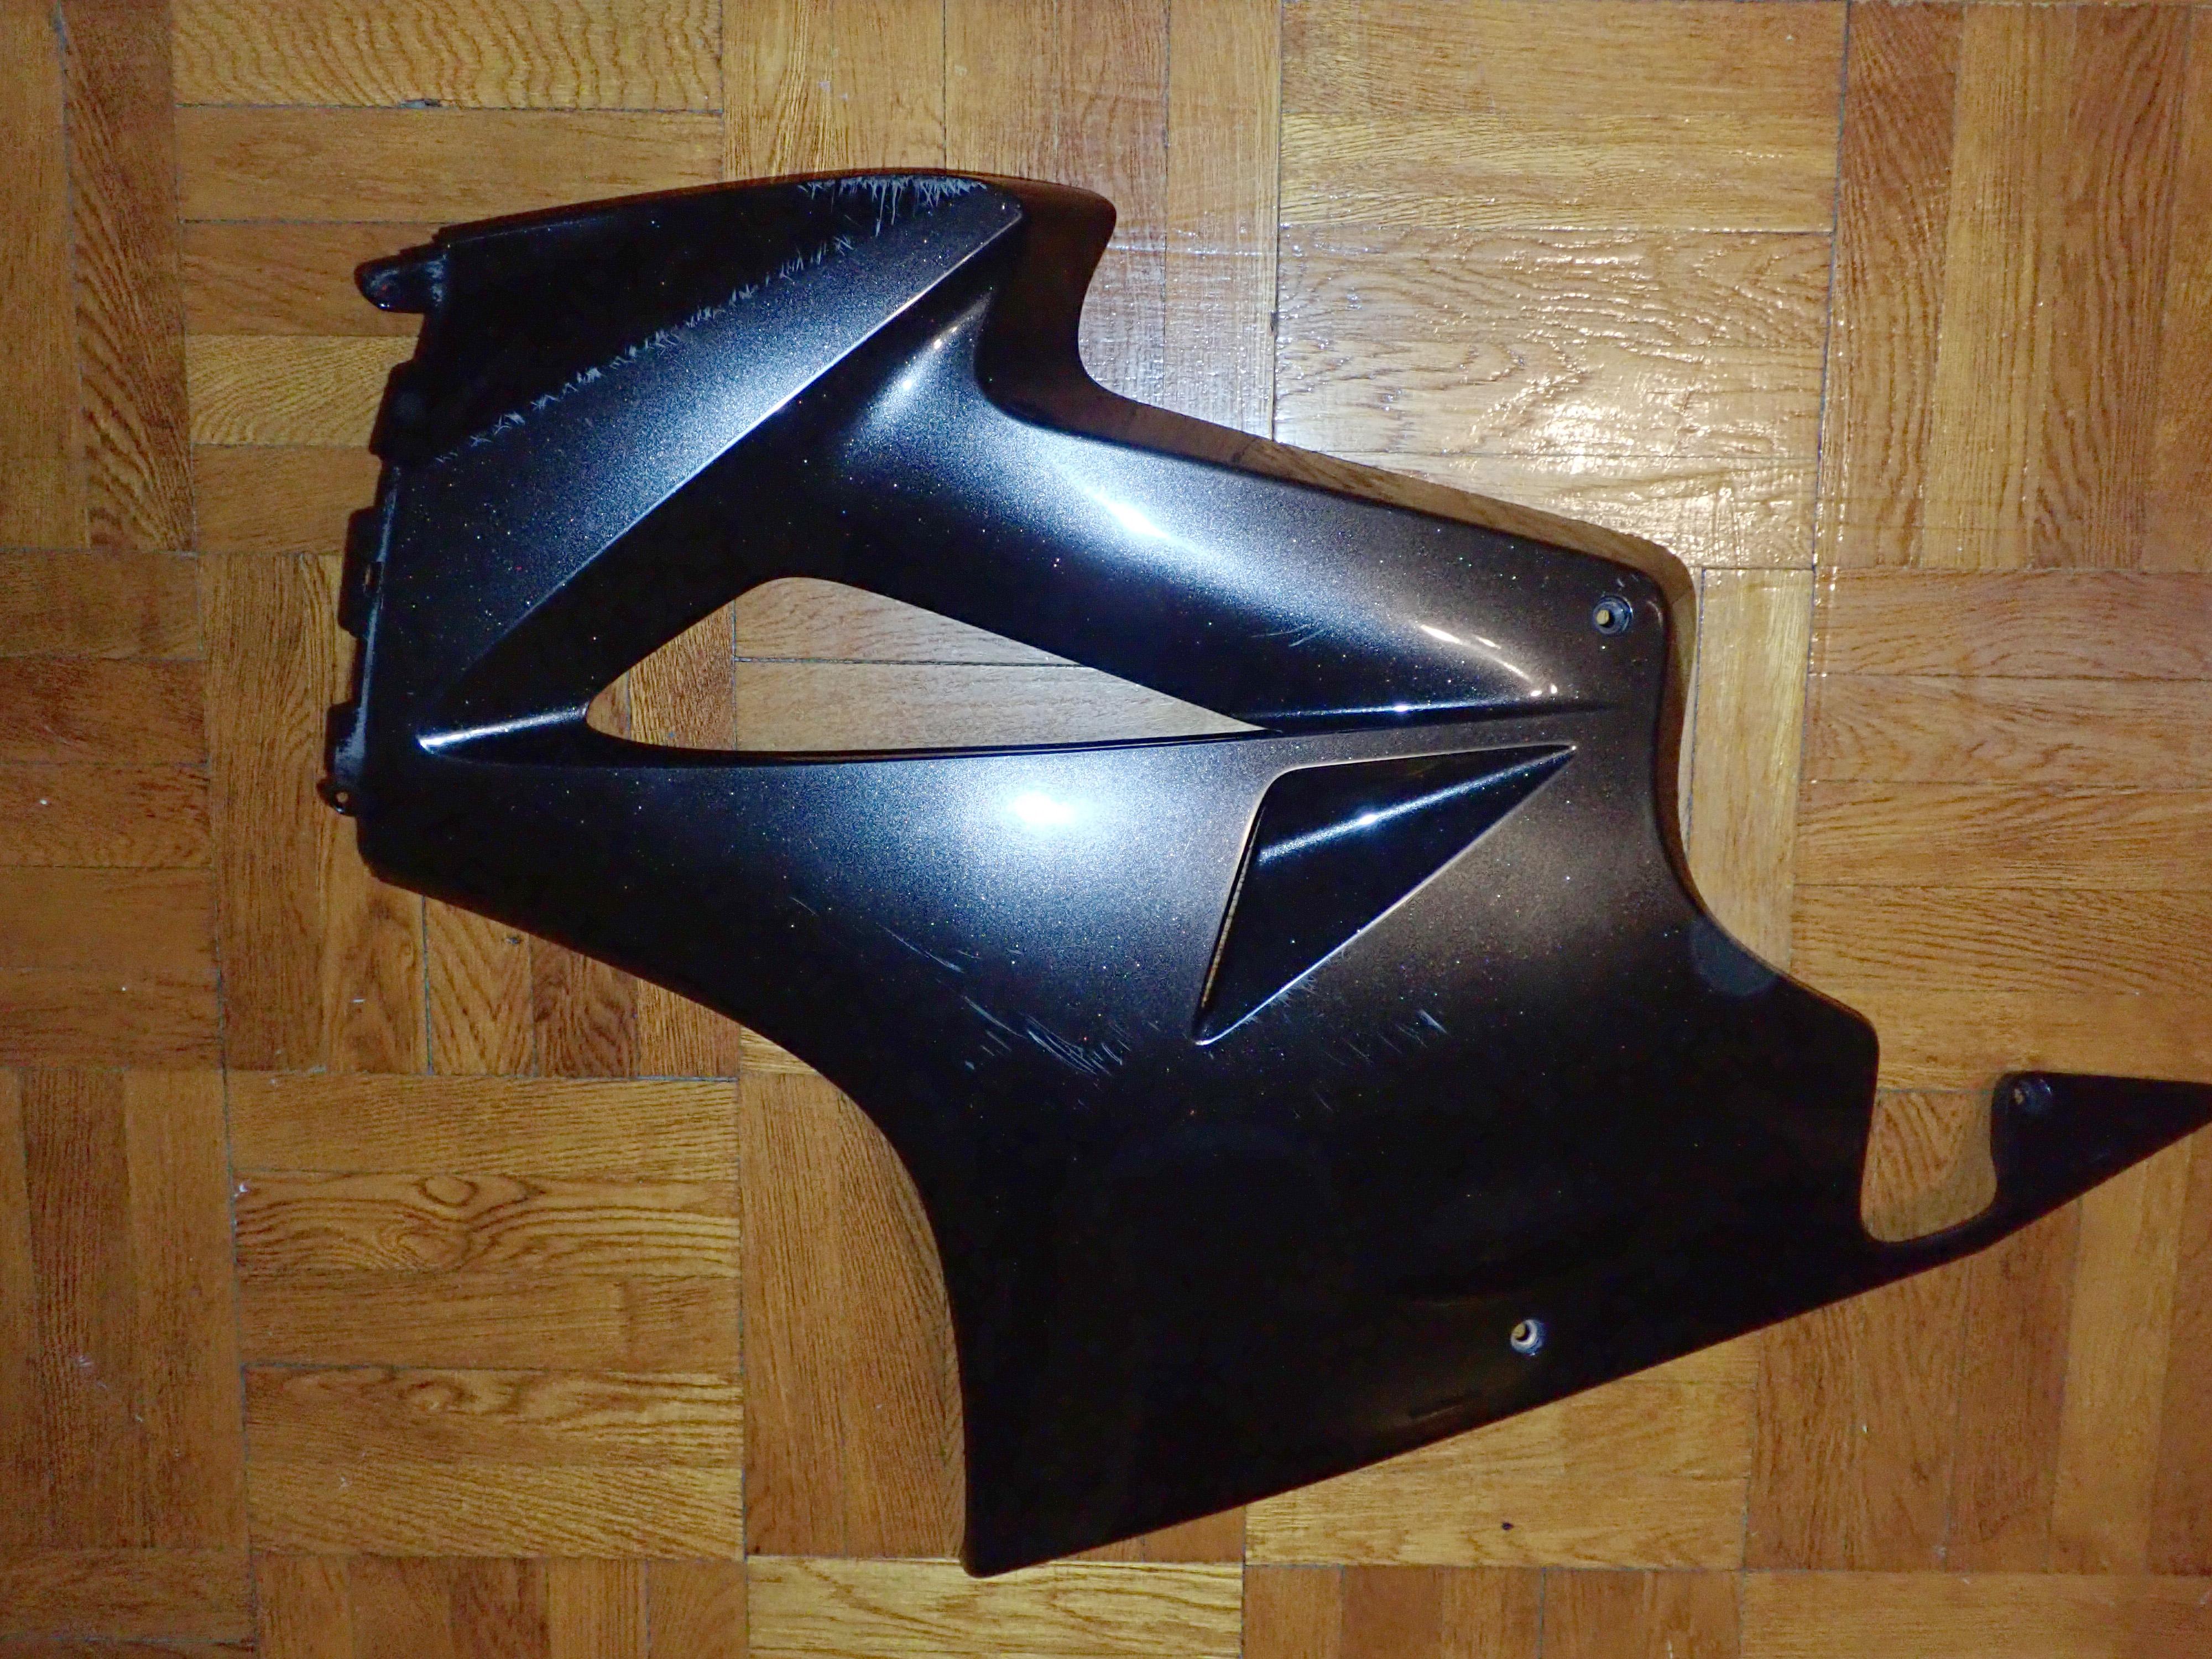
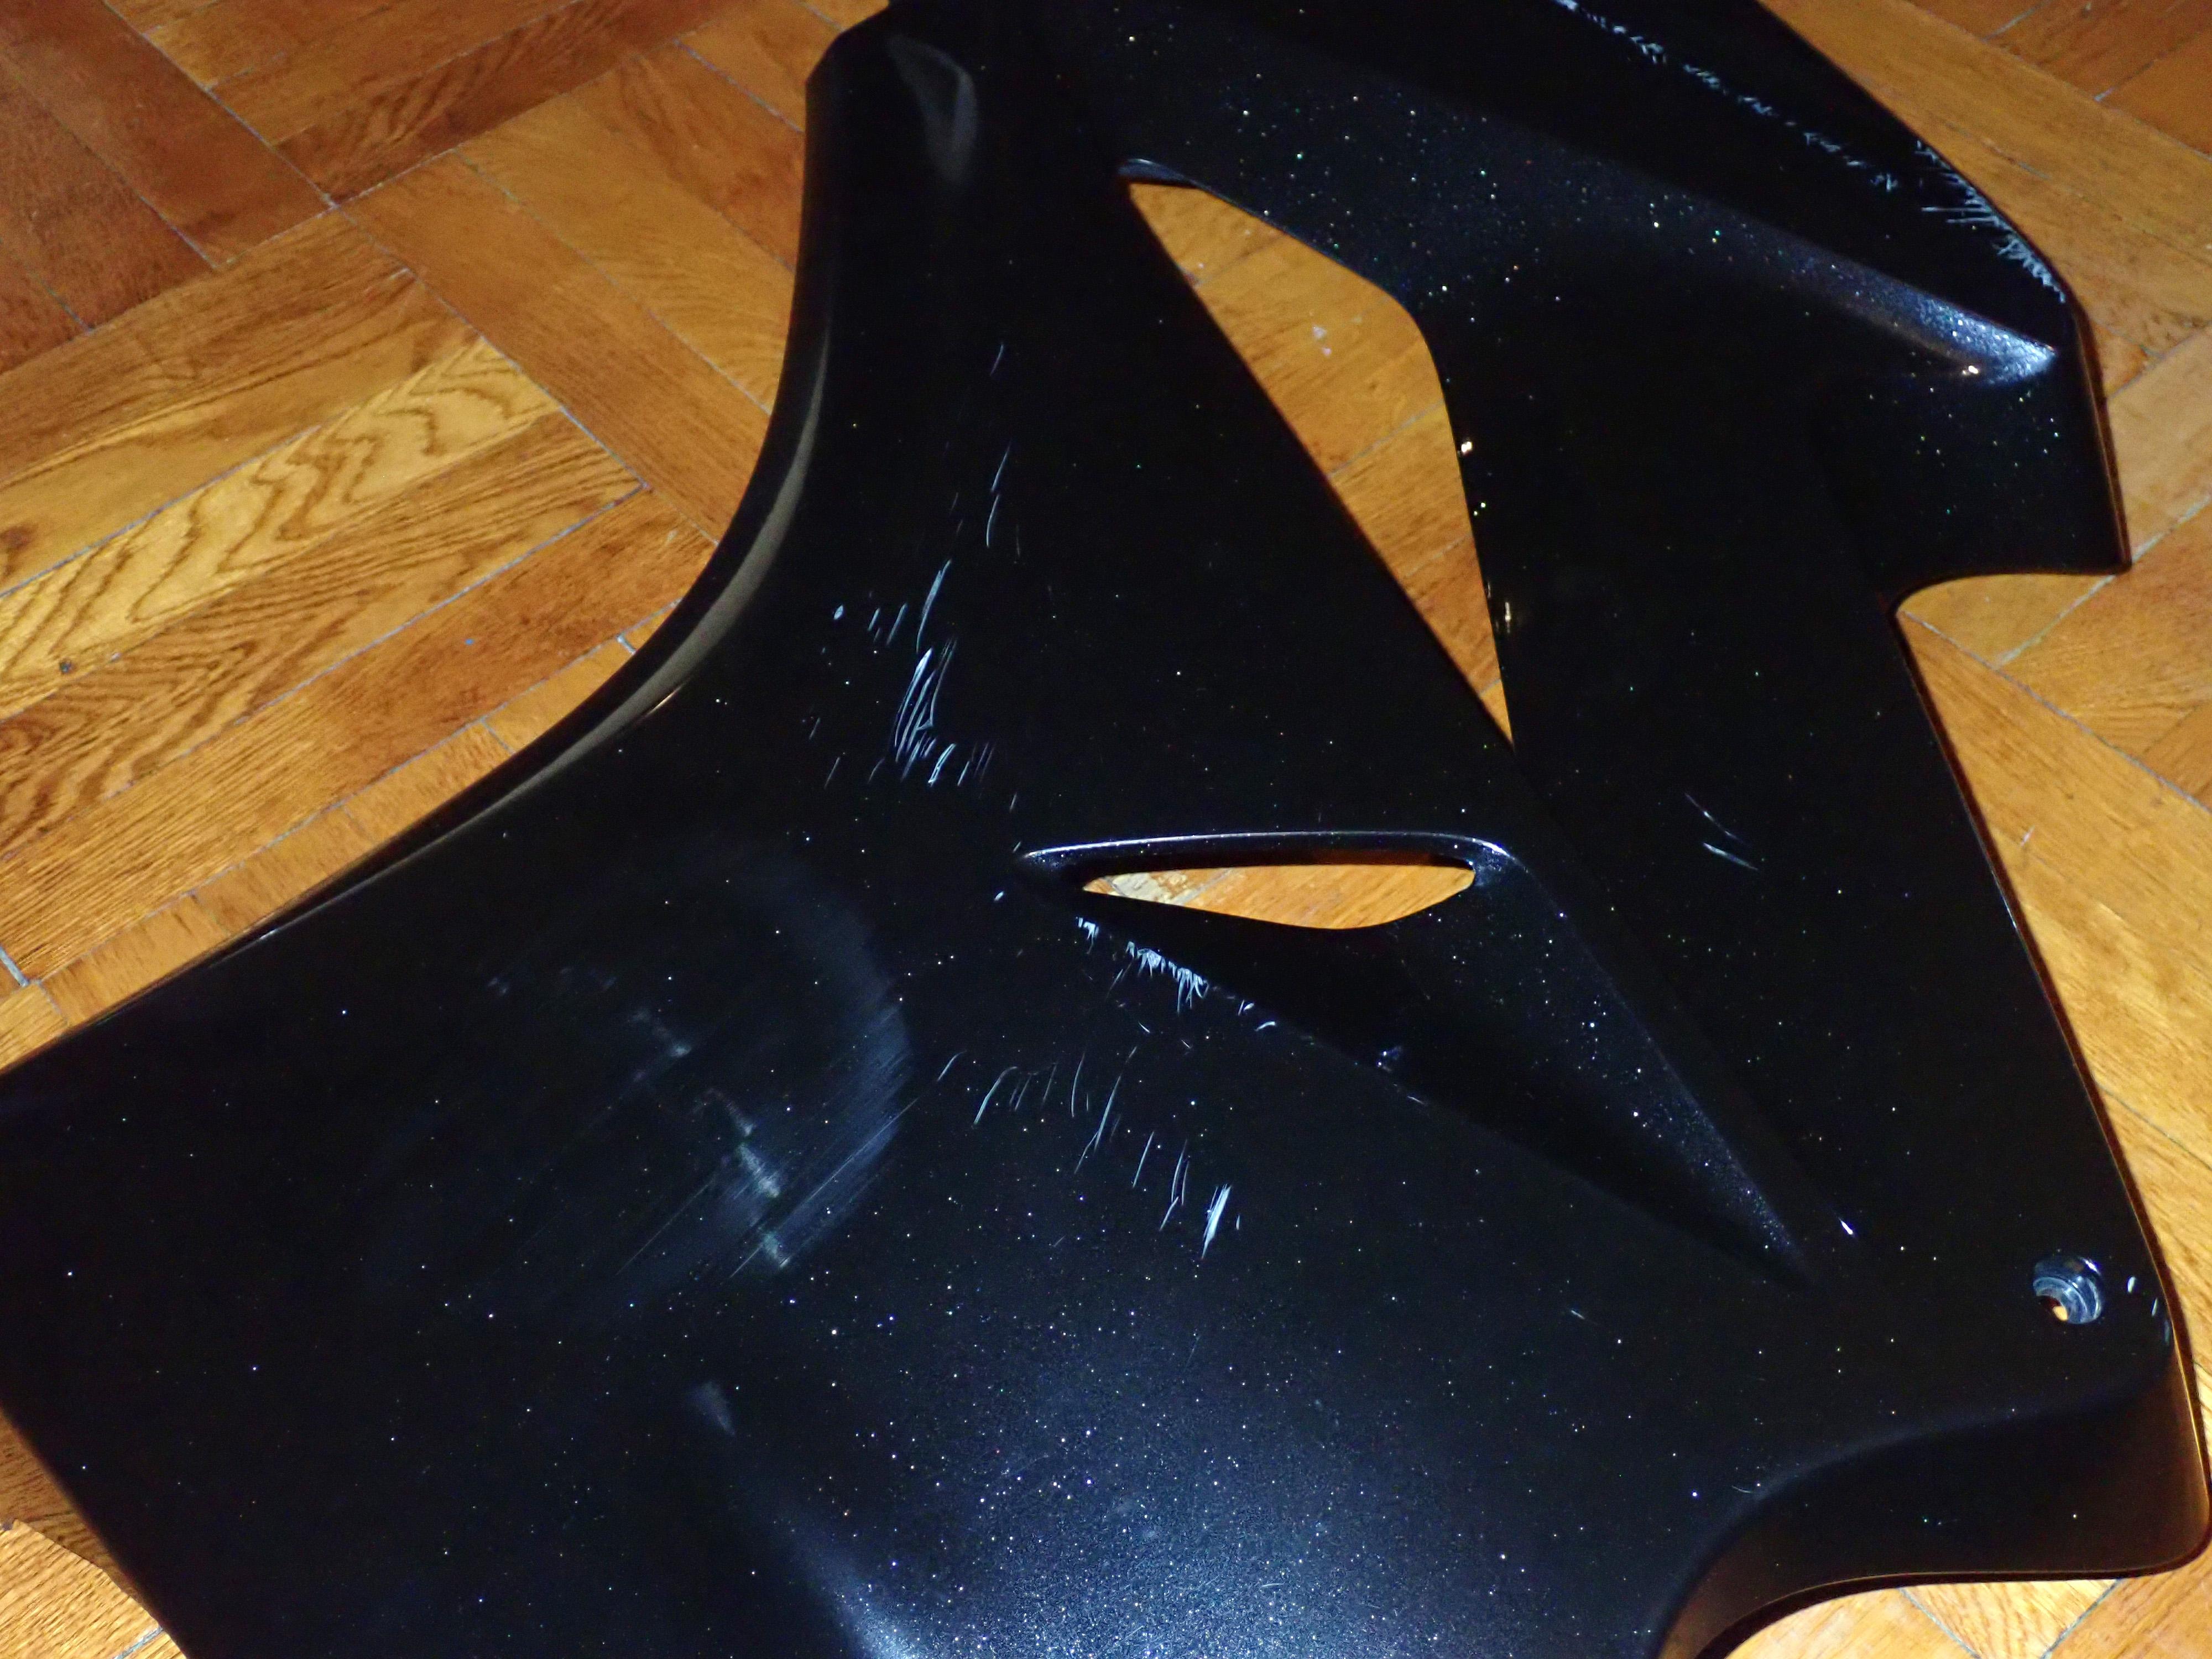
Upper and lower left side (Clutch) Cowls from a 2006 Honda Interceptor with the Pearl Cosmic Black (color code NHA64P).They were in excellent condition, never in a prior accident but now both have light scratches from a tip over while parked. Note the scratches are not deep but look like it from the flash photography. The cowls have no structural damage or cracks and all tabs are totally intact, it was a minimal impact tip over so damage was cosmetic only. I live in the wintry Northeast and do not have a garage, otherwise I would have repaired them. Insurance covered replacements but I had investigated repair and it is basically light sanding and painting. The exact NHA64P paint is available from many suppliers, I have put 3 links below where you can get the black as well as other Honda colors. Upper Cowl, where headlight is, has part number 64210-MCW-H00ZB and the Left side cowl has part number 64320-MCW-A00ZF. Shame to discard them and so am selling them as a pair. Together they cost over $725.00 new and that is if you can find them. They fit other years (2002 to 2009) of the 6th generation Interceptor line (the ones with the under seat exhaust) and vary in part number only with the last set of numbers to indicate the color. These two can be painted to any color and will fit the 2002-2009 Interceptors, the color code can found either on your bike or from any online Honda part seller in the part description for your year bike. If you need additional pictures or color code help contact me. Parts will be sent in box that the replacement parts came in well protected and padded. Insured shipping cost will be based on destination.
https://www.colorrite.com/product/honda-nha64-pearl-cosmic-black-1281.cfm
https://www.amazon.com/HONDA-NHA64-PEARL-COSMIC-BLACK/dp/B00XRVGUPI

-
It is just a straight hose with nothing at the end for overflow of radiator fluid from the reserve tank.
-
You are most welcome.
Come on folks, lets each do our part to keep VFRD going.
Just one post of DYI performance, diagnosis or repair information you get here is a heck of a lot better than going to the dealer, buying the wrong equipment or wasting hours doing something the hard way. So any donation will pay for itself in no time.
-
Hi expvet,
Thank you for your donation of 50.00 USD. We look forward to improving the forums with your donation.
Thanks VFRDiscussion
-
This is the link for the tensioner replacement without throttle body removal guide. I used this and it was very straight forward. Took about two no rush hours to do both. No need to rush and just be careful when removing and inserting them that the plunger at the end stays on. Those throttle bodies are a pain and not necessary to remove.
-
Hi expvet,
Thank you for your donation of $25.00. We look forward to improving the forums with your donation.
Thanks VFRDiscussion
-
I used a mini vice grip and they came out pretty easy. No way they were coming out with a philips.
-
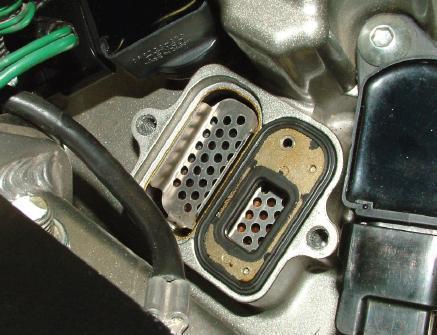
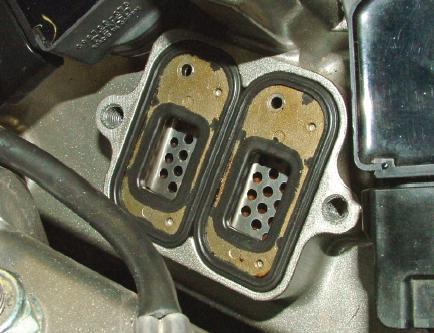
Just to be 100.1% sure, I installed my Mellodude PAIR rear block off plate (will do front next week) and as in the first pic left the plate with the holes in, left 4 of the the components in the second pic out and as in pic 3 put the plates with the rubber gaskets on, then installed the PAIR blockoff plate. My question is with pic 2, these upper 4 copper colored plates above the gasket plate stay out, correct?


-
Yeah, sad to say but due to phones and the overall rush to get there a lot of people's driving habits have erroded to the point where you have to look at everyone as a potential road zombie who could do the unexpected at any time. After an accident you just become more acutely aware of this. But with time you will regain the confidence that by being alert you will minimize the odds in your favor. Wear your gear, trust your instincts and remember that being alert while relaxed will put you in the best position to react quickly and accordingly.
-
Is there any info on the color for the silver wheels that the 6th Gen VFR's have.
-
Is the color for the silver wheels that the 2006 VFR have on any of these charts, or has anyone used a touchup color from another source? I am looking to touchup a couple of nicks on my wheels.
-
Thanks for the replies, she's buttoned up and ready for the first Power Commander test ride. Will report on the hopefully good changes.
-
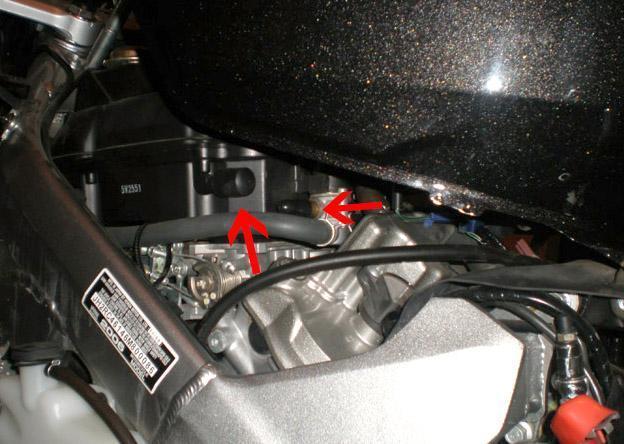
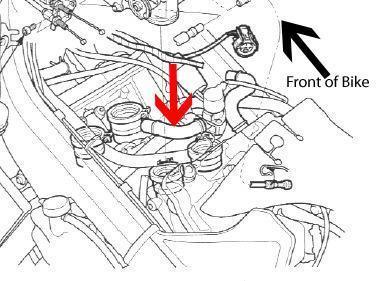
I am installing a Power Commander V on a 2006 VFR and have a question.I am disabling the PAIR Valve by blocking the hose connections indicated in a prior VFRD post concerning using a marble to block a hose. I have included 2 pictures to indicate the tubes I have blocked with vent caps and want to verify that these are indeed the only holes I need to block in order to disable the PAIR. I have Leo Vince exhaust and the stock air filter and will try the Power Commander Leo Vince map as well as the Coyze 06 map to see which gives me better results. Just looking to verify the PAIR blocking is correct before I button her up and take her out for a test ride.


Oil Level
in Sixth Generation VFR's
Posted
Clutch cover removal is easy. Advise to have a replacement gasket. Instructions are in the repair manual available here for download.