

.JPG.2a770a136838c8e36b0df2f3f67da10e.JPG)
ShipFixer
-
Posts
659 -
Joined
-
Last visited
-
Days Won
42
Content Type
Forums
Profiles
Gallery
Blogs
Downloads
Events
Posts posted by ShipFixer
-
-
I think Wal-Mart is one of the reliable sources for 10W-40, but I don’t think it’s in Canada?
Your bearings, rings, and other lubricated surfaces are designed around a specific viscosity. But 10W-30 will work, as will 15W-40 if you can find it. 10W-30 is called out as an alternative in my manual with its own temperature range.
The downward push on viscosities and why you can’t find it is a corporate average fuel economy thing. It’s kind of like shaved tires. It’s a cost savings and/or cost avoidance for the vehicle manufacturer, and they transfer far future risk to you that is unlikely to materialize while yo own the car so no one cares. It’s understood in engineering land that this is happening but unfortunately vehicle consumers don’t broadly know.
-
 2
2
-
-
Ha...this is strictly a reliability focused mod 🤪 Also I want my bike back, I am only doing this right now because I would feel stupid if it died in the next two months and I didn't do it now. The brakes took waaaaay too long!
-
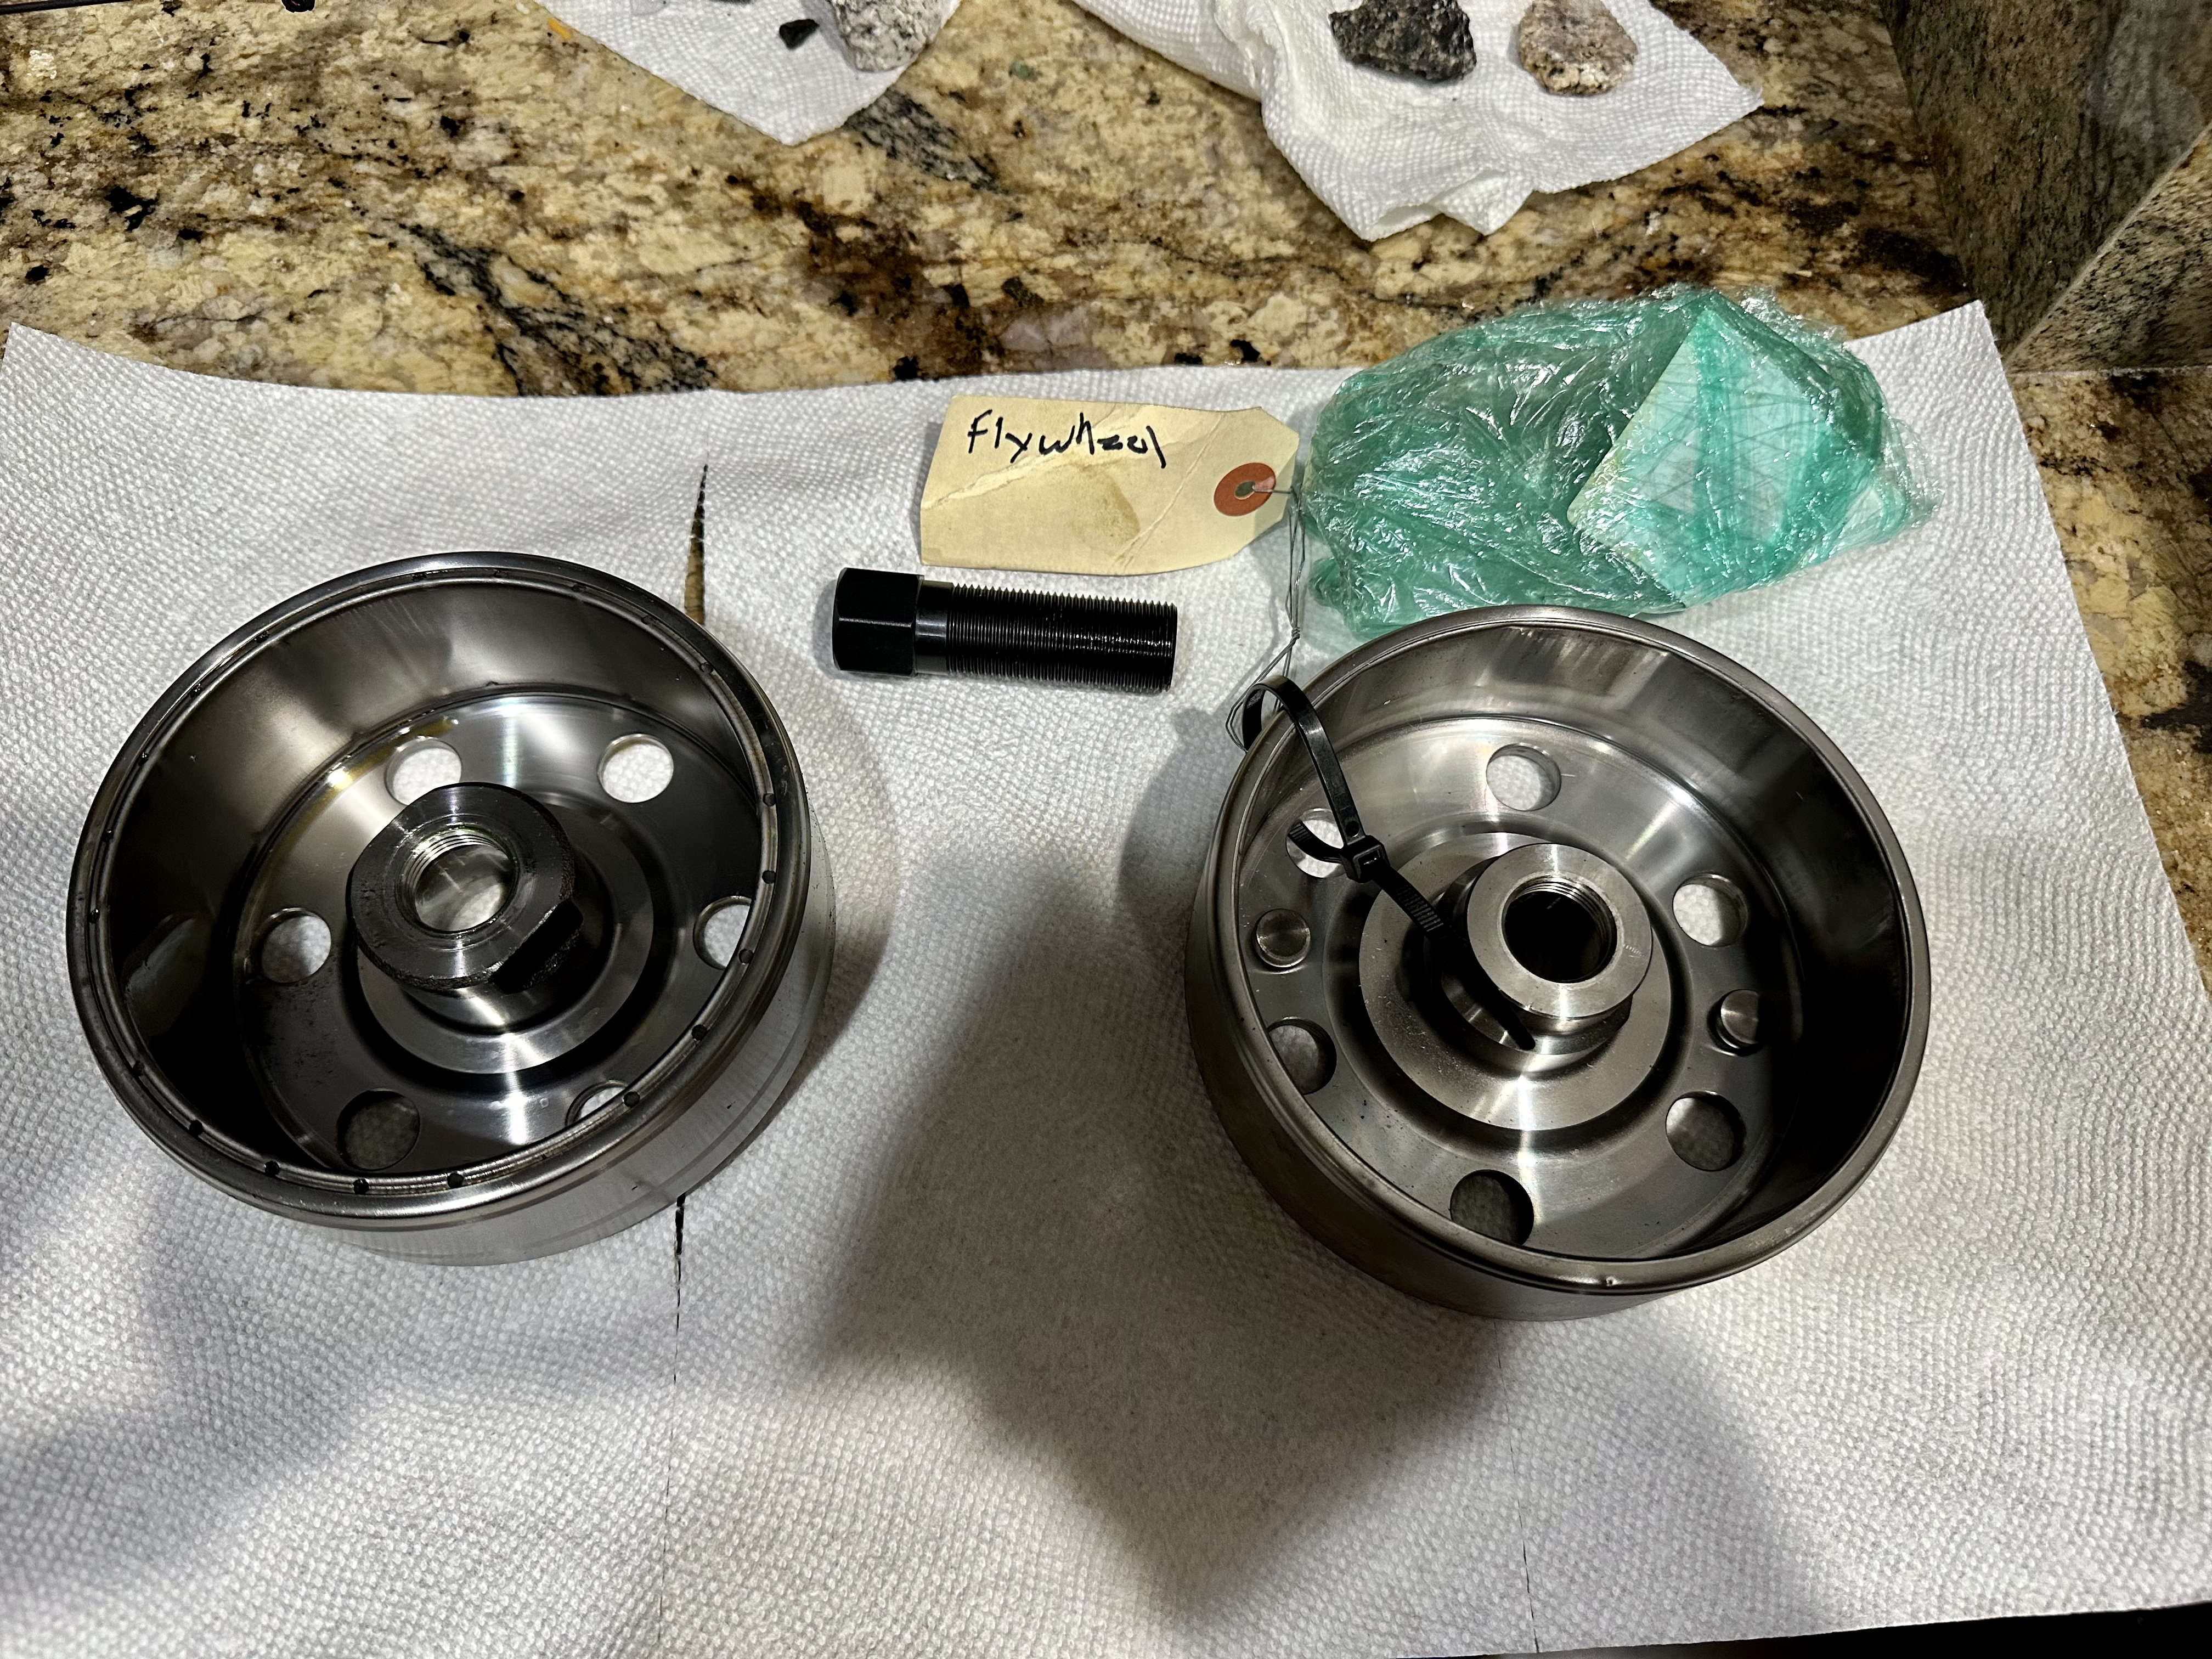
Removing the flywheel - easy with the Motion Pro M20 x 1.5 RH tool, which is just a big threaded bolt. Pops the flywheel right off with a 22mm socket and impact wrench. No back torque required.
For posterity - original 2002 flywheel on the left, newer 2003+ on the right. Newer one has a couple weights or discs visible in addition to the six holes like the original, and the outer edge looks a little different. If you don't know if your flywheel and rotor have been updated, well there ya go.

-
 2
2
-
-
14 hours ago, Wald said:
Have you tried the Dutch site
Nope... they pop up a lot in search though, I will check!
-
I've got all the things let's goooooo! 😁
-
1
-
-
-
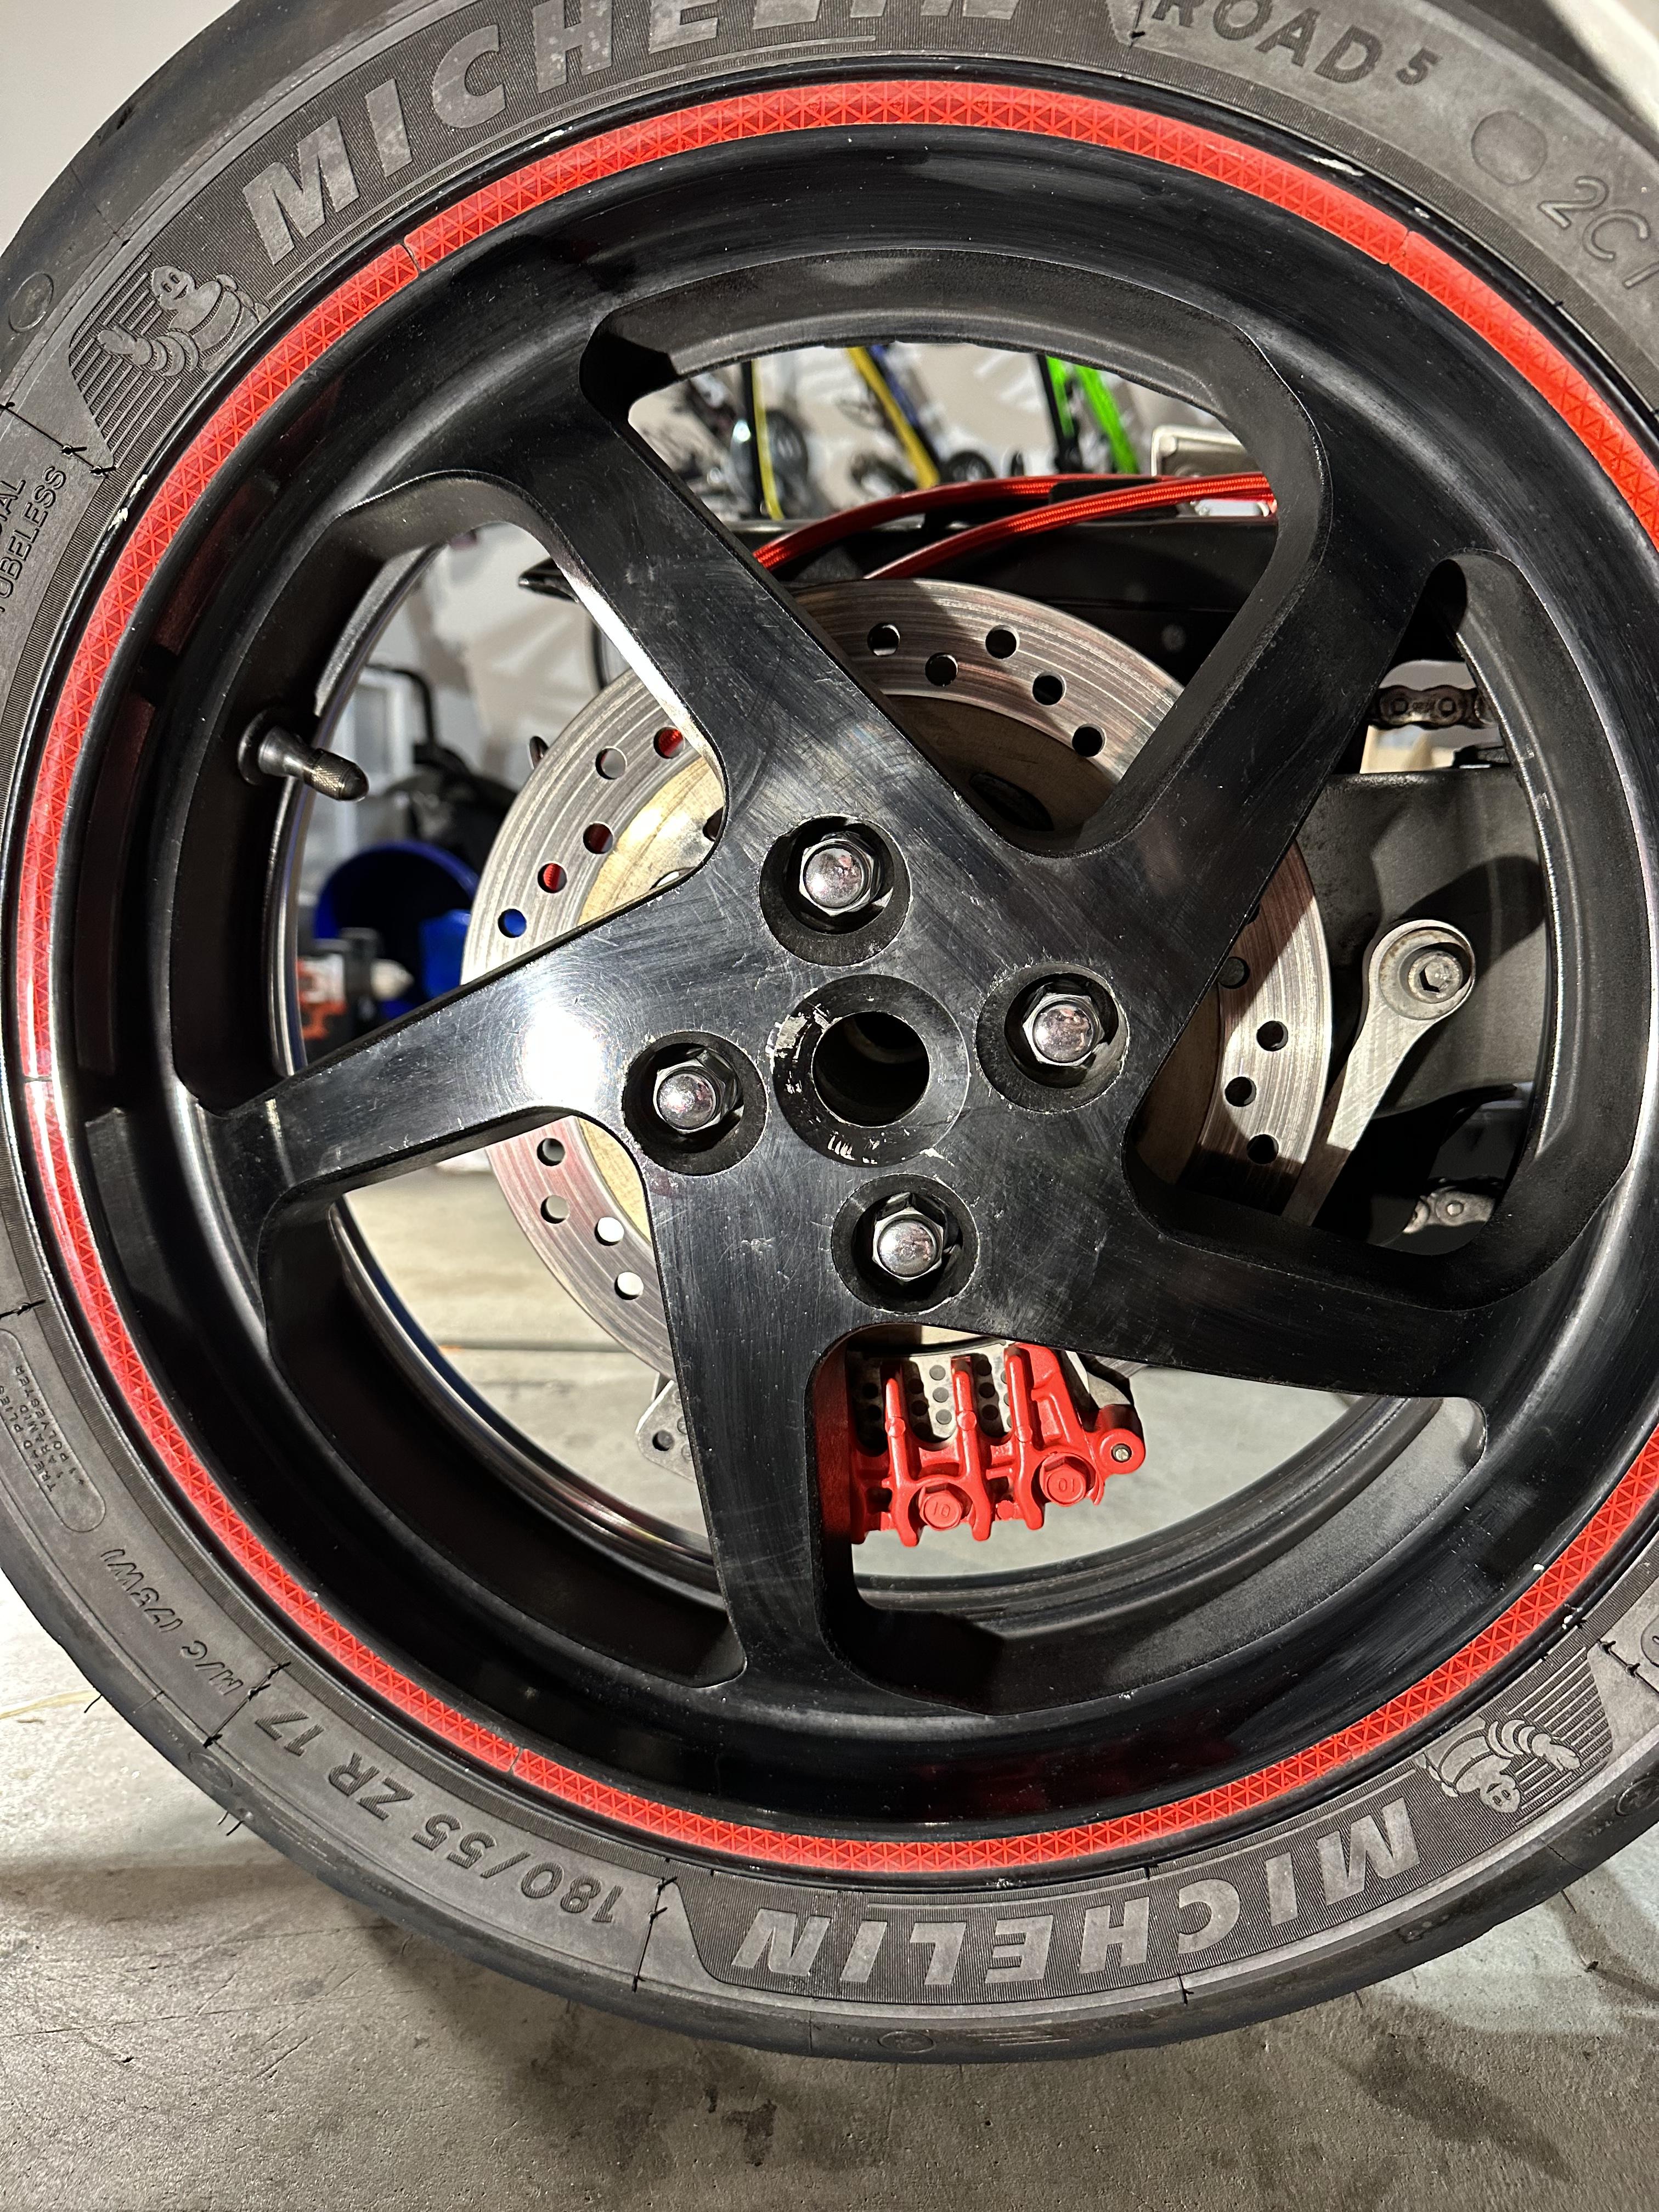
Who says you can't bleed the secondary master and proportional valve yourself? Brakes are on the money and don't leak!
Brakes are more solid than I ever remember. Tired of not having a motorcycle, I'm doing all these other upgrades later. Will get the stuff to do my rear hub checks in a couple weeks anyway, so I have another big maintenance window coming. Pictures later...
-
I don't have a leak "now" but since I am doing all of the other things, I tried to order the Honda piston kit. Of course, it's on infinite back order everywhere.
Anyone have experience with this from Amazon:
Or a different source?
-
FFS, the other flare up front between the rear pedal and the left caliper would not stop leaking. I had to disassemble it and clean out the mating surfaces twice after pressurizing it, following pulling fluid out of the caliper. It's not leaking "now" but I'm not going to assume it's done either. Here's hoping it's not cracked or something...
-
43 minutes ago, raYzerman said:
I'd recommend removing the rear caliper now and hanging it high once you have the system filled....... final bleed with it high.
Indeed - should point out the next long steps 🤣 Its not even bolted in completely, I just needed it in its final location before I tightened down the hoses at the other ends and along the way.
It's going to be a PITA but another reason I am doing rebuilt calipers and hoses is when I got the bike back in 2020, there were points I just couldn't bleed effectively at all. Even with new speed bleeder nipples, its like there was enough gunk to prevent it. Very good odds the last time the secondary circuit was effectively bled was when I owned it before 2011.
All of which to say, going to suck getting it started but I'm excited to see fluid moving through!
-
Finally got around to surgery last night. I'll leave my solution here for posterity, because someone out there is going to experience the same WTF moments.
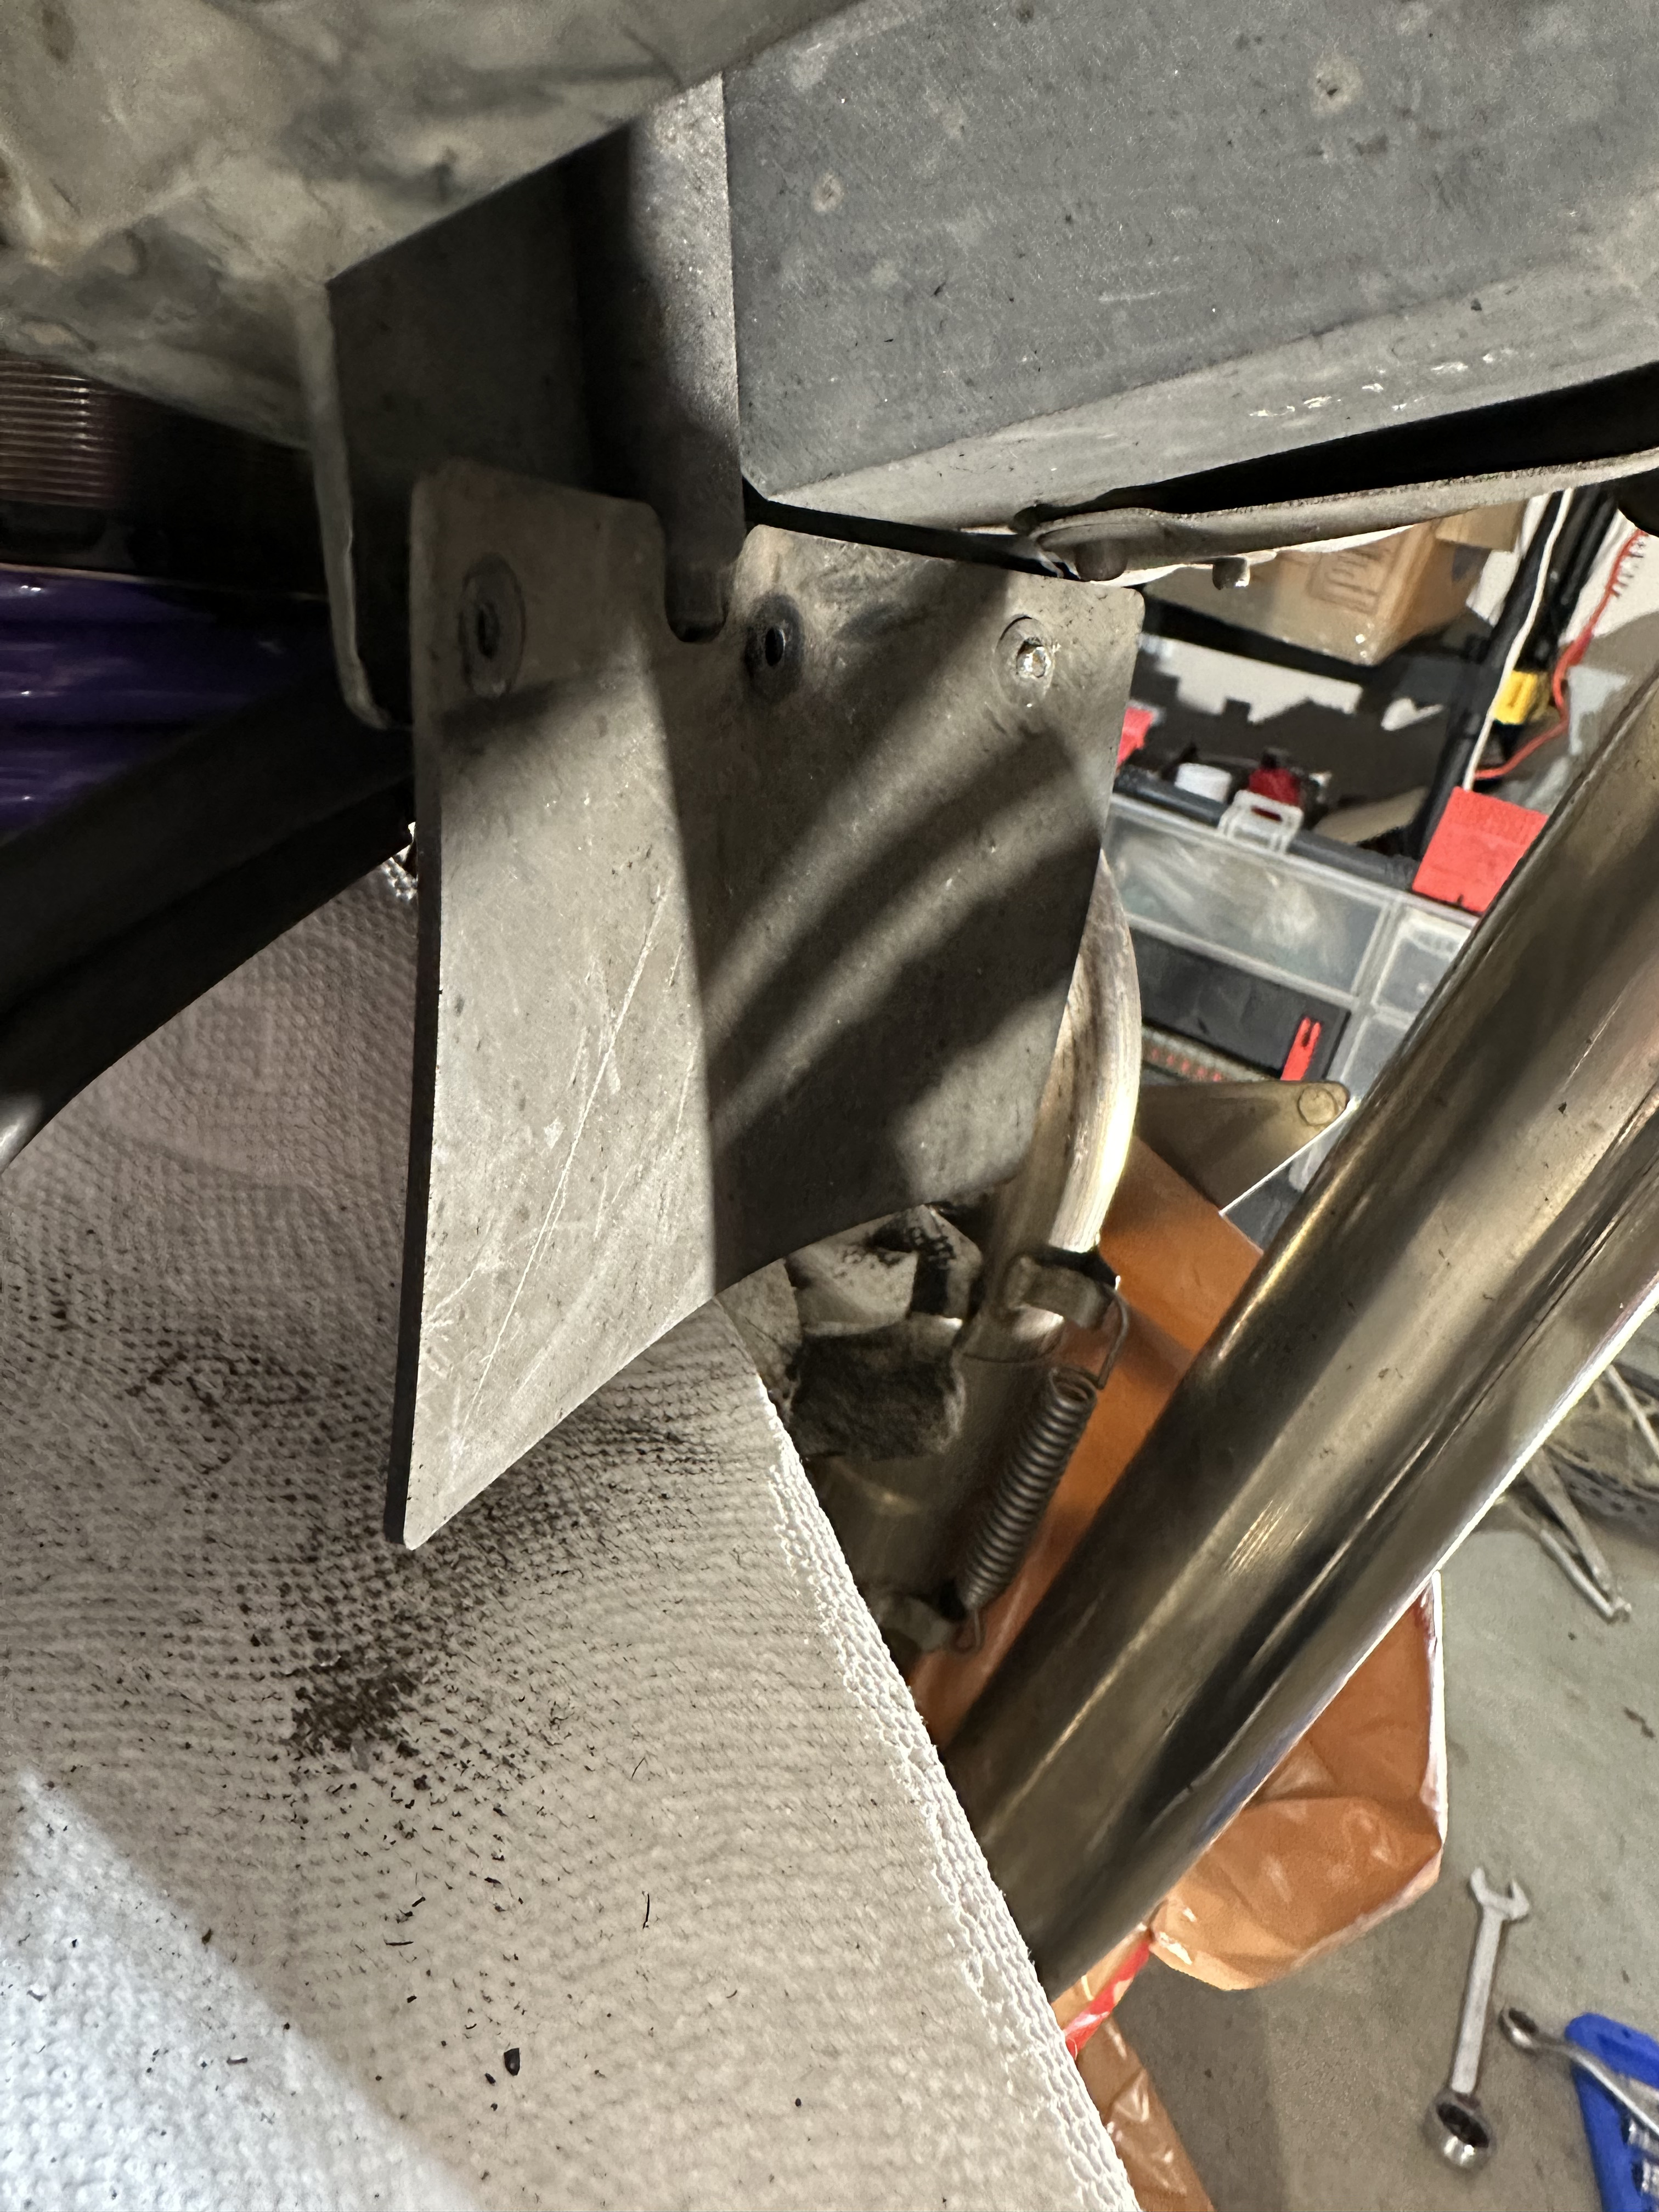
The bolt in question is just behind the plastic edge that the rubber "mud flap" protecting the rear shock mounts to. This flap is held in place by three pop rivets. I removed the left and center rivet, and pushed it out of the way:
Next, I used tin snips and a cutting wheel on my Dremel to cut a small access to get to the 10mm bolt:
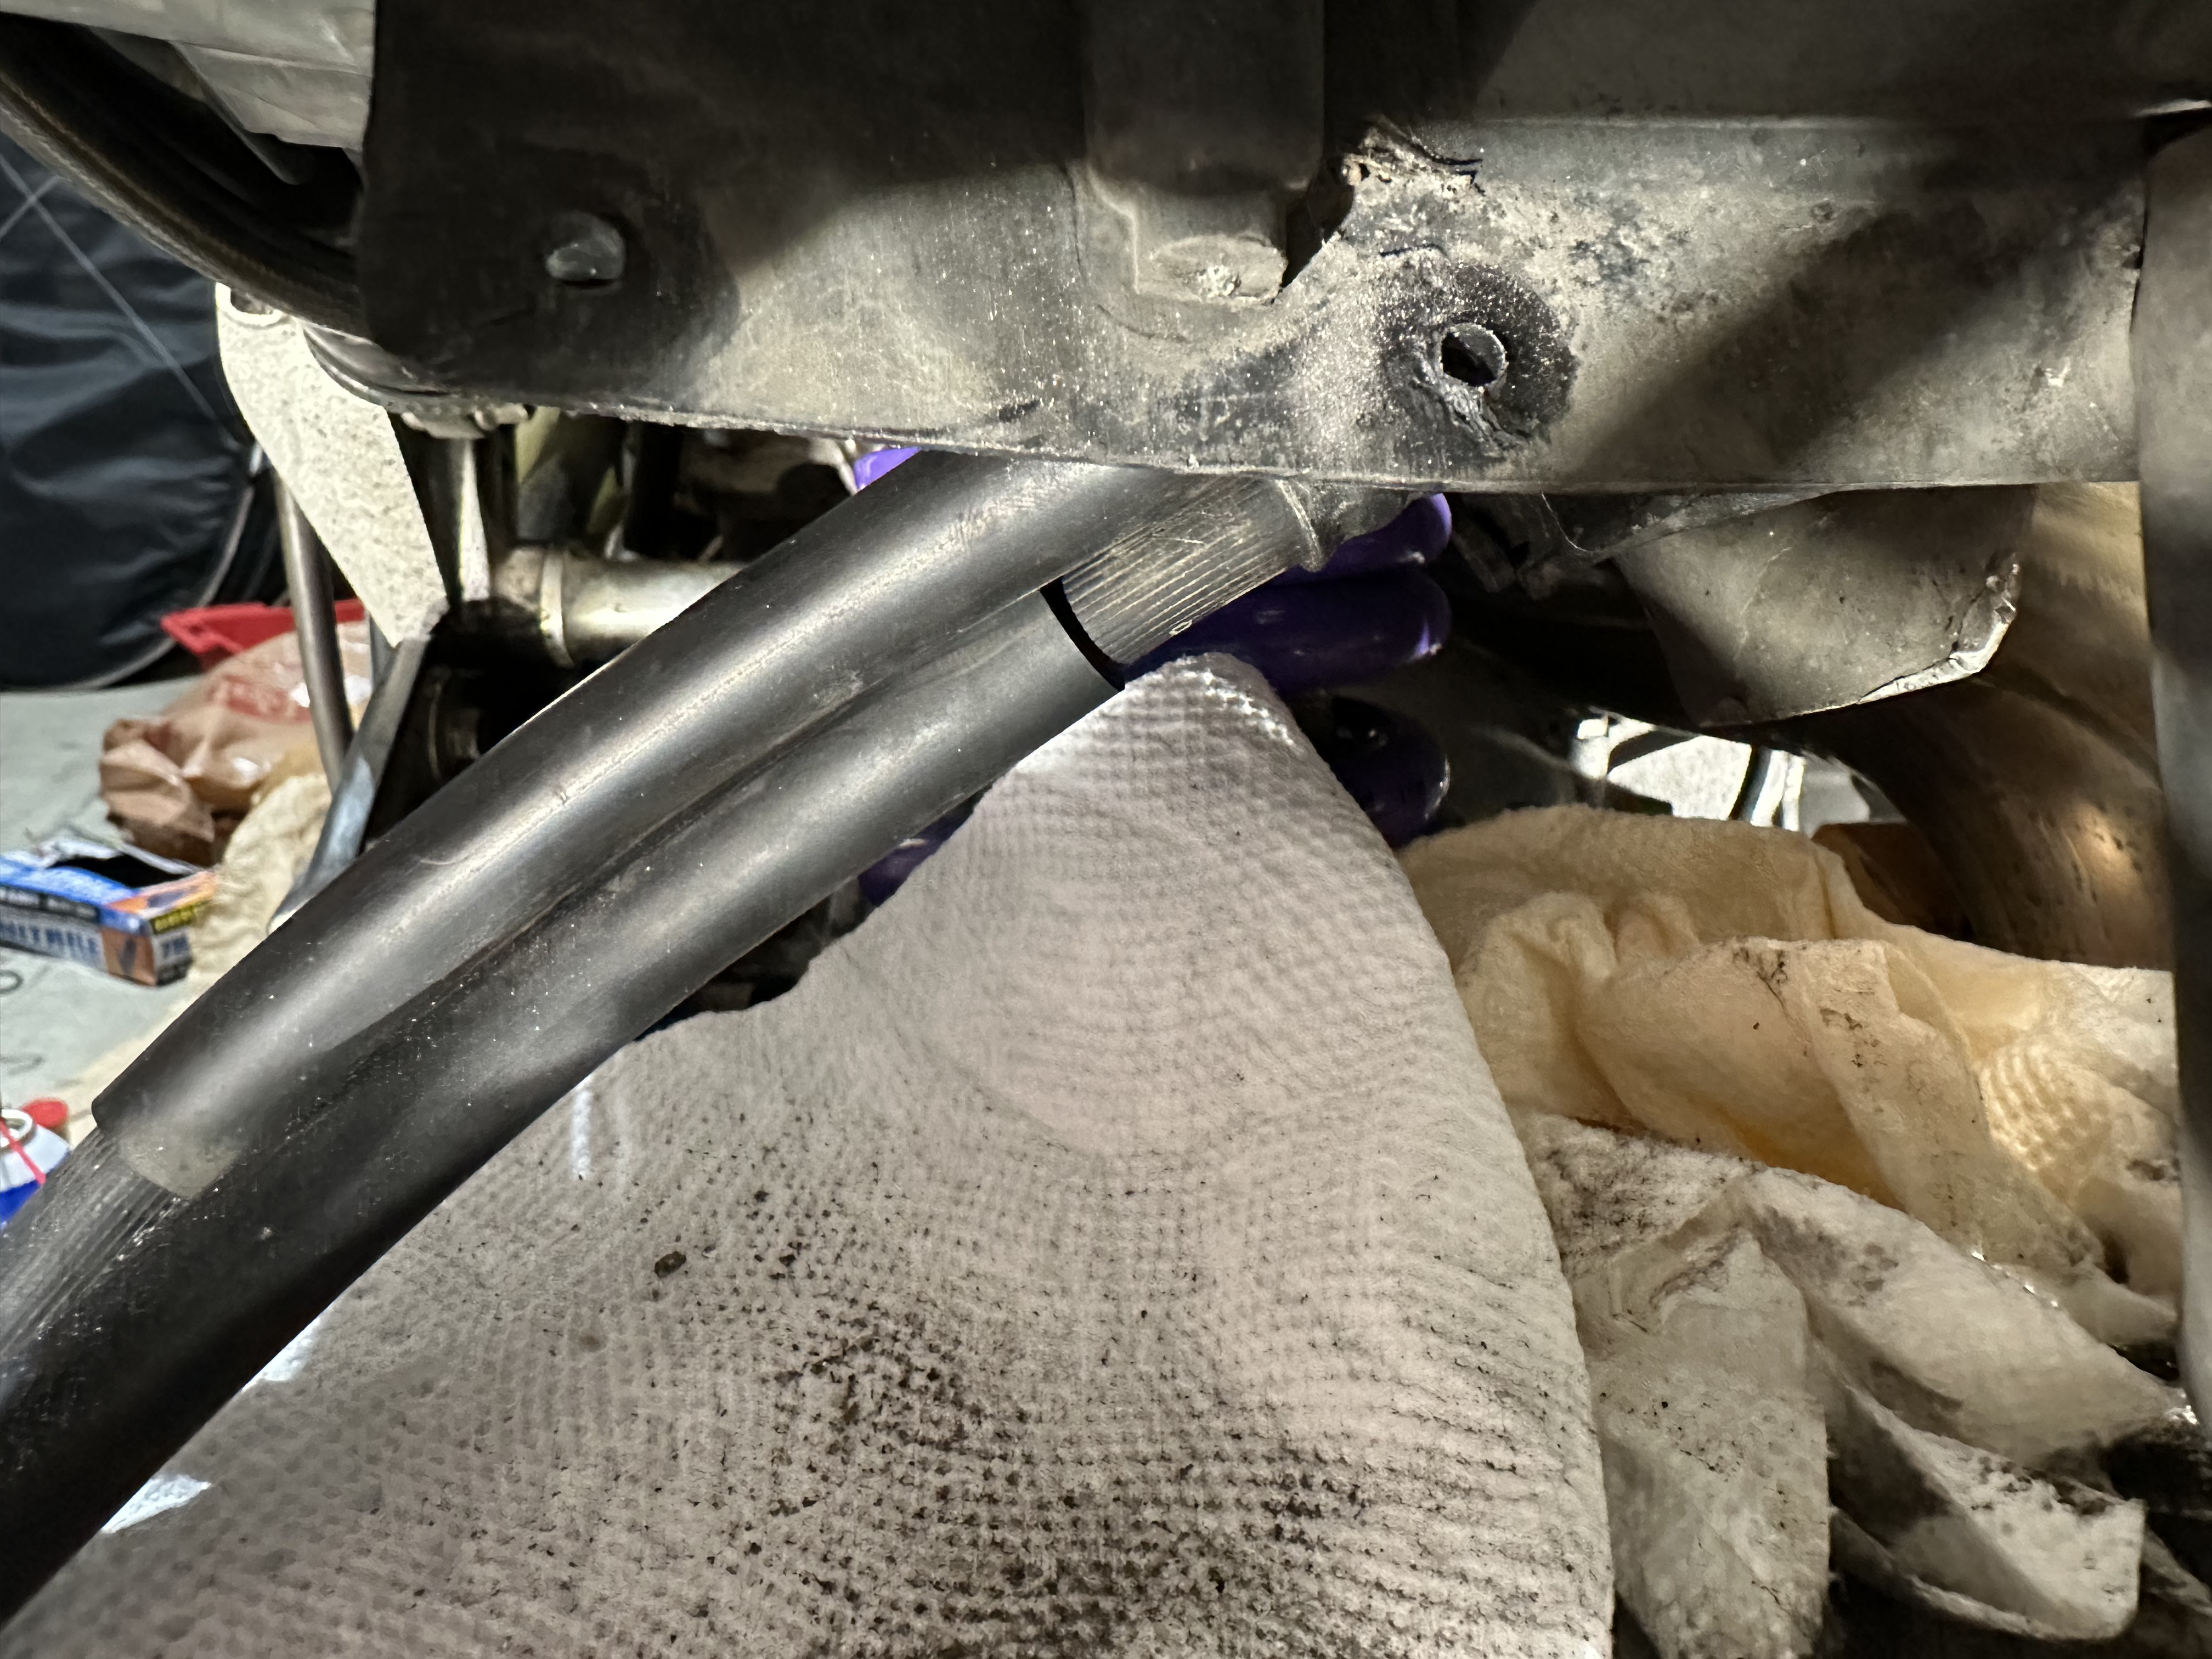
Now I could get a 10mm six point socket completely on it and break it free. From there, I could move the junction block with the flare nut free of the intruding bracket, get a flare nut wrench on it, and break that part free as well. No other way to really get this flare nut free without breaking that bracket bolt first, so if yours is seized, you are going to disassemble the rear of the bike or do surgery like I did. I can't stress this enough, that flare nut is really soft and will round right away if you try to turn it without freeing it of this bracket first, so you can fully seat the flare nut wrench.
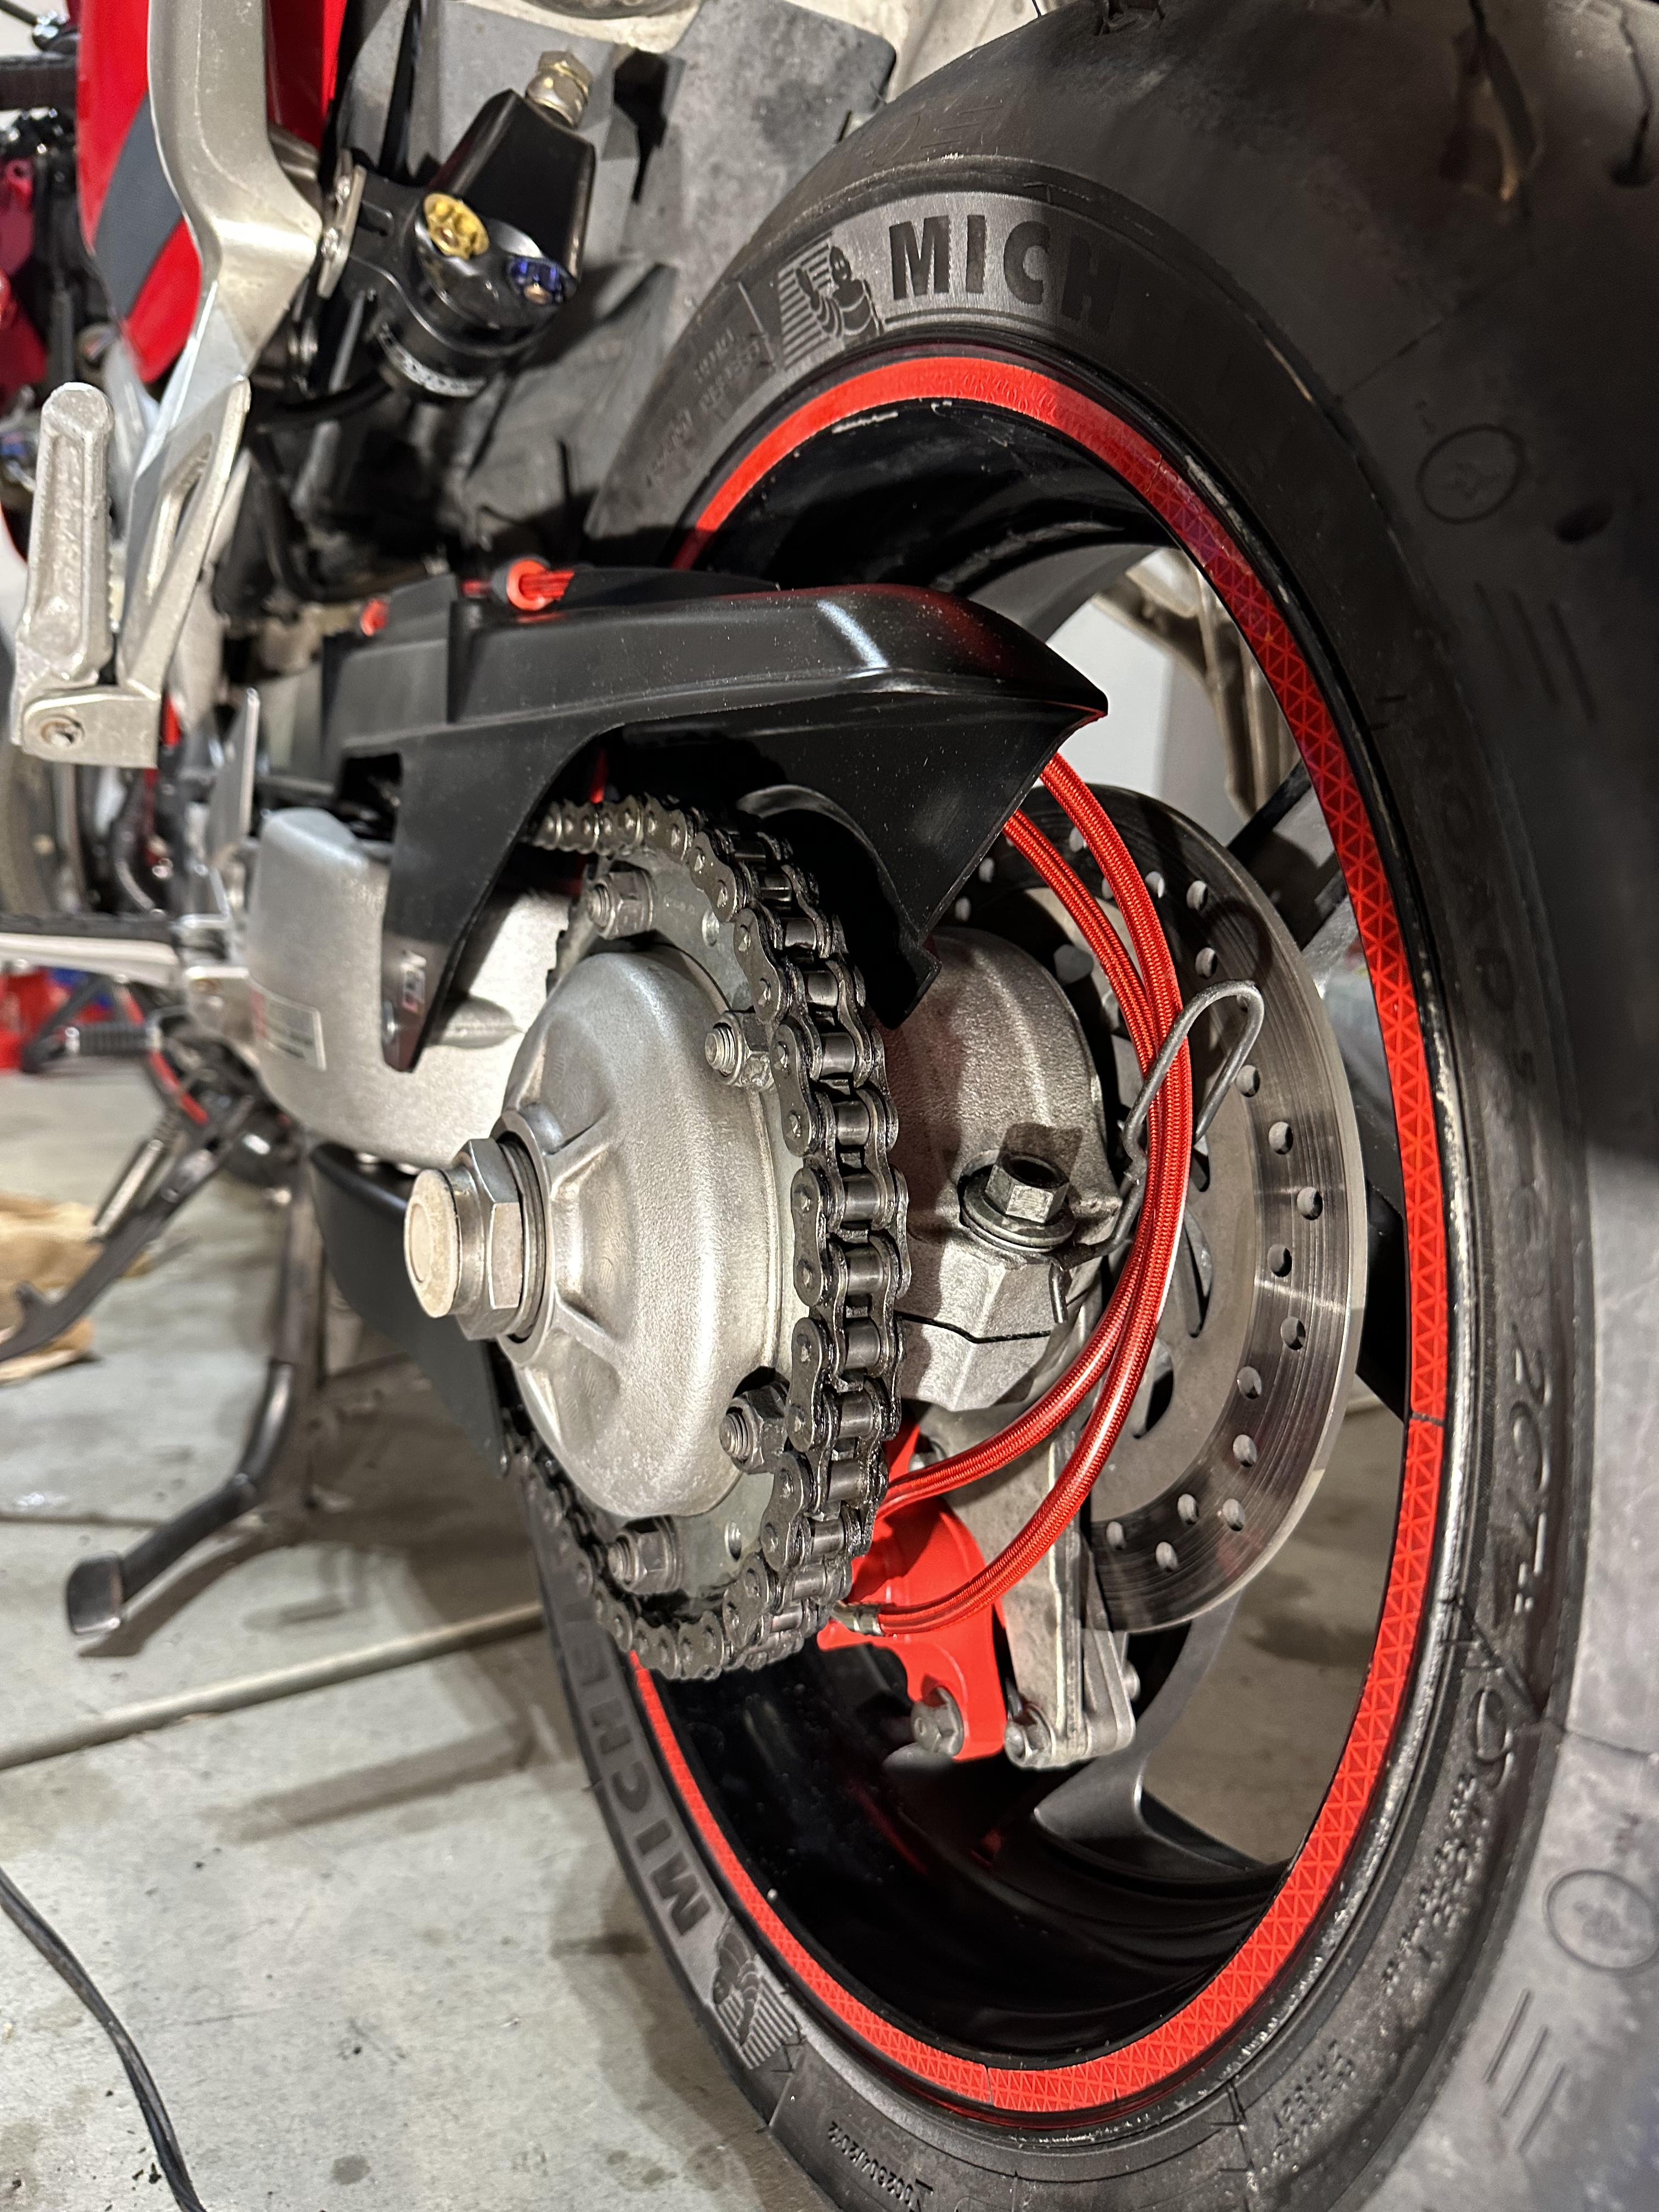
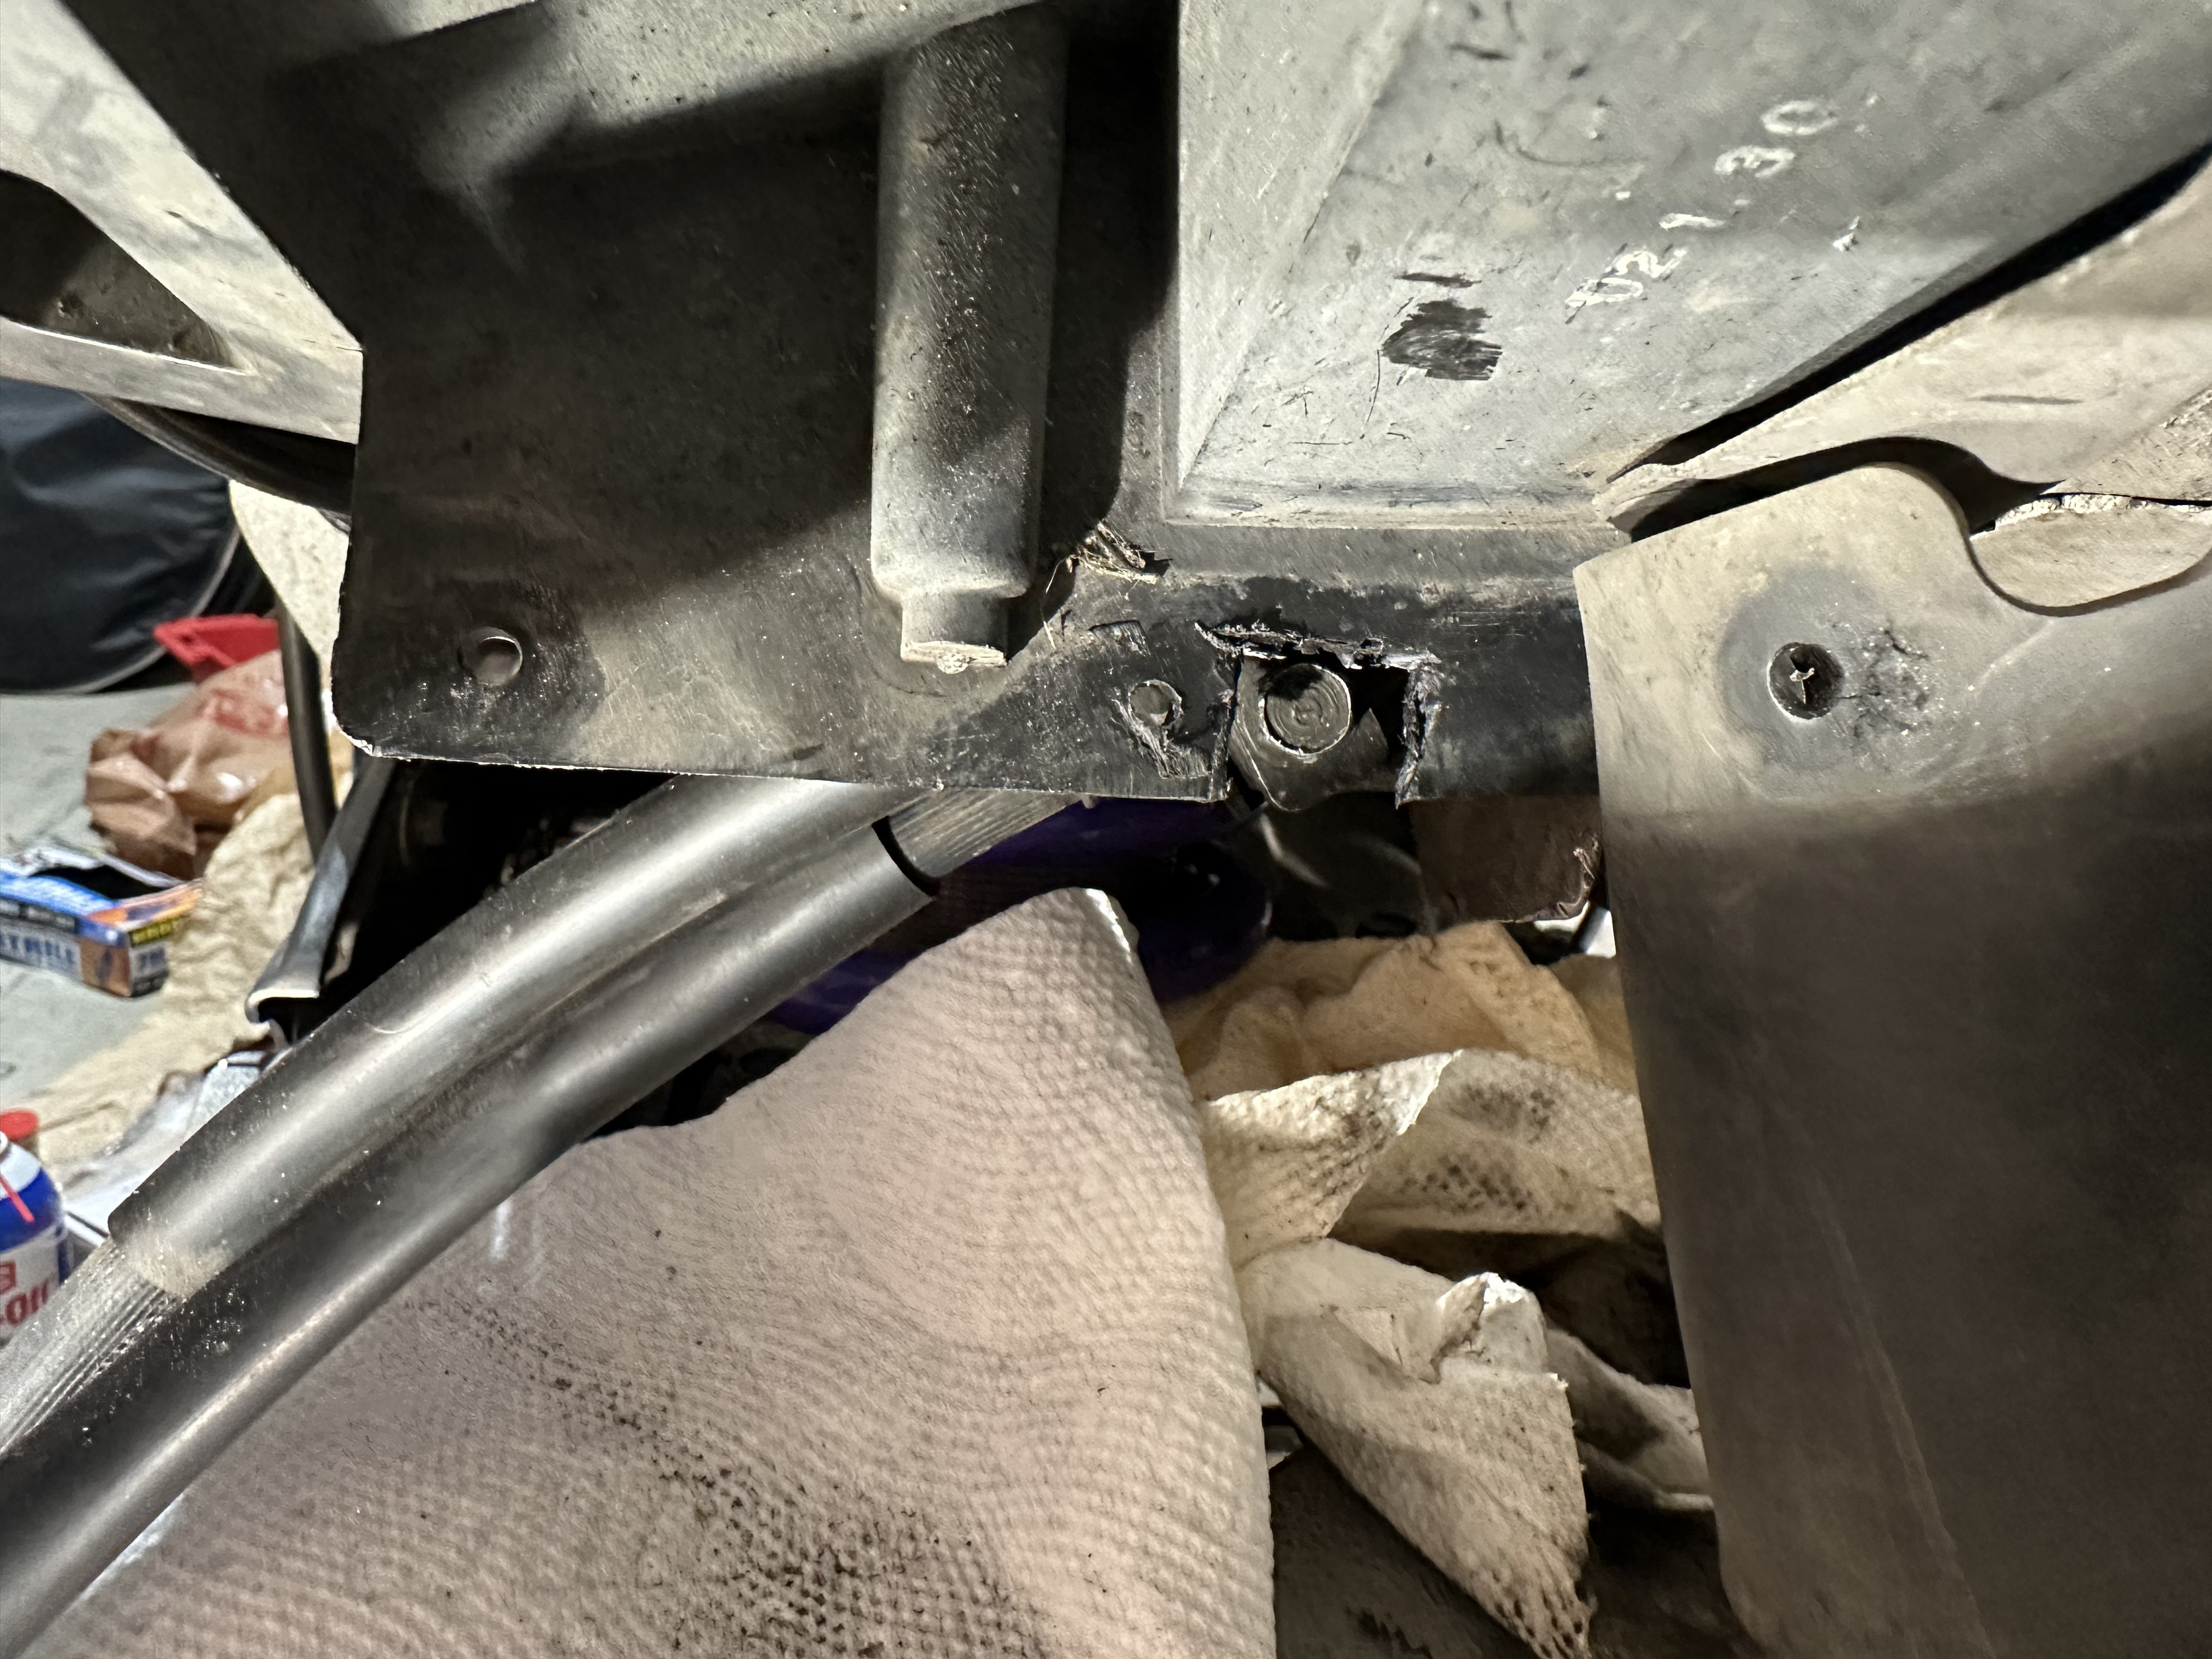
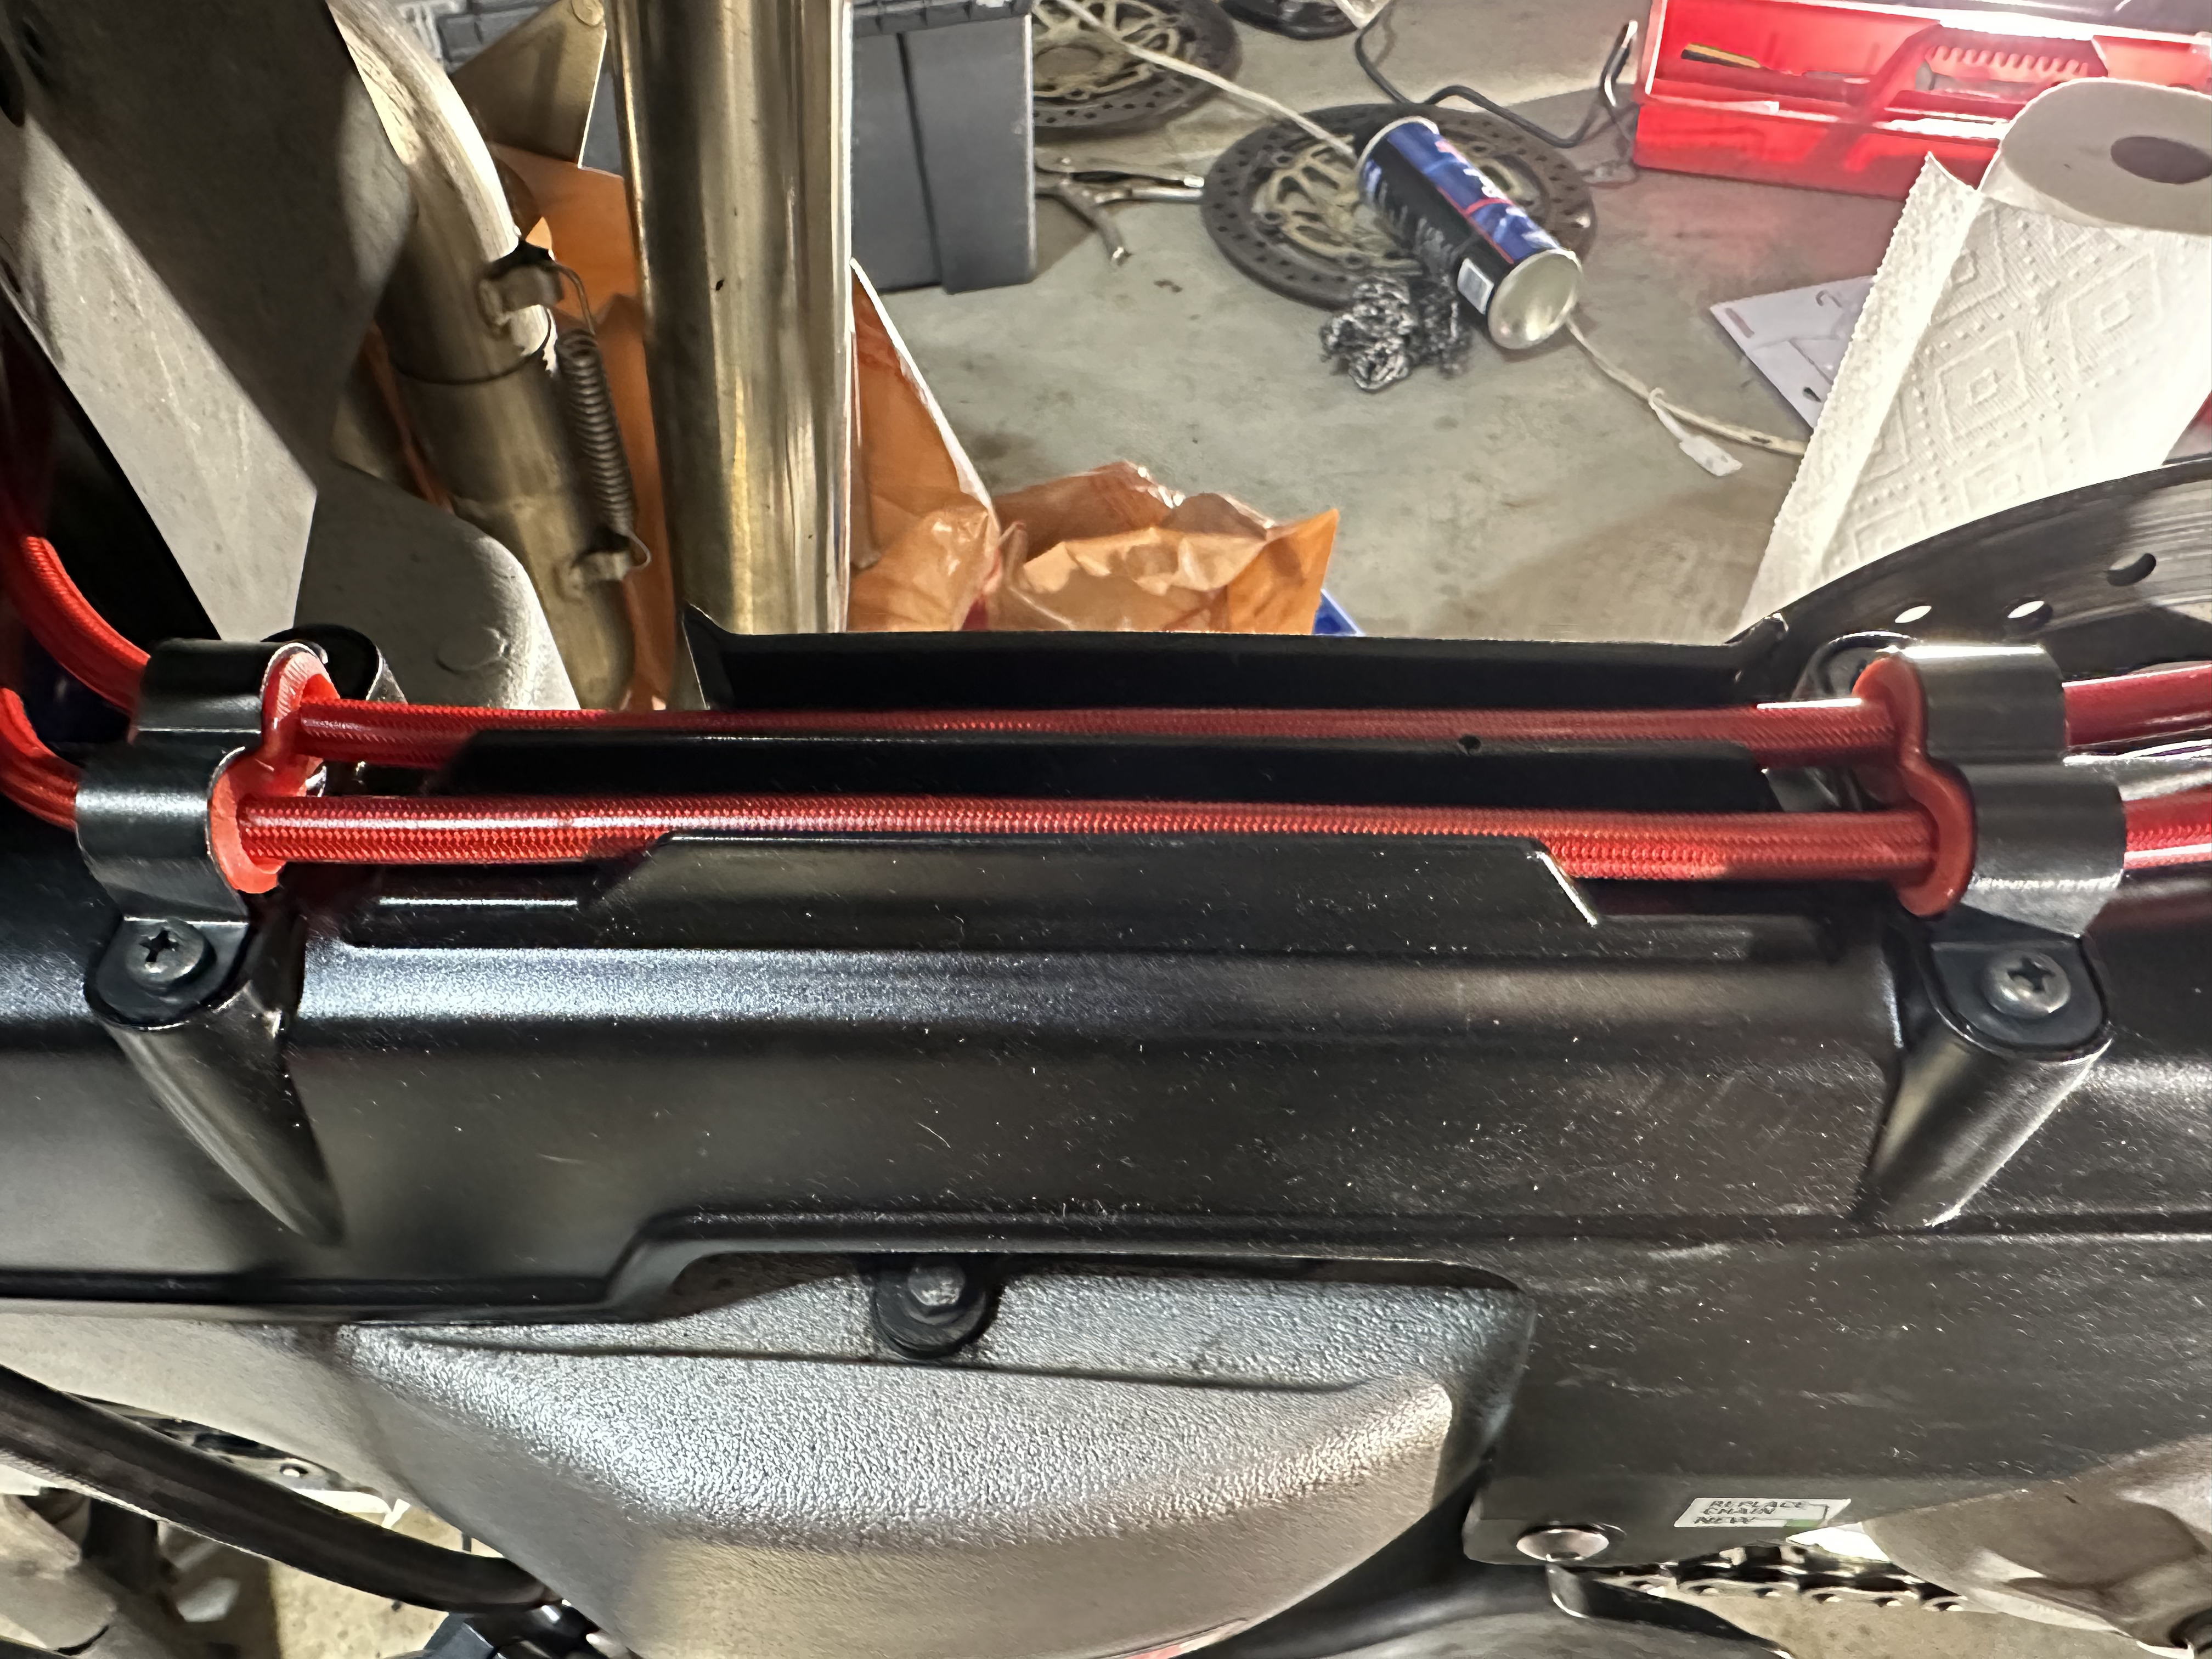
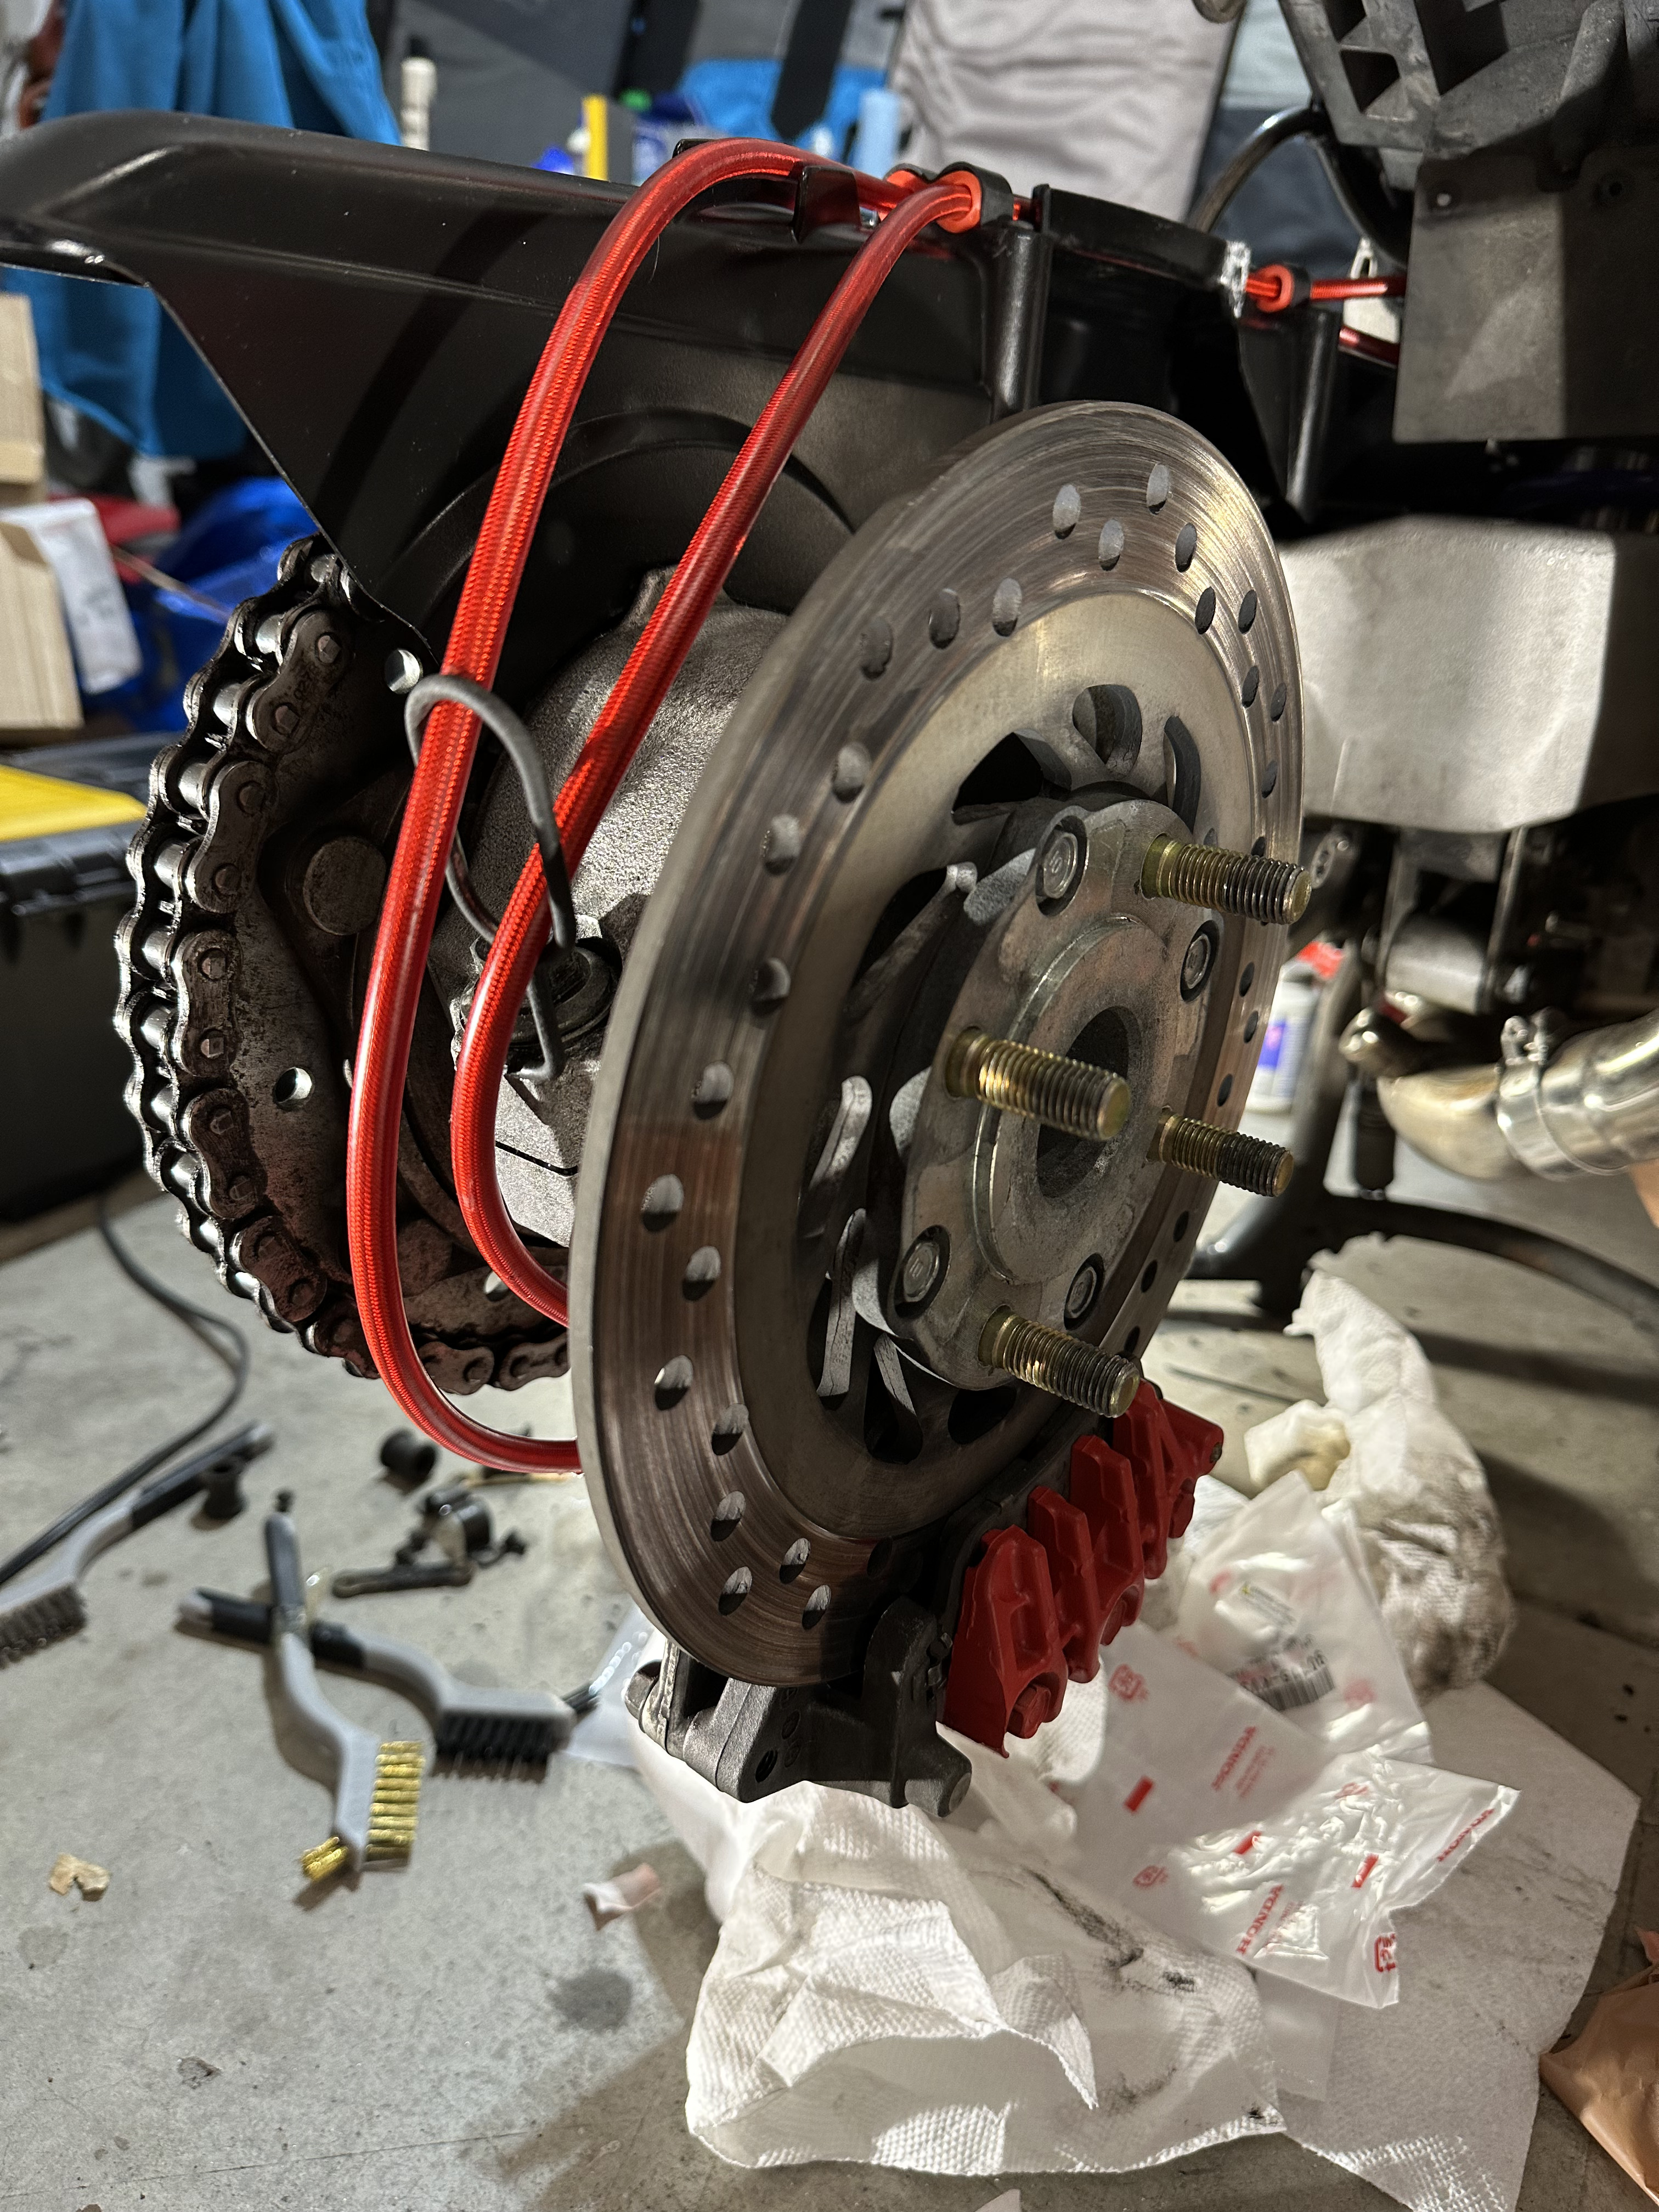
Something, something, something later, now it looks like this. All of my brake lines are in place and torqued down. I zip tied the Galfer hoses through the hole where the old junction was (couldn't reuse anything, and Galfer didn't supply anything interesting to hold it in place). Yes, it's ugly, but no one is going to see it. I'll rivet the flap back in place after I see nothing is leaking. The flap will completely cover the access cut I made.
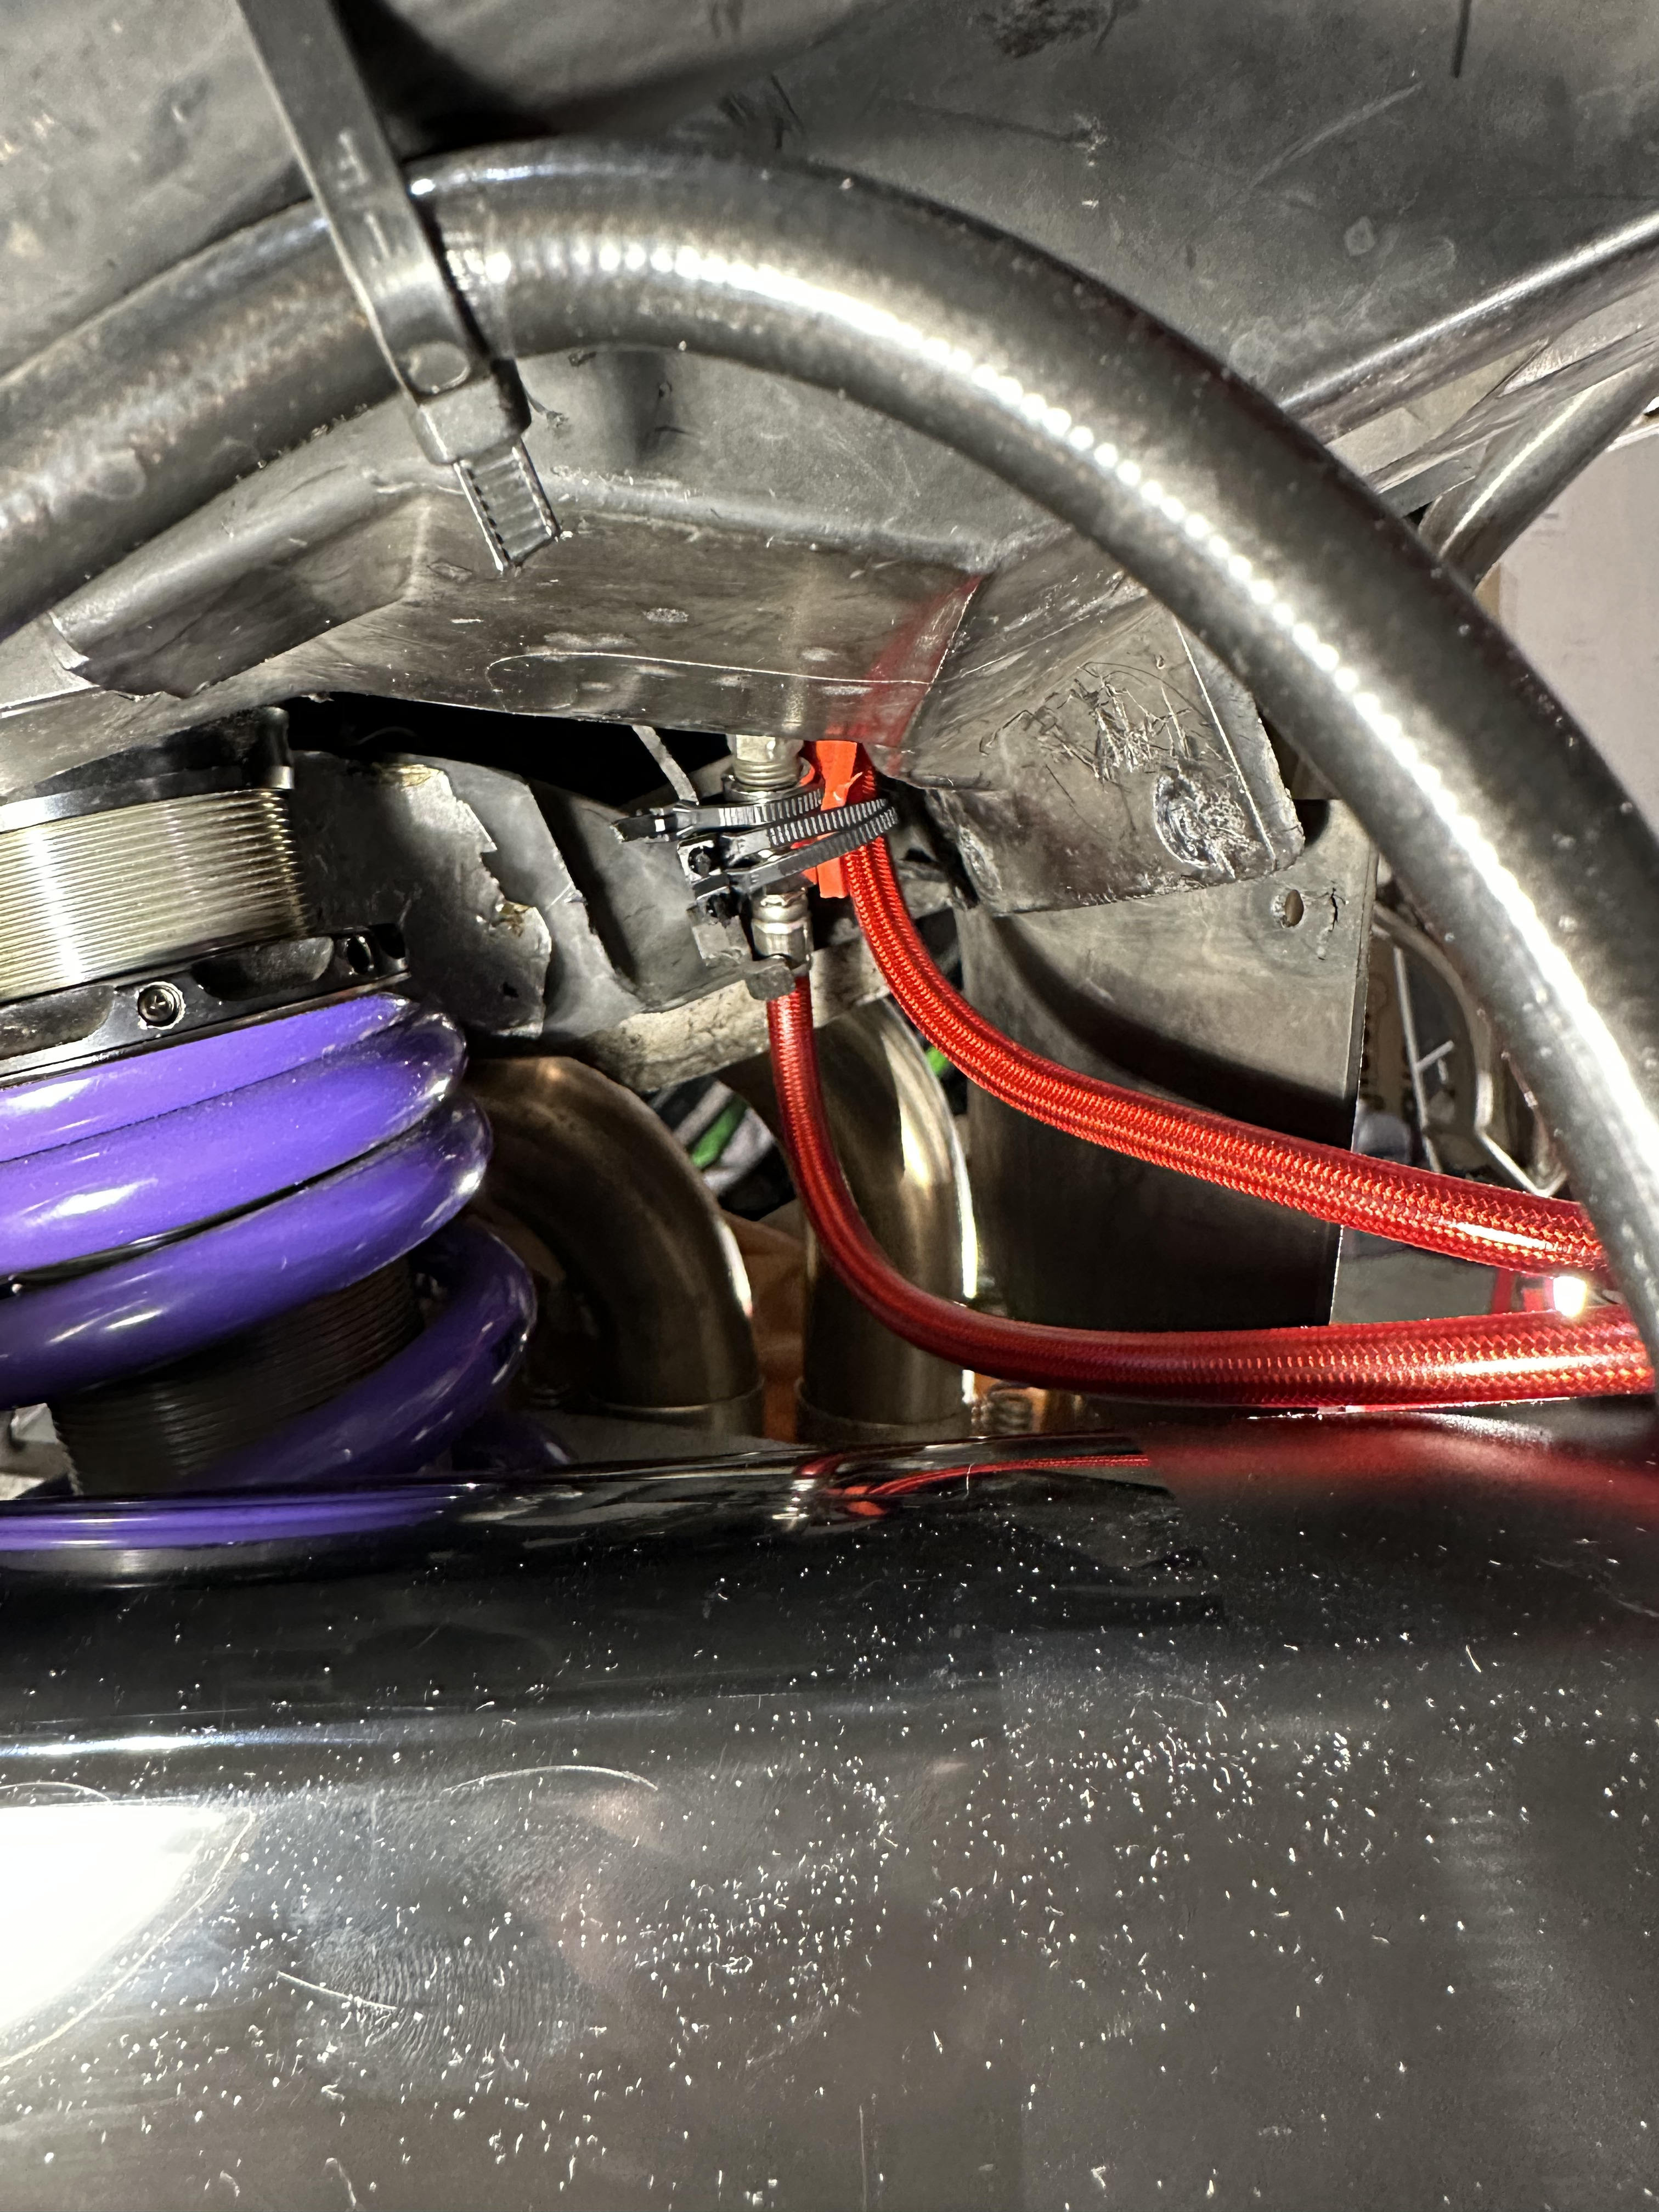
I also installed a new chain guard that I already used Cerakote trim wipes on, plus some new hose clamps. I've seen people use different ways of securing the smaller diameter Galfer lines to different chain guards. I used some 1/8" rubber sheet in red, cut some strips, and stuffed them in the clamps with the hoses like so:
Hopefully, will get to take a stab at filling the brake system tomorrow. The one hitch I see for solo bleeding is the Galfer bolt/bleeder valve for the proportioning valve (high point under the seat) is something smaller than the M8 used everywhere else. So I have Speed Bleeders everywhere except of course the place that is going to be the biggest PITA, where it would help the most for bleeding sans help. I could just reinstall the original Honda part but it has a fair amount of rust in it, and I'd have to clean it.
-
2
-
-
And here I was just thinking my crazy idea would be to go buy one of the ones up for sale every time I read this thread 🤣
I need to complete my brake and other mods and get my VFR back on the road, so I'll stop thinking about "back up motorcycles!"
-
1
-
-
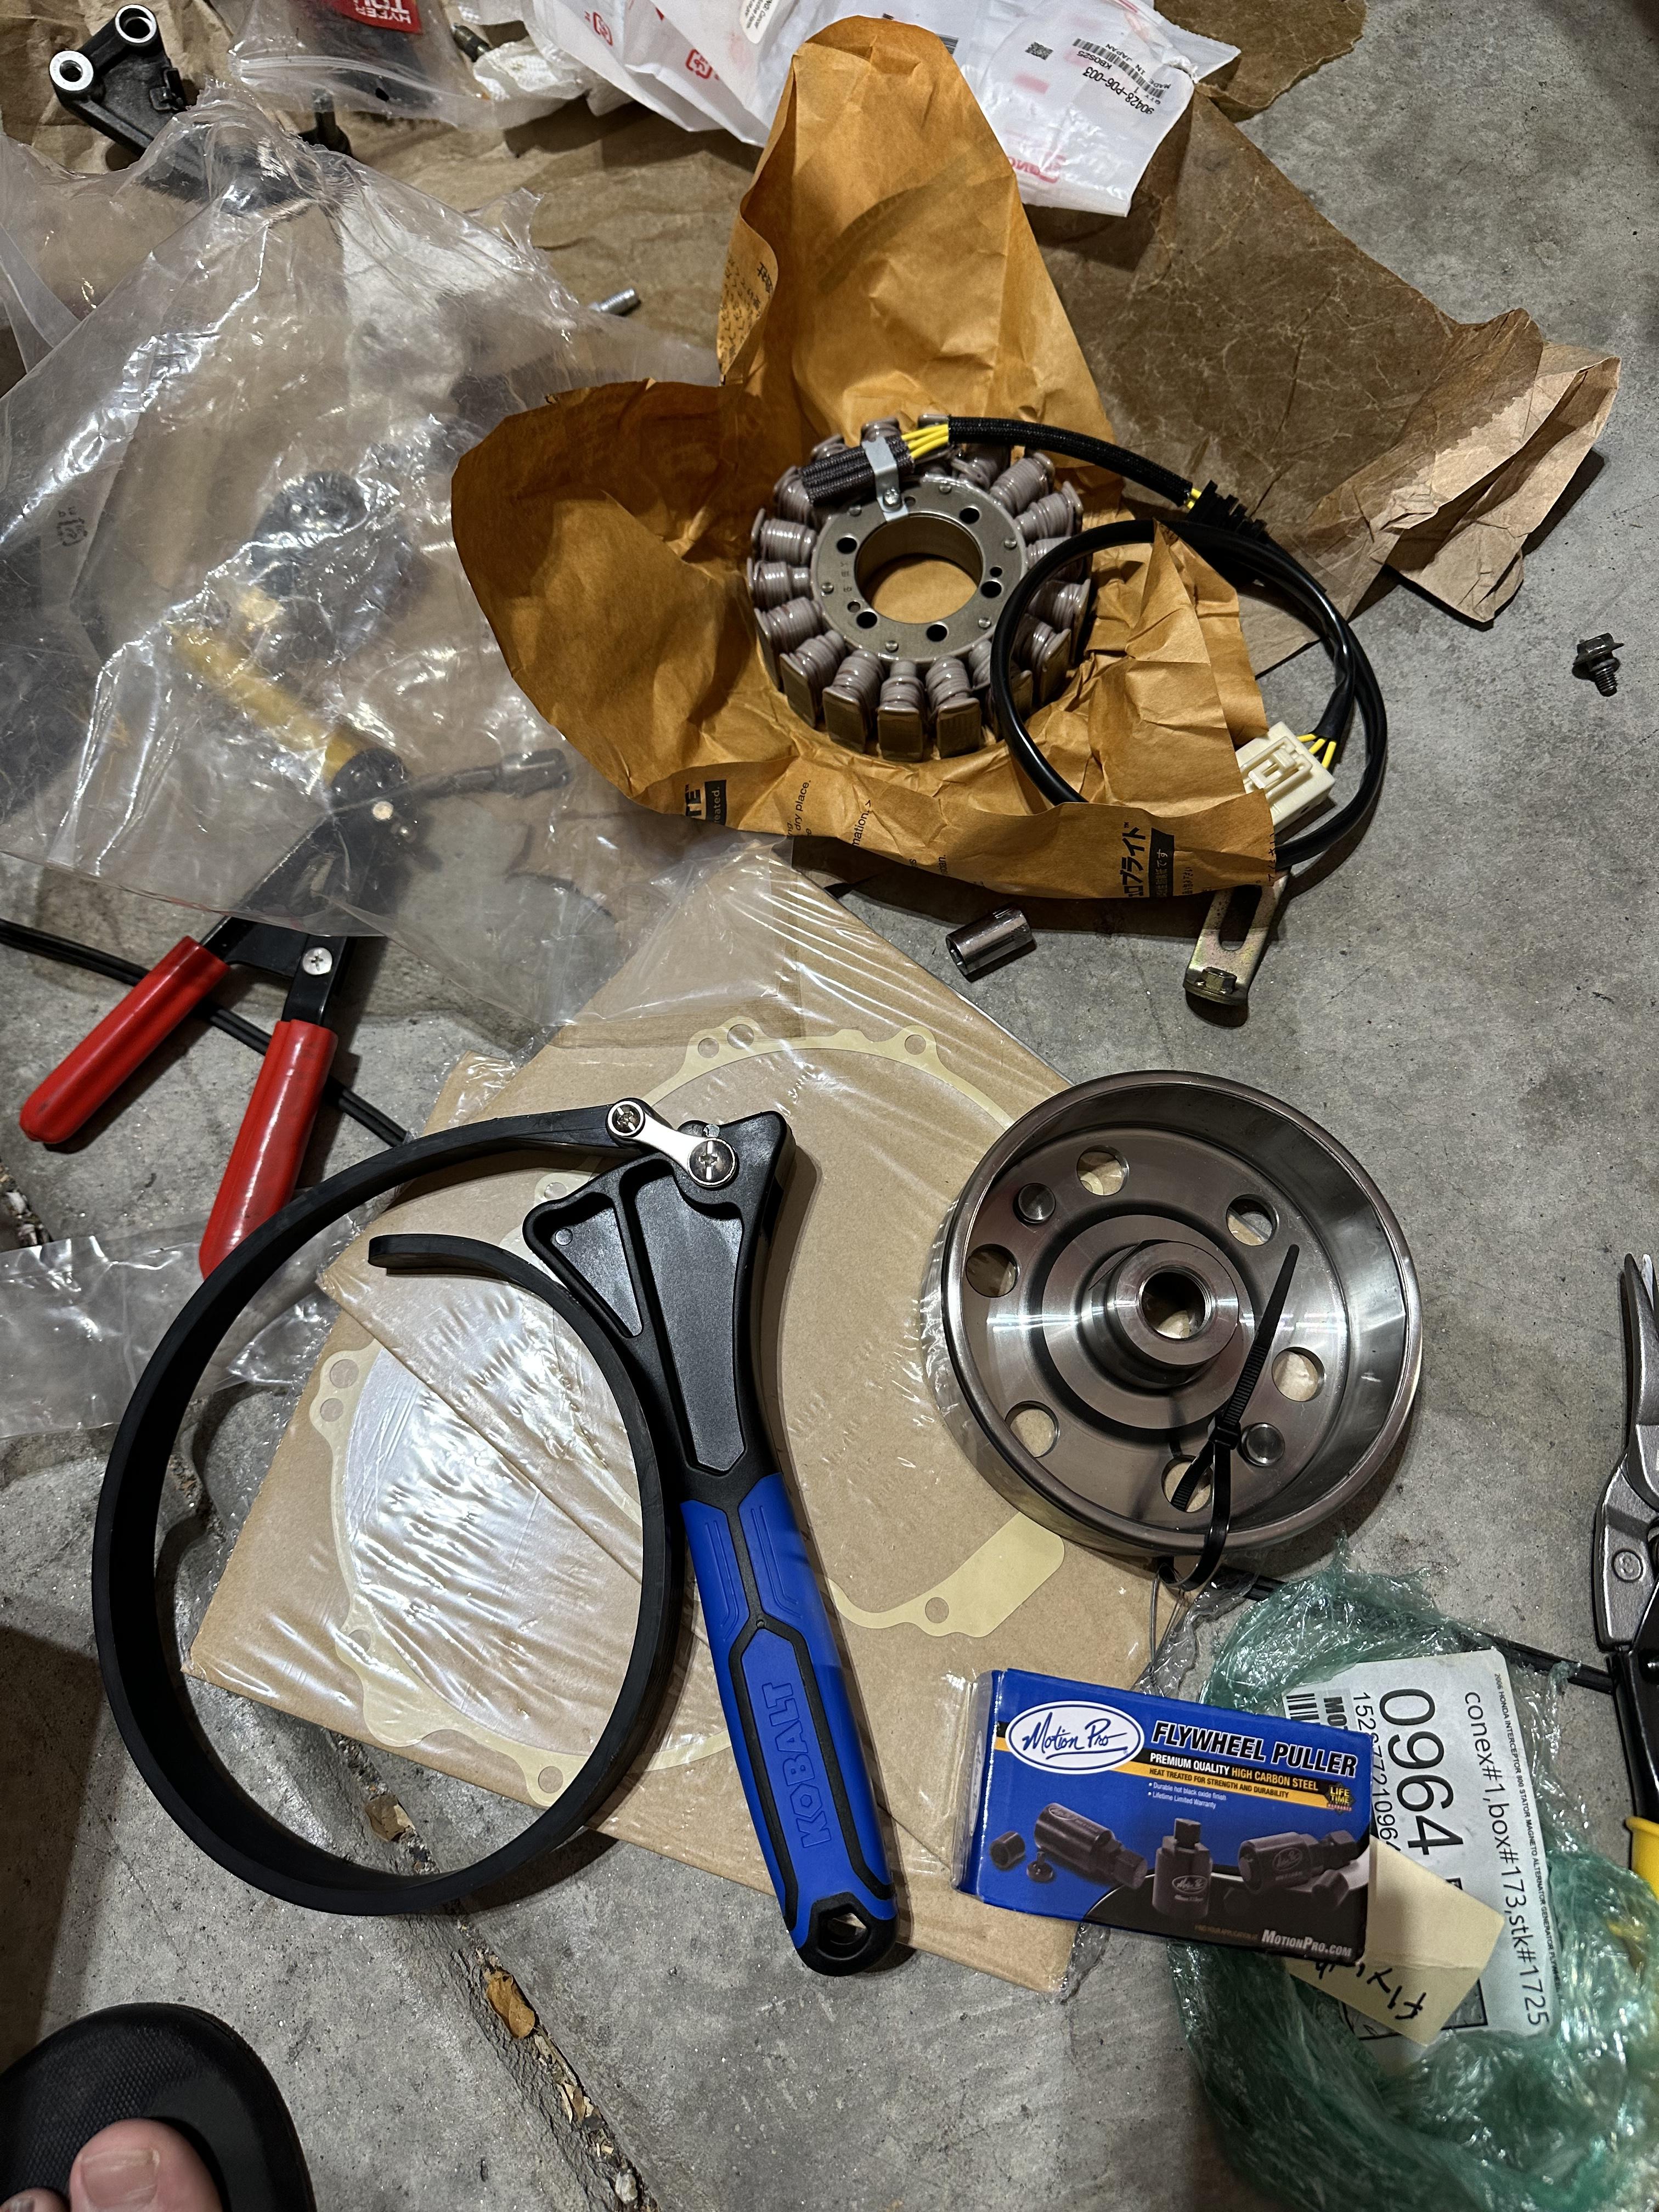
Wouldn't you know it, this is taking long enough that the remaining parts I needed to replace the oil cooler lines, stator, and flywheel arrived yesterday. Looks like I am doing "everything" now while I've got it all taken apart. 🤣
-
1
-
-
I think I "know" he's right but what I do works? 🙃
-
27 minutes ago, VicSev93 said:
So youre saying, all I need is an 03 flywheel and stator, and Ill be good to go? if so...I think Ill be going that route. My question is...how hard is the fly wheel change? never done that before..
Yup! Not too hard, there are some guides and videos. There's a special tool you can buy from ProMotion on Amazon, and you need a strap wrench.
-
I like that idea. I did not like the idea of a pencil torch near my fuel tank, so I really only tried a really strong lighter.
When I broke the sticky flare nut out, it didn't have loctite on it. It looked like it had some greenish copper corrosion but not much. I think the forward ones leading to the front calipers are "likely to be bad" because the top of the flare nut and the threads are looking up at the sky, ahead of the fuel tank. My bike was left outside a lot by the in-between owner, so...yeah.
That being said, the rear one I'm trying to get to now is protected from the elements and rounding pretty easily since I can't get the flare nut fully seated. But it wouldn't matter anyway because that block has to come off no matter what. I would cut it out if I could get it.
-
I should add, when I was trying to bleed it from empty, it was with a new master cylinder kit (piston and seal) and new Honda slave cylinder. Still sucked. Speed bleeder made the difference. Should not but did...
-
If I hadn't already got the Galfer line halfway through! I can't believe there's no way to access it adequately except a socket...and they made it impossible to easily remove the bracket or obstructions.
Ordered some pop rivets, cutting plastic is the new way forward.
-
1
-
-
That does seem to be the way...
So not enough room for a crows foot, and no amount of freeze off or PB will get it to move under the offset wrench without rounding. I am considering removing the mud flap at its three rivets, cutting an access hole for my socket wrench in the plastic behind it, then re-riveting. The other ways require disassembling the whole back half of the bike. For a while it seemed like I could bend that bracket enough by hand, but no luck.
Even the bolts holding the proportioning valve (where the bracket is mounted to) are reversed up against the frame, so step one seems to be "disassemble whole bike." It's like Honda never considered easy replacement of even OEM rubber lines.
What's even more aggravating is most of these parts are going to be permanently removed but there's not enough room in there to get my 1.5" stroke recip saw in to just cut the right things out. So destructive methods are mostly off the table...argh.
-
1
-
-
New fresh hell - WTAF was Honda thinking when it put the bolt and flare nut for the rear two brake lines in a place where you really can't get to either cleanly? I may have to disassemble the things hanging on the rear subframe to remove the tray so I can get to one stubborn 10mm bolt that wants to round in the one 12 point offset wrench I have that can reach it. A 6 point crow foot or something might do it but might also not. Super lame.
-
Someone could probably authoritatively answer this, but I think an 03+ 6th gen stator and flywheel would go on a 5th gen? Mentioning because I just bought a new Honda 03+ stator and a used eBay flywheel for my 2002. It's the $300 route but I too would like to do this only once...
-
I don't know why but the clutch circuit is just hard to bleed when dry. I was successful once I switched to a speed bleeder nipple (comes with coated threads, so no need to wrap with tape). Used a cheapo vacuum bleeder from Amazon that works better than the Mity Vac I had a long while ago. I have to squeeze a few things to make sure it's airtight, but then it applies and holds suction very well.
I just replaced the Honda slave cylinder with an Oberon unit and moved the speed bleeder nipple over to it. Worked like a champ, first time.
-
Preload adjuster caps are pretty simple screw machines...if you just want something different I would get whatever looks good.
A full Hyperpro spring kit for both ends, and/or a Racetech gold valve kit for the fork, now that's Christmas...
-
This kit does look better than the budget kits. I also have the replacement pipe in hand, so one thing or the other will work. Finding out soon...

6th Gen master cylinder piston kit
in Maintenance Questions
Posted
I did...problem is they were all ETA unknown. For anything they don't happen to have on hand they're just going to report the same (hopefully) from Big Honda. I didn't get lucky with any of them.
Meanwhile...I jumped on ordering rear MC and SMC parts while they are available, because I fear obsolescence hitting elsewhere. They ironically arrived the day after I called my brakes complete 🤪.