


Tightwad
-
Posts
1,689 -
Joined
-
Last visited
-
Days Won
1
Content Type
Forums
Profiles
Gallery
Blogs
Downloads
Events
Posts posted by Tightwad
-
-
I need to look more into this myself. I made my own using regular LED, but turned sideways. Surface mount LED are not very bright generally, and my setup was more of a Proof of Concept. It works, as proven I guess....but not nearly as bright as I would like.
I love the connectors, and will certainly look into them...I opted for a Cat5 cable so I could use a M/M connector and easily unplug.
As far as making them run, blink, etc...a chip would be the way to do it, and would make it a bit more complex...the worst part is there are so many different trunk styles that each one would be a custom design, and most don't want to spend $200 for parts + custom labor.
-
Congrats! Those look sweet.

I have a few question tho...
-I thought rearsets usually moved pegs up and back. Do these move the pegs in all directions?
-Are you going to feel more vibrations without rubber inserts on the pegs?
-Is there much weight savings with these vs. the stockers?
I am guessing...
They look fully adjustable in all directions
Not noticeably more, at least for the 1" drop pegs I fitted to my bike (but for only $75)
I am betting they weigh more, but not enough to make a difference....don't eat that whopper for lunch and it will be even
-
I've been following this thread, and I dont know if anyone is gaining chain life , But I definitely see alot of time , frustration and money
That maybe true for the first few weeks finding the right setup. After a year or two it has paid for itself, saved you a lot of time not having to do chain maniteance and no more worrying if your chain will last till the end of your journey.
I have had zero issues with mine, and never a spot on the garage floor (not that I care, it's a garage not my kitchen). I do notice the plastic piece below the swingarm has a nice coating, and the rim/sidewall has some streaks. I have gone close to 4K miles with it, and haven't touched the chain.
-
Per your request:
STUPID
sorry, I couldn't resist.
-
Nicely done Tw,
I replaced my CTT's years ago using mostly the same method, but I didn't remove anything but the air box for the front one. That little coolant hose makes it a tight space, but I worked around it no problem. All that's needed is patients and some dexterity and it comes right out! :blush:
That first time was at 32k miles and with my bike showing 66k miles now I expect to start hearing some noise sometime soon. The rear never seems to go out like the front, maybe because it's on the downhill side of the rear head and always bathed in oil unlike the front CTT. :huh: I replaced them both anyway.
Removing that hose (if equipped with a drain hose in hand) takes about 1 minute, and saves a ton of headaches...I would suggest removing them both, but natually there is more than one way to skin a cat (I prefer Duct Tape and Gasoline....)
I bought both, but the rear is quiet so I saved that one for future install...although next time I am going to try increasing the tension by 1-2 turns to see what it does. Now that I know the process is a 1 hour job at best, it isn't so daunting to put the old part back in.
Good post, TW.
Just to add a little tidbit from personal experience.
If you do nothing else right, these three things MUST be done.
1 - Don't be a lazy bestid and remove that hose.
2 - The CCT CAN be removed w/o the little key. BUT Don't be a lazy bestid and use the key
3 - You could tighten the two CCT bolts by hand, BUT Don't be a lazy bestid and use the torque wrench.
Following these simple instructions will prevent a lot of gray hairs and you wouldn't have to post topics titled "Oooopppsss!!!"
Ask me how I know :blush: :dry: :rolleyes: :ph34r:
I recall having read your thread prior to doing mine...which is why I was so careful about what was in the way. The worst part of the whole thing was when that hose started draining on me, and I was scrambling to find something for it to drain into while elbow deep in the bike.
-
just bumping this because Didit needed it in another thread....
-
Will these 6th gen pegs fit on the 5th gen?
Yes, they should fit. A small adjustment was made to the mounting that enabled them to fit the 5th gen bikes. I have a set in black if you are interested, or I can get the polished or clear anodized versions.
-
AB-Oz, I paid 126 EUR for the Racetech Gold Valves. Do you mean that you are going to install them in your Öhlins forks? I am a bit surprised, I just didn't think that Öhlins would need such improvements but I guess you can improve anything huh?
vfr-steve, I thought I was the only one with BOS GP1s in this forum, guess I was wrong. However I am almost 100% sure that I am the only one in Turkey. Most VFRs have either LeoVinces or Lasers installed here. Have you done the O2 sensor eliminator thing?
I haven't seen many with the BOS system either... in fact thinking about it, most VFR's I do see just have the standard pipes as I'm betting it's pretty expensive. Mine was already fitted when I bought the bike and it's one of the main reason I bought it - still makes me grin from ear to ear a year later :biggrin:
I've got the 02 elminators on my bike with no PC and I find she works beautifully with smooth power without any hiccups. I can't imagine anyone having the 02 oxygen sensors plugged in as it makes the bike feel terrible.
I actually just removed my O2 Eliminators, as they created a bit of a hesitation at 4500-6K RPM...just a titch but it bugged me, and i found no other benefit from them either.
-
That's any month but June/July/August in Ontario for you. :rolleyes:
I thought there were only two seasons in Canada....Winter and July...
-
For those who have been tracking this topic, Randy now has the Pegs available for sale! Two versions are available, the SideTrax and CrossTrax models. Both have a 1" in drop (future may include a no-drop option). The CrossTrax is a tapered peg...gives it a sportier look, and has a waffle design with 3 holes drilled through the pattern. I currently have this set mounted on my bike, and I find the traction to be very good. the CrossTrax is also a shorter peg, which may provide a small bit of ground clearance. In addition, neither contains a peg feeler, so some clearance is gained there
I am not a super aggressive rider (at least not in Dallas), so I haven't drug a peg yet, but I have caught my toe when under the shifter in a turn....so I am learning to be careful. I feel a bit more of the buzz because there is no rubber top, but the look is a great upgrade, and the 1" drop helps with knee position.
Randy has been awesome to work with, as has his wife Alicia. Their attention to detail, and desired to build a quality product is second to none. I am hoping to talk them into more VFR specific products, so hopefully the pegs turn out to be a good investment for them!
Pegs are available from my site as well as his. Pricing has recently been changed...price is now the same for Polished or Anodized (Clear or Black). 5th gen Pegs are coming soon I believe, onedowneaster has been very willing to help in the fitment there, and I believe the same pegs will work for 1998+ models!
Randy's website:
http://www.knightdesignllc.com/index.htm
My website is in my Signature
-
What about a small piece of window tint, which will dim the light shining through? I am sure any window tinting place can give you a 1" square piece that will do it.
-
I agree...the throttle lock reduces a LOT of fatigue, even if you have perfect posture. I have a bad back, so holding perfect posture is a bit tough on it, but the throttle lock allows for much longer days.
-
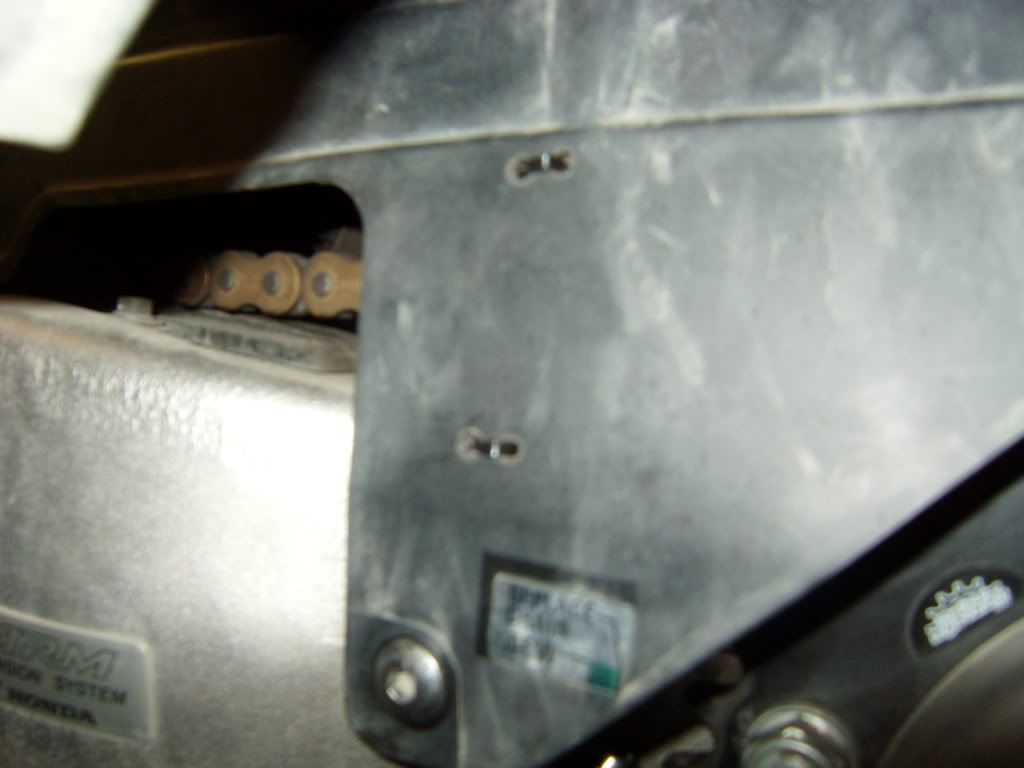
Took my first ride with mine today (driving to work). I cleaned by sprocket, but the chain hadn't been touched since new, when i changed it a few months ago. The chain is still pretty dirty...10 miles doesn't give it much chance, but I can see the sprocket teeth are "wet" looking, so I assume the oil quantity is about right.
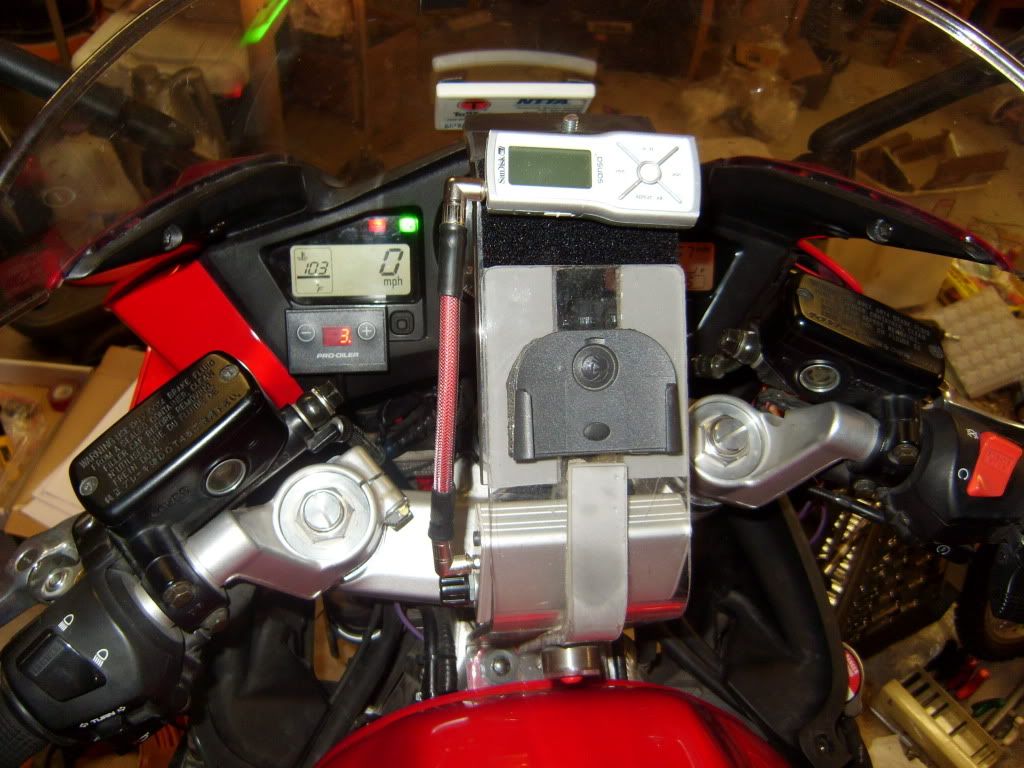
Controller mounting:
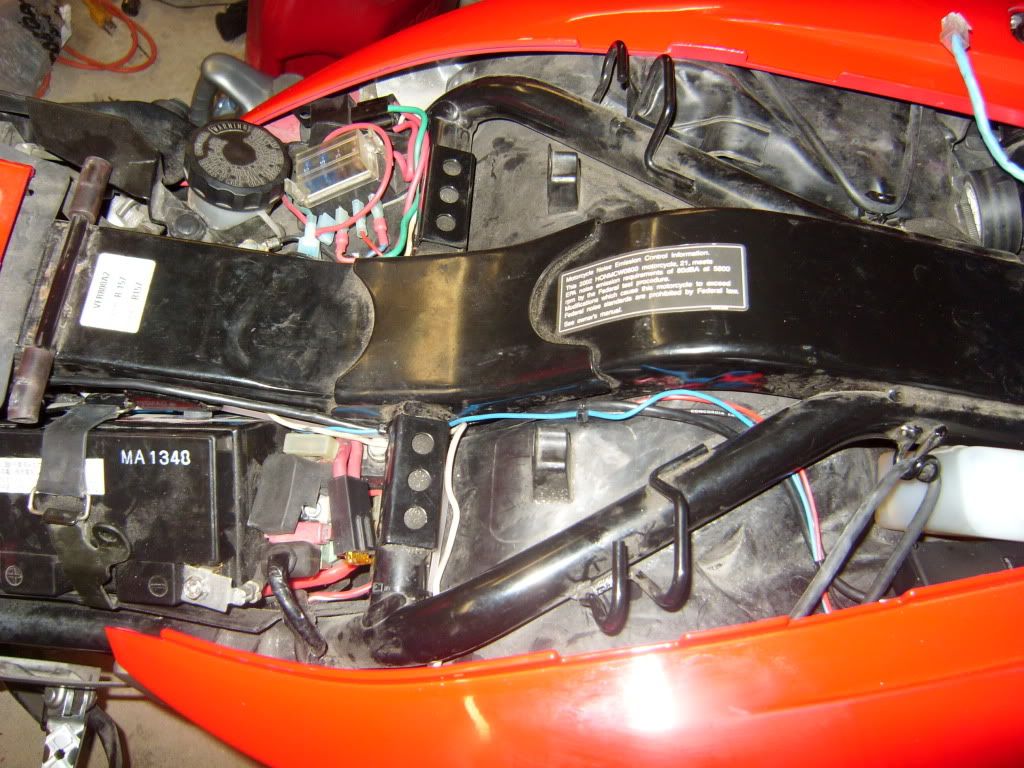
Wire/Line Routing:
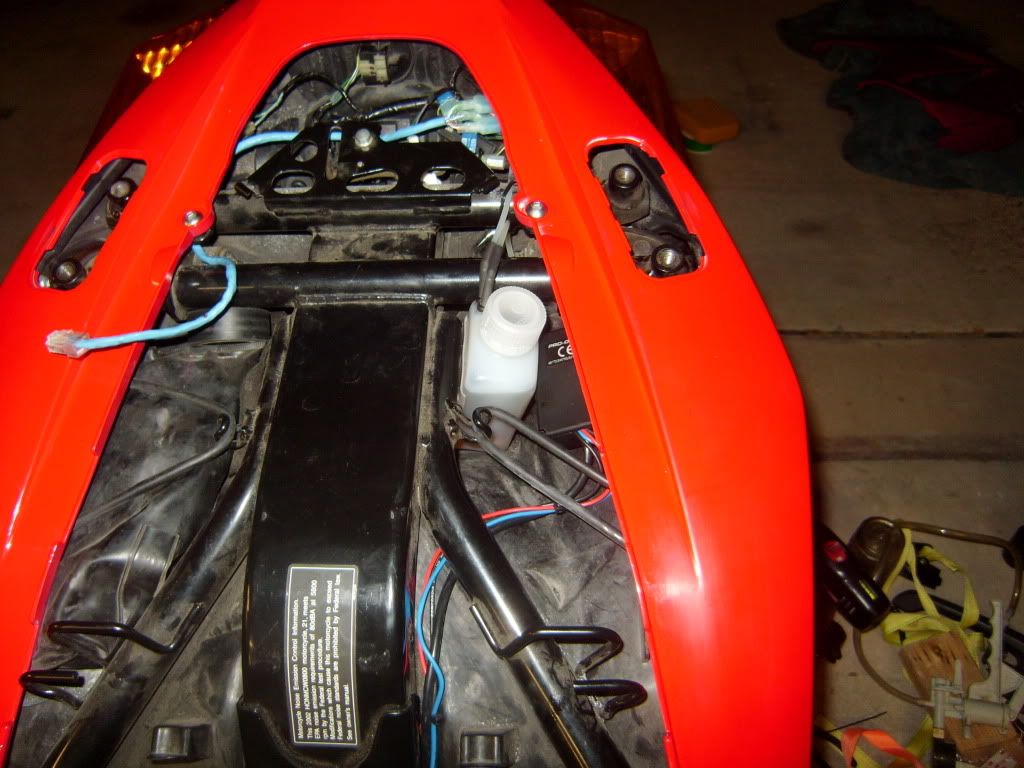
Bottle/pump mounting
You can see here where my oil line goes into the chainguard:
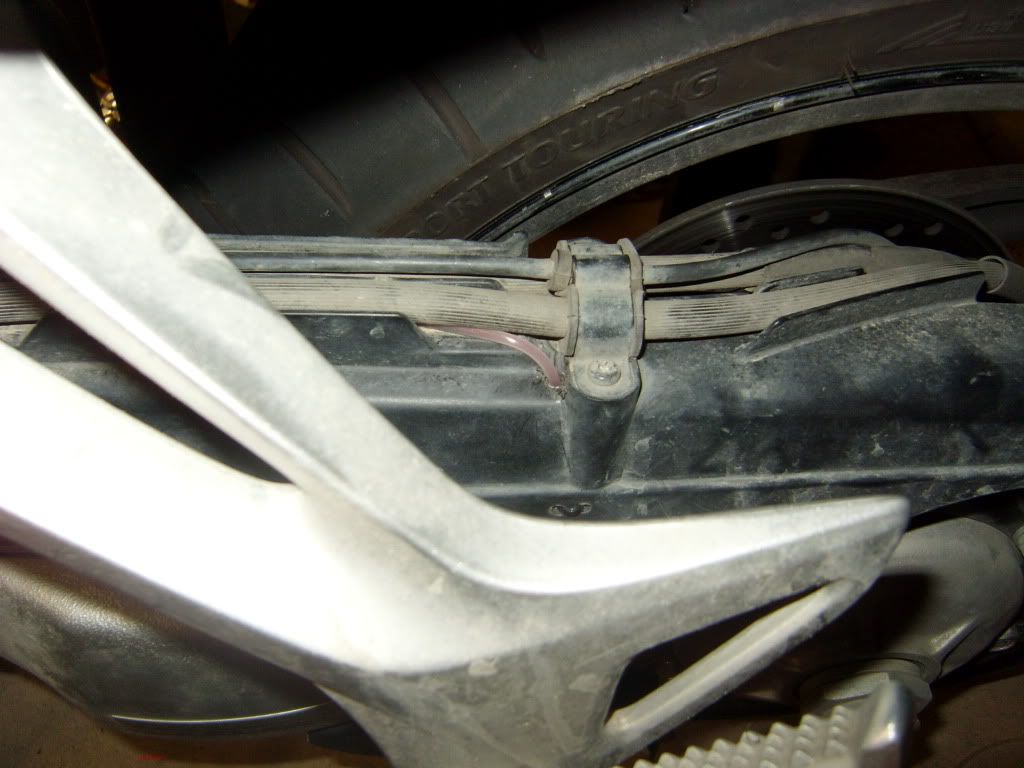
Zip Tied to Chain Guard:
-
That totally sucks! Glad you are ok, and that it happened close to home and not in the middle of your trip!
-
Got mine installed tonight....took awhile since I hadn't done it before. You would be hard pressed to know it was on there, other than the actual nozzle. I hid the oil line pretty good by running it under the brake hoses and down the inside of the chain guard (used a couple zip ties to secure it from the inside).
Thanks Rad for the tutorial!
-
Running the Voltmeter from a relayed connection is the best thing to do, otherwise a manual calculation in your head also works....like others I use my meter to look for big changes...and to pick up chicks of course.
-
I love my Datel meter, except in direct sunlight, as it matches the shaped of the gauges.
-
I recently found these to be available at Eastern Beaver as well ....
That is the source to whom I was referring - he got these specifically on my request.
Super vendor - this is the direct link for the connectors/harnesses
http://www.easternbeaver.com/Main/Elec__Pr.../FKWH/fkwh.html
That was a great writeup you did on the other forum. I am interested in the new MOSFET design. I am curious how they are sinking the stator input without heat...I didn't think the SCR was the problem as much as the output being so high potentially.
-
I recently found these to be available at Eastern Beaver as well, thanks to another VFRD member pointing me to them. Nice to finally have an option!
-
NOW TAKING ALL ORDERS 1998-2007!!!
After reading thread upon thread, and fix upon fix, as well as doing my own R/R sensor wire fix, I have decided to pursue producing an after market wiring harness. I am tossing around a couple ideas, and could use some target audience input.
Tightwad,
I hope you get f'ing rich off this stuff.
Over the years I've replaced 2 wiring harnesses, every sensor, two batteries, two stators, I don't know how many RR's, etc, etc, etc, before spending the short money on this thing. Not an issue since. I probably dropped a couple grand fixing Honda's crap electrics before I came across this thing.
Suddenly, after 4 years of dicking around with this thing between breakdowns while i put miles on an FJR I shouldn't have needed to buy, at 90K miles the VFR has regained reliable status.
If we ever meet, I'll probably need to give you a hug, and want to kiss a little bit or something. :blink:
I would be happy just shaking your hand I believe....cash donations also accepted :huh:
I am glad to have helped, I find pleasure in it, even if it won't make me rich.
-
For anybody looking to use the lowered pegs for the Buell XB9/12 (#N0006.1AD), they do NOT fit the 4th gen VFR.
I didn't take a picture, but the OEM peg has a single tab (male) that attaches to the rearset (female). The Buell pegs have dual tabs which are too wide to fit into the rearset mounting tabs.
I bought the packaged set for $40 CDN. I figured it was cheap enough to try. They'll be going into the Classifieds.
Will you measure the width of the rearset? It would be interesting to know how different the 4th gen is from the 6th, as that question comes up quite often.
-
Inquiring minds want to know; projected price?
Somewhere around $65 - 75 U.S. for polished. $75 - 85 U.S. for anodized. See how it works out from there. There are several variables. Having only made 2 pair, as One Off's, I don't have all the production manufacturing steps established yet.
Whats the latest news there Boss9 ? Any production date estimates yet ?
I just received what I am pretty sure will be the final test set. Randy was able to reduce the length to match the stock length, they look superb! I will be installing them and taking pictures Thursday evening hopefully, and that should do it for the development phase.
-
the pictures are down. Figures the one weekend I go to do it.

I can get any pictures you need, but it is fairly straight forward install. The one thing I don't explain well enough is that the VFRness fits INBETWEEN the existing R/R 6 pin plug, and the bikes 6 pin plug. The Stator connection is not touched at all.
Joshua
-
Why?
If you don't have the revs/mph/wind speed memorized already, just shift down for more revs, up for less.
For me it would be "because I can". I can't even see the tach anymore, due to the GPS/audio stuff blocking the way. I hardly need it, I can feel what the revs are. It would be a good reminded that there isn't a 7th gear of course...
Custom Led Lights . . .
in Modifications
Posted
Any details on what was installed? Are they on the case or in the case? Pictures?