
bliss
-
Posts
234 -
Joined
-
Last visited
-
Days Won
2
Content Type
Forums
Profiles
Gallery
Blogs
Downloads
Events
Everything posted by bliss
-
From the album: Bliss Album #2
-

From the album: Bliss Album #2
© ©vfdiscussion.com
-

From the album: Bliss Album #2
© ©vfdiscussion.com
-
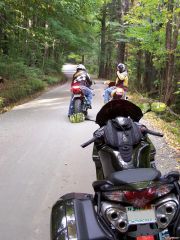
From the album: bliss album 1
© ©vfdiscussion.com
-

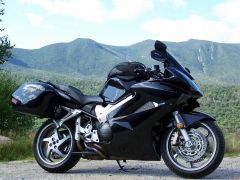
From the album: bliss album 1
© ©vfdiscussion.com
-

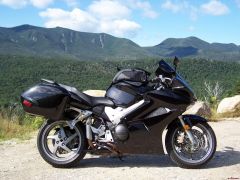
From the album: bliss album 1
© ©vfdiscussion.com
-

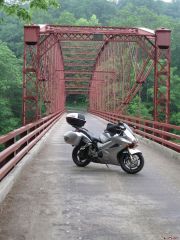
From the album: bliss album 1
© ©vfdiscussion.com
-

From the album: bliss album 1
© ©vfdiscussion.com
-
From the album: bliss album 1
© ©vfdiscussion.com
-

From the album: bliss album 1
© ©vfdiscussion.com
-
 HEY PAT! YOU MADE THE FRONT PAGE. HOPE YOU HAD A GOOD TRIP TO FLORIDA.
 -
 Hey, I know where that is! RTE. 100 in VT. :beer: Thought it was my bike for a second.
 -

From the album: bliss album 1
-

From the album: bliss album 1
-

From the album: bliss album 1
© ©vfdiscussion.com
-

From the album: bliss album 1
-

From the album: bliss album 1
-
From the album: bliss album 1
© ©vfdiscussion.com
-
 I was suppose to go on that ride! :D Let me know if you plan on another western Mass. ride. Love the red viffer.
 -
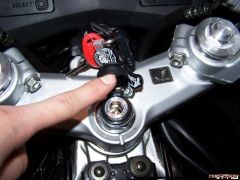
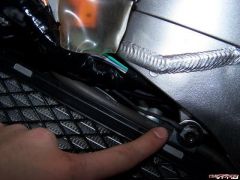
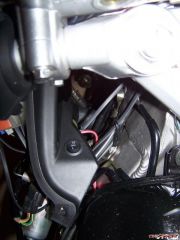
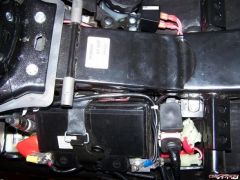
Thanks to guytimes, I decided to purchase a set of heated hand grips and do the install myself. I purchased the Dual Star brand and also picked up a powerlet to install at the same time. Here are a few pictures of the install; 100_2515.JPG I purchased the auto relay, wire, and female connectors at Radio Shack 100_2520.JPG 100_2517.JPG As guytimes did, I used the plate light to power the auto relay 100_2519.JPG Wire #1 to the plate light. Wire #2 to the negative terminal. Wire #3 to the positive terminal. Wire #4 to the center post to on/off switch. 100_2523.JPG All though I purchased the "shrink tube", I did not use it. 100_2522.JPG White wires from both heat elements are attached to a "piggy back" connector and connected to the "hi" side of the on/off switch. Blue wires are connected to the "low" side of the on/off switch. The red wire on both heated elements is the ground. This was wired back to the negitive terminal of the battery. The red wire to the far left is the power wire from the auto relay. 100_2524.JPG 100_2525.JPG Rocker on/off switch has a nice clean look 100_2526.JPG This is the ground wire for the powerlet. This is an easy install. 100_2527.JPG Special thanks to guytimes for his write up on the "kimplex install" and to the vfrdiscussion web site.
-
From the album: bliss album 1
-
From the album: bliss album 1
-
From the album: bliss album 1
-
From the album: bliss album 1