


Rice
-
Posts
1,398 -
Joined
-
Last visited
-
Days Won
10
Content Type
Forums
Profiles
Gallery
Blogs
Downloads
Events
Posts posted by Rice
-
-
It is definately unusual and takes a bit getting used to and I like it :fing02:
Especially the fact that you left the swingarm silver - woulda been too much.
-
I think that is where my knee goes on my 5th gen...
Where are your priorities, man! You can always grow a new knee. The bodywork is pressious :goofy:
-
I was told that Fox was going to stop making street bike shocks. Is yours new stock from Fox which would sort of disprove the rumor?
They did.
This is an old shock.
-
Nice!
I too have a Fox twin clicker.
Having it rebuilt right now and I will also need to mount it somewhere.
For now, I came up with the same temp. location as you did.
What a coincidense :rolleyes:
I am thinking of making a bracket to go on a rear subframe.
Now, that I finally have a workbench and vise in my "shop" I can prolly muster that much :idea3:
-
Nice... does the in the helmet doohickey get wired in or is it wireless, will?
:lol:
Good one!
-
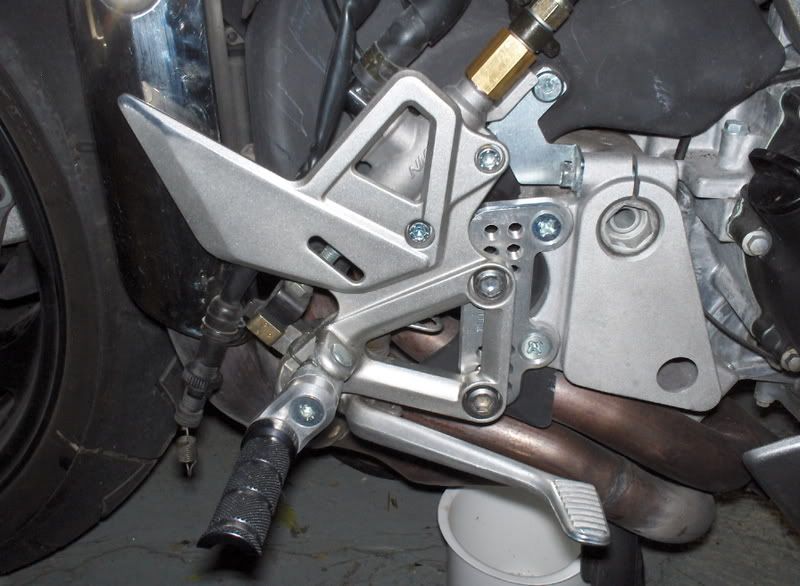
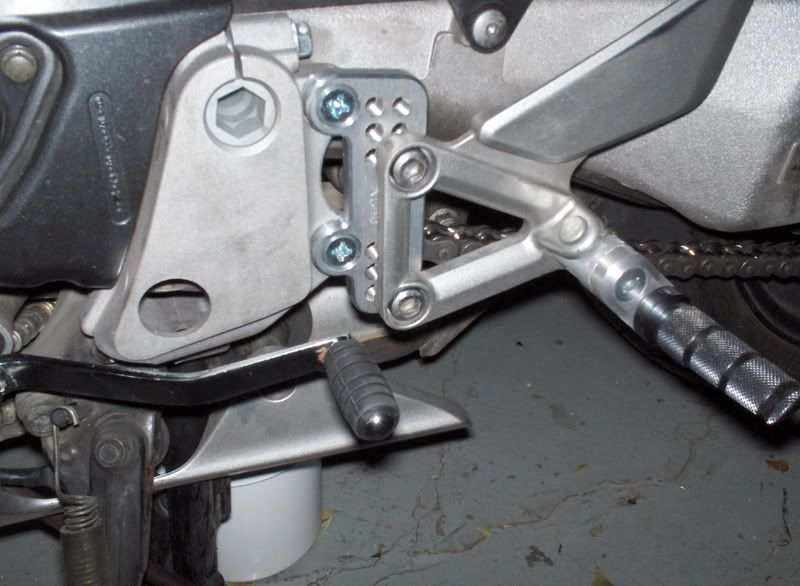
pics
<a href="http://photobucket.com" target="_blank"><img src="http://i135.photobucket.com/albums/q138/Do...rnmodparts2.jpg" border=<a href="http://photobucket.com" target="_blank"><img src="http://i135.photobucket.com/albums/q138/Do...idebrakemod.jpg" border="0" alt="Photo Sharing and Video Hosting at Photobucket"></a>"0" alt="Photo Sharing and Video Hosting at Photobucket"></a>
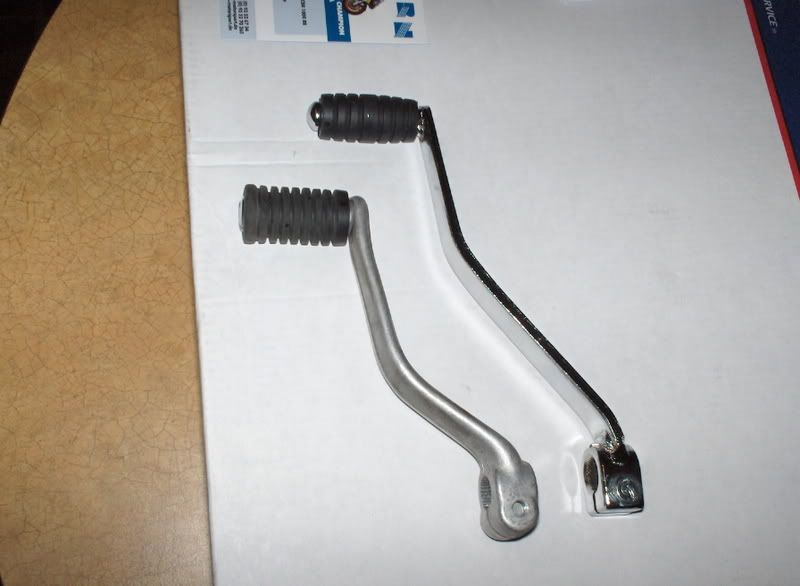
<a href="http://photobucket.com" target="_blank"><img src="http://i135.photobucket.com/albums/q138/Do...sideshifter.jpg" border="0" alt="Photo Sharing and Video Hosting at Photobucket"></a>
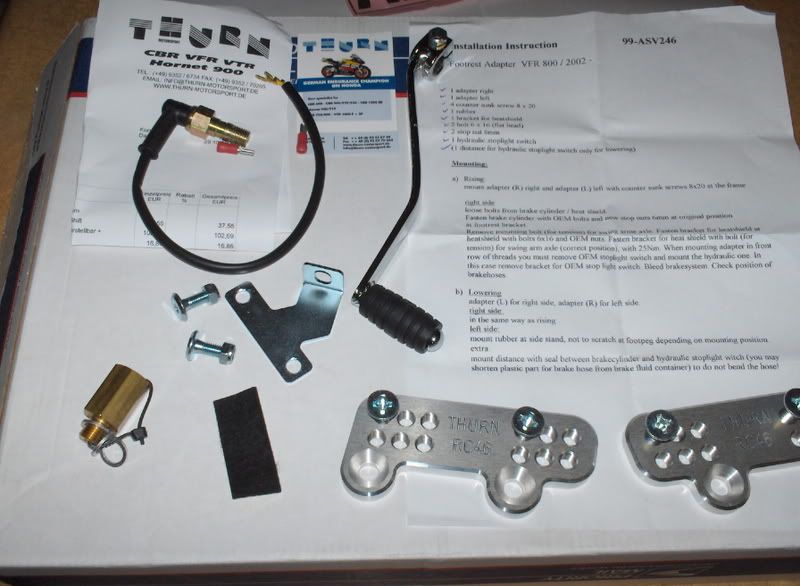
<a href="http://photobucket.com" target="_blank"><img src="http://i135.photobucket.com/albums/q138/Do...rnmodparts1.jpg" border="0" alt="Photo Sharing and Video Hosting at Photobucket"></a>
<a href="http://photobucket.com" target="_blank"><img src="http://i135.photobucket.com/albums/q138/Do...ngershifter.jpg" border="0" alt="Photo Sharing and Video Hosting at Photobucket"></a>
How much did you pay for those?
Looks like I could use them as well.
Tried to google them, but all I see is Thurn website which is in German and then there is shipping...
If anyone knows a distributor in the US or Canada, pls. let me know.
Thanks!
EDIT: Or better yet, maybe Ken or BLS care to reproduce the brackets using "LAZORS" :thumbsup: perhaps?
-
Note then that fanny in the UK is a vulgar term for vagina... :beer:
A good thing to know indeed as I am working with bunch of folks from the UK :thumbsup:
-
The pictures are in my gallery, but I can't seem to make my gallery post tool to work... never could actually.
Some help will be appreciated.
-
I should have said that a squirt of WD 40 - or some other lube in the guides might help. Unless you were literally unable to get the 1/4" drill through it?
Radar does some damn nice work.
Glad things went well - but wheres the pics????????
I tried the WD40, but still had to drill them out.
I must say that it was not a big deal at all. Took me a minute to do the drilling. It was all gravy from then on :thumbsup:
Picks are coming tomorrow. It's too dark now.
-
I received Radar's sliders in the mail today.
Canada Post is... well... let's just say lacking. Don't want to bash things Canadian.
Customer experience begins with packaging of the parcel. To be honest, I have never seen anything packaged so ...looking for the right word... "exquisite" comes to mind, so I'll stick with it.
The sliders themselves are made with the kind of worksmanship that people usually associate with jewelry. I don't want to go overboard and compare them to jewelry, but honestly, that was the first thing that came to mind when I looked at them.
The install went super smooth with the excepsion of one thing. The inside diameter of the aluminum guides is just a tad small. This causes the drill bit stick inside. I had to remove them and drill them out to size. Otherwise, everything is just as described in Ken's how-to.
Thanks Darren for an amazing product!
-
Very cool!
Great job!
I can especially appreciate the effort, since I stripped my rear wheel after reading slammer's how-to.
The taping has got to be the toughest and the most time consuming part of the deal.
Looks like you came out on top. Enjoy. :thumbsup:
-
First of all, coodos to Radar for coming up with such a great product!
Radar, you're da man! :thumbsup:
Ken, you too for posting such a nice write-up :thumbsup:
Regarding gluing the coolant bottle - Has anyone tried a hot glue gun?
It seems to me that this would be the perfect colution. It uses polyethylene-based glue sticks.
I have one at home and use it on many different applications. Once cooled, the glue does not harden too much - it is still as flexible as regular plastic. This means that it will not crack and chip away with time.
It also sticks and holds like a mofo - no way it will ever come off, especially in this case, weher there is no real temperature or pressure applied. Normally, the coolant never reaches this high any way.
It is cheap too. I picked one up at the local hardware store for about $20.
Now, about the sliders themselves.
I have not seen the price for the kit yet. Radar, if you have not come up with it yet, I, and others I'm sure, are patiently awaiting...
I am very much interested in buying one, so please, please, please ...
The spring's a comin and it will be time to put the bikes together soon...
-
Just want to add my 2c to this rather leangthy post.
I checked my 30 AMP fuse wire and had to replace it as well. Just like all the rest, my wire, just the short 2in portion that leads from the fuse holder to the conector, was brittle and discolored from temperature.
Unlike others that replaced the entire red wire all the way from the battery + terminal, I only replaced the fuse holder and the connector by cutting them off and splicing in a new fuse holder with a 12GA wire.
In my opinion, the red/white wire that comes from the battery as well as the one that leads past the connector is not the problem and does not need to be replaced. The problem is the smaller guage 2in wire between the fuse holder and the connector.
After making this change, I noticed an improvement in the way the bike starts. Apparently, the smaller guage wire had acted as a resistor and reduced the current available to starter. My starter would sometmes stumble during startup before. Each stumble was accompanied by a momentery loss of power, which would reset the clock and the trip meters. After the fix, this no longer happens, so I guess the fix worked fine.
While I was "there", I also used dielectric grease on ALL terminals and connections that I could get to with ferrings off. Now, the electric system should be bulletproof :goofy:
1986 Vfr700 Conversion To Electric
in Modifications
Posted
This is an amazing project and very timely as well.
I am watching with a lot of interest.
Also of interest is the fact that the rise in oil prices has brought alternative technologies to the forefront.
I like!
Keep up the good work!
On a related note, you seem very knowlegable in this electric business. Would you or anyone else know how much power it takes to charge an average electric car? A ballpark? Or a possible source to find this info?
I'll appreciate any help in finding this out.
The reason I'm asking is I am helping with a case study for a company that owns a patent for a 99.995% efficient power switching technology. The goal is to show savings on the example of electric car that their technology provides vs. regular 80% efficient technology.