


2FAST4U
-
Posts
559 -
Joined
-
Last visited
-
Days Won
3
Content Type
Forums
Profiles
Gallery
Blogs
Downloads
Events
Posts posted by 2FAST4U
-
-
Click here or read below: http://www.motorcyclenews.com/sport/motogp/2016/june/motogp-motogp-boss-webb-explains-iannonelorenzo-incident/
MotoGP boss Webb explains Iannone/Lorenzo incident
With both Jorge Lorenzo and Andrea Iannone arguing over their own versions of the incident that saw the Italian spear the world championship leader out of last weekend’s race at Catalunya, MCN sat down with the man in charge, race director Mike Webb, to get his factual account of exactly what happened when the two came together.
“When I first spoke with Iannone the first thing he said was that his data showed that he braked at the normal place and that Jorge was very slow and he couldn’t avoid him – so I looked at data from both bikes.
“Actually, what it showed was that they both braked at their normal braking points. We looked at all the laps, and they both braked in a normal manner. Iannone is telling the truth, but Jorge also did nothing unusual. Quite obviously, he was having a problem with front feel – but he was doing it all race!
“Iannone made a mistake in that he arrived faster than he thought he would to Jorge – but it’s his responsibility to avoid the guy in front, hence the penalty.”
And, while Lorenzo might have been left criticising race direction for what he deemed to be an inadequate penalty for Iannone, Webb says that the punishment awarded was standard procedure.
“Jorge put his point to me and I understand what he said, but the Stewards Panel believes we made the right decision. Iannone was given a smaller grid penalty for his crash in Argentina, because it was irresponsible riding.
“Our stated procedure this year is that repeat offences will always attract a higher penalty. He admitted he made a mistake – the same excuse, the same error, so I’m sorry but the penalty is higher – and we believe that back of the grid is sufficiently high to deter him in the future.
“Jorge believes it’s not serious enough, Andrea believes it’s vastly too severe, and we’ve landed somewhere in the middle. We’re trying to strike a balance, taking into account history, severity and intention.”
-
Maybe they will keep the FZ-09. Honda's got a CBR300R, CBR500R, CBR650F, and the VFR800. Clearly there's some overlap between some of these bikes in terms of their target market. The current generation FZ-1 has been around since '06 and so I can't imagine Yamaha keeping it beyond the '16 model year.
-
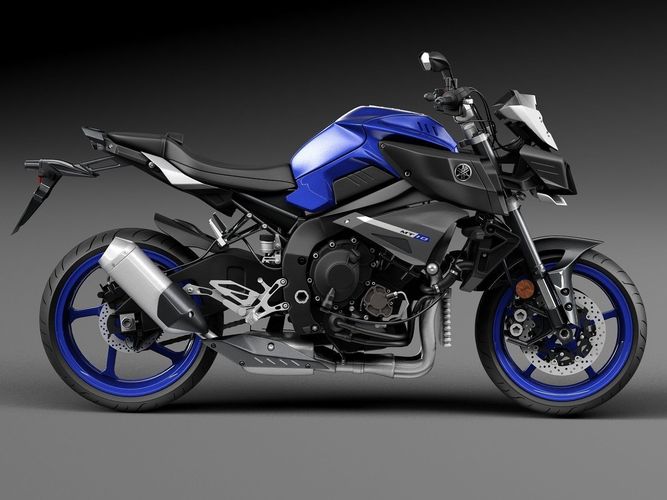
Since the bike's only been available in Europe until now, you may want to log onto the British Google (https://www.google.co.uk/) and do a search for Yamaha MT-10. You'll find a number of reviews, almost all of which are positive. As for the FZ-09, I don't know much about it other than I used to ride with a guy that had one and he liked it.
Speaking of the FZ-09, I can't imagine why Yamaha would want to keep it (or the aging FZ-1) as both bikes, in my opinion, are too similar to the FZ-10.
-
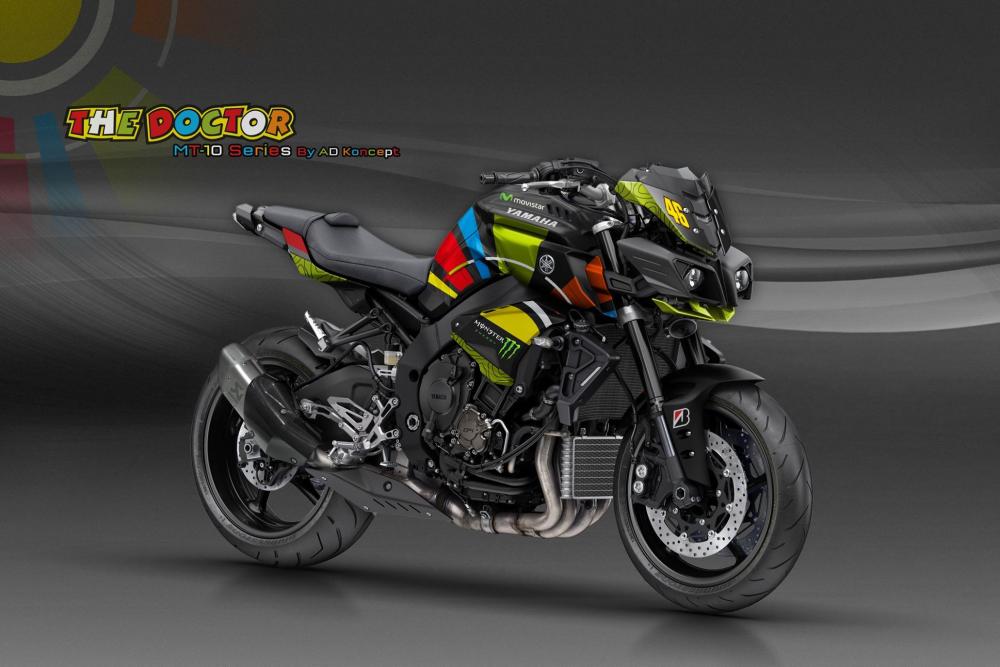
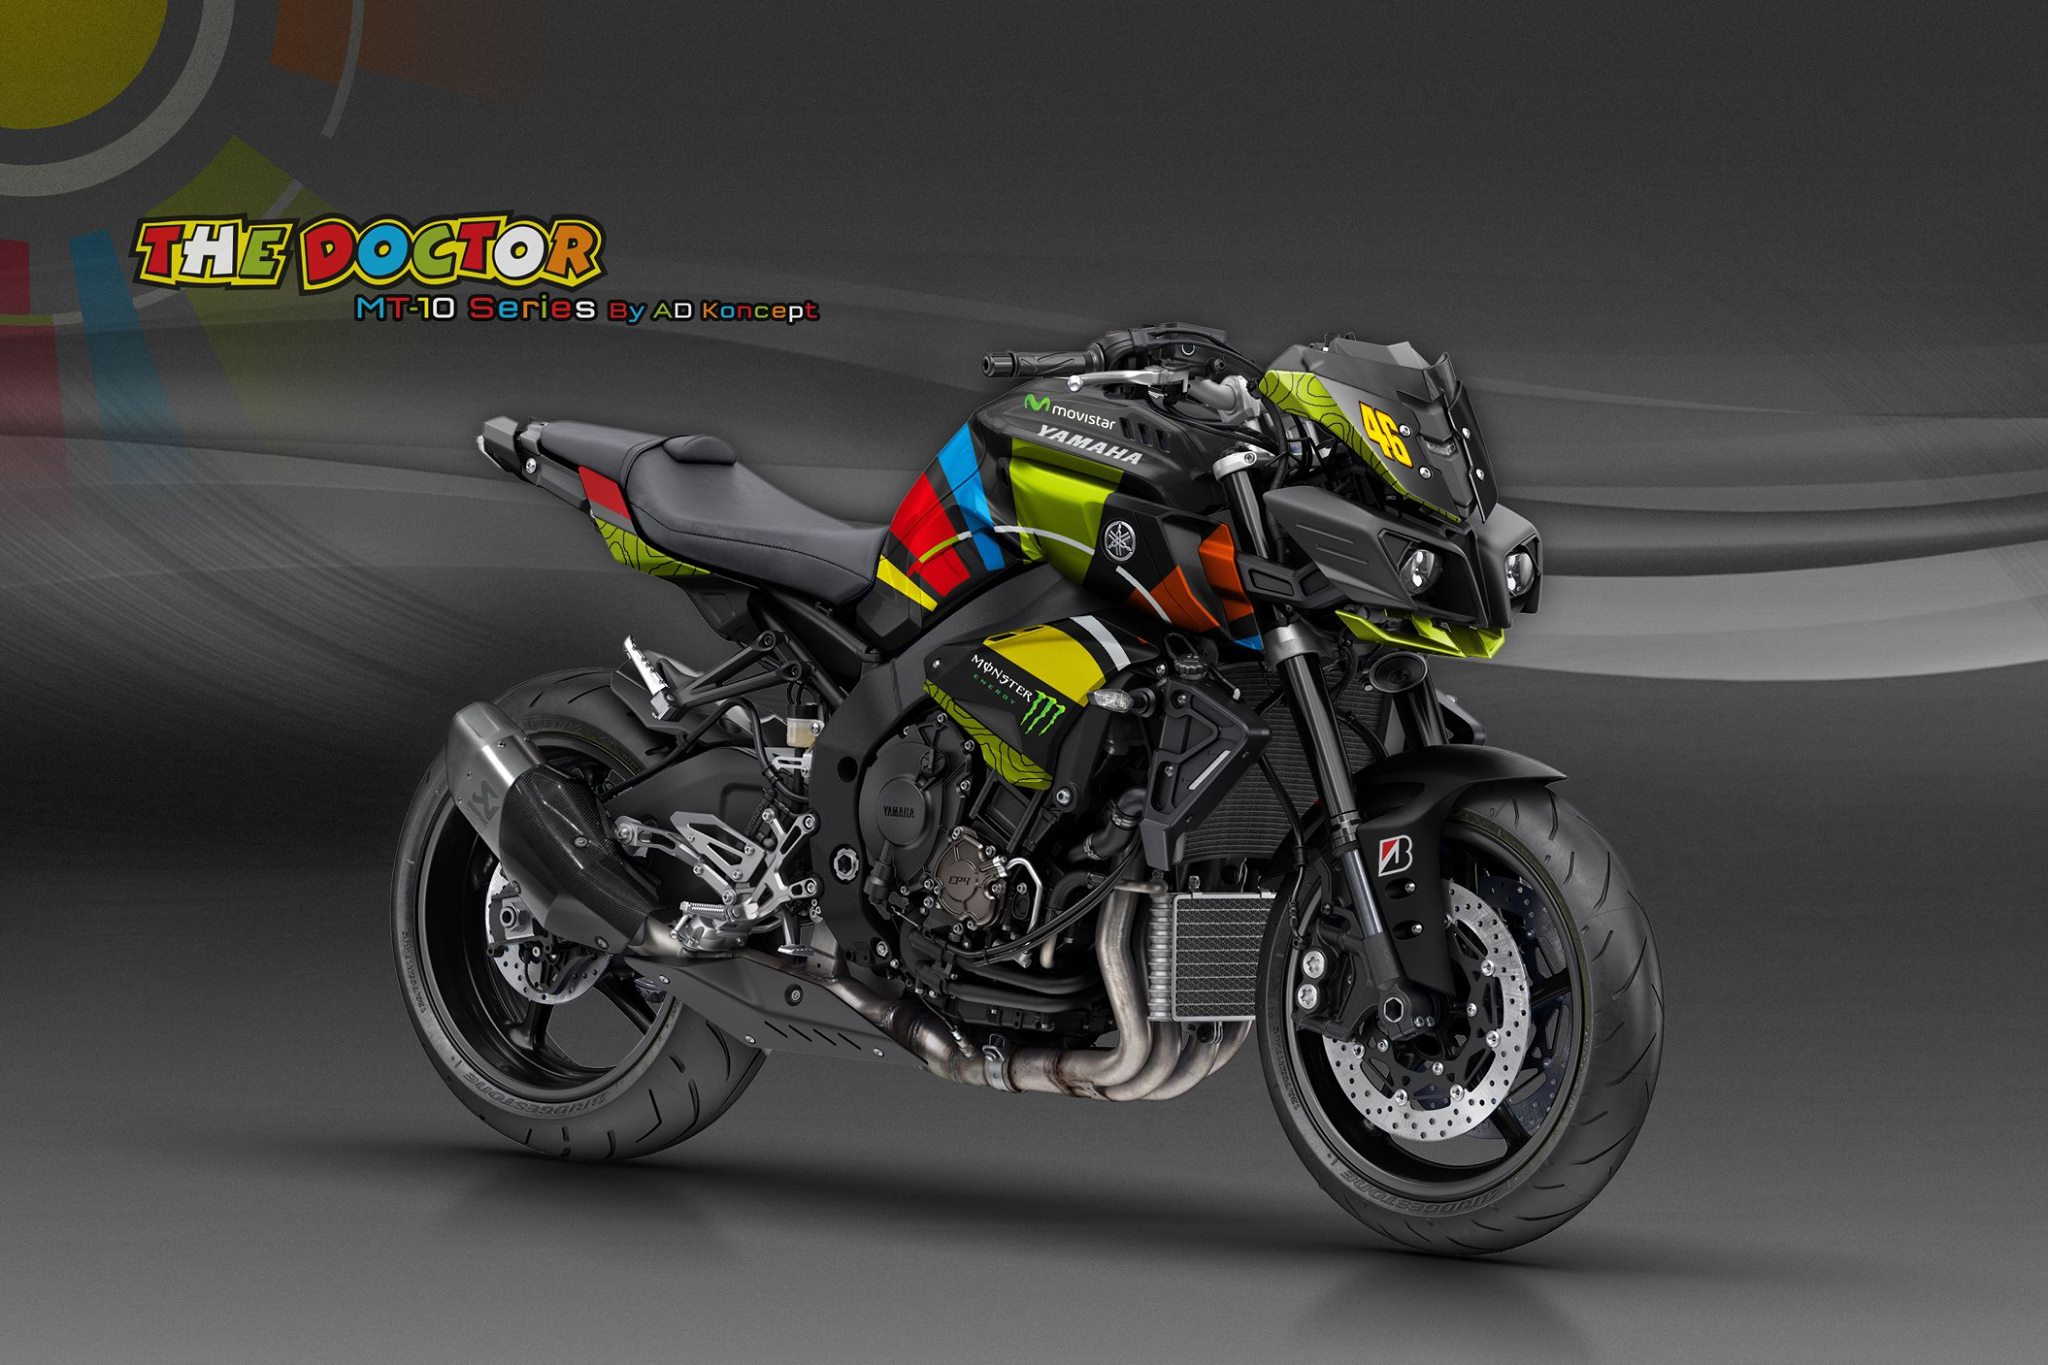
If those yellow wheels aren't making you Rossi fans drool, maybe this will.
-
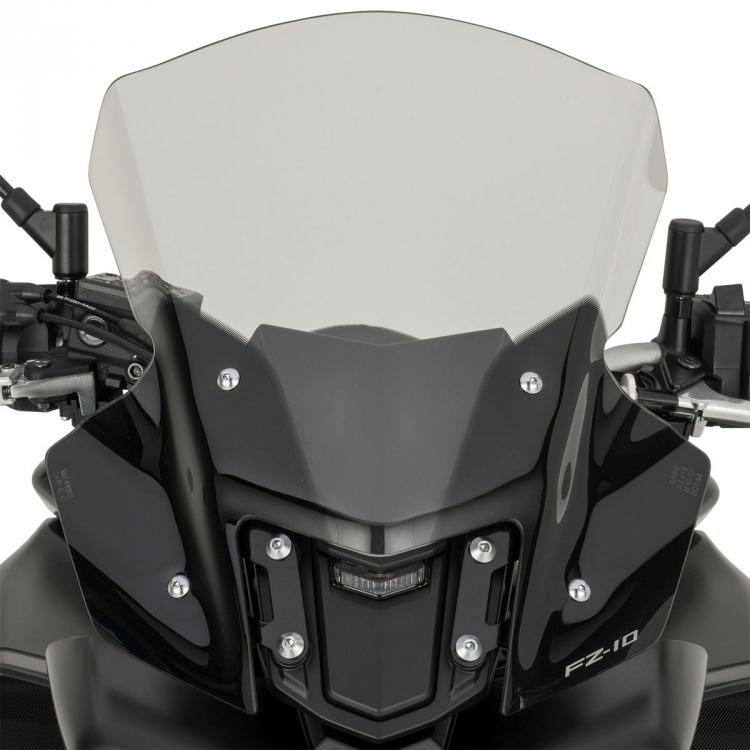
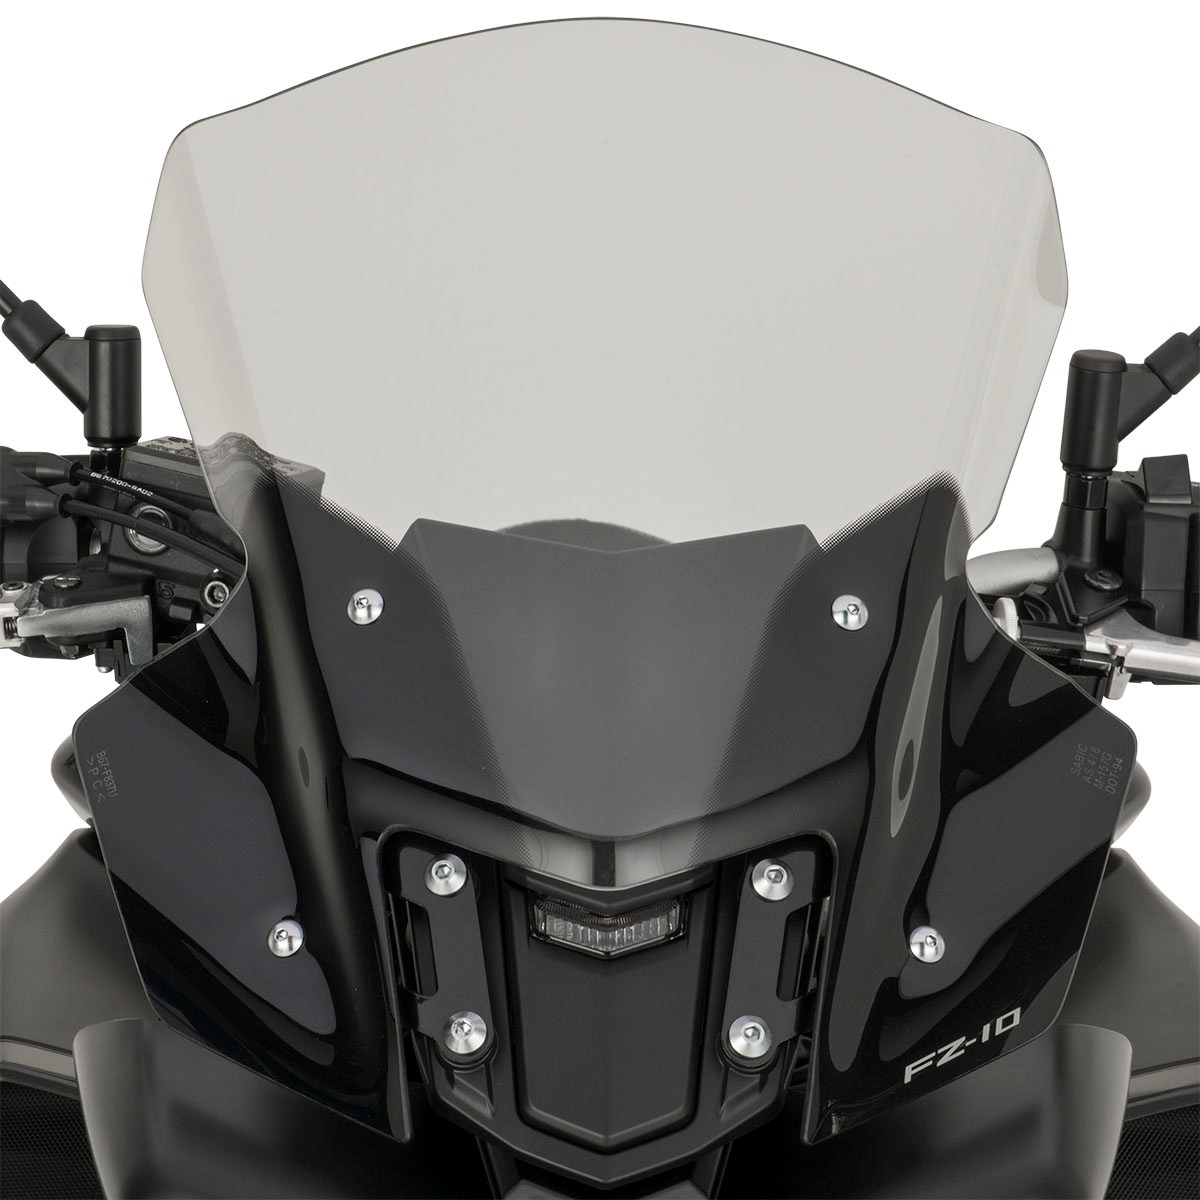
Yamaha offers a windscreen as an accessory. As for me, I hope they make fully-faired version of the bike.
I'm surprised I haven't heard anybody say the bike looks like WALL-E.

-
^ I'll take you up on that.
When my father got out of high school, he did a four year stint in the Navy and then headed to California. In his words, it was the place to be and so everyone was going there. Nowadays I frequently hear stories of people that left California (or want to leave it) because its become so unaffordable. That's really unfortunate because it's truly a great place.
-
Read about it here: http://www.sportrider.com/video-2017-yamaha-fz-10-first-look
It's already on Yamaha USA's web site: https://www.yamahamotorsports.com/sport/models/fz-10
-
^ I admit I've only been on Mulholland Hwy. once (October or November of last year), but the second half of that chase scene does remind me of it. You've probably been on it at least 100 times, so I'm sure you're much more familiar with it than I am. Again, I'm simply saying it reminds me of it. I was on it the entire length of the highway (if I remember correctly, it starts near Calabasas and ends near Pacific Palisades; it seems to me that near Calabasas, there are a few horse ranches in the area).
-
Where are the SoCal rides?? Here's one:
LOL, just kidding. A little off topic but I actually like this chase scene better. The second half of this video reminds me of riding on Mulholland Hwy. through the Santa Monica mountains.:
-
My $.02 on today's race:
1) I'll give credit where credit is due: Rossi ran a good race and deserved to win.
2) This incident was clearly Iannone's fault:
-
I root for Honda and Yamaha. In case anybody doesn't know, KTM will be racing in MotoGP next year (can somebody confirm they'll be racing at the premier level?)
Also, I'd really like to see the return of Kawasaki as well as BMW and Triumph race at the premier level.
-
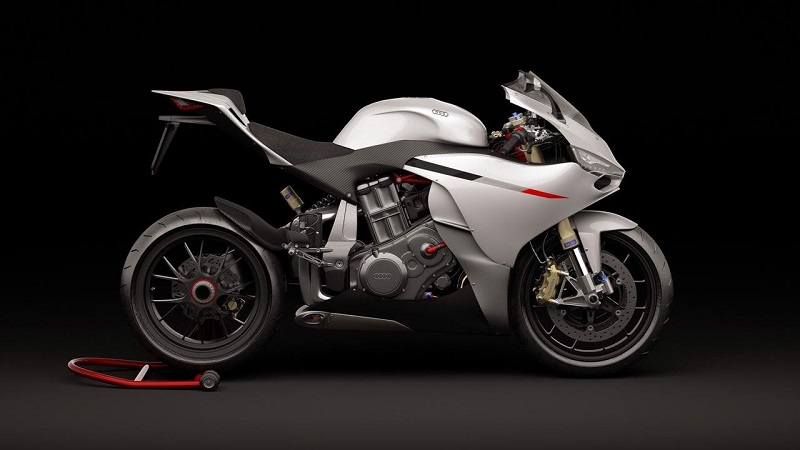
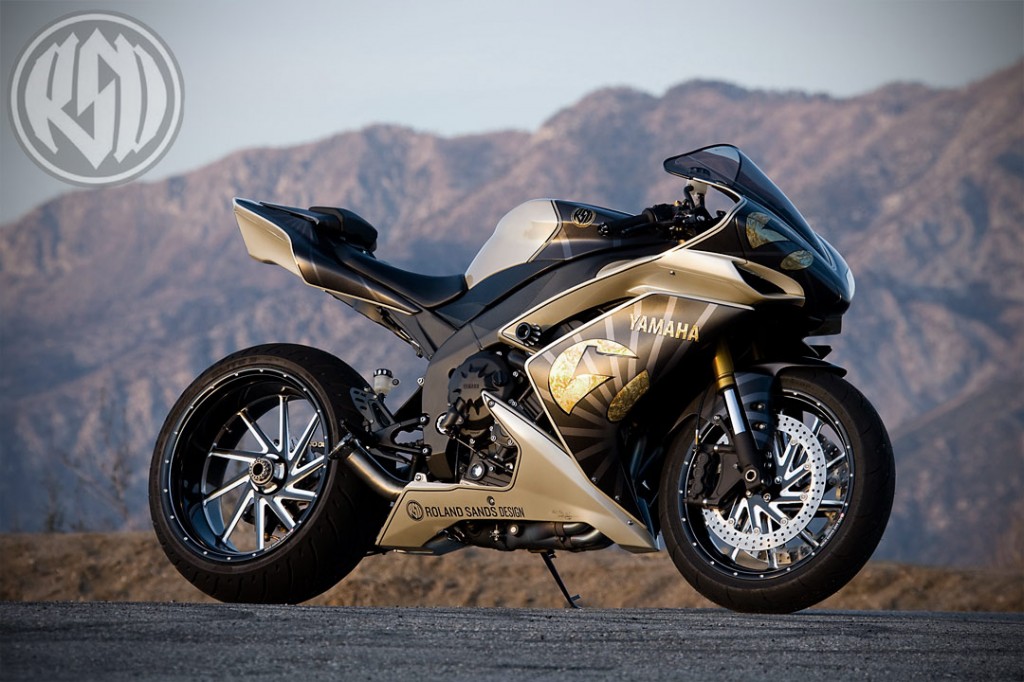
Roland Sands customized an R1 a few years ago that I thought turned out very cool. Speaking of cool, imagine if Audi had built this superbike. If you think it resembles a Panigale, that's no coincidence. Audi owns Ducati.

-
The MT-10 is on its way to America: http://www.motorcycledaily.com/2016/05/yamaha-mt-10-will-be-called-fz-10-when-it-arrives-in-u-s-next-year-with-video/
-
I did comment on the race. I recall saying Lorenzo came in first, Márquez came in second and Rossi got zero points. I also recall saying it was an epic battle between Lorenzo and Márquez for first place. And I also commented on the Factory Yamaha's blown engines.
Contrary to what some people think, I don't hate Rossi. He's never done anything to me. Just because I don't care for his sportsmanship doesn't mean I hate him. You want to hear a Rossi hater? You ought to see what some people say about him on other web sites. People say he's washed up, he's a has-been, they question his masculinity, etc. I don't say any of that nor do I believe any of it.
Rossi's DNF at Mugello doesn't mean anything. He's in third place and the season is only 1/3 of the way through. Lorezno had a DNF in Argentina and Márquez will probably have one before the season is over. I also recall saying that if Rossi's season starts to improve, I'll be the first person to attribute it to his racing skills and nothing else.
-
A lot of people clearly resent the admiration Lorenzo and Márquez have gotten the past few years.
They are not only in first and second place this season, but they've won five of the past six world championships (with Stoner winning one). That doesn't sit well at all with Rossi fans. There's no shortage of Lorenzo and Márquez haters because so many people think they "stole" Rossi's place in the spotlight.
-
Here's what some people evidently don't like:
Today's race:
First place: Lorenzo
Second place: Márquez
Season's standings:
First place: Lorenzo
Second place: Márquez
-
4 minutes ago, luvtoleanit said:
Pretty juvenile post. How was he arrogant? I shake my head at this. You hate him because of the admiration he gets. That's it and that is all. Just another hater.
And you and Casey are wrong. Rossi did say to respect the competitors, all of them before the weekend started.
http://www.gpone.com/en/2016051925815/motogp/rossi-at-mugello-the-battle-is-reaching-the-garage.html
What would you like to say to them?
“That you need to respect all the riders, and athletes in general”.Juvenile? I think you got the words juvenile and FACTUAL mixed up. Shake your head all you want. It's the truth.
And how long did it take Rossi to say something? After bodyguards were assigned to Lorenzo and Máquez? Or after Stoner stepped in and said something? After everyone kept pushing him to say something? And for the record, I don't hate Rossi. He's a poor sport and I'm glad he lost.
-
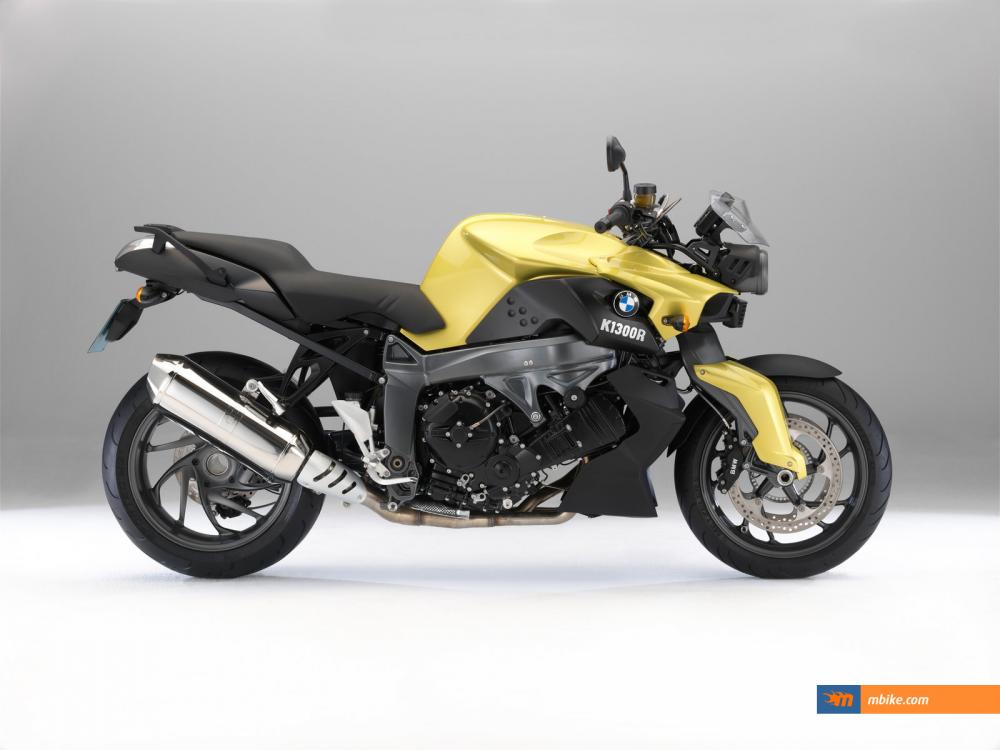
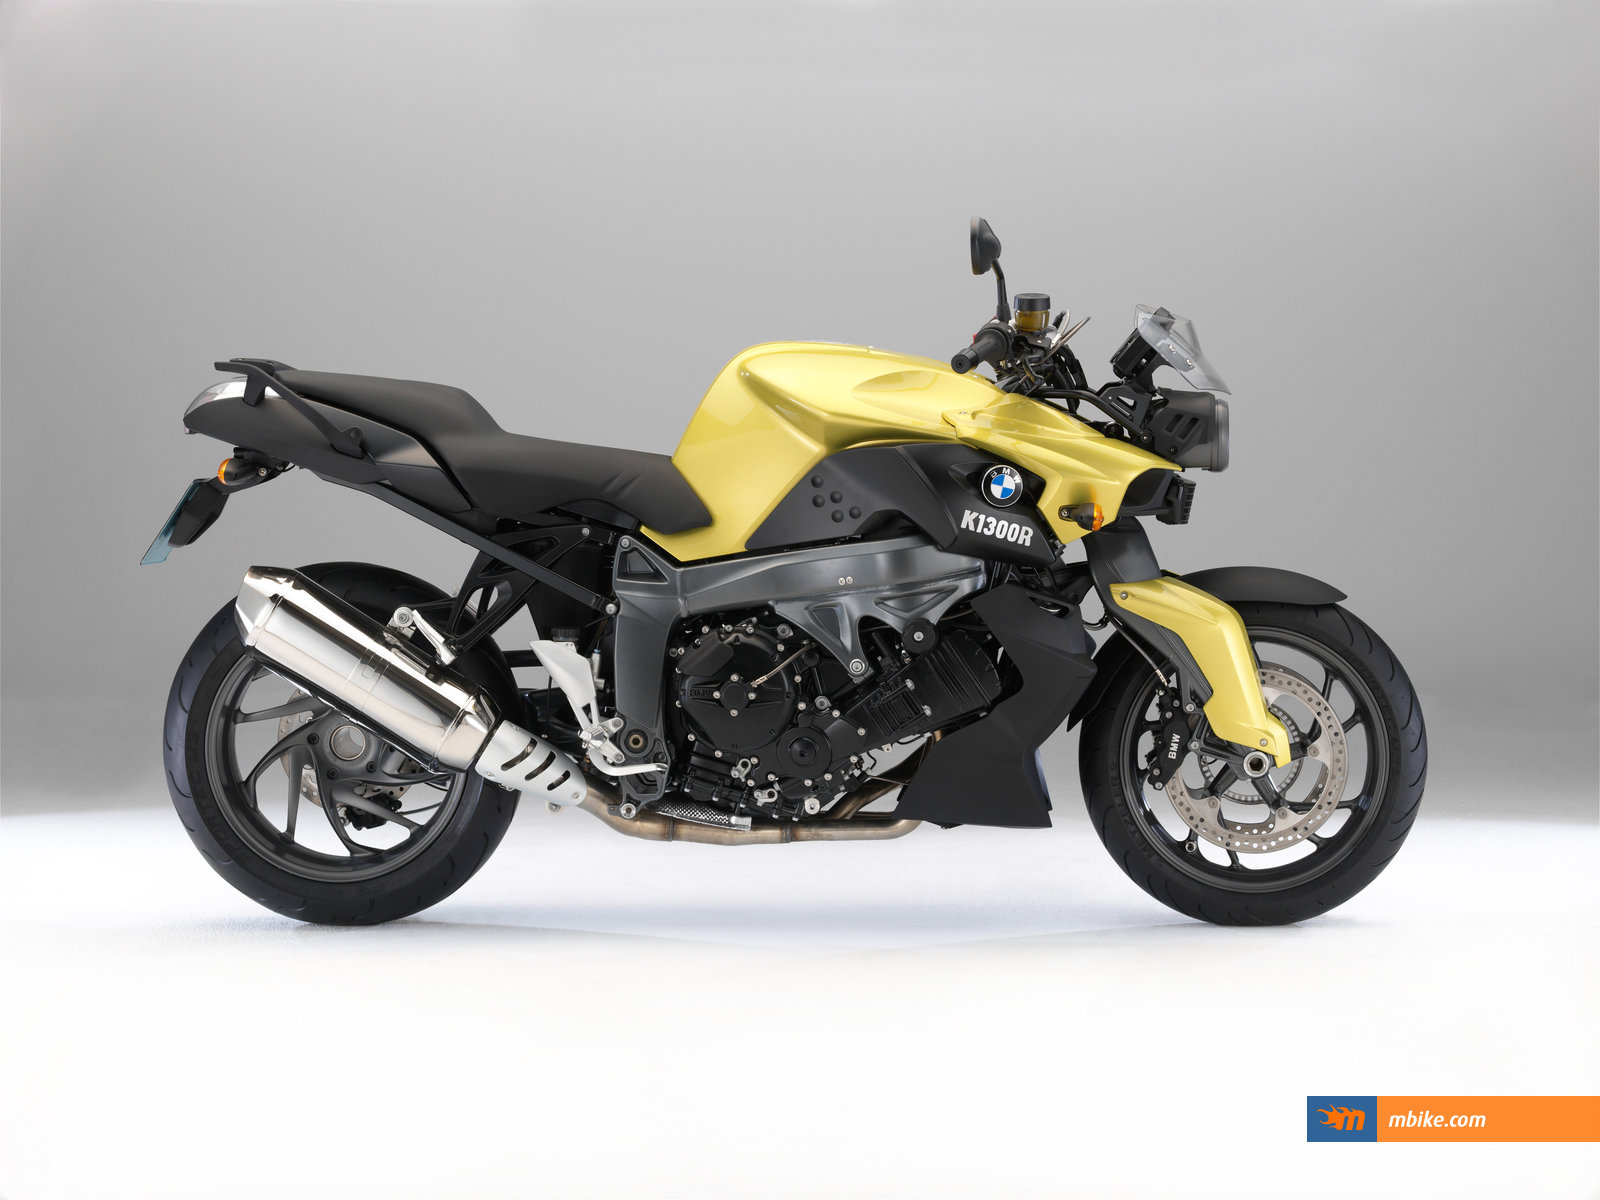
The B-King was a real missile. And so was the K1300R.
I'm hoping the MT-10 makes it to the States next year and is offered in both a standard and fully-faired version (kind of like what Kawasaki did with the Z1000 / Ninja 1000 and what Suzuki did with the GSX-S1000 / GSX-S1000F).
-
Yeah, I do remember that incident from last year. Rossi felt Márquez was getting in his way from winning the race and so he decides to kick Márquez off his motorcycle at turn 14 in Sepang. Rossi got docked three points and had to start the final race at Valencia at the back of the grid. And so what does Rossi do? Apologize? No. Accept responsibility? No. Instead he appeals it, loses the appeal, and then blames the court. And does anybody remember that Italian television reporters went to Márquez's home to insult and harass them? Yeah, that was real professional, too.
-
Another good ride in SoCal is Mulholland Hwy. through the Santa Monica mountains. I started in Los Angeles (near Calabasas, I think) and ended in the Malibu / Pacific Palisades area. After having been on it, I remember thinking how cool it was and wondered why I never heard anybody here talk about it.
I remember I kept singing this song to myself over and over again. His voice reminds me a lot of Elton John's:
And incidentally, he does ride a motorcycle:
-
^ There's a smile on my face every day, my friend.
 Even when my guys don't win!
 I agree with you regarding the two Factory Yamahas. The fact that both blew engines today has me wondering what's happening.
And there was an epic battle today! Rossi just wasn't a part of it.

-
^ Childish? I think not. I spoke the truth, my friend. Oh, and just "a few fans"? The vast majority of the 100,000 people there were Rossi fans. It's his home turf. As I said, Lorenzo and Márquez had to be given bodyguards, it was so bad. Don't believe me? Do an internet search and read up on it. And how's Rossi going to do anything "behind the scenes" with tens of thousands of fans? He never said anything publicly which is what Stoner was calling on him to do.
It doesn't matter that Rossi's engine blew. That's something that can happen to anyone in racing. The bottom line is he lost. Again. Get over it and move on. Oh, and if Rossi's season improves, I'll be the first to attribute it to good racing on his part and nothing else.
I'll say what I've said before about Rossi: I have nothing but respect for him in terms of what he's accomplished. I never root for him because he has a poor attitude: He's arrogant when he wins and he's a sore loser when he doesn't.
-
Today's race:
First place: Lorenzo
Second place: Márquez
Season's standings:
First place: Lorenzo
Second place: Márquez
I'm particularly glad Rossi not only didn't get a podium finish, but got ZERO points today. He went in with an arrogant attitude (as usual) and, more importantly, Rossi was fully aware he was on his home turf and all his countless fans there were being verbally abusive and highly disrespectful towards Lorenzo and Márquez. Rossi's fans treatment towards Lorenzo and Márquez was so bad that, for the first time, they each had a bodyguard assigned to protect them. Even Casey Stoner stepped in and said "I think @ValeYellow46 has an opportunity to show great sportsmanship, by asking his fans to stand down and respect his competitors." Did Rossi do that? Of course not. And once Rossi was out of the race, in came his lousy attitude.
Here's who got the last laugh:
First place: Lorenzo
Second place: Márquez
-
I'd like to see somebody customize a 7G to look like one of these.


Adding A Lower Radiator To A Gen6
in Sixth Generation VFR's
Posted
+1
Now imagine if he put in some lower compression pistons and installed a torocharger. I don't know everything he's done to it but I wouldn't be surprised if an aluminum swing arm and aluminum sub frame are in the works.