


soichiro
-
Posts
861 -
Joined
-
Last visited
Content Type
Forums
Profiles
Gallery
Blogs
Downloads
Events
Posts posted by soichiro
-
-
There is nothing like a bare frame straight from the powder coaters. It's a blank canvas and beautiful on it's on. Did they mask all the bolt holes and such?
-
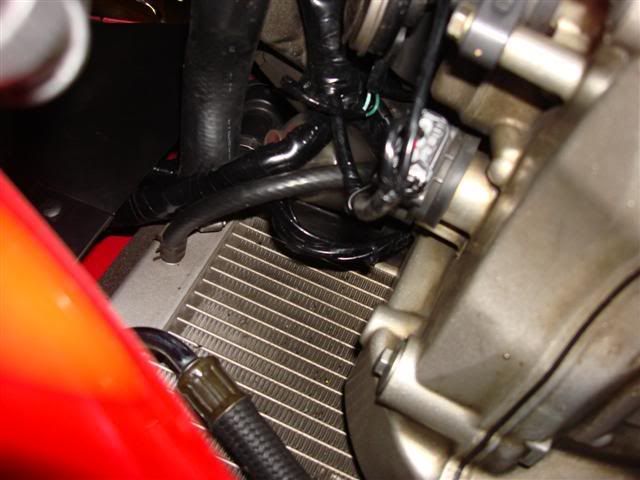
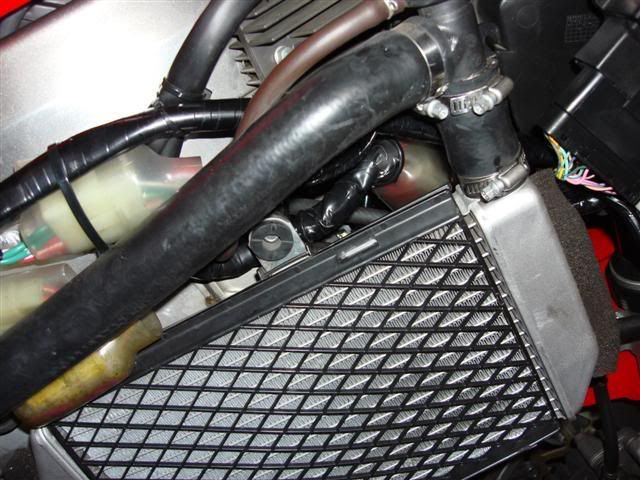
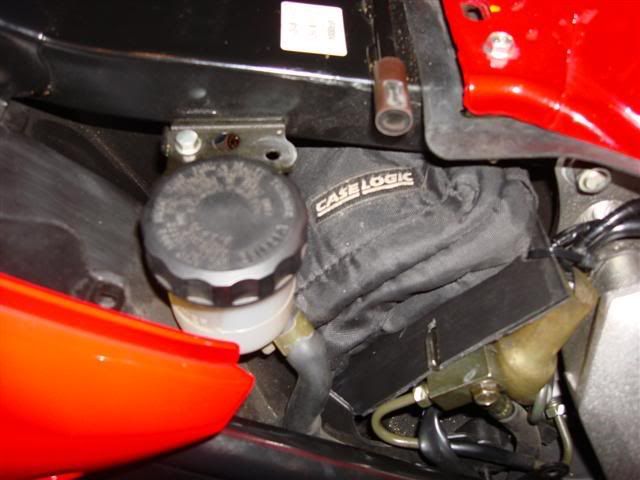
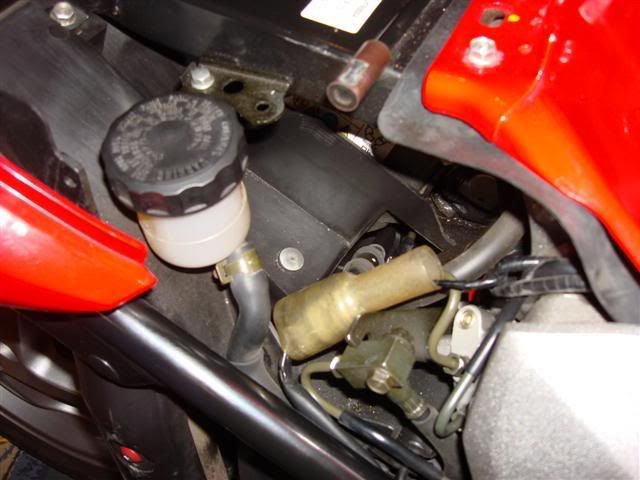
This is how I ended up routing my wires and connectors. I was totally unhappy about the fit from honda so, I had to come up with something that didnt push on the fairing.
I pulled the 10mm bolt for the right side radiator. Removing the one bolt allowed me to slide the two main groups of wires from the ignition switch and right switch gear. I pulled the radiator out and slid the wires behind the mount.
Routing the wires this way cleared up a bunch of room. I routed the rest of the wires they way they would normally go. I played around with it a while and this was the best I could come up with. I used extra tape and plenty of zip ties. The wires no longer touch the fairing.
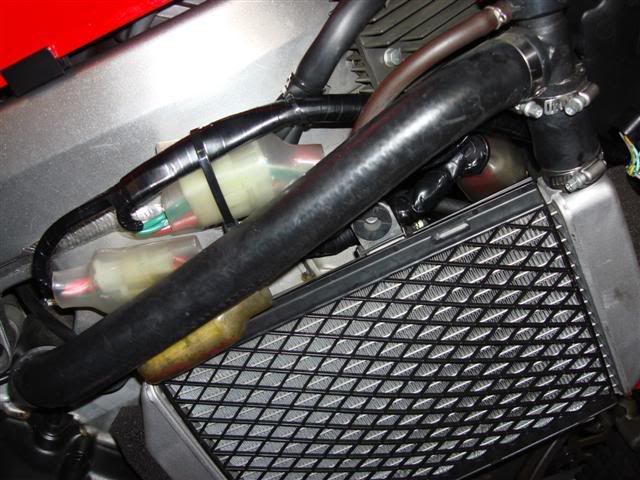
OH YEAH, MAKE SURE THERE IS ENOUGH SLACK IN THE WIRES. They go around the forks and need enough slack to be able to turn the bars lock to lock.
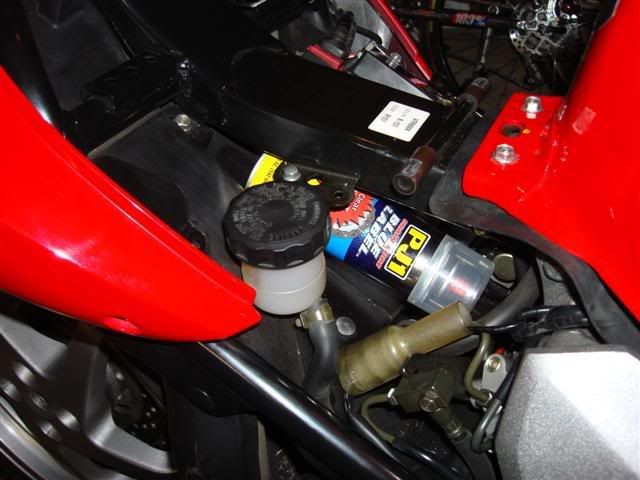
Any worries about engine heat affecting the electronics since you have the wires stuffed down over the engine??
No, not at all. They are not close to the engine at all. It wouldnt hurt them anyway unless they were on the exhaust. They are actually a little more in the air flow now. They may get damp in a monsoon but thats what dilectric grease is for. The routing works well.
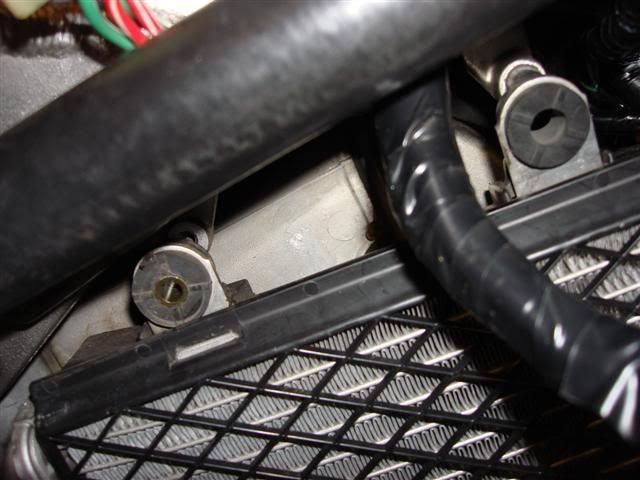
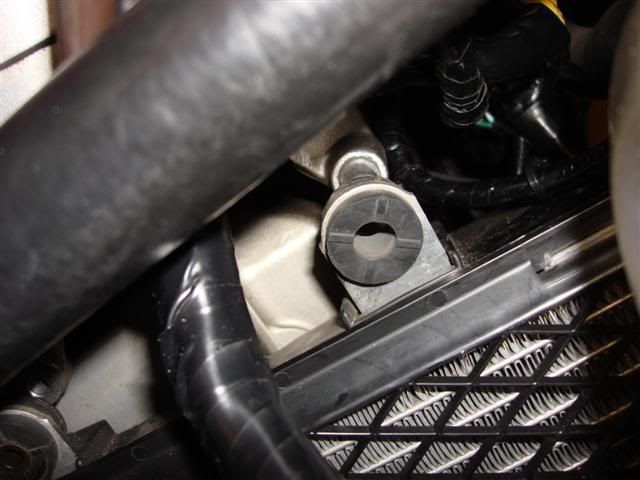
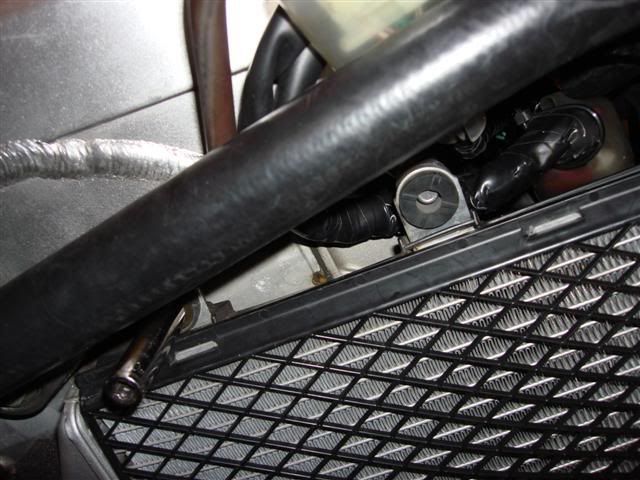
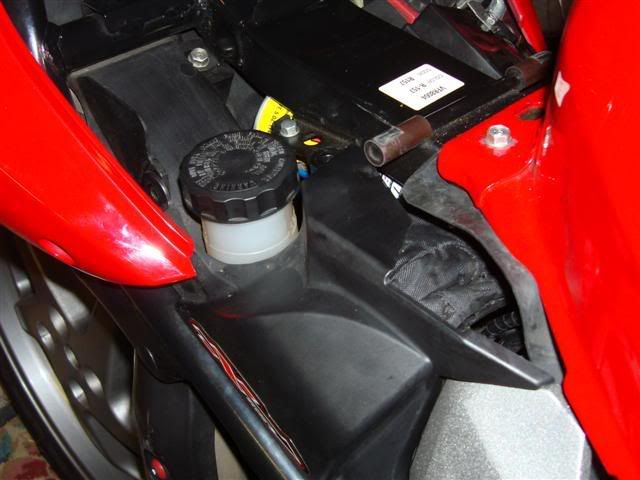
It's hard to get a good pic. with the bike together.
It is the shiny plastic between the two hoses on the left.
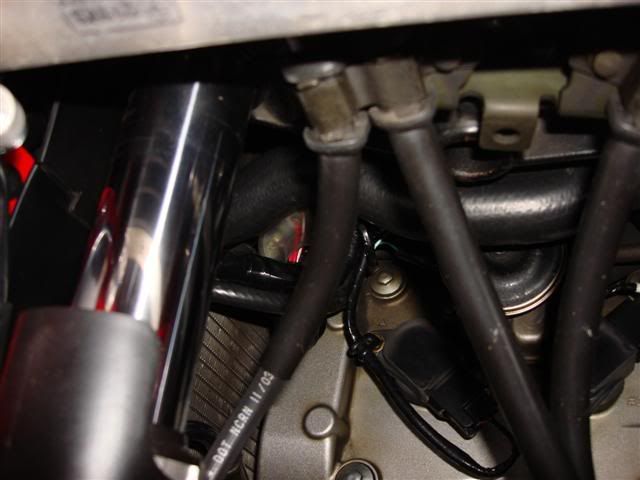
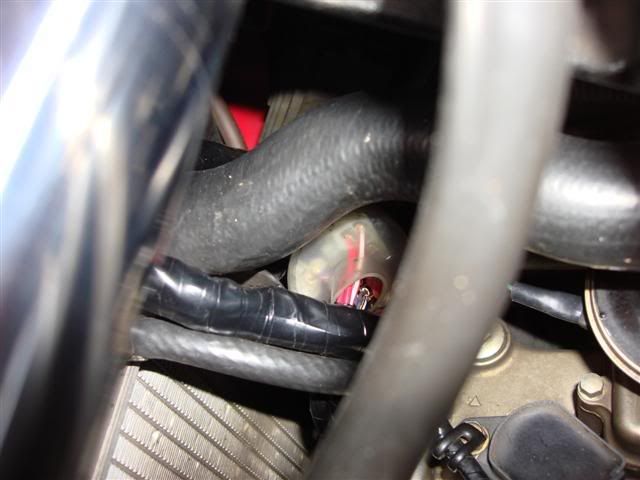
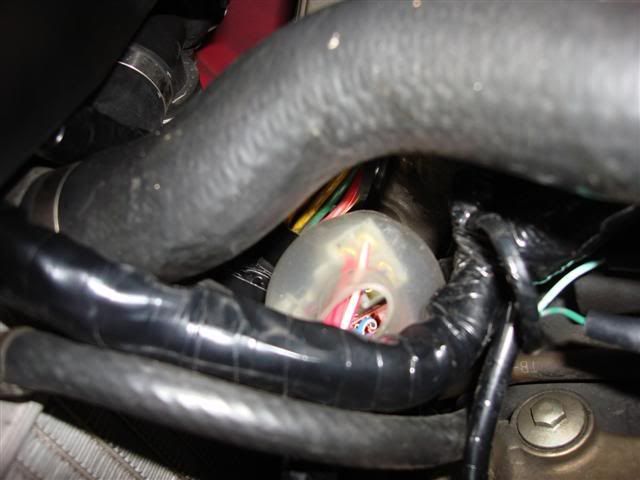

Hope this helps. Notice the factory harness sits on the valve covers, for the coils. No worries, from heat. It worked great for me and my fairing fits properly now with now binding or pushing.
-
This is how I ended up routing my wires and connectors. I was totally unhappy about the fit from honda so, I had to come up with something that didnt push on the fairing.
I pulled the 10mm bolt for the right side radiator. Removing the one bolt allowed me to slide the two main groups of wires from the ignition switch and right switch gear. I pulled the radiator out and slid the wires behind the mount.
Routing the wires this way cleared up a bunch of room. I routed the rest of the wires they way they would normally go. I played around with it a while and this was the best I could come up with. I used extra tape and plenty of zip ties. The wires no longer touch the fairing.
OH YEAH, MAKE SURE THERE IS ENOUGH SLACK IN THE WIRES. They go around the forks and need enough slack to be able to turn the bars lock to lock.
-
Very good idea. The clips on the battery side are easier to use.
-
I actually used an old battery cover from my nissan truck that was no longer needed. I am going to make a more precise storage box with the other side of it. I cut this one out in ten minutes with a dremel, just to see how good it work.
The tools are useless without the extension bar. Otherwise I think it's pretty simple.
-
I think I am going to use the space for my tire pump and plugs, or first aid kit. That will free up room under the tail for guns and illegal drugs. :wheel:
-
I took the idea and ran with it. I found some thick black plastic around the house and trimmed it to make an enclosed space. I didnt like the open places and wanted to make it more of a box.
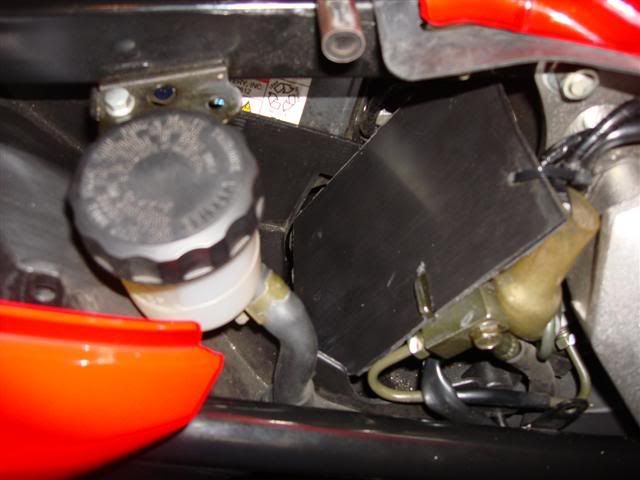
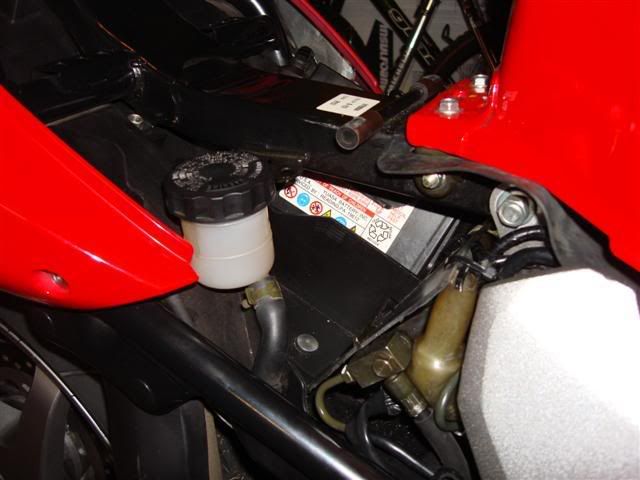
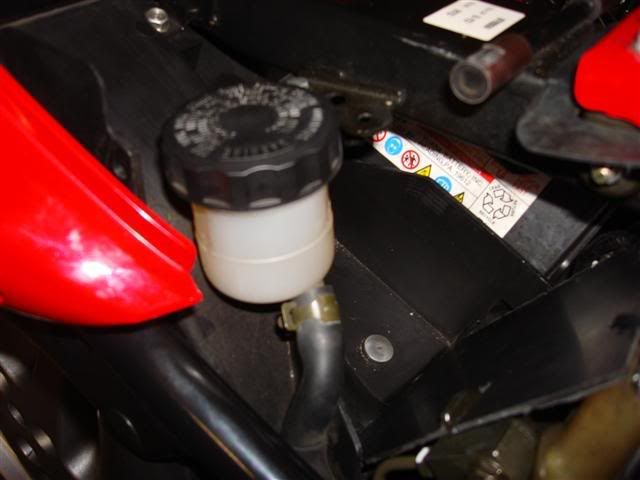
Here is the space with a first aid kit.
Now with a small can of chain lube and a first aid kit.

And with the trim piece on. Both items fit no problem.
Thanks johnga for the idea. Be careful and do not put small items in there. I have lost a tool before.
-
Here are some pictures of the space. Cover with three clips removed.
-
Turtle fur balaclavas are the best by far. The top is thin to fit under a helmet. Search for turtlefur or shellaclava.
-
I'm tempted to crack open my airbox to look at the stacks.
The velocity stacks are designed to give each runner the same length. All modern engines are this way, same for intake manifolds and exhaust headers. Thats why we have spaghetti exhaust plumbing.
Edit,
It is very good advice about the battery and very intriging. I see honda autos that start a little slow but still start. The abs or srs light will be on with many control unit failure codes. A weak battery is the source of the problem 9 times out of 10.
I had my airbox lid off today and my bike has the tall's in the rear short's in the front.
K&N with 28k miles and an opened up airbix lid and the filter wasnt even dirty.
-
Thats pretty cool, BUT, I didnt see any boost what so ever. It doesnt sound like a turbo engine and the blow off valve didnt work when he let off (no chirp) the gas. I have a little turbo experience and I just dont see it.
It should of lifted the front wheel at the first sign of boost. I have seen a few turbo kawasakis run and they had turbo lag and then hold on and you better be pointed in the right direction.
-
I'm tempted to crack open my airbox to look at the stacks.
The velocity stacks are designed to give each runner the same length. All modern engines are this way, same for intake manifolds and exhaust headers. Thats why we have spaghetti exhaust plumbing.
Edit,
It is very good advice about the battery and very intriging. I see honda autos that start a little slow but still start. The abs or srs light will be on with many control unit failure codes. A weak battery is the source of the problem 9 times out of 10.
-
Well this is one you won't see every day
 The folks at work have been calling me House for months (was using a cane for a couple of months cause I hate crutches.) So I grabbed my handicap sticker today and slapped it on the mirror and took a snap for you guys. Can you tell my dorky butt is gald to be back on a bike? Enjoy...
Shame on you, for taking up a handicap spot.
After I broke my femur, my riding buddy would always park the furtherest away from a store as he could. He made me walk alot. It was actually great for me getting healthy again.
-
I ran mine for a few miles with no exhaust. Like a damn stock car.
I dont understand why people pull the tail section off. The exhaust can be removed very easily without taking it off.
-
That sucks, I didnt expect that ending. At least you and the bike didnt switch positions. We would see a vfr with some rash and you, well you know. Your work is fantastic. She gave her life so you could walk away, thats one way to look at it. Where did the front end break off at?
-
I did the same thing on the front of my truck. I got the mesh at home depot, basically chicken wire I guess. I painted it black and covered my grill opening so a rock wouldnt take out my a/c condensor. I also made some guards for some fog ligths that turned out well and work good. I was having trouble with breaking lenses and it cured that. This is a great idea and the mesh can be painted or powdered for a custom look. I might do mine now. SWEET.
Where did you get your mesh? Like I said mine was from home depot but it is 4 years old and has not rusted. I also painted it though. If I could get something better , I would get it. Thanks :thumbsup:
-
Well it looks like I am in the club. I have checked my 30 amp fuse and wiring since new. Bike is an 04 with 15k miles. I have never seen any discoloration, and they always look fine. I have not had any problems. I checked yesterday and the plastic at the fuse and the small wire connector are discolored slightly. The short wire is hard and brown. The short wire started getting so hot and melted some plastic in the battery tray and the red plastic sheath on the wire to the battery. Looks like I am going to radioshack.
I do not see a good how-to on installing this fuse block. I am sure it is simple, but it is not clear to me exactly what I need for the wiring, except for the radio shack block with 10g wire.
I also noticed some photos towards the beginning of the thread have been lost, as well as some important thread links.
How To Paint Your Vfr
in Modifications
Posted
Please pin this.
Thanks for the time of writing up this how to. It is very informative.
Thank you, thank you.
The bike looks great, you have some skills and knowledge, :thumbsup: