


FotoMoto
-
Posts
1,137 -
Joined
-
Last visited
-
Days Won
3
Content Type
Forums
Profiles
Gallery
Blogs
Downloads
Events
Posts posted by FotoMoto
-
-
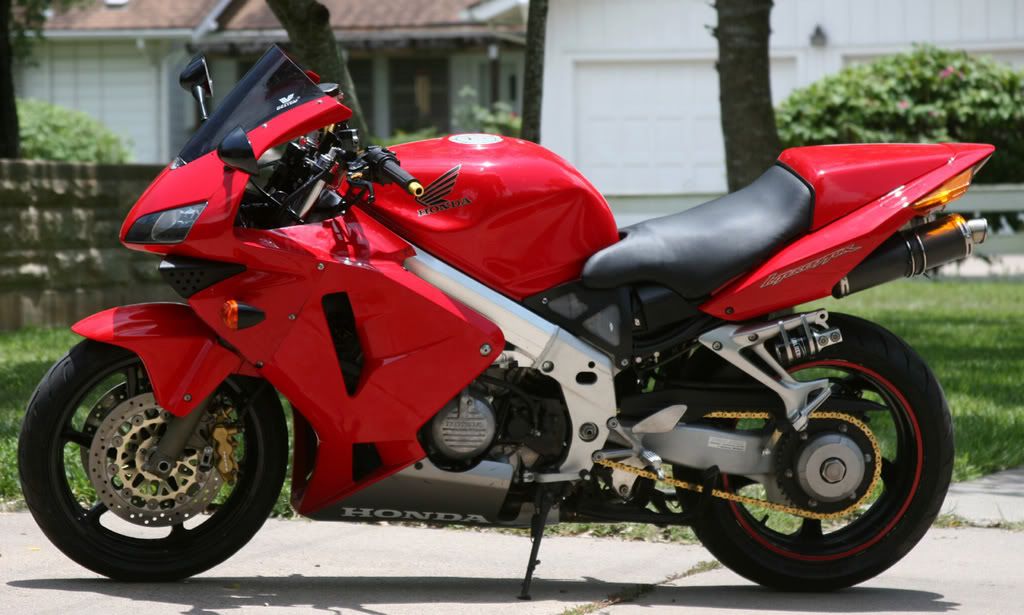
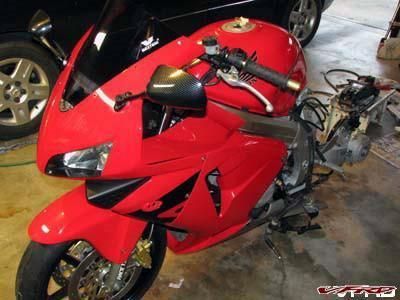
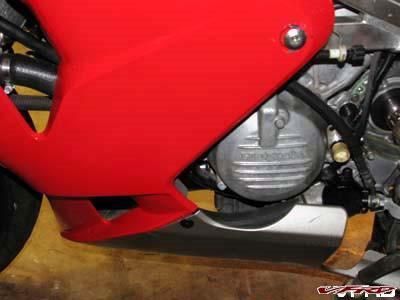
Well I spent some time getting the left side up to par with the right side that I've only been showing so far. Opps, I didn't plug in the right side headlight for the photos. I trimmed the gray lower a good bit to clear the centerstand while it's deployed and then drilled it to match the standard mounting point (no bracket required!). I've got a feeling I'll need to trim both of the lowers more to allow adequate heat spacing from the headers. I think I also have some of the Honda heat foil padding to add to the backs to give them more resistance.
I still need to make the cosmetic cover for the frame/subframe junction and add the cb919 hugger after I make an additional bracket for rigidity.
I will trim the lower around the stator cover section for a better match or else just cut it straight to the back mount. Dunno' yet.
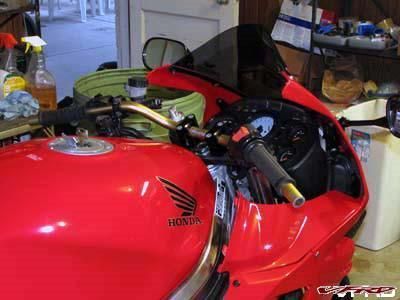
The speedo is easy to see in the daylight. I got most of the wiring routing determined but still have one issue with the gauge I need to solve. I think I will lower and center it some more. I'm using some stock cbr holes at present for the bracket.
-
Here's the thing, I've noticed several 5th/6th gen wheels that DO have this relief already in the casting! Not sure which gen it is, but I've seen them.
I've got two 6gen wheels sitting in the garage right now and both have a flush casting with no relief hole for the brake rotor bolts. Now they do have large recess holes between the lug bolt areas but those are simply for weight reduction and are inside the circumference zone of the interference. Maybe that is whay you have seen? :pissed:
Yeah I know, a pic right here would really be nice for explanation.
-
You can find those at any hardware or auto parts store for about 50 cents a pair. They usually are a tad tight on fitment.
-
You gotta tell us where you got it and how much it was! I've seen it, and researched it a little, had it in mind for a project, but I remember it was $$$, that or I found the price in canuckle funds...
Yes, they are expensive. Here's the N.A. KOSO website with US distributors who all show list prices on their websites too:
http://www.kosonorthamerica.com/koso_anglais/toutes.htm
but they are much cheaper on UK and German ebay which is where I got mine but I got seriously raped on shipping charges by the German vendor. In hindsight, I should have asked a Euro or Brit Viffer to purchase/ship them to me.
-
 1
1
-
-
I knew this could be done on my conversion. I even asked the mechanic if there was any way he could make H4 bulbs fit in the H7 holes so he wouldn't need to rewire the thing.
Two questions:
Do they aim correctly now that you widdled the H4's down?
How much effort did it actually take to get them the right size?
If I were the mechanic and working on somebody else's bike, I'd tell you the same thing.
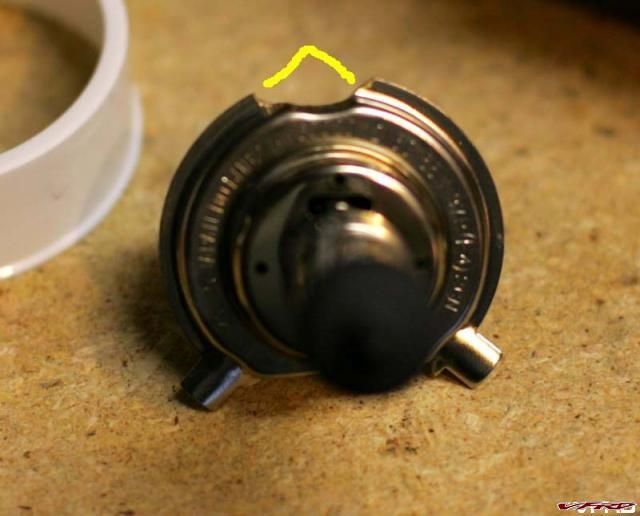
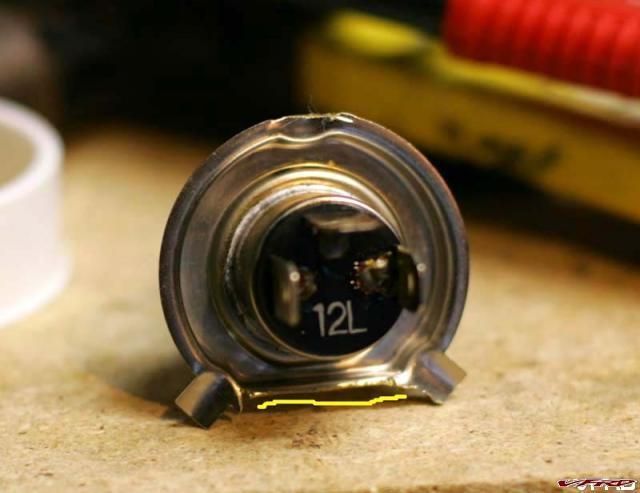
Here's what I did. I had to trim the top tab off and the area between the two bottom tabs to allow the H4 bulb to sit flush. Took a minute on the grinding wheel but tin snips would probably achieve the same thing.
KG9K7815.jpg
KG9K7814.jpg
Next I had to push the locking tab out a bit and bend the wire clasp some to allow for the larger bulb assembly. It's not an easy factory fit installation so it is MUCH easier to install them with the headlights/fairing off the bike.

KG9K7816.jpg
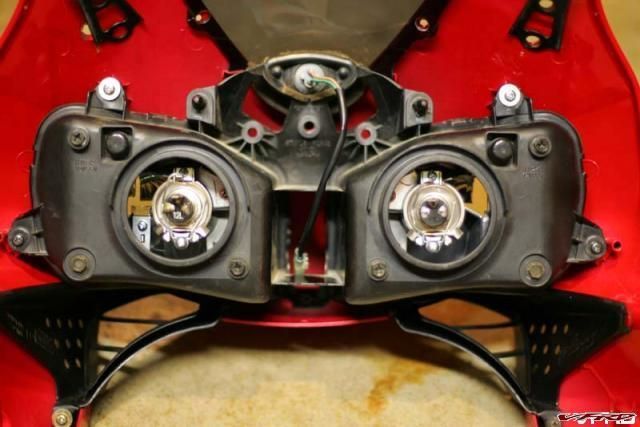
Plug the harness in and you're done. I haven't checked alignment out yet but the 600rr headlight assembly has both up/down and side to side screw adjusters for each lamp so I should have plenty of latitude.
-
I don't recall Hot Tip (could have been after I got axed), but they did make systems that were called "White Tip" (cool shark logo). These were systems that had the header Jet Hot silver ceramic coated.
Rex,
My memory is often quite bad so I may just be remembering this wrong but I believe they were made by Kerker/supertrap and sold under the targa brand:
targa hot tip.gif targa hot tip
I had the white one on my, then new, white 87 Honda Hurricane CBR600F.
-
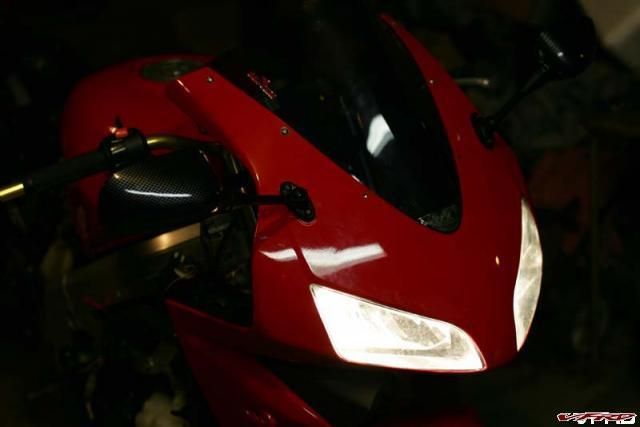
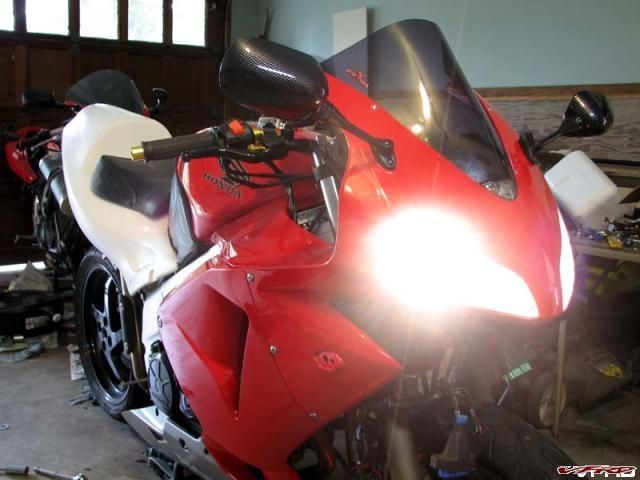
Time to turn more attention to the front end. I got the headlights working; using stock wiring and H4 bulbs but needed to trim them to fit the H7 housings.
KG9K7821.jpg
No winkie eye for me. Both will be high/low beam.
KG9K7825.jpg
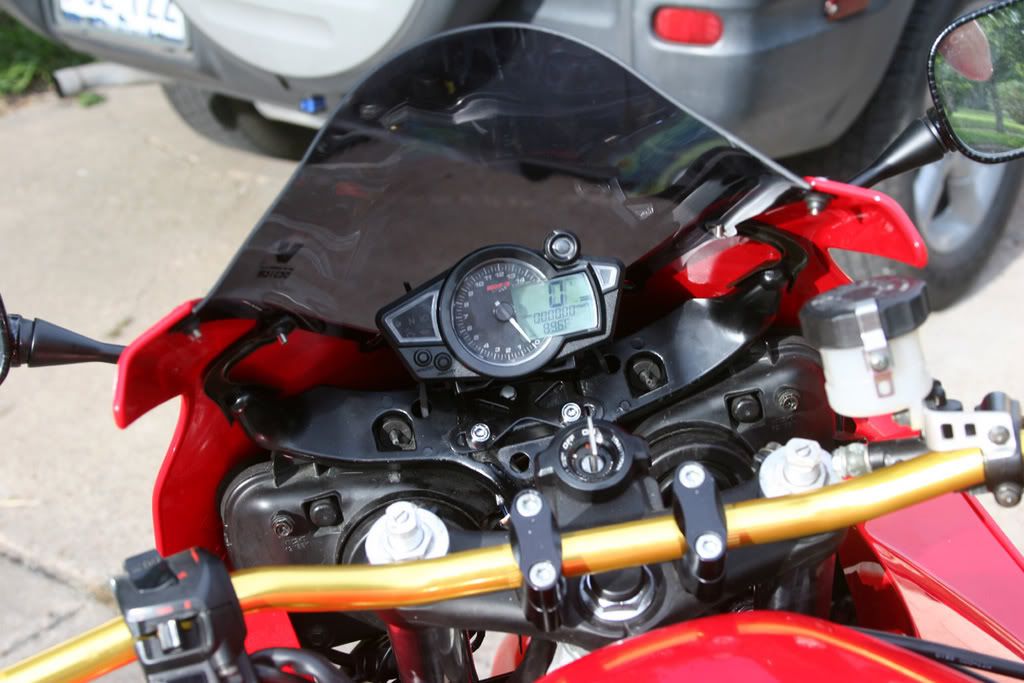
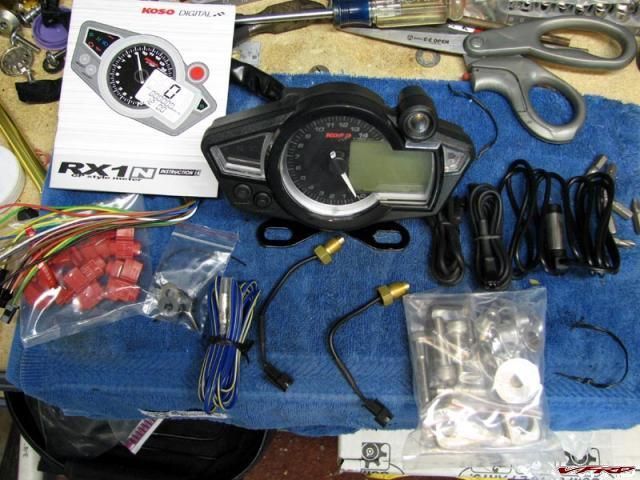
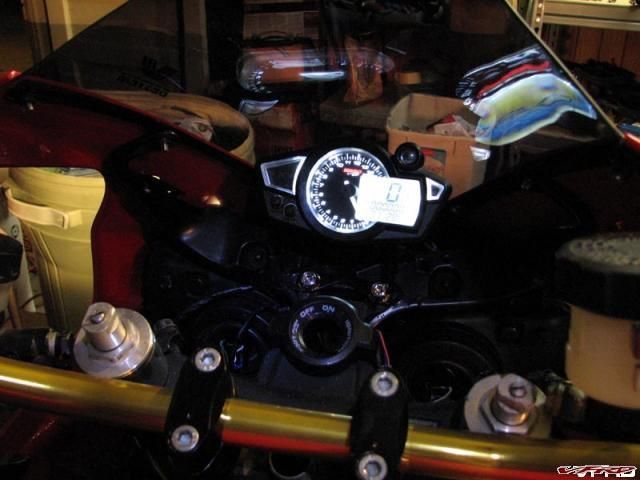
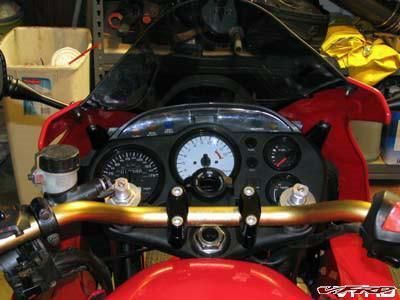
Finally got the new instrument panel in. It's a KOSO RX1N unit. It comes with plenty of supplies including extensions for cables, sensors, and nice hardware. It is a full feature unit with more things than I care to list (or will probably ever use) but besides the obvious it has two trips, water/oil temps, fuel gauge with reserve warning, clock, and all the typical warning lights.
Since I can't determine an easy way to tap into the oil lines/cooler for the sensor (seen just below the gauge), I'm going to mount it to the fairing in the same spot the VTEC uses as an air temperature gauge instead. It all ready has an oil pressure light just like stock.
IMG_1995.jpg
It's much smaller and thus lighter than the stock unit which now appears behemoth in size!
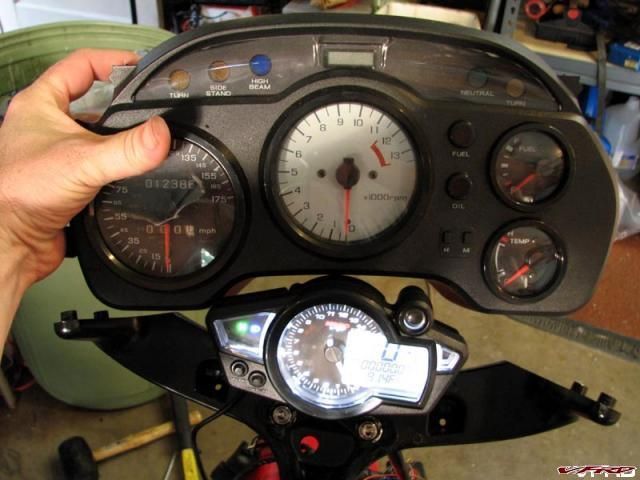
IMG_1996.jpg
Wiring it up was fun. It's not as bad as it looks.
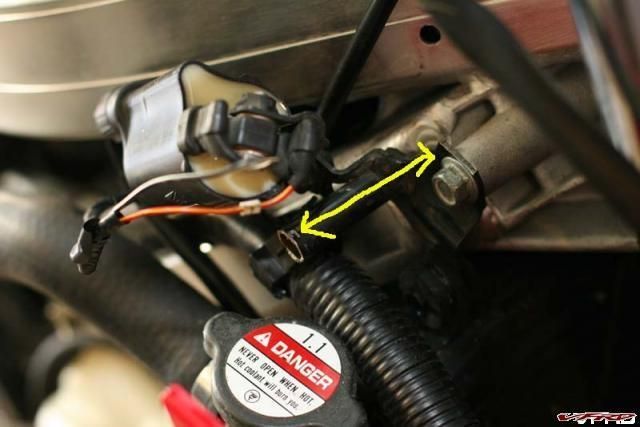
 I'm still not 100% there but it's now functional. The water temp sensor threads into the stock location on the thermostat housing.
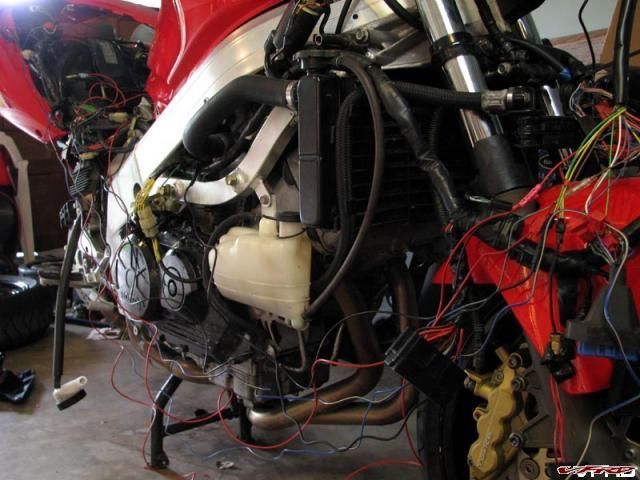
IMG_2003.jpg
Mounting it on the stay was very easy as there were two stock holes that matched perfectly. Weird. Just need to trim underneath for the bolts to stick out.
IMG_2007.jpg
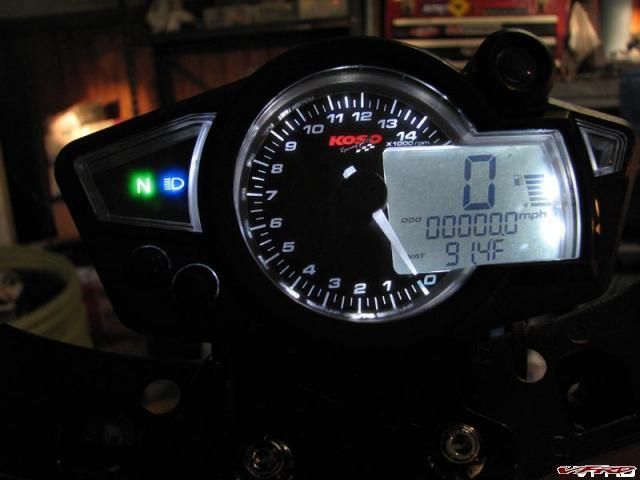
Overall, it looks very nice and is easily readable from the seat. It uses LED light sources. I haven't check it out in the sun yet.
IMG_2013.jpg
IMG_1998.jpg
It also does a power up self test just like the newer modern gauges. You can see all lights in this shot. That's a over rev light on the top right. Does both yellow and red and are adjustable to ones requirements.
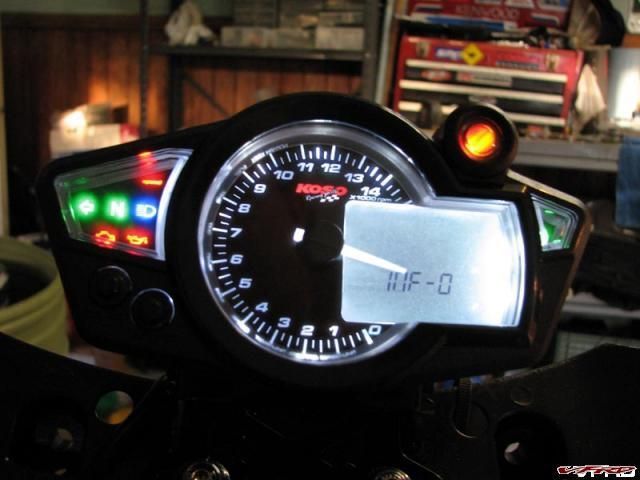
IMG_1999.jpg
-
When I was R&D Mgr. at SuperTrapp/Kerker back in the mid '90s, we started using SilentSport for all of the 'Trapps. Good stuff, made in Germany IIRC. www.silentsport.com
I guess you remember the old Kerker Hot Tips series. Man I loved my white edition. I wanted to try a set on my vtec (targa still carries the red) but thought two would leave too much gap while four (ala' mv agusta/lasers) wouldn't fit and moved on to other ideas.
-
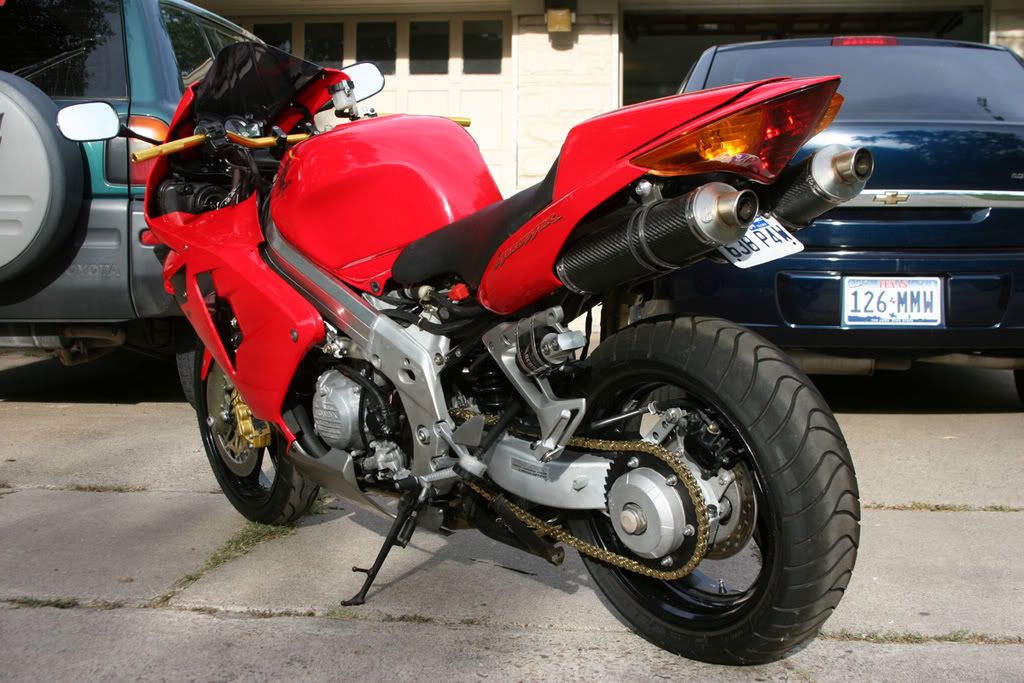
Some more work on the rear end. Got a 520 chain/sprocket set in today from sumofallparts2 who are on ebay. Thumbs down on these guys IMO. Don't stock anything and try to sell you higher priced items when they contact you to notify you they don't have the item you just bought. Took nearly a month to get it and I'm only a tad over 100 miles away from them ($20 shipping). A rivet link was extra costs (?) and they didn't send it.
But the gold chain/vortex sprockets do look great. :thumbsup: 15/45 ratio should keep things interesting. I also bolted on a stock vtec passenger peg for the wilbers remote reservoir.
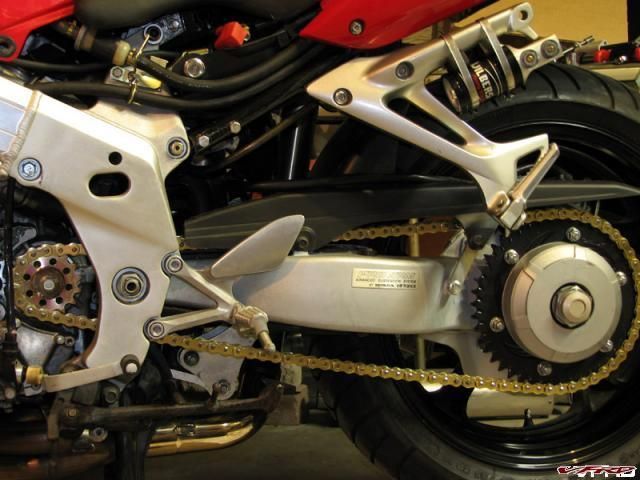
IMG_1984.jpg
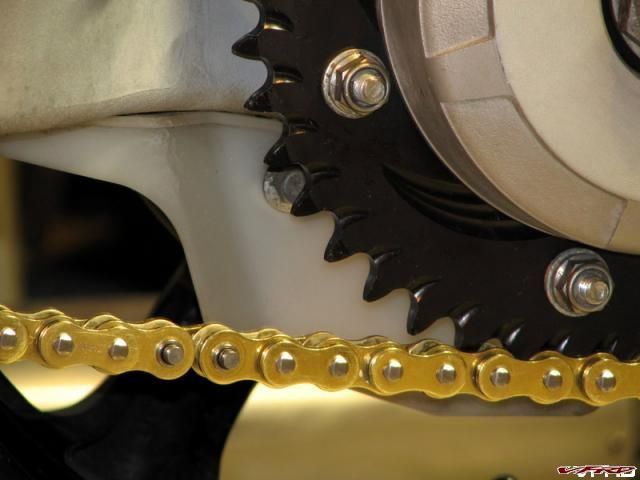
IMG_1987.jpg
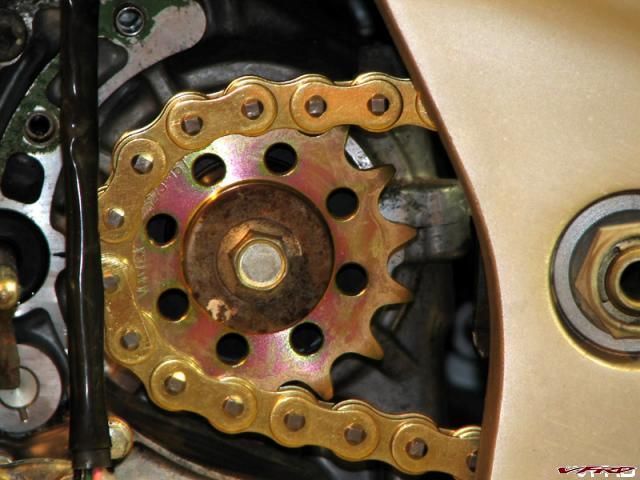
IMG_1985.jpg
With the chain installed, I could set about modding a 919 rear hugger I've been playing with. Since it comes from a double sided swingarm, I had to trim the entire right side. The left side mounts are close enough that I only need to make the rear mount bracket. It still needs some more work and a possible reinforcement bracket but I'm happy with the price (ebay $10) :thumbsup:
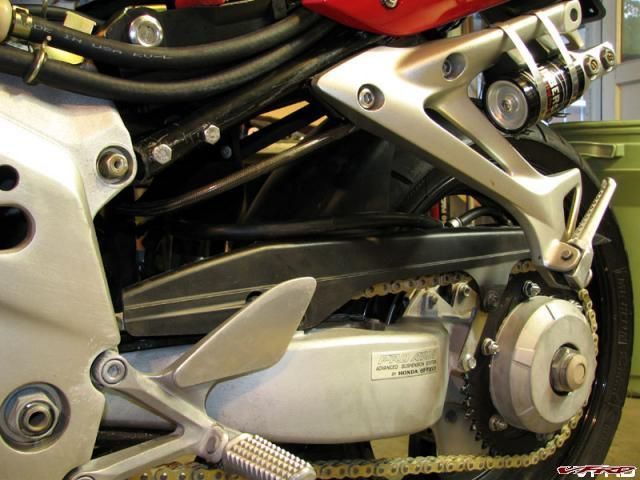
IMG_1971.jpg
IMG_1967.jpg
Time to renew efforts on the front end.
-
According to the pic, that's not a 1/2 inch difference. Looks to me about 3-4mm which is still too short but if he's been riding it with WAY too much sag all this time, it will still feel better. Throw a couple of washers on the top of the upper bracket and you'll be good to go.
Edit: see he's all ready done that. Life will be good.
-
Hey turtle, Welcome to 2003! :P I'm pretty sure I pioneered both of these mods to the VTEC. IMHO, the headers are a waste if you don't open the rest of the exhaust. I ran the F4i spring towards the max and I was about 170lbs at the time.
-
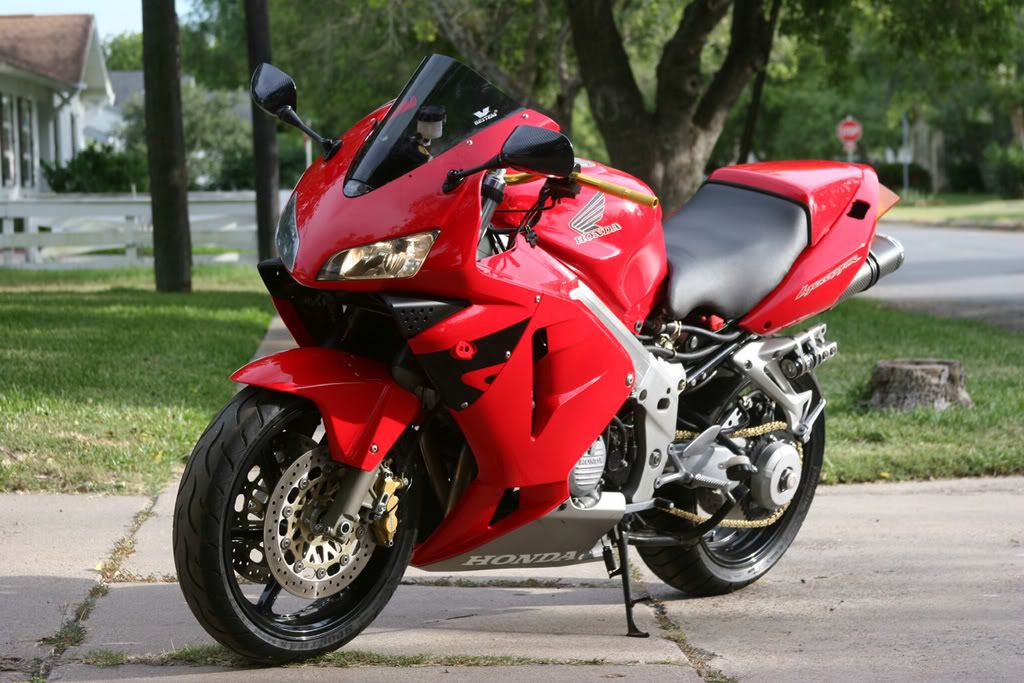
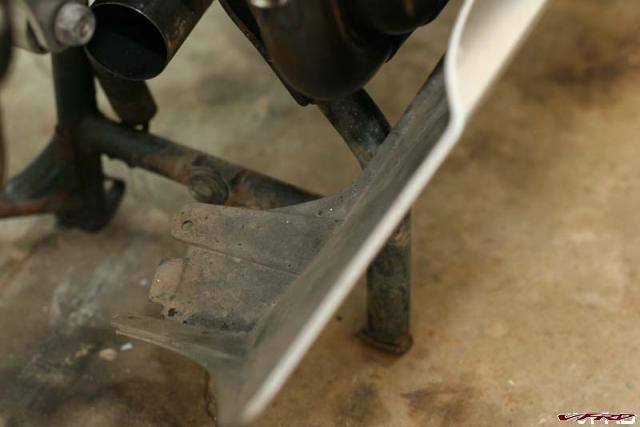
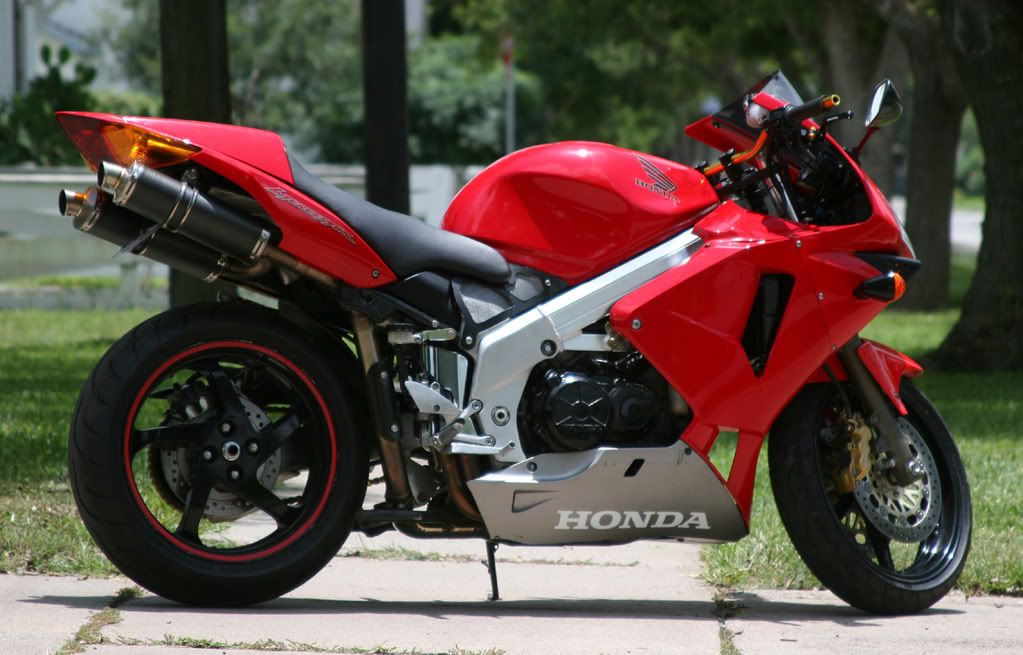
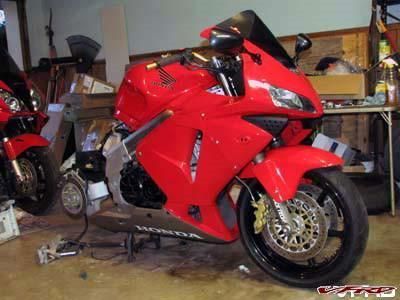
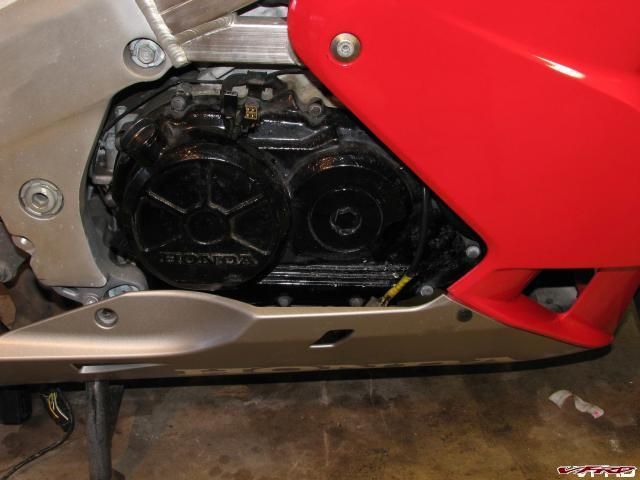
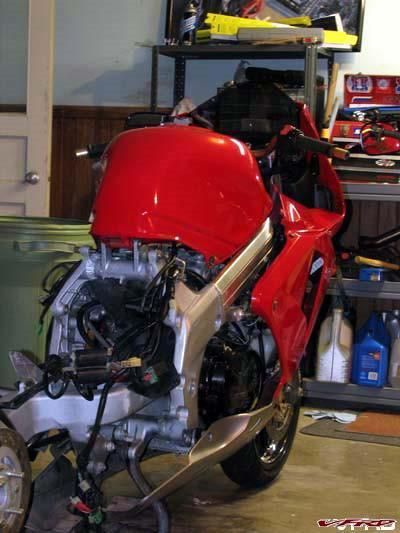
Finally reached a point that it's a roller and got it out of the garage for a little sunshine and some pics. Two Brothers header centerstand stop works with my modded VTEC exhaust system (much relief) and I trimmed the CBR lower for a better fit. I think I'll eventually paint these black as a tribute to the original 4th gen look. I still need to do the left side but here's some pics of the right.
IMG_1901.jpg
IMG_1898.jpg
IMG_1890.jpg
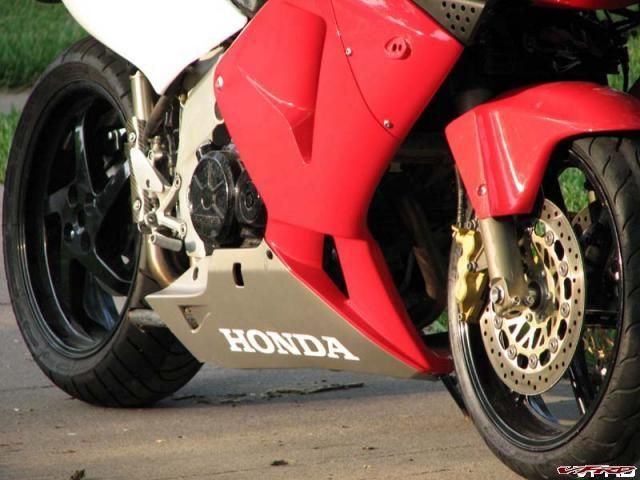
IMG_1908.jpg
IMG_1884.jpg
-
Got busy with the dremel on the RC45 fiberglass. A cutting wheel designated for plastic on medium speed cut thru it like a knife thru butter. Please note that these are all rough cuts in need of sanding/finishing.
First, I measured and trimmed the muffler cut outs. I erred on the side of loose due to heat considerations. Next was the seat.
IMG_1866.jpg
After those was the RC51 brake/tail light.
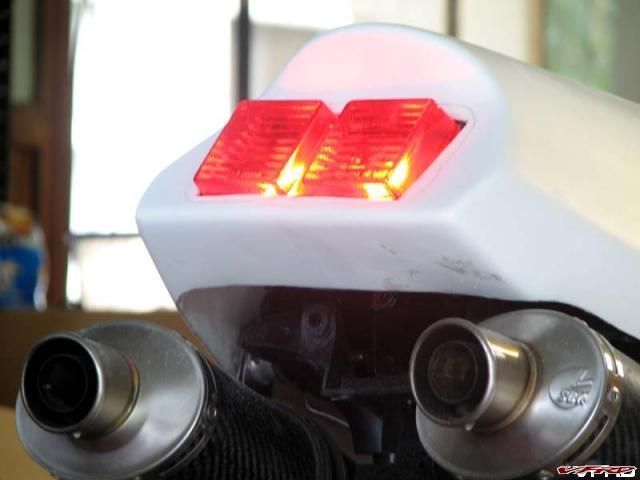
IMG_1869.jpg
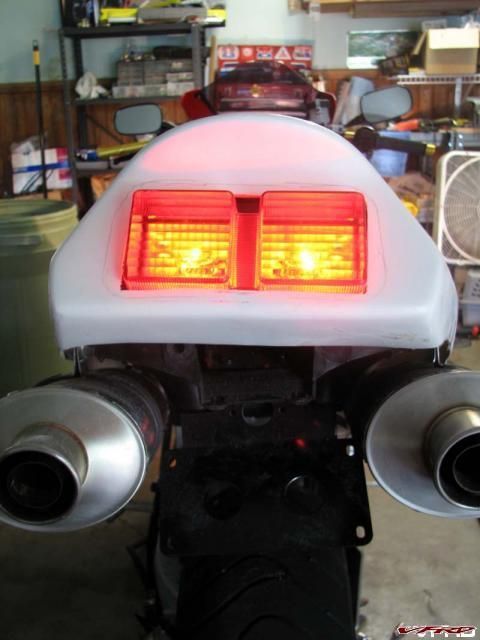
IMG_1873.jpg
I'm very happy with the first fitment results. I will need to make mounting brackets for the front and rear. Both will be quick disconnect. Why? Because I want to. :joystick: Also notice that I got the front turn signals (hanging not mounted in previous pics) and headlights working too. (need to post this in the Phase I thread).
IMG_1878.jpg
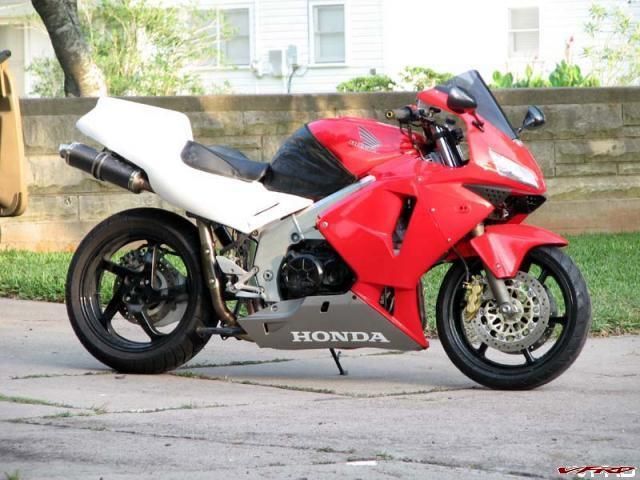
Overall, I'm really, really happy with the side profile lines of the bike. Once I get it painted, the tail won't stick out like a sore thumb against all the VFR red-ness! The ill fitting superhawk tank bra I had laying around does an OK job of hiding the mismatch of the RC tail and the VFR tank but a VFR specific bra will be MUCH better. Opps. Just realized I forgot to put the front fender on to complete the look for the pics. I'll make sure to do that next time when I trimmed the silver lowers.

IMG_1865.jpg
-
Just got it in today from air-tech in a box so friggin' huge I thought my wife had order furniture or something! This is an RC45 replica tail. The Mike Hale edition specifically. For those who may not know, Mike as a rather big guy for a racer (little Miguel Duhamel was his team mate) and simply could not fit on the race spec 45. Airtech built a special longer seat pan edition just for him and still sells it today. I decided to go with it as I thought it would give me more leeway for trimming at the tank/frame spare juncture and give me more wiggle room on the road.
With fingers crossed I tried an initial fitting but it would not go on. The VTEC undertail and parts of the subframe were too wide by about an inch on each side. So I pulled out the dremel and got busy. Now I can get it nearly all the way on to see where it will need to be trimmed, tucked, and/or cut to flush fit. It's very close as is. A testament to how close the RC45 and 4th gen are in overall size and layout.
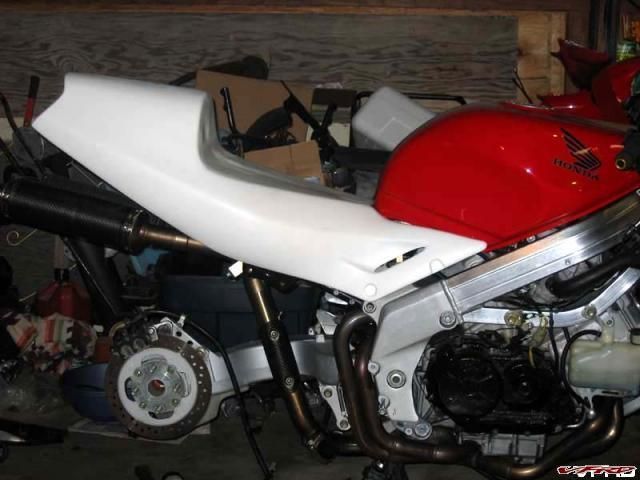
IMG_6087.jpg
IMG_6086.jpg
IMG_6088.jpg
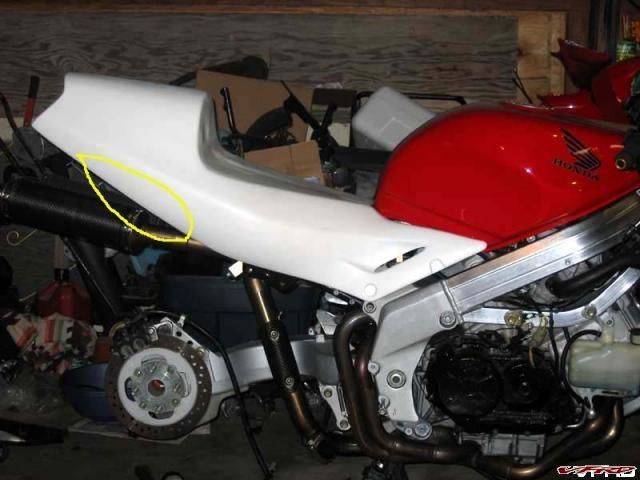
The two biggest areas of concern are the mufflers (yellow circle) and seat pan. Those will need the most extensive cutting. I placed the gixxer sargent seat on it for the pic. The longer Mike Hale edition will give me enough room for a real "selfislhy wasting bandwidth" pad for more comfort/support. Obviously the seat will not sit up that high as I will need to cut out the seat pan to lower the seat down to the frame rails for support.
cutout.jpg
IMG_6079.jpg
At this point, I don't know how I will bolt down the rear half. The front section will use the standard VFR lower mounts with an bracket to bridge the difference.
I'm pysched that it's as close as it is right out of the box. Did I mention how big the box was?
-
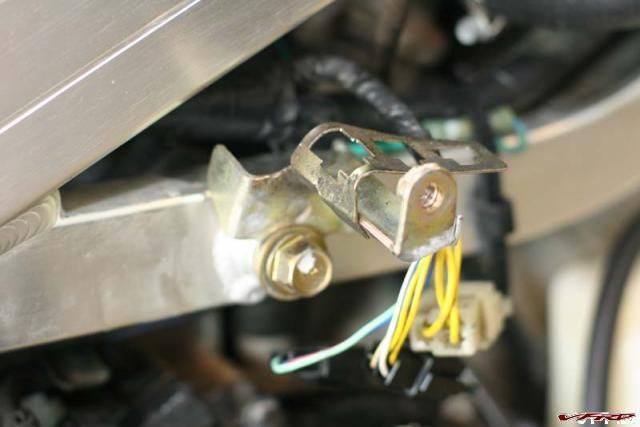
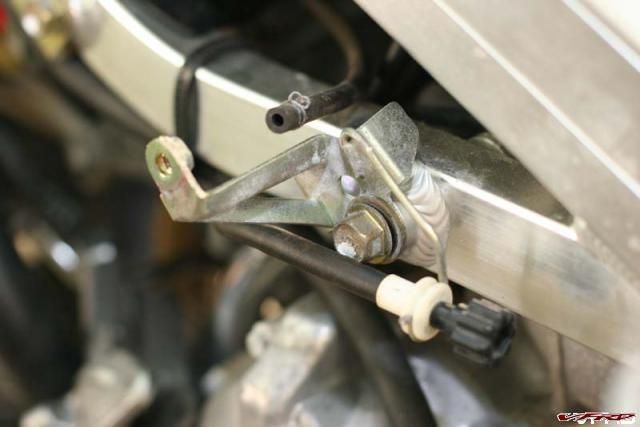
Continuing on with the rear subframe, I did a lot of head scratching trying to figure out where to put everything: fuel pump, fuel lines, rear coils, wire harness, main fuse assembly, R/R, and spark unit.
As previous mentioned, I needed longer battery cables since the battery is in different location and further back from original. I also lengthened the fuel lines and relocated the pump to the rear section. I even found places to attach the rubber sleeve thus keeping the pump suspended in the air.
KG9K7798.jpg
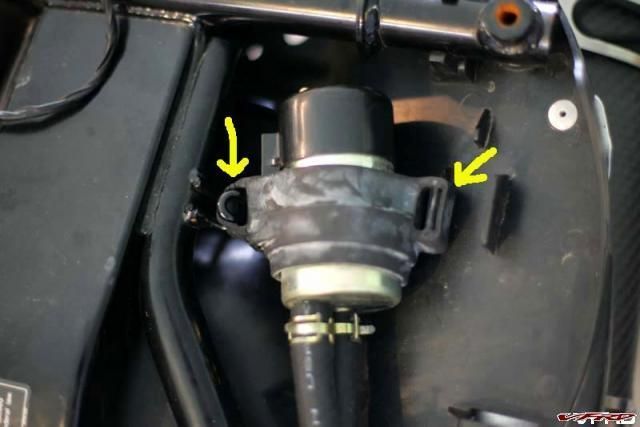
KG9K7800.jpg
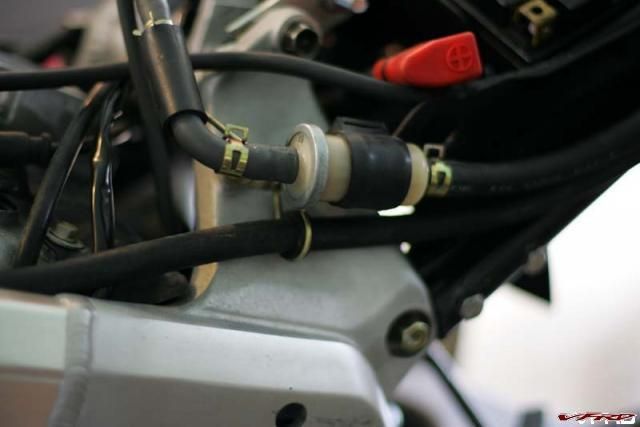
The fuel filter remains in the stock location for the time being.
[
KG9K7799.jpg
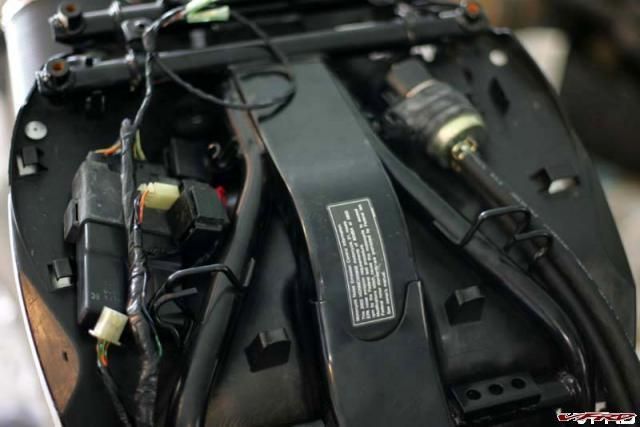
I also put the spark unit back there but on the other side.
KG9K7784.jpg
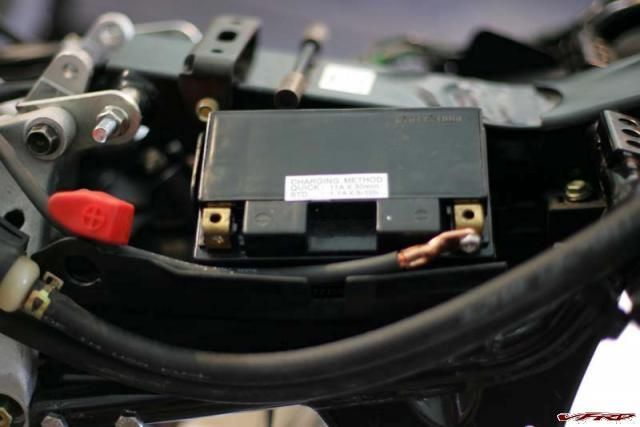
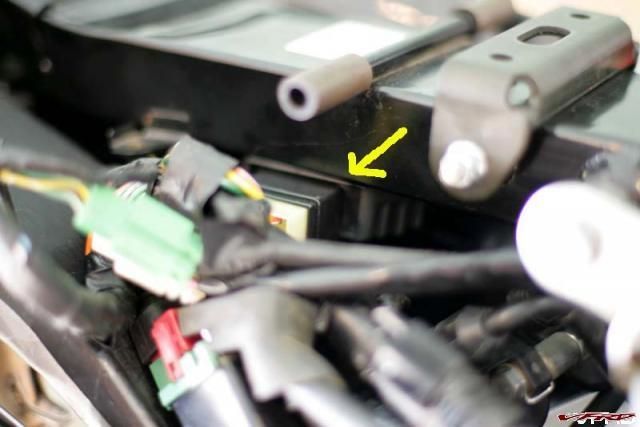
Moving the spark unit necessitated moving the entire rear wiring harness from the left side over to the right. The coils, main fuse block, and R/R all reside where the rear brake m/c and linked brake/abs guts would be on the vtec. The R/R is mounted upside down on the mail rail (see arrows). I'm getting a gsxr r/r which is MUCH larger and later on will relocated that to the rear passenger section.
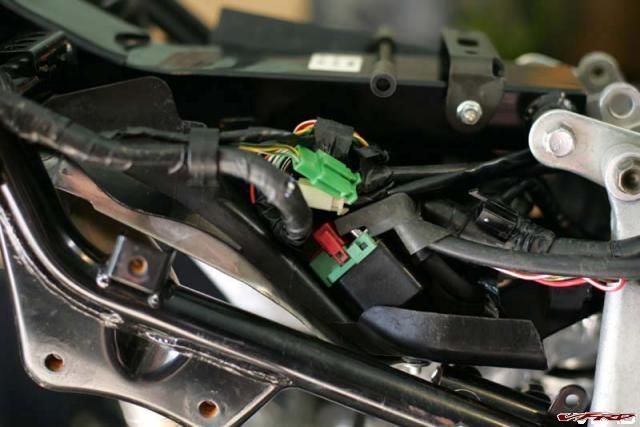
KG9K7781.jpg
KG9K7782.jpg
Everything is tidy and ready for the next step; getting some bodywork.
KG9K7784.jpg
-
Well it's been three long months waiting for this day, 4GSP lives! :goofy: I got the two brothers header hooked up to the leo vince vtec pipes, installed new battery with new, longer power cables ($9 made locally), hooked up fuel tank, crossed fingers, and pushed the button.
OK, so it sounds like it's running on 3 & 1/2 cylinders but it's still music to my ears. I'm adding "tune up" to the all ready long list of things to do but this thing might actually roll a wheel in anger one of these days.

-
How close are you to finishing your RR conversion? Final pics? The RR plastics look like they fit a little better than the F4i plastics. Did you figure out the upper fairing stay? Nice work.
I haven't been working on it too much due to work and other commitments but have made some important progress.
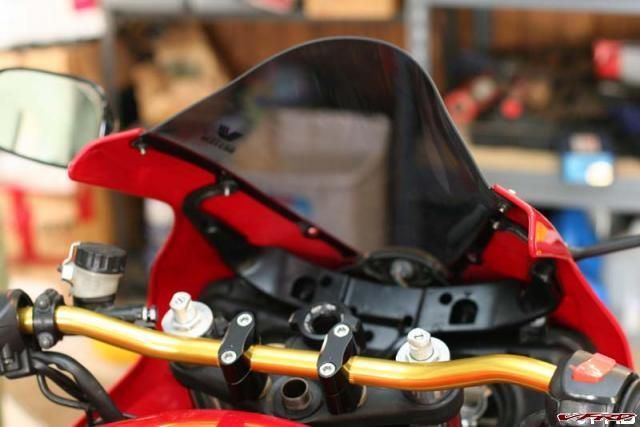
First: A slightly modified stock 600rr fairing stay works better than my more highly modified first attempt. Some grinding on the mount end for clearance gets it positioned just about right. It's slightly off center this way but my first attempt which corrected this introduced other more significant issues. I can live with but it might drive anal types kerr-razy. Only 1 of the two holes line up. I haven't decided if I will run it with just one (it's very sturdy) or drill the steering neck mount for the second hole(gulp), or fab a link between the two misaligned second holes. Also, the RR stay is aluminum, much lighter than the steel vfr unit, and much cheaper than I thought ($55 @ servicehonda).
IMG_6049.jpg
IMG_6050.jpg
IMG_6051.jpg
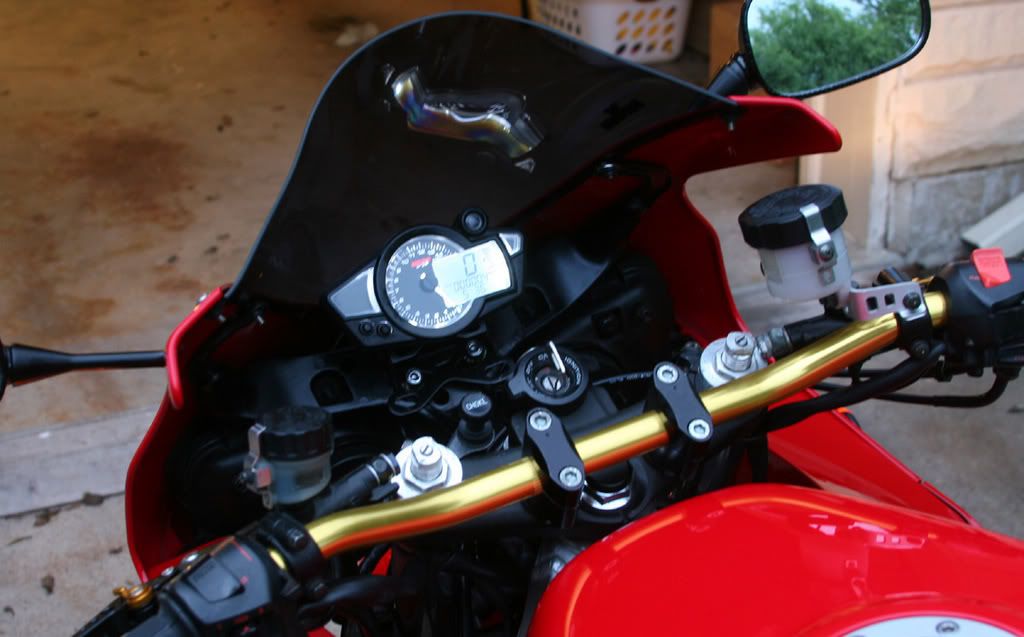
Second: Although it's an additional expense, I've decided aftermarket gauges are a simpler solution than trying to use the stock unit.
IMG_6056.jpg
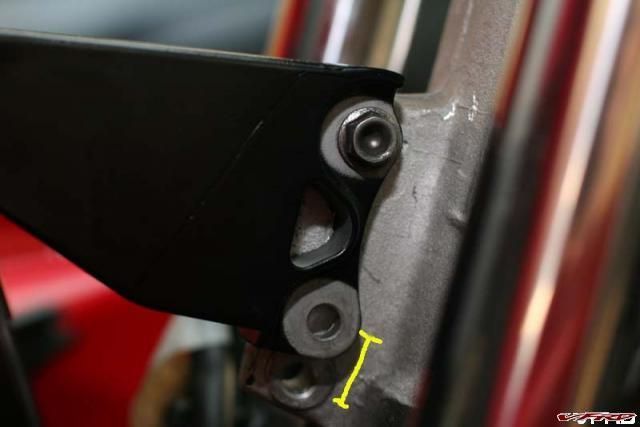
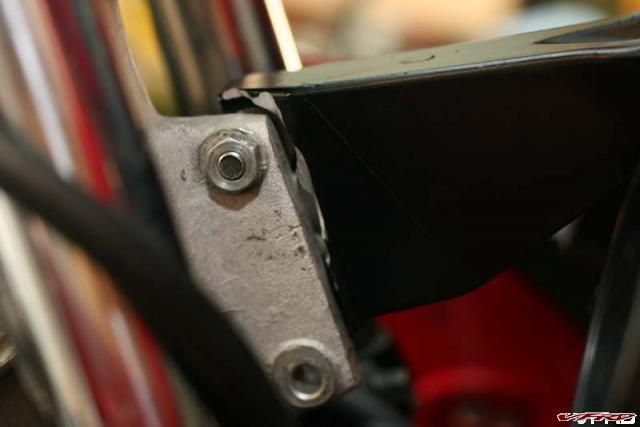
Third: Even with the stock 600rr stay, fairing panel alignment will bolt up using 3 of the 4 stock vfr mounting points! The left bottom (by the kickstand) is the only one that's way off and will need a hole drilled. The stock side frame mounting brackets simply need to be loosened and rotated forwarded/upward on their axis's. Some bending and/or filing of the locking tabs will need to be done but that's it! Suh-weet!
IMG_6046.jpg
IMG_6047.jpg

IMG_6064.jpg
IMG_6065.jpg
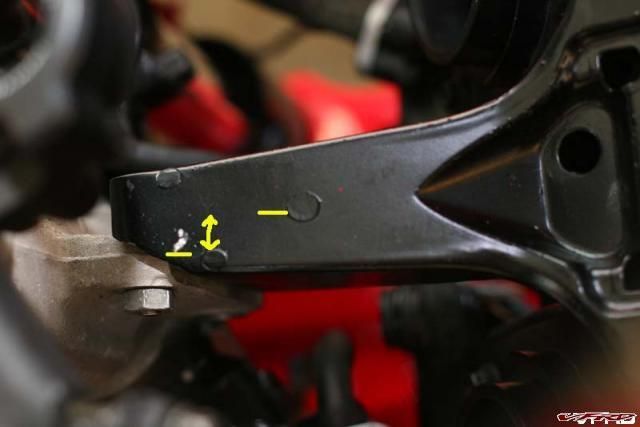
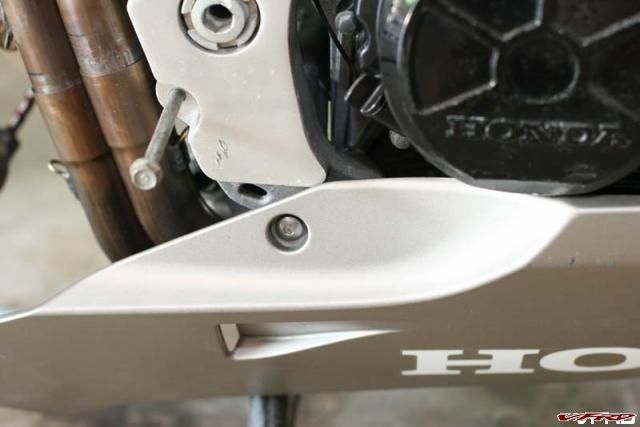
Fourth: the lowers will need to be trimmed at the rear for centerstand clearance. Maybe not if running no stand but rear exhaust collector could also be an issue. I don't know for sure since I'm running a TBR header with slightly different routing.
IMG_6071.jpg
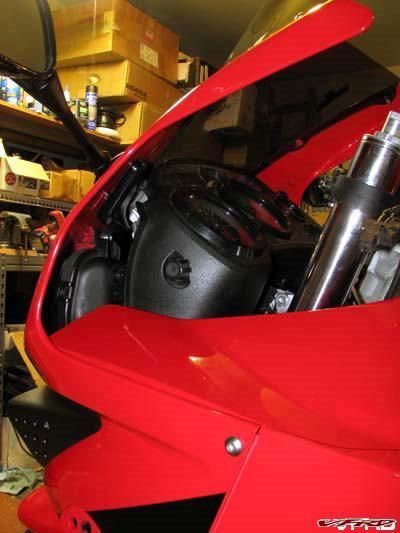
Fifth: Ram air duct panels covers the coils perfectly. Issues are the stock coil/radiator brackets stick up too high and need to be cut off, no problem since they aren't used now, and the panels need to be trimmed at the tank junction for aesthetic reasons.
IMG_6058.jpg
IMG_6062.jpg
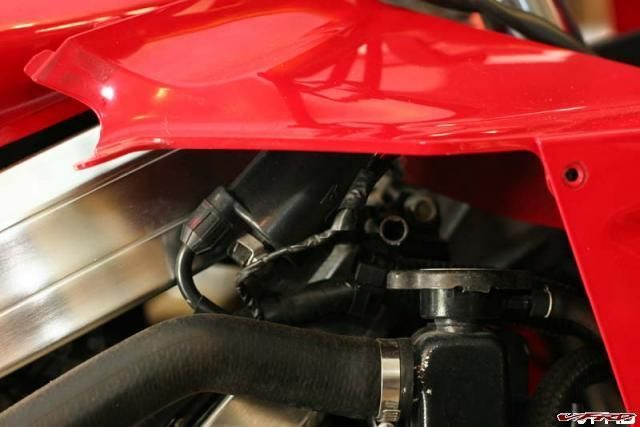
IMG_6063.jpg
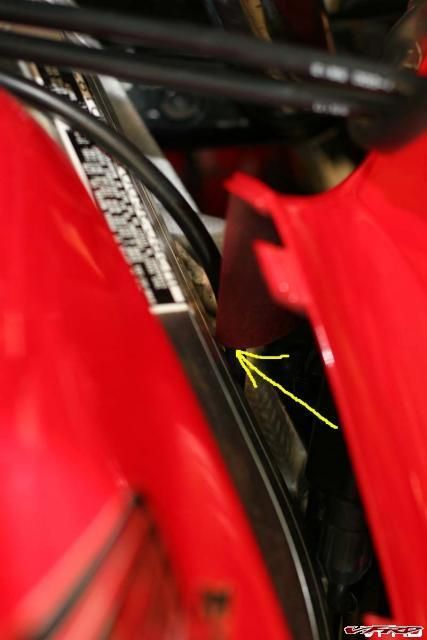
IMG_6070.jpg
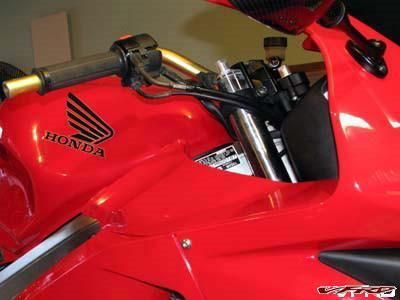
Sixth: The 600RR upper fairing stay uses two cheap ($3) mirror/windscreen reinforcement brackets. Get these. You can bend them forward on their mounts to push the windscreen upwards/forwards for additional steering clearance. Even with my high/wide superbike handlebars, I have no clearance problems. Stock clipons "should" be a breeze but I can't test that (sold stock bits).
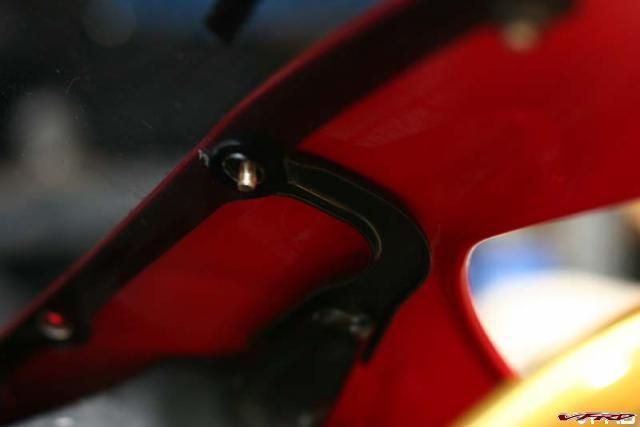
IMG_6054.jpg
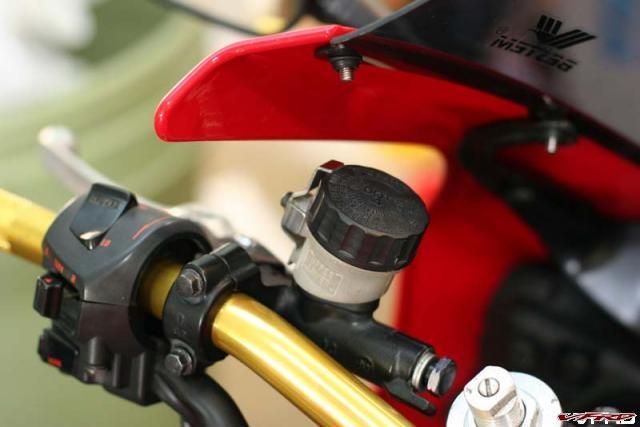
IMG_6055.jpg
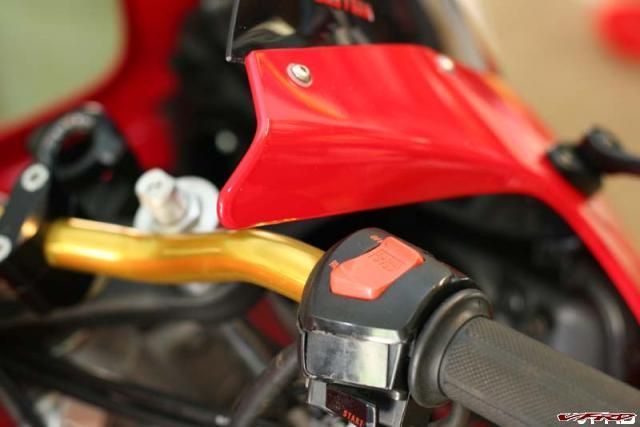
IMG_6052.jpg
That's how it stands right now. Waiting on gauges and a few other things to arrive and I'll be done with parts but the list is veeeeeeery long on all the little things I need to tidy up or solve. I don't for see any big issues with the front end now. yipp-eee!
-
can you post some more pics of that exhaust? im VERY interested in it!
Do you mean the headers?
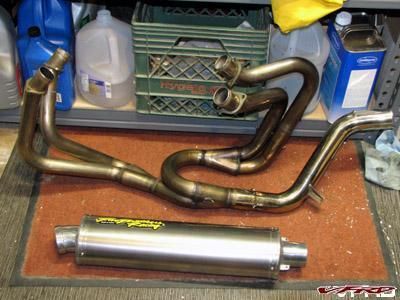
TBR SS pipes.jpg TBR 4th Gen Stainless Steel headers with Ti muffler. Besides looking WAY better, there is a substantial weight savings too. PLUS: I should be able to keep the centerstand.
I won't be running that single Ti muffler rather the dual carbon firber VTEC Leo system seen in the previous pics.
-
Well the back half is coming along quite nicely with no major obstacles (knocking on wood, fingers/toes double crossed).
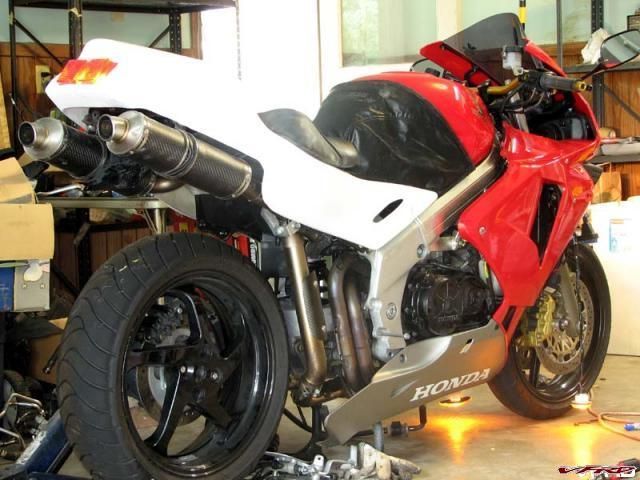
Here's what I've got done so far: VTEC rear subframe, VTEC LeoVince CF pipes, 3/4 gen TBR SS headers, Wilbers triple-clicker shock, and 5/6 gen wheel. Next I will need to determine bodywork (don't want to go VTEC) and fit the seat (GSXR sargent). TONS of little things to do that it seems like it will never end.
Can't find the gallery posting tool (Miggy working on it?) so here's a link to the gallery instead:
-
4 more days till TexasMac. <_< :blink: :o
Man, don't rush it just to make the ride. If for nothing else, you need some good shakedown runs to sort everything out. I wouldn't want the maiden voyage to be on a large group ride. Trailer it to show everyone your progress and ride that stinky IL4 instead.
One serious Viffer tourer told me to never do major repairs within a month of leaving. This is really great advice that I didn't heed when I changed out the clutch on my SuperHawk and broke the water pump impeller shaft during reinstallation. Lots of stress and money spent to get parts overnighted to make the group ride plus no good long local test runs to make sure the clutch and waterpump repairs were good.
I know you're in NC so it's not really a trip for you but I mention this for others.
-
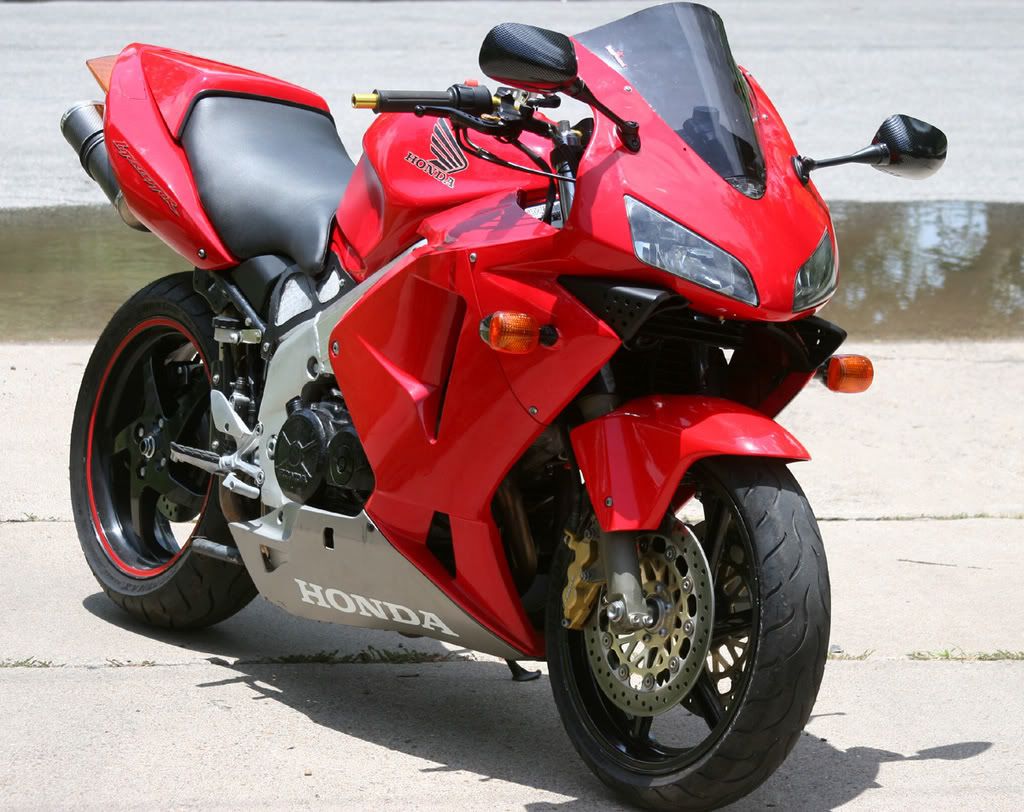
No longer a 4Gen Secret Project for quite some time so I needed a new name; hence RCBVFR. Maybe something better will come to mind. Although there are still quite a few minor details to attend to, I think this is the final and running edition!!!!! WOO-HOO!!! I put about 20 miles on her this weekend between rains.
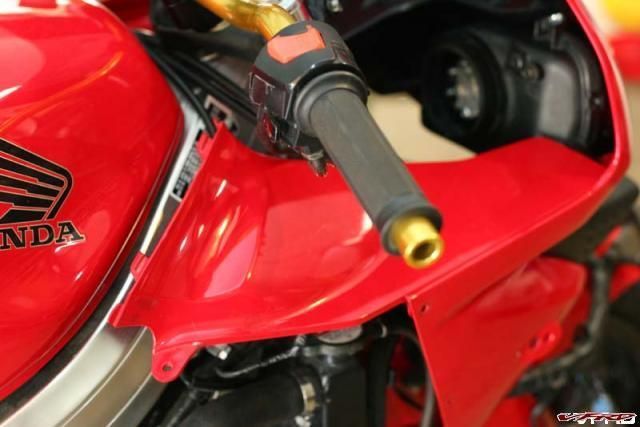
I installed longer VTEC throttle cables for the superbike bar and bolted a CBR900rr choke cable on to the top bridge since the stockers were way too short for this bar bend.
I modded standard 4gen h4 bulbs to fit the 600rr H7 housings but first impressions are not that favorable. Will try H7 bulbs/wiring next.

Mirrors offer a limited sportbike type view but it's liveable. I'll probably work on that some time down the road.
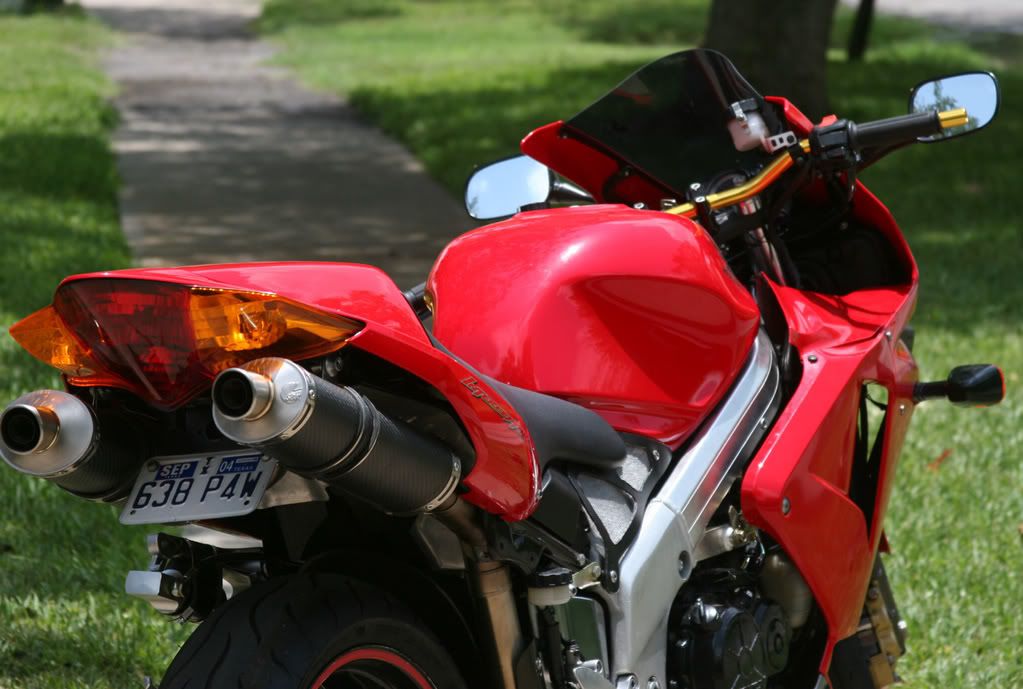
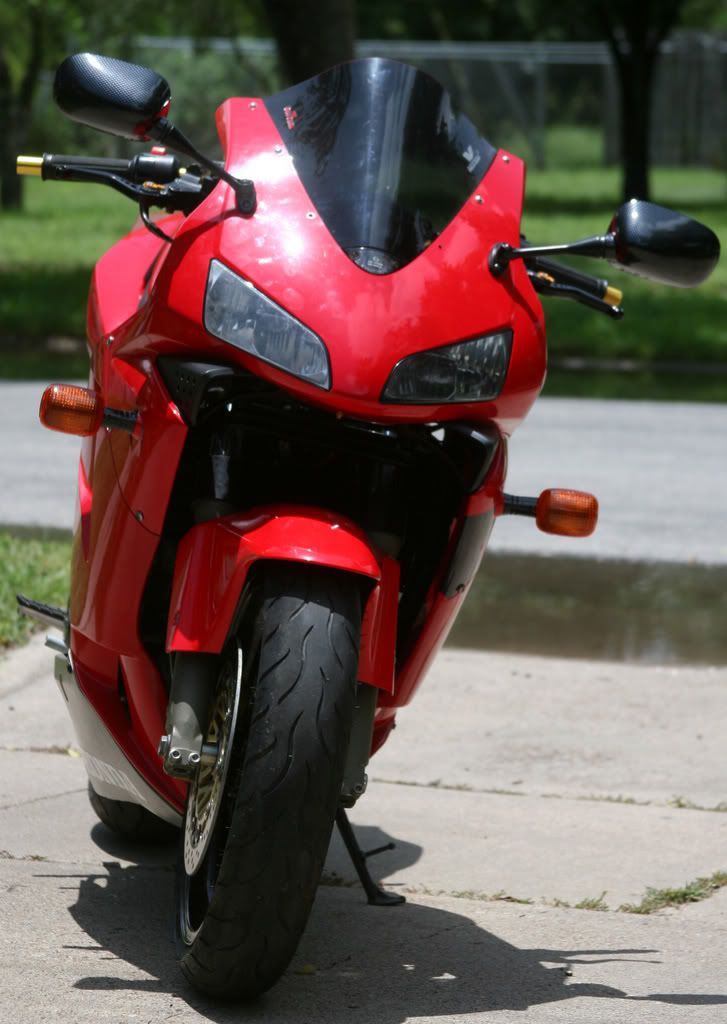
Oveall, I'm real happy with the look and the lines of how it all match up.
EDIT: I got around to weighing the RCBVFR and my 02 vtec with a bathroom scale (a'la the BLS method). While on the centerstand in the garage, I filled each bike up to the rim of the filler opening. Capacity: RCBVFR 5.5 gal vs VTEC 5.7 gal
02 VTEC Motorcyclistonline wet weight: 557lbs *
My VTEC with corbin otherwise stock: 569lbs
Stock 94 VFR 750F: 528lbs **
96 RCBVFR heavily modified: 493lbs
wheel.gif wheel.gif
* http://www.motorcyclistonline.com/features...00_interceptor/
**
The Beginning************************88
Now much to look at when you start with a "clean slate".
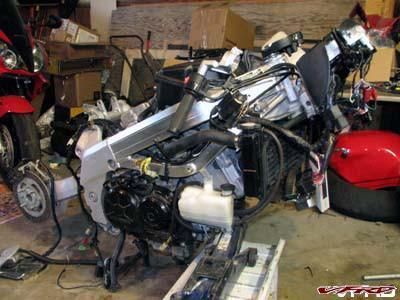
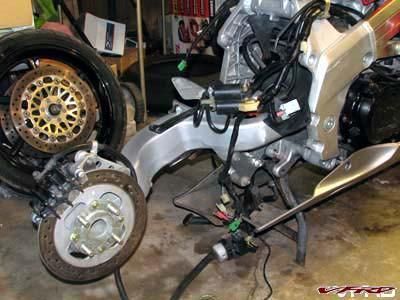
Phase one is the front end of the bike. NOTE: Although most everything is bolted down, this is still a mock up version at this point.
First off, I knew I would go with F4i forks since they bolt right on using the same neck bearings and are close in length. Second I wanted to keep using gixxer1000 6piston brake calipers. I had these on my SuperHawk project and they are amazing. They bolt right on to the forks with a little shimming, no drama. Will run the gixxer master cylinder too.
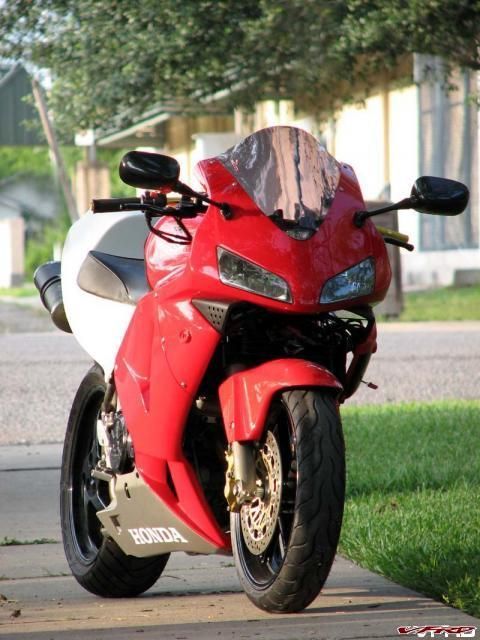
Next, I decided to go with a CBR600RR set of bodywork. Pretty easy to obtain used on ebay except for the very expensive fairing uppers. Those squiddies crash a lot! I removed the honda wings to keep the classic VFR look. Me likey! :unsure:
right side.jpg
left front.jpg
front.jpg
The side fairings were adapted with very little work. Kind of freaky. I rotated the main brackets around on their mounts. The bottom (gray) lowers will need some extensions or drilling but they are VERY close also. I was extremely excited at this point.
right side mount.jpg
left case.jpg
The upper, however, isn't as easy; different stay that bolts on a different way. The VFR stay would not work with the bodywork but it was bent to hell anyway so that was OK. I fab up some aluminum extension tabs as templates for later steel items to connect the steering mount neck to the CBR stay (sorry forgot to get pic). I'm using a cheap bent one as a test mule; however, I'll be getting one now as they are cheap compared to VFR's ($55 @ service honda).
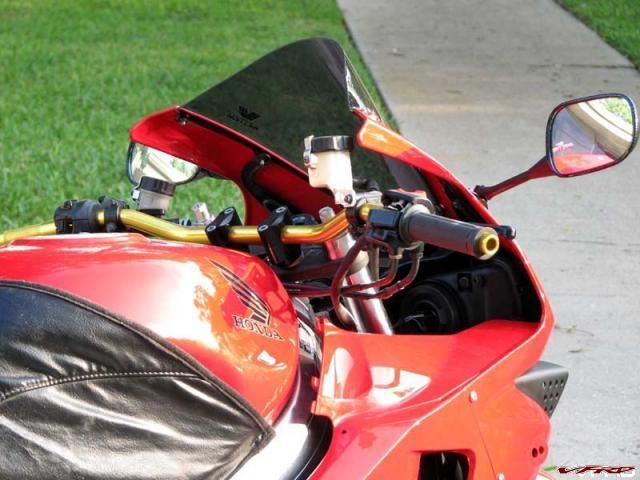
The instrument panel is a bitch too. In some ways it works perfectly and in others it's a pain. It's a very close fit with the forks as they just graze it on full lock but it's not a deal breaker by any means. There is NO clearance between the windscreen and the panel. An aftermarket speedo is the easy solution here. I'll probably do that but I will miss the fuel reserve light which is the only thing I can't determine a way to include on an upper end aftermarket unit.
I wanted to run a superbike bar so I knew that would negate problems with clip on clearance with the panel but would possibly introduce upper fairing clearance issues. Initial tests are good but choke and throttle cable length might be too tight. I have a lower rise bar on the way to help with that.
guages.jpg
top side.jpg
left guages.jpg
More pics:
right rear.jpg
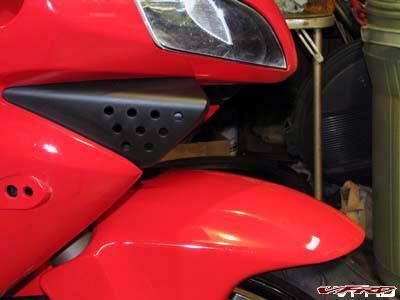
right air duct.jpg
fender front.jpg
Still LOTS to do. For one thing, I need to deal with the air duct cover issue. I'll probably just trim the tabs off for right now. Every time I stare at it or take it apart again (for the 50th time), I find something else to deal with PLUS I still have the rear end, Phase II to tackle.
rear phase II.jpg
Even tho' it seems like I'll never get it done, I'm having fun with it and feel like it will actually run one day. More to come. But first I need a few of these:
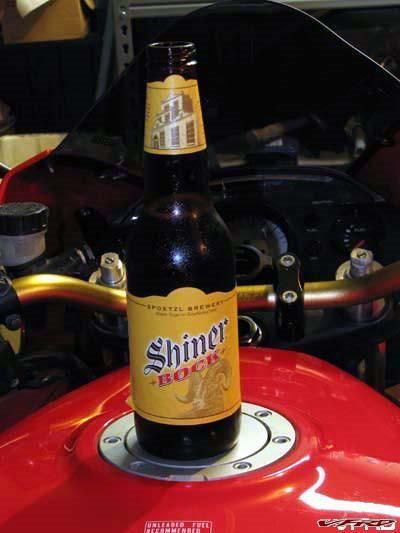
ummm beer.jpg
-
I had a set of low mount microns on my SuperHawk when I sold it. They were black fading to red. Anyway, that finish on them is amazing. I though they would be a bitch to keep clean but it was one of the easiest finishes and it never stained from the chain spooge or road grime. Nice product. :goofy: :beer:
-
The 3rd gen had a big collector box. The 4th gen doesn't. And neither have cats.
-
You could have them powdercoated in clear. Might keep them shiny longer?
They look good now, regardless.
Yeah, you definitely want to protect them. I went through this with a polished frame/swingarm on my SuperHawk. I got a two bottle metal polish/sealant system for about $40 that worked OK. Clear powdercoating is a great idea. That will push the total cost past chroming but it will be lighter.
Rcbvfr Frankenviffer Texas Style
in Modifications
Posted
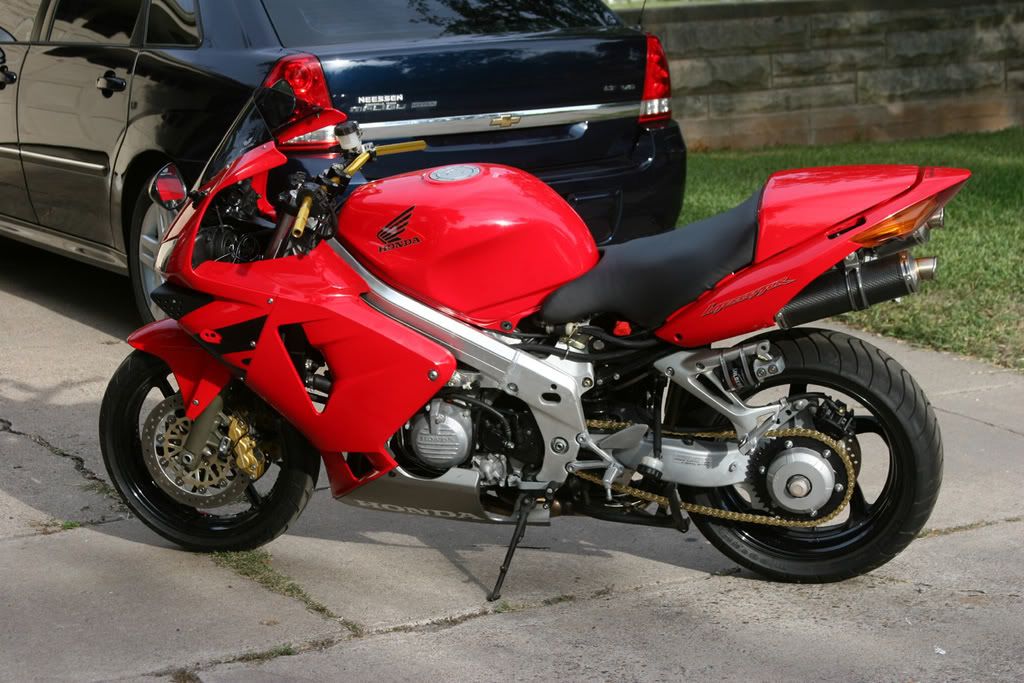
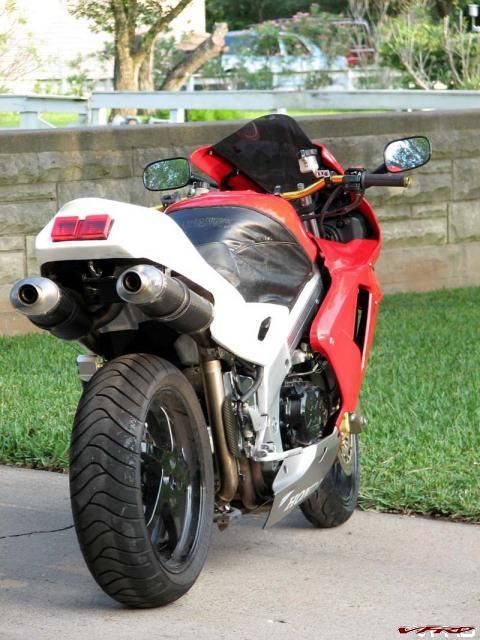
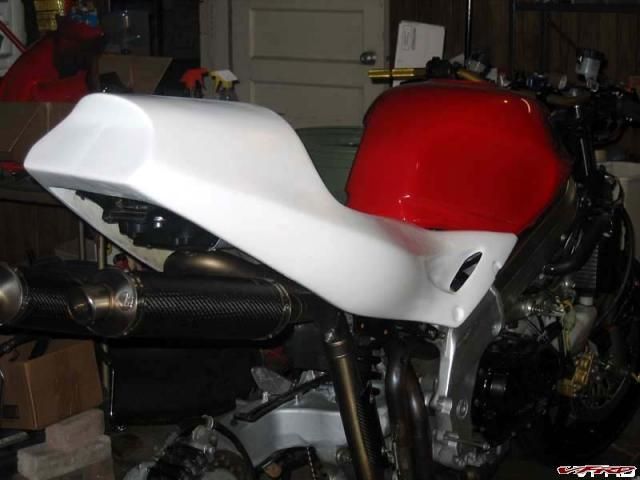
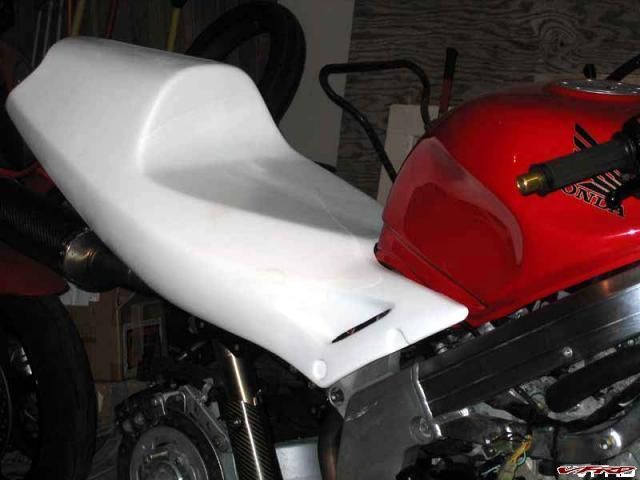
Not much time this weekend what with the Fathers Day activities (which usually involves me spending money?) but I did get the left side cover made. The seat has wrinkles because I added sargent seat foam and used it on my other VTEC bike. I'm not real good with seat covering but I'll try to redo it and make it longer to better fill the gap between it and the tank. Ultimately, I'll move the VTEC subframe closer (about 1/2 inch or so). I keep forgetting to remove the honda wing decals from the left side of the upper.
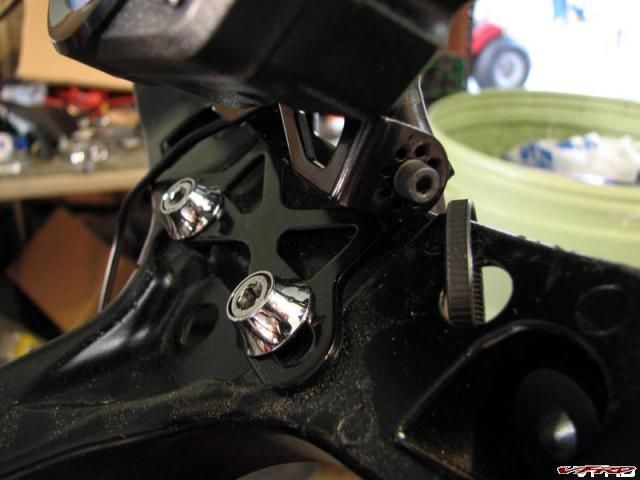
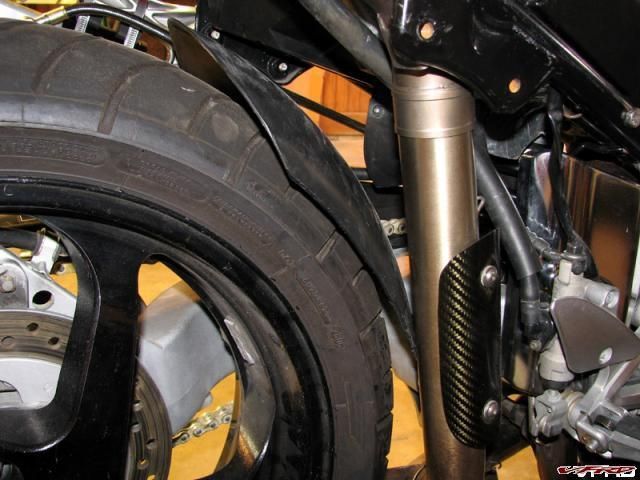
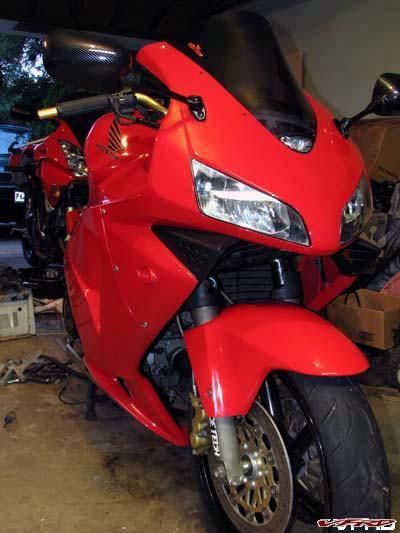
I also trimmed and installed the cb919 rear hugger. I think I will move it back about 1/2 inch towards the tire for closer fit and get it further away from the up pipe. Unfortunately, this means not using the stock front mounting hole on the hugger and making another longer rear bracket. Notice that the plate is several years out of date, this 4th gen has been sitting awhile (only 12k miles) after being wrecked.
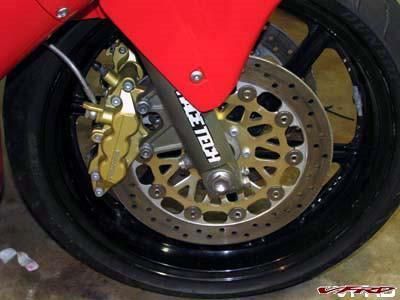
I got the VTEC rear wheel mounted correctly by cutting away slots for the rear brake rotor bolts/nuts. This allows it to fit flush with against the hub. Rim bought from VFRd is in definite need of some touch up paint or powdercoating. The bike is almost ready to ride!