


FotoMoto
-
Posts
1,137 -
Joined
-
Last visited
-
Days Won
3
Content Type
Forums
Profiles
Gallery
Blogs
Downloads
Events
Posts posted by FotoMoto
-
-
Just out of curiousity, where did you get the catless headers, and how much were they?
This a mod I came up with several years ago. 98-99 5gen headers are the only stock ones that will bolt up to the 6gen and don't have a cat. A couple of aftermarket companies also sell 'em but higher costs. Do a search, plenty of threads about this.
+1 on the interesting dB measurements.
-
Aren't you making things harder than they need to be? Get either the corresponding matching wheel or hub.
Here's what I planned on doing but have put things on hold: ducati spindle and wheel. Machine off the backside half of the ducati axle so you are only left with the brake rotor mounts and the threaded front portion of the axle for the wheel mounting. Cut off the brake rotor mounting points as they are offset and you want a flat surface. Drill press on the remaining rotor carrier 4 matching holes for the vfr lug bolts. The triumph axle in the above pics all ready has the holes in these spots but they are WAY too large. Slide it on to the vfr hub and bolt it down with regular nuts (not the lug nuts). Clearance backside of wheel to clear nuts if needed (probably so). Bolt ducati wheel to the ducati axle. Hope this makes sense.
A quick check with a hypermotard wheel on my 4gen showed that the offset clearance with the vfr brake caliper could be tight; very, very tight. Wheel alignment is, of course, critical too but you won't know until you do it. (yikes!)
-
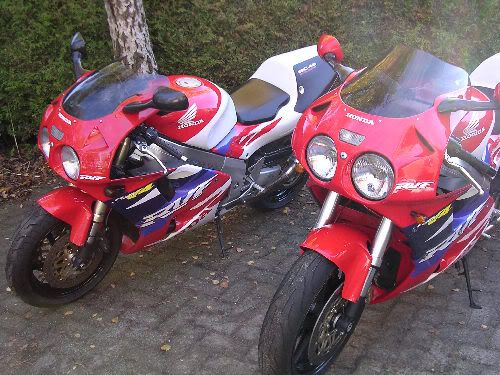
For a full body kit I was thinking of modding this set to work as it has side rads like the VFR! :biggrin:
The 51 design uses the central ram air intake for both the gauges and the fairing upper mounts as well as the obvious tank-to-mirror aluminum stay. It's really wide for a twin; especially compared to my old superhawks, so I'd think width issues would be minor. Rads should line up pretty close, I'd think. SuperHawkers have also done the 51 skin conversions.
-
Sorry, nothing up my sleeve. I will put these back on the RC and bolt up another set with Dan Kyle internals coming from the seller in California but with a quick stop back at Dan's shop to have them freshened up and resprung for my weight as there was a significant difference between us.
Basically I realized I had everything on hand except the triples to try this mod. Then if I didn't like it, I wouldn't be out much dough (easily sell the triples) but I did so now it costing me! :biggrin: :biggrin:
-
Ohlins:
So you mean that because the RC51's are of a different size and mounting, I'd have to replace my front brake calipers due to the different mounting system and I'd lose my ABS?
Any other Forks out there perhaps suitable?
Fork Sliders:
I mean those plastic slider thingies that go on the ends of the axel on the front wheel.
Yes, a fork mod (change) will require removing the LBS as it uses the stock left fork as part of the system and USD (upside down) forks can't do that.
I haven't seen axle sliders for the vfr but that doesn't mean they aren't out there or ones can be made to fit. USD forks typically have a larger axle diameter and bolt sizing.
-
Love the connector idea but in my situation I wouldn't have the room to fit a bundle that size behind my tiny cbr1000r gauges. I hardwired the cbr harness into the vfr main harness.
To make a super long story short, I all ready had an aftermarket water temp sensor installed that gives the correct range. See if the cbr9 sensor can be installed into the thermostat. That was my next plan of attack if the aftermarket unit (koso) didn't work. IIRC my original stock sensor (analog) also sent too high of readings.
Good luck and keep up the good work. A lot of folks (myself included before I did mine) don't realize the amount of work and hours that it can take.
-
I TOTALLY want to find a way to get some type of OHLINS Forks to work with my 6th gen. Not just the insert/springs, but the whole thing.
Man I REALLY REALLY want to do that.
Any possible way whatsoever?
Oh, since you seem to be the expert on VFR Mods, wondering if there is any way to get Fork Sliders for the VFR 6th gen?
Ohlins huh? (insert whistle sound here) Suh-weet. Got an extra $2800 laying around for a set of RC51 Road and Track units? Add a set of gull wing type triples and you're set!
 Of course, you'll lose the LBS and need to attend to that. You can find used sets on the more racer type forums for under $2k but they get snatched up pretty quick; gotta be ready to pull the trigger.
By sliders are you meaning the plastic protectors? If so, than the F4i items should fit as they are also 43mm. About $7 a piece.
Thanks for the kudo's guys. It's nice to know others like the RCBVFR too. I sure do. :fing02:
-
GORGEOUS! Way to go Toro!! :goofy:
Nice website too. May I suggest either having the install manual available for download or a more in depth section on the site to give potential buyers a better understanding of how much work is involved; something like this thread maybe. I think most folks would be more comfortable and confident in purchasing if they had that info easily at hand.
160hp bwah-hah-hah-hah!!!!
-
Forgot to mention, I'm also using a Carrrozzeria forged aluminum front wheel pirated from my RC51. You know, for that even greater bling factor!
 Seriously, these lighter wheels are really the tits; no kidding.
 -
Nice job Doug!
Dibs on the F4i forks, if they are available and the price is right! :blush: I mean, you're not putting them on the RC, are you? :huh:
Thanks Seb. Yeah, they would look at little funny on the RC, huh? LOL Well, they aren't for sale yet because......
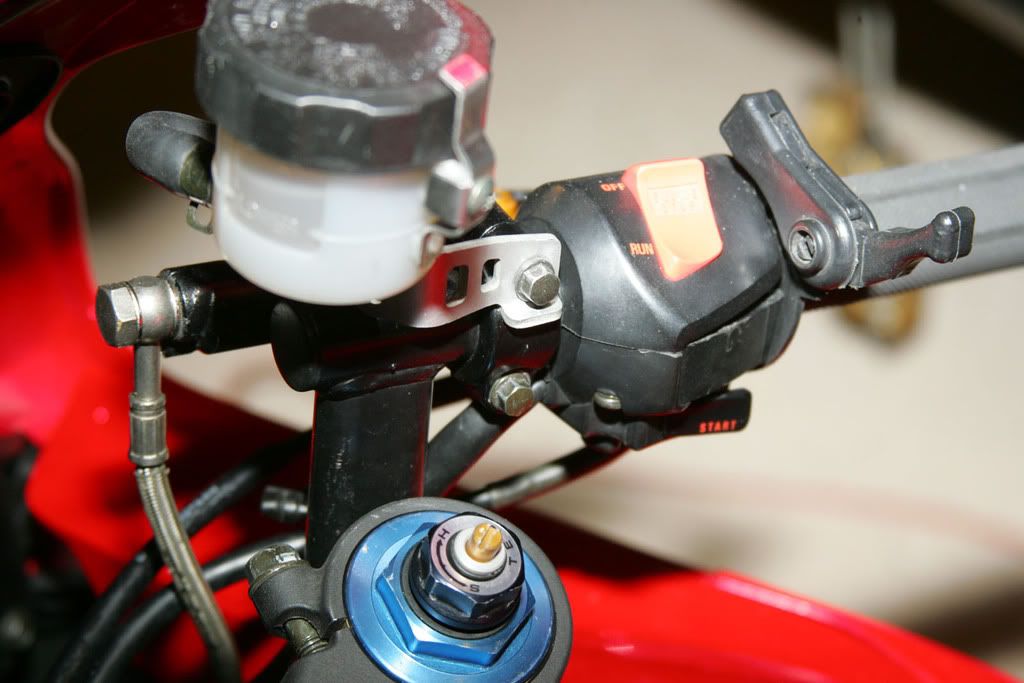
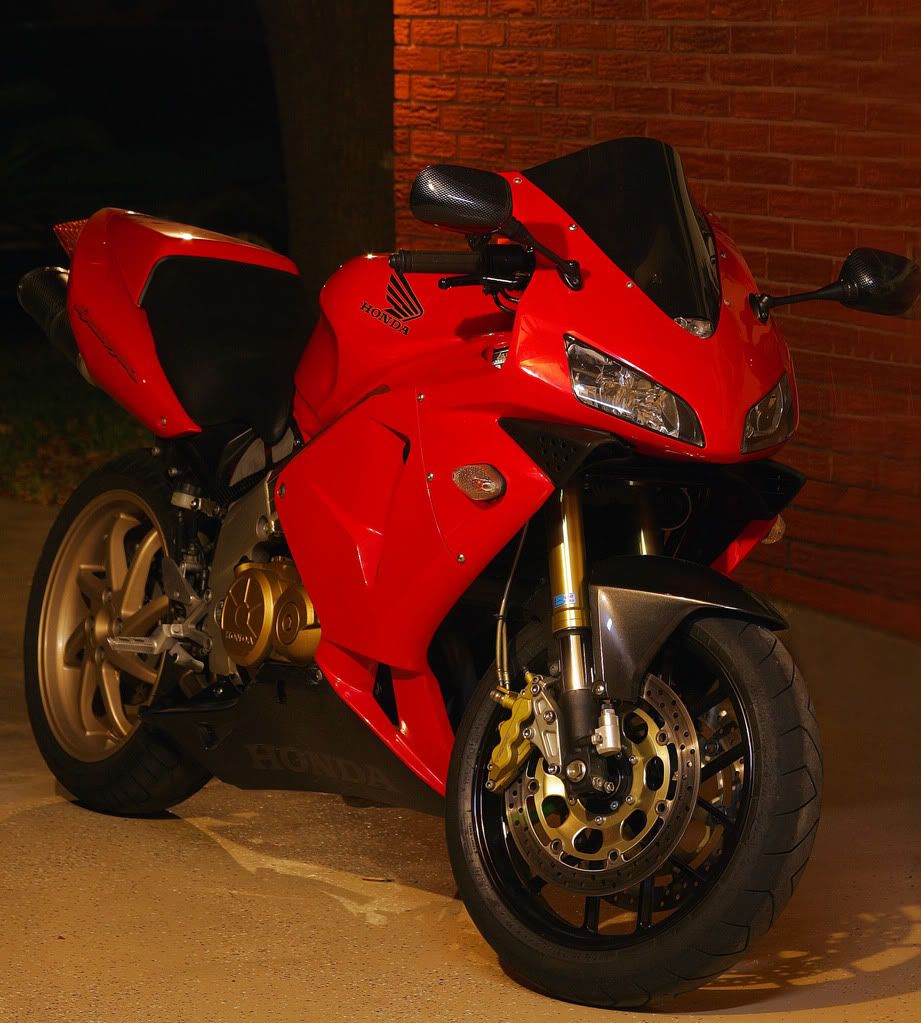
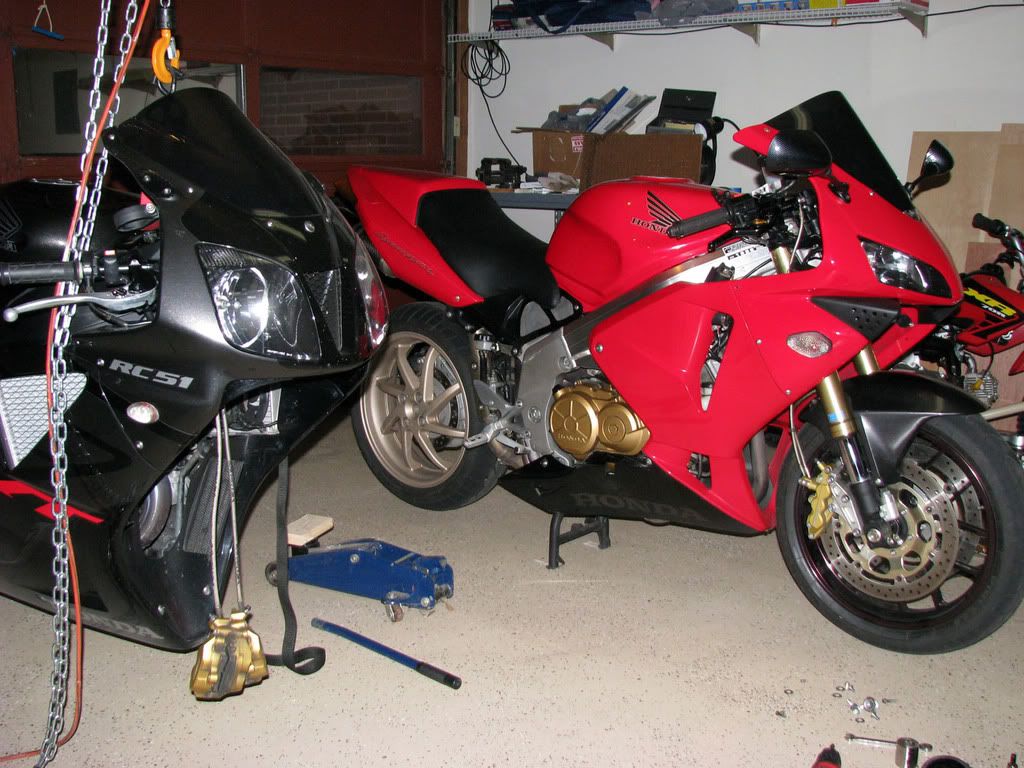
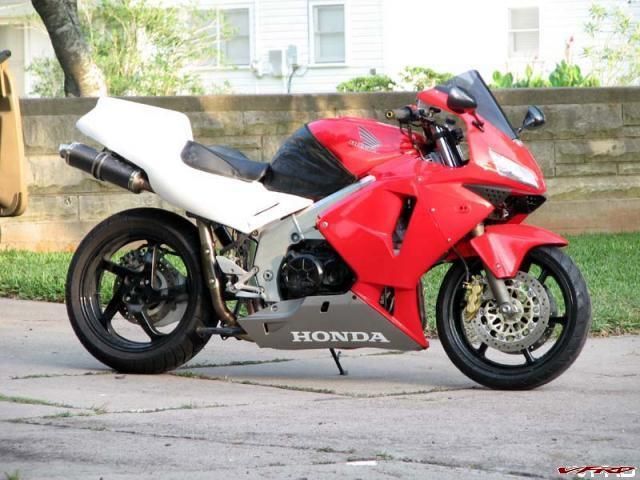
I really luv the look the look and bling factor of the USD forks on my RCBVFR. Not to mention the new found braking power of the larger 310mm rotors and that my gixxer 6p calipers bolt right up too is just icing on the cake. But..... with different offsets the steering is a little, well......, different feeling; however, after an hour + test ride today I am getting use to it. I didn't get a true test of the front end as we had 30-40+mph winds that were totally messing with my lines. :blink: Hell, I was leaned over in the straights! :cool:
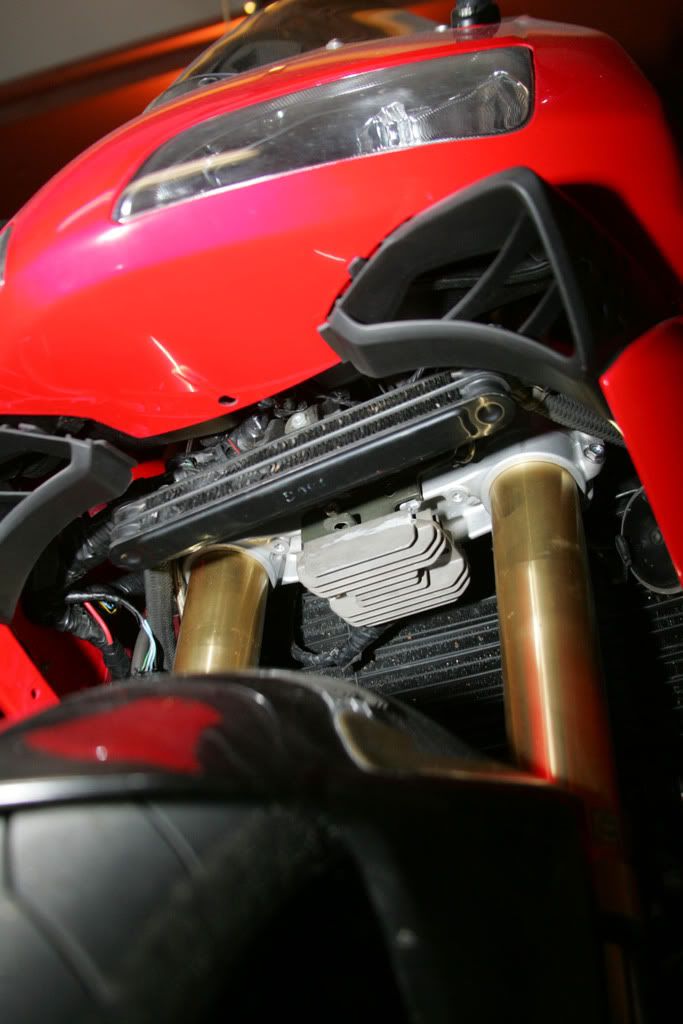
But the biggest obstacle with these on my 4gen custom is steering lock; as in, there isn't any with the cbr1000r lowers. I almost dropped it on a very slow u-turn while caught off guard watching traffic. I spent most of the evening grinding down the stops with a dremel to gain more clearance with the forks still mounted on the bike. I gained a lot more but realized I'll have to remove them for more working room to get the proper clearance. With the now new additional turning lock, I see I might have clearance issues with the radiator if I try to go for more. Hmmm.
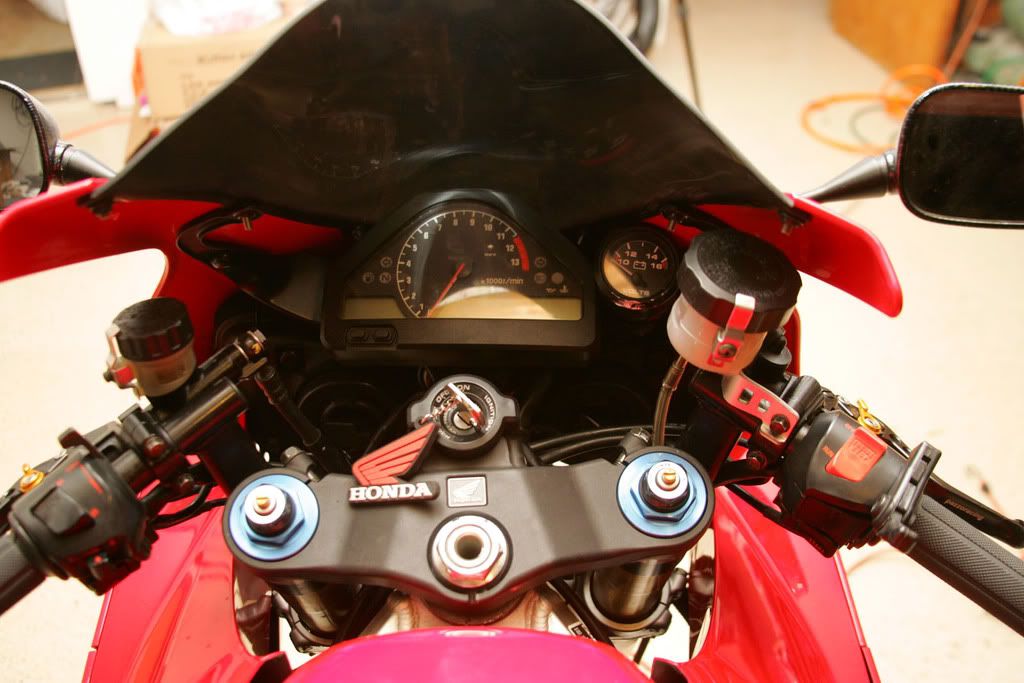
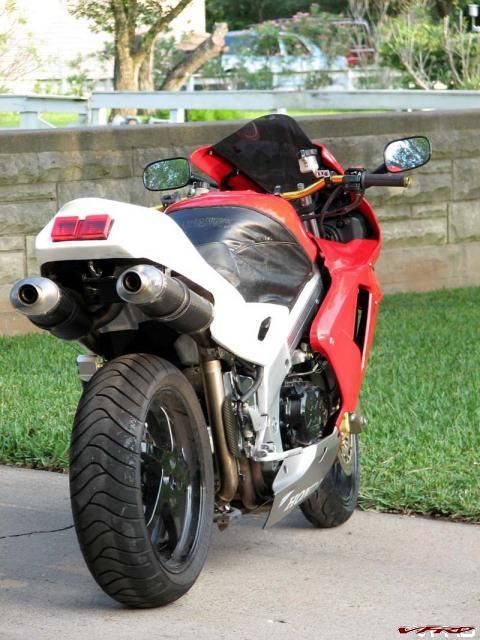
The very tall ducati 900 SS clipons are just about perfect as I have them set all the way up and that is about all my brake line length and fairing upper clearance can take. I used these on my RC51 and got the tinglies on very long rides that I think are due to no bar end weights; gonna have to fix that.
Nice pic of her after getting it all buttoned back up tonight and my new avatar.
-
I'm going to try the RC51 front end on my ol' RCBVFR. I found out that pre-2008 CBR1000R triples are identical to the 929/954 setups so popular with modders which use the stock VFR bearings and races but are becoming somewhat rare and thus high dollar on ebay. I picked up an entire 1000r setup for $90. The offset and stem length are the same on all of them (1000, 954, 929). This pic shows the difference in build substance vs my vtec triples and the difference in overall length due to the gullwing drop of the upper triple.
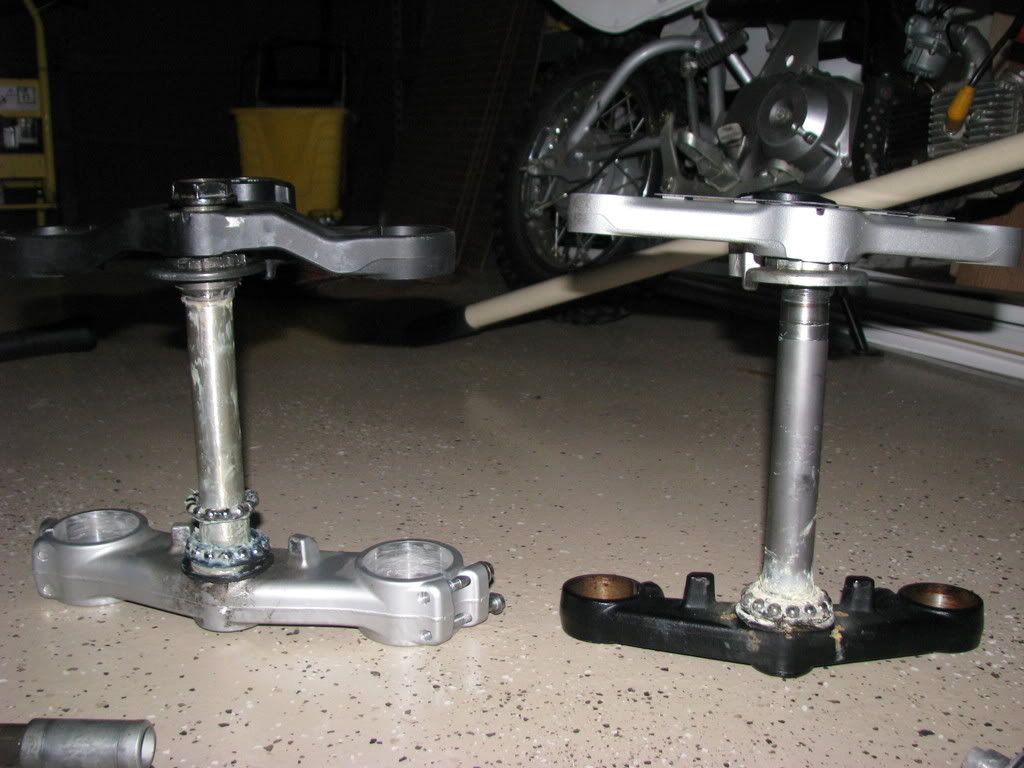
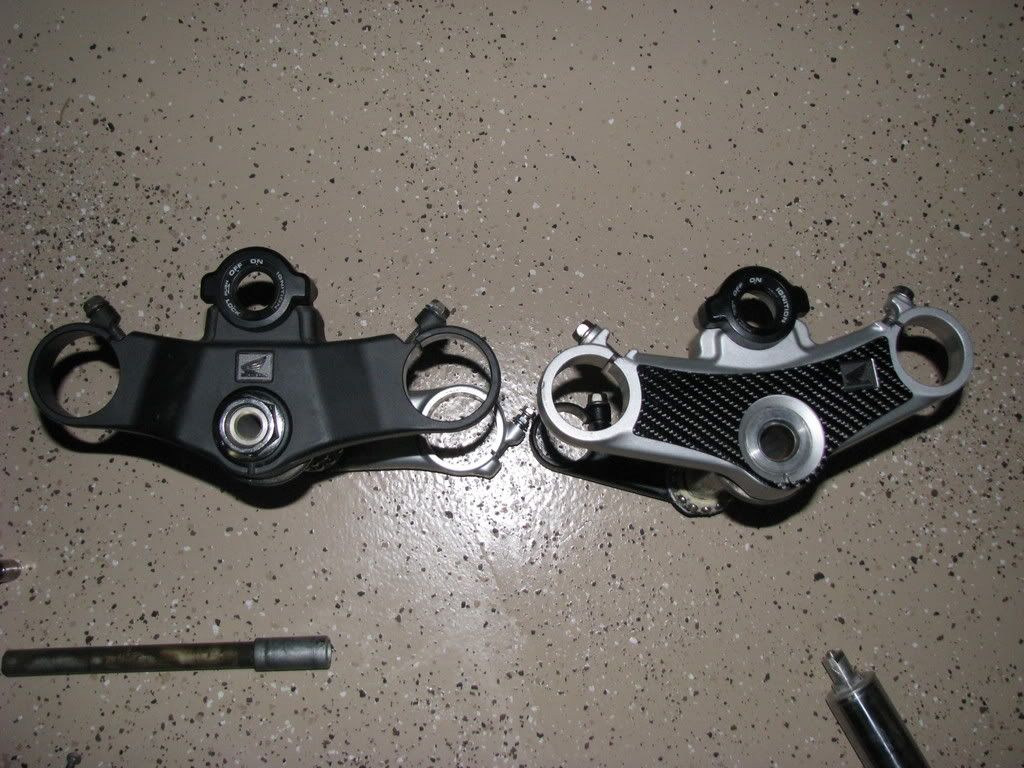
The only negative is the 1000r upper triple is "ugly" (not pictured) as it has mount holes for the electronic steering damper that is (obviously) not used in our applications. Fortunately, I had all ready purchased a 954 upper and used it instead as seen in this pic. It's mounted on the cbr1000rr bottom triple vs my previous setup on right: 2002 vfr triples (with f4i forks)
2005 RC51 (sp2) forks (left) vs F4i forks (right) in terms of length:
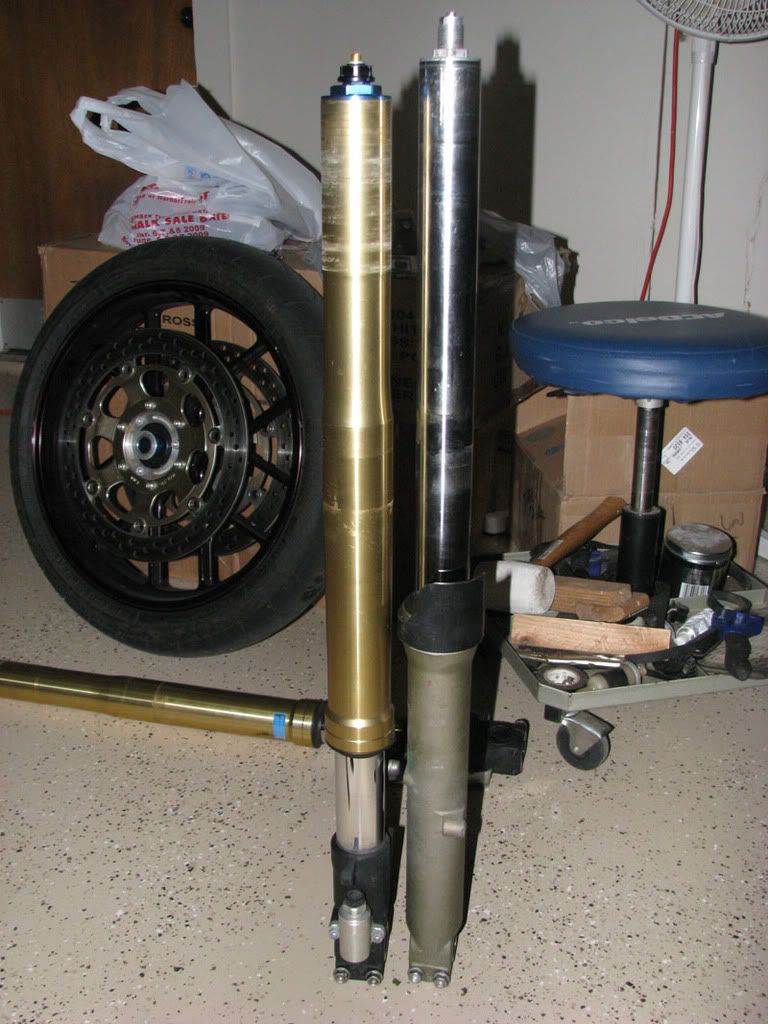
I robbed them off my 51 and installed them tonight but haven't ridden it yet. Looks alone, it's a winner! Report soon.
-
so from the lack of action in this once frenzied thread is one to assume the torocharger is no more?
OR if i pay $5 will i get a happy ending (which is all 5th gen dudes have installed theirs and the 6th gen kit is JUST AROUND THE CORNER!!!)???
+1 What happened? Has anyone who PM'ed indicating a serious interest heard anything?
-
I voted cool mod but I'm more in the mind of going the MUCH more expensive carrozzeria route and gain the unsprung weight benefit. :lurk: But that's not going to happen anytime soon.....

-
Good work - also digging the keggerator! :blush: :cool:
And that wicked awesome 486 on top of it!
-
3. How many of you who changed over to the Buell pegs have stayed with the mod? (ie. did you like the difference enough to stay with the change?)
4. Are the metal pegs without rubber like the OEM pegs comfortable? How much more vibration do you feel if any due to not having rubber pads on top?
#3. Yes I've had the buell mod for over a year now. I also have lowered pegs on my RC51 and getting on my RCBVFR after riding the 51, they feel "too" low. LOL
#4. 4gen comes with stock metal pegs so it was the same feel for me.
-
That is f'n cool. :biggrin:
I have sooooo needed something like this for my RCBVFR but didn't know it existed. I have real CF side covers but even tho' they are very thin they are too rigid and a pain to mount. Previously, I had a soft rubber version that worked well but didn't look all that good. I think I can add this fabric to the rubber versions and have the best of both worlds. Thanks for posting.
-
mrmatt,
Since most of your oem bodywork is in good to great condition and you sell it off, you should be able to fund most of your project. :biggrin: I originally wanted to go the RC45 route on my RCBVFR project. At the time I found the front to be too many headaches and went another direction yet continued on with using a 45 tail. I also wanted underseat pipes so I used a vtec subframe too. Ultimately, I decided to go with the vtec tail and seat too so I do have the white rc45 tail section sans pipe, seat, and tail light cut outs if you're interested in it. It's from airtech.
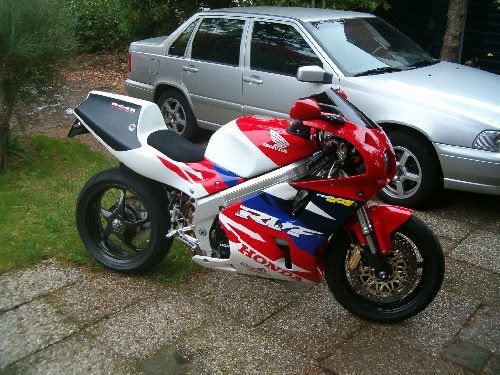
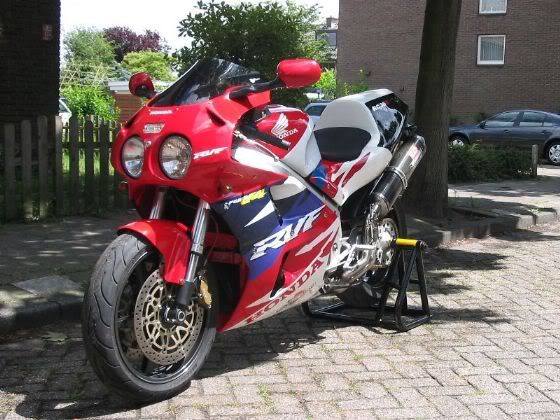
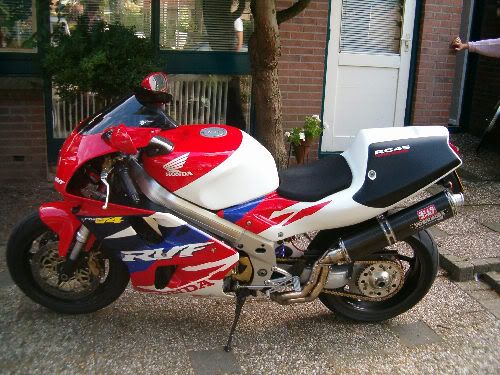
Good luck with your project. If you haven't seen it, there's a Euro rider who did a 4gen/RC45 conversion complete with OEM style paint several years ago. It looks fantastic. I think he used a 45 tank (they grow on trees ya' know) and upgraded both the front/rear suspensions to complete the look. :laugh:
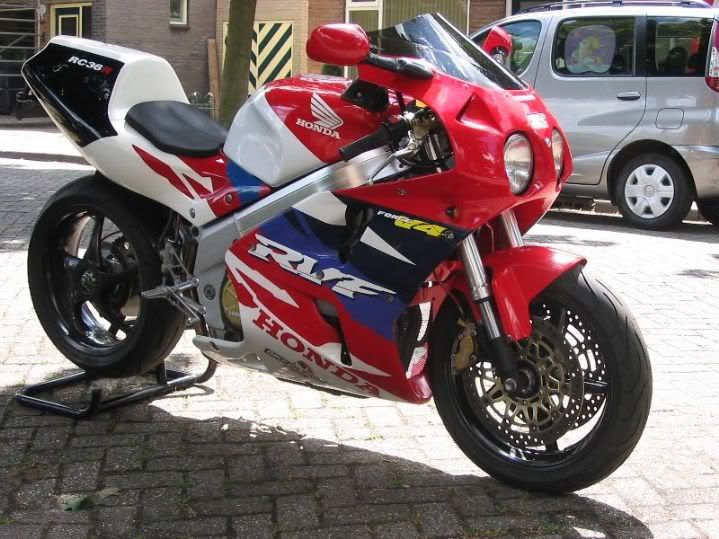
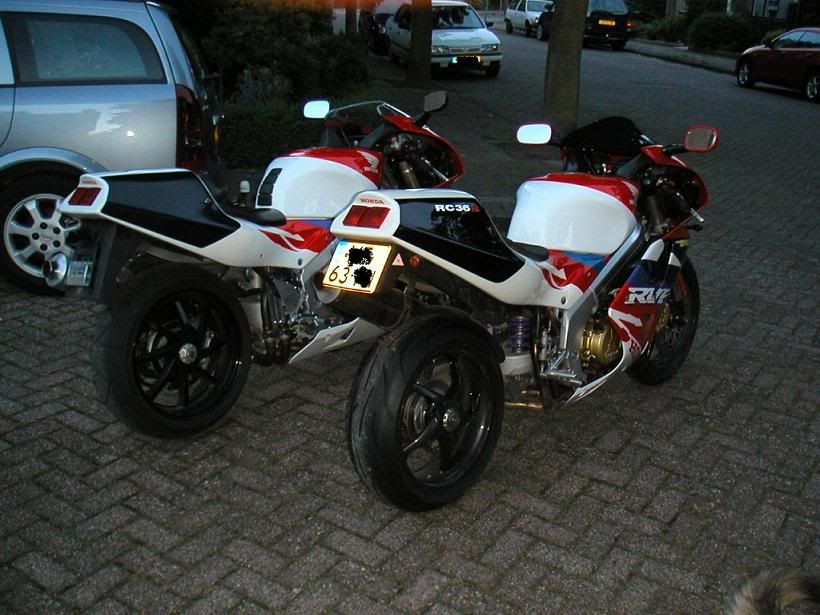
Compared with the real deal:
-
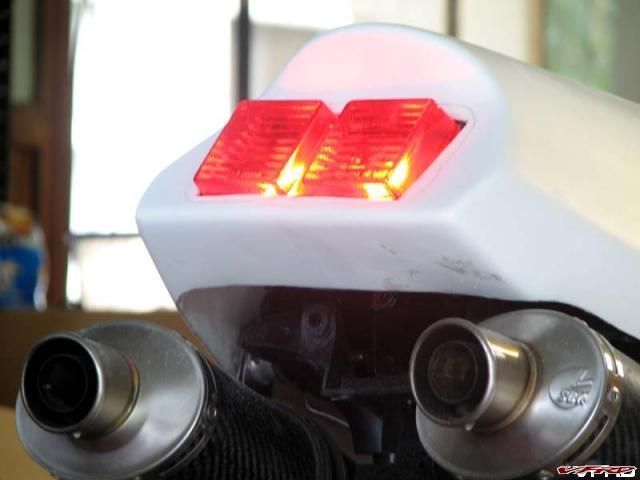
A nice aftermarket cosmetic rear wheel cover cost big bucks from Germany (approx. $150) so I came up with an idea for making one myself. I cut the steering stem off an bent triple I had lying around (doesn't everyone?).
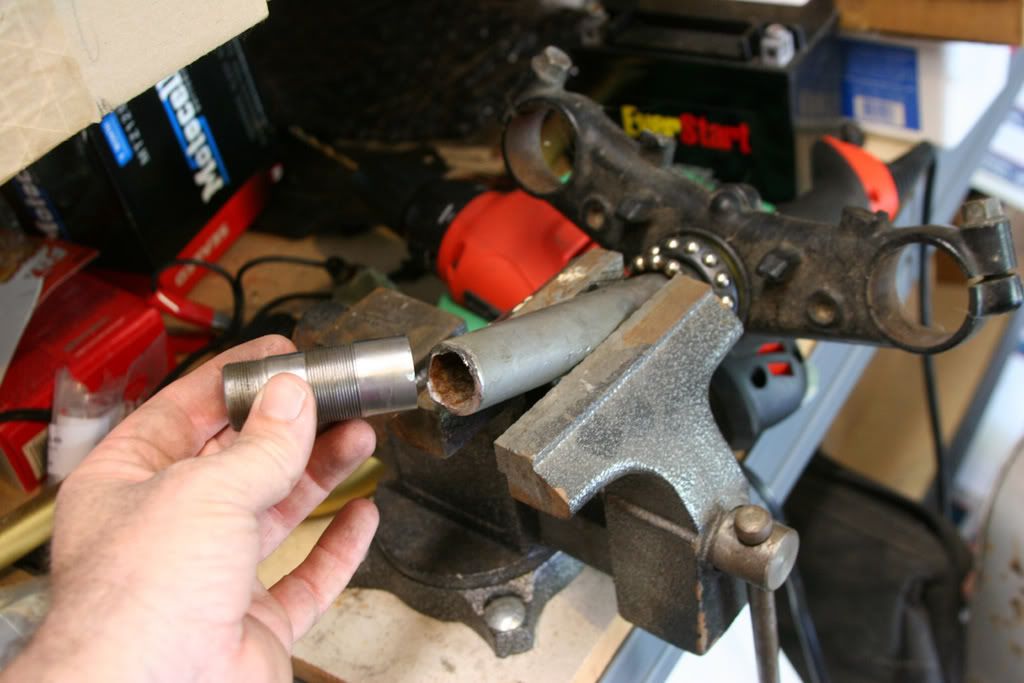
I made the cut so as to include both sets of threads.
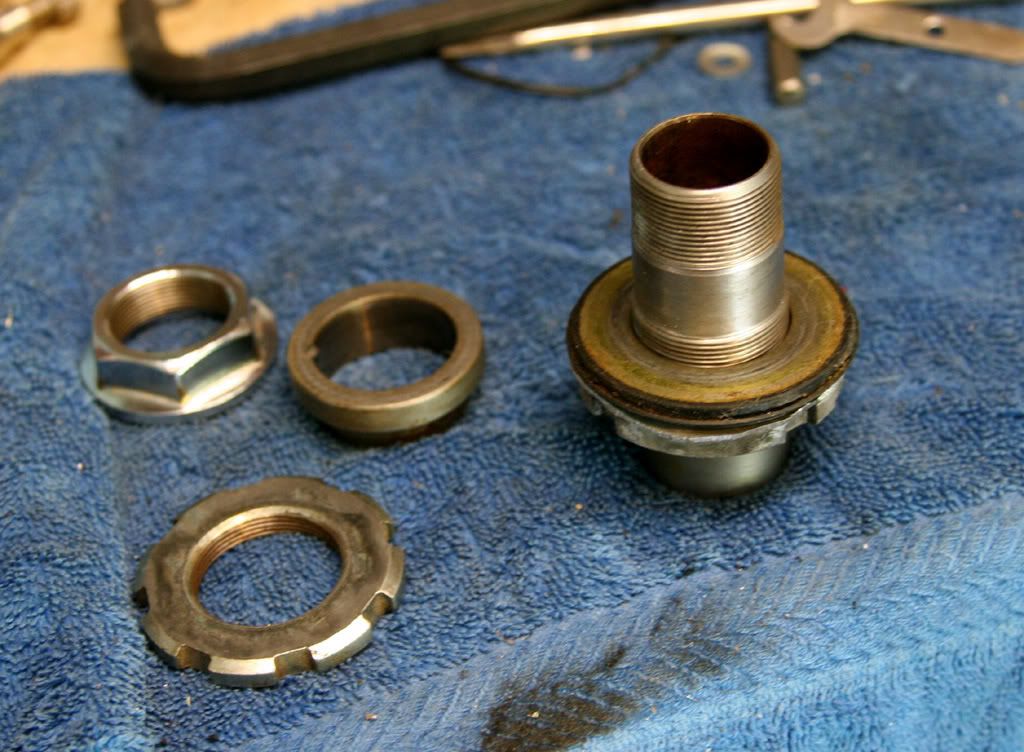
I threaded one set of the leftover washers and nuts for the backside of the wheel
and for the outside, I used the spacer and the nicer chromed nut that typically mounts on top of the triple.
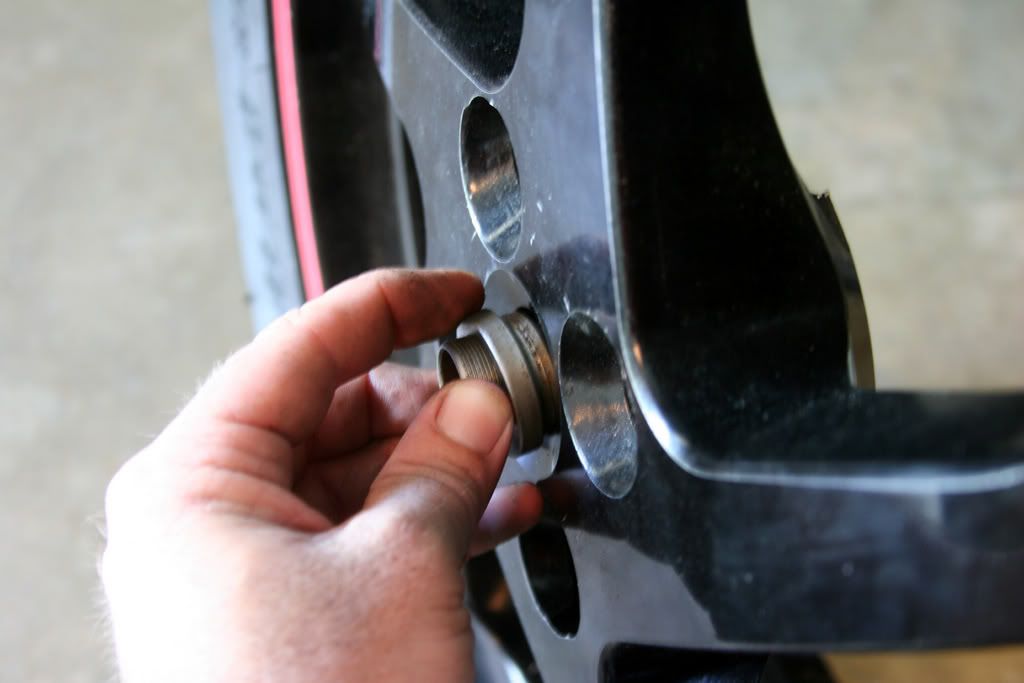
Next I cut a circular disk from some thin metal stock, painted it black to match, installed it over the spacer, and threaded the chrome nut on for a single nut look. The original four lug nuts are still properly torqued down underneath it.
-
No experience with the airhawk but I once tried the seat beads idea; a million taxi drivers can't be wrong, right? :laugh: WRONG.
I've also had several versions of both the Corbin and Sargent seats and they are much better. Yes, they cost ($$$) but they do work plus you can have them built up for your specific needs.
If cornering is high on your list, having anything between you and the seat will dilute feedback and make hanging off (or even simple weight shift) more difficult.
-
+1 on raising the swingarm with a jack. Since the linkage is unbolted and you are only lifting the swingarm and not the entire rear of the bike, not a lot of force is needed so even a helper with 2x4 placed underneath (the board not the helper!) the arm will leverage it up enough to give you more working room to remove the shock. A jack will be more precise during reinstallation tho'.
Also, leave the upper mount in place in the frame until later. Then remove it separately to do the lengthening mod on it.
-
i have checked ebay to no avail and am at a loss
ebay:
http://cgi.ebay.com/Honda-VFR-Sticker-Deca...p3286.m63.l1177
-
What's that saying again, "good things come to those who wait?"
Let's just say that when the time is right, a whole slew of information will become available. In the meantime, though, I can tell you that the bike is running better than ever...
...way better than ever
I don't have a dog in this fight (4gen); however, the "V" word is beginning to form on the tip of my tongue but...... I haven't said it! :goofy:
http://en.wikipedia.org/wiki/Vaporware
Specifically, the last two sentences in the first paragraph: "However, most vaporware would not be considered a hoax since the makers have a genuine intention to create their product, even if it ultimately never materializes. Products with unspecified release dates or long development times that outwardly demonstrate regular, verifiable progress in production are not normally labeled vaporware."
:dry:
-
Here's the pics to my fram mod using black RTV:
http://rides.webshots.com/photo/1221830929035753786vLyPlh
This turns the expensive oem filter replacement into a $5 affair plus I don't have to hassle with oiling and cleaning the other kinds.
-
 1
1
-
-
thats it, it stays.
+1 (for keeping it to spite them all)
:goofy:
Yeah go BIG!
http://www.castlewholesalers.com/ARNOLD-M-...On-Muffler.html
Rcbvfr Frankenviffer Texas Style
in Modifications
Posted
Sorry for the late reply, my email notification for this thread isn't working; need to reset it I guess.
I used cardboard to form the basic templates and then made the second set out of black plastic from a rubbermaid trashcan. The current edition is a copy of the 2nd but cut from thin carbon fiber sheets forming three layers with the screen sandwiched as the second in between.