


magellan
-
Posts
381 -
Joined
-
Last visited
Content Type
Forums
Profiles
Gallery
Blogs
Downloads
Events
Posts posted by magellan
-
-
Engineer porn :biggrin: Thank you!
-
BINGO! Radio Shack has these. Two inputs, one out. I don't know if it cancels one signal over another or merges them, but I'll give give this a try. Out of stock at the moment, though.

-
Magellan,
Thank you for being the guinnea pig on this one!! The biggest reason I quit using my Scala is because I can't hear it for @#$% when out riding. I'll have to look into doing this, or finding someone close who can. +1 on the skull candy earphones....they work great for Ipod's or any other listening device. I even use them as earplugs sometimes; work so good that they drown out a DPS officer's siren!! :laugh:
I hear ya. I hate buying something with high hopes and finding that it gets me only halfway to nirvana. At least now I'm 3/4 of the way.
I wonder if anyone make a two-input splitter with a single female headphone jack and diodes to prevent backfeeding from one input device to the other. If so I could plug in my iPod and just turn it down if my wife or another rider talks to me :idea3: Time to Google...
-
Two months ago I bought a pair of Cardo Scala Rider Q2s for my wife and me. I was mildly irritated by a couple of things, and severely disappointed by a couple of others, but hey, the price is right ($160/unit on eBay) and much cheaper than the best bluetooth communications system out there.
I was irritated by the fact that the system isn't stereo and that the helmet speakers are wired solidly to the comm bracket. You can't unplug and swap in your favorite molded phones or off-the-shelf earbuds. But I was really disappointed that there's no way to attach a bluetooth adapter to an iPod and pair it with the headset. All the iPod adapters use the A2DP profile (for stereo), which won't pair with the mono-based Cardo. I actually tried a couple of different ones and couldn't get them to pair. However, I've been in touch with customer service at Cardo and they say that their own bluetooth adapter (a design several years old) will plug into an iPod and pairs with a Q2. I may try that, but I'm getting tired of buying stuff and sending it back when it won't work.
The only other way to listen to recorded music (the Q2 has an FM receiver, but...blecchh) on a Q2 is via a bluetooth-enabled GPS unit like a Zumo, but I've heard there are glitches with that pairing too (reportedly being worked out).
So I've put the iPod idea on hold for now until I hear of something that works without a hitch, but I decided to do something about the fact that I can't hear the helmet speakers very well at anything above about 60 mph. I have a favorite set of Skull Candy earbuds that I always used before buying the Q2, and I really wanted to be able to plug them into the Q2. So I went to Radio Shack and got a 3.5mm headphone cord extension, cut the female end off, and then (with a nervous lump in my throat) cut the speakers off the ends of the Q2 headset cables.
PROBLEM: after stripping wires and twisting them together, I learned that Cardo uses some kind of super-thin space age film on the bare wires instead of insulating them with plastic. That way they can twist what look like bare wires together in direct contact, get a thinner cable, and have no short circuits. Only the very ends are conductive where they're soldered to the speaker and at the circuit board inside the bracket that holds the removable Q2. I even tried soldering the Q2 wires to my female headphone jack and got nothing through my headphones. Crap!
Finally, I buckled down and opened the case to look at the circuit board, which was nicely labeled with L/R +/- at the soldered terminals. From there it was fairly easy to heat the solder, remove the OEM wires, and solder in my cable with its female jack. Once I screwed everything back together, it was time for a test with the earbuds plugged in. Whoa...so loud it could make you deaf! Good thing the Q2 and my earbuds both have volume controls!
I think I'm going to be much happier now. I can't recommend this mod to anyone who isn't comfortable with tiny wires and very cramped little circuit boards, but if you want your favorite buds with a great bluetooth comm system, this is the way to go.
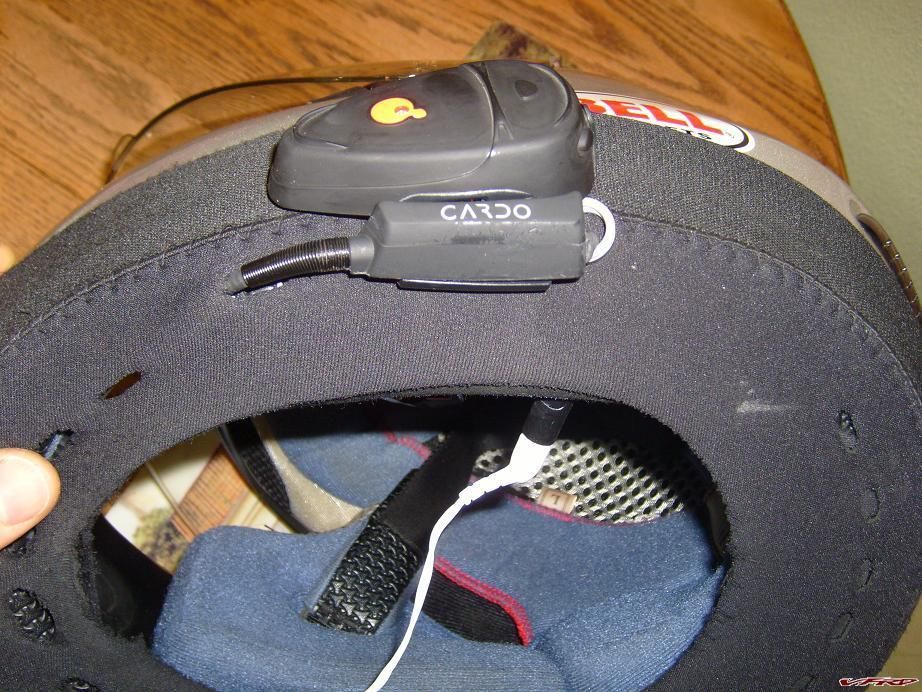
S7000869.JPG Final Product
-
:idea3: to all the above. If you have a gym membership, back extensions are a great habit for keeping the low back strong, posture correct, and hamstrings loose. They make a huge difference for me. If you don't have a gym membership, well... :blink:
-
Might as well get used to "V-Tec-Type" valve actuations, because Honda, along with other companies, are developing this technology for use on most everything.
I agree with everything you said except for this. I dare say no other motorcycle ever will use VTEC as it exists on the 6th gen, not because VTEC is "bad", but because variable-timing on both intake and exhaust cams is the next logical step. VTEC on the 6th gen, ironically, isn't variable timing at all :laugh: - it's an on/off switch for half the valvetrain. Advances made in air/fuel management make that particular type of control illogical in future applications.
As for whether 6th gen VTEC was a good idea at the time, I for one think it was a cool idea that works pretty well. Kudos to a major manufacturer for trying something "out of the box". But it's not without it's drawbacks... :laugh:
-
In my professional opinion, the 5th gen is better and 6th gen is better, gear-driven VTEC will blow your mind, 42-mm fork tubes were a real missed opportunity, a Bill Mayer seat with built-in catheter tube is prefered by 7 out of ten iron-butt urologists, and no matter which one you buy we'll have you convinced that it needs parts from eight other models and sixteen aftermarket suppliers before you put 1000 miles on the stocker.
So there you have it.
-
I'm the most self-righteous person here. I love my kids so much I haven't let any of them out of my wife's womb! So take that!

-
Take some bigger, higher res pics when you get it all back together!
Will do. Should have the fairings painted tomorrow eve, back on the bike Wednesday. Got a 1000-mile ride Saturday!
-
I thought about getting a 5th gen second time around but the looks of the sixth just say "shwing!"
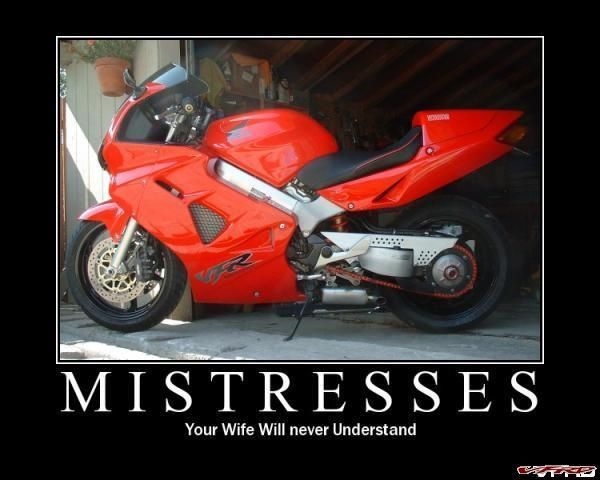
Mistresses.jpg You vant shving? I give you shving!!
-
Bump (my last post was actually made today).
-
I might have missed it so I'll ask. I bought the bike used with 1,000 miles and I don't know if the first oil change has been performed so needless to say I'm going to change the oil and I was wondering if I can start with synthetic oil or not?
The first oil change my bike got I put in synthetic.. Made the Vtec transition smoother actually.. I dont think it will harm it..
:rolleyes: The tolerances within a VFR engine are so exact that you can go straight to synth now. The old advice about sticking with dyno oil until the motor is broken in isn't bad, but it's a lot less necessary now that we have diamond plateau-honed cylinder walls and mirror-polished cam and crank journals straight out of the box. There just isn't a whole lot of rough metal inside the case that needs to be abraded away during break-in on a new Honda.
Just a reminder: break it in the Motoman way. Problem is, you have to apply this method within the first 20 miles!
-
Um...should be able to see it from a plane anyway.
Yeah, you'd have to be an idiot to have your plate at that angle... :beer: :fing02:
2000_0323_201152AA.JPG
-
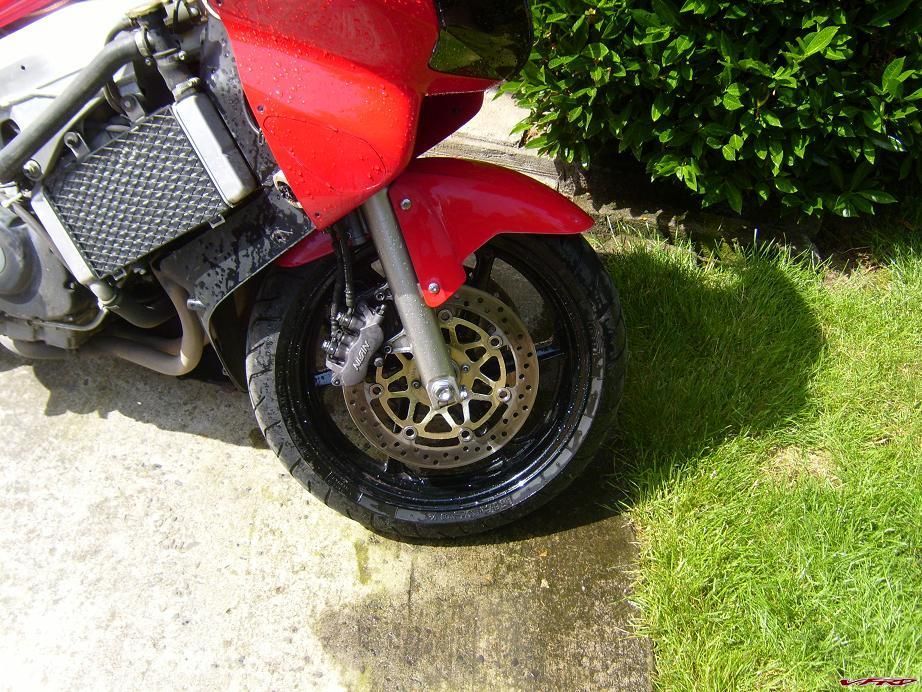
I ride two-up/solo about 50/50 and ride the twisties hard at all times, but like long-mileage touring also. I was an unqualified fan of my first set of Metzler Z6s, but I changed the rear to another Z6 and at about 50% tread it started to wear very strangely, with cupping and feathering only on the left side of the tire about 1/3 of the way around, which of course has completely stolen my confidence in the corners. It isn't cupped much at all in the middle. When I roll into a turn it feels like it goes over progressively for 15 degrees, then suddenly drops in and slides three inches laterally :fing02: I know it doesn't really, but that's what it feels like.
At about 1/3 of the rear Z6's wear, I replaced the front with a Strada (Cycle Gear sale tire) after hearing they were made in the same factory as the Z6s and have similar feel. Bad logic! I don't like the lack of feedback from the Strada, although it's wearing well.
I'd give Z6s another shot (replacing both at the same time), but I think I'm going to have to try the PR2s after all the high praise here.
BTW, I use Dynabeads in both tires, have no other balancing weights, and never feel any vibration from the tires. I highly recommend them.
-
I question your welds

So do I. We are so screwed.... :unsure: :laugh:
-
Best looking Blackbird I've ever seen. How's it handle?
-
Lets say your car can get you 50 miles on a charge, safely. Lots of cars cruise between 300-400Wh/mile. Say thats 2000Wh, or 20kWh. Use your local utility company bill for dollars/kWh and see what that works out to be. Thats a good guestimate on cost. If its 10 cents a kWh, then 10*20 is 2 bucks. This doesn't account for charger inefficiencies, but assume that you'll get 70% of the wall power into the batteries.... so you might use 26kwh to charge it back up, and it would cost roughly $2.60.
Motorcycles and cars average below 4 cents a mile... if that helps
I hate to nitpick, but I know you meant 20,000Wh
:beer: It's also important to note that a car rarely averages as high as 400Wh/mile, especially in city traffic with its stops and starts, but to cruise at 55 mph for an hour requires a fair bit of capacity (e.g. 20 kWh). There are few electric cars with that much storage, but I've heard of a few homebrew EVs with 40+ kWh with lithium-ion. The Tesla Roadster is packing 56 kWh of carefully monitored and liquid-cooled L-Ion and is achieving 200+ miles of real-world range.
Improvements in battery technology are being driven by big investment and scores of manufacturers globally, so I can't wait to see what form factors are available in five years. I'd be happy if I could pack 10 kWh into a L-Ion sportbike with quick-release modular clam-shell packs split along the bike's centerline with highly impact-resistant composite outer shells that mimic lower fairings and numerous software and hardware safety systems to eliminate the possibility of fires or electrocution (picture something like GFCIs throughout the pack to limit voltage, triggered by the tilt sensor, anomalous discharge, or any other significant fault). Then I want to see an EV supersport race series... :fing02:
Top-level racing drives technology, and advances in safe fuel storage and efficiency are two big dividends that have been applied to petrol-powered cars. Similar advances are needed in the EV niche. Since electric drive is already gaining great respect in drag racing circles, it's time for the next big step: wheel-to-wheel endurance racing. One problem is that physics limits storage of electrons with anything near the energy density of gasoline. Even if the theoretical limits of battery storage are reached, gas still wins (but electricity will be be around for as long as the planet. Gas won't...), so in EV racing I imagine numerous pit stops to exchange quick-release packs. Should make for high drama. Wait and see, it will happen in time. :fing02:
-
Simply amazing Doug! Well done :fing02:
:wheel: Fantastic and one-of-a-kind.
-
For the sake of engineering argument on materials, what about a 5000 or 2000 series aluminum such as 2024-T3? The 7075-T6 is strong as hell, but not so great in the fatique end of the stick. -It still maybe the best, just want to here other opinions.
Tim really has his heart set on 7075. As far as fatigue, well, fatigue implies bending, and I don't see these things bending in the least except for on the rare occasions when the fork clamps are loosened. I guess I see it as a matter of choice rather than necessity either way. These things ain't gonna break... :pissed:
-


Oooo, gnarly. Did Honda farm out work to Kawasaki during the 80's or what? :pissed:
I know I'm going to take all kinds of heat for this, but I stand by my earlier suggestion. Clean it, mount it, and use the aluminum brazing rod. When I saw the stuff demonstrated at the Seattle MC show, the guy brazed a glob on a piece of cast aluminum can and then pounded on the glob with a hammer to show how strong it was. It didn't separate, crack or do anything but deform a bit from the hammer blows. Incidentally, a broken case from an old Norton or something was on display, repaired with the brazing rod and polished out beautifully.
Why not try it?
-
Can't wait to see it all in 7075-T6. Now hurry up so I can finish assembly :unsure:
-
Not an easy job to weld, the parts will need to be clean and preheated. Then there is still the fact that it's cast. It's doable, but will not be quick & easy. Might not be cheap either.
I wonder if it can be done in the bike? Or are we talking about a tear down to the bare case? If the header, filter and maybe frame rail are removed I think there's room to weld it, I don't know how clean you can get it.
Yes, to do it right, you would need to pull the motor and tear it down. I wouldn't trust the weld if I couldn't have a bare, clean part in my hands as a welder.
Cast aluminum has millions of tiny(sometimes not so tiny!) air pockets. The second you start an arc on it, the material starts to melt away(it has to for weld penetration), and the air bubbles out, creating new ones at the same time. this leads to a loss of structural integrity in both the new weld, and the area around it. In reality, the area immediately around the new weld will crack before the weld does.
I've seen this stuff in use, and it's pretty damn amazing. I would absolutely try it if it was my bike. The worst that can happen is it cracks out again and you have to pull it apart for TIG. You can get it cheaper on ePay. Just scroll down and select qty. You will still need to use solvent and a metal detailing brush to get the area really clean before brazing. I'd also rough up the surface as much as possible with sandpaper to assure a good bond.
-
Since I lowsided yesterday, I decided to go ahead and bite the bullet and repair my broken fender by cutting it down (as if I didn't have enough to repair after crashing). I didn't remove material quite as aggressively as you, Seb, and the rear I left alone entirely. I think it came out too well; I can hardly tell I did anything!
S7000359.JPG Before...
S7000830.JPG ...and after. Still needs a repaint.
What do you think?
EDIT: Weird. In the reduced size photo, it looks like the transition from the horizontal line to the one sloping downward is very sharp, but it's not. Look at the full size pic.
-
Wonder no longer for I am here temporarily to explain all.
I am completely satisfied :fing02: ...that you guys have too much time on your hands
I miss those endless days of tinkering sometimes - laying on the showroom floors of Ducati dealerships with a tape measure...
Owner came by one day and said it would be faster if I just bought one rather than make my own :angry:
Yet another OCD victim. :rolleyes: You guys have the nicest toys...
Mineral Vs Synthetic
in Sixth Generation VFR's
Posted
I pay about double for synthetic oil and change it half as often. I run the bike as hard as I want to with complete peace of mind, something I would not have running mineral oil. I've scraped too much sludge out of engines to want it in my VFR. Don't let anyone kid you; dino oil fails much more quickly under load and builds up higher acid levels before a change. Even some of the premier brands of dino oil are crap that readily leave sludge and varnish behind.
For me it's not even a question.