


magellan
-
Posts
381 -
Joined
-
Last visited
Content Type
Forums
Profiles
Gallery
Blogs
Downloads
Events
Posts posted by magellan
-
-
Dayum, that looks good :blink: How about some pics of the finished product :beer:
George brought over the front fender for me as a preview and pics don't do it justice.
We also have another project in the works for George's buddy Paul. It's an '86 VFR750F with a freshly rebuilt engine (hasn't even been started yet) and plastics finished with (get this!) spray-on bed liner. It's going to be completely cool (and easy to repair if damaged!), but you'll have to see it to believe it. I'll post pics asap.
-
Very cool! Thanks for inviting us along. :thumbsup:
-
Threatening people with all this math is a fantastic way to encourage weight-loss among VFRD folk. Thanks for always looking out for us, HS! :P
-
 1
1
-
-
I understand that one off stuff and custom stuff is $$$ but for $1000 my Micron Carbon high mount is looking better and better.
Thanks for raining on my parade. LOL
F&F
Yes, but a nice underseat setup is even better than a high-mount, especially if you want luggage options.

-
I've been :lurk: ing here since this thread began, but it's been a busy holiday season... First off, great work among the fabricators here. It would be amazing if we collectively came up with the means to assemble a reasonably priced kit. I for one like dual outlets, regardless of whether that means two mufflers or one. It just fills the space nicely. License plate placement is another issue, especially if you don't like the idea of it hanging way down below your beautiful muffler mods. That's the reason I went with mine above the muffler, even though it unfortunately obstructs the rear view of the muffler a bit.
The reason I eventually abandoned my underseat setup for the tok tokkie underbody design was that I ride two-up all the time and we were hitting the pipes and muffler with the rear tire on big bumps, sometimes hard enough to send an impact up through the seat. Another problem I had was melting bits on the undertray. I tried to cheap out and modify the stock plastic undertray, which later melted in several spots (despite heat-resistant sheeting between the undertray and exhaust). Last but not least, the muffler guy I used did a hurry-up job on the mid-pipe-to-muffler section with mild steel, and after seeing veefer800canuck's stainless and Wolf mid-pipes, I'm pretty underwhelmed with mine.
So I built one like tok tokkie's last spring. After living with the underbody system for a season, I found it had several significant drawbacks (not that I think tok tokkie is anything but brilliant for designing it!!), so now I'm back at the drawing board... again... <_<
At this point, I'd recommend the following for any complete underseat system: An undertray made of thin ceramic-coated aluminum (I think Rob would agree that even thinner sheet than he used would be fine) with as much room as possible underneath for the bend connecting the mid-pipe and Y-pipes (it needs to be as *up-and-forward* as possible to avoid tire contact later. Ovalled pipes (much as on the 6th gens) would be the best solution yet. Carbon-skinned cans would be best for limiting heat transfer. The grommeted stays for the tail plastic (at the back by the lights) need to be replicated to avoid cracking plastics (as happens with Wolf systems unless modified). Re-positioning of the CPU is required. Shimming the shock (especially if you ride two-up) will likely be necessary, no matter how compact/ideally routed your system is, to avoid tire-to-muffler/pipe contact over big bumps. License-plate location is still an issue, maybe one best left up to the individual (I recommend Lite 'N Bolts for license-plate lighting).
First one to assemble a plug-and-play kit that addresses all of the above for under $1000 wins!!!! :D
-
Beautiful work. I'm a little concerned about your seat cowl cracking without the support of the two posts with grommets back by the lights. In the photos it doesn't look like there's anything there for support (ala Wolf). Did you see what veefer800canuck did to address the problem? It should be easy to do on yours too.
Congrats on a sweet setup! :biggrin:
-
New pics:
Notice the street sign...
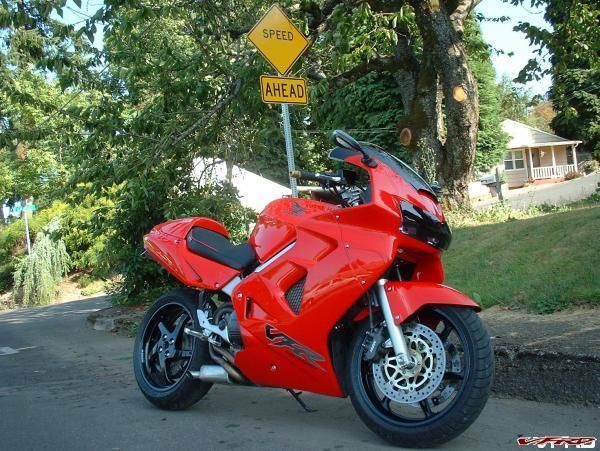
2000_0323_201251AA.JPG
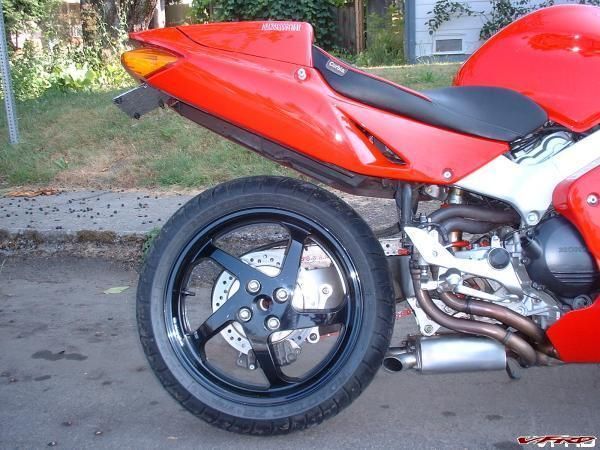
2000_0323_201313AA.JPG
2000_0323_201529AA.JPG
-
unless pockets are made for the lugs in the muffler.
I also found myself wishing for this. Additionally, about 4mm could be shaved off the bottom of those lugs without compromising their strength at the threads. Might be worthwhile for that extra little vertical adjustment if I touch down again.
On a funny note, I had a guy looking the muffler over yesterday and admiring the handiwork. Then he said, "But I don't like the outlets. They look cheesy. They should come up beside the tire, like this..." and with his hand drew a line up to the hub center. "...like on a Harley with the tips of the pipes turned upward." :huh:
Sure glad he didn't design this system! :blink:
-
I thought about that shape as well, but retroactively. I think it would be fairly easy to cut the sides right off the muffler and weld in two flat pieces angled out as you've shown.
I think I've probably got mine situated now. I was able to move the whole thing up about 1/4" at the front and 3/8" at the rear (had to lose most of the clearance between the suspension link and heat shield). Then I took a body hammer and very carefully hammered a taper into the lower right rear corner of the muffler, filed and sanded it smooth, and called it good. I'll have to load up and go for a ride to see if it's the final solution, but I think it'll do.
-
Have you really left the O2 sensors on?
Now who is going to be first to extend the fairing right to the back? Would look nice but difficult with headers on right sticking out slightly but can on left even more in the way & also the side stand. Not high up my priority list but very high on my wish list. Your turn?
You say it is noisy. What tubes have you got inside at this stage?
I have perforated tubes both for inlet and outlet. I may go ahead and leave it loud for a while and see if it bothers me. I certainly love the quality of the sound, but I may want to take it down a few decibels with solid outlet tubes.
The O2 pigtails are of course connected to nothing. I simply didn't go to the effort of finding or making plugs yet.
-
Busy day today. I got the system gasketed, put together and mounted without a whole lot of fuss, but it was a royal pain to get the right-side (used to be) centerstand bolt in past the headers. Oddly, it was much easier with the larger-diameter 5th gen headers in place. I'm very happy with the result visually, but it's no quieter than my underseat setup was (minor issue), so I may play with some stainless steel wool between the inlet and outlet pipes and see what that does.
As for practicality, I no longer have to worry about loading up the luggage and wife on the back and hitting the exhaust with the rear wheel.
Thank you Ralph, for designing this remarkable muffler and sharing your ingenuity. I'll never fail to mention that this wasn't my idea when people see it (besides, it's kind of fun to let them know it was custom-designed for me in South Africa
)
The Whole Shebang.JPG

Front.JPG

Lovely Profile.JPG

Rear Three-Quarter View.JPG

Side View Close-Up.JPG

Mrs. Magellan.JPG
I'll post up a .wav file as soon as my laptop comes back from the repair shop ( I use it to record)
So whaddya think?
-
Well, if you've been desperately bored enough to follow the story of my difficult choice of headers ('98-99 larger diameter pipe vs. '00-06 smaller diameter pipe but perfect alignment of pipes for tok tokkie style muffler), I can finally say I've gone for the easier fit of the late-model cat-equipped headers. My catless exhaust may very well be sold this weekend (if I can bear to part with them).
As it stands, Fred has my muffler tonight and is slightly adjusting the position of the mounting brackets. Everything went smashingly until we realized that the inside of the rear headpipes was rubbing against the engine casting where it curves under to join the front head pipes. I also wanted to more precisely center the muffler with the bike's longitudinal centerline. Anyway, it should be done tomorrow (fingers crossed).
Interesting note: I cut the loop the cat bolts to off the bottom of my block (yes, it's on the '98s too. Mmmm...), seeing as how my bike didn't have one and won't be needing one. Removing this obstruction allowed the muffler to be mounted further forward than tok tokkie's (he left the loop in case he ever wanted to go back to the stock exhaust), so I didn't need stub tubes to be welded to the headers. I simply welded flanges to the carefully flattened end of the headers and voila, I'm ready to bolt on the muffler.
Weld like the wind, Fred!!

2000_0310_011620AA.JPG
-
Life has a weird way of changing one's expectations.
I don't weld stainless, so I called a friend of a friend yesterday to see when I might schedule an appt. He asked, "What are you doing this afternoon?"
So, much to my surprise, we spent all afternoon and evening welding up and polishing my Tok Tokkie Special . It's a beauty!

2006_0715_192406AA.JPG

2006_0715_192438AA.JPG

2006_0715_192346AA.JPG
This is Fred, the evil welding genius.
Now all I have to do is cut the cat off my spare headers, weld on the flanges that mount to the muffler, line everything up on the bike, tack it all into position, and do the final weld-up. I think I can do it all this week with only several hours of downtime.
-
Haven't I heard that riding two-up is no-go with a Wolf-type system? Do you ever have a pillion, Rob?
-
What are your impressions after living with the system on your bike for a while now? Is the Db level comparable to an aftermarket slip-on (you have Mark II on the bike now, right?), or louder? Any clearance or fit issues? Are you content to be without a centerstand while far from home? And of course we'd love another pic or two...
-
Whoo Hooo, I'm on the homepage! It was fun to review this thread and see where I stand on the wish list. I still need to get JetHotted, but I did get a stock windscreen (painted black on the inside), removed the dumbo ears and shimmed the shock. I have no excuse for not JetHotting and getting an A/F meter next.
Since doing this mod I've removed a bit of the steel wool to cure a restriction problem after some of it got loose within the muffler and plugged the outlets. The bike is louder as a result, but I love it and ride with earplugs anyway.
Hey, maybe I'll just build a Tok-Tokkie muffler when I get tired of this one... :idea3:
-
I have a complete spare set of sliders for a 6th-gen. My bet is that they will just fit straight onto a 5th gen. I will measure them up for you, but I'd say they are at least 6", plus the smaller diameter bit that slots into the bolt recess.
Kaldek
It'll be good to know what you find out. Oxmole came up with this...
 border='0' alt='user posted image' />
gallery_3392_431_70707.jpg
I'm thinking I can live with the spindle that fits into the frame recess being only 7/8" in diameter (I can shim it with a sleeve or leave as-is), but the impression I get is that 5th gen bodywork requires a longer slider, something at least 6" long (according to Trace's eyeballing of the situation). If you find that your sliders are longer than theoxmole's - but you both have the 6th gen kit - that would be odd :rolleyes: . Let us know what you find.
-
Trace has been trying in vain to get Motovation's help developing a kit for the 5th gen, but they blew him off oh so harshly, so we're gonna do it on our own. We need some info, though, if one of you fairing-drilling maniacs would be willing to grab a ruler...
How long is Motovation's 6th gen slider (6" plus would be good, as with many things in life :P )? And what is the diameter of the machined insert that fits the recess in the frame?
Also, if you know anyone who has these for an RC51, it would be good to have the same info for it.
Thanks in advance!
-
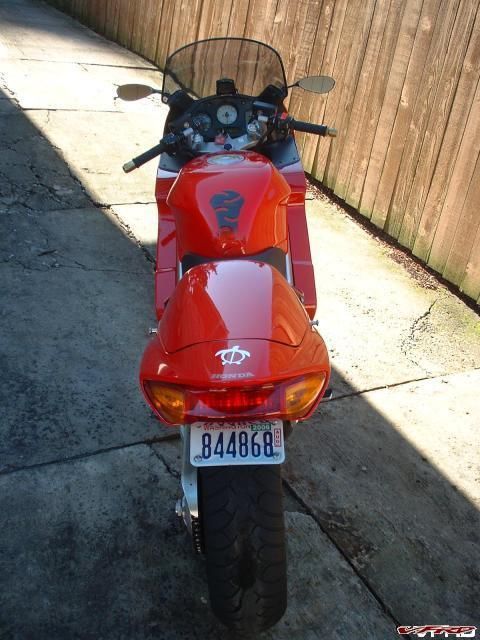
Very smooth, Magellan.
Two suggestions:
1. Lose the left peg feeler (or find the right-hand one)
2. Lube the chain
: )
You're way too perceptive, Phantom! I knew there was something else I needed to do the other day. The feeler that's on there is going into the drawer with a couple others I've got. I lubed the chain right after the pics were taken, but I need a new one badly anyway. It's on the list.... :D
-
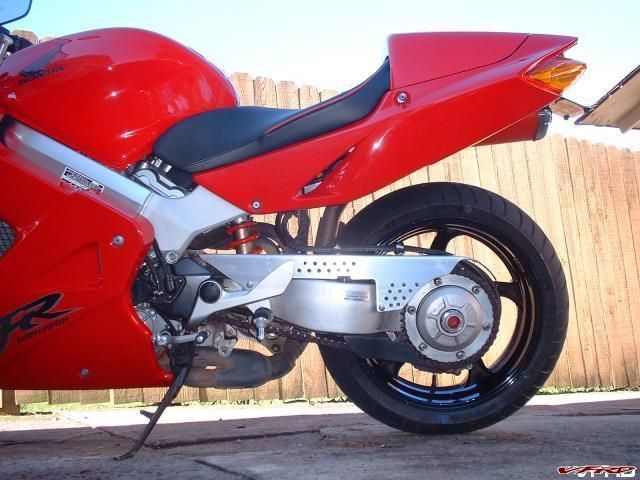
Just a little update: I removed the center stand and cleaned all the crud out from behind where the right-side heat-shield was. I can hardly wait to get the exhaust JetHotted, get the turn signal pods removed, and fit a stock windscreen (at least for local riding and track days). I also have an idea involving a small rear fender attached to the body instead of the swingarm, to keep crap off the shock and back of the engine. It'll all happen in time. Here are a few new pics:
 border='0' alt='user posted image' />
Can't Wait to JetHot This
 border='0' alt='user posted image' />
No Center Stand, No Clutter
 border='0' alt='user posted image' />
Getting Better...
 border='0' alt='user posted image' />
What Exhaust?
 border='0' alt='user posted image' />
All the Modding It Needed.JPG
 border='0' alt='user posted image' />
Skinny Runway Model
-
what about using this thing to trigger a relay to activate the vtec solenoid... thereby achieving a variable vtec engagment point?
Can you count on the electronics of something that is only designed to trigger a light? I don't doubt that the shift light hardware is decent quality, but using it to control the VTEC engagement might be pushing the envelope. Does the light operate at a full 12 V? If so, I suppose it would work for a relay, but I'd still want the light to work so I would know when the VTEC was engaging.
Heck, try it. I think it's a hell of an idea.
-
Very interesting. Has the performance of the bike been comprimised in any way?
It's just a hair faster due to the slightly wider-open exhaust, and I have no issues with stumbling or surging under any load/rpm. Couldn't be happier. :goofy:
-
Good write-up. I'll be doing this before spring. And yes, I'll use masking tape... :P
-
Stupid question. The epcv unit, I am assuming, is not using a ground to the frame? Doesn't appear so. But if I don't over think, I usually screw myself. And I'm no good at electrical.
Thanx!
No, it doesn't. Even if it did, you'd be okay with a homemade metal strap as pictured above.
Son Of Frankenviffe
in Modifications
Posted
Wow, I guess I must have been under a rock to have missed this thread 'til now. I was wondering what had become of Ralph lately...
She was a beauty, but just a machine after all. Glad you're okay Ralph!!