vfrpete
-
Posts
6 -
Joined
-
Last visited
vfrpete's Achievements
")


-
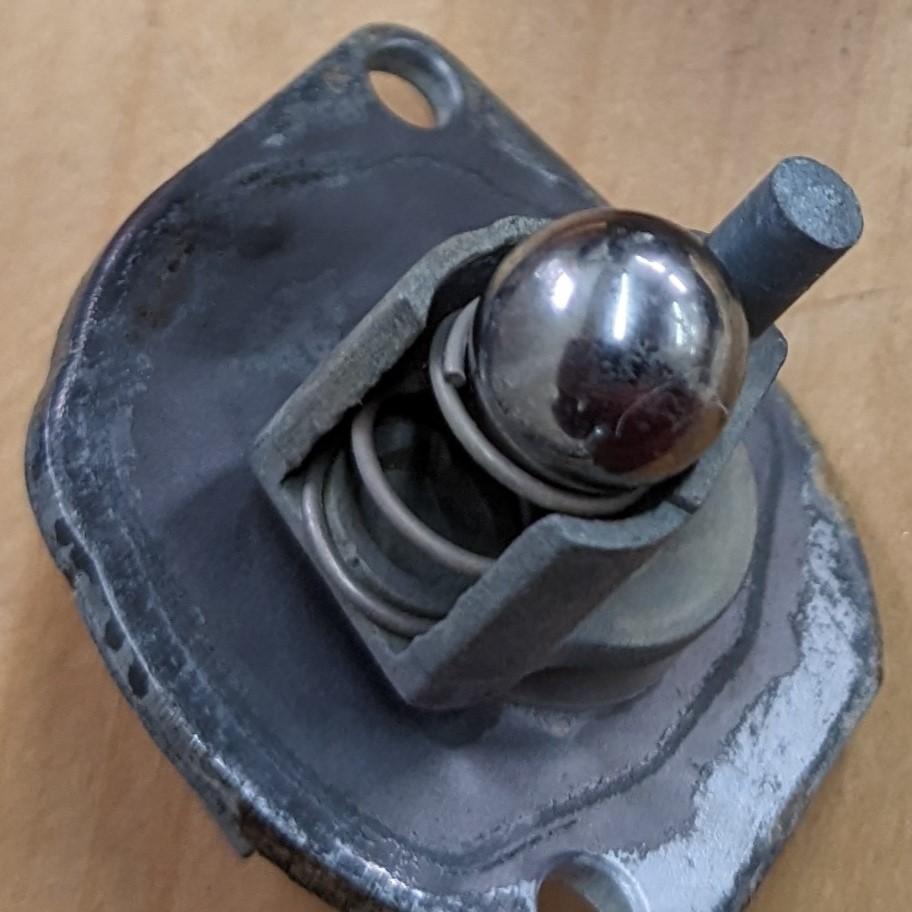
Reassembled and was disappointed to find the petcock dribbled from the outlet when in the “off” position. I think this spring is old and tired. Replaced with a stiffer longer spring. It's a little harder to switch the petcock on/off but that seems to be what it needs to seal. Success! No leaks now!

-
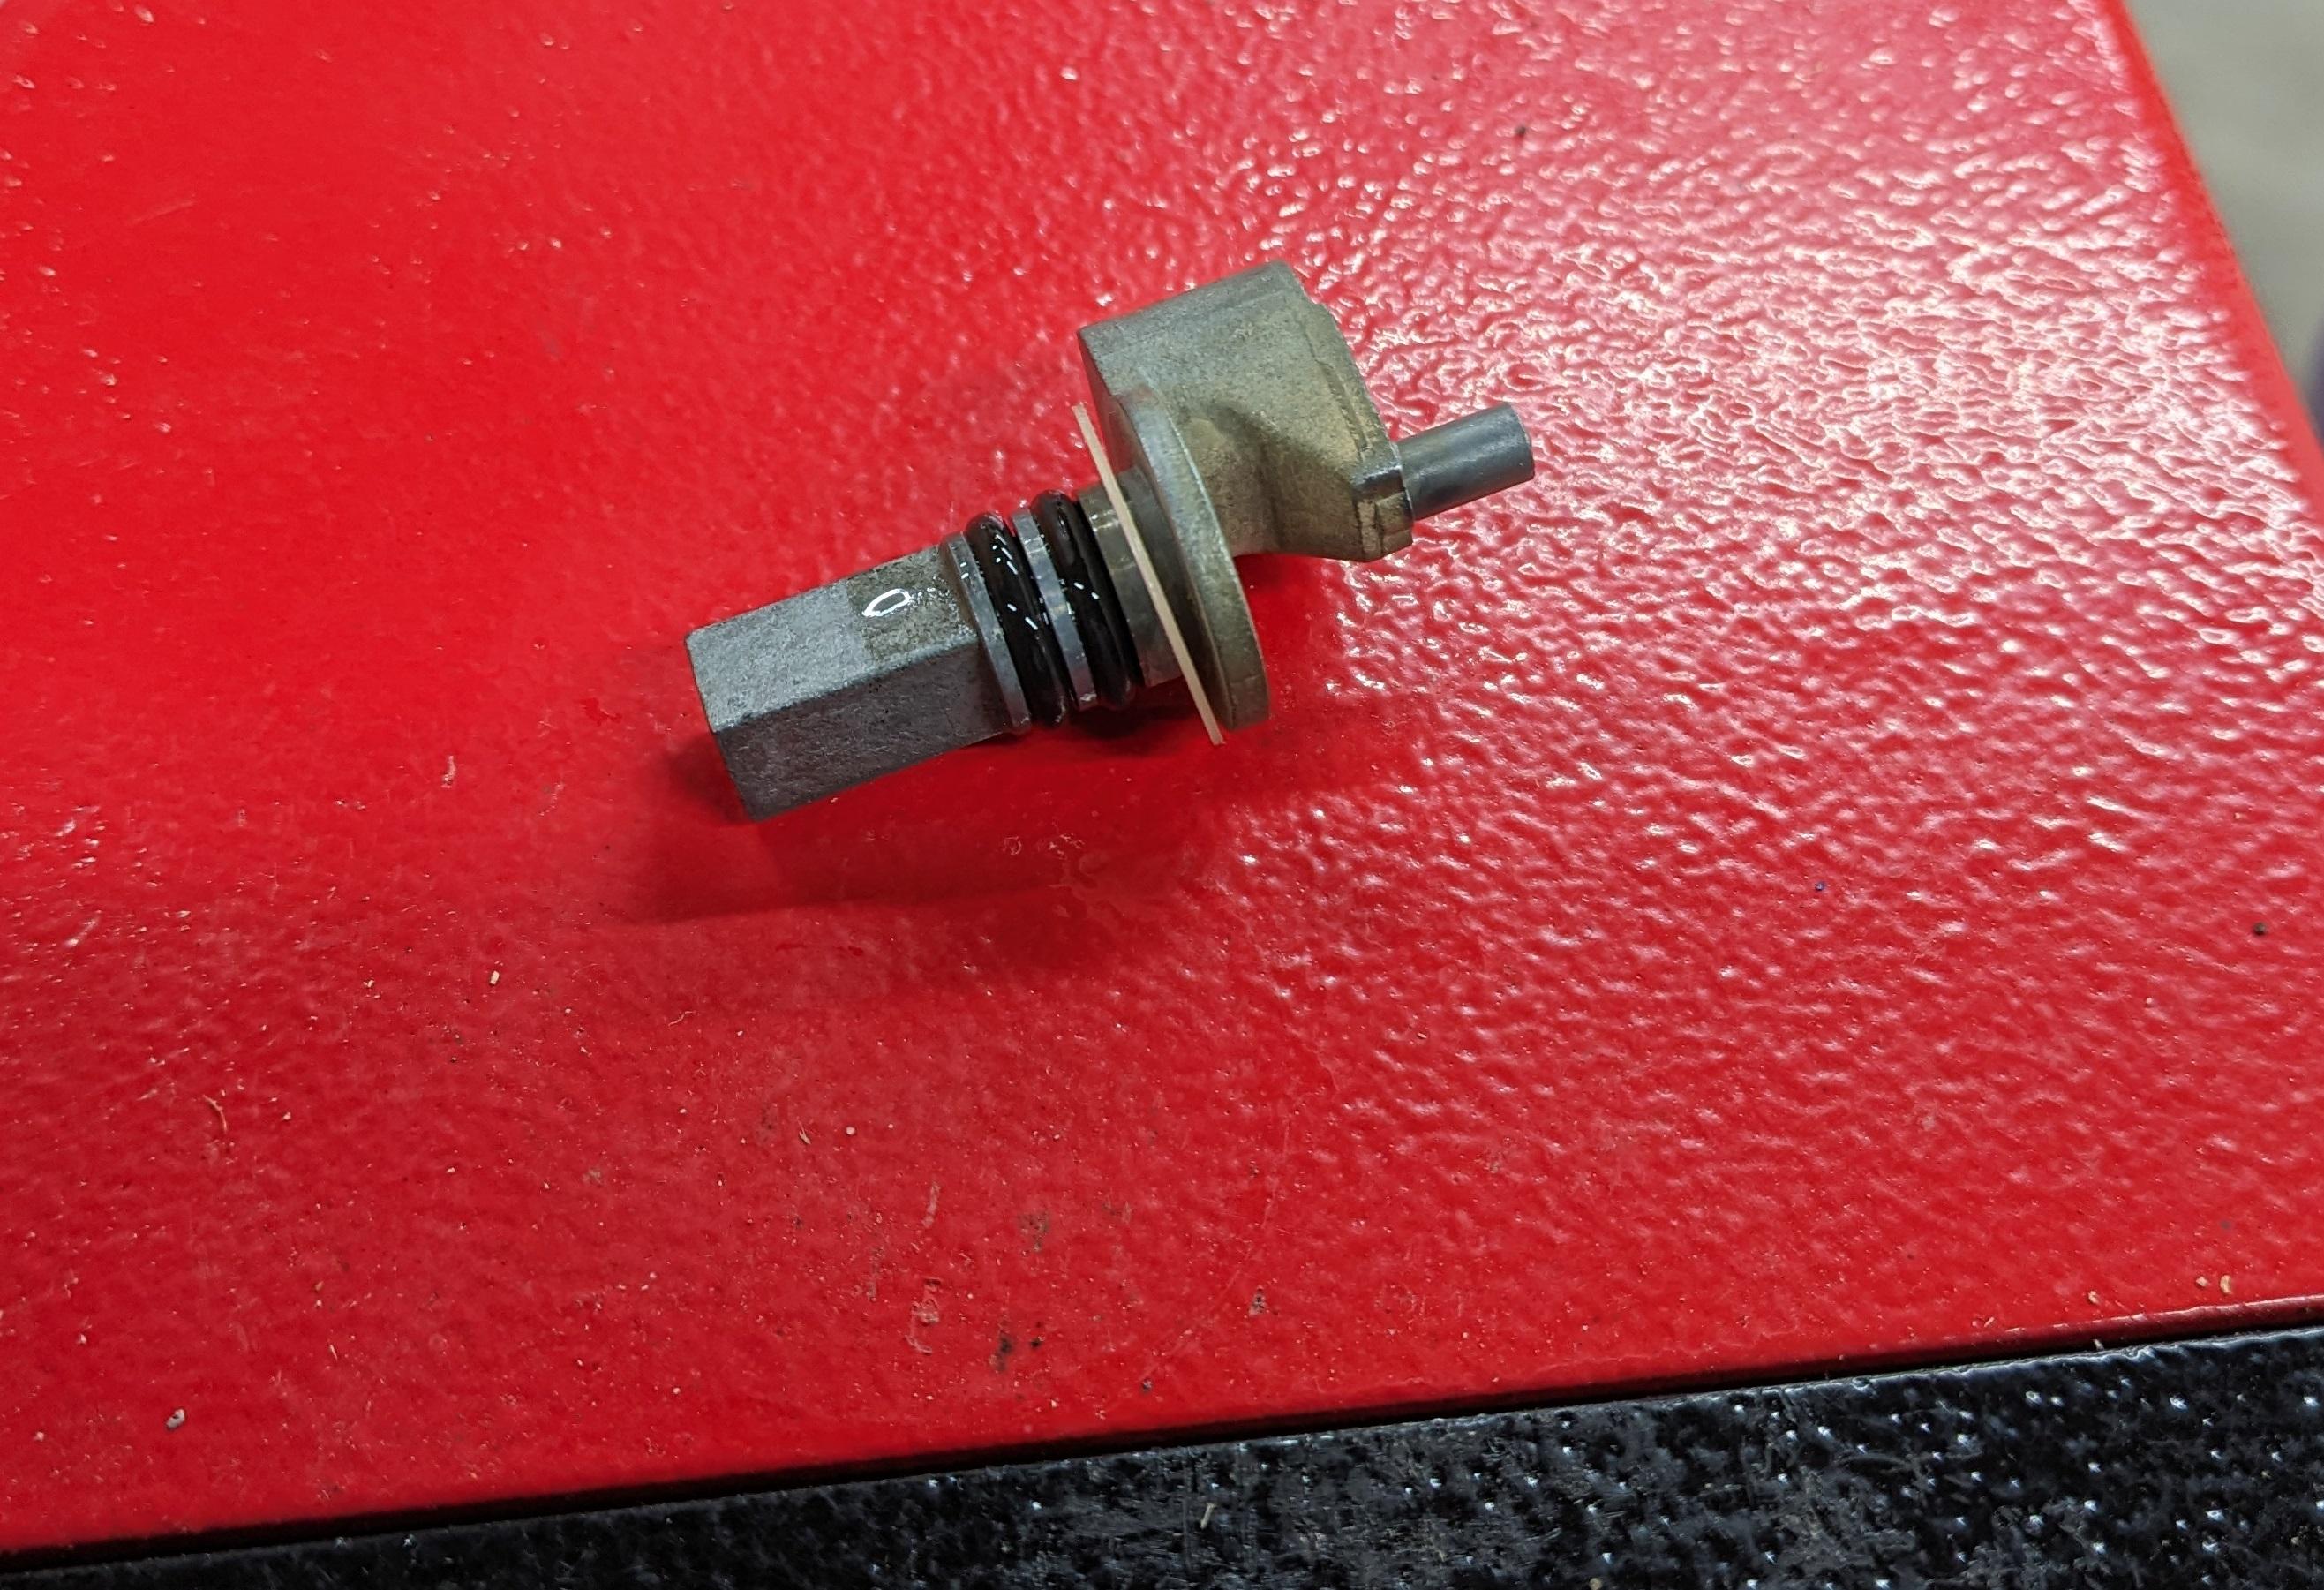
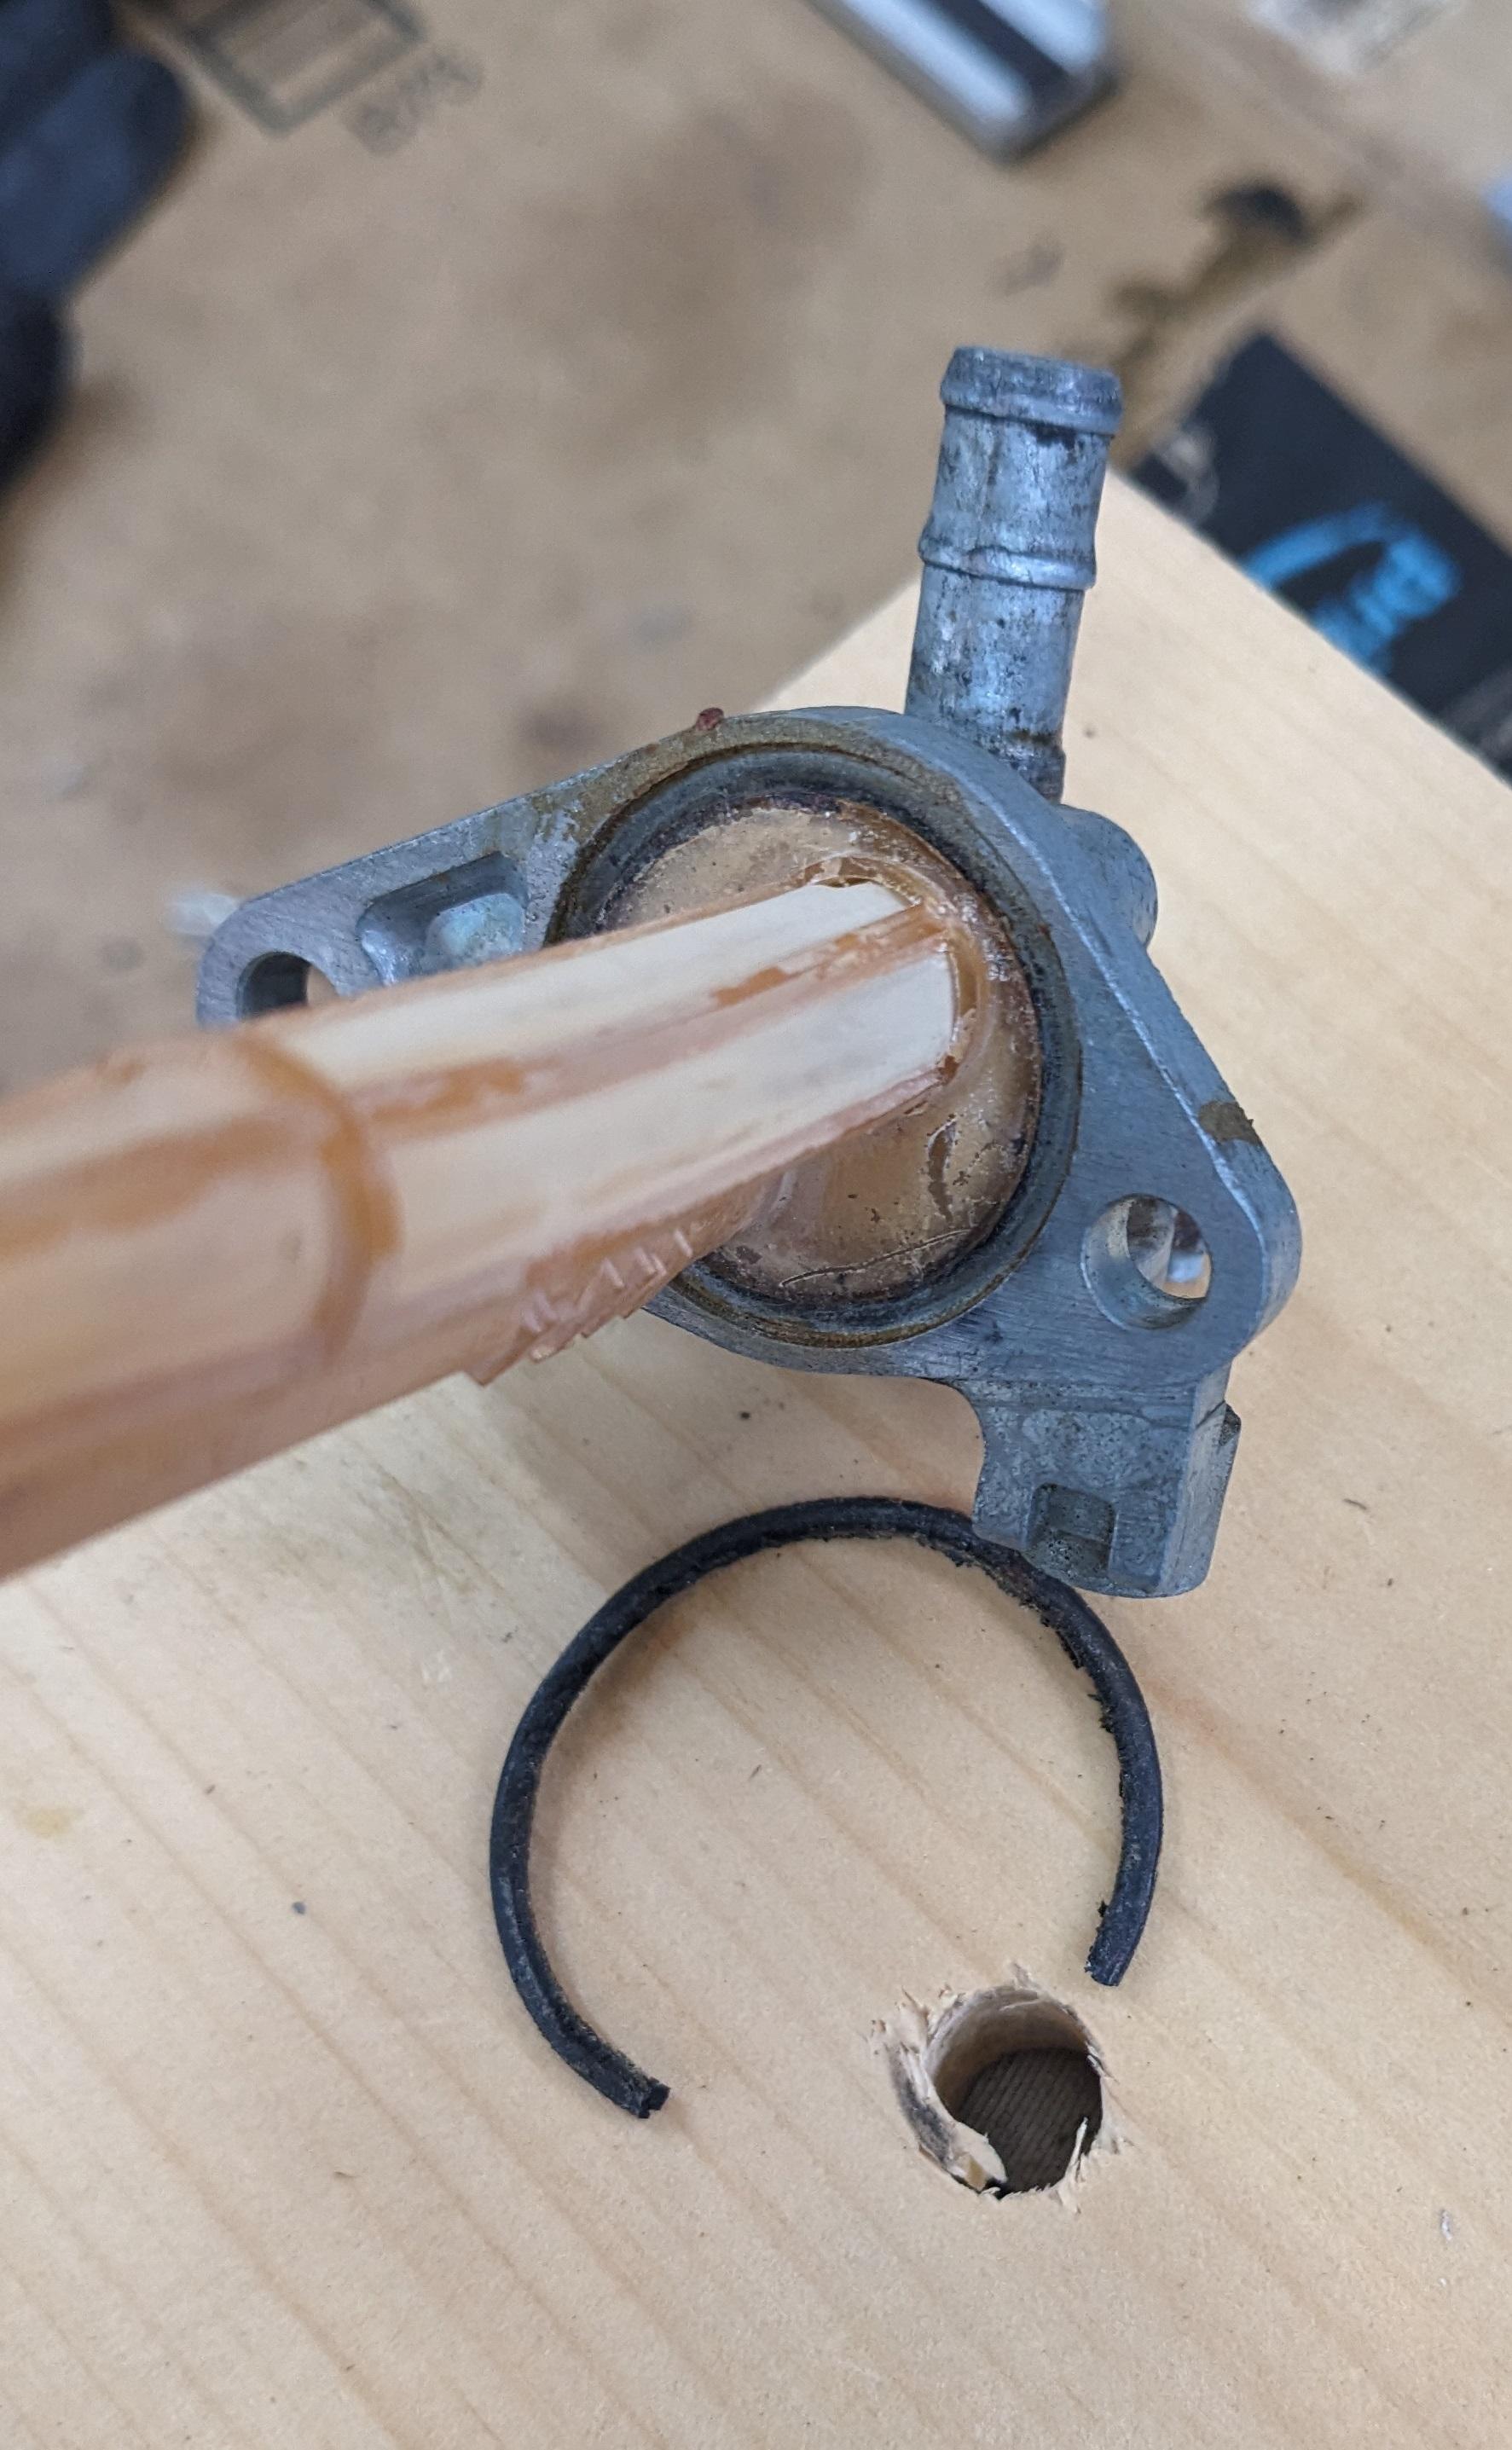
I put a dab of oil on the the two new o-rings on the shaft. That made slipping them on easier and assembly easier.
-
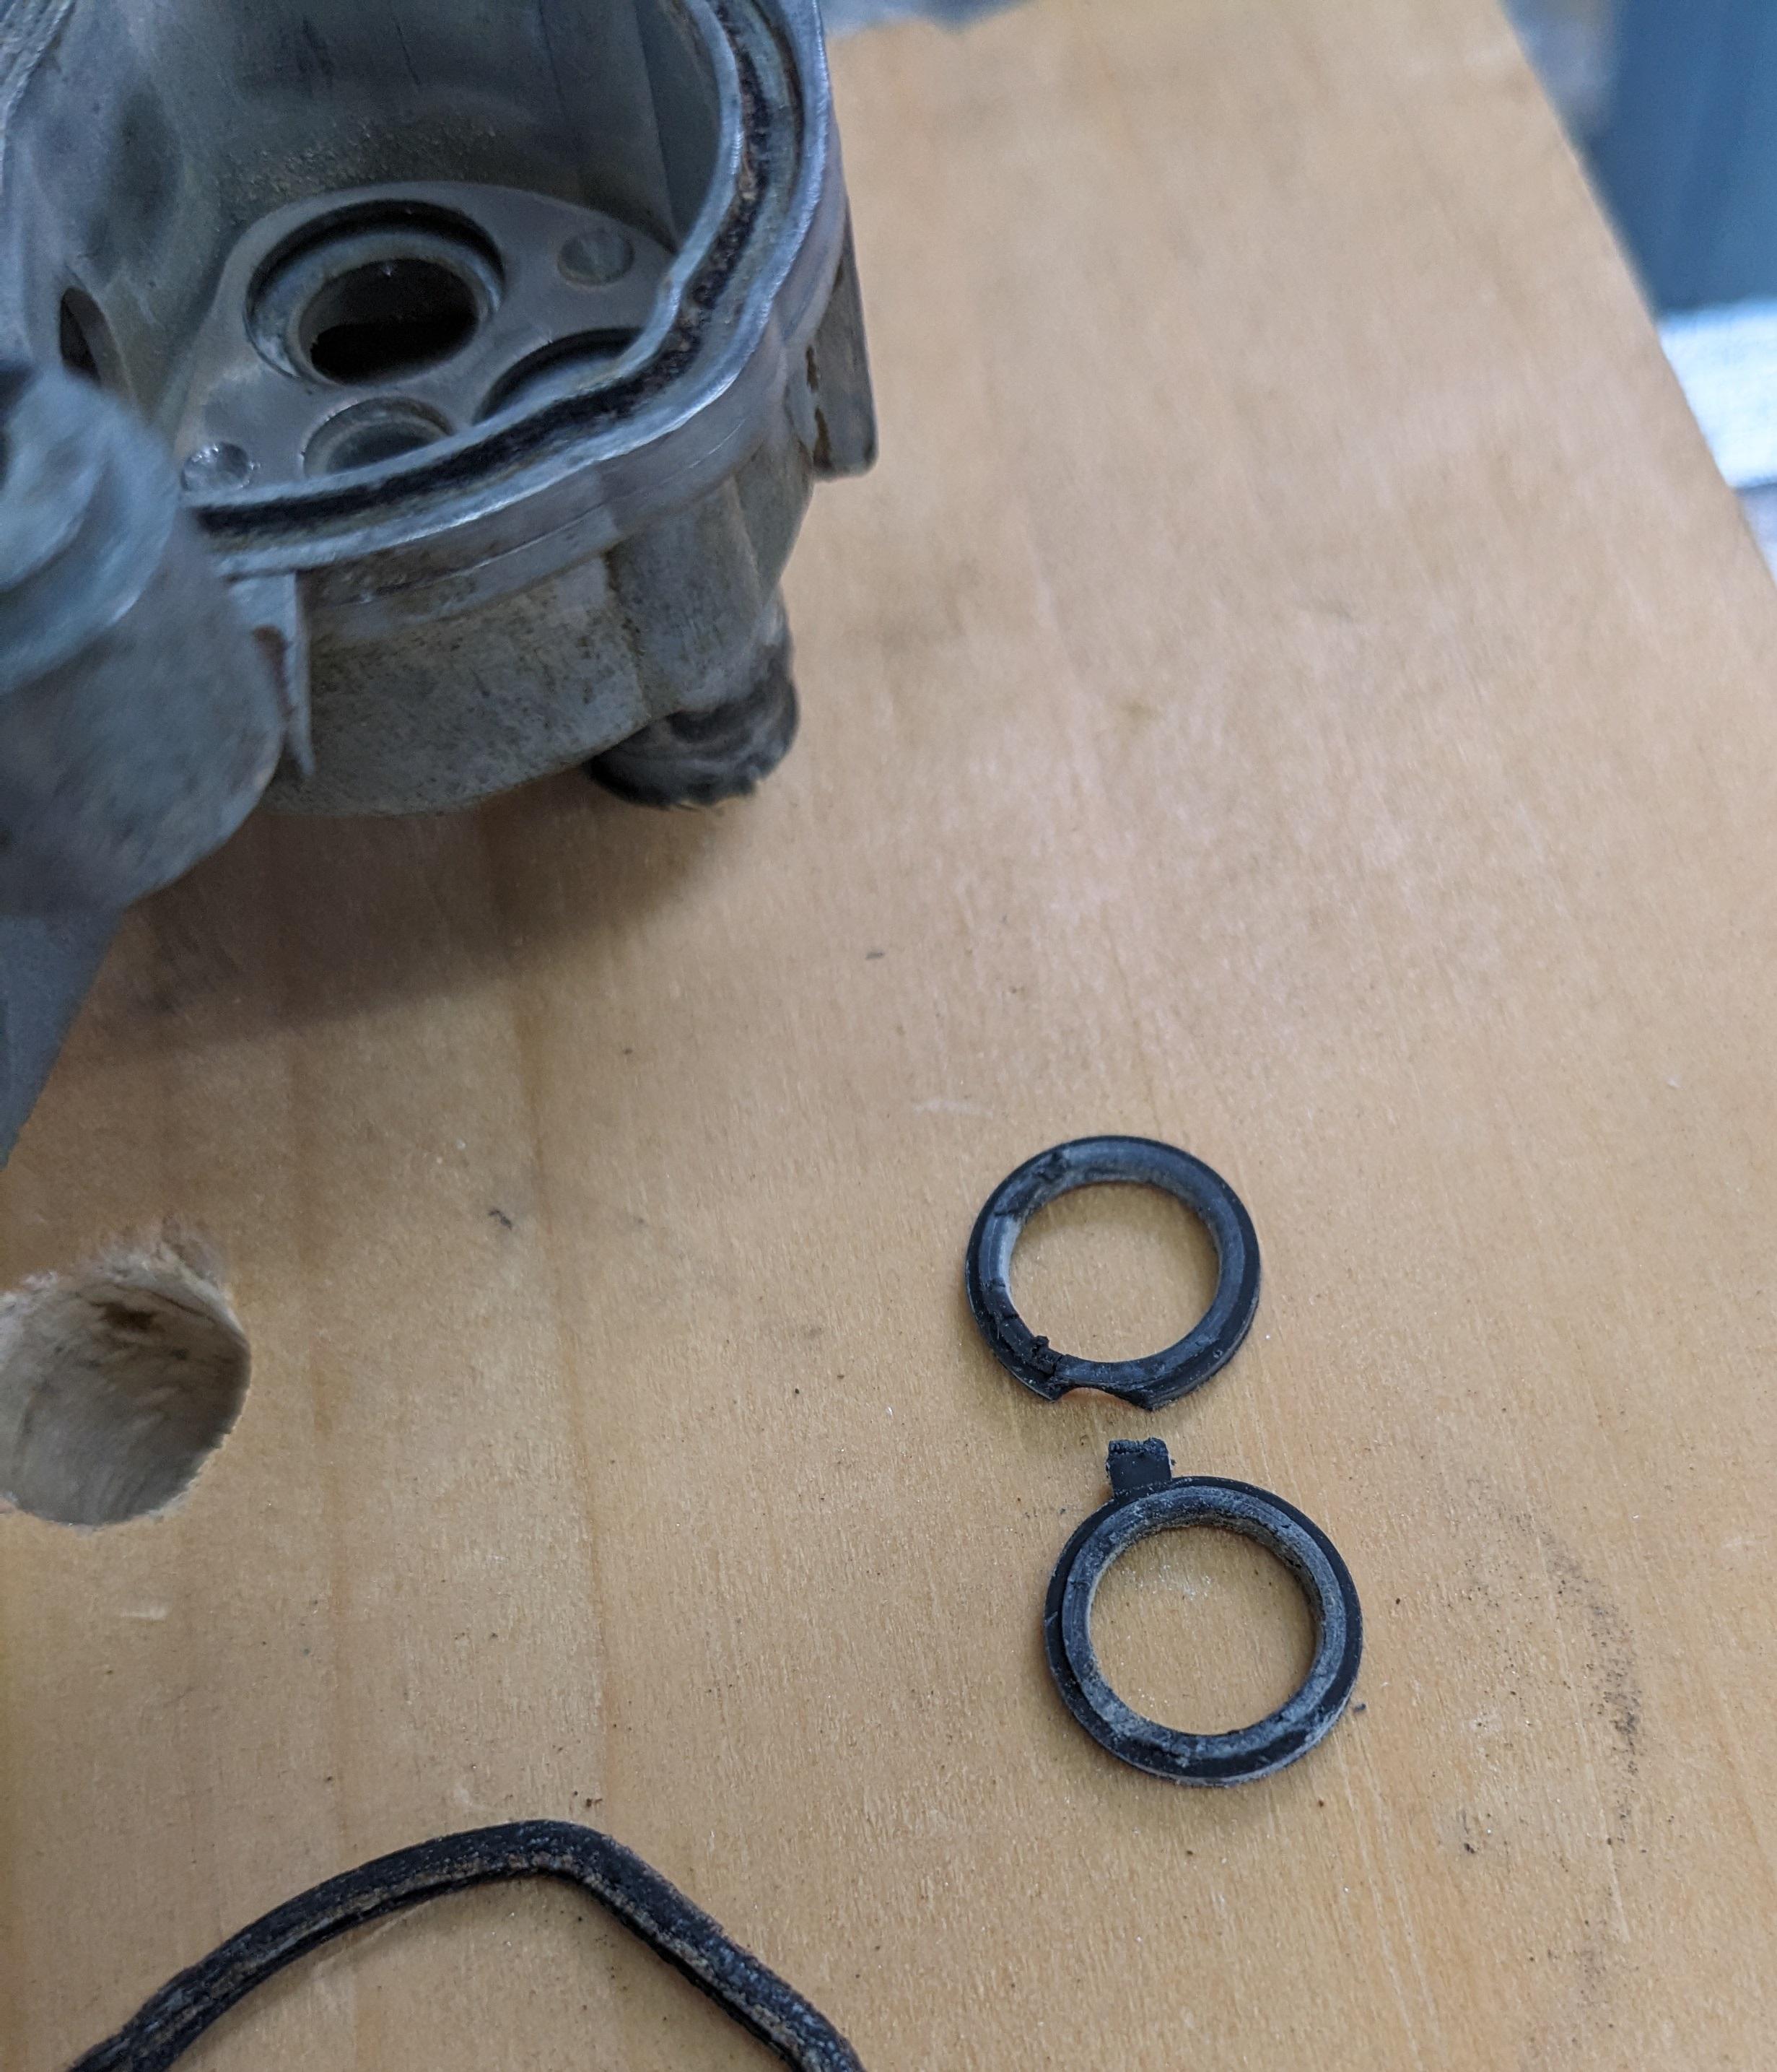
You could install only one new internal o-ring to seal the ball when in the “off” position. I figure that steel ball may not need to rest on an o-ring when petcock is in the “on” position because it’s not sealing anything at that point. If you don’t want your ball to rest on metal when it's not in use, get two o-rings 😄 I used a 7mm ID x 2mm W o-ring for this. Getting that internal o-ring to seat was fiddly but with a little patience it worked out. You could probably go down a size on this internal o-ring, like 7mm ID x 1.5 mm W, to have less fuss getting it in.
-
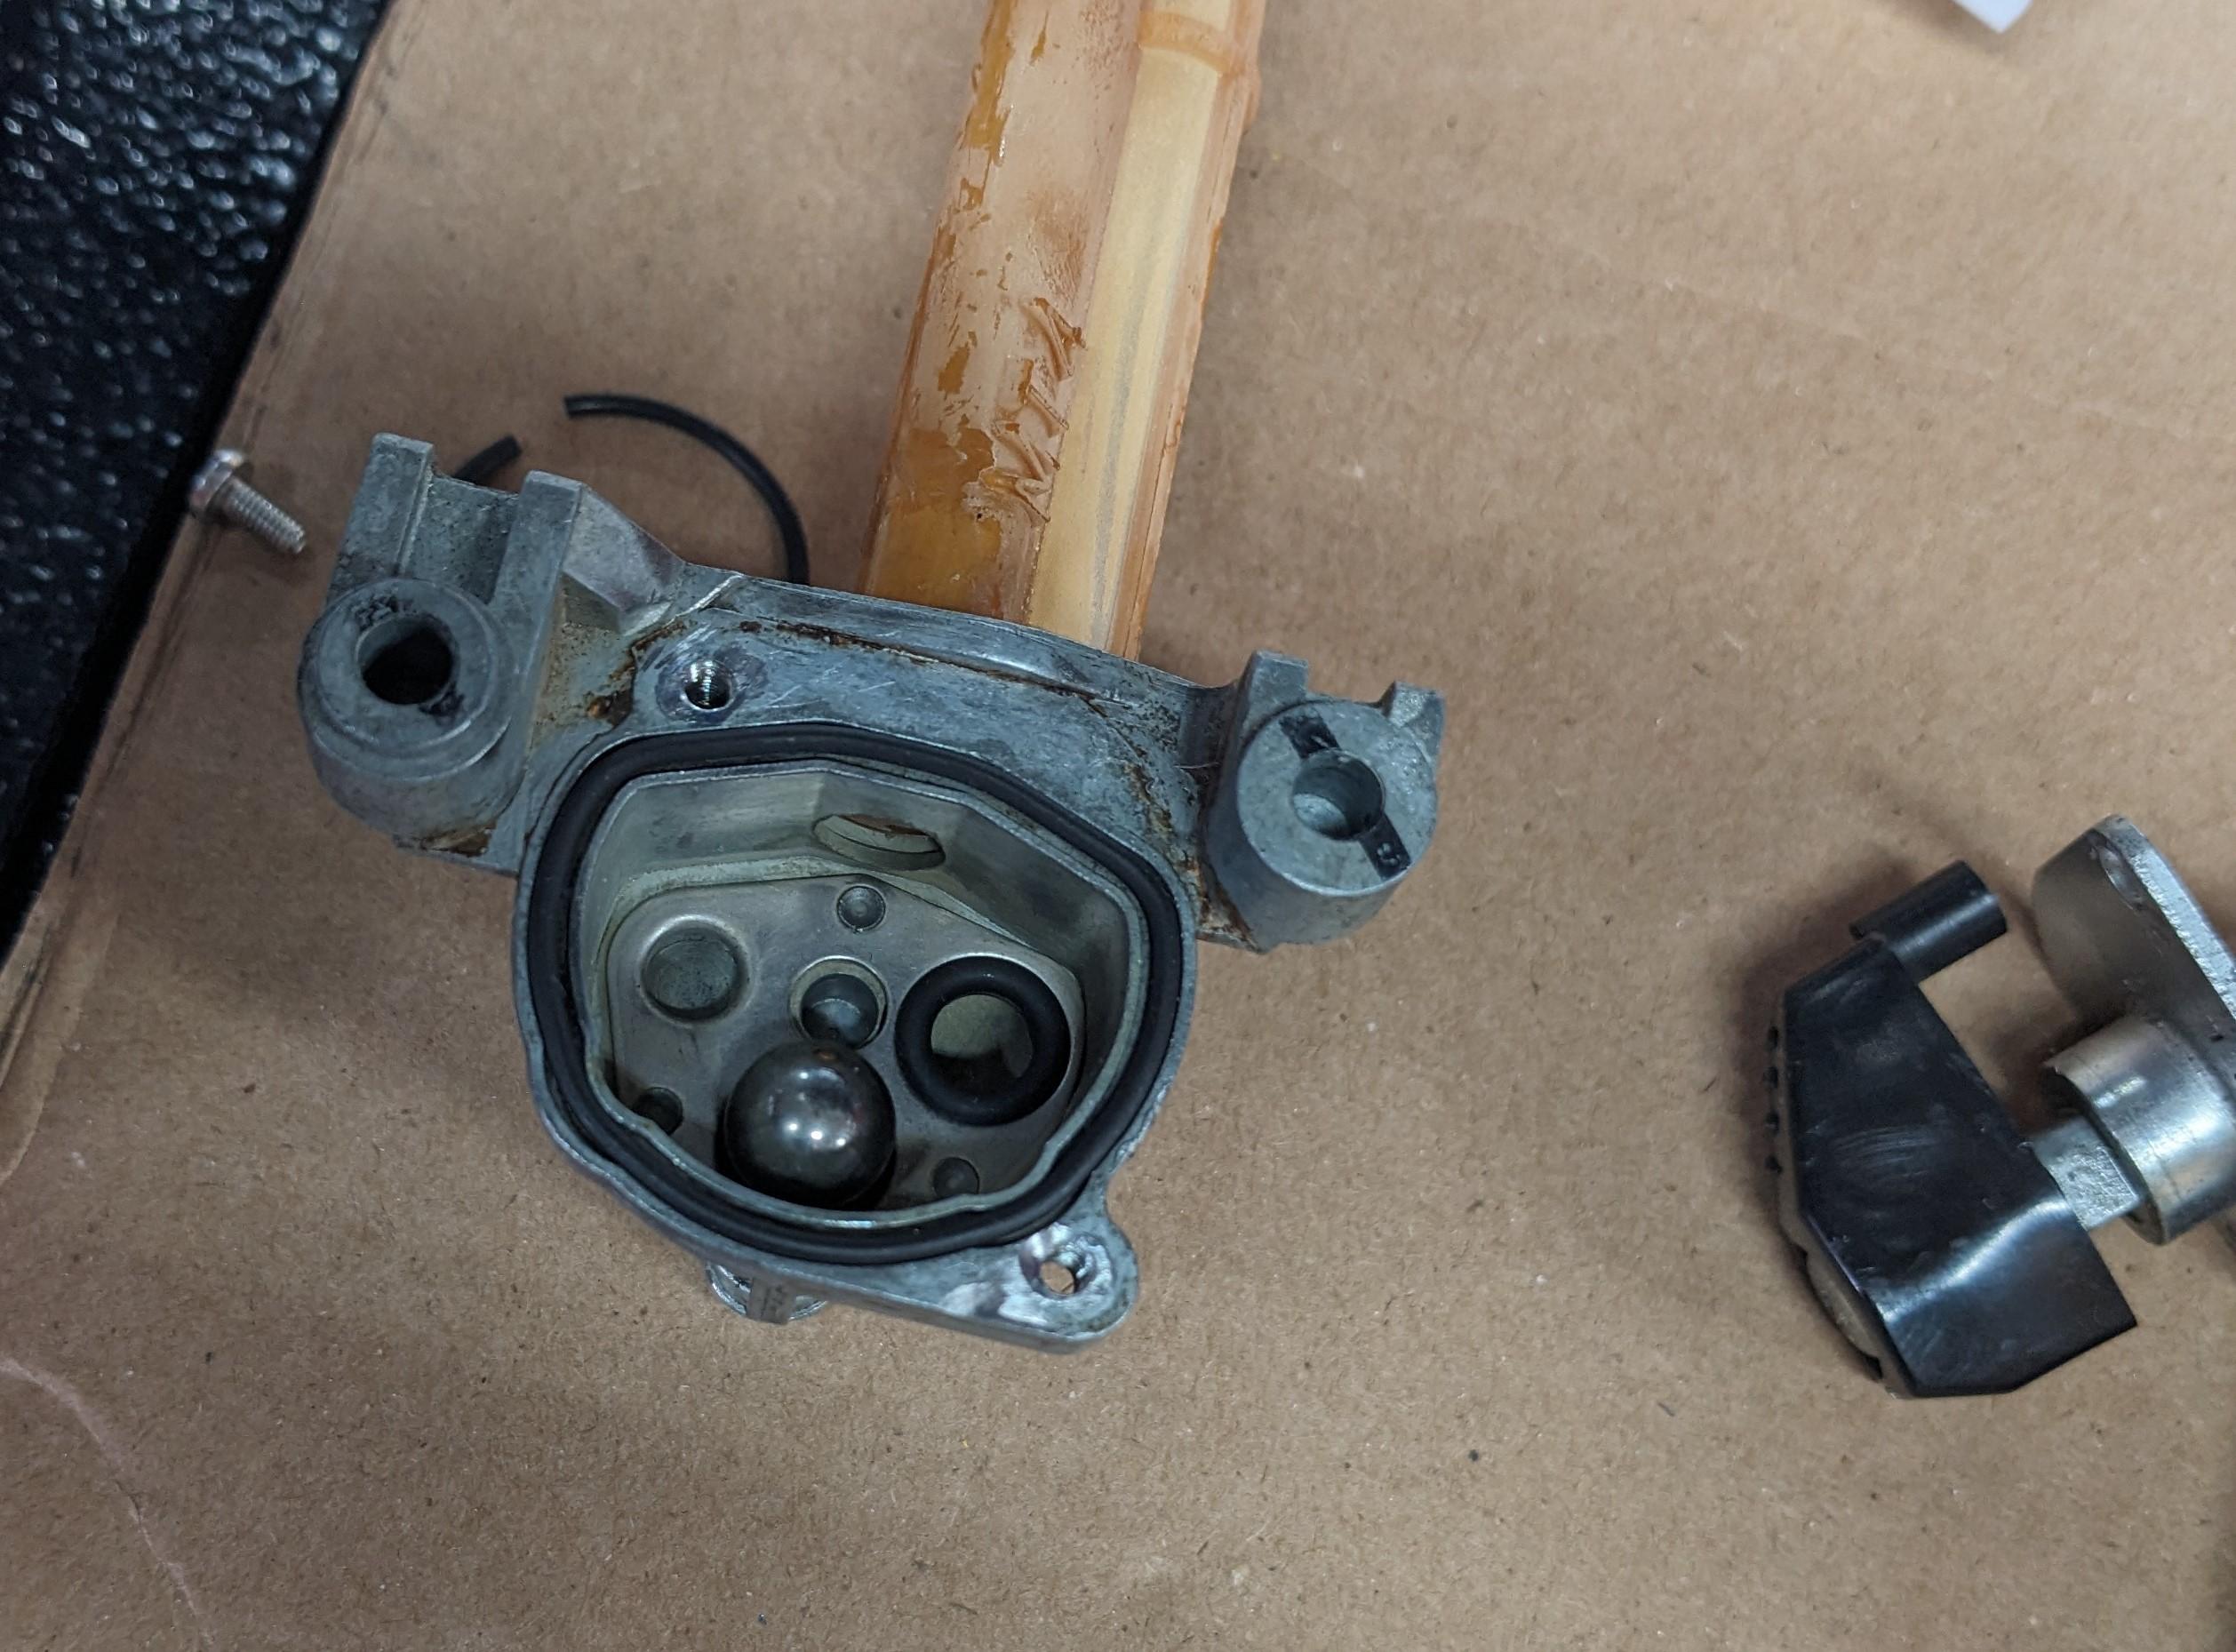
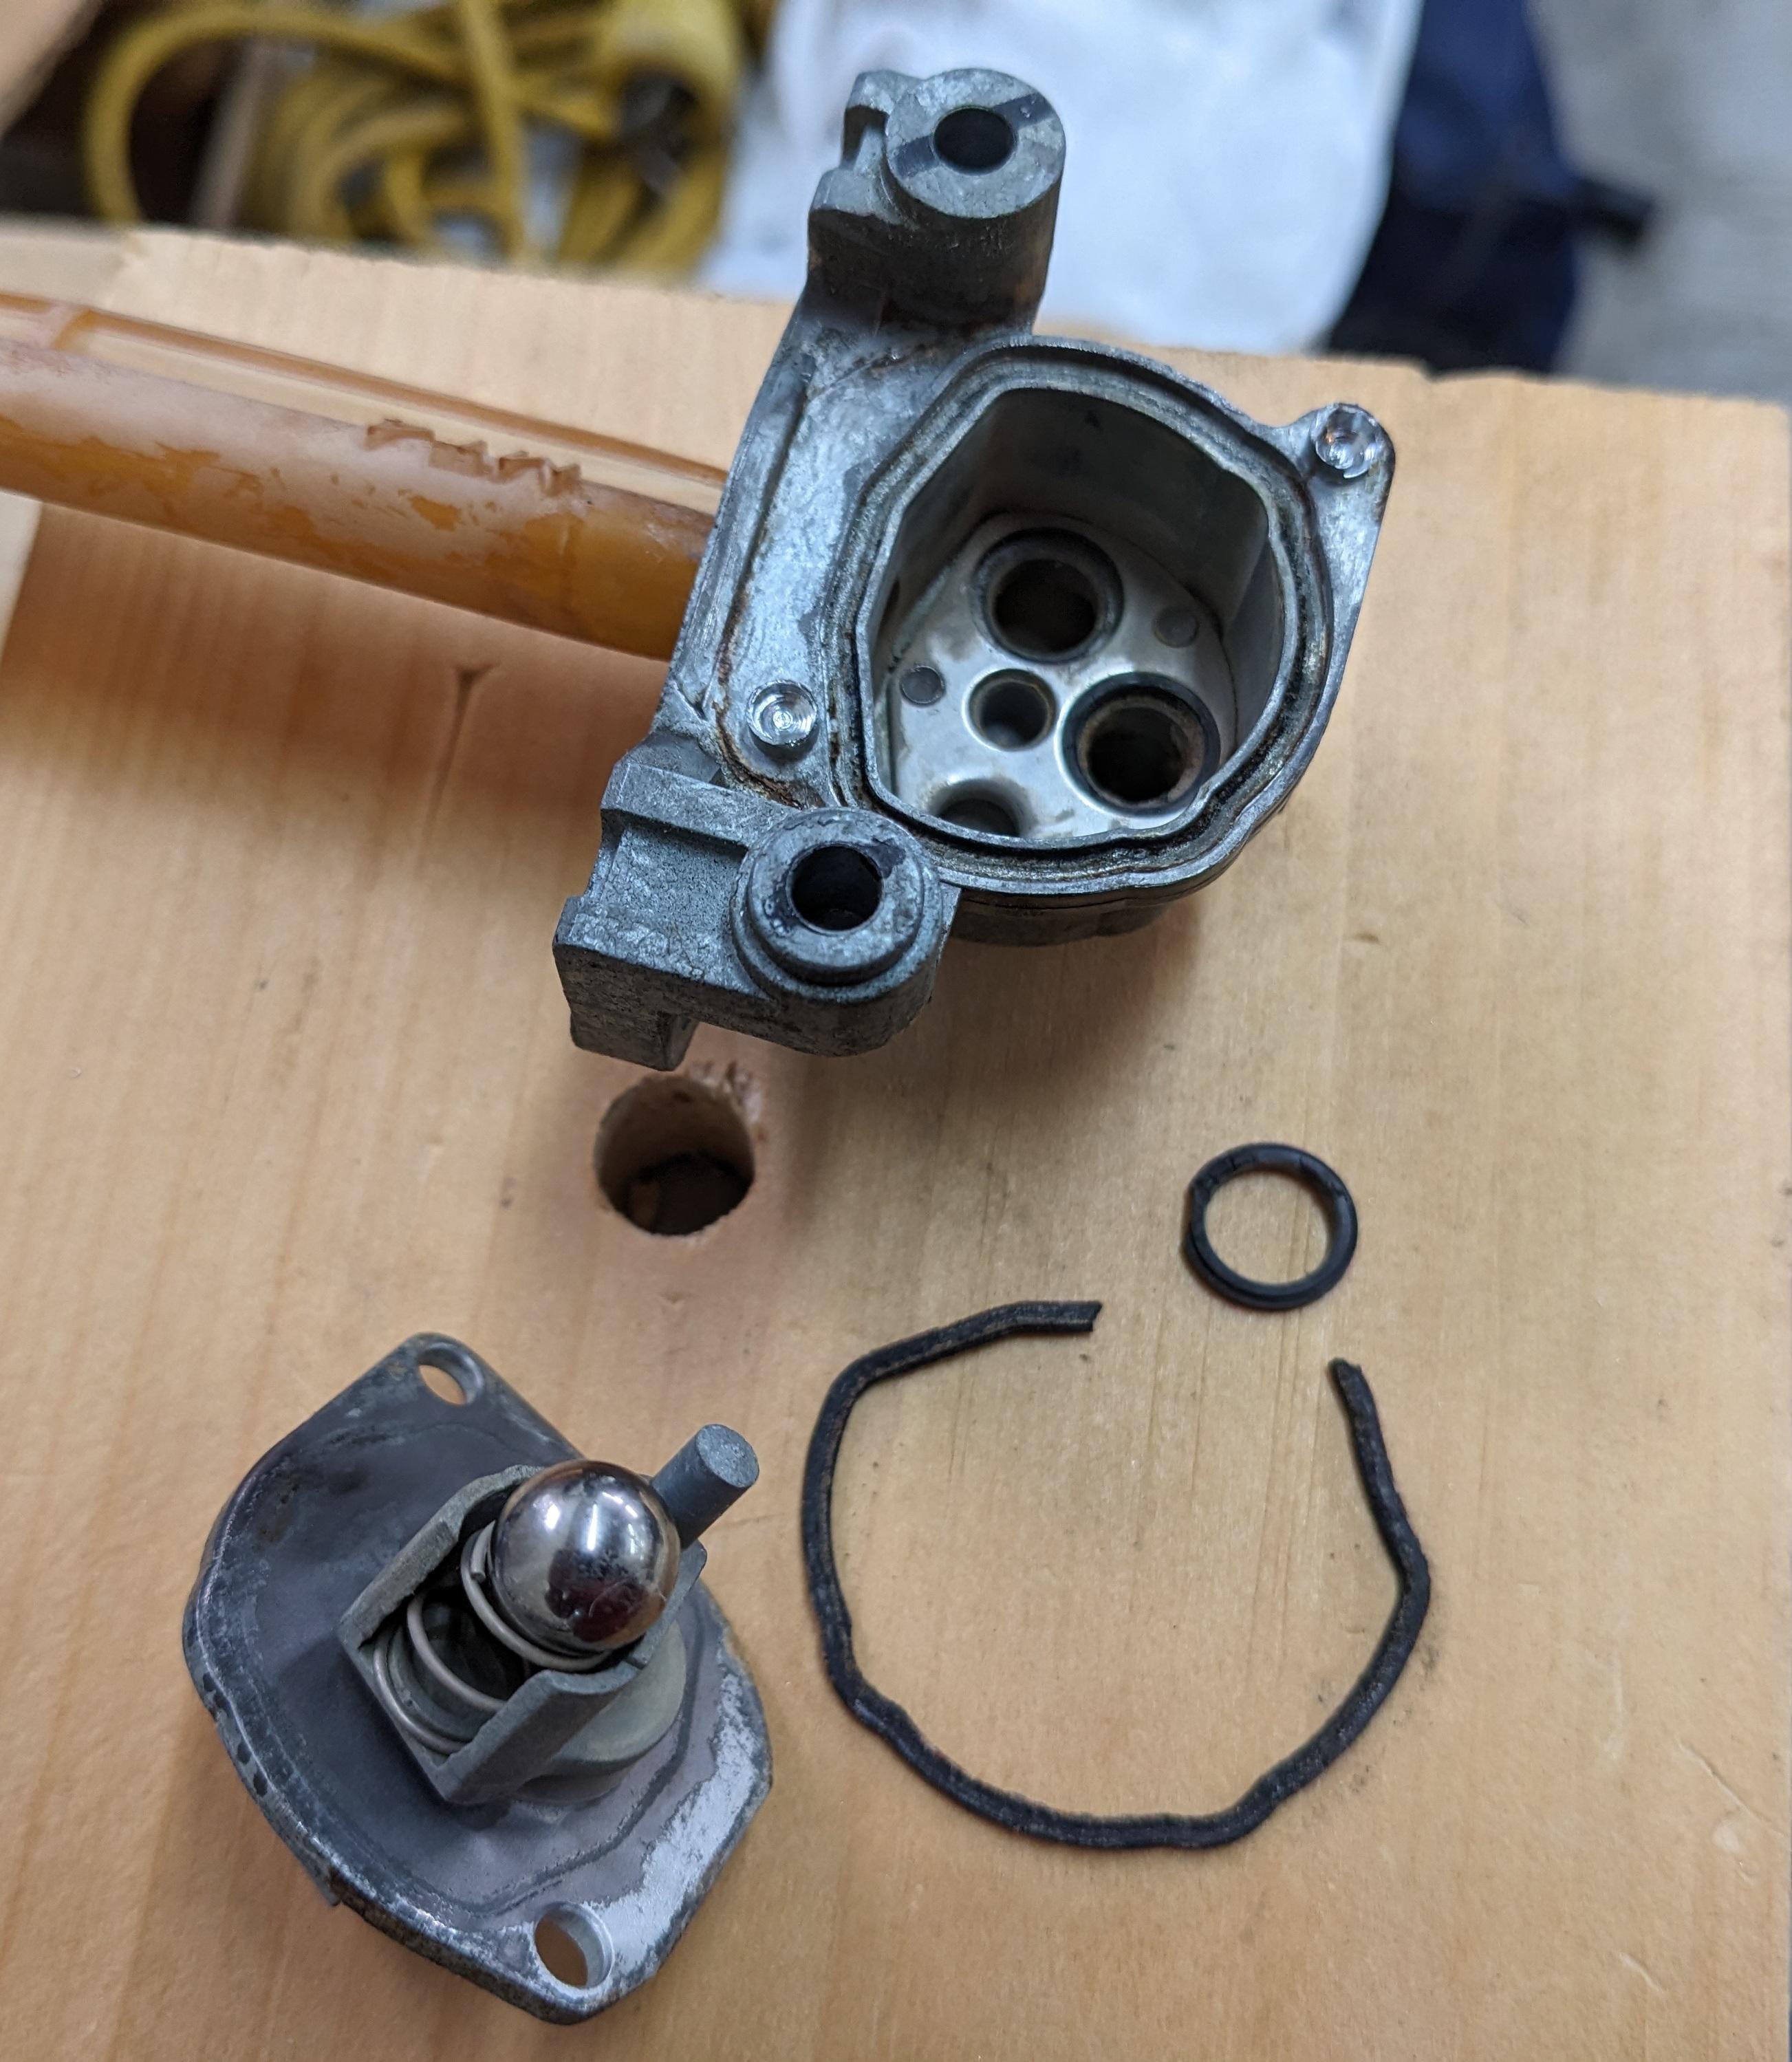
All the o-rings were toast. Two of the internal o-rings were molded like a figure 8. Not much corrosion. Disassembled and cleaned up the petcock.
-
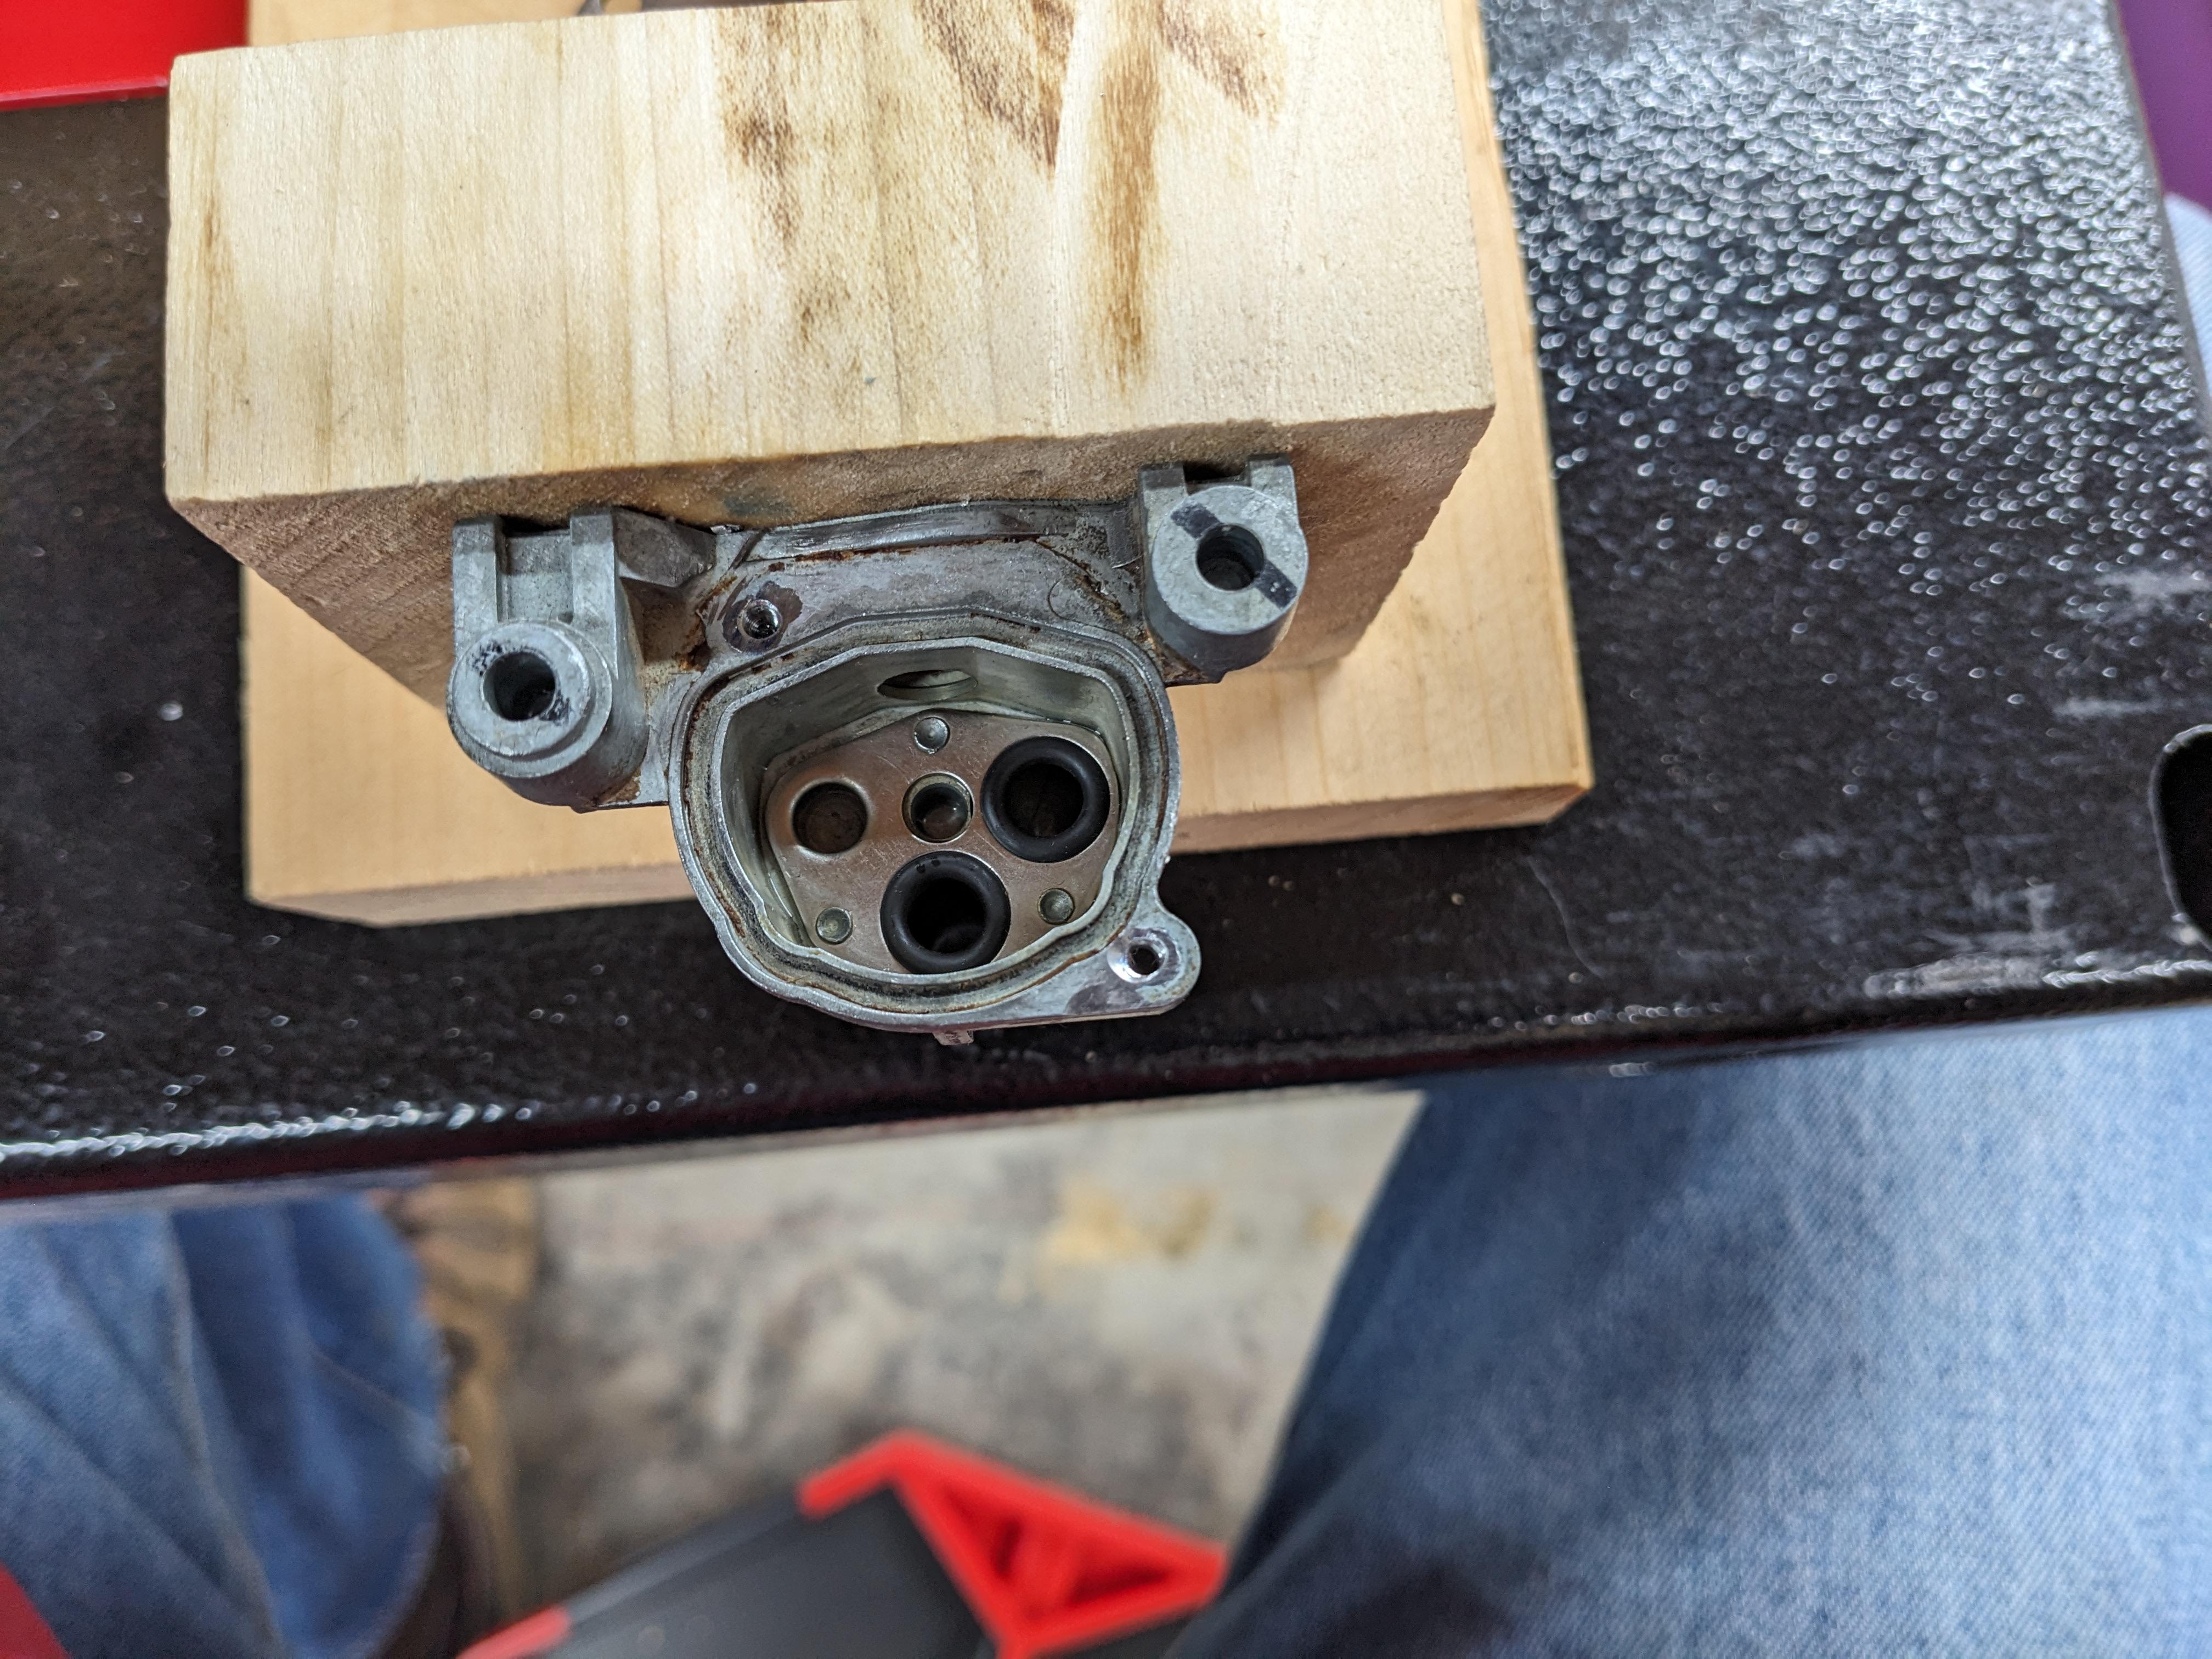
I followed others’ recommendation from here to drill out the rivets and tap. There’s a Youtube video on this specific petcock here: https://youtu.be/sZ0rx_zf6qM?si=d9D9TDic7wHzKkjV I have access to a drill press so that made it easier to keep the drill bit centered but it was still a challenge. I mounted the petcock to a block of wood to hold the petcock for drilling and tapping. Didn’t want to drill out too much material when drilling out the rivets. Started with the drill press and ended up grinding them off with a Dremel.
-
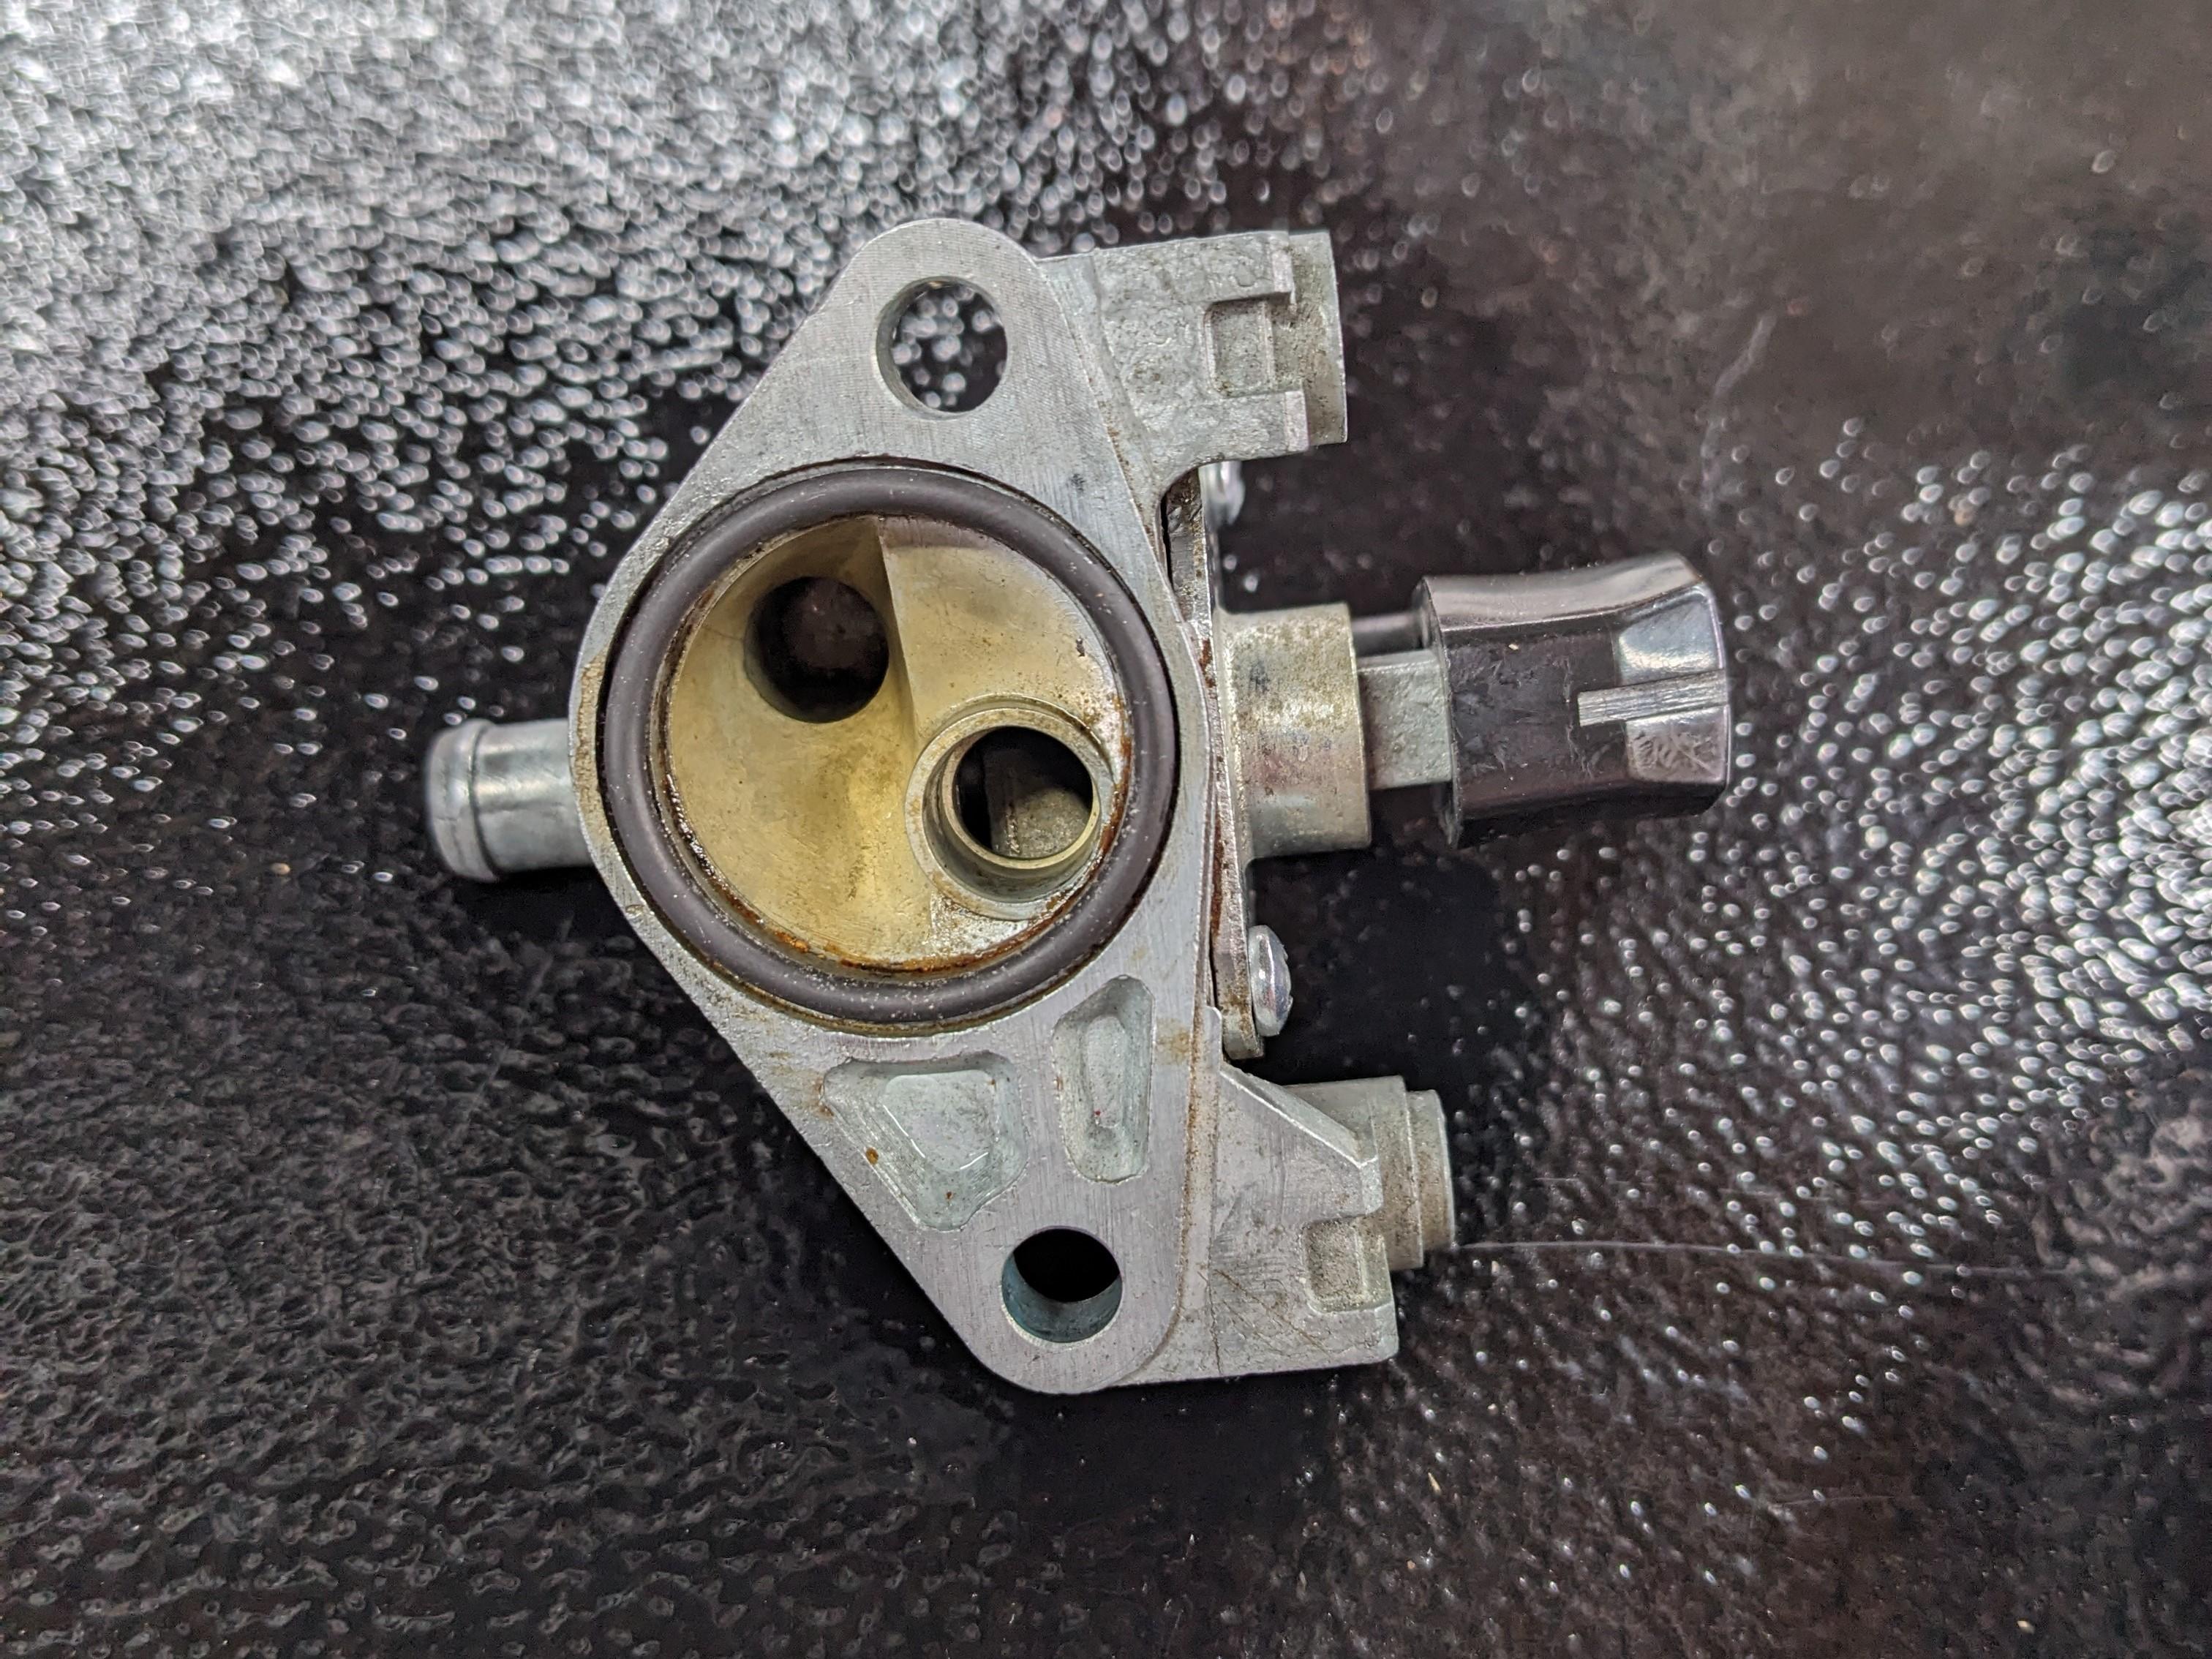
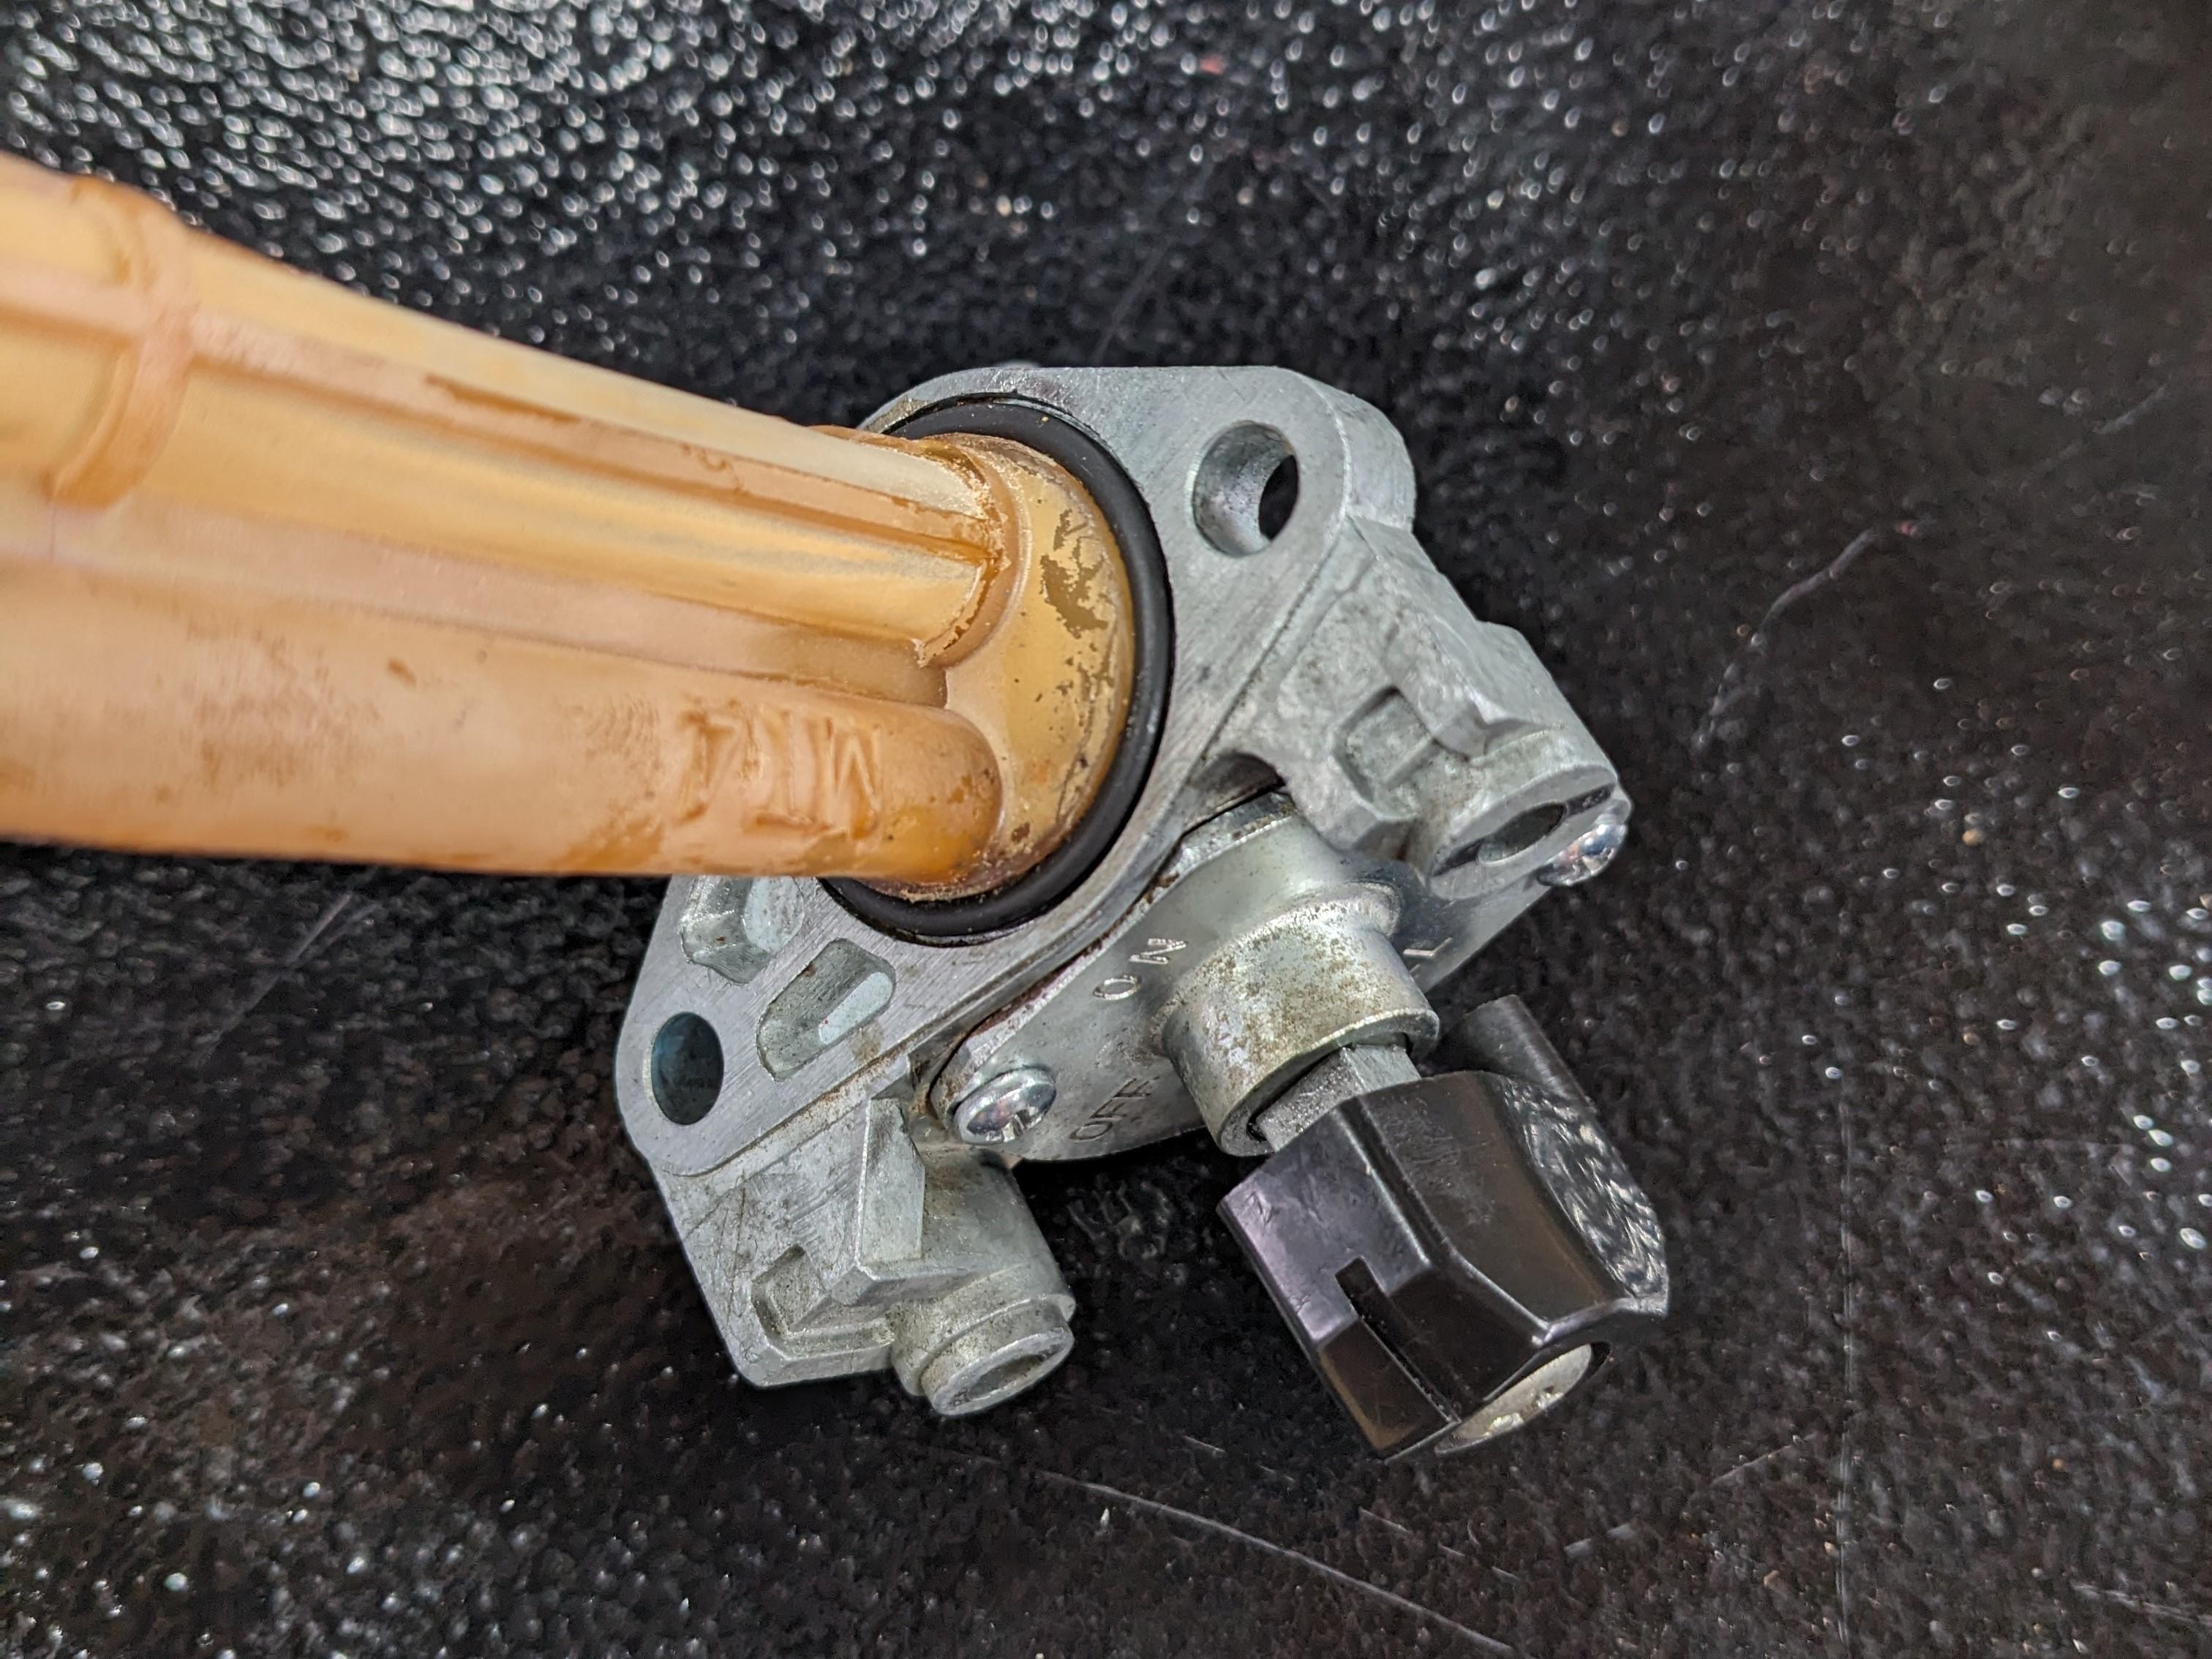
My 1990 VFR750 petcock was leaking. In my case, leaking from both the petcock body as well as through the outlet when the petcock was turned off. After reading a bunch on the forums I learned that it can be rebuilt. Some threads that were helpful: https://www.vfrdiscussion.com/index.php?/forums/topic/87331-petcock-body-leaks/ https://www.vfrdiscussion.com/index.php?/forums/topic/82877-3rd-gen-fuel-petcock-o-ring/ Should have got the kit from NRP but I decided to homebrew it. I thought I could add to the discussion here by providing details. I recommend the following Viton o-rings. Petcock to fuel tank: 24mm ID x 2mm wide, quantity one (not sure if still available as OEM? Disappeared from Honda p/n’s on revzilla, partzilla etc. but I found the size on one of the forums) Side plate to petcock body: 29mm ID x 1.5mm wide, quantity one Internal seal: 7mm ID x 1.5mm wide, quantity one (two if you are fastidious) (FYI I used 7mm ID x 2mm W and it was a little big, I’d recommend go down to 1.5mm W) Shaft seal: 7mm ID x 2mm wide, quantity two *If turning your petcock “off” doesn’t stop the fuel flow to the outlet after you rebuild, you’ll also need a new spring about 0.9 wire thickness x 9.5mm OD x 10mm L. You might have to try different springs depending on how firm or soft the new spring is, but this is what worked for me. I got it from this kit: https://www.amazon.com/Compression-Assortment-Stainless-Different-Individual/dp/B0BL7RYQ27/ref=sr_1_4?qid=1707004725&th=1 So that’s the short version! If you want pics and step by step keep reading!