

kaldek
-
Posts
1,317 -
Joined
-
Last visited
-
Days Won
11
Content Type
Forums
Profiles
Gallery
Blogs
Downloads
Events
Posts posted by kaldek
-
-
I would love to test it, but alas my brake bleeding tool is a 100ml syringe! (the 50c brake bleeding tool - works really well though)
Are there any other cheap ways to test it out - if it's like any other automotive product in this country that isn't tacky (and crappy) bling made in China, a hand vacuum pump will be terribly overpriced...
Mate, I've got a vacuum gauge. Heck, I've got a handheld one as well as another four bolted to my carb balancing kit.
You want me to go for a ride and measure the vacuum readings for you?
-
kaldek, did your PCV come with a speed scalar and gearing pre-set up? Mine did, but I remember reading that CodeRighter's didn't. I am guessing firmware version and what is preconfigured will depend on how old the stock was that the PCV was taken from.
My scalar was all wrong - something like 8,300 or thereabouts. I didn't check gearing, but just went straight into my own calibration.
Since upgrading to firmware 1.4.0, I have set my scalar to your value for Km/h (5638 - very tidy thanks!) and calibrated the gears again. Lovely!
I'm so geeky, I'll probably sit there with a multimeter tonight and perform a super-duper calibration of my temperature. :cheerleader:
-
So..... What do you have where EVAP would be connected, because that's the source for the vacuum switch.
Nothing:
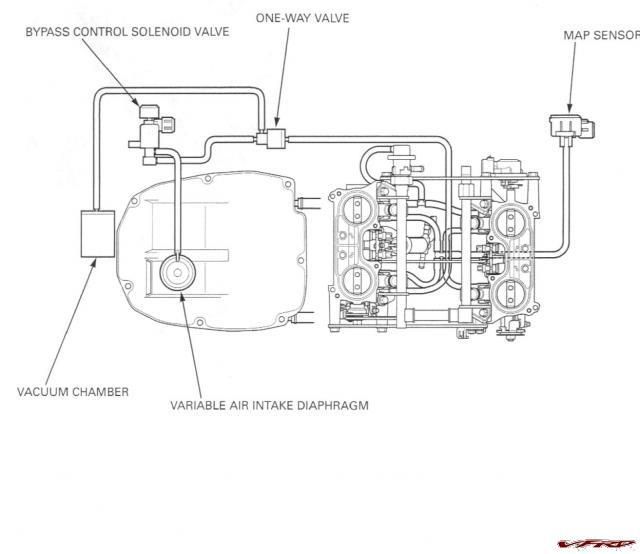
But wouldn't the PAIR solenoid do just as well?
-
My PCV, which i installed May '09, had 1.2.0 firmware also and the temp didn't work either. Sorry, so long ago, I forgot all about it. You must have gotten real old stock?!?!
Yeah, we're a long way for America over here mate. They would have imported them in bulk and maybe don't sell so many for the VFR. Coulda been on the shelf for aaages!
-
Folks, GPM has confirmed he also runs the 1.4.0 firmware but also that his model came with the 1.3.0 firmware. My unit came with firmware 1.2.0, and the temperature sensor function did not work.
You will need to have either firmware 1.3.0 or 1.4.0 for the temperature sensor functions to work. GPM reported no problems with his firmware upgrade, so you also may not have a problem with your upgrade.
-
Great write-up!
I wish I was as good at getting stuff out of my head and onto "paper".
If you want to try the vacuum switch, let me know and I'll hook you up. It makes a big difference if you do a lot of round town riding, not so much if you do mostly highway.
I wouldn't mind giving the vacuum switch a shot - sadly I have 0 experience with such things so while the theory works in my head I don't know how to translate that into practice (or for that matter, exactly what sort of parts I need to make it all work!). Hence the effort vs frustration tip up.
This might be a silly question, but does the Aussie model have EVAP?
The '02-'05 models definitely don't. Someone said though that after '06 they were standardised worldwide and they all have EVAP now. Not sure who that was or if it is true.
I just wish the Aussie models had ABS. They never offered it here. :cheerleader:
-
Hey GPM, I'm feeling a bit like we're the pioneers mate, forging a path for others to follow once all the gremlins are sorted! :cheerleader:
Yeah, stick with it boys :biggrin:
If you like what we're doing now, just wait for when I buy the Supercharger kit. I'm even going to do videos!
-
OK - TEMPERATURE READINGS ARE FIXED.
It took upgrading the firmware to 1.4.0 to get it working, however the firmware upgrade was almost a failure.
The firmware upgrade process tells the PCV to go into "boot" mode, which comes up as a device with a different USB ID. Windows XP asked me to reboot to support this new device ID, and I think it caused some form of communication failure. The upgrade process said "error sending file" and the PCV was stuck in boot mode with the green light flashing. I flashed it again, but I had no TPS readings, nothing other than RPM showing.
Anyway I managed to get the firmware installed, but the process was as follows:
- Tell the software to upgrade the firmware
- Upgrade fails, PCV is stuck in boot mode (green light flashing)
- Perform upgrade again
- Green light goes solid
- Bike starts, but no inputs work. No TPS readings, nothing other than rpms.
- Reboot Windows PC to ensure all USB device IDs dynamically detect OK
- Perform firmware upgrade again
- All problems resolved
During the final firmware upgrade, I noticed that the upgrade process did a lot more stuff - it downloaded not only the firmware file but also a "configuration file" - I would guess this is what made it start working properly again.
Hey GPM, I'm feeling a bit like we're the pioneers mate, forging a path for others to follow once all the gremlins are sorted! :warranty:
- Tell the software to upgrade the firmware
-
That's a bit odd. You have them all plugged into the right 'ports'? - from the nearest edge it should be - unused - temp. - speed - rest unused -.
Try removing the wire, grab a jeweller’s screw driver and pock it down there (obviously make sure power is off!) - it may be you didn't pop the membrane fully. Another way to tell you have it in there correctly is when you remove the cable the copper bundle should be squished. If it is still the same shape as when you put it in (likely nice and round) you either are not getting it in far enough or not getting enough contact.
I know the temperature can be a funny beast - going from memory (it's too late to play with my bike right now) you need to set the bike to run (so start the FI sequence, etc) before it will register at all - with the ignition on by kill switch set to 'kill', it should read 160 degrees or so (basically 0 volts) - once the FI sequence is done it will be stupidly inaccurate (as in negative temps) until it starts to approach the first voltage point (so the 48 degrees). As I only use it to tell the PCV when to start listening to the Autotune, I didn't care enough about the oddities to see if they could be fixed (and frankly I don't know if they can be).
Yeah it's odd alright. I mean it reads *something* because with the bike running when cold it read "0 degrees" and then shows 48 when the bike reaches 48 (as per the table). But after that, it never changes.
-
First, as it is not clear on what you wrote, you will need to input all the temp voltage points - the PCV does a little magic math to come up with a 'best fit' progression through the points you enter. The more points, the more accurate that is. Obviously if you only enter one voltage point, the PCV will likely treat all voltage readings as that temp.
If that's not the problem, remove the wire from the PCV end and test the voltage there (I assume you were testing at the tap before). The fact you get a reading should mean it's not a continuity error. I had some trouble getting the speed reading to work, turned out to be a bad connection, which is why I removed the pin from the pluged and crimped my tapping wire straight on (problem solved!). All else fails, check all the connections again.
Yep, I have all the temp points. I have been measuring the voltage right at the wire that goes to the PCV - ground goes to the battery directly, same as for the PCV.
It's just bizarre.
-
We're now going to adjust the idle speed. Here's where the idle adjuster is on the right-hand side of the bike just behind the fairing.
Turn the idle adjuster clockwise to increase the idle speed. Most likely it will be really hard to turn with your fingers, so use some needle-nose pliers if you like:
Once your engine is hot, and your idle has been set to approximately 1,200 rpm, you're ready to roll!
There is actually a Phillips screw head inside the black plastic which you can use with a screwdriver (instead of pliers). I find that the easiest way to tweak my idle.
Oh yeah, there is too. Man I was even looking at the screw while I had the pliers in there, but must have had a couple beers too many to click.
-
Hey GPM, I'm having no luck with my temperature sensor. It never reads above 48 degrees on the Powercommander (I used your starter voltage and temp)
I've tested it with a multimeter, and it's tracking the voltage just fine (and fairly close to the numbers you posted - with a couple of degrees as you say). When the wire is hooked up to the PCV though, it sits on zero until the bike hits 48, then shows 48, but never rises.
Note I am running the stock firmware.
Any advice mate?
-
Yeah I guess so, I was wondering what the lifespan would be like on the 02 sensors
Hundreds of thousands of kilometres!
Ripped from Wikipedia, it says:
"Normally, the lifetime of an unheated sensor is about 30,000 to 50,000 miles (50,000 to 80,000 km). Heated sensor lifetime is typically 100,000 miles (160,000 km)"
The autotune sensors are heated - this is why they must be connected to a 12v power source on the bike.
-
Didn't Codewriter use a vacuum solenoid to turn off the autotune on decel?
He did, and he reports it as being an excellent solution. Personally I think it shouldn't be necessary, Dynojet should be able to take decel into account software side. Failing that it is a minor annoyance really, and in the long run for me it will be a toss up between the effort required to fix using a vacuum switch and the frustration it causes.
It also stops you from having two distinct maps, does it not? If you bond the switch to controlling the autotune, then it's not available for map selection.
I noticed my PCV eating a lot of memory just with a map-by-gear without Autotune enabled. What percentage is consumed when map-by-gear *and* autotune is enabled I wonder?
-
So, what target AFR values did you use? 13.2 across the whole range?
Did you just take Cozye's PCIII map, convert it to a PCV map, enable Autotune and leave the stock AFR values?
Whoops, I found what you did:
Final setup is easy too - Dynojet supplies a default AFR map which you can use (and after taking a quick look it should be fine to use the 2006+ AFR map on a 2002-2005). I cheated and recycled CodeRighters existing good work, which I then altered to suit my needs (basically leaning out where I tended to cruise). Activate the Autotune functionality in your PCV software and you are good to go (I'll cover gearing and temp shortly).
So that was good enough, eh? Hmmm. I still think a dyno tune which finds the best AFR for performance on a particular bike would be best.
Can you please post your map file for me to download and have a look at?
-
Any particular reason for not unplugging the solenoid?
Just to avoid any Fuel Injection (FI) light warnings. The service manual doesn't *have* a code for "faulty PAIR solenoid" though, so arguably you could disconnect it and have no errors on your FI system.
I'll be blocking my PAIR valves off with Toro's PAIR block-off plates in a couple of weeks, but I'll probably still leave the solenoid connected to avoid any electrical gremlins.
-
Worthless w/o pictures! :fing02:
Congrats, now show us your work! :pinocchio:
BR
Ask and you shall receive!
Beeewwwdeeeful!
But smudge that Beemer out of the pics will you? It's spoiling the view!
-
This shows the simple and easily reversible "marble method" for disabling your PAIR valves. Please note that disabling your PAIR valves is not a performance modification, but is a good change to make when you have a Powercommander (and particularly an Autotune module) to get the best fuel mixture dialled in.
At this point, I will try and sell you Toro's PAIR block-off plates which I also have on order. These are a much better permanent solution and any money to Toro is a good thing because the bloke deserves it!
Anyway without any further ado, let's get started.
First, you need to get your seat off. I don't need to explain how to do that, but note that the tank cannot be lifted if the seat has not been removed.
Next, lift up the tank:
Remove the two 8mm bolts which secure the tank.
Once the tank bolts have been removed, lift up the tank and replace one of the bolts, like so:
Screw the bolt down a bit, then spin the washer so it seats against the frame.
We're going to use this bolt which is nicely sticking out of the frame as a means of securely holding up the tank. I have used some socket wrench extenders, with the hollow end sitting over the bolt head, and the solid end pushing up under the tank, like so:
Nice and secure!
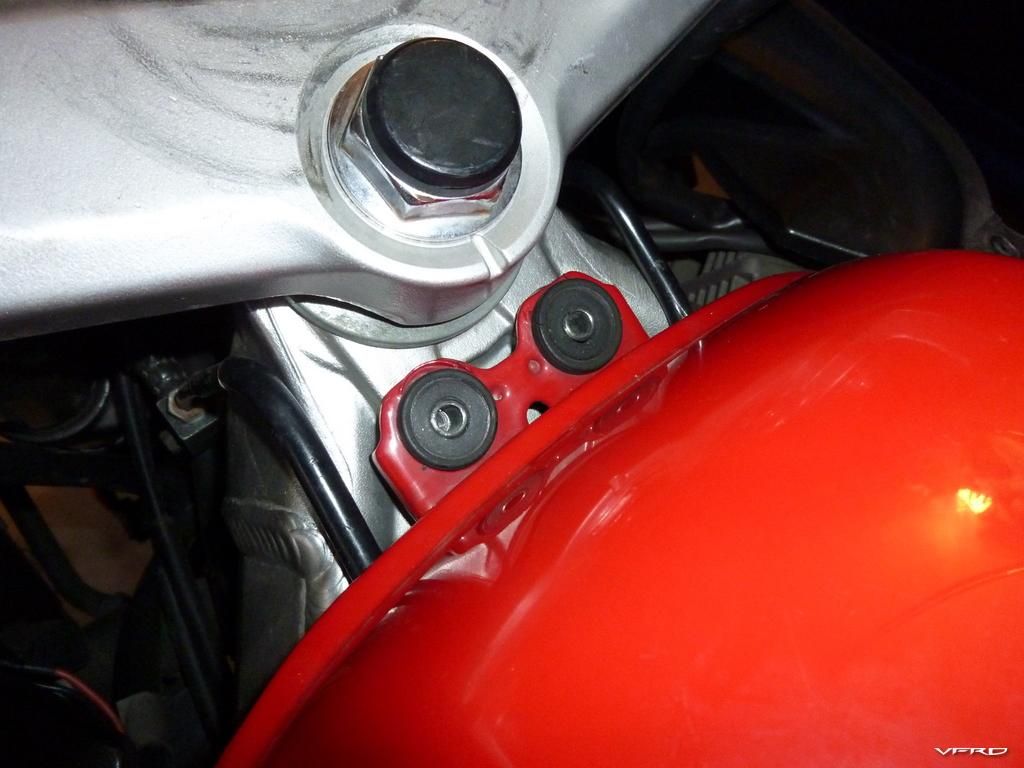
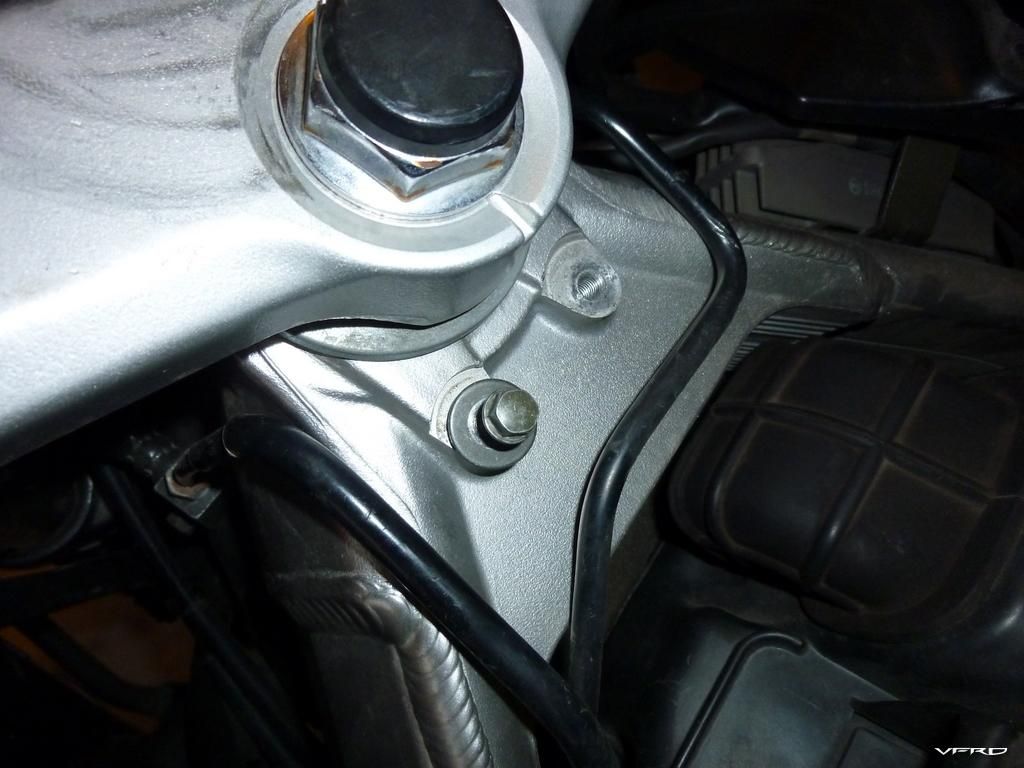
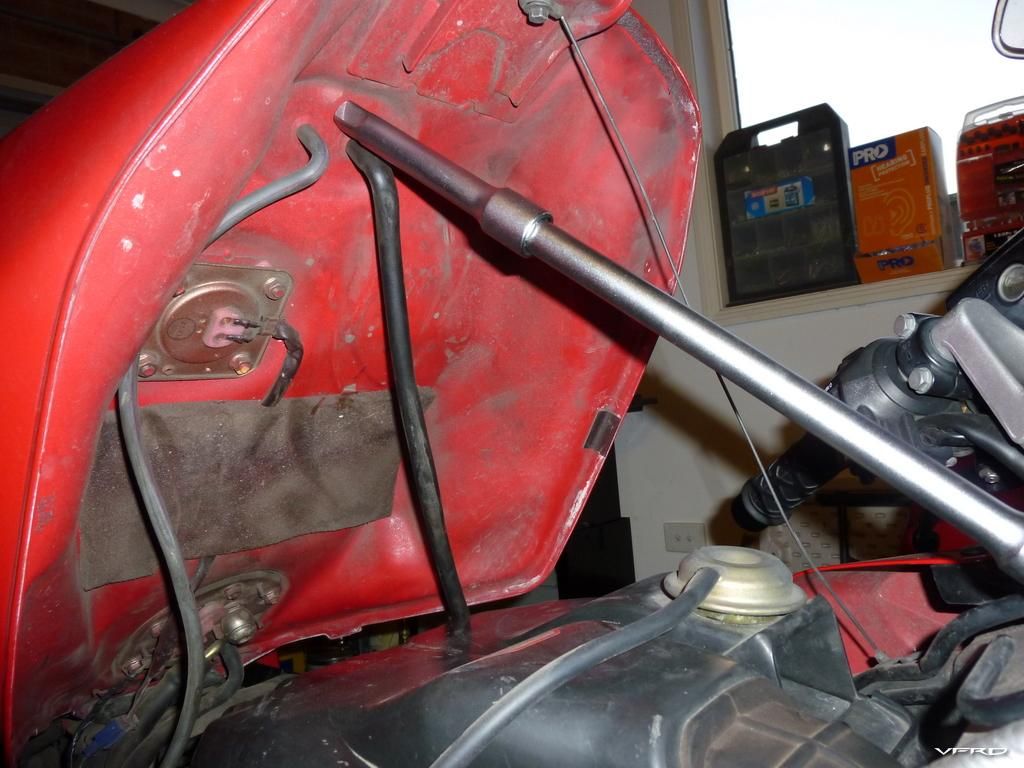
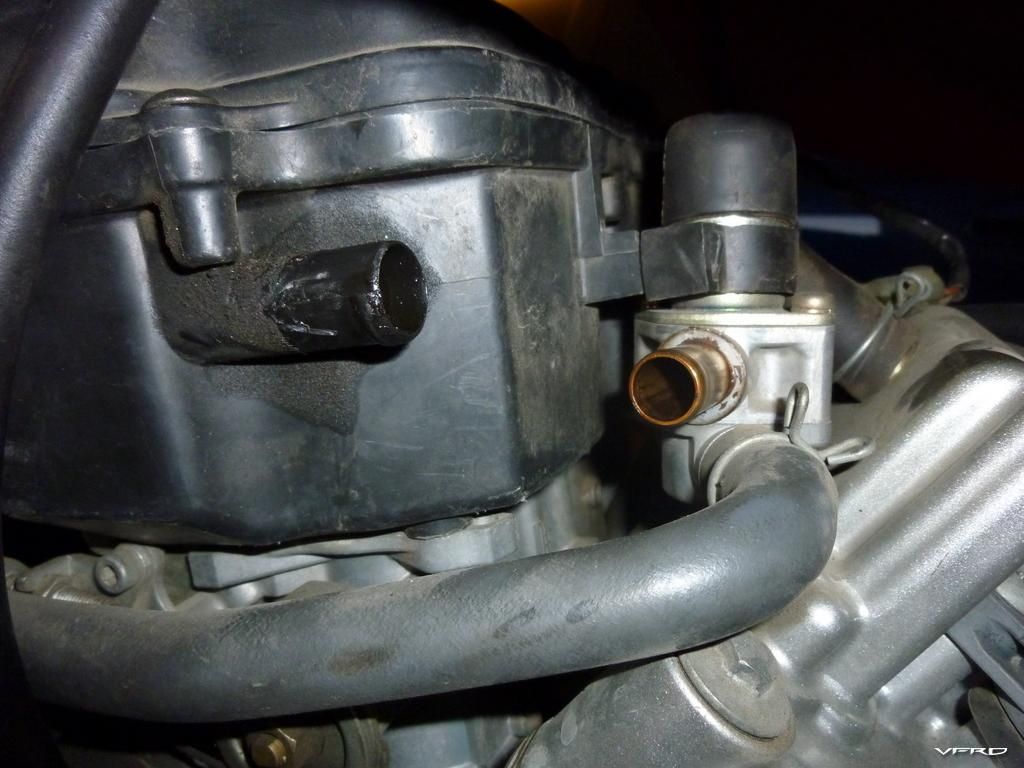
Now we need to remove the UPPER air hose (it's the short one) from the rear-left of the airbox. This hose connects directly to the airbox and to the PAIR solenoid.
Remove the UPPER hose by loosening the clamps with your fingers and moving them down the hose. Use a small flat-blade screwdriver to wiggle the hose a bit to get it off.
Once it's been removed, your airbox should look like this:
Airbox without PAIR hose.
The next thing we need, is a bag of these:

Three dollar bag of assorted marbles!
Find a marble which is a nice tight fit in the hose but can be pushed with some effort. Note that it doesn't need to be the world's tightest fit - these are not vacuum hoses, just low pressure fresh-air hoses to draw air from the airbox into the exhaust. Don't be concerned about the marble being sucked into your engine! Firstly, there is very little if any air pressure going through these hoses, and secondly the marble will head towards the solenoid rather than the airbox, if at all!
SPECIAL NOTE: Feel free to test the marble by sucking on the hose. If you can successfully suck the marble out of the hose, put your tools down and go for a job interview in the porn industry. :pinocchio:
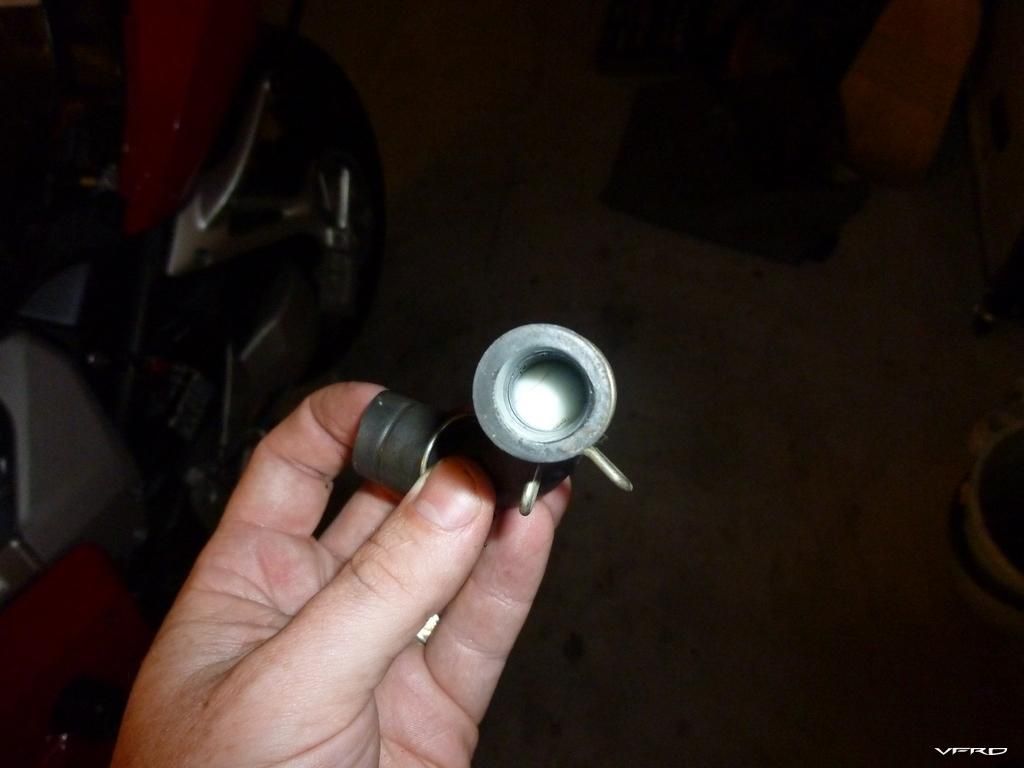
Push the marble into the hose, past where the clamps and hose connectors would reach to.
It's best to push your marble into the end of the hose which is straightest, so you're not trying to shove the marble round corners.

Marble goes in straightest end.
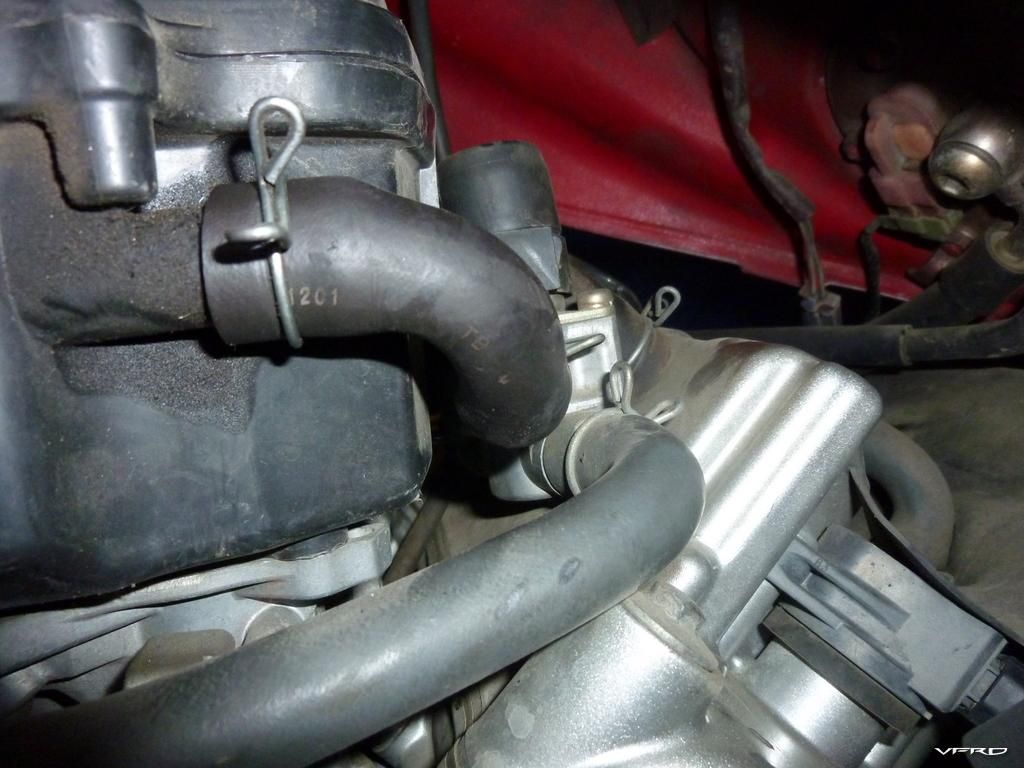
After this, you can just slip the hose back on, put the clamps back in their original positions, and secure the tank again. However we now need to adjust the idle speed, as the ECU holds the PAIR valves open during idling, which affects the airflow through the airbox and exhaust. Disabling the PAIR system causes the fuel mixture at idle to change and therefore the idle speed will drop, so we need to bring it back up.
Start the bike and let the engine warm up. If it won't hold an idle already, skip right ahead and perform the following step with the engine cold and also once it's hot.
We're now going to adjust the idle speed. Here's where the idle adjuster is on the right-hand side of the bike just behind the fairing.
Well hidden idle adjuster!
Turn the idle adjuster clockwise to increase the idle speed. Most likely it will be really hard to turn with your fingers, so use some needle-nose pliers if you like:
Be gentle and make small adjustments! A quarter turn can be a hundred rpm!
Once your engine is hot, and your idle has been set to approximately 1,200 rpm, you're ready to roll!
-
 2
2
-
-

An electric waterpump means the mech drive is no longer required, and saves some power (it all adds up). Also you can set it up to run on when you switch the motor off, which eliminates heat soak.
Saves power? Doesn't that power get absorbed by the motor yet again driving the stator to power the electric water pump? I could see if that microcontroller turned it off and on by demand?
Kinda; the stator generates power all the time whether it's used or not. If not used, it gets dumped as heat by the Regulator. If your stator is powerful enough to run an electric water pump, I'd imagine it's doing nothing more than helping avoid generating waste heat.
In short, I'm pretty sure the mechanical effort to turn the stator doesn't increase with the power being asked of it. The energy drain from the electric water pump at idle would probably be the biggest problem. Possibly the voltage could drop so low that the bike stalled. Oddly enough, switching off the pump here would be a bad thing because sitting at the lights on a hot day is when you really really need your water pump to be cranking!
Interesting video on electric pumps here:
-
1
-
-
My worst mod was done "free" for me by my local mega-dealership right before I left for a 3500 mile trip. I didn't catch it until almost half way through the journey. Brand new tires mounted with the rear on the rim backwards. Is it REALLY that hard to match up the directional arrows on the tire and rim?
Amen brother - that's happened to me twice. The second time I watched the guy doing it as he put the tire back on the rim and said "uhhh, mate...it's backwards". The response is always the same - "sorry mate I'm used to doing BMW wheels".
Damn them and their paralever-on-the-other-wise wheels!
-

Good lord, the trail on that MTB front end is nuts!!!
-
Also, Dan could you please post the required octane ratings to avoid detonation? Not just in American (RON + MON / 2) but also RON and MON.
You state 93 US octane, which to me works out at 98 RON, yeah?
Such fuel is not *always* available everywhere in Australia - sometimes you can only get 91 RON (approx. 87 US octane), but 95 RON is fairly common. What is your advice in these circumstances?
My car - a 4 litre six cylinder turbo - will run on 91 but only because it has a knock sensor AND a closed-loop EFI system driven by the O2 sensors. The VFR doesn't have this of course....
-
It should work fine with the stock exhaust, but just realize that with the supercharger, the more exhaust flow the better, which is why I'm kicking around the idea of making a full system with larger diameter tubing. There's certainly power to be gained by opening up the exhaust.
As it stands, catless '98-'99 headers are the best flowing pipes found on any VFR. I'll find out how much power is lost from the cat once I bolt a kit onto a '00-'01.
Dan, have a look at the Motad kits already available for the VFR. They are aftermarket stainless headers with no cat.
http://www.motad.co.uk/product.php?prod=VF...+Collector+Unit
-
What about the ScottOiler? This seems very complex compared to their own solution, and it's been around for years!
Experiences of a PCV with Autotune on a 2004 VFR800
in Modifications
Posted
No problems. I will hook it into the vacuum line used for the flapper valve - it comes off that group of hoses in the throttle body, so it will be a good test.