

enzed_viffer
-
Posts
1,047 -
Joined
-
Last visited
-
Days Won
5
Content Type
Forums
Profiles
Gallery
Blogs
Downloads
Events
Posts posted by enzed_viffer
-
-
So... I deleted one column from one table, and it made it much worse.

Still don't know if the tables are additive/cumulative.
Still don't know how to tell if hesitation/stumbling means too lean or too rich, or too much of a step between adjacent values.

But hopefully I'll get there eventually.
-
Thanks for all the comments. I do enjoy riding it. I get a lot of people asking what is it and they simply do not believe it is a 20 year old VFR.
And why would they? It has a very modern look now. That's one sweet ride, Sir! :wub2:
-
OK, now I have a nuther question. After years of trying many maps, modding my own, etc etc., my current map (downloaded from this site the other day) is the BEST map I've ever tried, except for some small hesitancy at around 5%-10% throttle. "Who rides at 5% throttle?!?!?" you cry. Well.. it turns out, *I* do, and surprisingly, a LOT of the time. (I know what the throttle opening is, as I put marks on the twist grip and housing while looking at the PC screen).
Anyhow, looking at the map, I found something odd that might account for there being only one glitchy bit of fueling on an otherwise great map. The 10% column has figures in it on two different tables (I can't remember which ones, and I'm at work at the moment, but either table can be used for this same RPM and throttle range). It seems like when the ECU / PCII moves from the 5% to 10% column, this is causing the hiccup. So how does the PowerCommander interpret this? Does it use both together, or does one table take precedence over the other? How do I choose which table's figures to remove?
Never mind; jolly bad form I know, but I think I'll answer my own question.
"Why don't you just delete the numbers in one column, and see what difference it makes? If it's better - great, otherwise reinstate them and delete the figures in the other column."
Thanks for that; I think I'll do that when I get home.

(What do we call this - "self-foruming"? Does it make you go blind? [Can't tell if it makes you go mad... too late for that...])
-
How come you didn't mount it on the left footpeg bracket? That's where my Elka/Ohlins hybrid's remote is mounted and it works really well there.
-
Wishing Jim a speedy recovery. I wish they would just ban cell phones entirely while driving!
Yeah me too - get well soon, Jim. And cellphones ARE banned here while driving, but you still see people talking on them while driving, or - worse still - texting. And they still have crashes, but are quick to hide the cellphone, but often get caught out because the police will check the phone records if they're suspicious.
-
Hate to say it, but shipping might be more reasonable for you from Germany to Holland???
I was quoted 28 Euro by Mr Thurn-Motorsports for shipping and insurance from Churrrrmini to Noo Zilund, so to the Netherr
egionsland must be practically free. -
I'm with Rush 2112 on this one.
I know for a fact that the Australia/New Zealand (AU/NZ) 2009 model has a different part number for the ECU to that of the US.
I thought the US ones were generally different to that of the EU, AU/NZ, and this has to be based on general software configuration.
The US is the only market that has the carbon canister as well.
When I first fitted a PCV to my 2010, I tried a few of the US based maps and ended up finding the EU map supplied by PowerCommander the best until I could get my own built.
Moot point now as I've moved to a RapidBike RB3 and mapped the lot myself.
I agree - I too tried the US maps and they weren't ideal, but the Yurpeen ones were better.
What's a "RapidBike RB3", where did you purchase it, and how does it work?
-
Something occurred to me yesterday, when trying to sort out a suitable Power Commander map for the VFR. In the past, I've tried all sorts of maps that were supposed to be really good, yet made the bike worse. My question is this: Do VFRs for different markets come with different factory ECU maps, to suit each country's fuel, etc., or a unique map for each individual bike, or does the factory map all bikes for a particular year with the same settings, regardless of which country they're shipped to? If either of the first two cases apply, then it would explain why when I've loaded a map that someone else with a 2000 or 2001 VFR has said was brilliant, it was 'less than stellar' when I loaded it. I've actually found that apart from the last map I loaded, every map I've tried has been worse than just running O2 sensor eliminators and no PC.
-
I had bad atrial fibrillation in June 2010, after I had open-heart surgery to fix my leaky mitral valve (which neither I nor my doctor knew about, until I asked him to listen to my ticker, because I had chest pain, which turned out to be indigestion). To fix the a-fib, I was first given Amiodarone tablets, then after I was discharged and went into a-fib again a few hours later, stuck into the local public hospital and (eventually) put on an Amiodarone drip. I was on warfarin tablets after discharge, but only for a week. The a-fib came back a few weeks later when the meds wore off, which freaked me out until the doctor pointed out why, but it's no biggie, comes and goes but no real problem. So apart from daily 10mg aspirin for the rest of my life, I'm on no meds. Yay!
But yeah, if I was on blood thinners, I'd still ride.
-
I agree 100% earplugs with helmet speakers is the way to go.
As of today, I (very nearly) disagree with myself.
The 3M earplugs I had in were slightly too quiet on the way to work, and when I turned the Sena up, it beeped to say, "Th-th-th--that's all, folks!"

So, on the way home, I didn't push them in so far, and was able to turn the volume down a bit.
Next thing is to find some slightly less efficient plugs...

-
I've spent a bit of time (and lots of money) fiddling around with my Sena SMH10 and various options for earbuds (I've about 5 or 6 pairs). Gave up in the end and went back to using the standard in-helmet Sena speakers and some 3M earplugs. It works great - the earplugs block out the wind noise, and there's enough volume to hear the music or phone or intercom with the plugs in. The best thing is not having to try and get the helmet on and off with the plugs in. I love the setup; put plugs in, XR1100 on, tap the phone button and jog dial to turn the Sena on, wait 5 seconds for the phone to pair, hold the jog dial in for a couple of seconds, and the music cranks up. I've taken to using it every day, even though the commute is only 15 - 20 minutes each way. There's only so much entertainment that can be derived from lane-splitting past slow cars and lines of commuter buses, and racing other bikers...
-
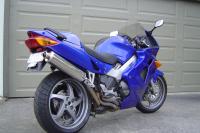
Two years of trolling CF, a marriage, and a baby boy later, I decided what I wanted and pulled the trigger on a 1998 fifth gen VFR 800 vtec.
Welcome to VFRD! By the way - your new bike is not a VTEC. But! (however), unlike the Vtec models, it does have gear-driven cams, and it doesn't have Honda's crappy camchain tensioners, so the motor
is pretty bulletproof.
-
I don't get it... Are you sure the wear is just from being on the pegs? You're not dragging them on the road at all?
I've had my StylMartin StylSafe boots for over 7 (seven!) years now, and if the zips hadn't blown out, I'd still be wearing them. Soles (and the rest of the boots) are fine. Shame, as I've loved their carbon fibre goodness (7 CF plates in each boot) and super comfort.Anyhoo - new boots (as of last week) are Forma Cape Horn, and the soles are pretty gnarly on those. I defy you to wear those out! (And yes - they are available in the US).
-
I've got two, plus the helmet clamp kits for using earbuds and choice of microphones, PLUS an SM10 stereo transmitter. So... my SpousalUnit and I can both talk to one another, answer our cellphones, and either listen to music on our phones or plug in the Walkman to the SM10 and listen to the same music.
-
Instead of cilicone, I would apply exhaust sealer paste. It won't burn off, like the cilicone might.
Don't have the LV myself, so take my advice with a grain of salt.
I had baffles made up for my VTR1000 that a previous owner had bored the muffler cores out of. The whole time I owned the bike they were held in only by high-temperature black silicone. Not only did it seal the gap between the baffles and the muffler bodies, but being flexible it didn't crack or work loose.
-
I am somewhat bemused by the complaints about having to use premium fuel. You guys have no idea how lucky you are to have cheap fuel. It's just hit $2.27 per litre here, for low-octane gas. Cost me nearly $40 to fill up this morning.
If the Honda DCT is as good as the DCT on my car, I'd be interested. But even with the heavy Honda clutch in stop/go traffic, I'd prefer a manual transmission.
-
I've got a waterproof manual fan switch on my LH switchblock, mounted on the soldistate heated grip controller's bracket (was running out of other places to put things). Last week I fitted an automotive termo fanswitch, as my Honda one stopped working months ago. The new one is suppsed to come on at 95C and go off at 85, but in fact it comes on at 99C, and goes off at 83C. Near enough. It was NZ$23 cheaper than a Honda one, and took only 3 days to arrive, as opposed to 3 weeks...
-
OK, thanx for the help
I ended up just diving in and taking things apart to see what was going on. To answer my own question, the thermo fan switch is 16mm with 1.5mm thread. It also doesn't have a long 'snout' into the radiator as appears on the parts diagram; it's very short (only about the length of the threaded bit) and there's only space for one about 15-20mm longer than that.The waterpump seems fine, so instead of ordering a NZ$85 Honda fan switch (and waiting maybe a month or more for it), I'm going head out to the autoparts store armed with the numbers from four car ones and see what they've got and how much. (I'm also aiming for a 95C-85C model).
-
I'm going with a thermoswitch with a slightly lower temperature, and a manual override for in traffic. First I've got to take my U/S thermoswitch out, verify it's 16mm with 1.5 mm thread, and then off to the autoparts store. I've already got the manual override switch, which is just as well seeing the thermoswitch died shortly after (because of??) fitting the manual switch.
-
HS has a thread as well as myself that shows how to install a manual fan switch that will get you by until you can get a new thermo switch. I think I have a good one in my parts box if you need it. Not sure what shipping would be but let me know if I can help.
Thanks for the help and your kind offer, but I've had a manual switch fitted for ages. There's just the odd time when I forget to use it, and end up with a very hot bike. A few times I've ended up with a puddle of coolant on the ground under the bike, which is weird because a very good bike mechanic serviced it 5 or 6 months ago. Some time afterwards when I was testing to see if the thermoswitch was working, the temp got up to around 110C, and I ended up with a very large amount of coolant spit onto the garage floor.
Since then I've also done the "topping up on the sidestand" thing, and last weekend topped it up again, and ran it for ages with the fan on, and even with lots of revving the temperature never got above the mid 80s.
So... I have no idea what condition the cooling system is in with respect to the pump, radiator cap, thermostat, etc. It's done 61,000 miles, and apart from a few coolant changes, I'ts had no work done on it. I'm thinking I'll fit a lower temperature thermoswitch (say 95-85 C) as most of my riding these days is commuting, where due to the entrained air column when sitting in a stream of cars, there's actually very little air movement through the radiators. Then if it behaves OK, I'll leave it alone. If I get any more coolant puking, I guess I need to look at a new radiator cap and pump overhaul?
I was actually going to buy all the parts on ServiceHonda, but they didn't have the pump parts under "water pump" in the catalog!
-
My thermoswitch is non-functional. Can you tell me, is the thread on it 16mm with 1.5mm threadpitch? The reason I ask is that a Honda switch is unavailable here, so I'd have to order one from overseas, or I can buy a non-Honda one as several are available in various on/off temperature points. I' don't want to have to take the old one out until I've bought a replacement.
-
Thanks for all of the input. A lot of reading and good info. I have found many dealers on Cycle Trader that have these bikes still on the floor and willing to cut deals and ship to my location. Now, the delicate process of buying a bike from one dealer and having my closest dealer service it. That's not a fun scenario any way you cut it. However, I still like the bike and with some of the pricing I have seen, it seems like a good deal.
I doubt that dealers here have significantly discounted 1200s available, because they're generally not like that. Just as well, because I did the dough from my mother's estate (she died last year) that wasn't spent on the house, on toys: Sena gear, new helmet, and (the big ticket item) a car. After reading all the positive comments, I think I might have been tempted. The thing was, I'd decided there wasn't really anything around that would do anything my bike doesn't do. However, in the last couple of weeks, the VFR has started feeling a bit rough. It had a big service nearly 6 months ago (the first I've ever paid for), and was really smooth. Now it has an annoying vibe around 4-5k rpm, the suspension feels like it needs a service, and I'm just not enjoying it like I used to. Doesn't help that my riding for the last 15 months has been ALL commuting - 15 or so minutes each way.
-
I've got a pair of SMH10s, a pair of the helemt clamp kits with the two different mic options plus plug-in earbuds, and an SM10 so both the pillion and I can listen to the same music. I've ridden with the cellphone (Nokia N8) paired, listening to the music player on that, taken a phone call while riding (so easy!), and with both the cellphone and SM10 paired. This thing works so well!
The only thing I've found is that streaming music from my phone in heavy traffic, I get occasional clicks and pauses, presumably caused by momentarily picking up bluetooth signals from other phones(?)
-
Would these mod's apply to a '98 also ?
Yes, the '98 and '99 engines are identical. If you get serious about this, I can help. There are many helpful PAIR threads on this site, but all the info. isn't in one place.
IG
Thanks. I'll let you know.
What is the reason for doing this mod ?
My reasons are:
1. Reduce or eliminate the slight backfire/popping on decel due to the aftermarket exhaust and PAIR system.
2. Get rid of the hardware associated with the PAIR system. It clogs the area under the airbox. Will make future maintenance easier. Won't have to remove hoses, etc..
What?
I have "an aftermarket exhaust" and have never had any "backfire/popping on decel". As for the PAIR system "clogging the area under the airbox" and this making maintenance difficult, I've owned my '01 for 9 years and this hasn't been an issue either.
I *did* disable the PAIR valves once (even had some flash blanking plates to fit) and I reckon the engine ran worse, so I put it back how it was. FWIW, the only engine-related mods the bike has are a BMC airfilter and O2-sensor eliminators, and it runs pretty well (it will wheelie when accelerating hard in 1st and 2nd). All that unnecessary hardware can stay there forever as far as I'm concerned; out of sight, out of mind.
Standard Map On Vfr Ecu
in Modification Questions
Posted
Whelp, last night I did some research, and suddenly (actually, it was s-l-o-w-l-y), the light went on
So... I went out to the garage, and disconnected the plug from the PAIR system.
Put the fairing panel back on, and went back inside to do some more VFRd research. And my laptop crashed, died, burst into flames, and died all over again.
Well... actually, it just flashed up a lovely white screen with thin black lines, and that was that.
So, I went for a ride, and it seems that the was right, coz the herky-jerky was gone.
Just wish I could now load some better maps, that don't have heaps of fuel added to counteract the air injection from the PAIR system. Asked my VERY techy son for some help, and he just laughed and said, "Your GPU is fried". Gee, thanx, Dave.
Luckily (or prehaps not), I have a very old Compaq 'portable' (in quotes, because it weighs a ton, being made in the time of Noah, and carved from solid granite by the feel of it), which is useless for anything but 'bike stuff', as all that is on it is Power Commander s/w and the VFR mainteance manual. Unfortunately, it can't connect to teh interwebs, so I dunno if I can get a sensible map onto it, unless I can copy some onto a CD.
Technology, huh?