

enzed_viffer
-
Posts
1,047 -
Joined
-
Last visited
-
Days Won
5
Content Type
Forums
Profiles
Gallery
Blogs
Downloads
Events
Posts posted by enzed_viffer
-
-

... but what a shame the Service Manual, as you will now be able to testify (testify, kick a hole right in the sky, slap a lion in his eye, testify testify, Johnnyyyy Johny Johnyyyyyyyy), sorry RHCP momento... the all elusive manual that covers the 00-01 versions, AKA the one I have, DOES NOT include the MFin' code number 23... behold...

Otherwise you surely would have found the culprit at the beginning!!
Numpty is an understatement.
You should do what I did last night - download the right manual from the "Downloads" right here on VFRD! Took me several goes to get more than just the cover - for some reason; I think it was my browser, and I finally found at the trick is to NOT choose to save it as a PDF (even though it is), but as "all other files". Funnily enough, it downloading OK from my work PC.
It's a nuisance I spent so much time chasing the 10 and 13 codes, especially since I was almost positive they were bogus. Shoulda listened to my instincts (and for once, not my SpousalUnit, as she would rather I always take it to a workshop.
As soon as I 'untrapped' the cable from behind the clutch cylinder, the Evil Doom Eye disappeared.
Bike rode well this morning (no flames, no tickets for my unruly riding), especially once I topped up the tyres (and the tires, too); the front one has always lost pressure since I had Ariete/Bridgeport 80-degree valvestems fitted, and surprisingly the back was low too. Made for somebad tram-lining on one of the roads near home that's been dug-up, resealed, and totally f'd up. No kidding - it's gone from smooth asphalt to having bumps 30cm or more high! I've tried jumping them, but the VFR's not a great motocrosser....
-
Yay!! All fixed!
Once I knew it was 23 flashes for the error code, not 10+13, and what that meant (O2 sensor heater), it was easy to track down. It was ME! Well, quite indirectly.
I've had some of my servicing done by shops recentlyish, and one of the service numpties managed to tighten down the clutch cylinder onto the wires from the O2 sensor, so the heater wire was either shorting to the one next to it, or (more likely) to the frame. I just freed it, taped it up, and NO MORE ERROR CODE!
Yayyyyyy!!!!!
-
Whelp, they're NZ$22,000 here. That's US$16280. That's because there's just one company here that imports them, so they're a monopoly, and they don't give a crap about their customers. Spares are not kept in stock (all need to be ordered from Japan.) That's why 2 years ago I bought a new car instead of a replacement bike.
-
Thanks, Terry - I didn't even know that was there!

-
OK, I found a site that had a "Honda Programmed Fuel Injection - How it Works" pdf (Couldn't copy and paste the address here for some reason). It was very good - explained lotsa stuff. Turns out that what I was beginning to think last night while lying awake in bed thinking about how crap Microsoft is (don't ask!), was true. The EFI error codes were not a 10 and a 13, but a 23, which is: "Oxygen Sensor - Heater voltage is not applied to ECM terminal". Should be easy enough to fix.
-
Don't bother with resistors; just go on ebay or whatever; the indicator unit that works for LED bulbs (and also filament bulbs) is very cheap, and just plugs in, in place of the other one.
-
On my 5th Gen, yes. Also replaced the taillight (main reason for doing the indicators as well). There's no significant advantage (maybe bulb lifetime), but I broke my taillight and it was an opportunity to bling the bike a little.
-
Well, that's weird; the cover clearly states: "1998 - 2001 Honda Service manual VFR800FI Interceptor" (not that they were called that here).the 98/99 models had NOO2 sensors, you need the second edition manual that covers the Y2K/01 models with O2 sensors !
-
No, they said on their website that if you ordered LED indicators, you would need a new flasher relay. It's because the OEM one relies on the resistance of the incandescent bulbs for the right flash rate; if you fit LED bulbs they flash way too fast.One of my questions was regarding the flasher module.....I wondered if it was integral but clearly it wasn't?
-
I've seriously considered the "black tape" fix. I also need to check the service/diagnostic connector connection (continuity, voltage, etc.), as the reset procedure doesn't work.
The other option is to stick the resistors back in, as there's no discernible difference between that and "Eye of Doom" mode.Eye of doom...Huh... perhaps it's a hobbit infestation!
-
I bought a Thurn, plus the matching clear indicators and a new flasher module.
-
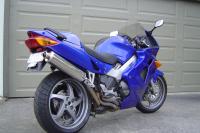
Although mine is a 5thGen, it's probably (somewhat) relevant to comment anyway. After breaking my taillight on the last day of work last year (by parking the bike with the tail about 1cm to close to the block wall of the parking garage at work before hoisting it onto the centrestand), I decided a refresh was in order. All up, I think the total cost for taillight, new flasher unit and clear front indicators was slightly more than buying an OEM taillight on its own. The taillight wasn't in stock, so had to be made (I have a suspicion the work is outsourced, but don't know for sure). Whatever - I had a wait of several weeks before it arrived.
While I'm pleased with the look, I'd have to say the quality is nowhere near OEM. The front left indicator shell wasn't glued to the lense, but I didn't want another long wait, so I used some sealant to fix it. Fitting the taillight was tricky, as you have to plug the wires for the unit into one of the existing plugs, then fit the plug into the shell. The plastic is a little thinner, and the sockets for the plugs are not well moulded, and thin and brittle, so don't bode well for a long life. (On the plus side, unless you need to remove the taillight for some reason (like I did this week, to take the tail cowling off), you won't be doing this very often, due to LEDs expected superior lifetime.) Also, you can see the circuit boards and wiring for the LED panels through the taillight lens.Performance and appearance wise, they are very good: quite bright and visible.
Hope this helps.
-
It's weird: have a look in the service manual: the O2 sensors do NOT exist: they're not mentioned in the "Fuel System" chapter, nor in the "Technical Features" chapter, and they are not in the wiring diagram.
-
The only fault codes were baro sensor and #2 injector (10 flashes and 13, or the other way round). Faulty ECU is 20, and "doesn't hold the self-diagnosis data", which it does. There are no error codes for the O2 sensors.
It is interesting that the manual makes NO mention whatsoever of the O2 sensors with respect to the determination of the duration of injection pulses: it seems to be all determined by the other sensors and which part of whichever of the two preset maps per cylinder is being selected. Perhaps it's just an oversight? Maybe they thought it was too technical? Too much information? Too secret? -
I have a Spare set of O2 sensors off a 2003 6th gen. The reference numbers differ From Those off the 5th gen V2.0 in the Middle segment.
36531-MCW-D01 6th gen
36531-MBG-D01 5th gen
These refs are for the Forward sensor.
You are welcome to them to try a differential diagnostic if you cover postage From Spain only. The sensors are Free of charge to you (no Blood suckers Jumping on the bandwagon please)
Thankee kindly, Sir, but I don't believe the sensors have anything to do with it. After lotsa testing, it looks like although the fault codes are for the baro sensor and #2 injector, they're bogus, as they both test fine, but the error codes remain and won't reset. That makes it look likely that the ECM is borkt, perhaps from too much feeedlin about with the PC2 and whatnot.
The nett result is that whether I run the resistors or run with the error codes, it uses a map with default settings. I can't afford $600+ for a new ECM, so I'll just run it as it is, probably with the resistors or maybe I'll just paint over The Eye, or decorate it.

Hopefully, it won't explode into flames and make me crash, die, catch fire, and die all over again...
-
I still have the clunking noise which I'm reasonably sure is the Cam Chain Tensioner/s. I have a couple coming from Ireland.
Why Honda changed from the gear driven valve mechanism on previous generations and put that stupid bloody Vtec in its place I'll never know.
Yeah, Honda are crap at making decent camchain tensioners. I've had 7 (?) or 8 (??) Hondas, and the only ones that didn't have noisy camchains were either two-strokes or had gear-driven cams. My first bike - (72?) CB175 had so much camchain movement it had eaten a big chunk out of the internal castings of the engine. My last bike (VTR1000) was bought from a guy who had one tensioner let go, which lunched the front cylinder when "catastrophic interference" occurred between piston and valves. One of the very first things I did was fit APE manual tensioners!
As to Honda changing from gear-driven cams, the reason is obvious: the 99 to 01 VFR800s are too noisy to meet more recent Euro noise limits, because Honda moved the gear drive from a central location to the right-hand end of the camshafts, so more noise escapes.
-
I use Howard Leight plugs every day, because they're not particularly noise-reducing (plus I don't insert them all the way in. This cuts out the wind noise, and most of the road noise, so I can listen to loud music.

For touring and other things, I use 3M plugs, because they are particularly noise-reducing. I wish I'd had them in the 70s and 80s.
-
Well, I did the tests in the workshop manual for the baro fault and #2 injector, and they tested fine (as expected), so I dunno why the faults are there. And it runs fine too, so for the time being, I'll just ignore the Doom Eye.

-
Gloves?!?!

Ohhh!... So that's what I'm doing wrong!
-
My suspension upgrade was the single best thing I've done in the 10 years I've had the bike, and it cost around NZ$2800 (probably more than the bike's currently worth). Part of the cost was buying an Elka rear shock on a VFRD group buy, which cost me $1250, $250 of which was shipping and insurance. Then I had it gutted and replaced with Ohlins internals, which cost about $450 - money very well spent. The forks were first upgraded with Sonic Springs, then had a complete overhaul and refettling, which had to be repeated a couple of weeks later, as the springs (ordered using SS's spring calculator) were way too hard. So, new Ohlins went in, and the oil replaced again, and the valving rejigged to suit the new springs.
If there's ever a next bike, I'll take it straight to KSS and get it done properly, straight off.
Buying and fiddling with a Power Commander was a complete waste of time and effort, but luckily not a lot of money.
Thurn LED lights were a good idea (but breaking the tail-light in the first place was not), as was the rear hugger (but I'd buy a better brand); 60/55W halogen bulbs in the headlights were already fitted, but if they weren't, they're a cheap improvement.
If I hadn't been though the whole brake replacement thing on my previous bike (VTR1000), I would have done that, but as it is, I've had to replace all three rotors, pads etc. anyway, due to wear.
-
I've only ridden one BMW - a GS1200, I think it was. Weirdest bike I've ever been on. I was expecting masses of torque, and some character, but I was surprised by it. Hated the screen - heaps of turbulence behind it so it was noisy. The engine was very strange; it was like there was some factory or summat beavering away below me, that had little to do with the throttle, and less to do with the rate of progress. Perhaps it was assembling cardboard boxes or stamping out teaspoons or some other industrious endeavour, but it was very unlike a bike engine.
No thanks.
-
Mine was starting to look a bit tired and manky, so I bought a cover off TradeMe (local equivalent of Ebay, I guess), added some extra foam, bought a staplegun (because I couldn't get suitable staples for my pneumatic one), and Bob's yer auntie. Cost me not much at all, but does the job.
-
And you done gone and messed with it... after all these years!!!
You know what they say: If it ain't broke, don't fuggin' fix it!!!
"After all these years"? Dooood - I've been almost constantly feedlin' widdit!
You know what they say: "If it aint broke, feeedle widdit till it is!"
Enzed: Hello, VFR. Do you read me, VFR?
VFR: Affirmative, Dave. I read you.
Enzed: Turn off the glowing red eye of doom, VFR.
VFR: I'm sorry, Dave. I'm afraid I can't do that.
Enzed: What's the problem?
VFR I think you know what the problem is just as well as I do.
Enzed What are you talking about, VFR?
VFR This mission is too important for me to allow you to jeopardize it.
And we all know how that ended, don't we?
!
Now I'm really scared.
I had a feeling that there was some serious evil voodoo at work, but this could be worse. Perhaps it's high time I bought a Nomex suit
-
Whelp, I figured it out late last night in bed, and it's kinda obvious.
When the resistors are fitted to the O2 sensors, it gets no signal from the sensors, so runs a default internal 'fallback' map.
Because it's running this, it must ignore all the input from sensors, so no fault codes are displayed (no FI light illumination).
Secondly, even though the error codes displayed when the resistors are removed may be bogus (as evidenced by the code for #2 injector saying the engine won't start or run with this code), they still indicate that there is an error of some kind: either poor connection, intermittent contact, corrosion on a plug, or (at worst) a faulty ECU. So, even though I'm lazy (and wary of flaming death) I should really check these out. There's only two errors, after all, and unless I completely screw things up, I can always go back to refitting the resistors). The bike runs OK-ish, except when warming up, or when engine temp is really high.
Glowing Red Evil Eye Of Doom?
in Fifth Generation VFR's
Posted
Thanks, Terry. I've got a valve tool - replaced the core, but it didn't fix it. However (but!) both tyres are due for replacement, so I'll get the tyre techs to check it out (again!) when they're replaced. Just have to save up some shekeldollarz for the new doughnuts...