
sfdownhill
-
Posts
662 -
Joined
-
Last visited
-
Days Won
43
Content Type
Forums
Profiles
Gallery
Blogs
Downloads
Events
Everything posted by sfdownhill
-

New 5th/6th/8th gen performance header now in production in USA
sfdownhill replied to sfdownhill's topic in Exhaust Systems
Having tried four different types of 42mm crush gaskets, we found the best option is 42mm copper crush gaskets from Delkevic (pictured in a couple places on this thread). The 42mm gaskets are not on Delk’s website and they do not sell them on ebay. I only learned of them because I was on the phone with Matt at Delk to order the 41mm gaskets they recommend for VFR800s (Hoping the 41mm gaskets would crush to a functional size) and Matt said they have and sell 42mm gaskets. The 42mm gaskets from Delk have a skinny, round cross section and crush to a perfect id that is larger than the VFR’s exhaust port. The Delk gaskets have a seam on one side - we put the seam side down, toward the head, to give the header’s collar a cleaner surface to press against. They create a good seal. All the other 42mm gaskets we tried were too big to fit into the head’s sleeve - where the headers seat - without grinding and/or cutting. I’m editing out reams of trial and error, grinding, cutting, splicing, and cursing data. Even the Delk washers are difficult to get started into the sleeve, but because they are so thin, they can be persuaded past the lip of the sleeve. After starting the gaskets in by hand, the headers do the rest of the job of escorting the gaskets into their final resting place, then crushing them. It’s a lovely kind of slow-paced violence. -
New 5th/6th/8th gen performance header now in production in USA
sfdownhill replied to sfdownhill's topic in Exhaust Systems
I sent a PM to BusyLittleShop asking about a quick release system for VFR center stands. Note - BLS has been logging pilot-in-command time in a P-51 Mustang lately, so he may be wonderfully preoccupied. Anything that can be turned up about this by searching this site and VFRW will be welcomed. -
New 5th/6th/8th gen performance header now in production in USA
sfdownhill replied to sfdownhill's topic in Exhaust Systems
Here’s an important installation note about the new headers: using anti-seize on the head stud bolts (recommended) reduces friction enough that the 9 ft-lbs torque for the header nuts specified in the service manual has proven to be enough to bend even the thick, high grade stainless flanges Wade is using on our headers. We’re not sure if this happened because each of the two prototype headers has been installed and removed several times for fitment and dyno on both 5 gen and 6 gen motorcycles, or if 9 ft-lbs is just too much torque when using anti-seize. The flanges are still serviceable and nothing has broken, but bending where you don’t want it is always bad. As the flange bends toward the head, it likes to bend the head studs outward, which makes removal and future installations tricky. We’ll stay on top of this occurrence, try using less torque on future installations, and report back. -
New 5th/6th/8th gen performance header now in production in USA
sfdownhill replied to sfdownhill's topic in Exhaust Systems
Hi MooseMoose - yes, the headers need to be removed in order to remove or install the center stand [CS]. It's the same with OEM headers. Being able to remove just one pipe on your Delkevic to remove or install the CS is a nice feature. Alas, it will not be so with the new headers. Another member was asking the same question you are - a lot of us like having the CS on for touring and off for sport or track riding. I mentioned to the guy asking the question that another member here - I'm pretty sure it was BusyLittleShop [One of our resident VFR gurus with an advanced degree in the RC45] had set his VFR up with a quick release system so that he could remove and replace the CS without removing the headers. It would be great if anyone has time to search out that thread and see what it says. Now that it's come up a few times, I'll PM BusyLittleShop and see if he can offer any insight. I had another thought on removability of CSs: since only the right side CS fixing bolt access is hindered by the headers, and the bolt hole for the right side fixing bolt goes all the way through the cush bracket, there might be a way to run a tap all the way through the bolt hole to clear the threads, then thread a bolt of precise length through from the center of the bike outward to a nut on the outside of the CS where the bolthead usually resides. This would allow removal of the bolt without removing the headers. NOTE - 6 GENS HAVE REVERSE [LEFT-HAND] THREADING ON THE RIGHT SIDE CS FIXING BOLT. 6 GEN LEFT SIDE CS FIXING BOLT HAS REGULAR [RIGHT-HAND] THREADING. ADDITIONAL NOTE - 5 GENS HAVE REGULAR [RIGHT-HAND] THREADING ON BOTH THE RIGHT AND LEFT SIDE CS FIXING BOLTS. [Please do not ask me why I'm so adamant about this or how I learned about the 5/6 gen CS bolt threading anomaly - it still stings a bit] -
New 5th/6th/8th gen performance header now in production in USA
sfdownhill replied to sfdownhill's topic in Exhaust Systems
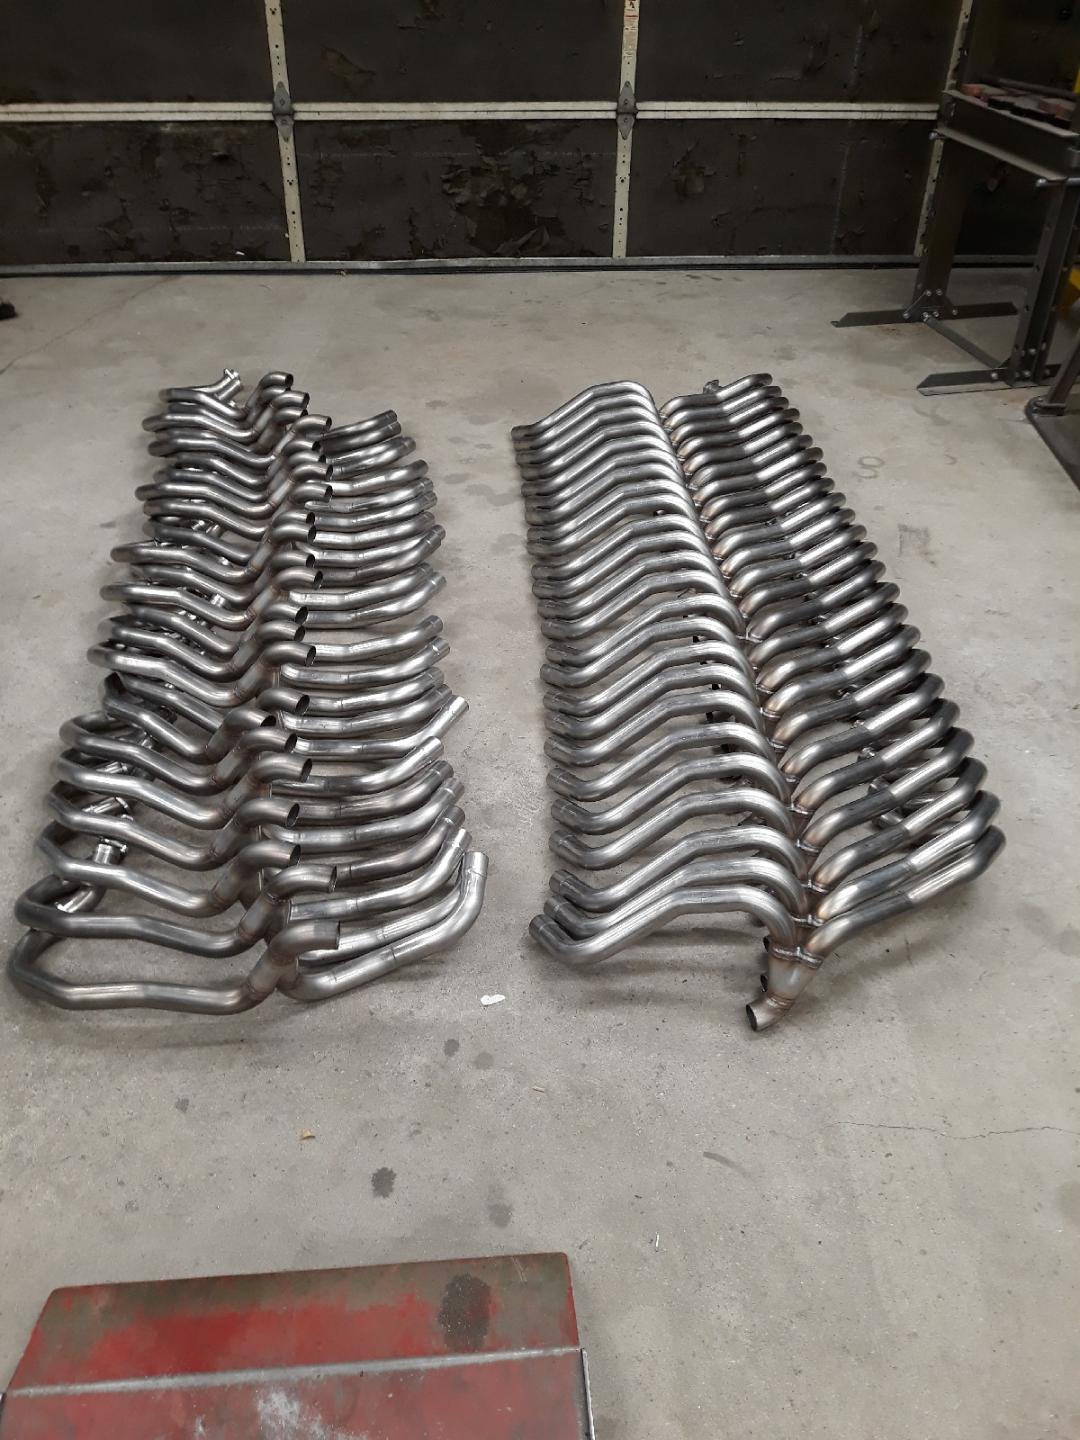
NO FRICKIN' WAY! When a project hits a couple of the 'just one more week' cycles, it raises one's eyebrow a bit. But here is physical molecular evidence of the cause of giant ____-eating grins on the faces of 22 VFR owners: Rows of cylinders 1-2 merges alongside rows of cylinders 3-4 merges: And here is a set of production headers just the way we like our women...almost fully dressed:
-
New 5th/6th/8th gen performance header now in production in USA
sfdownhill replied to sfdownhill's topic in Exhaust Systems
Hi Weirdo - it's good to hear first hand that 5/8" probably won't matter on 5 gen. If the same holds true for prototype 1, we'll just have Wade slice 5/8" off each production run header's collector exit. -
New 5th/6th/8th gen performance header now in production in USA
sfdownhill replied to sfdownhill's topic in Exhaust Systems
Updates: 1 - We are waiting to hear back from Wade about how the production run is progressing - it's scheduled to be done this week. 2 - This past weekend we fitted prototype headers to a 6 gen. We needed to trim 5/8" off the collector exit, then OEM 6 gen mufflers fit great. By early next week I will mount the now-trimmed prototype to my 5 gen to recheck fitment. I'll use an OEM muffler, TBR slipon, and Staintune slipon [Using both support brackets on the Staintune to lock down positioning] to confirm that proper fitment is maintained on 5 gens after the 5/8" trim. 3 - We have an 8 gen loaner in our sinister clutches. Monday Duc2V4 mounted new tires while I installed speed bleeders and new brake/clutch actuation fluid to get acquainted with the 8 gen - neither of us have one [Yet]. We will be installing a PCV on the 8 gen. One of the production run 5/6 gen headers will be converted to the 8 gen by modeling the curves of the 8 gen front primaries. Wade will build a prototype, then we'll do a baseline and dyno tune April 6. -
New 5th/6th/8th gen performance header now in production in USA
sfdownhill replied to sfdownhill's topic in Exhaust Systems
Thanks for reposting that Madscientist - good stuff. -
New 5th/6th/8th gen performance header now in production in USA
sfdownhill replied to sfdownhill's topic in Exhaust Systems
Good point Mohawk. On your mod, I was impressed that the gap between the tank and the air box could flow so much air, and it certainly works well. Your ram air mechanism is cool, too - it makes sure the air supply to the filter is plentiful. -
New 5th/6th/8th gen performance header now in production in USA
sfdownhill replied to sfdownhill's topic in Exhaust Systems
PMs are back on line, so communication regarding headers can resume there, -
New 5th/6th/8th gen performance header now in production in USA
sfdownhill replied to sfdownhill's topic in Exhaust Systems
Welcome back to VFRD after its little vacation. Hispanic Slammer, thanks for keeping the forum up to speed - you're efforts are appreciated. To purchasers of headers: Duc2V4 and I are unable to access PMs at this time, but we are getting email notifications when you send a PM, and we can read what you wrote. Until VFRD is back to being a fully armed and operational battle station, you can email us at vfrheaders@gmail.com. A few of you have already done this and it's working well as a stop-gap measure. K&N's large aperture [big mouth] air filter with part number HA-8098 is the only one they currently make for the VFR800. the big mouth is the filter we installed for dyno testing and tuning of the prototype headers. I was lucky enough to have purchased that particular filter from an individual in the UK for $85. Now the general public can purchase the same filter for $59.99 from K&N. The small aperture filter with the same part number is an old design, and is no longer manufactured. Confusion ensues because K&N on their own website and online retail dealers of K&N products all feature photos of the now defunct small mouth filter. Yesterday I ordered an HA-8098 straight from the K&N website and today a big mouth air filter arrived. I will attempt to attach a photo of the filter that arrived today:
-
New 5th/6th/8th gen performance header now in production in USA
sfdownhill replied to sfdownhill's topic in Exhaust Systems
I rolled the dice and placed a call to K&N to revive the discussion about the big mouth version of the HA-8098 for VFR800s. My call was answered by a representative who was not only willing to help, but held the position of product specialist. She could find no trace in the K&N system of the previous calls or emails I had exchanged with other reps. So I forwarded the email thread and photos to her this past Monday and heard nothing back. I sent an email follow-up today and eventually received this response: "Hello, The filter you are speaking of in the plastic wrap [large aperture version] is the only one we manufacture now. The older one may have been from our UK facility when we manufactured them there. The only one available for purchase is the one in the in the plastic wrap. The new one has more filter media space and will flow more air. If you would like to become a distributor of the K&N products or purchase for resale fill out our Dealer application. You can also email or call our UK facility." I sent a brief response thanking her for getting to the bottom of the puzzle and observed that part of the mystery stems from K&N's website photos featuring the small aperture filter and people who have recently purchased HA-8098 filters from K&N dealers receiving small aperture filters. There was no further response from her. To verify the info she provided, I ordered an HA-8098 directly from K&N's website. If it turns out to be the large aperture/big mouth filter that so many of us are after, I'll post it up on VFRD, then install the filter on VFRD member Hammerdrill's 6th gen prior to his dyno baseline and tune March 23. -
New 5th/6th/8th gen performance header now in production in USA
sfdownhill replied to sfdownhill's topic in Exhaust Systems
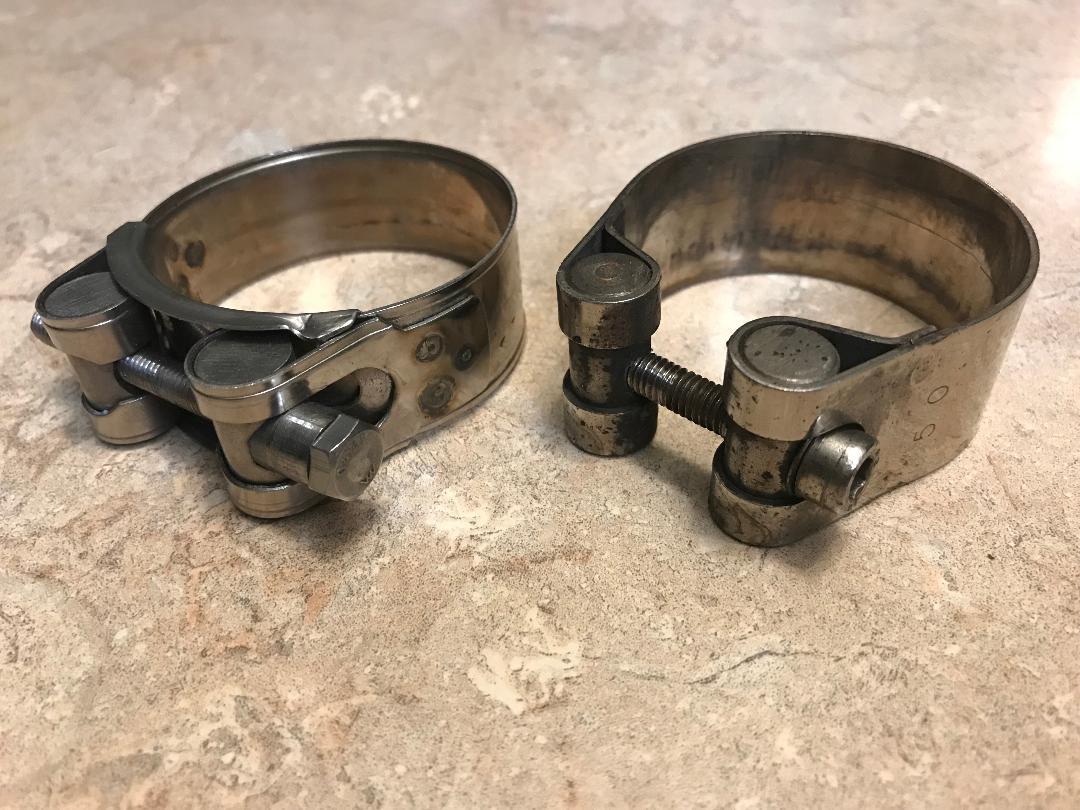
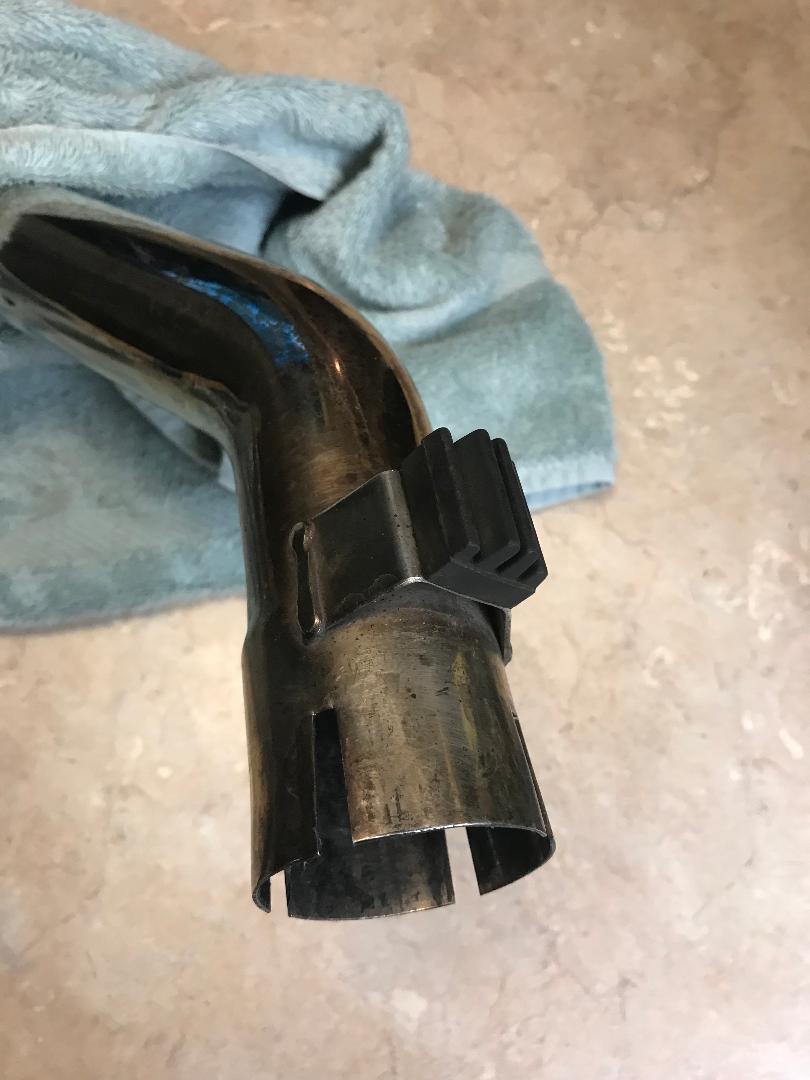
The lists on p1 of this thread have been updated. Now there is a 'LIST 8' made up of those who have placed deposits for 8th gen headers. Deposits are $200 and can be sent to the paypal of vfrheaders@gmail.com. In the note section of the paypal transfer, please enter your username and '8th gen'. Enter '5th gen' or '6th gen' along with your username in the notes section if you are placing a deposit for the third production run, which will consist of 5/6th gen headers. VFRD member Hammerdrill has purchased prototype 1 and we'll be taking his 6th gen to Attack Performance Saturday March 23 to do a stock baseline and dyno tune. Another VFRD member [I haven't yet asked him if it's ok to mention him, so mum's the word for now] located geographically close to Duc2V4's control and command center has volunteered his 8th gen for prototyping and fitment. We have April 6 reserved at Attack to do a baseline and tune on his 8th gen. One of the 5/6th gen production units is tagged to become the 8th gen prototype - we hope through building the 8th gen prototype from a 5/6th production unit Wade will get his mind around the concept of building modular front primaries. Tonight a PM is going out to all who have placed deposits for the first production run of 5/6th gen headers. For the new headers, a center stand stop for 6th gen owners will be a $50 add on [maybe less - I'm getting a fixed quote next week] and will consist of a tidy stop welded to a simple t-bolt clamp that will be fastened onto the 6th gen midpipe. The stop will be a single piece of 13g [2.4m] bar stock with two bends and a hole for a rubber stopper [not included]. The bolt tension section of the t-bolt clamp will be oriented on the backside of the midpipe - toward the tire - so all that will be visible will be the stop. We don't have a finished example yet, but the clamp will be one of these two types - Delkevic is on the left and Staintune is on the right: The center stand stop for 6th gen will look and function like the one on this Staintune, but it will be built on a t-bolt clamp instead of being welded onto the midpipe:
-
New 5th/6th/8th gen performance header now in production in USA
sfdownhill replied to sfdownhill's topic in Exhaust Systems
Good question boOZZIE - I followed up w K&N 3 times after emailing them the photos of both of their HA-8098 filters and got the run around each time. Their last position statement was that ‘it’s been pushed up to a product manager”, and I haven’t contacted them since before the dyno testing Jan 26. I’ll give it another go. -
New 5th/6th/8th gen performance header now in production in USA
sfdownhill replied to sfdownhill's topic in Exhaust Systems
Thanks Phil - that looks like a good place for an O2 sensor. -
New 5th/6th/8th gen performance header now in production in USA
sfdownhill replied to sfdownhill's topic in Exhaust Systems
Thanks JZH - not putting it there gives us a lot of leeway. That Erion is a good-looking assembly - is that your 2000? -
New 5th/6th/8th gen performance header now in production in USA
sfdownhill replied to sfdownhill's topic in Exhaust Systems
Michael - I don't understand why you'd post this on the thread, as we have been corresponding successfully via PM. Your post here covers the same topic as the PM you sent yesterday. I responded yesterday that I'd been home since 9am, the mail hadn't arrived yet, and I have not received a notice from a carrier that a delivery attempt had been made. Later in the day yesterday I PM'd you with an update that the US Postal mail had been delivered and did not include an envelope or parcel from you. PM is the appropriate medium for our transaction. -
New 5th/6th/8th gen performance header now in production in USA
sfdownhill replied to sfdownhill's topic in Exhaust Systems
Good question, MBrane. Yes, over the next few days, I will PM everyone who has placed a deposit to ask those questions and request a destination shipping address so we can start preparing to ship finished headers. (Like you, I can’t help but snicker while trying to remain serious about anything bung-related) -
New 5th/6th/8th gen performance header now in production in USA
sfdownhill replied to sfdownhill's topic in Exhaust Systems
So true sir - getting back to Brian’s ‘Greatest Hits’ road selection with the gang must happen again. -
New 5th/6th/8th gen performance header now in production in USA
sfdownhill replied to sfdownhill's topic in Exhaust Systems
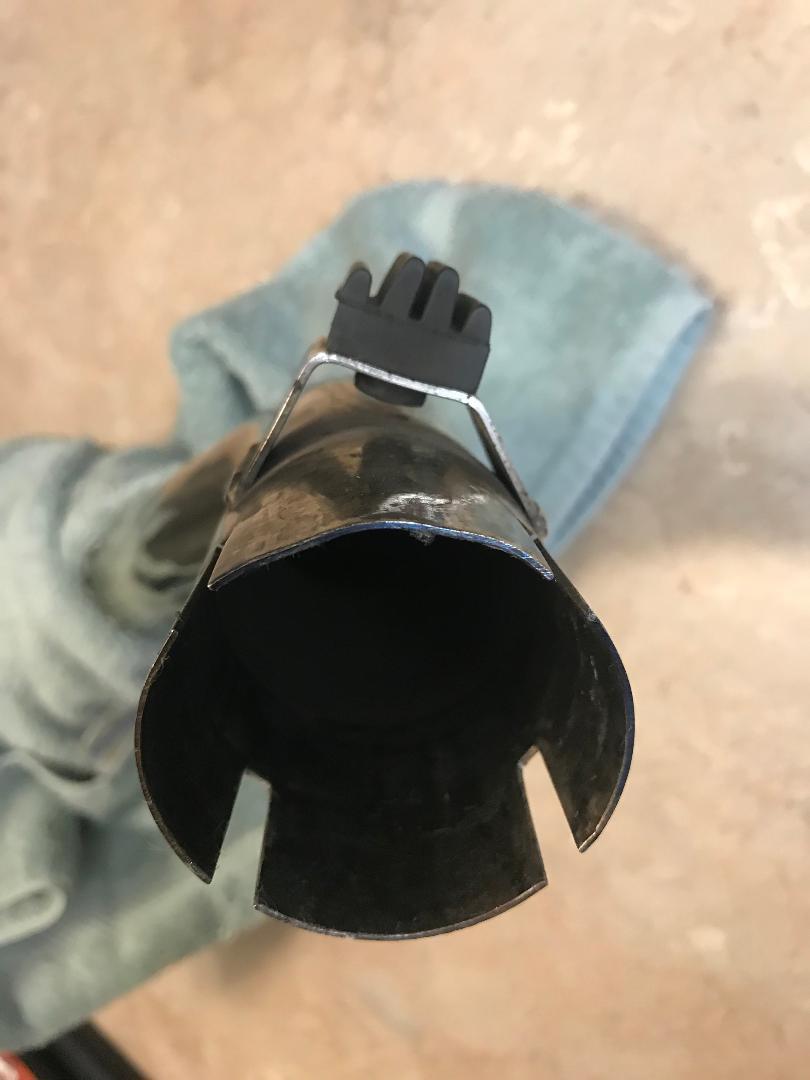
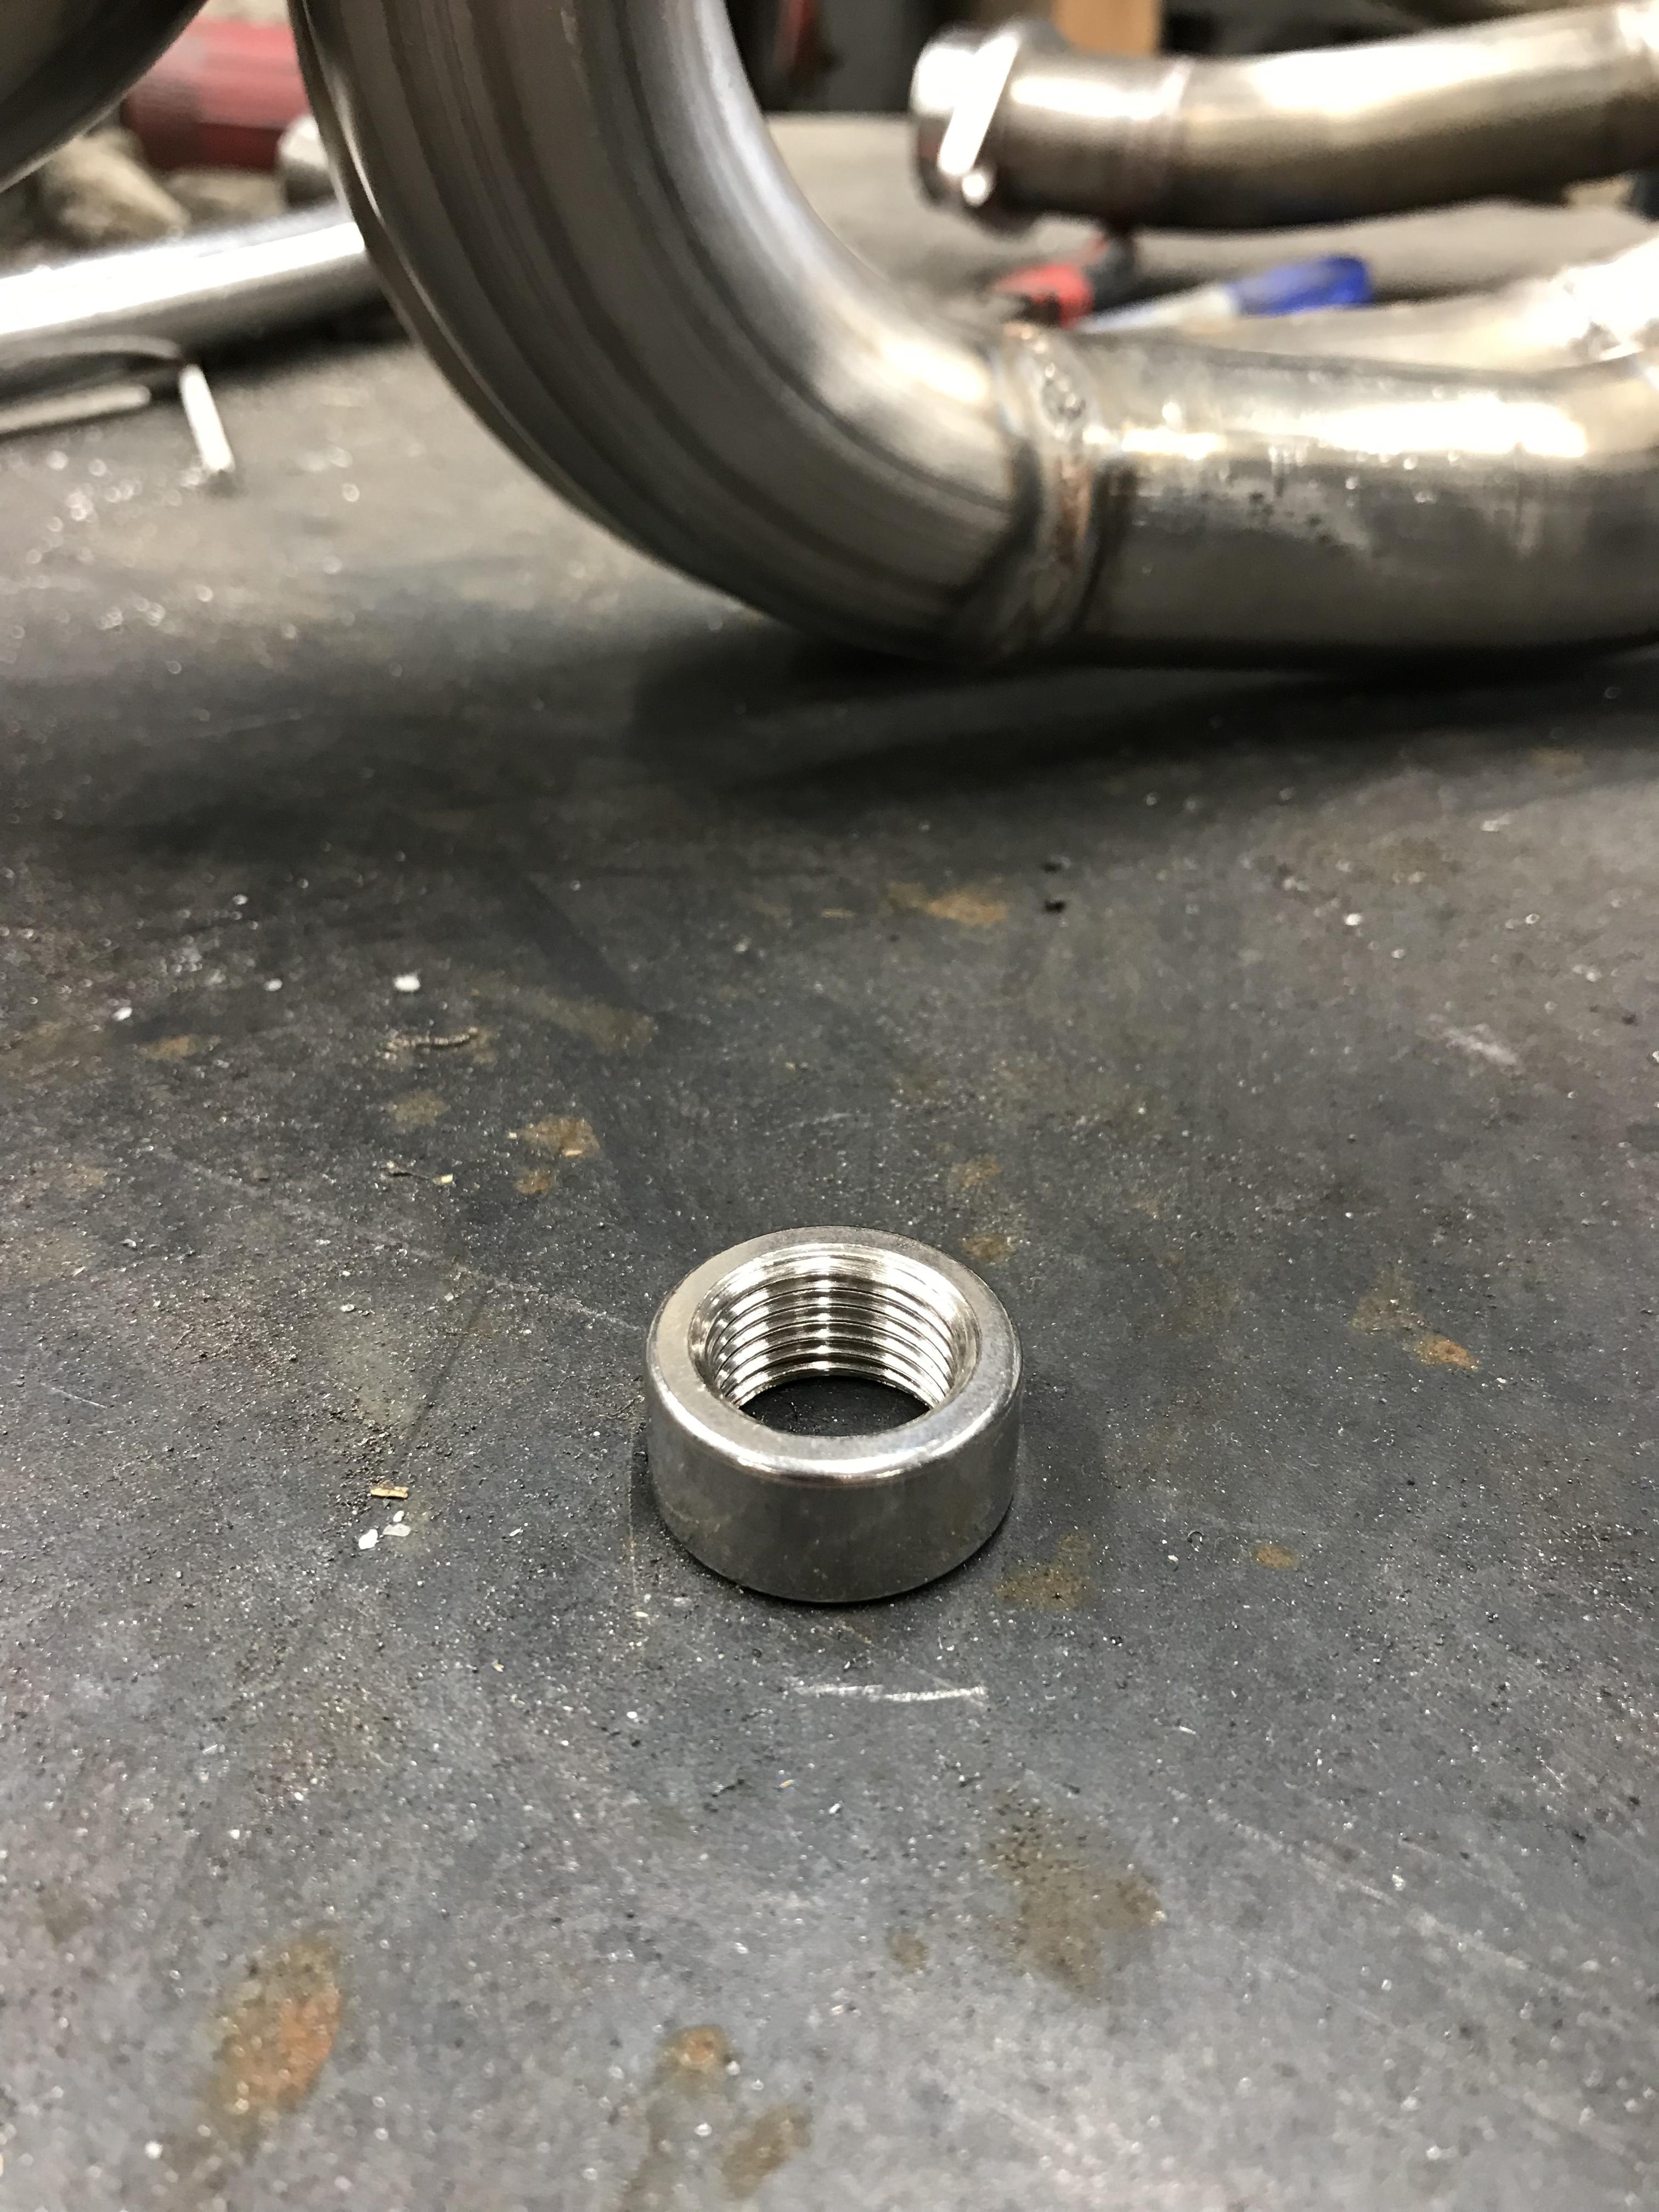
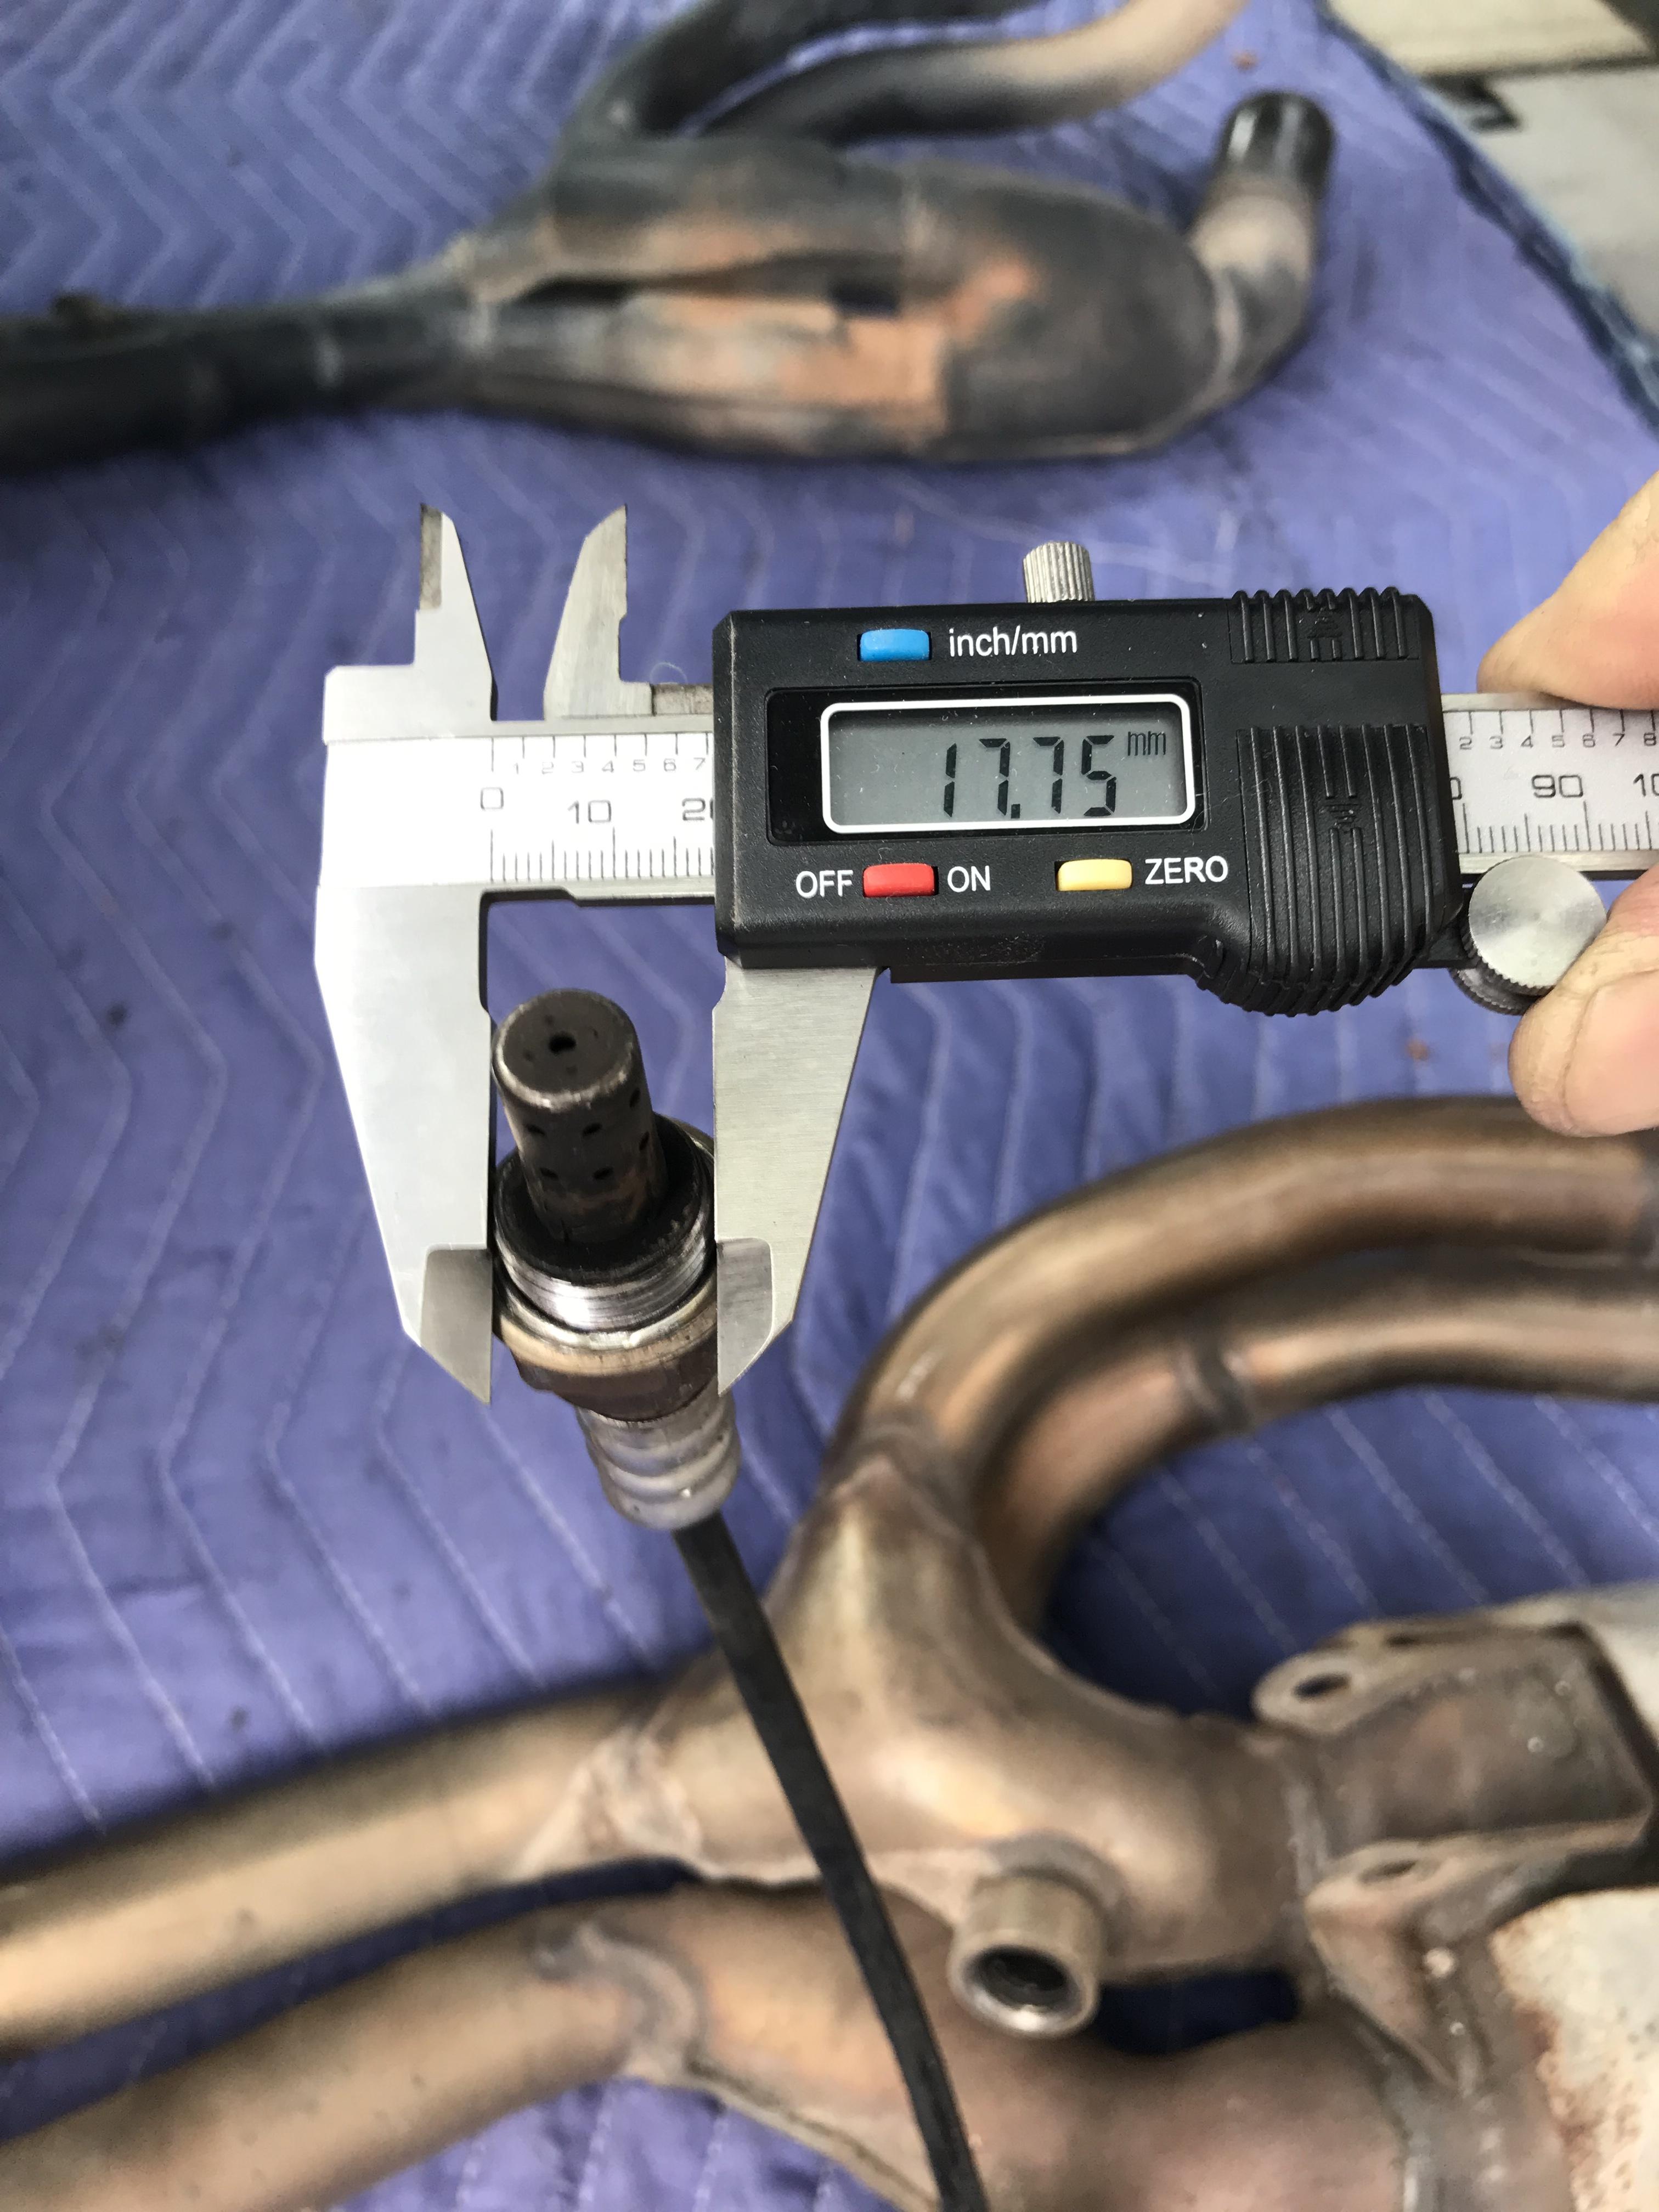
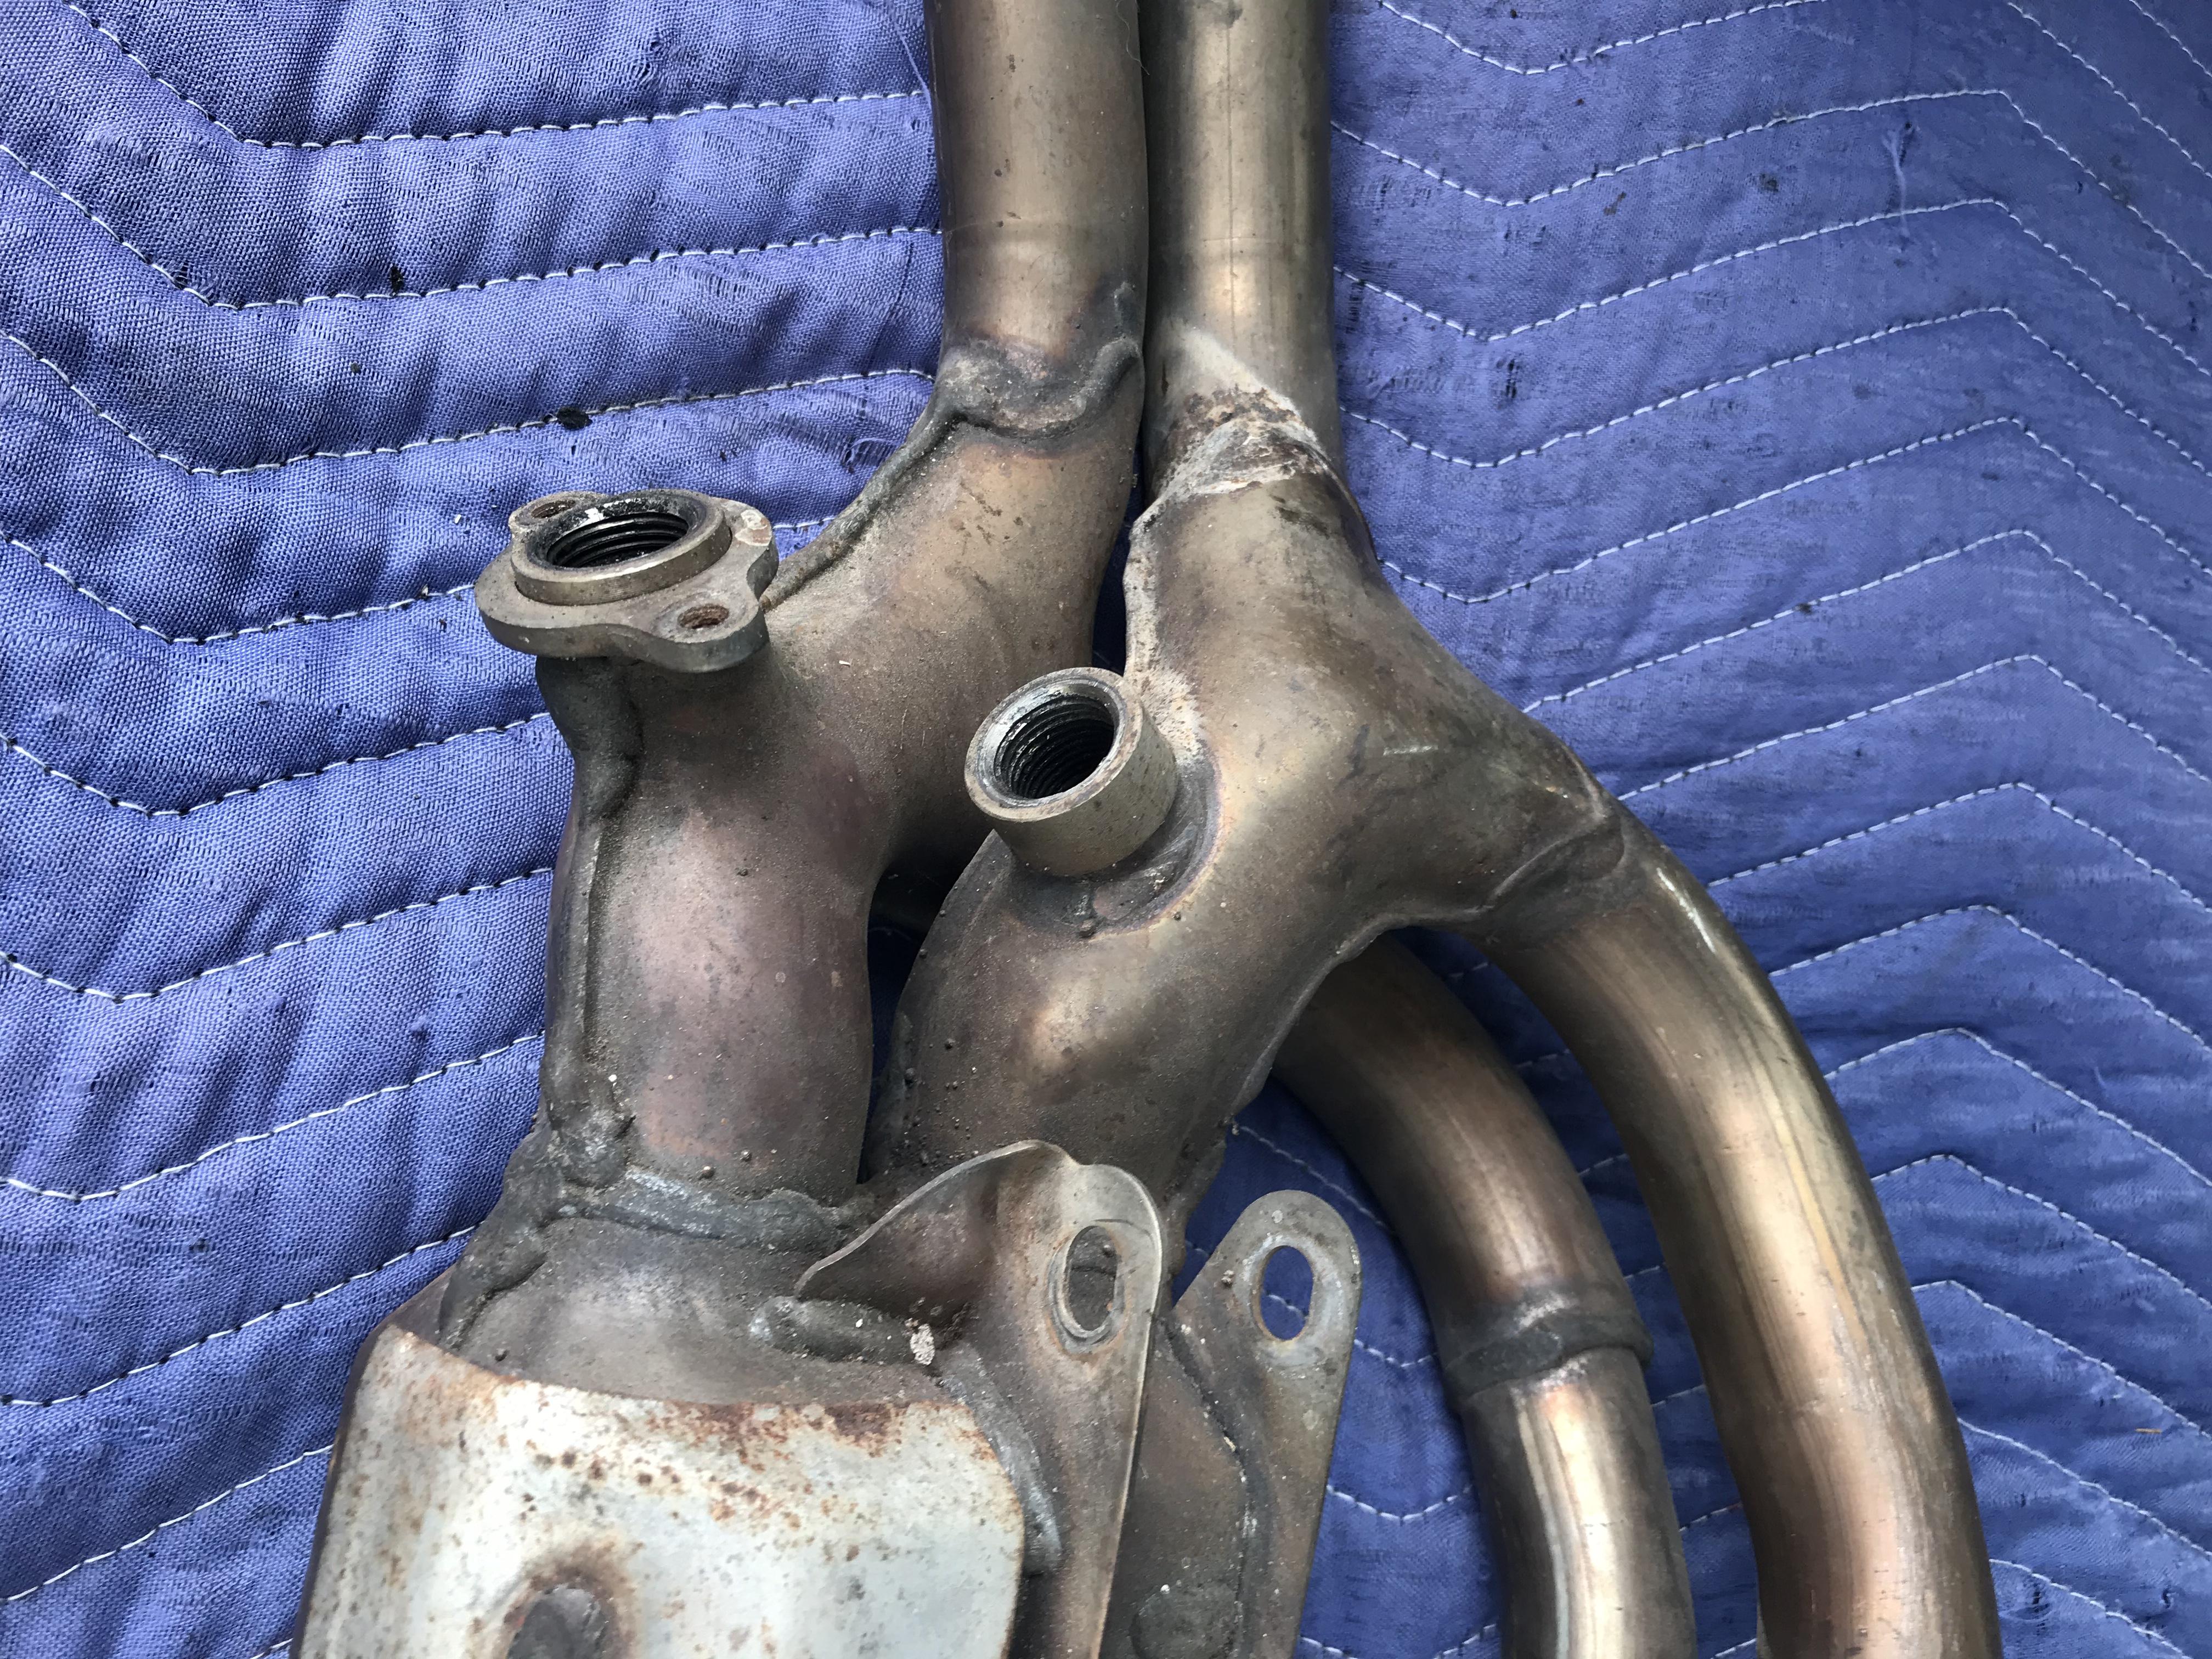
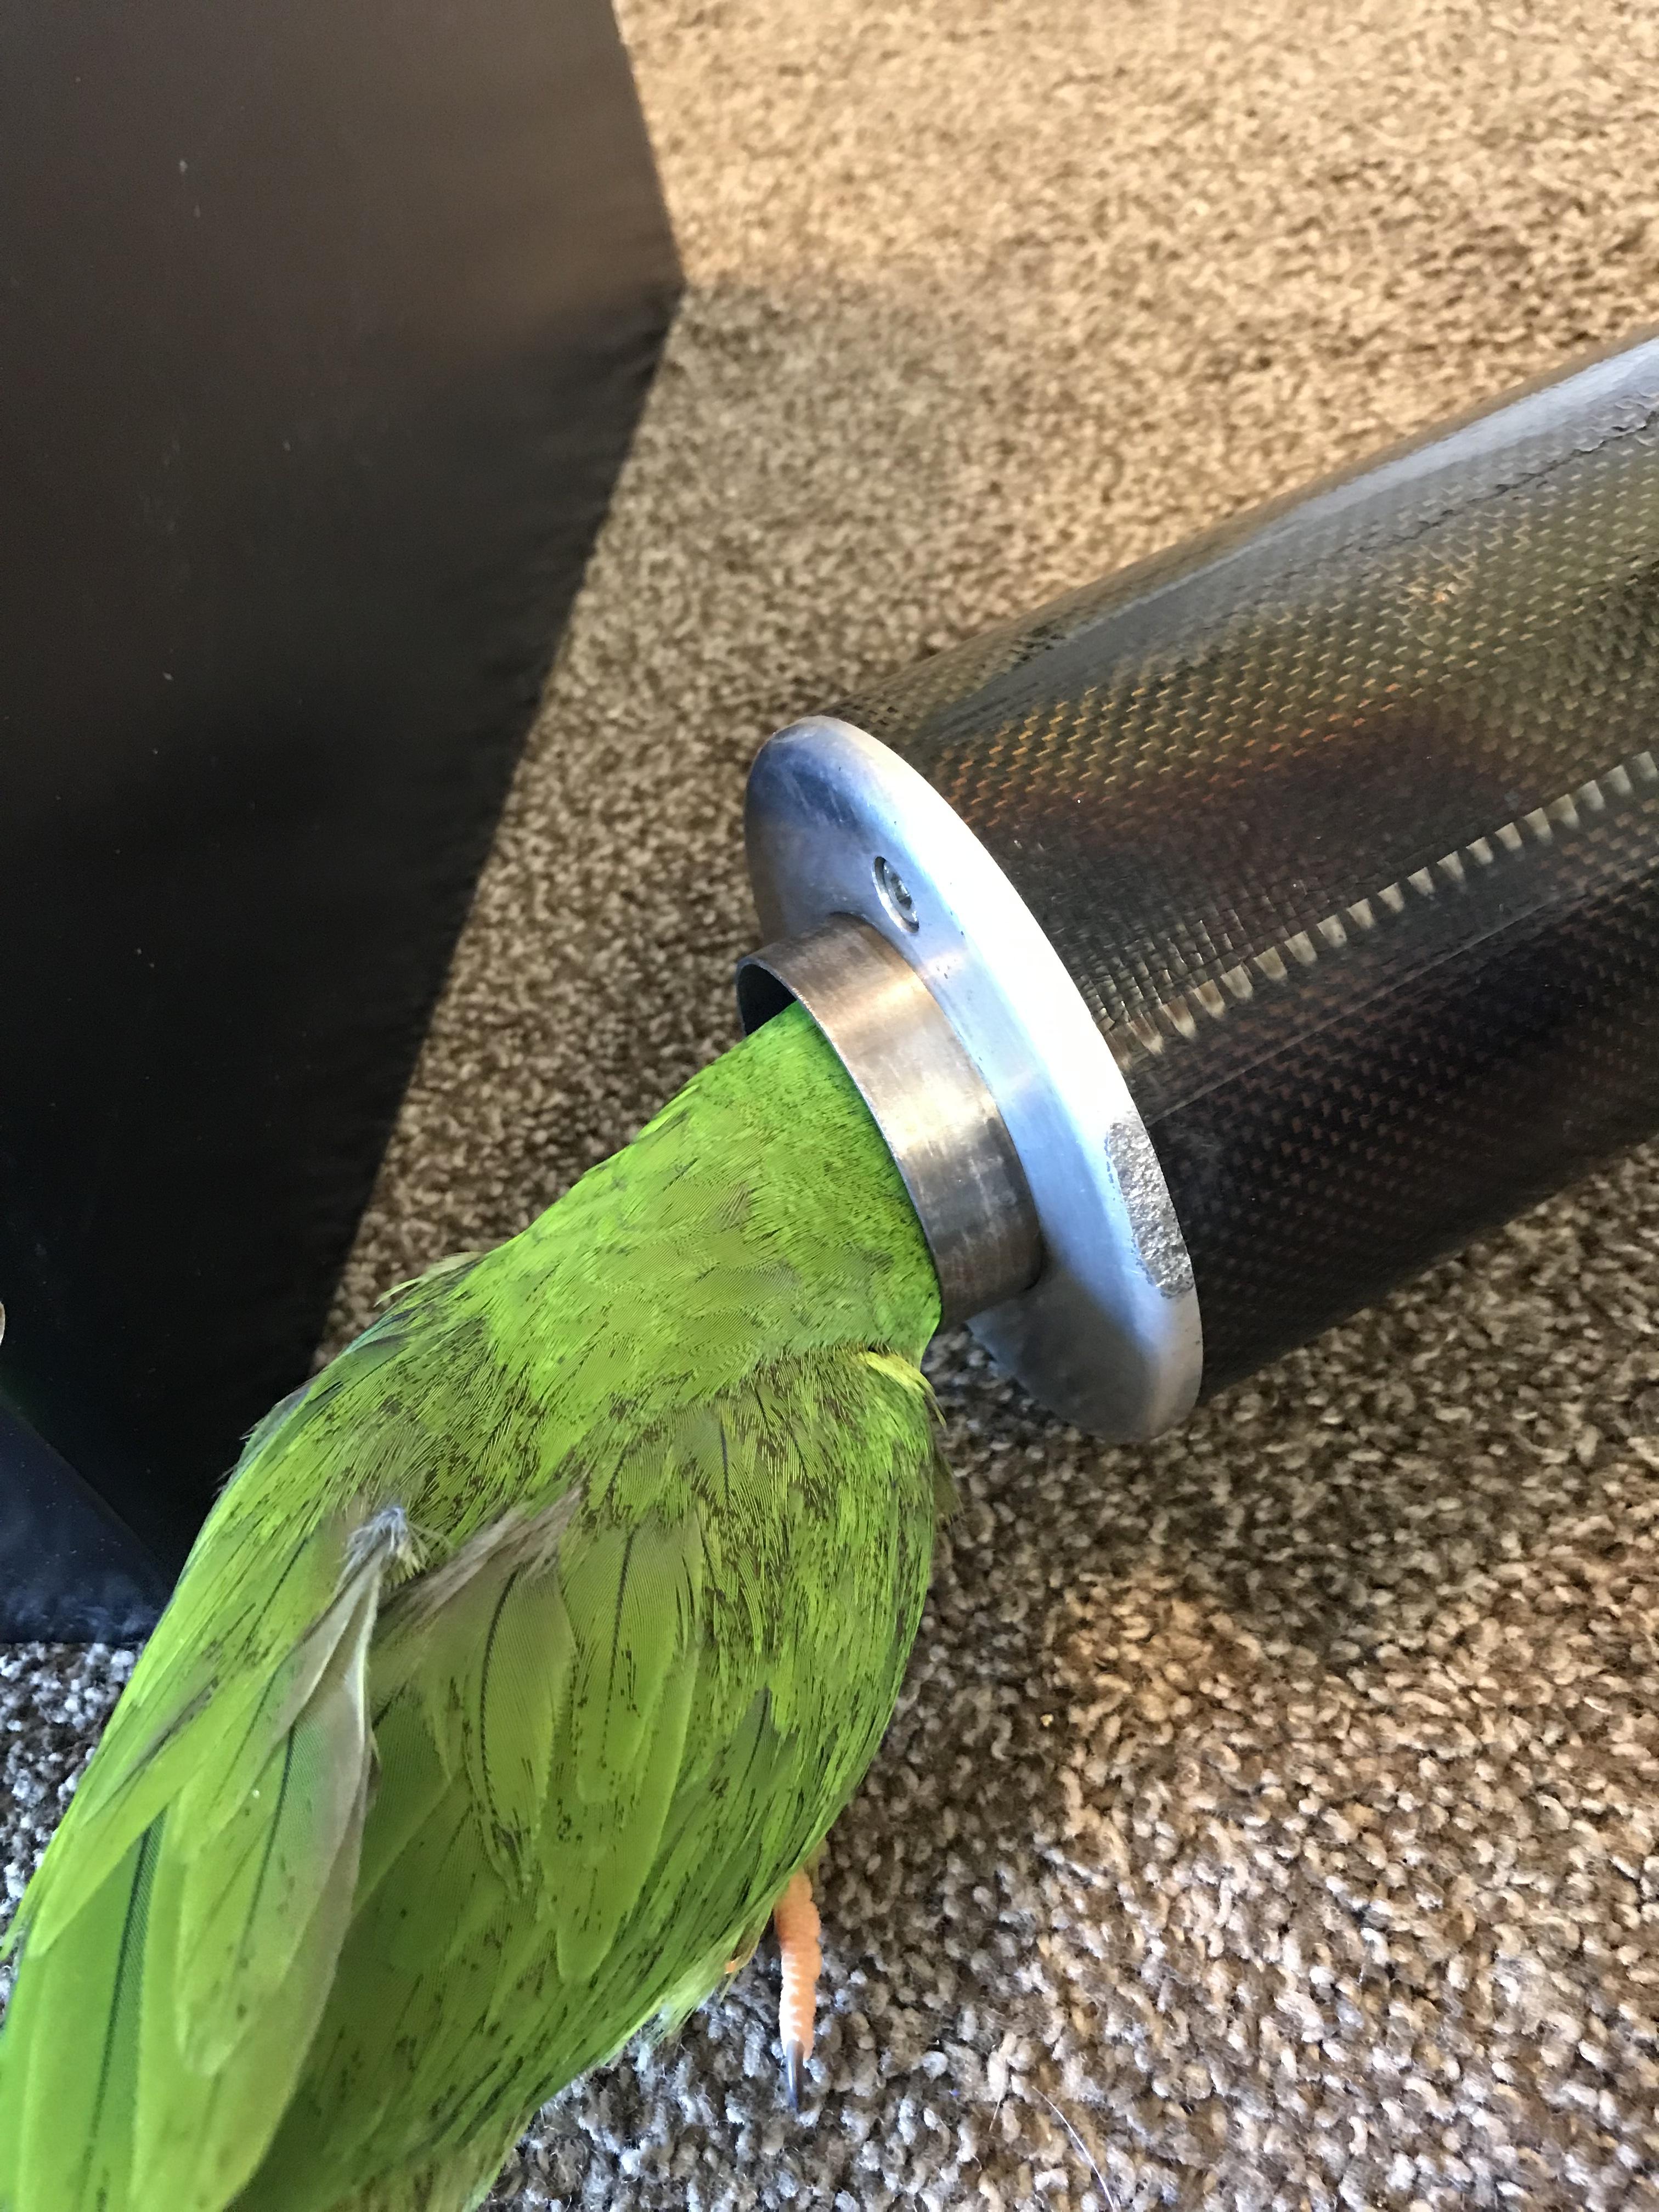
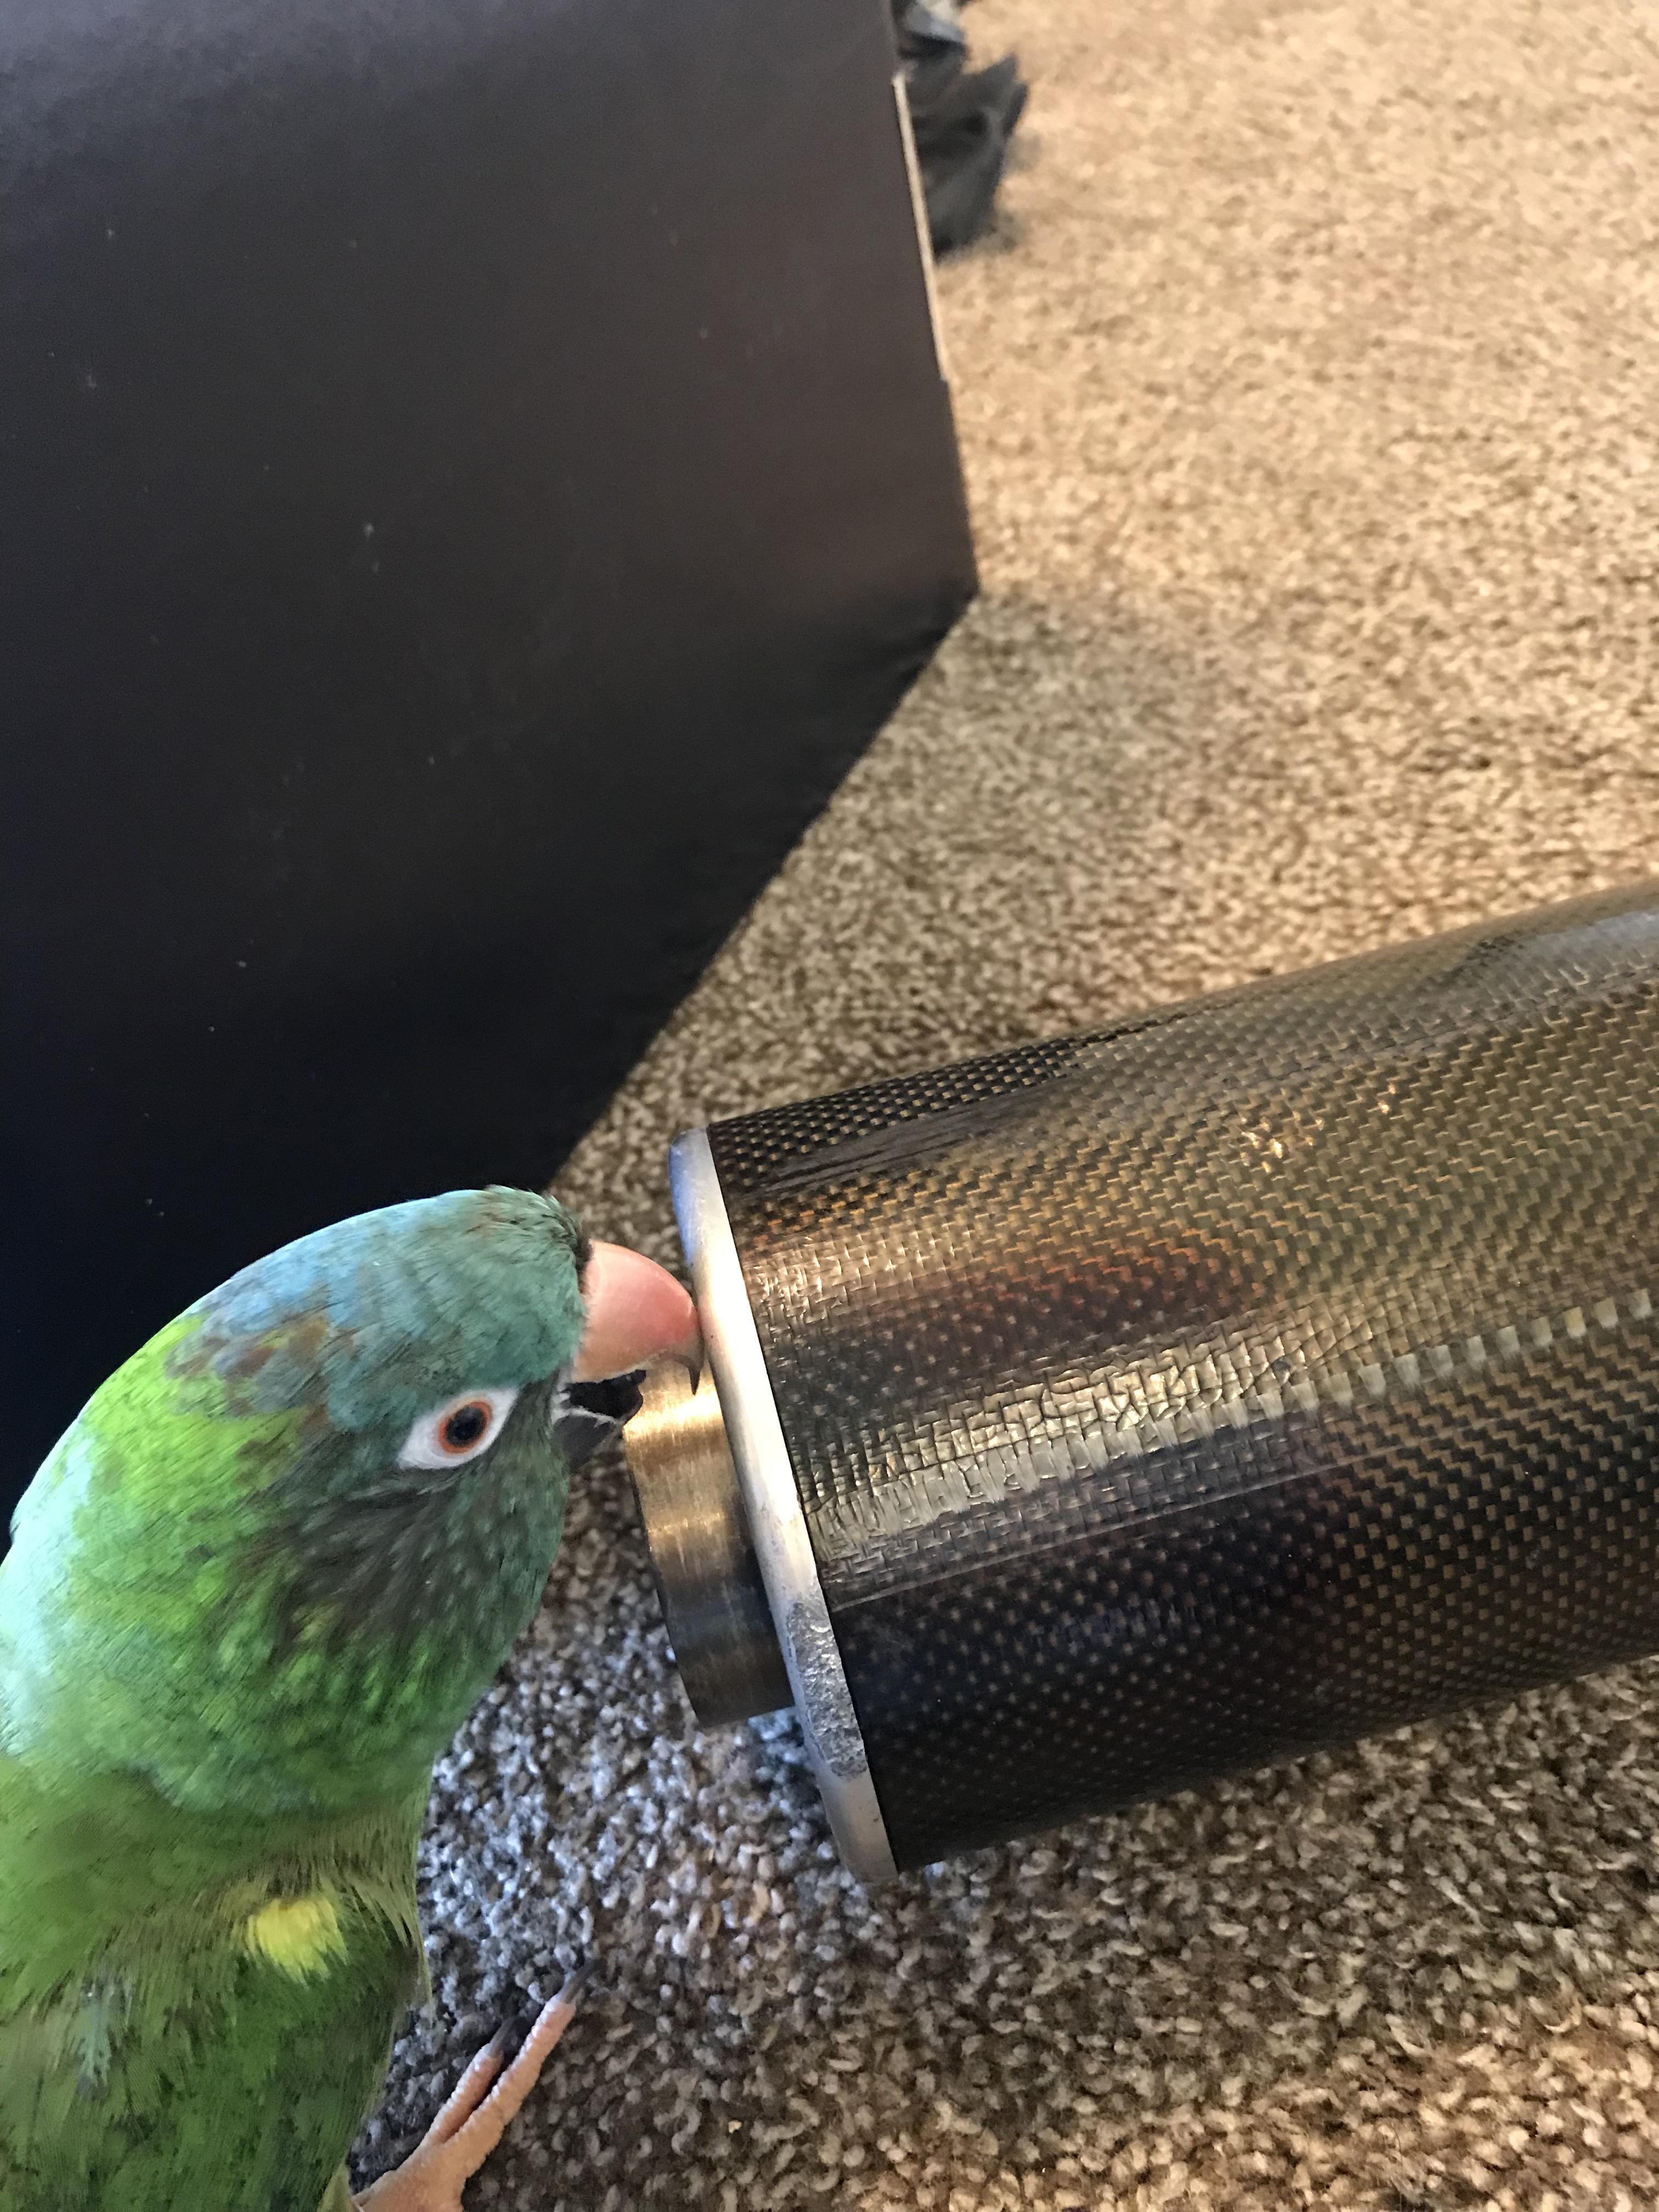
Hey MadSci - yes the cost of passivation is extra above and beyond the cost of the header. We are having the prototypes passivated on behalf of their future owners - VFRD member Hammerdrill and some lucky individual who would like to own prototype 2 at a discount. We did discuss bung placement with Wade, and arrived at offering purchasers their choice of one of three options included in the price of the header: (1) no O2 sensor bungs at all (good for Power Commander owners that are not using autotune) (2) two O2 sensor bungs in OEM positions (3) one O2 sensor bung in the collector for users of autotune who run a single sensor. MadSci, my sense of Wade’s approach to things is that he’d do a third sensor bung for an additional cost. I will pin down what that cost would be and report back. Request - I would appreciate feedback from those 5/6 gen owners who use a single sensor in the collector: where and at what angle is it located? The photos below feature the standard 1/2” tall M18 bung that will be installed unless the ‘no bungs’ option is selected. The OEM bung locations and sensor size are also shown. DO NOT neglect to liberally coat sensor AND bung threads with anti-seize every time you install a sensor or a plug! At the end of the dyno day, I hand-threaded mild steel plugs into the bungs of prototype1, and 5 days later they had galled so solidly that I had to soak them in penetrating oil overnight and use an impact wrench to get them out. Close enough to M18 for government work: Positions everyone! (As in ‘here are the OEM bung positions’) Get yer frickin bird away from my pipes! Can’t you see that we are working on a header project here? No, I really, truly don’t care if he likes carbon fiber.
-
New 5th/6th/8th gen performance header now in production in USA
sfdownhill replied to sfdownhill's topic in Exhaust Systems
Announcements: [These are restatements from earlier posts regarding cost and scheduling] [1] As stated on the Jan 28 post to this thread, headers with deposits received after Jan 28 cost $790 plus shipping [plus 7.75% sales tax for California residents]. [2] The deadline for receiving deposits to add orders to the first production run of 5th/6th gen headers is 4pm Pacific Time Monday February 18. This date/time was moved closer because it is Wade's last opportunity to call his tubing bender vendor and have more sets of tubing bent. The next production run of 5th/6th gen headers will probably be ready to ship 4 months from now. Please send your deposit via paypal to the paypal account of vfrheaders@gmail.com. In the paypal note section enter your VFRD or VFRW username and state '5th/6th gen'. Send your deposit as friends and family to avoid paypal charges, then send me a PM to let us know you've sent a deposit. I will respond with a confirmation that the deposit has been received. [3] We are now accepting deposits on headers for 8th gen VFR800s. Shipping of finished 8th gen headers is estimated to be 10 weeks from now. This timeframe represents 4 weeks to complete the production run of 5/6th gen headers, 2 weeks for prototyping 8th gen headers, and 4 weeks for production of 8th gen headers. Please send your deposit via paypal to the paypal account of vfrheaders@gmail.com. In the paypal note section enter your VFRD or VFRW username and state '8th gen'. Send your deposit as friends and family to avoid paypal charges, then send me a PM to let us know you've sent a deposit. I will respond with a confirmation that the deposit has been received. -
New 5th/6th/8th gen performance header now in production in USA
sfdownhill replied to sfdownhill's topic in Exhaust Systems
Hi Phil - yes we are now accepting deposits on 8th gen headers. Welcome aboard! The estimated shipping date for 8th gen headers is 10 weeks from now [That's 4 weeks for completing 5/6th gen production, 2 weeks for prototyping 8th gens, and 4 weeks for the 8th gen production run. Yes, the procedure for placing a deposit on 8th gen headers is the same. Please include "8th gen" along with your username in the notes section of the Paypal transfer. -
New 5th/6th/8th gen performance header now in production in USA
sfdownhill replied to sfdownhill's topic in Exhaust Systems
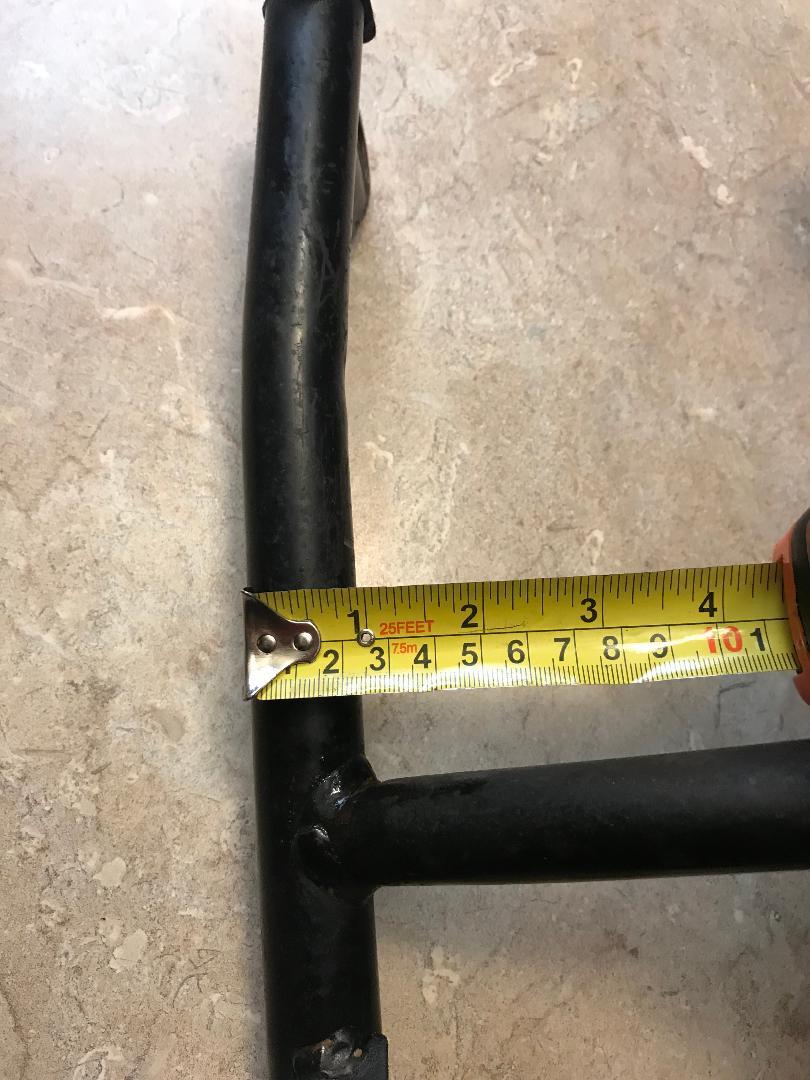
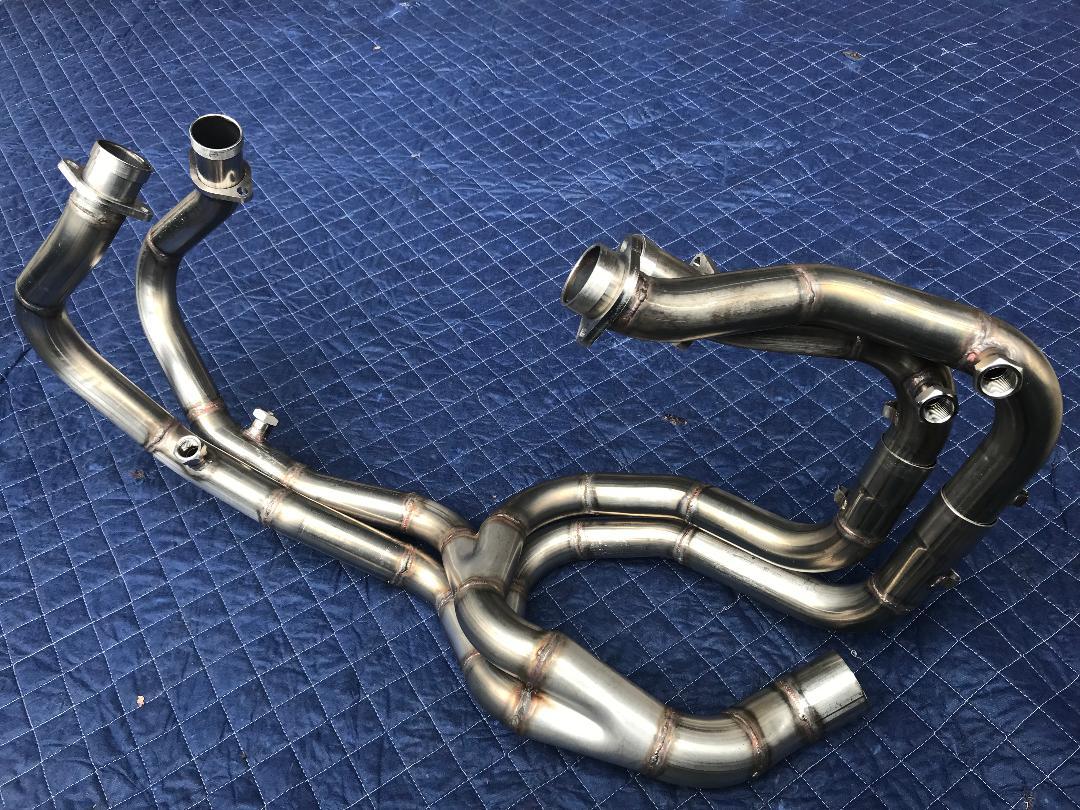
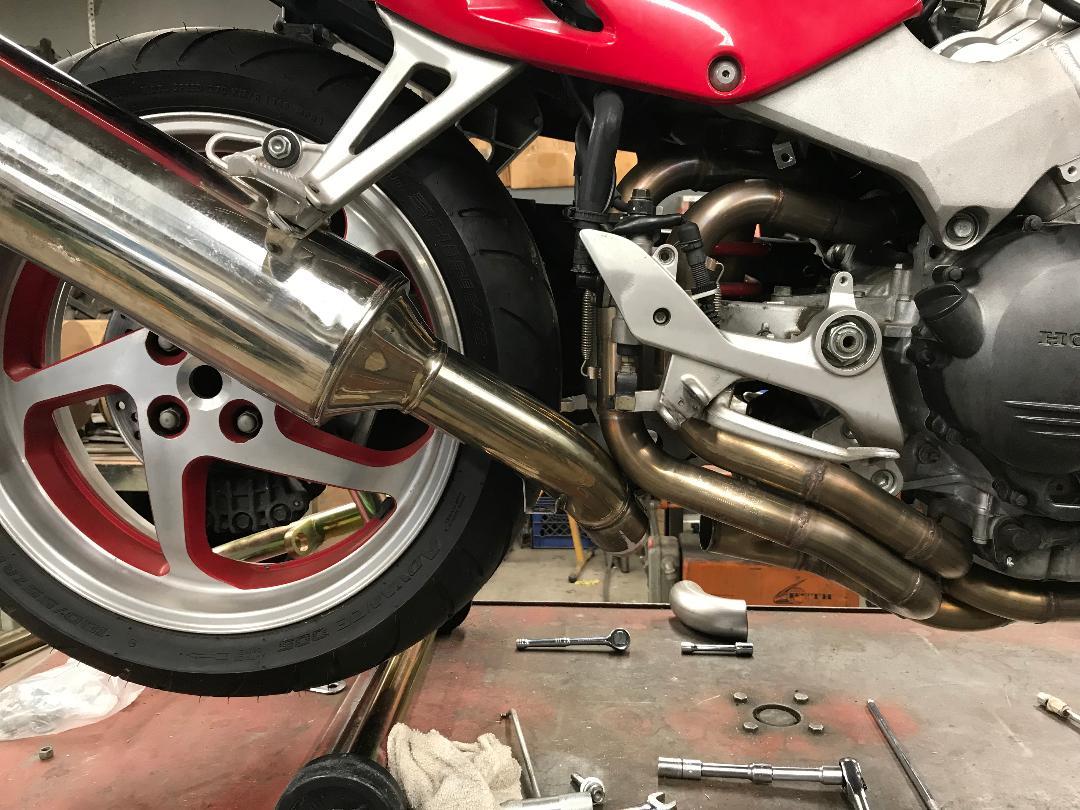
Center stand findings: Here is CornerCarver's original TBR header with strategically placed measuring tape to show the size of the gap between collector exit and cylinder #1 primary: Here is the right leg of a 5th gen center stand: TBR headers and replicas of them have a space between their collector exit pipe and the #1 primary that is too small for the headers to be installed over the VFR's center stand while the center stand is still installed. Once the headers are installed, the center stand fits and functions normally. Deconstructing the #1 primary and rebuilding the jig carries the risk of decreasing the header's performance because the primaries' shape and length are a critical components of a header's function. Making these changes would also incur a considerable expense. The production replicas will have the same spacing and interaction between their tubing and center stand that the original TBR has. Here is how we've successfully installed these headers [And sometimes OEM 98/99 headers] with center stands: [1] Put the bike [With headers removed] on a sturdy rear stand. [2] Remove the center stand. Keep the stand's left and right side spacers, washers, and bolts in their correct stacking order and located on their respective sides of the bike. [3] Place the right leg of the center stand through the loop made by the headers' rear primaries and collector exit pipe. [4] Leave the headers hanging around the stand and move the loosely connected headers and stand into position under the bike. [5] Bolt the stand into place. [6] Install the headers. [7] Connect the center stand's springs. A method we discourage requires bending the header collector exit pipe's trailing edge inward enough to allow the center stand's right leg to pass between the exit pipe and the #1 primary. After placing the bent section of the exit pipe over the still-installed stand, install the headers, then straighten the exit pipe's trailing edge. This method risks permanently deforming the collector exit pipe. On to passivating, which as discussed earlier in this thread, is dipping in acid to remove ferrous welding contaminants. The process also etches, which removes heat damage to the surface layer. Here is prototype 1 after passivating:
-
New 5th/6th/8th gen performance header now in production in USA
sfdownhill replied to sfdownhill's topic in Exhaust Systems
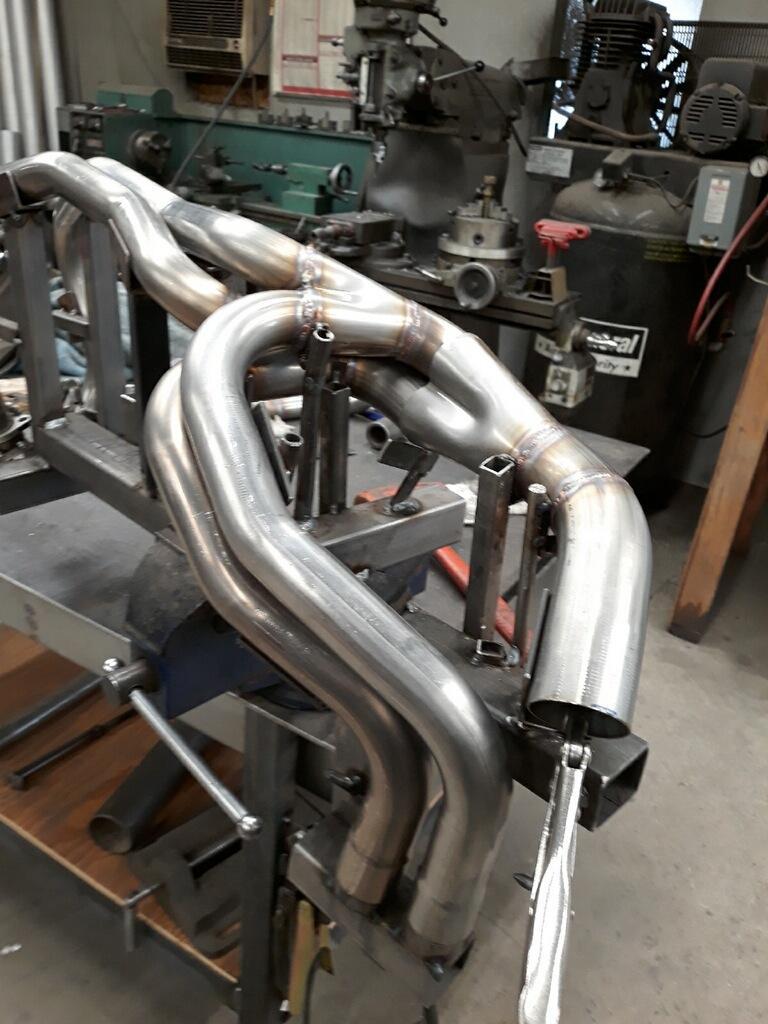
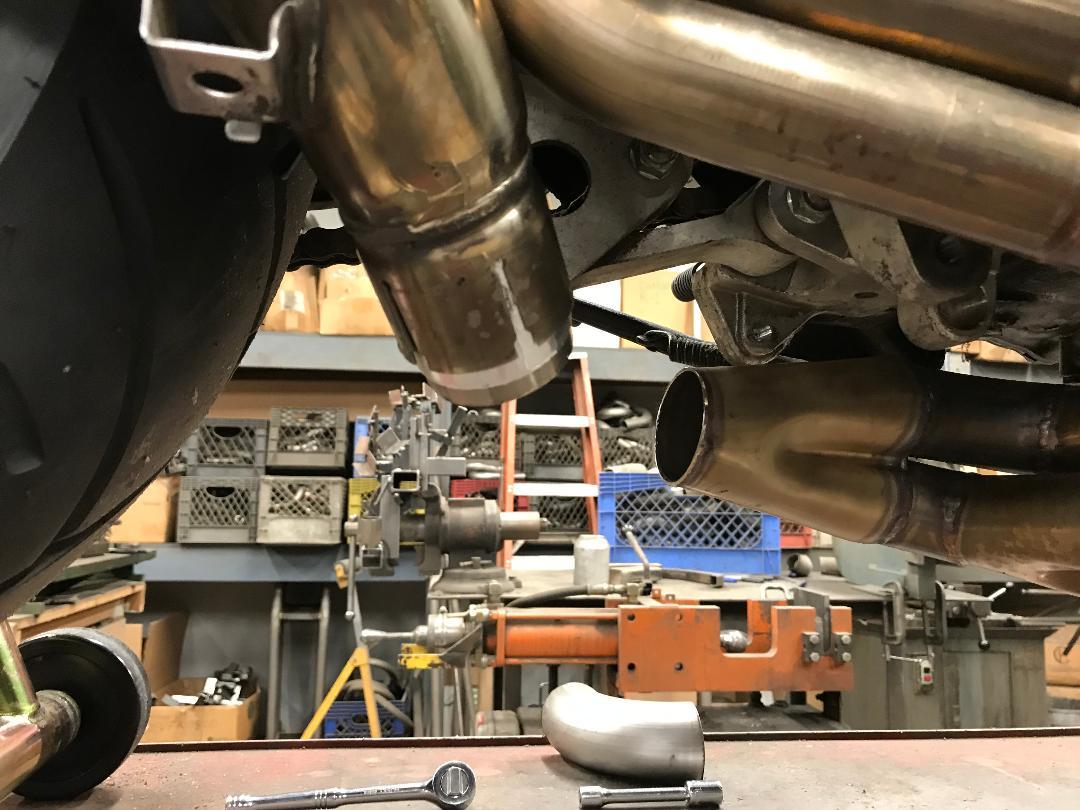
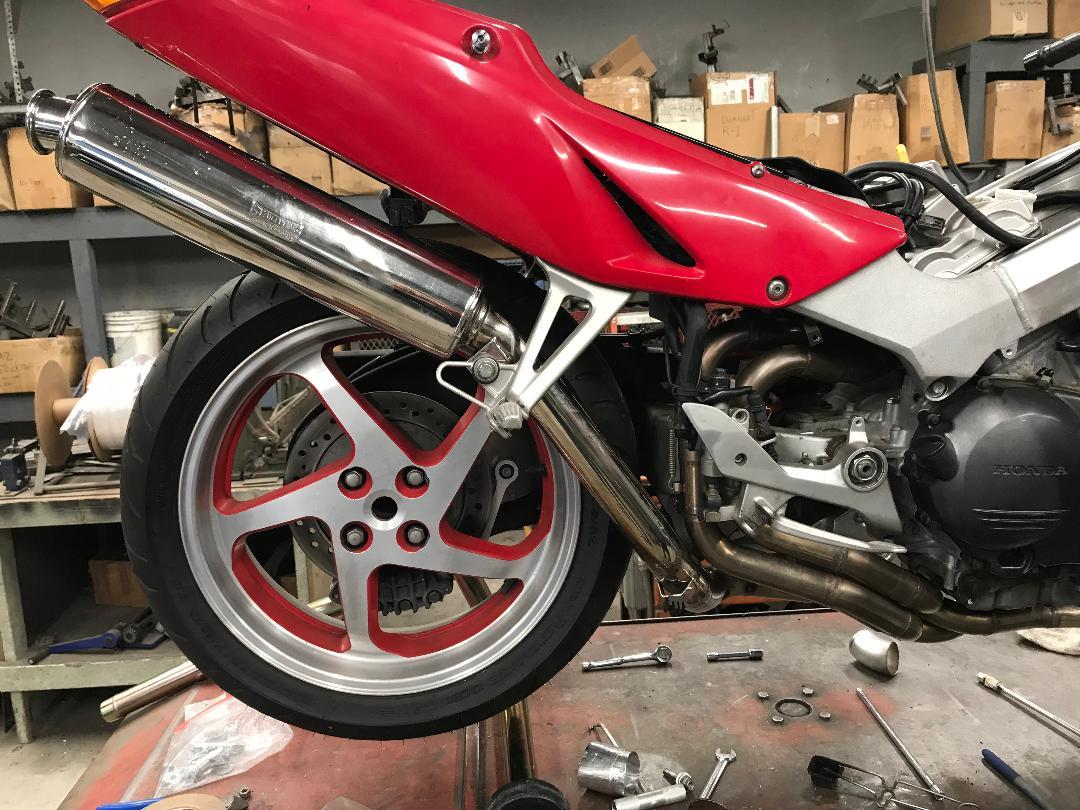
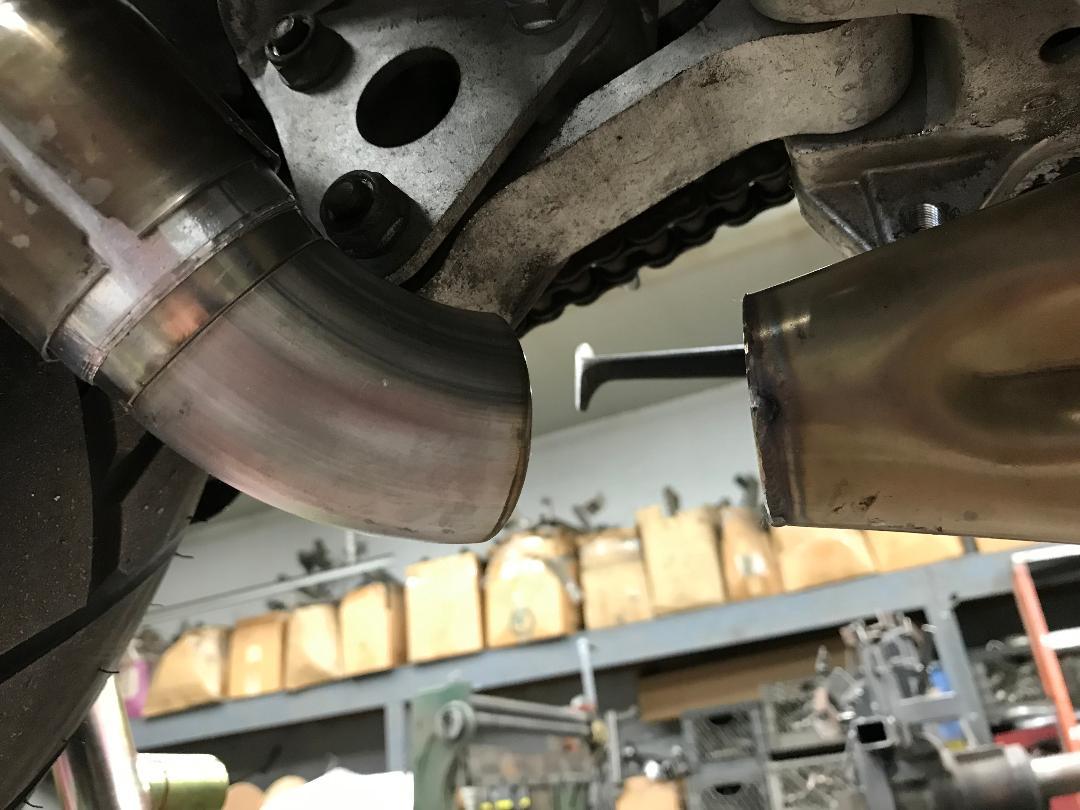
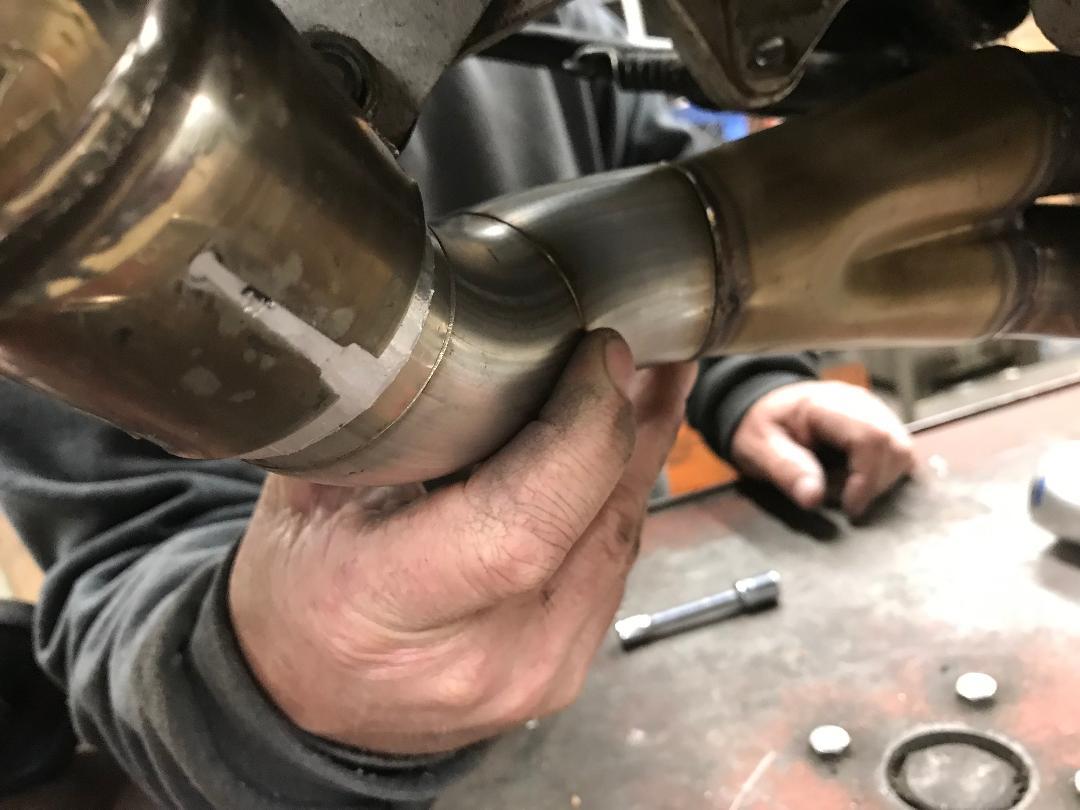
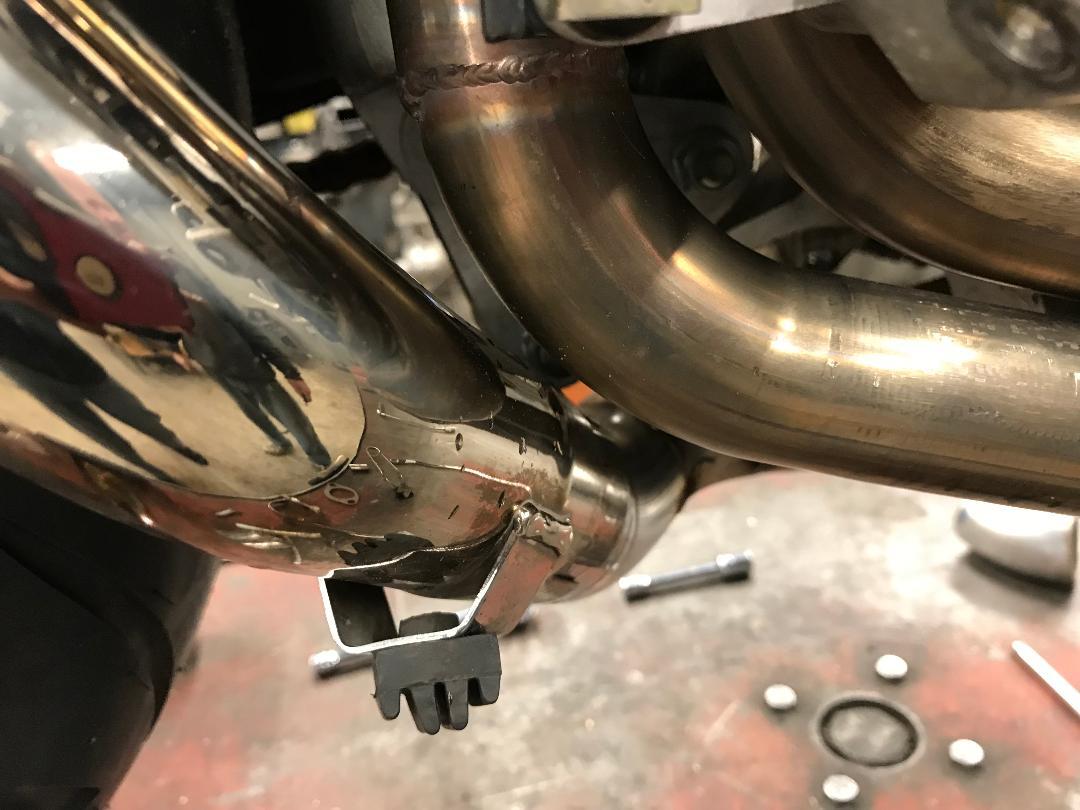
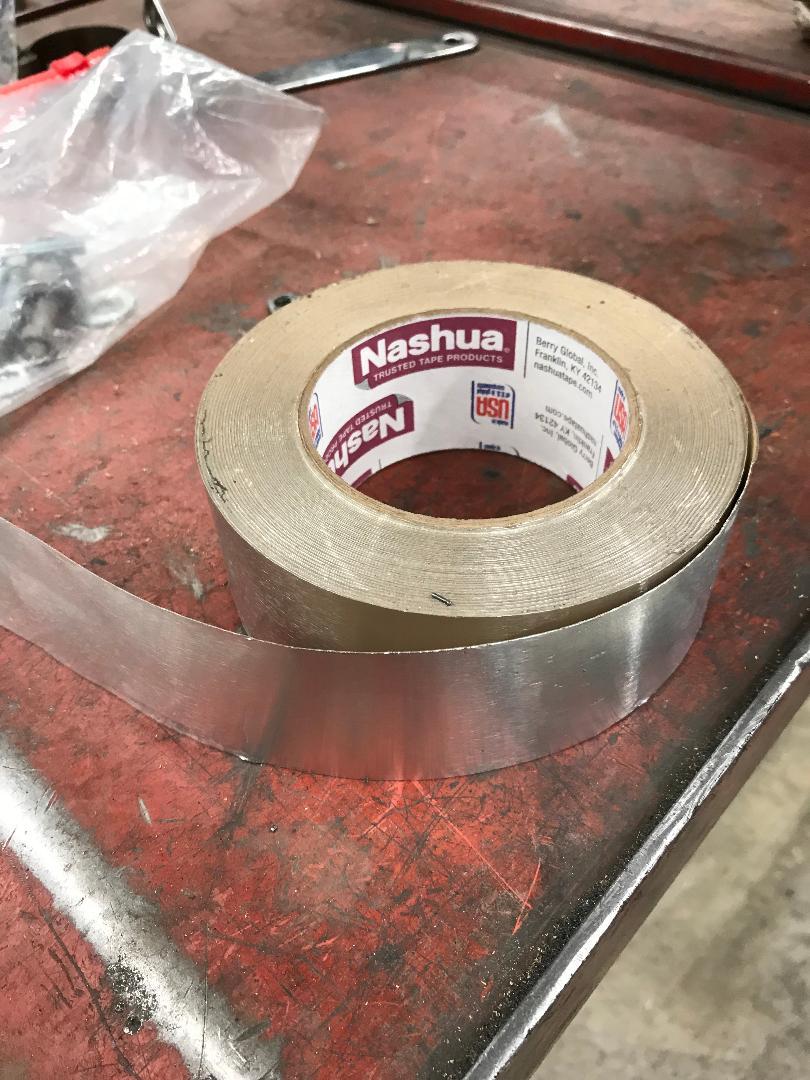
First of all, the good stuff: We are 4 weeks from shipping finished product. We thought finished units would be trickling out 3-5 at a time, but Wade's process is pure undiluted assembly line philosophy: he does the first phase prep and assembly for all the headers, then the second phase prep and assembly to all the units, etc until they are all done on about the same day. ***Please take note: If you have not sent a deposit, but want in on the first production run of 5th gen/6th gen headers, send a $200 deposit with your vfrd or vfrw username in the note section to the vfrheaders@gmail.com paypal account and PM us [in that order]. Do it post haste [real fast, right away]. Wade will be happy to make more than 15 headers in this first production run, but he has purchased materials and is having tubes bent for deposited orders only. I've gotten him to accept additional orders until 4pm pacific this Monday February 18 [Edited]. The second production run is going to be 8th gen headers. It will be 4 months until another run of 5th gen/6th gen headers is ready to ship. Second, the so-so stuff: I had a misconception that Wade would be shipping the headers from his location, but have learned that his price is FOB. We will have to pick up all the headers in the first production run, bring them home, box and ship. Crap. It was sounding so nice to just email him paid shipping tags and know the pipes were on their way to their eager new homes. Duc2V4 has volunteered to take on management of the shipping exercise - praises be! If I was going to have a first-born child, I'd definitely name him [or her] Duc2V4. Thanks Stray flya750 - check out the post after this one to see whassup with closed-captioning for center stands. I met with Wade Tuesday and yesterday. The second trip [yesterday] was entirely my fault - I hadn't gotten the picture on what his game plan was to reset the collector exit angle/position, and I didn't bring the prototypes with me Tuesday. Recall that the miscue on the prototype was that the jig was built from the TBR headers stem to stern - no adjustment was made to obtain OEM exit position/angle. Here's Wade's simple four-step plan to reset the collector exit position/angle to OEM: Step 1 - cut the offending collector exits off of both prototypes Step 2 - install OEM 5th gen muffler and trimmed prototype 1 sans collector exit on 5th gen fitment bike Step 3 - fabricate a collector exit pipe that joins the prototype header to the OEM muffler with smoooooth flowing bends [Rinse and repeat with Staintune slipon and prototype 2 - total of four fitment exercises] Step 4 - cut apart the collector exit portion of the header jig and rebuild it to fit the prototypes with their shiny new, fully armed and operational OEM-like collector exits. All production headers will have collector exits that are mandrel bent from a single piece of tubing. The segmented collector exit pipe seen in the photos below was welded in sections only for the prototypes. Sebspeed, thanks for suggesting Nashua aluminum tape as material for making a custom donut gasket to fit between OEM-style slipons and larger-than-OEM exit pipes. The aluminum tape worked great, but you have to be sure to get the tape made of actual aluminum sheet with adhesive backing because Nashua makes a bunch of different tapes, many of which are called 'foil' but are not aluminum, just clear flexible plastic-ish sheet with a metallic sheen. Stay away from any tapes advertising flexibility. Ask me how I know this [Thank you Home Depot for making returns so easy]. I think the correct tape is called 'Extreme Weather' but I can't be sure because the roll I bought was the last one of its kind on the shelf, had no wrapper, no barcode, and I couldn't find a price or skew on the shelf that matched its 1.88" width and aluminum sheet construction: It's easy to relate the photos below to the process described above. Note - the OEM muffler's midpipe at 2 3/8" od is the fattest of the fat midpipes [as far as any of us can recall] so it does get pretty dang close to the #1 cylinder primary, but there is a whisker of space there. The Staintune's midpipe uses more standard 2" od tubing and clears the primary with room to spare. For fitment, Wade volunteered my Staintune over the other two aftermarket slipons we had on hand because its canister and midpipe are built in one solid piece and its mounting points are fixed threaded brackets [Not bands looped around the canister] so it provides more precise alignment. I had been stubbornly waiting until some time way in the future to expand the front end of my Staintune's midpipe to fit the new headers, cuz there's no going back [Just ask RVFR]. I know members Tirso, wholepailofwater, and one other I can't locate in my memory were worried about permanently modifying their 5th gen Staintunes...it doesn't hurt a bit, and I'm glad I did it! It is possible to slip a stack of as many as two sheets of paper between the OEM midpipe and the cylinder #1 rear primary: The Staintune's spacious fit:
-
New 5th/6th/8th gen performance header now in production in USA
sfdownhill replied to sfdownhill's topic in Exhaust Systems
Update - there’s not a lot to update. Wednesday I dropped off Prototype #1 at the metal finsher’s to be passivated (acid dipped). They’ll do this first set of headers for $110, and batches of 5 headers for $95 each. I’ll post photos of the treated headers later this week. Production headers are underway, but Wade was sick last week and bowed out of our Tuesday meeting. He’s feeling better (racing motocross sidecars in CA this weekend!) and I’m heading to his shop tomorrow. Objectives for this meeting are: (1) refine our approach to collector exit matching OEM angle/position - relates to having had only TBR and OEM 6th gen headers on hand when making the jig for the prototype. The cat on the 6th gen headers didn’t allow an accurate measurement of the OEM exit angle/position, so I’m taking 98/99 headers to Wade to confirm production units match OEM angle/position (98/99 tubing and merges allow measurement & duplication). (2) examine clearance required between the collector exit pipe and the bottom curve of cylinder #1 primary as relates to the header fitting over the diameter of the right side center stand leg during installation. Clearance at this point on Prototype #2 is enough to just squeeze over the right center stand leg, so the center stand doesn’t have to be removed to install or remove the headers. Clearance at this point on Prototype #1 isn’t enough to allow the header to pass around the center stand during installation - we had to remove the center stand, thread it through the headers, then mount the center stand with the headers dangling down at the base of the stand like pants around one’s ankles, then mount the headers. file