

badelman
-
Posts
117 -
Joined
-
Last visited
-
Days Won
2
Content Type
Forums
Profiles
Gallery
Blogs
Downloads
Events
Posts posted by badelman
-
-
Could this be one?
Not possible it's for a vfr 400.. Nm.
-
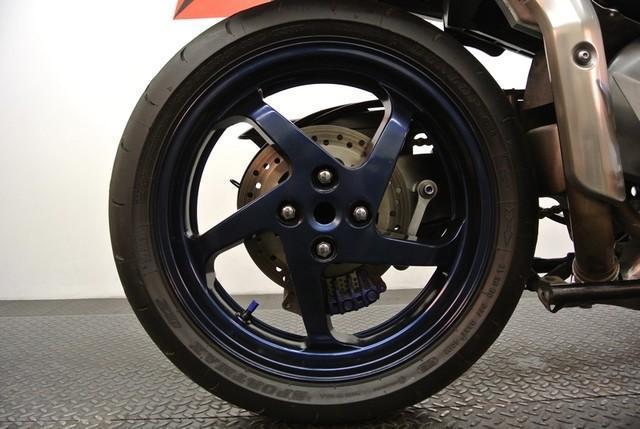
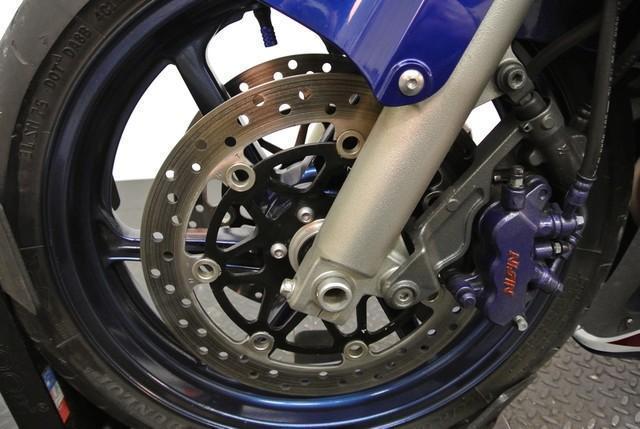
Hey gang, I'm about to have my RWB wheels powder coated white. Anyone with experience with this know what white I should ask for?? Also, anyone know where I can find an 8 spoke for the rear?
Thanks all!
Hey gang, I'm about to have my RWB wheels powder coated white. Anyone with experience with this know what white I should ask for?? Also, anyone know where I can find an 8 spoke for the rear?
Thanks all!
Keep a close eye on ebay - last April seven 8 spokes were auctioned - two for under $100 (and they looked in nice cond.) and one for $599 which had a touch of rash - prices can be all over the place. It's a crap shoot - just be persistent. Also, check the UK ebay site - they sometimes will have them too. Watch for condition - they can be bent and it won't be obvious in the photos. Some sellers don't have a clue about the trueness of their wheel - DAMHIK.
An 8 spoke sold on ebay on Nov 24th - $225. Just keep looking.
Thanks Cogswell. What are the best search terms when looking online? vfr 8 spoke? vfr 750 3rd gen? vfr 750 rear wheel? Or all of the above??
Thanks!
Barry
Set of blue bags are on Ebay if you are interested . And can you clear coat powder coated wheels ? Mite be easier to clean .
Thanks switch. I think they automatically clear metallic colors.. I have it on good authority that waxing (McGuire's Professional Yellow wax) the wheels after cleaning helps keep them clean or makes them easier to clean.
-
This is awesome. Interested to hear when we can order asap.
-
This is part of a rebuild I'm having to do after my wife and I (riding 2 up) hit a deer in the Texas hill country. We didn't go down but the front end was jacked! I'll tell you this... I ride with some retired road racers and we do about 300 miles on Sundays. I find myself doing 80mph plus over cattle guards and sometimes I may completely jump them on the viffer! I was thinking of picking up an Aprilia Tuono for these rides but honestly after seeing the VFR gut punch a deer in mid-air and not go down.... I think I'm happiest with how heavy the VFR is. There I said it.
The 8 spoke probably cant happen this time but good to know where to look!
Thanks guys!
-
Are you doing the forks, too?
Cogswell, long story short.. No. I did however recently have the forks rebuilt due to a busted seal on the left fork and asked that the shop make them stiffer. During the rebuild they added some fork oil in cc's to each side. I can tell they are much stiffer now. I will say that down the road I would definitely like to add Jaime's fork kit... absolute genius going from factory forks with little to no adjust ability to fully adjustable with not much learning curve and some guidance for the install!
-
Hey gang, I'm about to have my RWB wheels powder coated white. Anyone with experience with this know what white I should ask for?? Also, anyone know where I can find an 8 spoke for the rear?
Thanks all!
-
Can't wait for this to happen! Keep up the good work gang!
-
Here's a link to someone doing a DMR shock install on a VFR. They purchased a special tool and show how to adjust the shock after install. Perfect! I'm about to order one from Jaime.
http://www.biketude.com/do-it-yourself/replacing-shock-on-vfr-800-a/
-
I'll take a set! 6th Gen!
-
Ok seriously! After riding and syncing new table to primary twice... My front tire comes off the ground (bobbles.. I can feel it) like on my old 600 Hurricane during full acceleration in 1st gear. And.. I am only using Rapid module suggested settings.. I have not done ANY crazy tweaking. In addition, she's smooth pulling like butter on steroids! That's what I'm talking about!! This device is successful in my mind. I have no other mods (not even chain/sprocket mod) yet although I'm about to get the Pipercross (already ordered from UK).
P.S. Yaman is on point and those guys have the best customer service around..
-
 2
2
-
-
HS, great write up! Question, it looks like the manual advises some sort of chemical flush. I noticed you're using only the distilled water. Have you had bad luck with chemical flushes or feel it is unnecessary or too harsh?
Thanks!
-
Welcome to the best working forum on the net there is!
-
Sweeet!
-
just finished the vfrness. betweeen this thread and few questions to tightwad. it took 20min from start to finish.
oaxgard all connections I can see. now it starts up stronger, maybe it me. glad I got it done and ease my mind
cheers everyone.
 Cheers to you!
 -
Welcome from another Texan.
You've got a sharp-looking bike. You've probably already seen what your bike looks like with white wheels, but in case you haven't, here you go. I think Honda should have done this at the factory.
Nice!! Agree AND.. This is on the plans.....
-
Hello all. been posting for a little while but felt compelled to do the right thing and at least go ahead and introduce myself.
I'm Barry.. live in Austin, TX. A real estate broker by trade. I bought my 2007 RWB just this last year. I've had my cycle license since I was 16 years of age (44 now). My first bike was a Honda Rebel 250. I rode that in high school. I then graduated up to a 1987 black and red Honda Hurricane 600. It was my main transportation for years. I went down on it at 99MPH after being clocked by an officer at 160. Got it out of salvage an rebuilt it. Wrecked a couple more times. Always wore a helmet... thank GOD. I probably rode last at around age 20 when my cane was stolen.
I've always loved Honda's as my Grandfather owned Matteson Southwest Honda in Kerrville, TX. When I was a boy I used to go out and watch my Uncle practice motor cross behind the shop off of Hwy 27/39 and compete in local events.
So.. years later.... after raising 3 daughters (just sent the youngest off to college) and maintaining a marriage for 20+ years it was time to get back to some ME stuff.
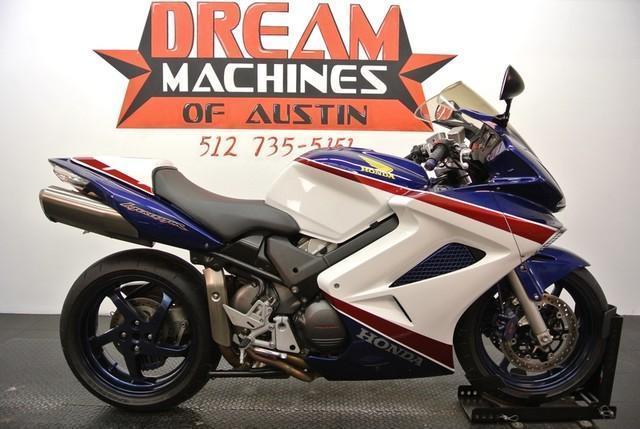
I'll never forget walking into Dream Machines of Austin and seeing this very bike:


Man.. this was the one! A sport tourer that was sporty like my cane and something the wife could ride on with me!! Note the powder coated blue rims (rare?), calipers, bar ends and such. I told the sales guy I'd be back. I came back a week later and it was GONE. However... I took a look in Craigslist and searched for another VFR. I made a mistake by not checking the box that says "only ads with pictures" as I would usually do. To my shock an RWB 2007 25th Anniversary VFR800 came up. I wouldn't have seen it without the mistake as there were no pictures. Long story short... I went out to see it and he asked if I wanted to ride it.. END OF STORY....
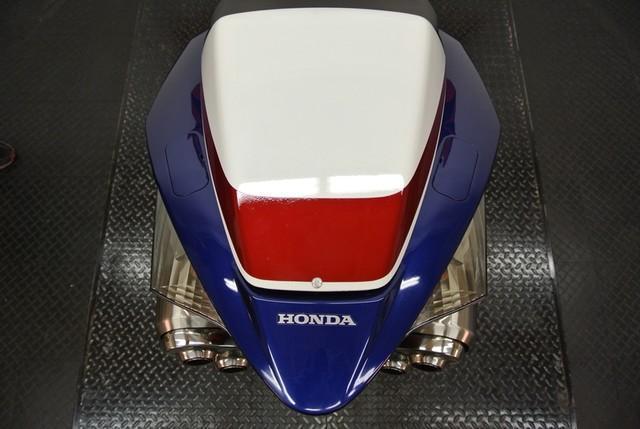
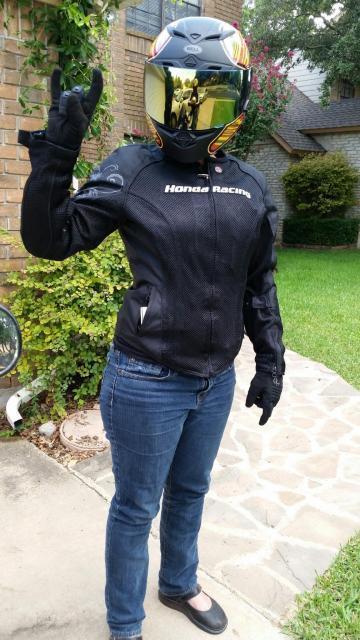
I love this bike with all the Honda racing colors. Those large yellow wings on the side remind me of my Grandpa, Buster Matteson. My goal is to keep this one forever if possible. I'll baby it and upgrade it and have a blast on it. My wife loves it too. We ride together often and I picked up the Corbin with backrest just for her.
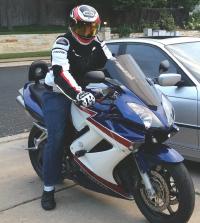
Here's a picture of Tara ready to ride:

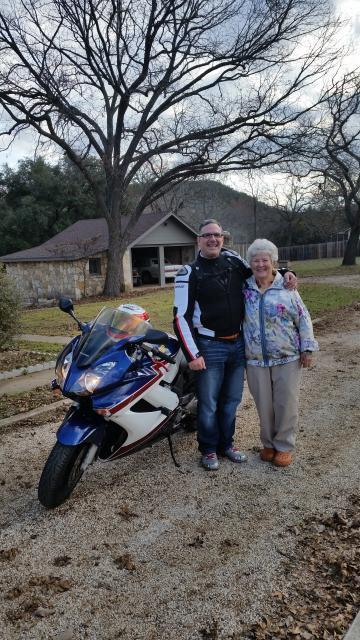
Here's a pic of me with Grandma in Hunt, TX after a day trip there to see her:

Love this bike.. love this forum. I'd love to ride with some of you sometime. Still learning the ropes and gettin' the rust out..
Barry
-
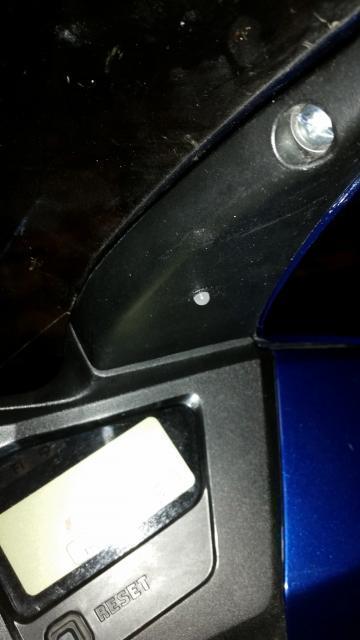
Looking at upgrading my R/R as suggested and am torn between two versions from Roadstercycle. I also NEED to do something bomb proofing for my main fuse A AND B. Both are either discolored or slightly melty but nothing crispy yet.
So questions:
1. Should I go mosfet or the series? Roadstercycle has both: FH020AA, or SH775 R/R
-I've read to stay away from Rick's models for now.. although Tightwad carries the Mosfet but it's a Ricks right?
-I also have VFRNess installed so no need to go direct to battery so I assume I'll have to find adequate connectors somehow.
2. Are there any better r/r options in 2015?
3. I do plan on using the metric pack connector as suggested by Mello Dude for the Stator connection so am looking for a good crimper that wont break the bank. Any suggestions?
4. I've seen kits at wiremybike to replace fuse A and B connectors. Is there anything more bombproof? I remember seeing something called "littlefuse"? But cant find it for some reason.
Any guidance is greatly appreciated!!
Thanks all!
-
Badelman, glad you got the bike back and running.
wow thank you all for this very informative thread. I have a 07 and now getting VERY paranoid. don't have problems yet. thought honda fixed it but........
I have 2 questions for all.
1. by installing the vfrness will this prevent this problem from happening or do I also need
to replace the R/R ?
2. Any tips when installing the vfrness ? I got the instructions off the wiremybike but I heard the 06 on is a little different?
I'm pretty mechanically inclined but once it gets to electrical i'm nervous. also planning a 300 mile trip up to the sierras and dont want to get stranded.
once again thank you all (Badelman) for posting up end results. alot of thread I searched (not this forum), the original poster don't follow thru and post end results. cheers everyone
Thank you for the kind words Puig510.
The VFRNess will definitely help prevent problems down the road and make the VFR more electrically bullet proof. I personally wouldn't think about replacing the R/R or Stator unless you've done "the drill" and found issues. I would however order yourself some Oxguard, open up each connector carefully and put some on the connector pins. This stuff reduces resistance and helps make a better connection. Dielectric grease does not. Also while doing this it would also enable you to look at each connector as you go along the wiring in order to see potential issues ahead. Doing this has prompted me to replace Main fuse B which is discolored on my bike.
Tightwad did a great job as the VFRNess is pretty much plug and play. If there's a difference in the 06 I'm sure he knows just let Tightwad know what year bike you have in the comments when you order and I'm, sure he will accommodate. As far as tips on the VFR installing VFRNess:
A) The instructions are awesome just follow them step by step as you go but read through first
B) There will be a large bulge on the right side of the bike at the frame where most of the connections are made. I ended up lessening the bulge by arranging (how you connect and position) all connections from left to right. Pushing things together and shoving them back didn't help much.
C) Go ahead and order the fusebox if you intend on installing anything in the neat future as everyone seems to run into issues just tapping in or not knowing what wire to use for a switched (meaning comes on when VFR is turned on) connection
D) Dont worry so much about how ominous the job may appear to be. Everything gets easier after you pull off the fairings and get to work. Once you start you should have several aha moments. And of course.. you always have us!
Other road trip tips when worried about possible electrical stuff.
A) Get a volt meter. I got a Head Up so I can see it right away but also plan to get one of Tightwad LED's to actually see the real volts.
B) Carry extra 20,25 and 30 amp fuses
C) Carry some auto grade bullet connectors for fixing connections (just in case)
And seriously.... Just have fun. My wife and I have ridden all over without issue. The issue in this post was something I smelled for 2-3 weeks like something burning and then the Viffer wouldn't start in the garage.
-
Here's mine. I may add Tightwad's digital monitor as well but needed this one as it's in my face and will let me know if it changes ASAP by virtue of its location!

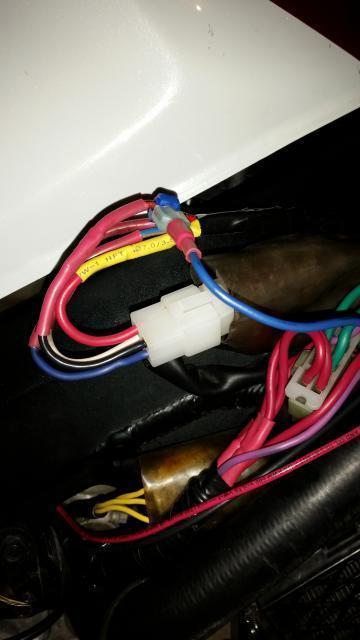
-
As a quick follow up... here's a pic of the newest connector after being installed and a shot of my new "Head's Up" voltage monitor. The voltage monitor is connected to Tightwad's fuseblock which is connected directly to the battery. I may add one of Tightwad's monitors as well but need this one as it is in my face!


-
Ordered!! Except I got the upgrade/newest that uses Samsung 5630 chips at $16.99 for the pair USD. They make an even brighter pair but it is much larger and I'm worried that it may not fit.
I'll let you know!
-
I just made some edits to the above post as I re-measured!
I got an led tail light for my fifth gen from Thurn in Germany. No idea if they have them for 6th, but if so get one. It will be too expensive, but far better than any bulb!
When I saw the switchbacks, I immediately thought of 6th Gen turn signals! Perfect!
I like the headlight plan. There was a link posted about some led headlights that look identical to the Lifetime bulbs, but near half price. Check the ZoomZoom thread in the fifth gen section. At the end.
BTW, every bulb in my '99 is led except one. FI light stays on at half brightness in the 5th Gen. Probably the new ones come with built in resisters, so I could make it 100%. I think the 6th has led wired into the gauges.Good info! Thanks Kev!
-
Hello all!
I am starting the process of going ALL LED for my 6TH GEN Viffer for instant on light, better brightness and less hassle. I've read everything including this great headlight post here and am still having trouble with a firm understanding of the details to get started. BTW.. at the urging of this group I already have many Posi-locks and have Tightwads distribution block if I need some switched power.
The order for my plan of action is to do:
1. Brake lights
-I've already ordered these based on a post here (see post #30). I should point out that according to the vendor.. these are the brightest at a smaller size and an upgrade in brightness to what's in post #30. I'll also point out that these could possibly fit but are much larger however the very brightest!
2. Turn signals
-I want to get switchbacks (white to amber) and have all four be running AND turn signals
-I'm aware I'll have to get a flasher here (instead of loading up on resistors)
3. Headlights
-Looking at h4's and h7s at LifetimeLED's
-I just want them to run like they do now. I believe it's 2 lights on bottom for lows and all 4 lights for highs. If that's wrong please correct me.
OK QUESTIONS..
1A.) BRAKE LIGHTS - Anyone in the 6TH Gen group know how large of an LED tower bulb we can get away with? I measured the top brake bulb housing from the hole (right where the light connector gasket would seal) to the back plastic being careful not to let the allen wrench ride up or down and keeping it straight and got 2 3/4" (as accurate as I could get). I then measured the bottom of the bulb that clicks into the base (1/4"). So we have a total of 3" or 76.2mm. I know someone has got to have a more accurate measurement? I'm trying to go as big as possible without the bulb touching the housing for the sake of choices.
1B.) I imagine the lower bulb housing is the same size but I am assuming here.
2A.)I saw a post once upon a time that went through a simple plan to tap/connect some rear turn signals wires to existing wiring to get them to behave like the fronts. Can anyone explain or know where that post is?
2B.) Anything special I need to do to run led switchbacks in the front or rears than the direction I'm already heading?
3A.) Is it really as easy as following this video?
3B.) Am I selecting the correct LED headlights?
3C.) I've considered Tesla LED's but because of advancements in LED tech I'm thinking maybe some headlights will do it and can be aimed better
All of your experience is highly appreciated!
P.S. We really need to (if not done already) have an up to date BEST and latest led recommendation post along with retrofit guides per GEN. As powerful of a collection of info we have here regarding our beloved beasts it would seem we could do this AND... to hopefully aid in my contribution of giving back I may initiate this myself after going through the paces. BTW.. I am aware that not everyone will want to do this.
Thanks all!
-
Blowing LED's sounds awful. Anyone know what specific 7443 bulb works for turn signals? I thought they all did. What 2 types are there? Which one to avoid? Is this vendor full of it or what??

Wheels Going To Powdercoat Soon.. Which White?
in Sixth Generation VFR's
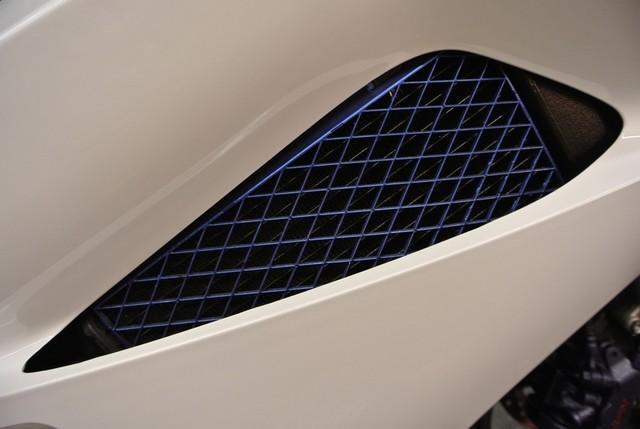
Posted
Ooh.. great info! It's the little detail touches that can make the difference! And.. YES there is slight pearl in the paint/plastics on my 07.