


sa1713
-
Posts
396 -
Joined
-
Last visited
-
Days Won
4
Content Type
Forums
Profiles
Gallery
Blogs
Downloads
Events
Posts posted by sa1713
-
-
I'm curious as well. The delay is not with the EBD, but rather with Dave Dodge. It seems when he moved his operation, he may have lost his mind, and my cams. I believe they were found and finally faced and ground but that has been the delay.
In this delay, I've been able to learn the PCV to the point where I'm now playing with AFR. Oh, and my stator crapped out on me too.
I hope to have something good to report in the next few months.
Sorry for the quick burst of excitement and then a long lull. It is killing me too.
Jim
-
This was fun helping a fellow board member with a project. He even got his underseat fab'd cheaper than mine!
Dan has a 5th gen OEM set of headers and can make this for anyone now, OEM, TBR or Erion.
John is a great guy to get this done for.
-
So i guess my sweet 1998 vfr will be left out of the pcv experiment due to the lack of o2 sensors?
No it won't be left out of the experiement. I've installed a PCV on my 98 with great results. I have the Autotune, map by gear, and temp sensors installed and working great. All I did was drill a hole for the Bosch unit and had a bung welded. Works great.
-
Hi - Just a curiousity - on the air filter, why didnt you just grab a BMC part? It has more area than the K&N. --(I'm running one.)
MD,
I calculated the filtered area and came up with the off the shelf rectangle that filled the OEM dimensions, which is almost the complete size of the pan. I also went with a deeper/longer pleats as that added to the filter area.
-
Just a small bit.
I spent the majority of the fall getting to know the PCV and how to deal with all of the adjustablity that comes with it. Just so much flexibility that there is almost too much. I've installed the PCV (w/ autotune) on my original motor as I want to learn and dial it in before I take delivery and attempt to learn it then.
I'm very glad I saved my pennies to purchase this over a PCIII. As I get more into the maps(6 total) I realize that eventhough the PCIII was a good tool, the PCV is much better. Having the ability to map by gear is by far the best upgrade over the PCIII. Oh, and the temp control feature. Preset a temperature and you can add/subtract fuel to cool/heat her up. I'm wondering if we could somehow convert engine temp input to an exhaust gas temp input......
Anyway, my findings on my 98 with a full TBR header along with a custom up pipe into two Laser xtreme cans are that the base DJ maps are way to lean for me. I'm not particularly interested in MAX HP, rather engine life and smooth operation. I found the DJ map was too lean around town, spiking the temp of 200 + in the 30-40mph range. Normal temps would range around 185-195.
Many thanks to Coderighter(John) for his guidance with my setup.
So I've cut into the AFR tables about -2% and I'm working on those. The EBD (engine builder dude) reccomended I get close to 12.7.
He's test fitting all parts now as Dave Dodge came through with freshly ground cams.
I'm reworking my custom K&N filter mod as the sealer did not hold as I wanted. I will be looking at a more sticky adheasive tape this time.
As far as an option to fit a ram system into the airbox area, I'm looking into something like medical splint material. It comes in sheets (1/16 thick), is easily formed and is rather rigid after applying the setting agent.
I hope to speak with the EBD this week and get an update.
More as I get it.
Jim
-
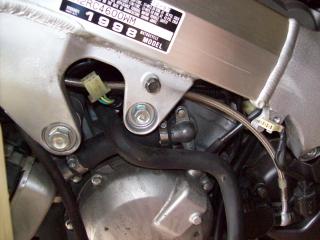
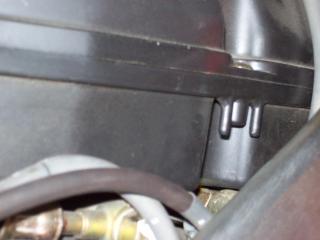
Forgive me for not checking first, but I believe the swingarm pivot bolt was inserted from the "wrong" side... if I remember correctly, the nut goes on the left/clutch side of the bike to facilitate easy chain removal without having to cut. At least on the 5th gen... not that I remove chains that way, just jumped out at me when I saw it. Probably makes no difference.
SEB,
The pivot bolt on my 5th is as shown in the picture. I guess access to the headers was first on their mind.
-
I believe the dual Bosch units are set up for HD and that allows them to tune each cyl independently. Not sure how what would work or if DJ would advise that use. Best bet would be to just plug the two OEM bungs and drill a common spot. Not the easiest way, but may work out best.
-
The EBD inspected the stator and said it looked brand new. I asked if he could upgrade the 3 phase leads and he said that he could. So, at least I'm trying to lighten the resistence a bit and combined with Tightwad's VFRness I think It may work out very well.
I believe the EBD is nearing the reassembly portion as all of the cam grinding is complete and the racing season is finished. I hope to have it back within the next few months.....
-
Sorry for the absence, way too much other "pressing" things to take care of.
I spoke with my EBD about the everlasting stator and the three phase leads. He's in the process of determining if he can rewire them with a larger gauge wire. If he can not do it due to OE manufacturing process, I'm going to check with Custom Rewind in Alabama. Good Ol' Gary there will be able to determine if that will help with our charging issues.
I believe we are still awaiting the delivery of the cams from Dave Dodge and the end of the racing season. EBD is ususally inundated with "needed it yesterday" orders.
I'm still fussing with my own electrical deamon as the R/R side of the connection did a bit of melting and I've not had time to repair that eventhough Tightwad hooked me up really well with a custom VFRness.
I hope time will free up after the base and door molding gets installed (yes, I'm becoming a trim carpenter..)
-
I've installed a PCV on my 98 without any issues, except a faulty DJ unit. They swapped me out for a new one without any quesion.
Installation of the temp/gear leads was about an hour job, including plastic removal and installation.
Here is my topic regarding an ongoing engine mod process. Page 3 has the pics of the temp/gear wire installation.
It is pretty neat to see your engine information shown on a computer screen....
-
I have a 5th gen frame in my basement, but the extruded side frame has come off the stering stem area :cheerleader:
Let me know what and where you need the measurements.
Jim
-
+1 for DynoJet customer service.
After installing the PCV w/ Autotune on my current motor, I was not receiving all of the information. A couple of members had to flash their firmware a couple of times before all of the features would work. So, I reinstalled the new firmware. Almost immediately I noticed an error code (148 CAN Rx Configuration - Invalid Output Error).
So, I jot that down and call DJ for support. They recommended that I disable all of the extras and work back from there, since there is no such error code 148....
Today I was able to do a little detective work, only to find that nothing that I disabled/enabled seemed to fix the error code. Back on the phone and I remember Coderighter talking about live customer serivice, so I pulled up their site.
Doink! There it was. After speaking to a live tech dude, he worked through the network and took control of my laptop in order to trouble shoot. See, I had one lonely fuel table at 8000rpm and 60% throttle that showed -95. Tech dude tried all he could to fix including another firmware update. No go.
So, he set me up for a return.
I'm very pleased with their service. I'll update once I get the new unit installed.
Jim
-
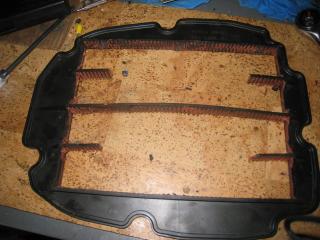
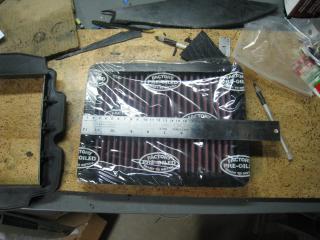
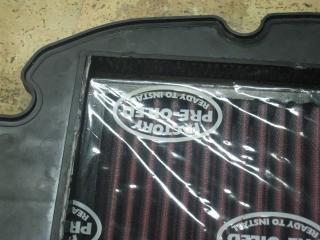
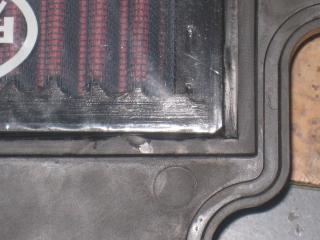
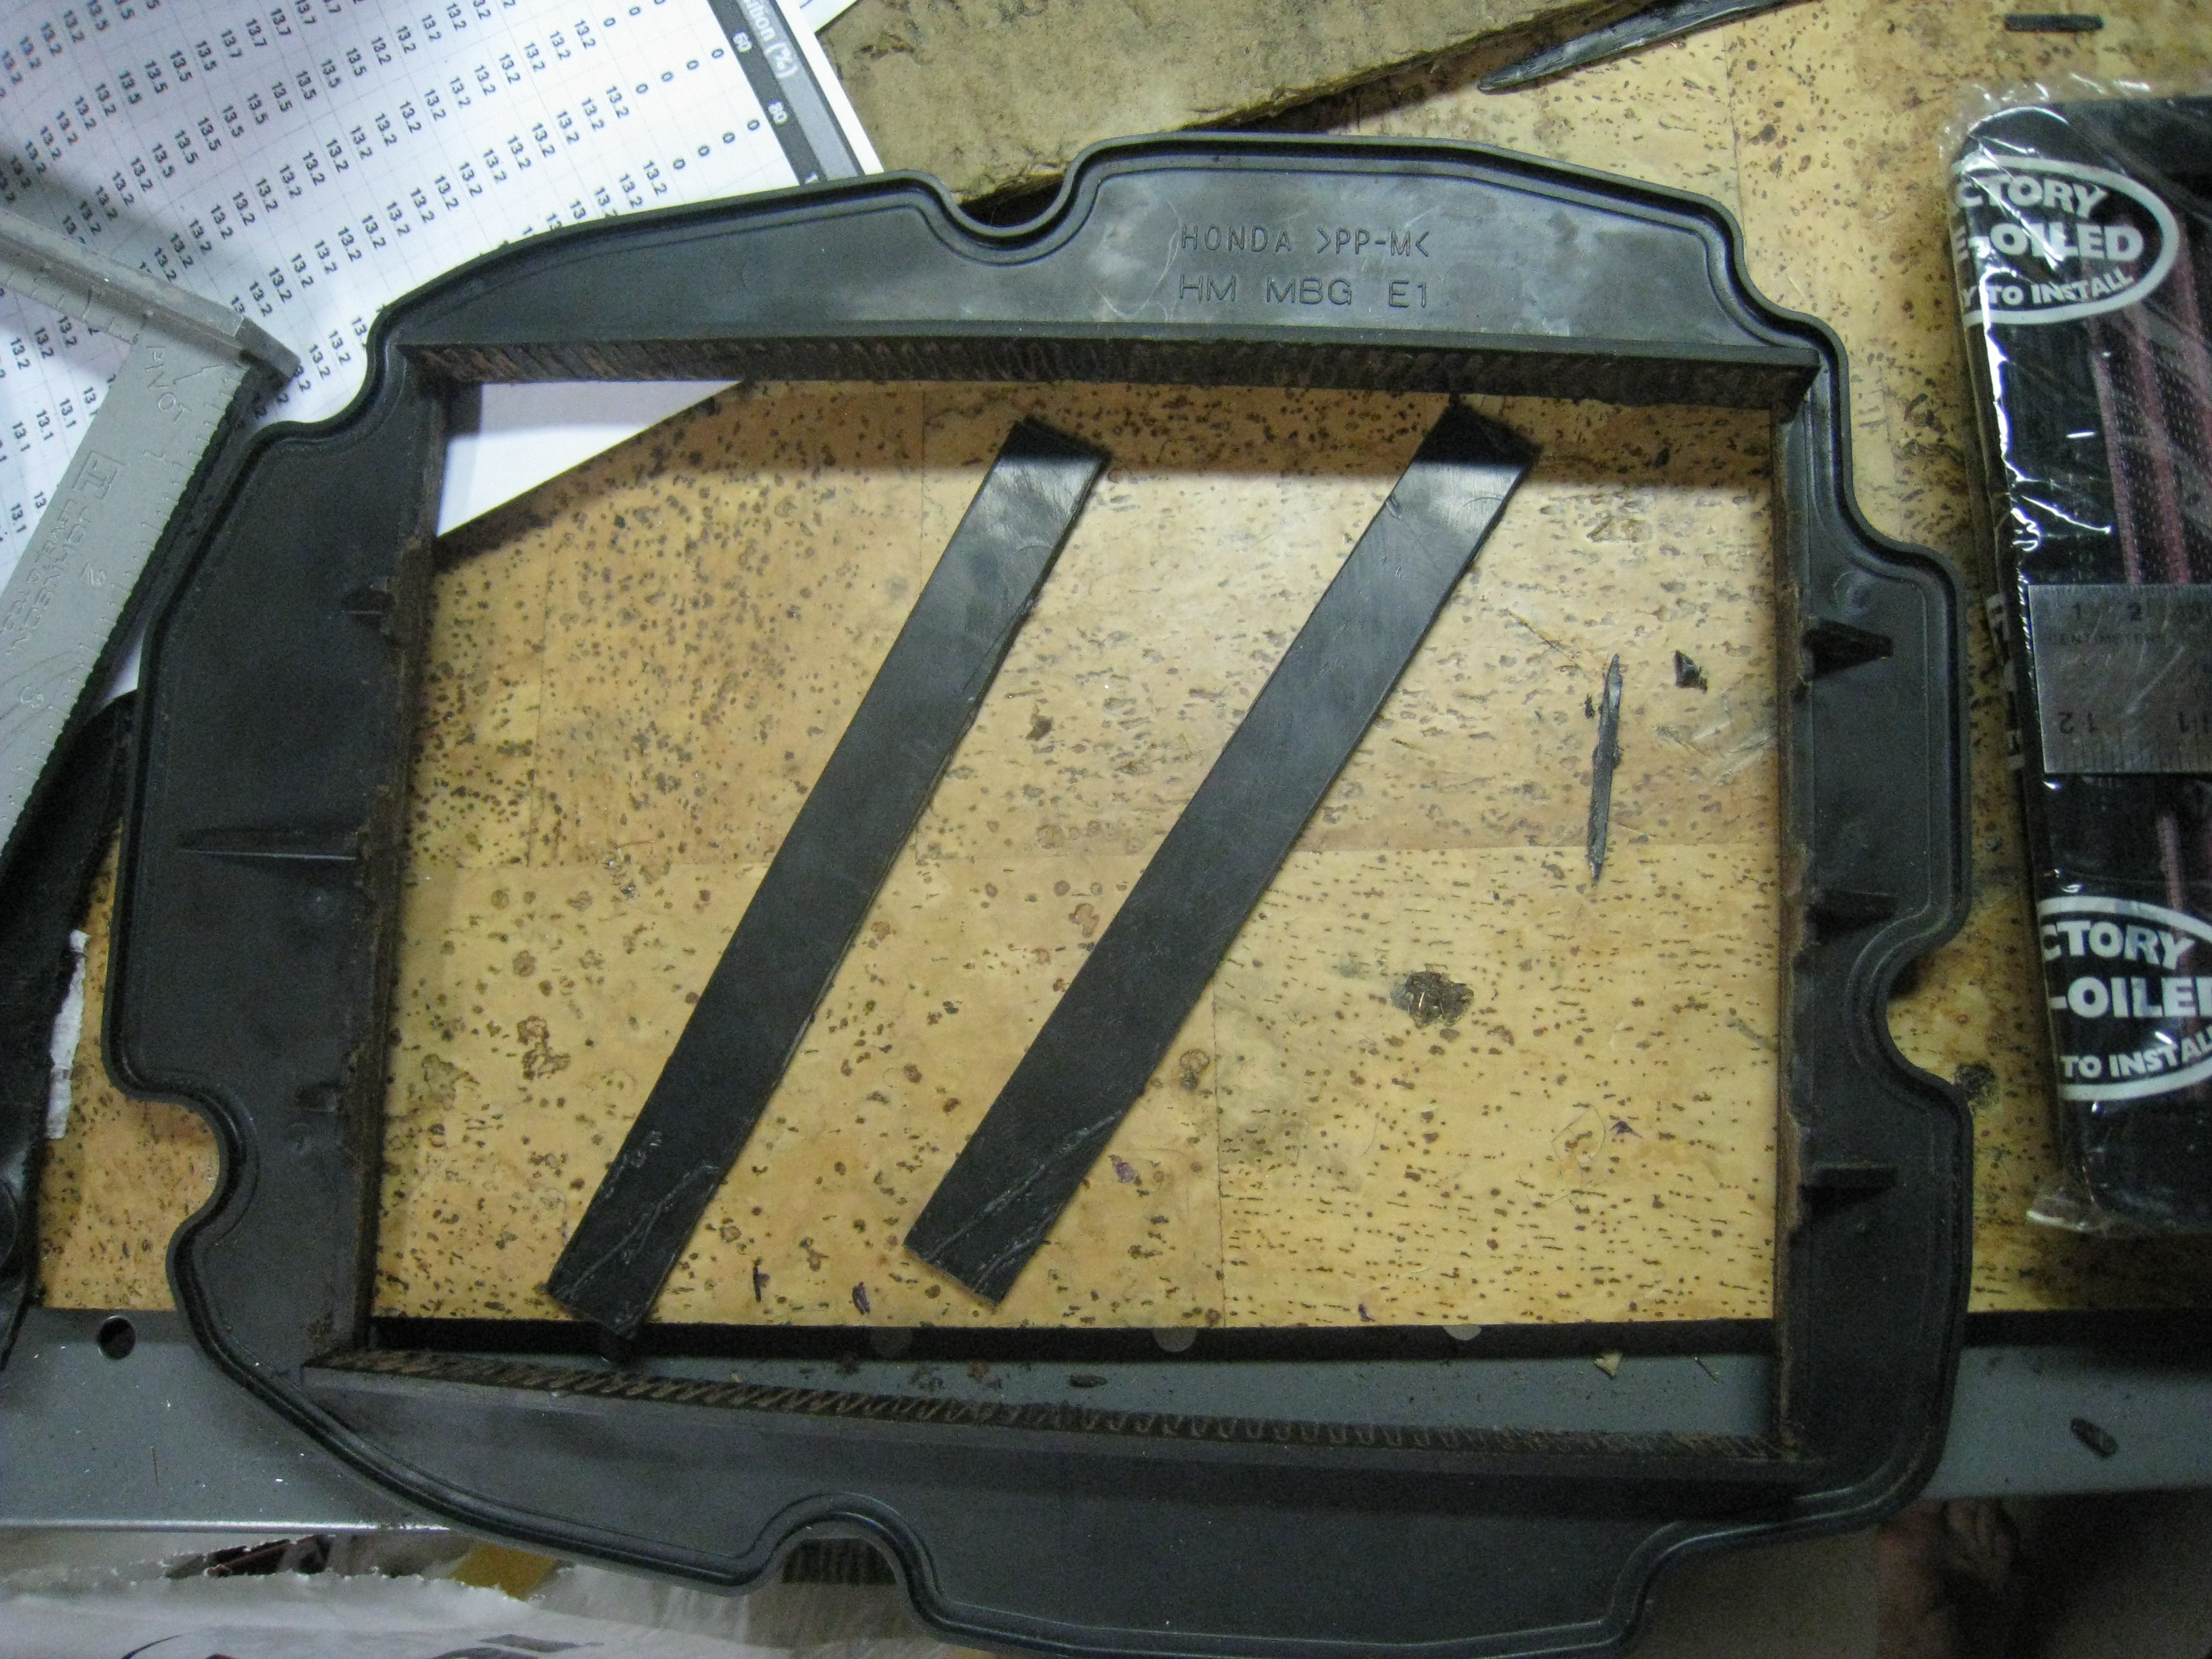
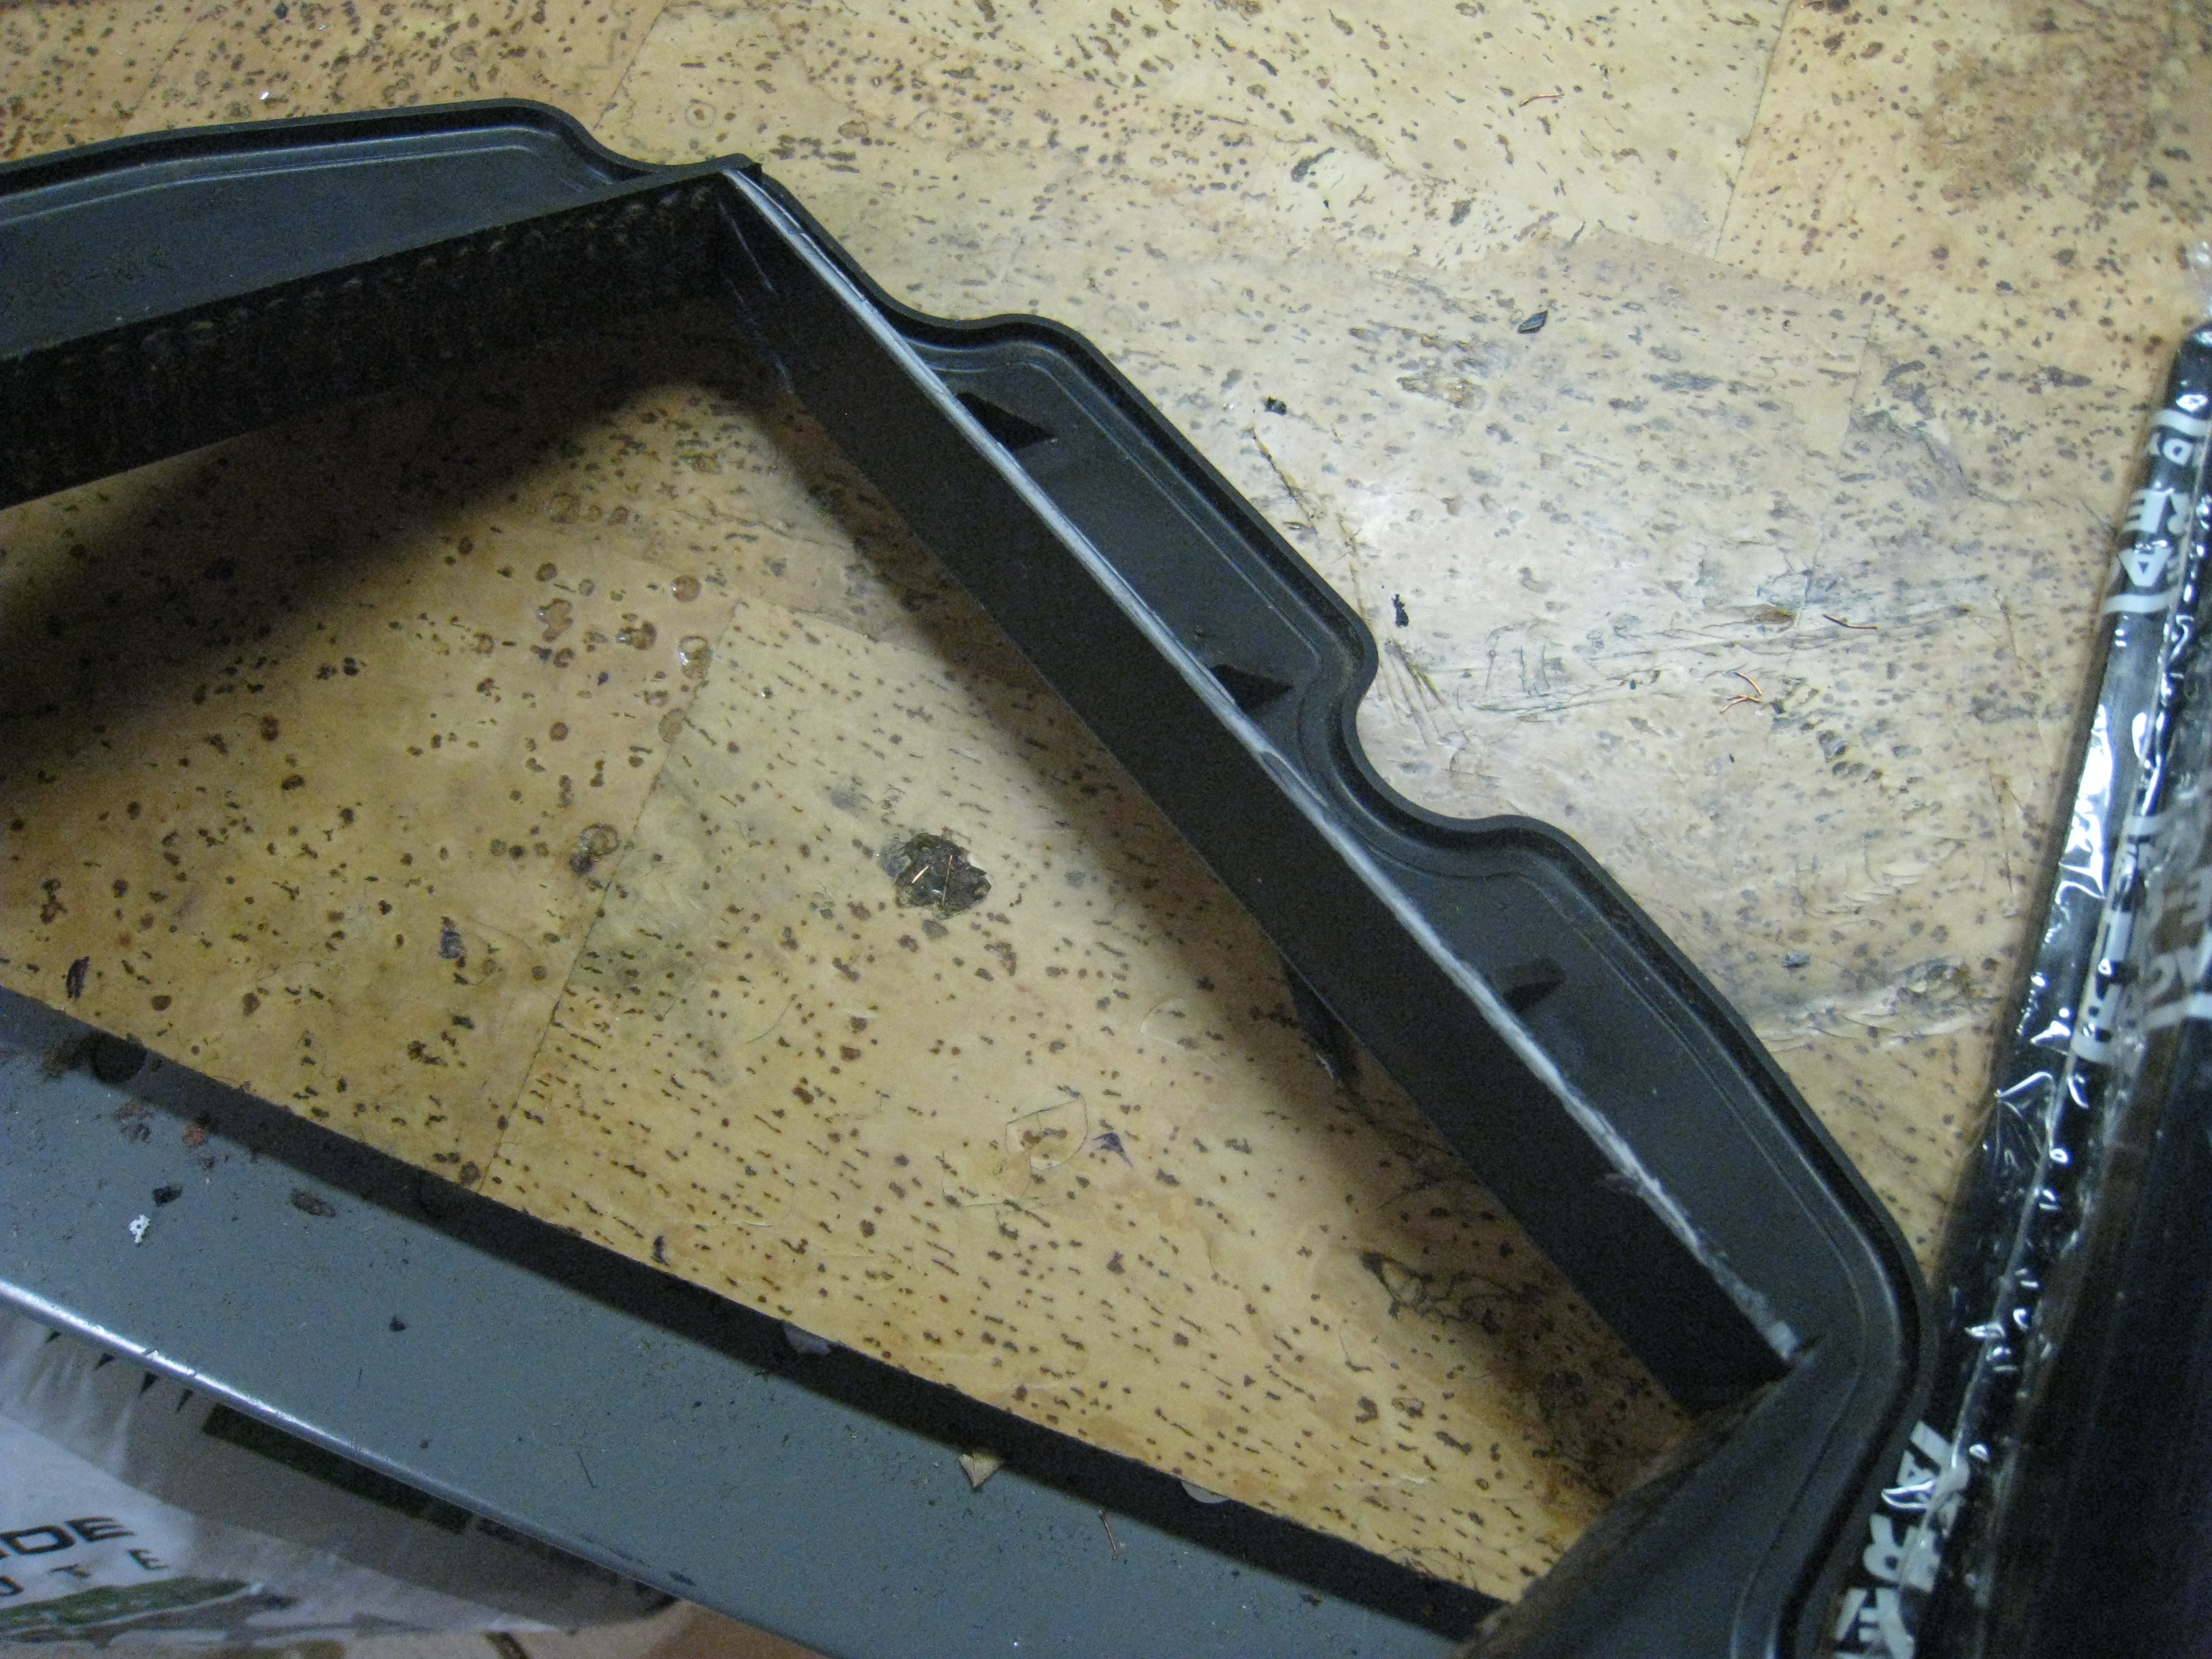
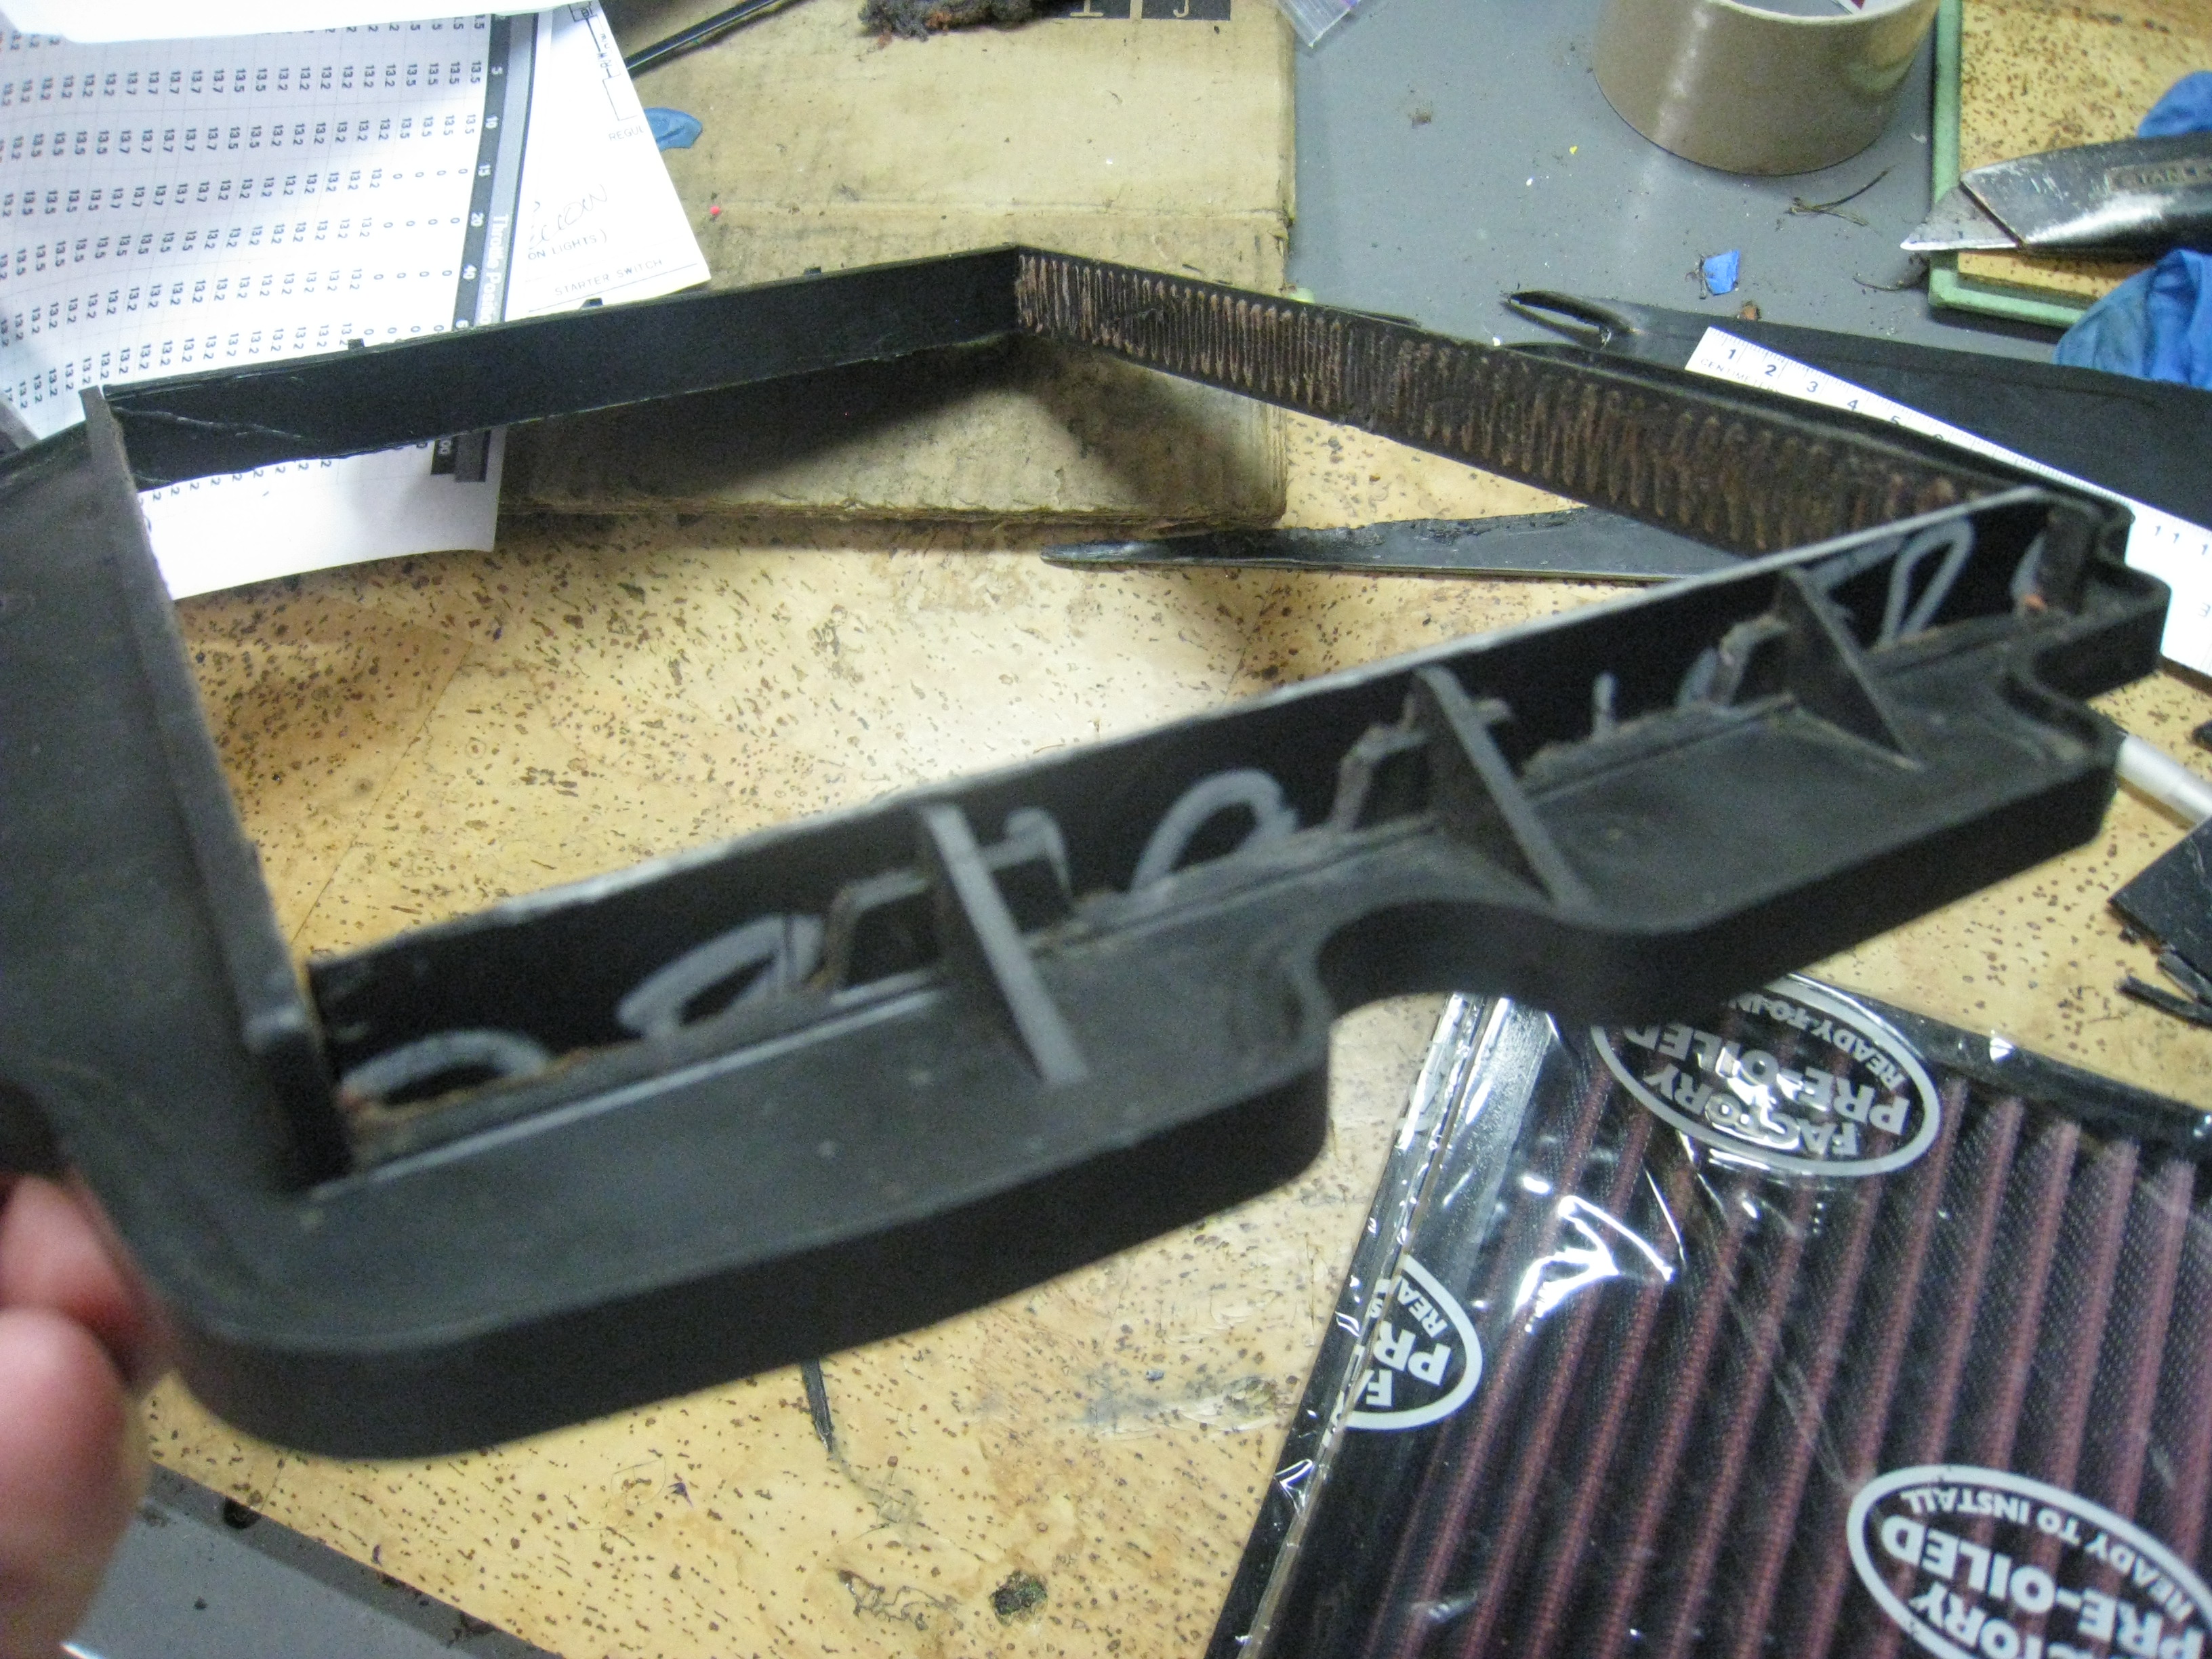
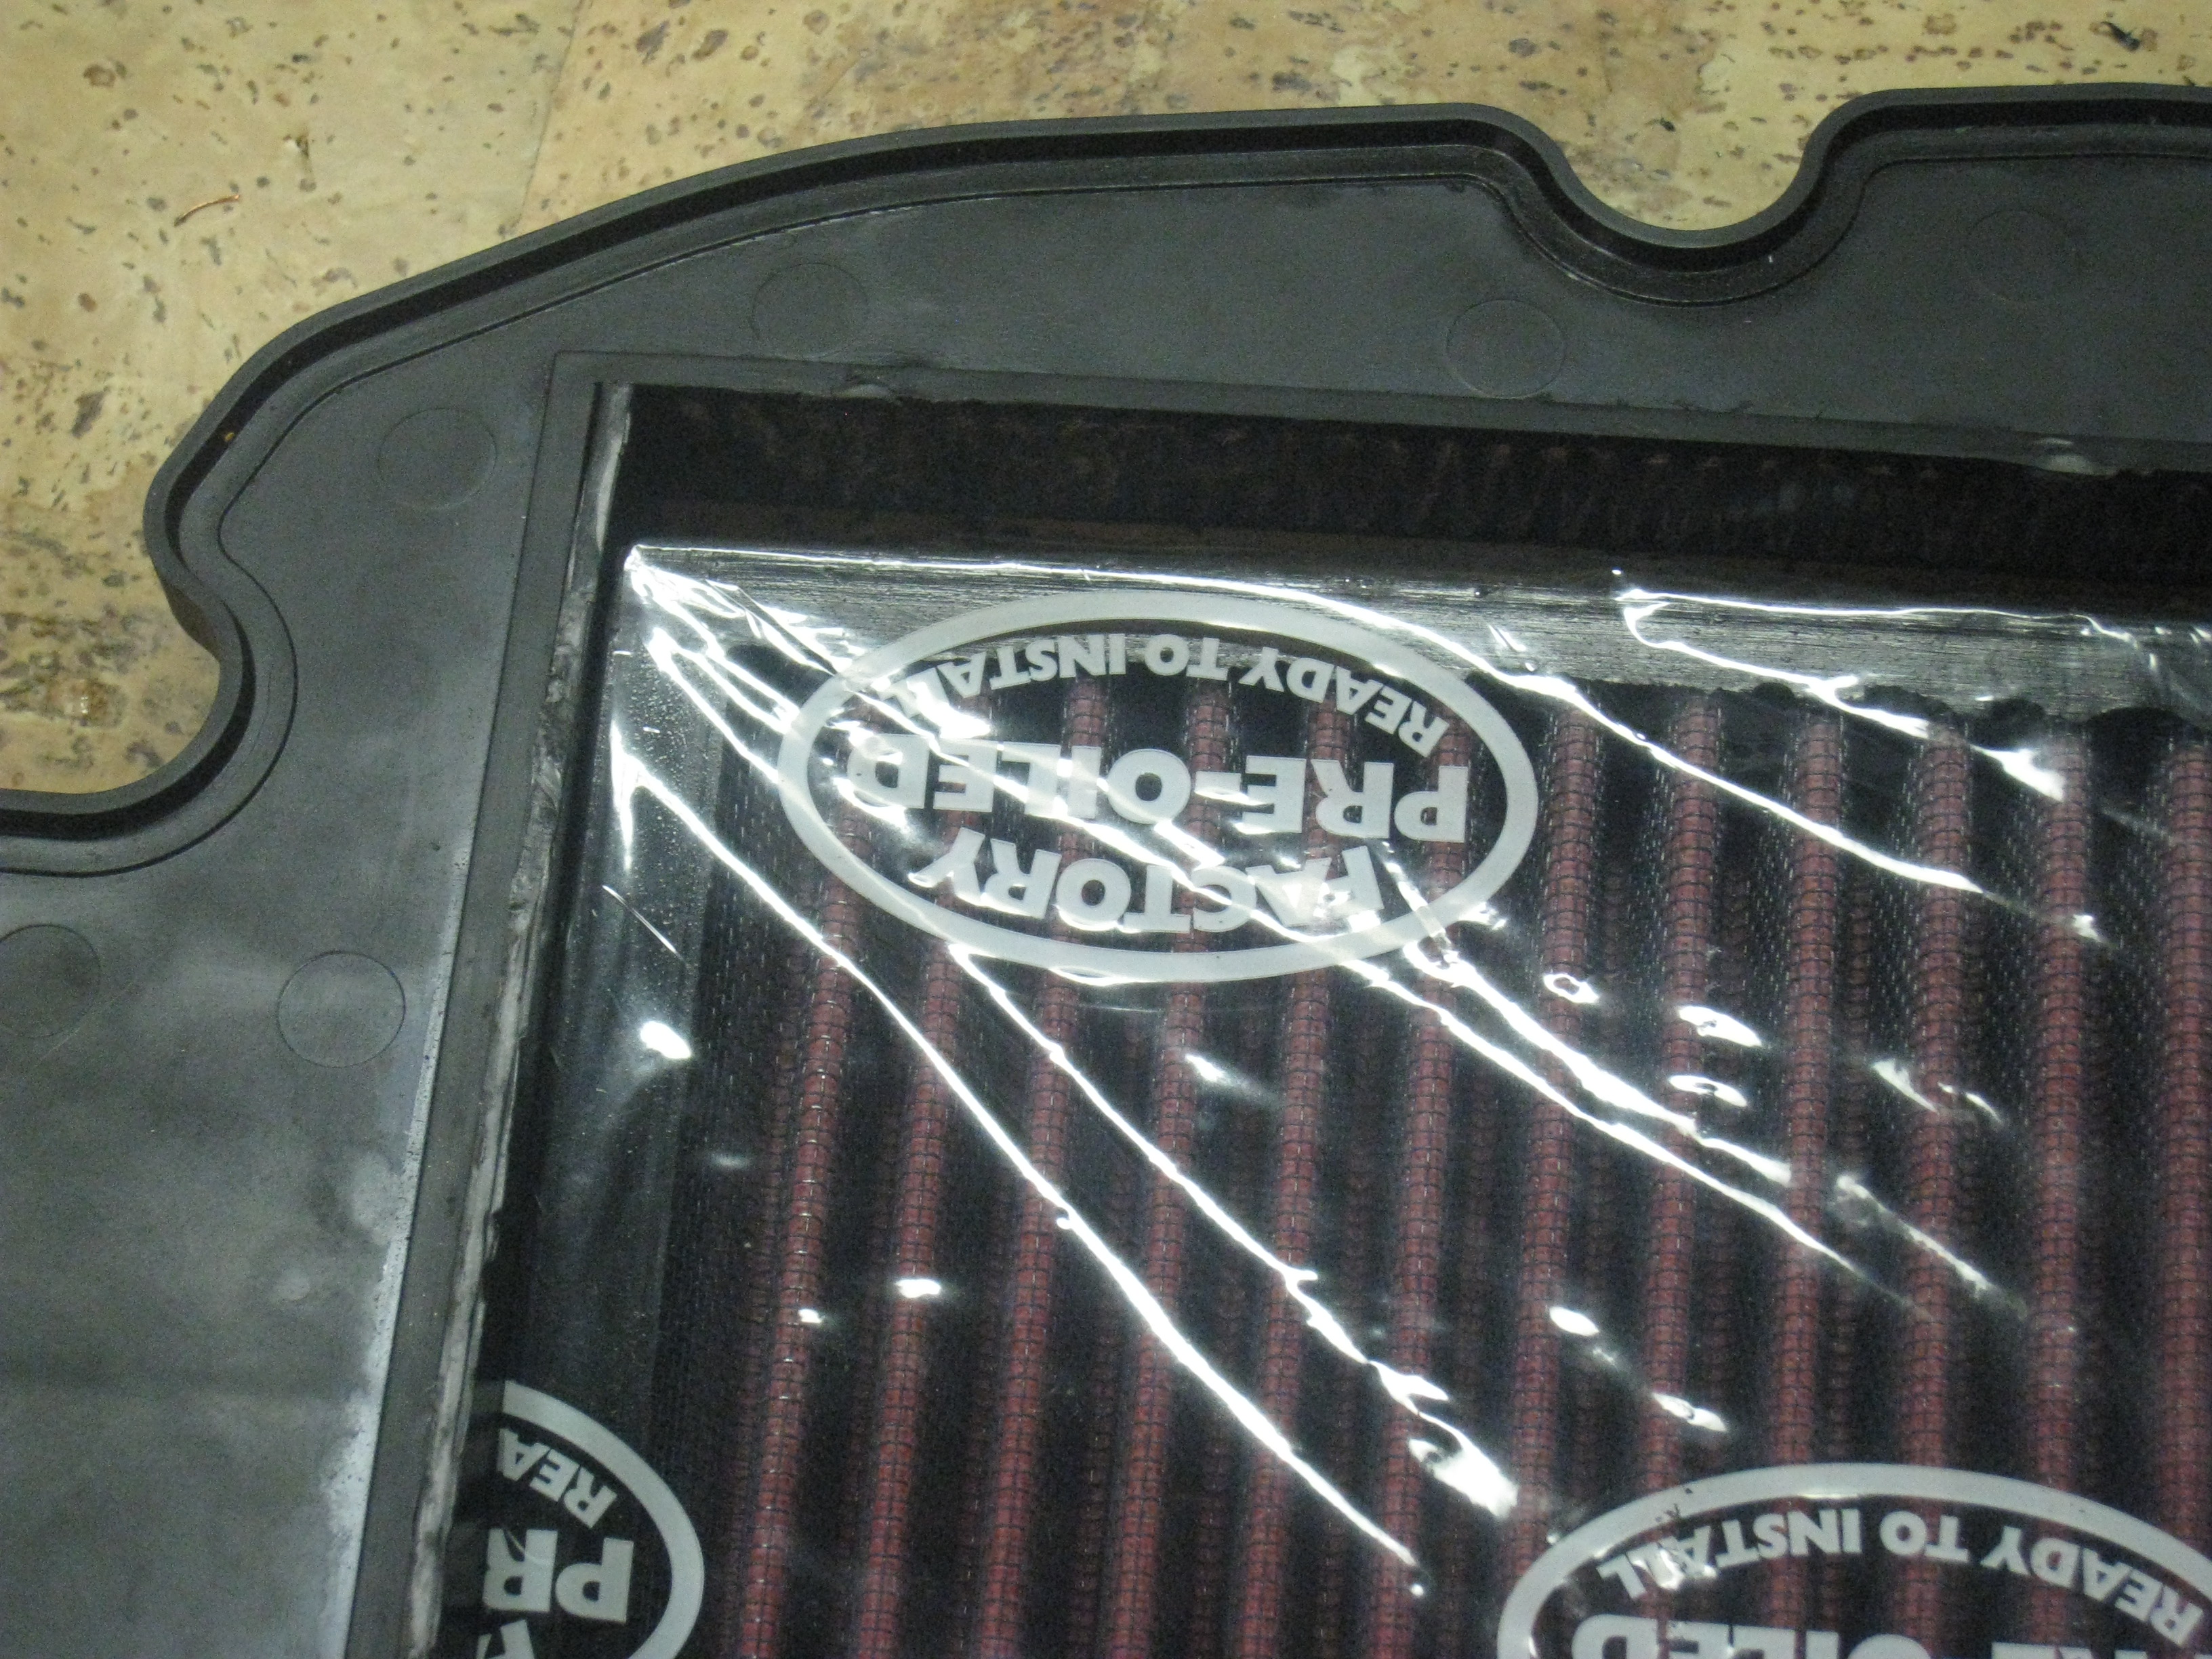
Okay, some pics of the K&N custom filter mod.
First I used an OEM air element and cut out the filter material and spines.
I then ordered the wrong sized rectangle K&N, and returned it. Ordered a larger one (K&N part number 33-2629)and voala! I only needed to fab two spacers (about 3mm each side, the thickness of the OEM ABS rear fender/undertray...)
It pops right into the OEM plate. Now just a bit of epoxy to secure the spacers and then a final dose of RTV gray (MOTO) which will hold all of it nice and snug. I researched the use of the gray due to the possibility of petrol fumes eating away at the adheasive. The gray will withstand petrol.
The custom dimentsions are about 10mm less in length and that much in width, but about +10 on the depth. Just those figures I'm up about 28% more filter area, and with their better material even more.


Once I get the PCV set, I'll dump this into the airbox and see what happens....
Jim
-
Yup, mostly electronics.
I have the complete PCV w/Autotune installed and running. All of the TPS, Speed, and Gear calibrations completed. I have the Temp input wired, and it reads voltage from my hand held unit, but the software does not yet recognize it... I've flashed (not the old lady on the corner) the firmware at least 4 times, so maybe I need to do it 4 more?
The vacuum switch Coderighter sold me works flawlessly to turn Autotune off during decel.
The block off plates were a bit of a bugger to install, but they finally went on. No leaks yet!
Now on to some data gathering and tweaking.
I'm glad I've installed this package now so when the worked engine arrives, the learning curve will be a bit quicker.
I have an air element mod that I'll have pics soon. Let's just say a lot more airflow...
-
Latest update.
The EBD is waiting for the cams to return from Dave Dodge.
He is going to lighten the flywheel. I'll have the before and after weight for publication as well as output.
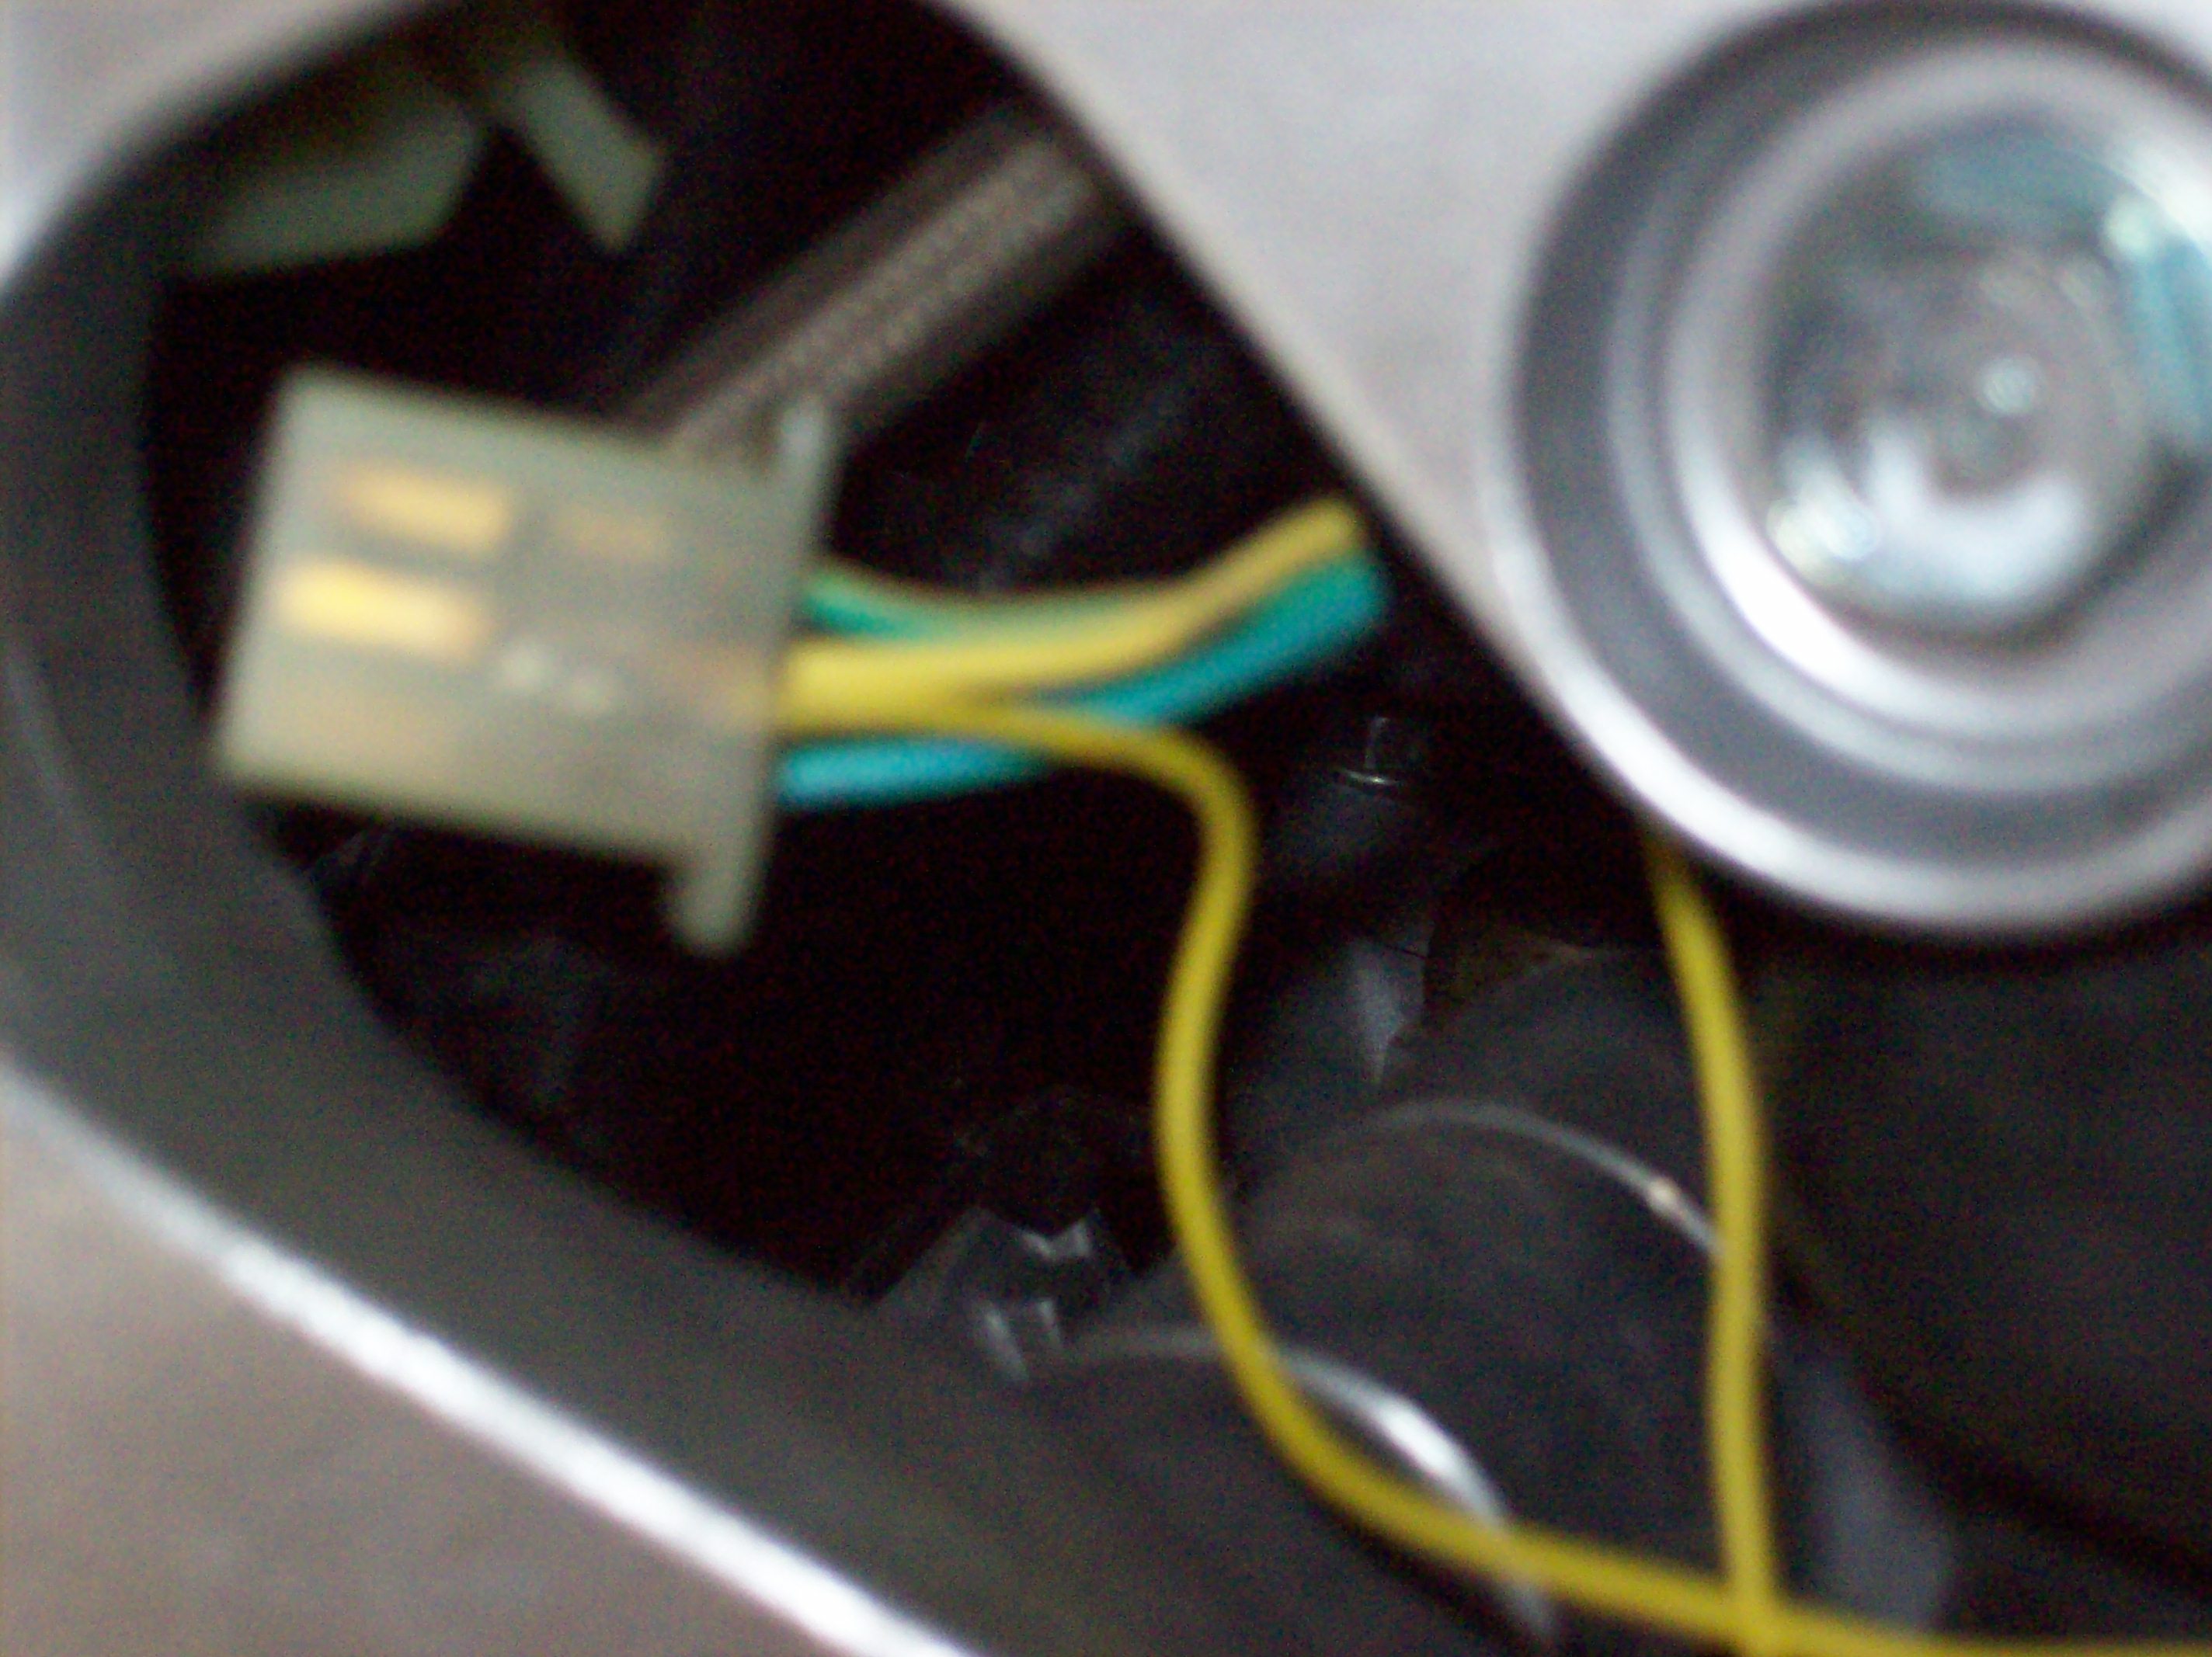
I did a rough routing of the PCV and also soldered on two leads that will allow map by gear and engine temp. Not as hard as I imagined as the locations of the pins were about as obvious as the rising sun.
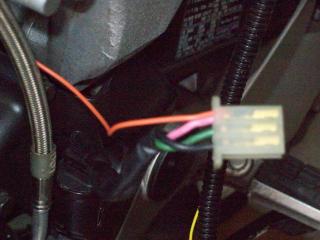
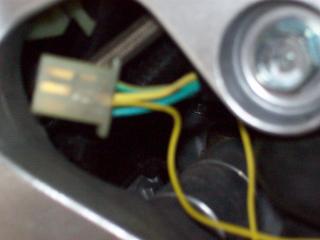
I stuffed the wires into a split loom and ran them to the rear of the subframe for future connection.
I researched some readily available K&N rectangle air elements, looking for something that would fit inside an OEM plate. Alas, I found the elusive Citeron, part number 33-2227 with a thickness of 29mm (about 9mm more than OEM) which provides approximately 40% more filter area.
I cut out the used filter material from an OEM element and I'm awaiting the K&N for final fitment.

Meanwhile, I received a vacuum switch from Jon (Codewriter) that will be used to turn the Autotune on during accelleration and off during decel. First I needed to source a 5 way vacuum terminal and then extend the OEM hoses which terminated on the sides of the lower airbox.
OEM hose location:
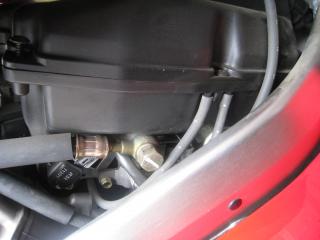
5 way vacuum hose relocation:

I've tested the vacuum on and off throttle and the values Jon provided me will work out spot on! The switch he sold me(the same as he's advertising) was simple enough to set and wiring will begin shortly. Awaiting block off plates.....
That's all for now.
More as I get it.
Jim
-
Yep, the EBD is eyeing all possible details including those you mentioned.
Right now he has some additonal HRC performance information to grind into his melon and spit out a balanced course. The trick he said is to balance all components so that each is complimentary of themselves. Otherwise, he could have bored it out and called it a day.....
-
Dave Dodge and MegaCycle are still in the cam business.
Dave Dodge to the rescue :pissed:
I spoke to him this morning and he said he could do some cam work. He finished a 5th gen last year with very good results. That job included a 1 over bore and some other stuff...
I've linked up with my EBD who will contact Dave direct and they'll do their engineering stuff.
Great call Seb. Thank you.
-
Okay I'm following that. My question was were did you find the 4 into 1 "T"??
Auto parts store or somewhere else??
Doink! I forgot to mention Coderighter used the old vacuum hose system that connected to the EVAP system. In that system there already was a 4 into 1 T. If you don't have that, I obtained a 4 into 1 from a 6th gen and will use that to tie into the vacuum switch.
-
Well I see you are putting the bung in the tail end of the collector. I'm just going to swap out one of my stock o2's for now.
Where did you find the 4 into 1 for the vacuum switch?
I already have the switch from Coderighter, but was waiting on the PC V and autotune to arrive before installing it.
I'm sitting here waiting for my pcv to arrive, and I should have already had the autotune in hand (damm ebay copyright policies).
Coderighter dumped his EVAP system and ran that vacuum plumbing to the switch. The EVAP plumbing is a 4 into 1 with the 1 now being used to link to the switch. On my non-EVAP model, I'm going to unplug those four vacuum hoses that connect to the sides (2 each side) of the airbox, and T those into a 4 into 1. Then I'll run a hose from that to the switch.
-
A better option would be an Autotune, but since they're not available for the 5th-gen it's somewhat of a moot point!
I'm working on that option as we speak as I'm installing a PCV with Autotune on my 98. The PCV will work back to the 00-01 model years as a plug and play. Since the 98-99 don't have O2 sensors, I'm having a bung welded onto my header to accept the Bosch unit. The PCV's wire harness plugs into 98-09 without issue.
I hope to have results witin a week or two.
-
More engine info.
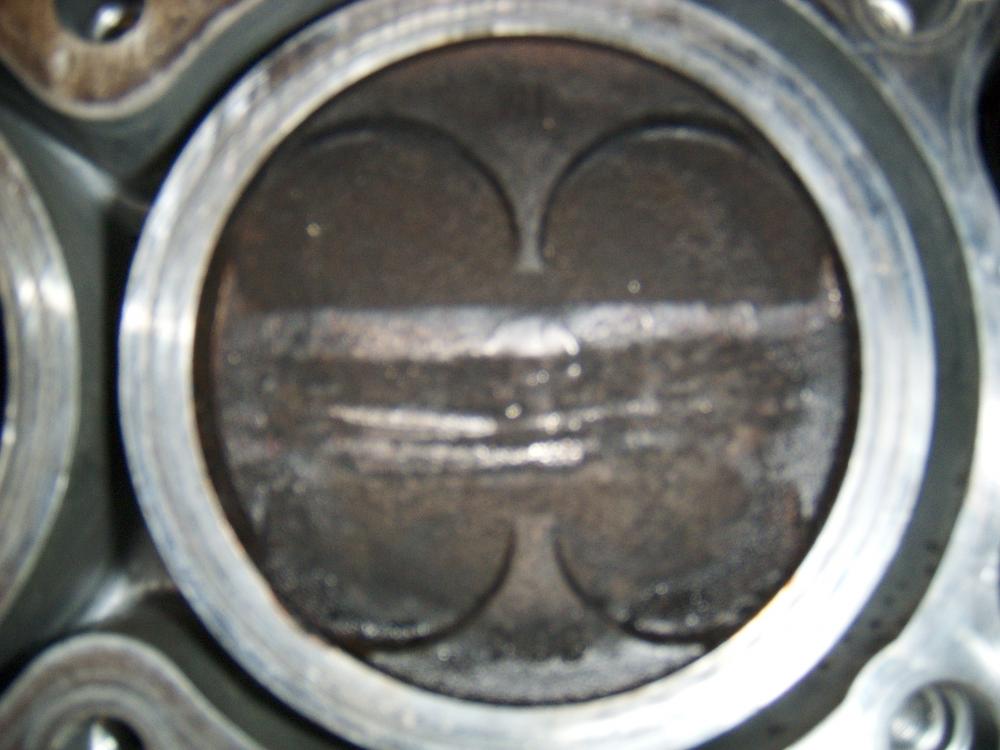
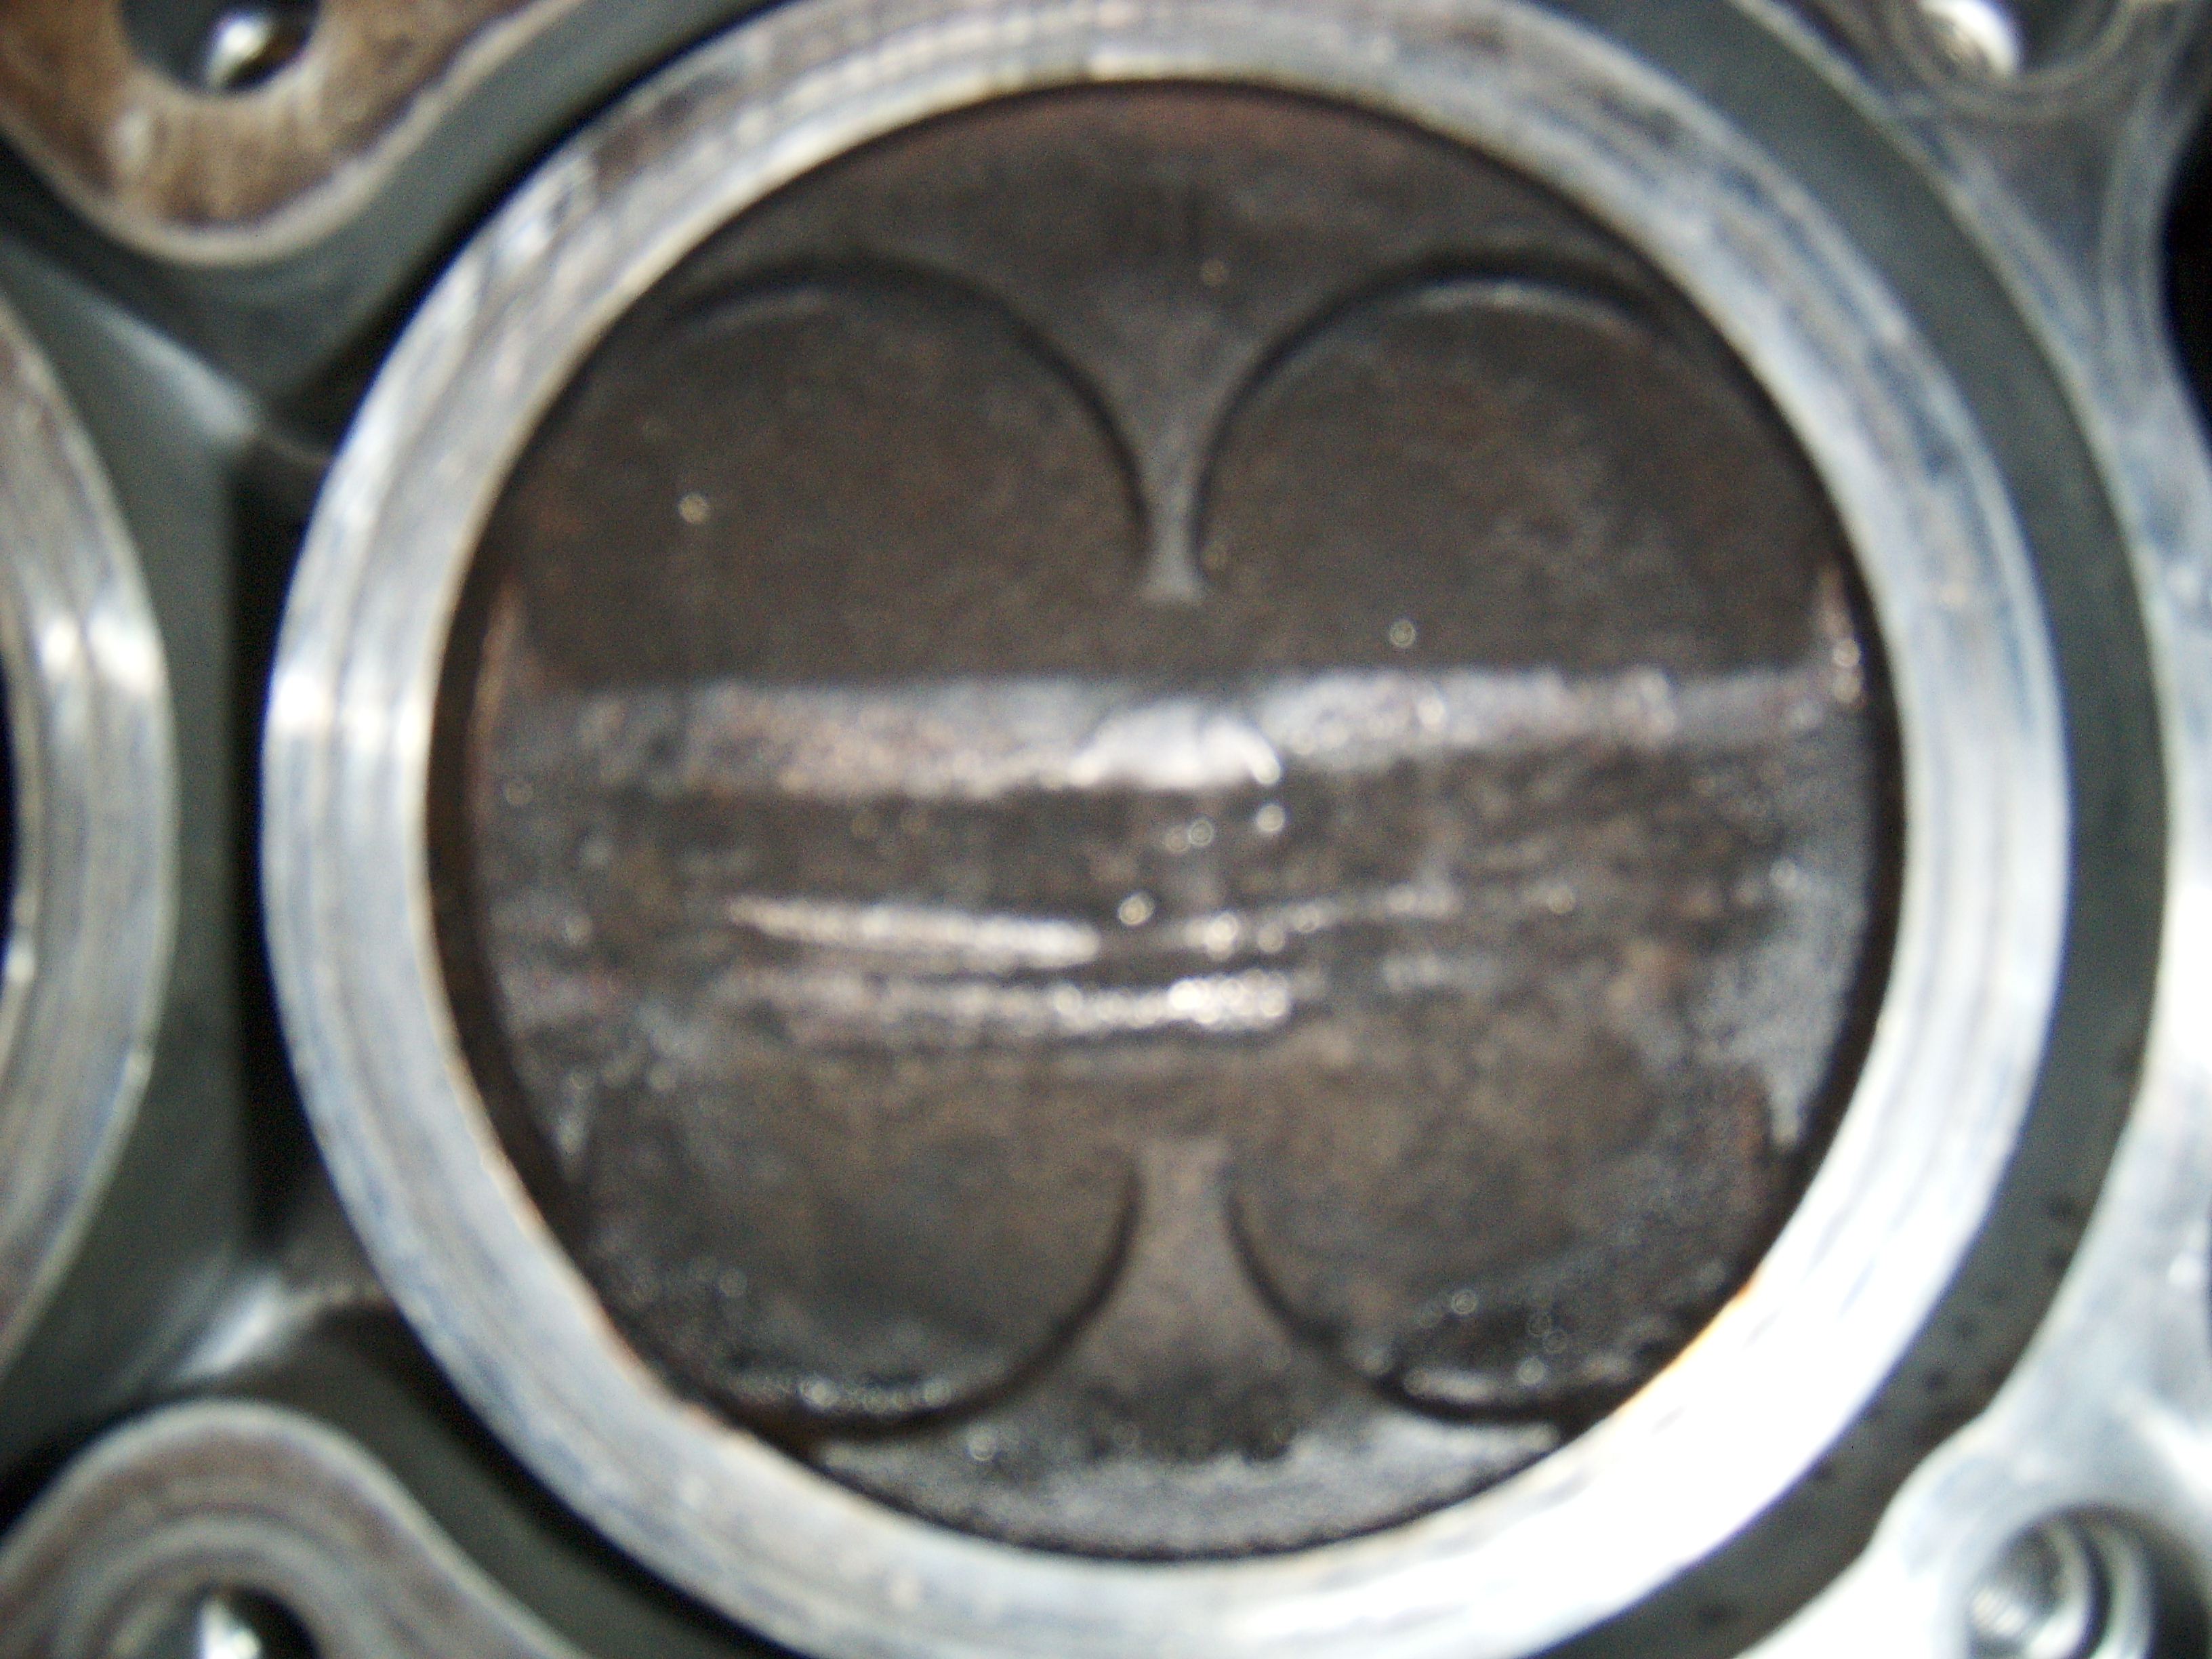
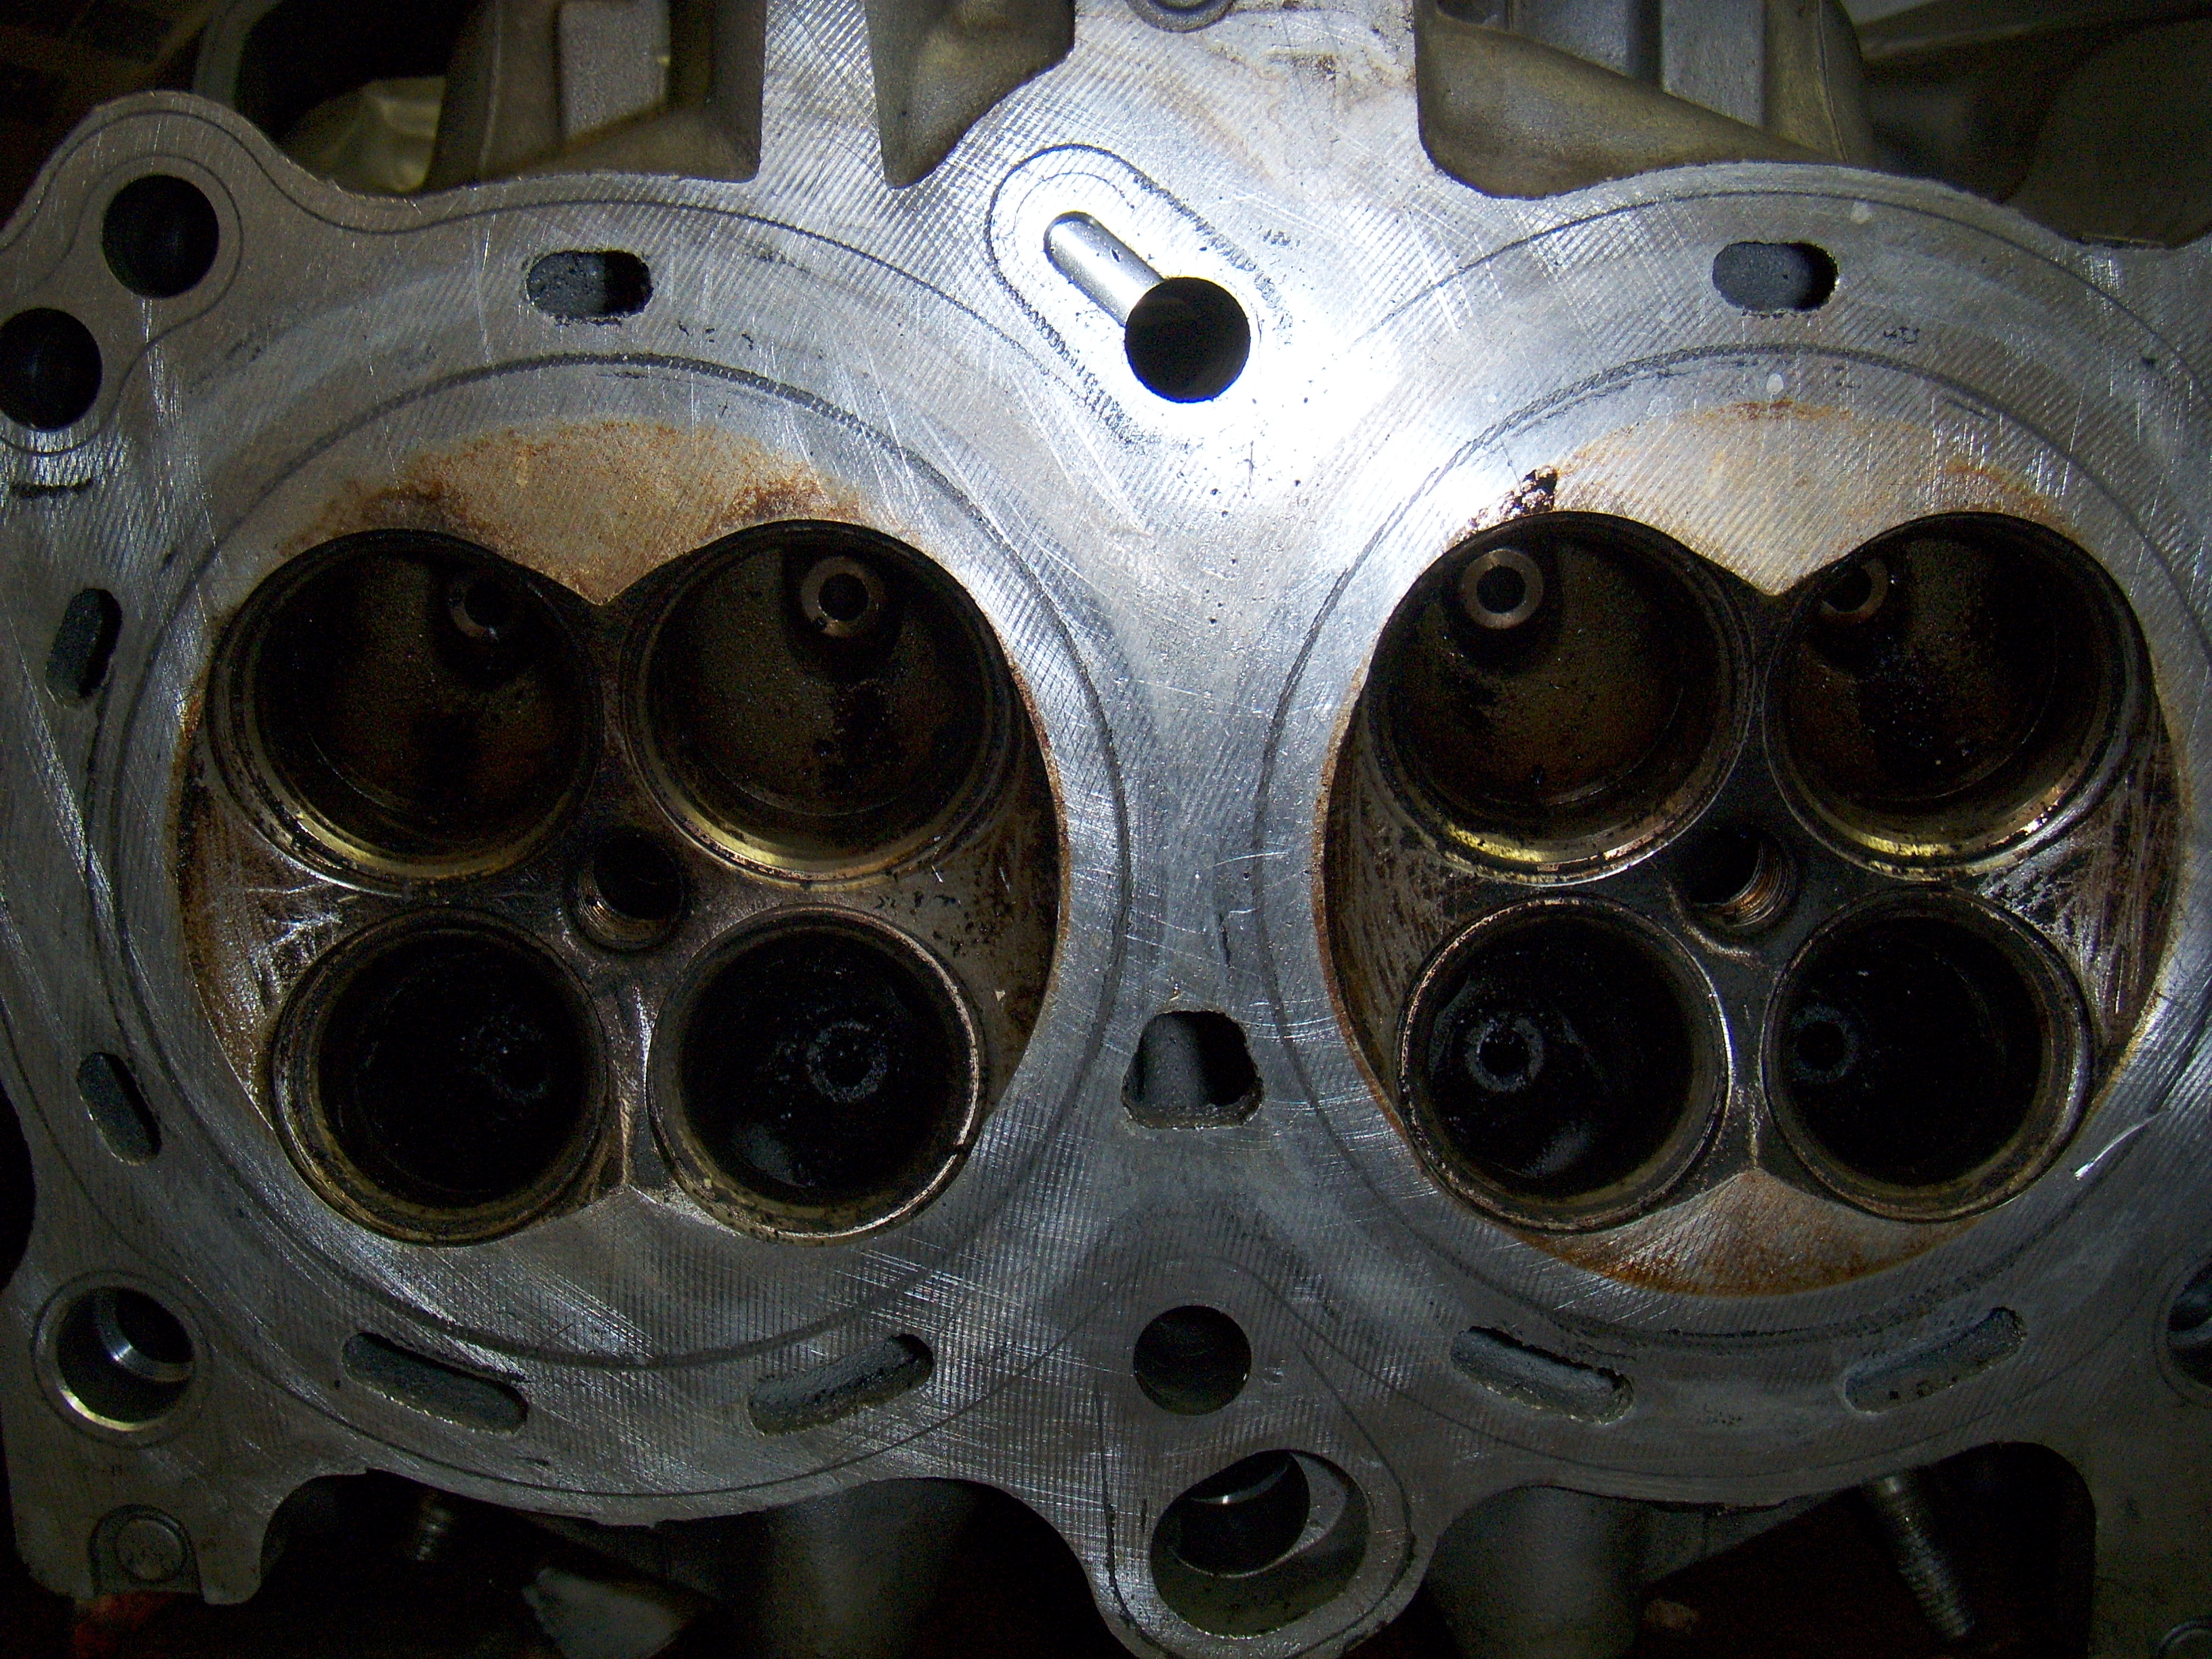
Got some pics of the tear down. The cylinder heads are a bit crispy with carbon, as you can see in the photo where he scraped the soot off. Those are the areas where the EBD will add material and "weld it shut". On the cyl that had the bad cam, a bit more carbon as the lobe had been worn to not allow full motion, capturing the burnt gases and not allowing them to escape.

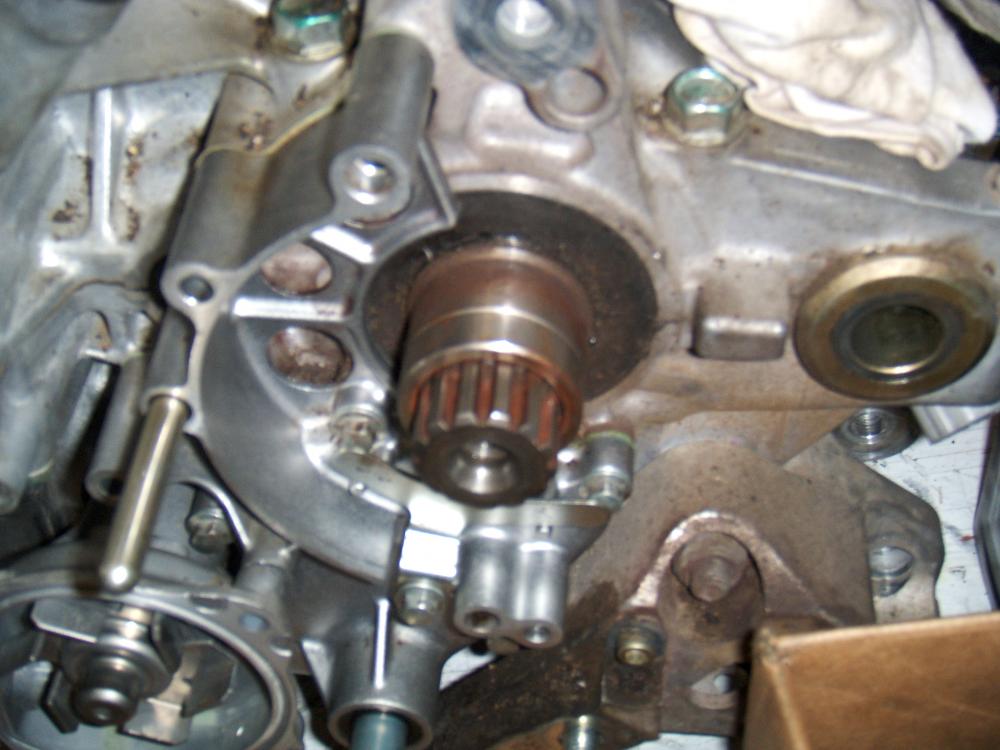
The work on the water pump was more than I first reported. He also milled down the cover to decrease the area. Decreasing the area allows less cavitation.

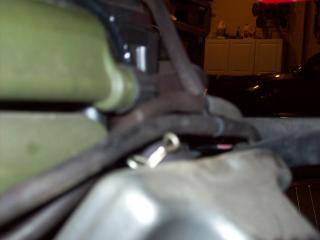
Here is a shot of the Autotune sensor. I've located it here as it is the only place that won't foul the suspension linkage, and I can route the harness up and near the driver's peg holder.
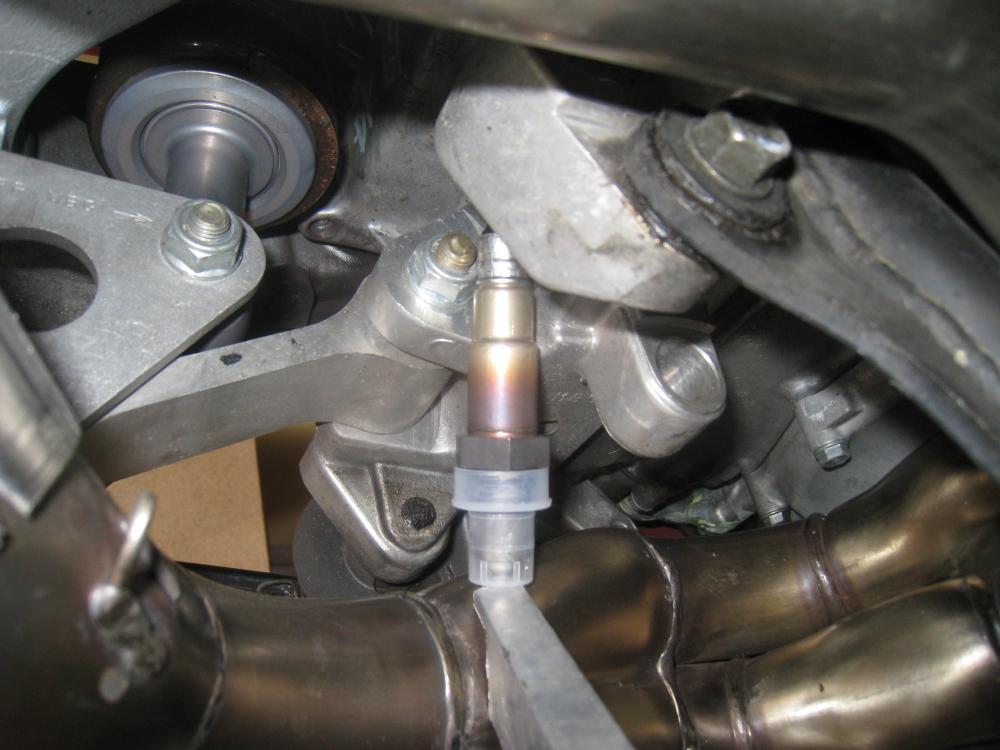
Coderighter and the boys down under have kept up with the PCV testing. Once I get the bung welded on, I too will jump into this. Coderighter was kind enough to assist with the vacuum switch I'll be using to turn the Autotune on and off depending on load/no load.
I can't install the PCV yet as the bike is at the pipe dude for the custom up pipe/ Y to connect to the Laser cans. I hope to have it back mid next week.
-
 1
1
-
-
To address the heat issue, why not just add some fuel when the engine temps hit a certain mark? That option is available to us no?
-
So..... What do you have where EVAP would be connected, because that's the source for the vacuum switch.
A bunch of mounting points with nothing on them (probably a good spot to put a Stebel or something actually... hmmm, next project maybe).
Where exactly do you tap in the vacuum switch? I can't imagine Honda would completely redesign everything for non-EVAP markets, so where ever the vacuum source is, it's probably just plugged off (or still in use for anything else that taps into it).
Coderighter and I determined the difference between the EVAP models and non is where the four injector hoses terminate. On non EVAP bikes they terminate on the sides of the airbox. EVAP bikes have those same hoses terminating into a 5 way T where one hose exits to an EVAP solenoid.
Coderighter removed all of his EVAP system (including the solenoid) and used the vacuum hose exiting the 5 way as the vacuum source for his vacuum switch. This switch turns Autotune on/off depending on accel/decel.
On my 5th gen non EVAP model, I sourced a 5 way T and some vacuum hose from a member and I'll plumb that to the vacuum switch to work the same as Coderighter's.
-
Other than the additional O2 option, will these upgrades change your/our setup?


5th Gen Engine Modifications
in Modifications
Posted
Well,
It looks more and more like Dave Dodge has misplaced all of my cams. The EBD is still trying to get him to ship them back, with no results.
More in the next few weeks.