

KanadianKen
-
Posts
1,159 -
Joined
-
Last visited
-
Days Won
12
Content Type
Forums
Profiles
Gallery
Blogs
Downloads
Events
Posts posted by KanadianKen
-
-
man, that is truly a thing of beauty.
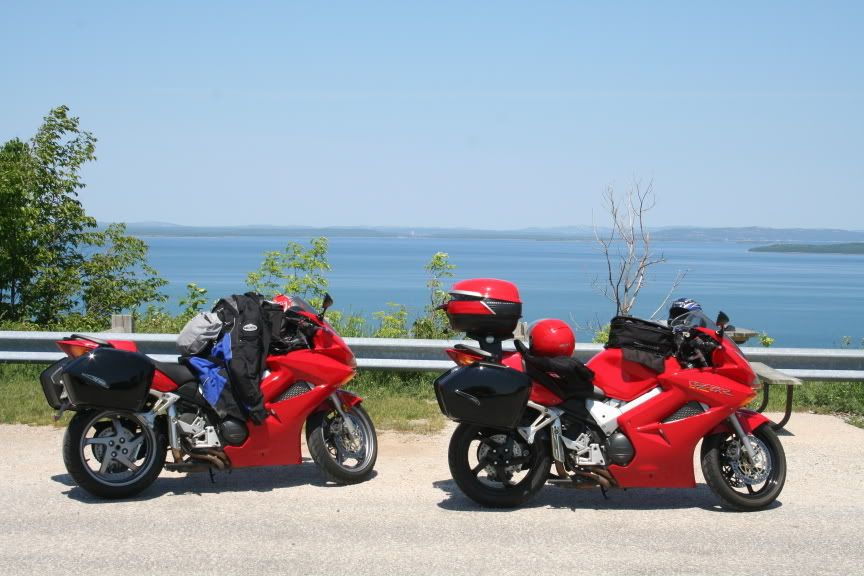
Anybody still got a set of these brackets fer sale? Gawd I love the internet. I would like to see a full side view of the bike left and right side, yall got any? Maybe even with rider installed?

/needy bastard
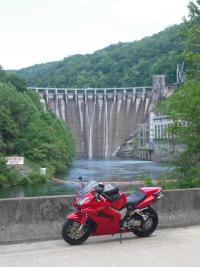
heres one - no rider on it - but it might give you an idea.
-
I pulled the "Blue" connector apart today (the one that is on the left side of the bike, above the left Rad). I was looking to see what kind of shape the internal connection was on the GREEN ground wire terminals.
It was absolutely perfect. No buildup of any corrosion or crud, immaculate.
My 02' had the beginnings of the 30 AMP main link wire burning up issue, but I snipped it and spliced in a serious duty 10 gauge wire and heavy duty fuselink about 18 months ago.
I wonder if the preventive measure I took on the 30 AMP link, had something to do with the Green ground terminals inside the BLUE block being in such good shape?
THe blue block is easy to seperate - just push the tab in, and using a small flat head screwdriver, gently split the connector in two. Piece of Cake to inspect, and worth your time - I did it cause I changed the oil and had the fairing off today.
:thumbsup:
-
Travis - thanks for keeping that - I forgot I made that short clip. I have to say that after putting about 4,ooo kms on the gutted pipes, I absolutely love the sound. Its not obnoxious, but it is noticeable. NO rattles, not tinny sound - just deep growling, soothing small block chevy with a cam kind of sound. I love the result of the full gut treatment.
:beer:
-
Kanadian Ken,
Why do you keep the passenger grab bars?
Good question - easy answer....
It would look totally unfinished without the grab handles in place - as you would see the mount location, and the bars for the side bags.
I left them there only for appearance sake mostly - and to keep water from getting into the under seat area.
-
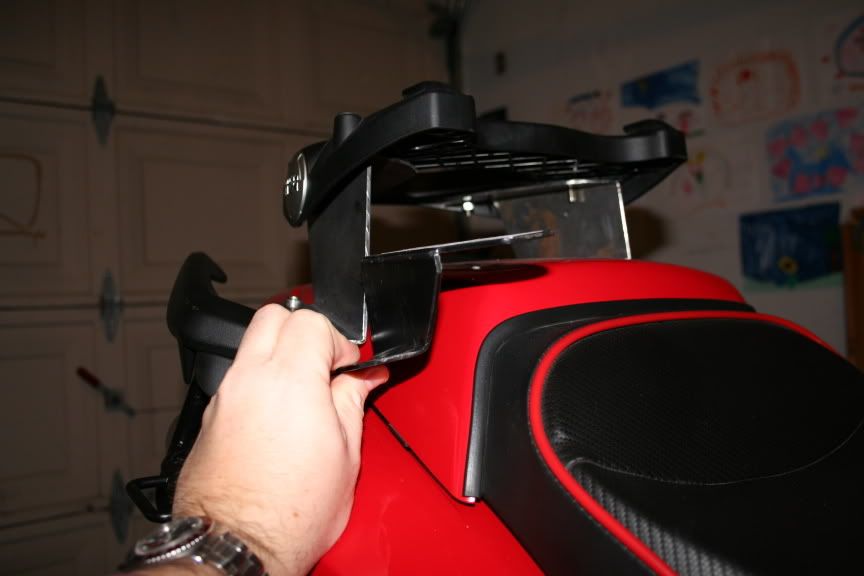
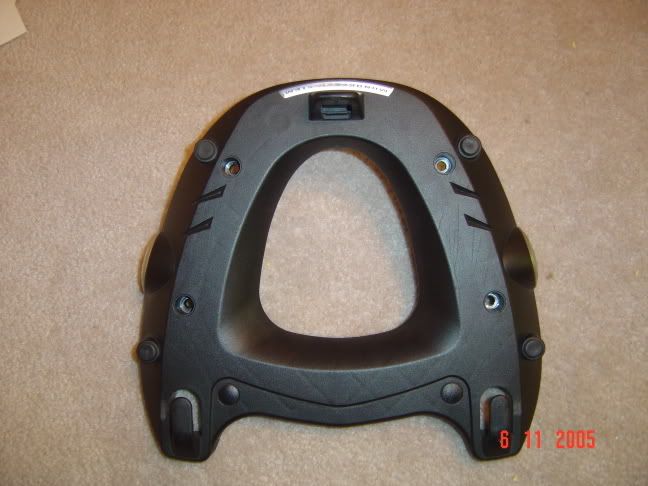
THese aren't finished (as in apray painted and pretty'd up) but here's the TALLER version that I had made. I can get the seat off with these in place.......
 border='0' alt='user posted image' />
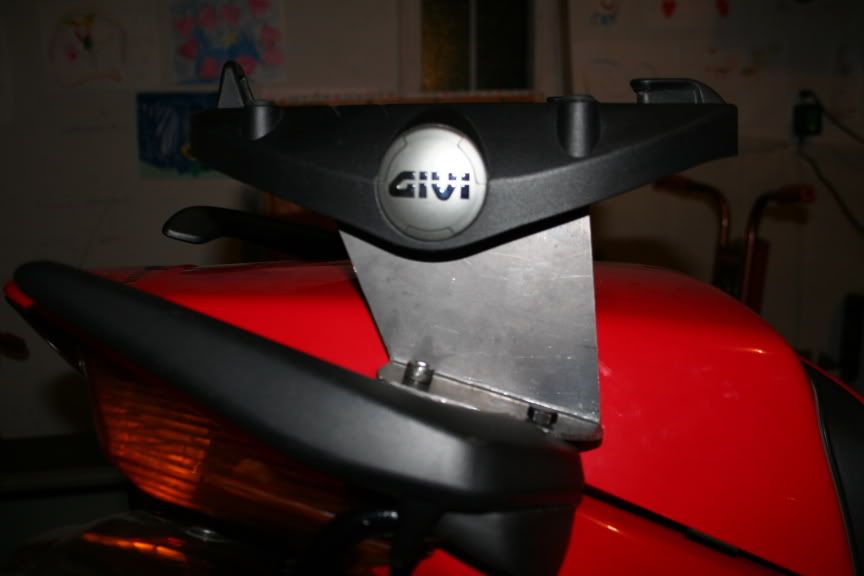 border='0' alt='user posted image' />
 border='0' alt='user posted image' />
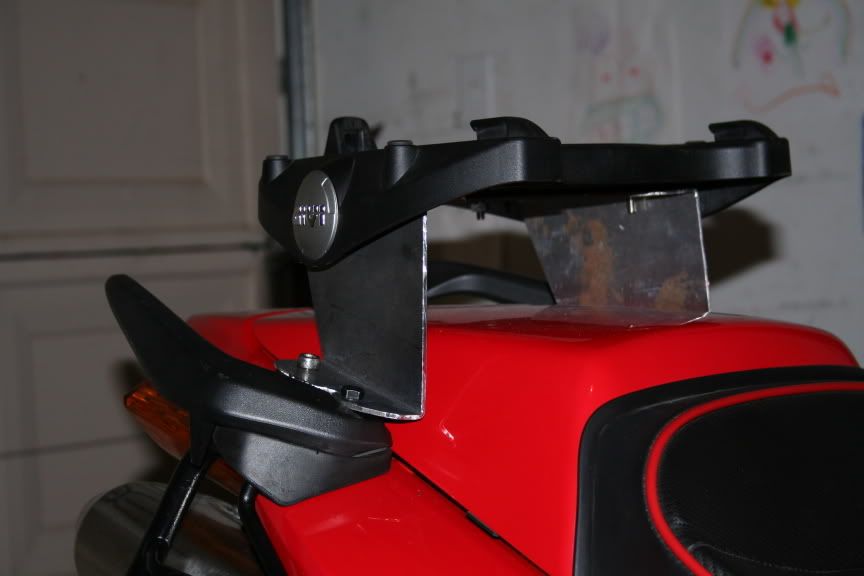 border='0' alt='user posted image' />
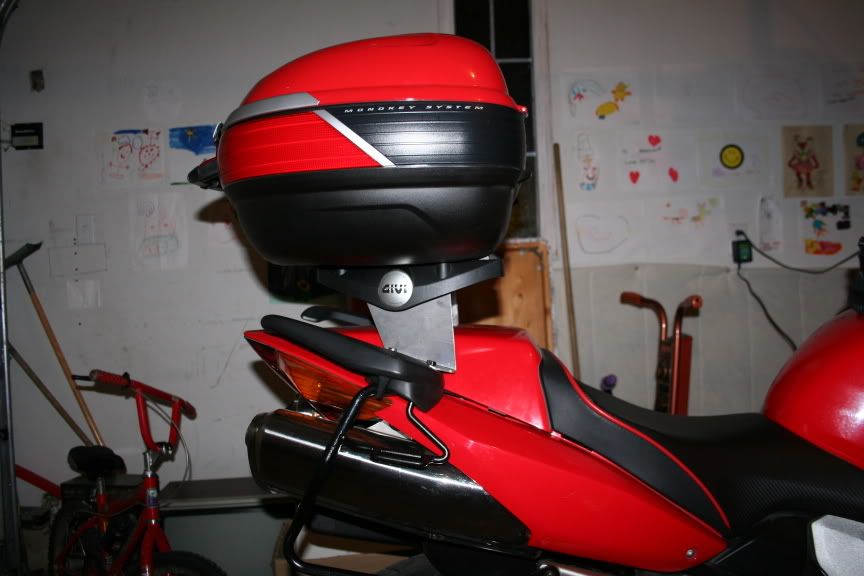 border='0' alt='user posted image' />
 -
so hopefully there is a chance for one of my siblings
Fixer - you and your son are brothers? huh???? :P I think you mean your offspring versus sibling right? :lol:
-
We sometimes have the lead rider pass the rolling road blocks, slow down until all can pass, than wick it on again. It doesn't make the cages very happy sometimes, but hey, they started it! :P
I've used the previous 3 methods - but this one ULEWZ, scares me a lttle. I'm not too crazy about becoming the punching tool of some pissed cager that doesn't like me slowing him down so my group can pass.
I'd use this one as a last resort. I'd also never do that in the States - you guys have the right to shoot at moving targets don't ya? :D
-
Ken
Sorry, but you're dealing with an idiot here. What I really wanted to see is a pic of the fabricated brackets themselves. By the way, this is one of the best mods I've ever seen. Great job.
HEre's the brackets before being drilled for the top plate:
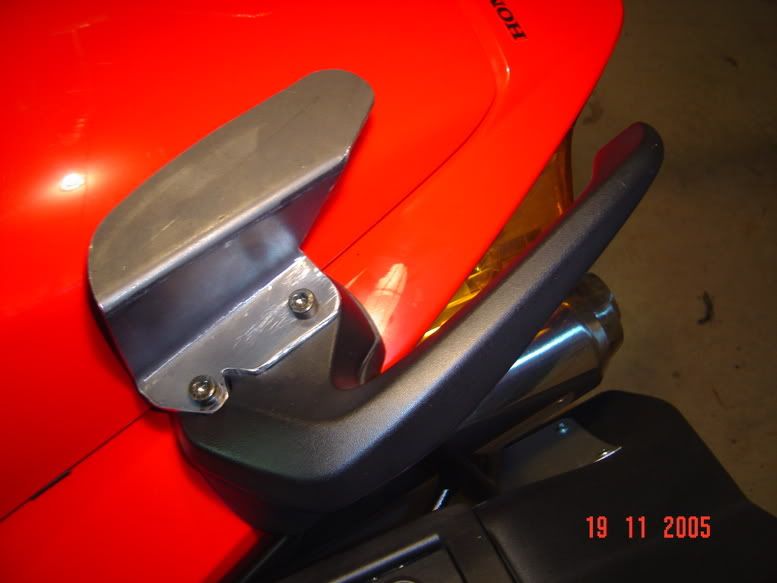 border='0' alt='user posted image' />
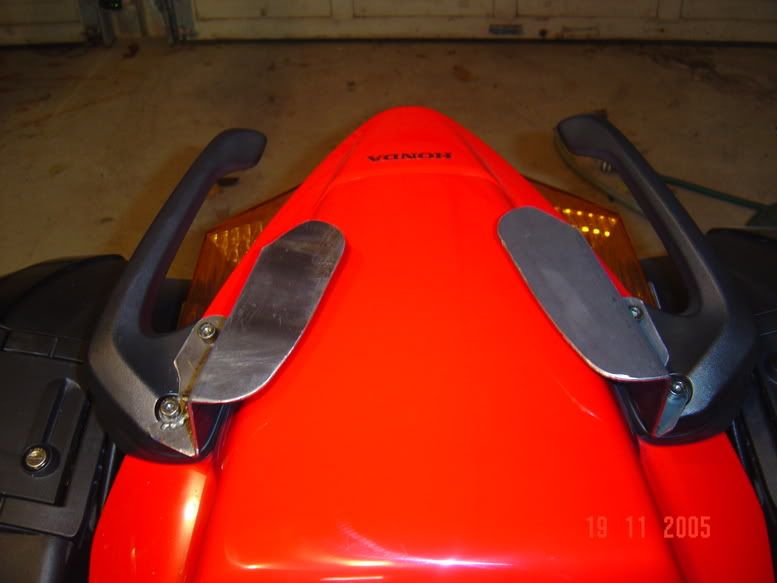 border='0' alt='user posted image' />
I"m getting some new taller brackets made - will post those pictures after I get em installed.........
-
Ken
Hate to be a pain; but could you post a pic of the baseplate without the GIVI rack. I have a 2000 and need an idea how it looks.
Here you go........
 border='0' alt='user posted image' />
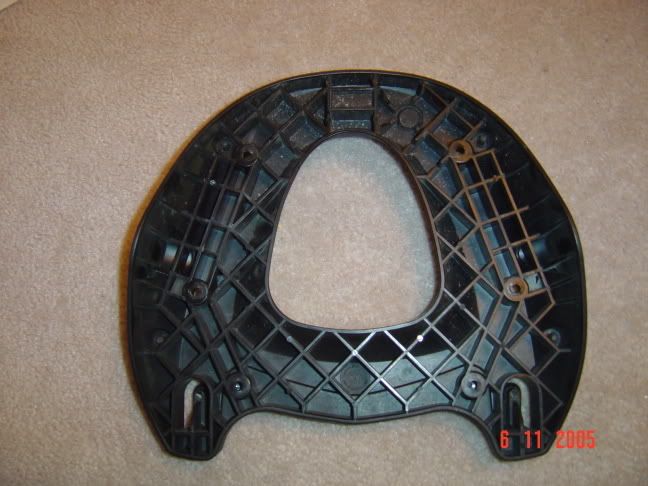 border='0' alt='user posted image' />
Hope that helps you....
-
SO how did you get the bike into this issue? WOnder if my gutted exhausts would get me a two page spread as well???????? :P
-
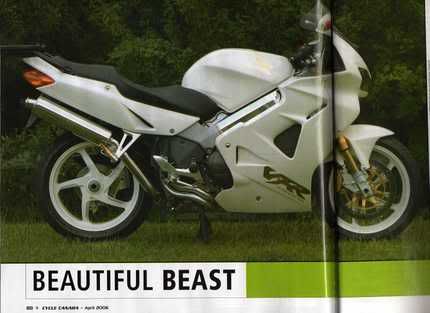
Just got my April 06 Cycle Canada mag, and right near the end of the magazine is a two page layout of the infamous Frankenviffer of Safe-T. Bike looks great - thought I'd post the article for those that don't get this magazine. How does this bike handle with all those fancy mods? Looks really nice - but I hope you ride it !! Congrats on the article.
 border='0' alt='user posted image' />'
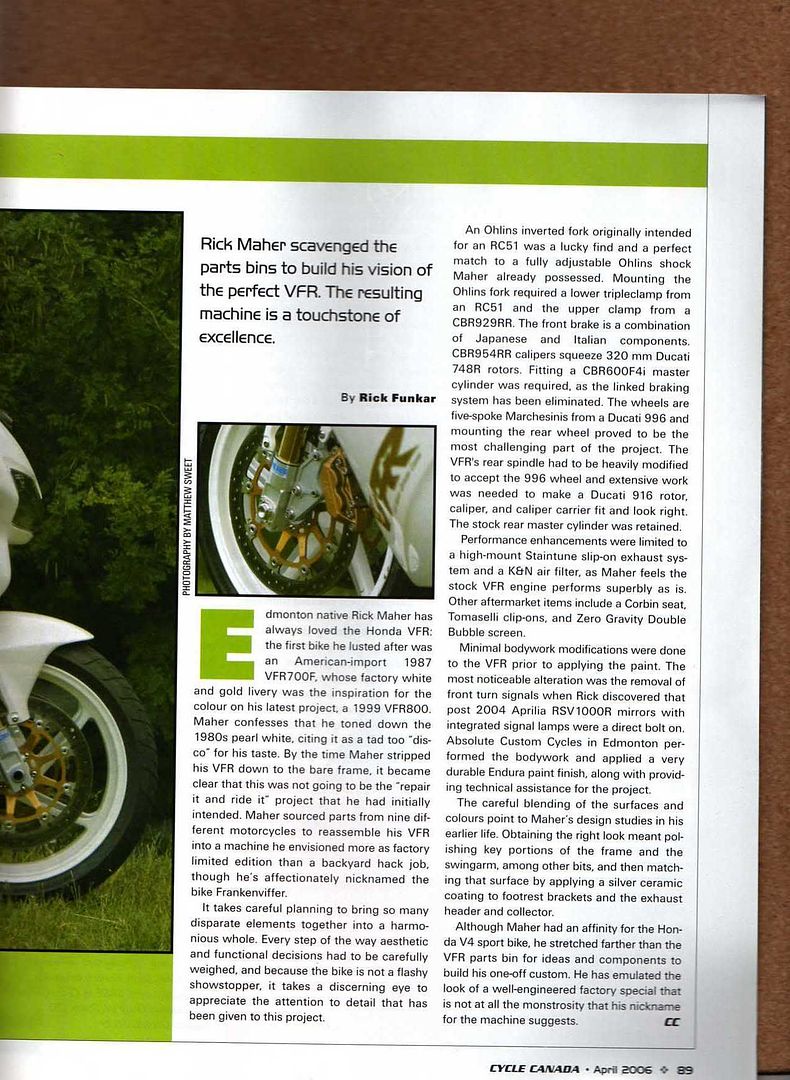 border='0' alt='user posted image' />
 -
hcope 1 - sorry for the delay - i hadn't checked in on this thread......
I do not know the part number, but if you go to the GIVI website, the topplate is part of the FZ166 kit for topcases for the 2002 VFR.
hope that helps you..... :beer:
-
I have made a new set of templates and am attempting to make a higher set of brackets - to clear the seat for removal purposes. Stay tuned for the results.... should be a day or two before I have them completed and installed.
-
Thta's alright, I fogive you. I know you Candians don't know wany better. :P
Besides, you're in the same industry as my wife (she works for AirNZ), so that makes us practically kissing cousins.
Enzed - FIxer applied to be a Canadian once, but he really sucked at hockey, and can't hold his beer or rotgut that well, so we refused him. He's a Murkn still, but we like him for trying!!! :goofy:
-
Ken rides with a whole entourage, ready to do his bidding. Fluffers and all. :blink:
YEah - and I even have to carry CBAR's sheep - I had to make a convertible top for the topbox. He loves his sheep and I hear that some of the riders from New Zealand are also quite fond of their wooly friends...... :lol:
-
KKKen you could carry a small ladder in the top box so when getting on and off (the bike) you would have no problems. :goofy:
I'll just make sure to ride with you DUde - your cane could be used as well for me to climb up on..... :idea3: :goofy:
-
Quick release mount if you want to remove seat & keep lower mount hight is not real hard & there is 2 ways to do it, 1 you need lath & will look trick, the other alittle more back yard.
Extend grab handle bolts with custom made bolts that have shaft above thread, then smaller short shaft above that with hole drilled for locking pin (use hex mat then no problem tightening bolts into handle). These all are same length, you then have plate that has holes lined up with the 4 handle bar pins & push it on & lock down with quick release pins (use o-rings between pin & plate to stop rattle). Box mount just mounts to plate.
Want to remove seat just pull out quick release pins.
Back yard way is to weld a longer bolt ontop of handle bolt & use nuts to adjust hight (you lock 2 together they don't move) & drill hole for Quick release pin.
If box mount above pins then space up alittle above lock plate you made to gain room to install lock pins (you would only need 10mm max if that's the case).
In words something like this:
TURNED THREAD HANDLE MOUNT/HEX BAR/8MM TURNED PIN/CROSS DRILLED HOLE IN PIN TO LOCK BOX MOUNTING PLATE
I like the idea of a quick release - thanks for the help!! :thumbsup:
-
Ken,
What's it like getting on and off the bike with the Topcase on. I definitely like the look better than the topbox sticking way up and out like the oem one does.
Comical is how I mught describe it...... :goofy: I haven't figured out a graceful way to do it yet - but it is tricky to not bang the top box with the foot thats swinging over. I think the centre stand needs to be used, put the left foot on the peg - climb up and over. I'll see how that goe s- hopefully get out this weekend,
:lol:
-
Nice work kkkkkkken. :thumbsup: Just for reference, how many cases of Sleemans will it support? :beer: :wheel:
Johne - you bring up a good point. The main reason I needed to better position the weight of the topbox was for those RARE occasions when precious cargo must be transported safely. Sleemans is one of Canada's finest beers, and it rightly deserves to be protected, and cared for with the highest respect. Not to mention it costs a small fortune to buy......
I can get at least 24 beer, with ice, packed into this fine cooler, er I mean topbox. Its there for the end of the day AFTER the riding (I don't drink and ride - at ALL.)
BOx is watertight - so as long as it doesn't melt too much - it shouldn't slosh around. We'll find out this summer though - won't we......
-
Ken,
How about changing to a Hex Head instead of a Allen? You should be able to slip an open ended wrench in the space without any problem. Change all 4 and the look is identical and you will be the only one that ever notices. You could also consider cutting an Allen wrench down and that might work too. I don't like the idea of vise grips either.
Rich
Yep - thats an option as well. THose rear bolts STILL need to be slipped through the bracket first though - don't ask me how I know that...... :D
-
I looked at your pics again.? It looks like the Givi badge is in the way.? Is that what you are talking about?
YEs - the GIvi badge - heres a top down look see:
http://www.vfrdiscussion.com/forum/index.p...cmd=si&img=9842
-
Can you drill an access hole in the top plate and drop the allen wrench in to tighten the bolt? I don't like using vice grips to tighten them if I can help it.
TBZEP - I just took some photos - photobucket site is under maintenance right now - so can't load them up. BUT - - to answer your question in the meantime, no - there is no way to drill into the top plate to get the allen key in the head.
I'll see if I can remember how to upload to VFRD......
-
Ken,
Very nice job. I get my brackets from the metal munchers this Saturday and hope my results are close to what you have achieved. Again, thanks for the templates. I'll send you a photo of the spacers I'm going to use to raise the brackets too avoid chaffing the grab handles, assuming the job comes off half decently. Maybe they will resolves the seat removal problem, too.
Rich
RIch - look forward to seeing the results. I'm thinking that the ultimate solution is about 1 inch more vertical height than what the templates show. However - your spacers as mentioned may be a fine solution as well.
I had to place one of the grab handle bolts (the most rear ward ones) into the bracket before the topplate was mounted, because the topplate actually partially covers the head of the grab handle bolt. I had to use vice grips on that bolt to tighten it - an allen wrench will not slip into it from above - because of the topplate. (hope that made sense). If not - PM me and I'll explain .
-
The trouble with that, Ken, is that you would then be raising the centre of gravity again, which would be nearly as bad as the 'normal' Givi mounting position.
What about if the brackets were like door hinges (the kind that have a pin in the middle), with a locking pin in one "hinge pin" you could pull out? Then you could just pull the locking pin out, remove the pin on that side, and hinge the rack over to get the seat off. You wouldn't even need tools then to get the rack out of the way.
THat is a SLICK answer - thanks for bringing that up!!! NOw - to figure out how to make that happen........ :idea3:
Stebel Air Horn - Post Season Review
in Modifications
Posted
Sebspeed asked me to check the horn install I did on my bike in the spring, to see if there was any "surprises" that I might not have noticed.
I just took the biek out, and had a close look. Everything looks great. No rub marks on any lines, the horn is still tight into the bracket, alls good.
Heres a bunch of pictures - more for Seb to get anidea of how it fits.
I go the Stebel off of Lobster, and he was kind enough to epoxy a screen over the output area, so that it wouldn't get filled up with crud.....