

KanadianKen
-
Posts
1,159 -
Joined
-
Last visited
-
Days Won
12
Content Type
Forums
Profiles
Gallery
Blogs
Downloads
Events
Posts posted by KanadianKen
-
-
Anyone taken the red kill switch apart to clean it ? I think mines acting up and needs to be gone through.
Not sure what to expect when it comes apart - if anyone's done it and can recall what to look for - I'd appreciate hearing.
My bikes an 02 but guessing they are all similar.
Thanks.
Sent from my iPhone using Tapatalk
-
If anyone finds me behind the wheel of a beat up old Suburban/Tahoe that has a Moose crash bar/push bar on the front - you'll know that i've finally snapped........ THe next thing you'll see me doing is pushing the car in front of me into the intersection when they fail to move to the left of their lane - to allow me to make a right hand turn on red.......... yes - that would be highly gratifying.......... ROad rage - no - I don't have issues.........honest........
LOL......
-
THats pretty cool Dutchy! NIcely done.
-
Wtf Canada!
All hoses are back ordered until end of July! Such bullshit!
Does anyone know a place online I can purchase said parts? I can't wait until the end of July :(
See if a USA supplier has them - and find a "friend" at TMAC that'll receive the hoses for you at the hotel, and bring them back for you. OR - look for aftermarket hoses - I believe SAMCO is a name that stands out.
-
anyone have a spare turn signal for a 5th gen? 4773? Couldn't grab one, and I figured this is about good as any time to finally replace it. Won't be as fun to watch as replacing a headlight bulb, but it's the best I can do for entertainment.
YOshi i believe thats a 7443 you need.....I have a box of them - here, in Canada.......... ARGH!!!!
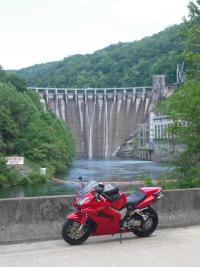
Rolled in to cabin last night - unpacked and had a beer. Planning to head to Dragon today - leaving around 10 - may see some of you up there. Will stop at Motel tonight say hi. Road to cabin looks like nice warm-up except for the bit from the cabin to the road - like 45degree slopes with switchbacks on a laneway the size of a sidewalk - truck did It ok now just have to see if can do it on the bikes

Greg - howd the trailer reverse at the cabin? SAme as usual ?......... MEaning you unloaded the bikes then unhooked the traielr and strongarmed it? LOL ENJOY!!!
-
I'm with Cogswell - I'd look to your blue connector "fix" and make sure those solders are solid.
-
Ken Shuart will be there with one. Check his out.
Sent from my iPhone using Tapatalk
-
Bike is cool looking Seb - congrats. Is it the same blue as the one that Apex ANdy has on the front page of the forum? Similar look.
-
Is it the same price for the 6th gen? And would the big Honda box be too big for those?? Would anyone have a picture of that big box on a solo rack??
Same price for the 6th Gen SOlo Rack. I have a 52 litre Topbox - don't think there are any larger - and it works like a charm.
-
I"m sending a couple of Motorcycling books and a MIchelin cap along with Greg and Virginia.... Wish it was ME they were bringing....... Have fun!!
-
Time has flown since my last update on this - but I'm pleased to say that I'll have the 5th Gen Solo Racks ready to ship within the next week. I've been told they are back from powder coating, and will be delivered to me tonight.
I'll start up a proper thread in the classified section - but I wanted to mention it here first. Price will be $140 USD - includes shipping via Canada Post / US Postal and I'll also include Stainless Steel bolts, washers, as well as the required spacers. An instruction PDF will also be included.
I made 30 racks, and a half dozen are already spoken for - so if you want one please order ASAP.
For those with a 6th Gen - I have about 15 of those racks ready to go as well.
Cheers.
Ken
-
I think I used 3M double sided as well - that looks like the stuff!
-
Microtel Robbinsville?
Yup.
I can see Baileyrock, MArtina, Brian (K BIKE), Kevin (KWWR228?), Billybobjimjack?, Dale(Oxmole), CornerCarver, JEremy556, Marty LEmons, Dude from Ottawa (can't recall name, and the inventor of the BUg BLocker in the back row........
-
-
now, there is a video on "happy ending", but since there is no mc content................

Dutchy is showing restraint........ well done Leon!
:beer: -
Hi All,I'm in a similar situation right now. I have a 2002 VFR non abs, and this time I decided to visit my local Honda dealer for my yearly inspection. Inspection passed. Then they did a VIN check and discovered that both the wiring harness and the PCV valve recalls had not yet been performed. Parts were ordered so I took the bike home and returned it the next week. The PCV valve checked OK but, per Honda, they replaced the wiring harness. When I picked up the bike, a tech asked me when the low beam lights stopped working. He explained that the low beam lights were not working but the high beams were and said it shouldn't have anything to do with the wiring harness that was replaced. He suspected a faulty switch set which I've ordered and may install myself. I asked to see the old wiring harness and I took some pictures which I've attached here. After reading the recall notice, downloaded from VFRD (thank you!!), I was able to determine that no additional wiring harness replacements were necessary (no scorched connectors). I also inspected the old harness for any possible alterations (blue connector fix) that previous owners of my bike might have performed. There didn't seem to be any alterations.My questions are, (1) could the new wiring harness and install of the new wiring harness affect the low beam lights and (2) would you suggest I have the dealer install the new switch set or take the chance of doing it myself, having it not fix the low beam problem and risk having the dealer point blame on me for the continued electrical problem, if one still exists.Thank you in advance,JRB
IF the dealer is messing with your wiring harness under a warranty / recall situation - have them do the repair to the low beams. Installing the switch set shouldn't take long - even if you have to pay the half hour of labour.
-
plug wire not attached firmly?
-
If you still need help I am just a short ride down the road ,have a shop and all .
Joe - such a kind offer! Your destination might be just what the Dr ordered. Let me flesh out the brakes for a couple rides and I'll see how things are working.
Nonetheless - a trip to visit with you would be well worth it!!! Cheers.
Sent from my iPhone using Tapatalk
-
I have rear brake from the pedal - it's way better than it was but it isn't anywhere near as good as the front. The front is just amazing. I'll bleed them all again in a couple weeks when I change the rubber and see how many bubbles I can get out.
Sent from my iPhone using Tapatalk
-
Well I think I have rear brake on first pump! I used the Bartman procedure from a few posts above- and the problem seems to have been the rear caliper. Following the steps from the procedure had me bleeding at the rear caliper and both speed bleeders were worked. Bubbles flowed from both when the pump was attached. The proportion valve didn't bubble at all. I think Carver and I had that area perfect but we just didn't know it.
I just put the fairings all back together and it's pitch black outside. Test ride in the morning. Fingers crossed that this thing is sorted !!
Sent from my iPhone using Tapatalk
-
Servo Brake Line: Second Master Cylinder to Servo Proportional Control Valve
NOTE: this bleeder (PCV bleeder) (even if it's a Speed-Bleeder) must be shut off between the following steps;
[3][a] manually depress Second Master Cylinder at Left Front Caliper
[3] close bleeder (PCV bleeder)
[3][c] use Pedal to recharge Second Master Cylinder (SMC)
[3][d] open bleeder (PCV Bleeder) and repeat [3][a]-[3][c]"
Caliper bleeder is not in play on step 3
OK - thank you for the clarification! Much appreciated. I may be a dumbass with this but i don't mind asking for help. CHeers.
-
Did you try pushing the left front caliper forward by hand to compress the secondary master cylinder while bleeding at the proportioning valve amidships?
Yes. for about an hour.......... I'll be revisiting the bleeding tomorrow - maybe tonight.
-
All bleeder references in step 3 (including 2nd line of excerpt) are referencing PCV bleeder on left hand side of bike.
So what is the bleeder that is being closed in 3(B) and opened in 3(D) ? Sorry but there are two bleeders potentially at play - on the caliper and the PCV.
-
This procedure worked for me...
did not have to remove left front caliper...you should feel a strong push at the secondary master cylinder when performing Step 3c
From the procedure laid out - here are a couple questions:
"Servo Brake Line: Second Master Cylinder to Servo Proportional Control Valve
NOTE: this bleeder (even if it's a Speed-Bleeder) must be shut off between the following steps;
[3][a] manually depress Second Master Cylinder at Left Front Caliper
[3] close bleeder
[3][c] use Pedal to recharge Second Master Cylinder (SMC)
[3][d] open bleeder and repeat [3][a]-[3][c]"
WHICH bleeder is being referenced in the second line from above excerpt (that must be shut off between the following steps) ? I'm assuming its the bleeder on the front left caliper - but want to be sure.
3(b) - is this reference to the bleeder on the PCV ?
3(d) - is this reference to the bleeder on the PCV ?
 [/uR
[/uR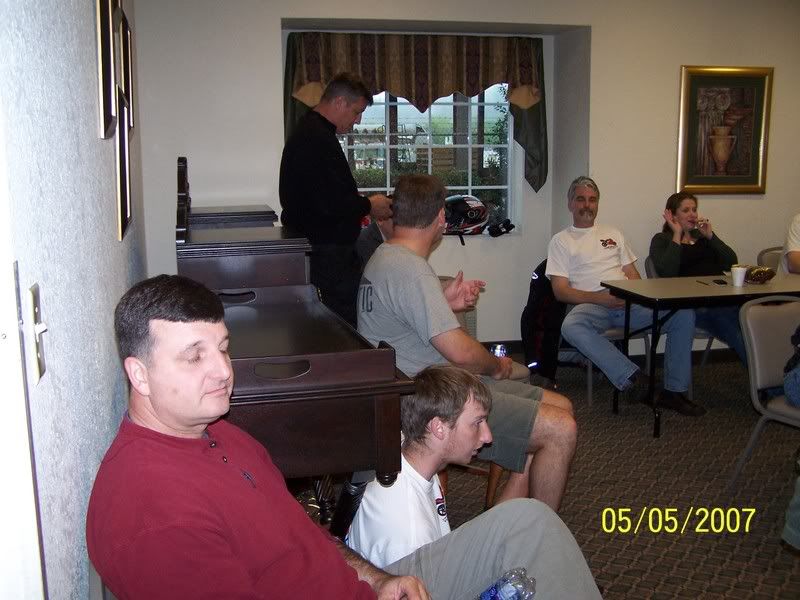

Red Engine Kill Switch And Taking It Apart
in Electrical
Posted
Mucho Gracios - I have had the bike for 45,000 of its 56,000 km life - and NEVER use it - unless one of my friends flips it at a red light......... I'm thinking its oxidized a bit. Will have a look this coming weekend.