

zoomzoom
-
Posts
510 -
Joined
-
Last visited
-
Days Won
7
Content Type
Forums
Profiles
Gallery
Blogs
Downloads
Events
Posts posted by zoomzoom
-
-
The level of your fabrication skills and attention to details, never ceases to amaze Seb. Can I send you my wife's 96 for a few mods. Better yet, could I come visit for a few days (or weeks, OK, months) to learn how to perform some of this work myself.
-
VERY NICELY DONE. As one would expect after seeing photos of a couple of your other projects Seb, you have done it again. And, where on earth did you get that clear window clutch cover from. Nice touch there, and the sliders as well. An excellent way to show off the parts that you have created. A window to the Viffer's soul and all you will pass you on the highway is a blue streak. Hmmmmmm, could be a name for the bike in there somewhere.
Soul Streak
Excellent work.
-
Maybe you should buy the bike and swap the wheels with your bike and then we'll startup a collection of sorts to pay for the rest, send the bike to Apexandy for him to convert to a street fighter and then we can sell the resulting creation on eBay and donate the profits to VFRD in keeping the site going. LOL
I've personally seen Apex's bike and would LOVE to see him work his magic again. LOL
Any takers
-
Somehow the wife's 4th gen looks just soooooo plain by comparison. Another, and still excellent work Andy. Look forward to perhaps meeting up for a ride this summer. With any luck, maybe even the wife can join in the fun. She starts her motorcycle safety course the end of April, and she is looking forward to getting in a little seat time.
-
Hey Seb, just a question in aesthetics. Could the slider be made large enough in diameter that an outer flange could be added to the piece?? Thus when the slider is installed the flange would contact the hub and cover the large nut.
-
Hmmmm. So we have a Clutch Window mod perfected by Seb, now perhaps a quick drain drain oil pan mod.................
Geez Seb, if you keep this up you may never need to look for work again, It just might show up at the door. LOL. I took a look at your webpage a few days ago, and wow, some pretty impressive looking work.
-
Cool. I had actually seen those pictures but I thought for some reason your bike was a 6th gen given the undertail exhaust. Perhaps you have installed a 6th gen tail onyerbike??
Thanks for the link and YES, tha does look very cool. Might have to add that to the list of winter improvements. I think getting one of the DMr front fork kits may be required first however. Really like therapist scheme onyourbike to Veefer800.
-
Though I have seen this thread before and love the look of the cover, would anyone happen to have a photos of one of these magical pieces of visual eye candy installed on a 5th gen??
-
It may be a lot of pages to go through but check out this street fighter build by Apexandy. He used a Koso gauge cluster on his 4th gen build and it is quite compact but still offers all the functionality of the stock gauge and a bit more.
http://www.vfrdiscussion.com/forum/index.php/topic/75243-my-95-vfr-sf-project-the-process/
He shows the gauge cluster that he is using on the first page of the thread but the install is further on in the thread.
-
Being the owner of a 5th gen i I can't be of much help to your issue, BUT, here is a link to the download section of this site where you can download a copy of the Factory Honda Service Manual for your bike. This may be of some use, if you don't already have a copy that is. Hopefully someone else might chime in with some more definitive info.
-
Hey spot
Love the paint scheme on your bike. Shame Honda doesn't look at forums such as this for ideas on how to improve the look of their bikes. Between your awesome paint scheme and some of the other members ideas of VFRD, I'm certain they could learn a thing or two. Nice Job.
Noticed in your garage is a 2002 Protege5. I had one of those a little while ago and to this day it is one of the cars I wish I had kept. Maybe not THE best car in the world, but man it was sure a fun car to own.
-
Thanks for the great write up Duc. I love reading How-To posts, if for any other reason than to see how others do stuff on their bikes. You never know when you'll see an idea that makes your life so much easier when it comes time to do something to your own bike.
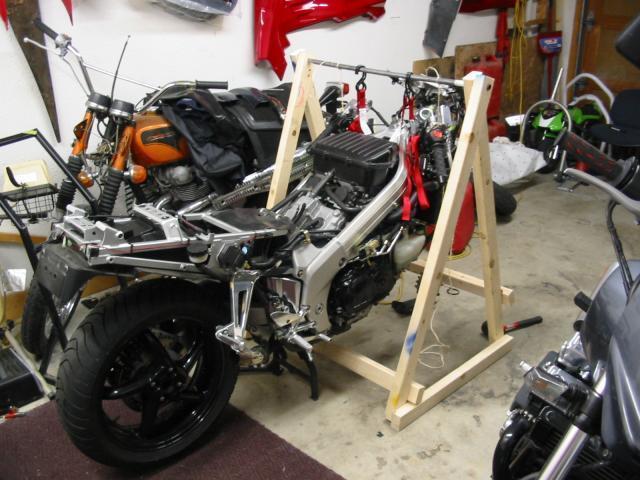
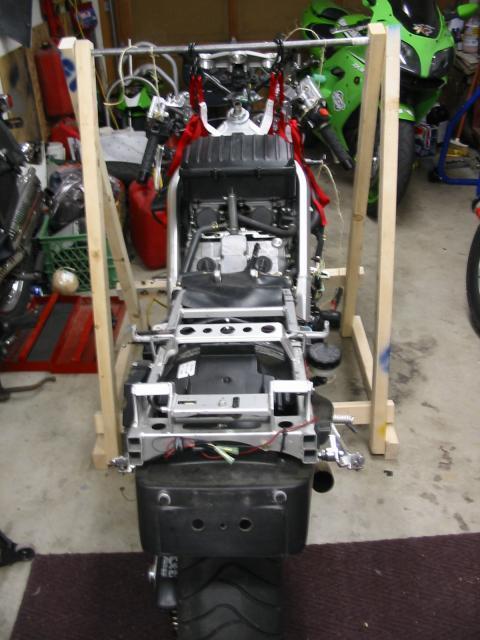
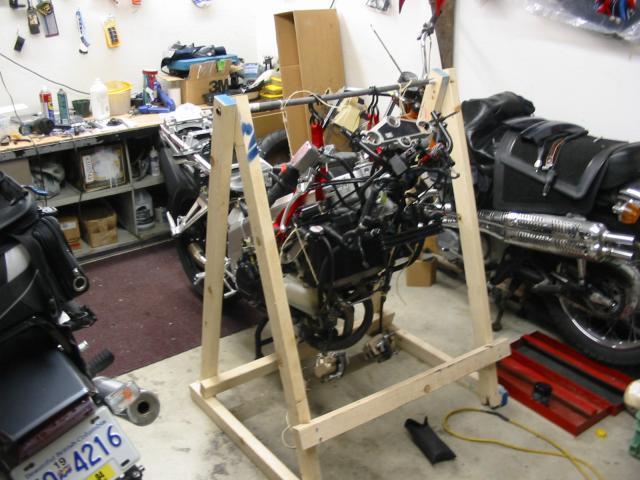
If perchance you don't have a garage or at least if no way to support the bike from the rafter or roof of the garage, shed, etc. you could also try using the support brace method. When I was doing some detailing, metal polishing and powder coating work on my last bike (a 97 VFR750) I made some braced frames out of wood that I had lying around in the garage. Since I was renting the house at the time, I did not want to add any extraneous holes in the ceiling, and thus I built the side frames to support the bike while I removed the front end of the bike.
At the time there were a few things I wished to do over the winter like powder coat the wheels, fork seals, steering stem bearings, brakes pads and the addition of heli bars. Not all required having the bike supported but it did make life a lot easier.
The sides of the a-frame are made from 5 ft long 2x3's, and the base was 4ft wide x 3ft long (front to back). The cross tube that was bearing the weight of the bike was a thick wall steel tube that I found in the metal recycling bin at work. I drilled the holes in the 2x3's just large enough to accomodate the bar and then when I made the frame and overlapped the 2x3's the side braces twisted just enough that they locked the bar in place. Once there was weight on the bar there was no chance of moving it either. It was easy enough to remove the brace at the front of the bike when I went to reinstall the the forks and the front wheel. If you don'r have a steel bar kicking around, I'm sure a 2x4 on edge would have worked just fine in place of the bar. I would be tempted to screw a 2x4 to the top of the brace frames though as compared to screwing it in between though in the interest of making sure the weight of the bike bears on the frame and not the screws.


To hold the bike up I used a couple of cam buckle style tie down straps and looped them around the support bar and then around the sides of the frame. I made sure that the buckles were facing outwards and not touching the frame so as not to scratch anything. Once raised in the air the bike was very secure and not the least bit tippy. Another thing that came in handy is that the bar was useful to tie up the stock clip-ons so they were not dangling, and to tie a support strap around the brake calipers so that they were not hanging from the brake lines. Be sure to place the bike on the center stand so that it is more secure once you lift the front wheel off the ground. If you find you need a bit more clearance you can also remove the rear wheel so that the front can be lifted a bit higher. The pictures show that the tank is also off the bike but I would imagine that the bike could be supported in this manner just by wrapping a tie down strap around behind the bottom triple clamps so that you don't need to remove the upper cowl, as shown in Duc's pictures. I was doing other work to the bike at the time and thus pretty much everything was removed at the time. One thing led to another, and another, and another. Sometimes winter in Canada gives us lots of time to think, and think, and think, and when it comes to adding farkles, that can lead to a lot of extra bits being removed. LOL
-


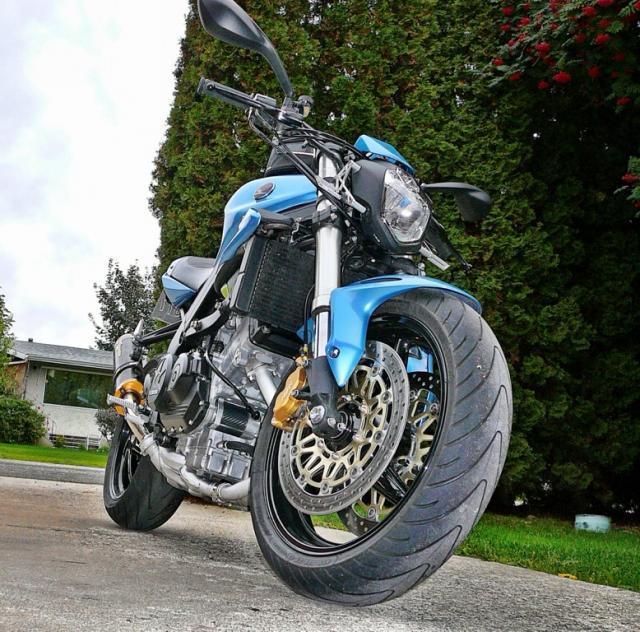
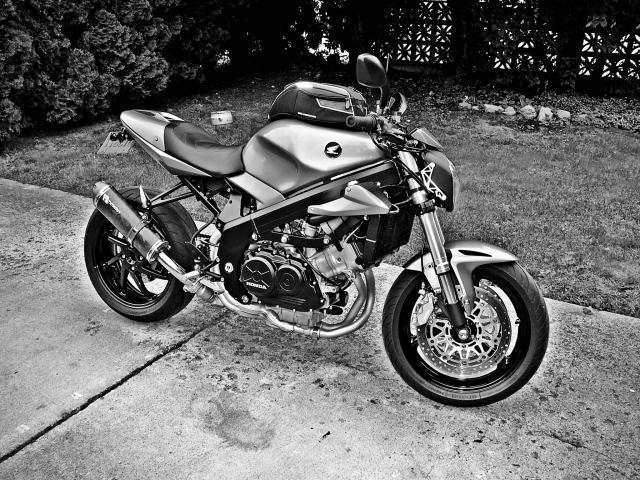
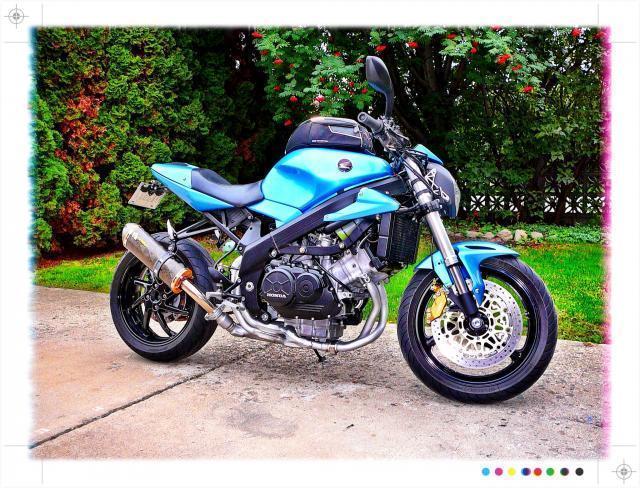
A few photos of Apex's machine sitting in the driveway at my house a couple weeks back. There has been some photographic trickery employed, but I can not say enhancement, for Apex's bike needs no real enhancement.
PS. Sorry Apex, I just could not help myself. Hope you understand. LOL
-
Thanks zoomzoom :) You are definitely quite close... I like to do the occasional west side road ride to go and check out the bikes at Bently Motorrad. Maybe it would work to meet up sometime.
Hey Apex
I would love to meet up sometime and have the chance to both see your bike and most of all just the chance to shake your hand. You have completed a project that is both stunning and deserving of awards. I'm not sure even the design guys at Ducati could have come up with a bike that looks as good as yours. Absolutely every part of your design flows into the next. Not sure what exactly you do for a living, but perhaps you have missed your calling.
My 6 year old son Liam was looking at the computer with me as I was reading through your write up and he was practically drooling on the kitchen table. To see him that enthralled about something (anything in general) was amazing to see. He asked after we looked at the build and he asked "Daddy, can we go see that bike??" I told him that there are not a large number of people on the site that are from Canada as opposed to the US so the owner who built the bike is probably too far away to drive. It wasn't until I happened to look at where your avatar that I discovered you were so close. I take my son for the odd ride with me, but alas Armstrong is a bit far for him (he would fall asleep for sure on a ride to Armstrong), so if we do get the chance to meet up I will have to bring him with me.
When it comes to the badge issue on your bike, I have seen a badge like the one you have on your bike and as I recall the badge has a type of 3M adhesive rubberized two sided tape much like the stuff they use to install body side mouldings on cars. The difference being that I think your badge has the tape across the entire back side of the emblem. I do PDR for a living and I have had the odd customer ask me about removing badging from their car. I tried to remove the badge off an older BMW once and it had two sided adhesive that covered the whole bottom surface (I checked with the BMW dealer to make sure there were no positioning pins) and it was hard as heck to get off. I had success finally by (I think someone else mentioned this already) using a hair dryer to heat the emblem the whole time I was trying to remove it as it takes a while to get the adhesive warm and pliable in the middle. The other thing I did so as not wreck the emblem was to use fishing line to saw through the adhesive tape while one of the guys that works with me dribbled 98% Isopropyl alcohol (rubbing alcohol) on the fishing line. This helped to release some of the glue and it won't harm the paint, though it will remove any wax. One thing you may find upon removing the emblem is that the adhesive on the emblem may have stained the paint a bit where it is attached, depending on how long it was between when you painted the tank and when the emblem was applied. As long as the paint was well cured before you applied the emblem it should be fine. Once you get the emblem off I have used a product called Goo-Gone to remove any excess tape adhesive, and you can get it at most hardware stores. If you want to get the rubbing alcohol you need to ask for it at the pharmacy counter. Wal Mart carries the stuff and it is about $7 for a 1 litre bottle.
Hope you get the emblem figured out if you haven't already. And again, WOW.
My 1996 Vfr750 Streetfighter
in Modifications
Posted
A question for you Seb. Recently, my wife and I purchased a 1981 Honda CB400T (I think I may have PM'd you once already come to think of it in regards to replacement shocks) and the engine looks a little oxidized especially around the cooling fins. Any recommendations on how to clean up and restore the areas to new(er) looking. I know you mentioned soda blasting your engine prior to your build. A friend in the same complex as my shop mentioned one of his friends in Vancouver that does something called water blasting that supposedly works wonders. Any thoughts.
i just finished doing some paint work to the CB400 while the wife and kids were out of town but now I think that the upcoming winter season will be replete with some restorative work like having frame and swing arm blasted and powder coated to name but a few and having some of the chrome bits redone. The bike has taken on a bit of a walk down memory lane for me personally as I learned to ride on a similar bike and I have immensely enjoyed riding the CB. It's amazing how much fun a small cc bike, and a vintage one at that, can re-kindle an old flame if you will.