

Resin
-
Posts
110 -
Joined
-
Last visited
-
Days Won
2
Content Type
Forums
Profiles
Gallery
Blogs
Downloads
Events
Posts posted by Resin
-
-
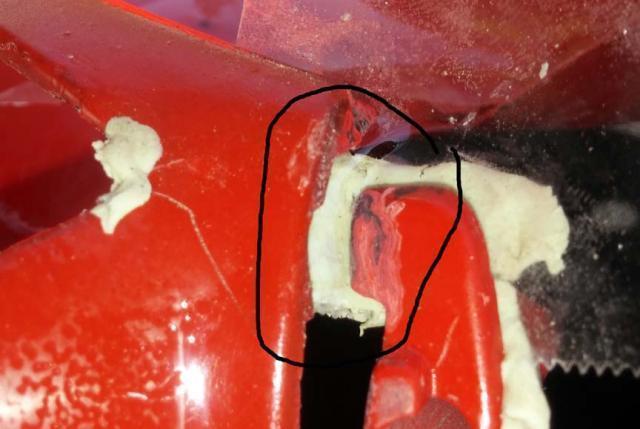
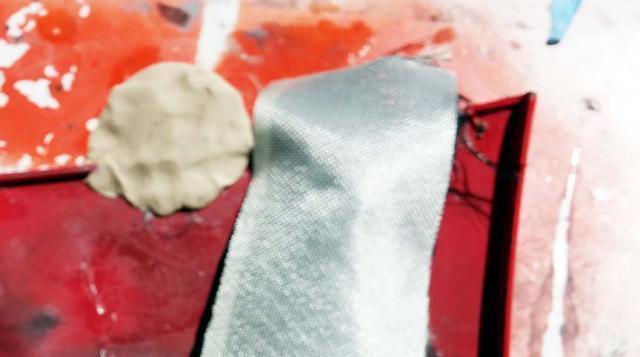
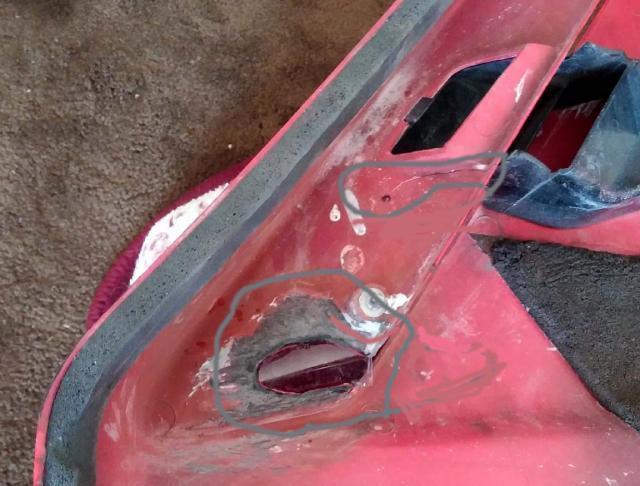
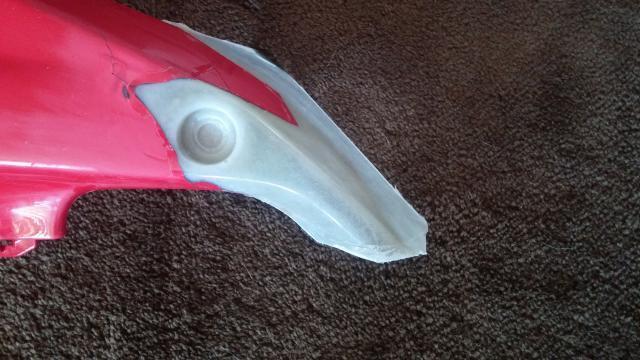
I've attached three photos. One photo shows a missing section in a form of a void opening on an upper fairing. I used tape and clay to fill the void. The tape and clay is for a build up of fine chopped glass and resin. I used a quarter size of lump modeling clay to back and hold the clear tape into place. Once the resin fill has cured, the upper locking tab will be dressed to a proper fit, so it's lower fairing tab can be accepted. Lastly the upper locking tab will be reinforced on it's back sided with strains of carbon fiber and resin.
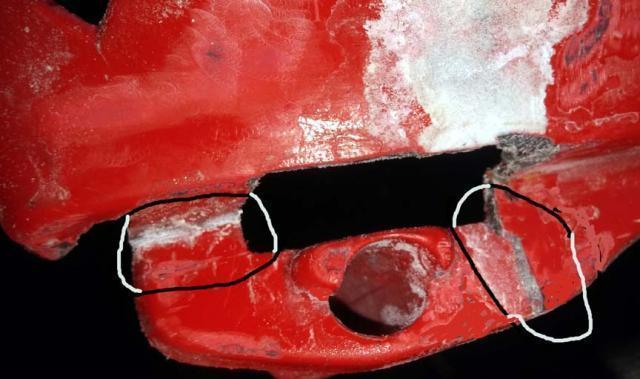
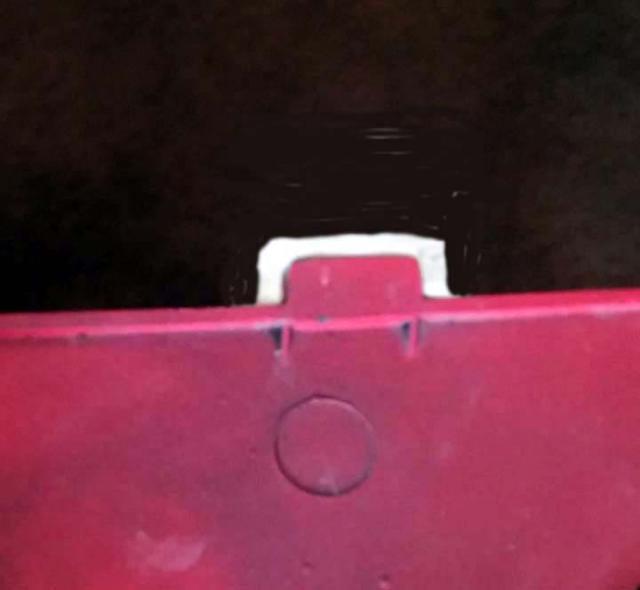
A second photo shows a segment of an upper locking tab that has been CA glued back into place. Modeling clay was used to accurately hold the broken segment ABS piece in place while the gluing was being done. the small voids had baking soda to fill minor gaps. Lastly again, the repair was reinforced as the other repair tab was using carbon fiber and resin.
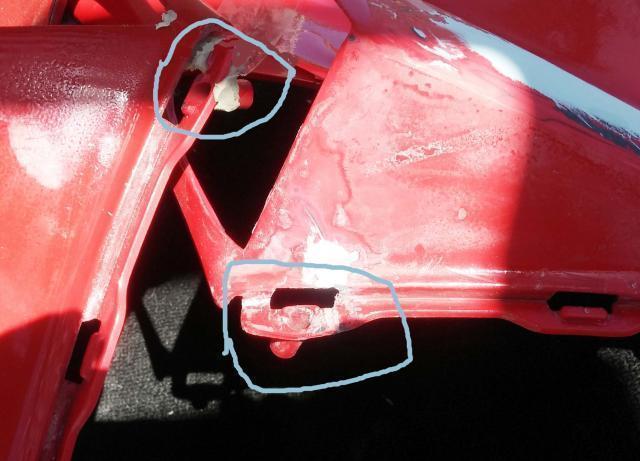
Third photo shows the two upper faring tab areas that are being repaired.
NOTE: Modeling clay and tape must completely removed and clean in order for resin to bond correctly.
My next posting will show the above void resin filled with chopped fiberglass, and two tabs molded back to a seat cowl.


-
I'm about to layup tab, and mold the tab to my fairing at the same time.
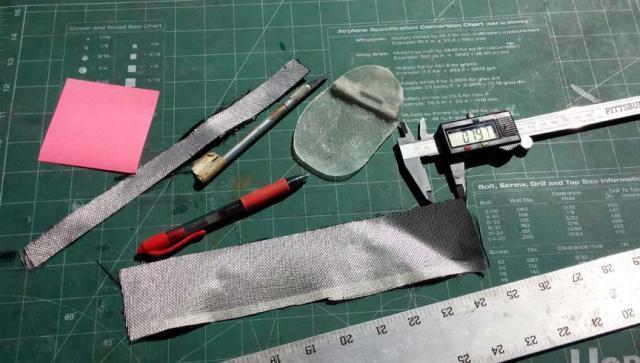
My first photo shows tools and material used for making fairing tabs.
I use a caliper for measuring the width of material required for cutting my fiberglass carbon fiber strips.
Strips cut to fit inside of tab mold, caliper also used as a dividers, depth gauge for tab mold, and to measure the thickness of material to determine the number of small cut segmented piece of material needed to fill my tab cavity. Be sure to grind and clean areas where resin is to be applied
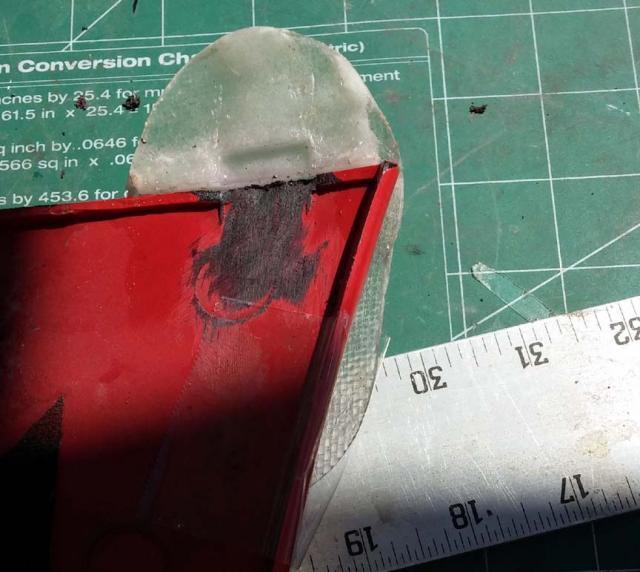
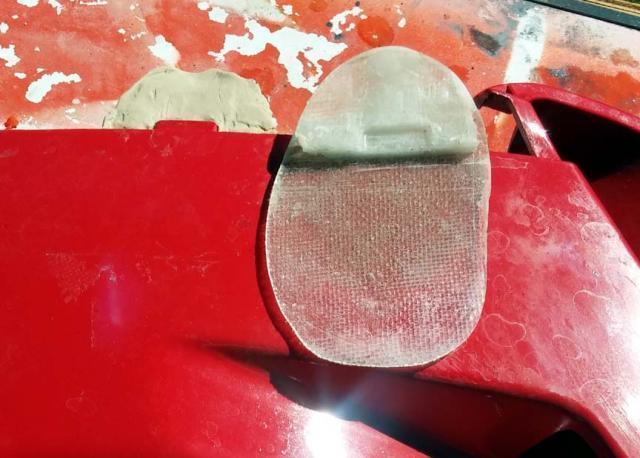
Second photo shows a waxed tab mold accurately attached to fairing. I used tape to secure tab mold to it's from side of fairing.
Examine the two tab vertical positioning marks on the inside of the fairing.
The mold sets the vertical location, and it's correct positioning.
NOTE: Wax mold's front, lower portion areas that fits to fairing, the outside front of fairing. and other areas were resin may come in contact of fairing.
where NO Resin is wanted.
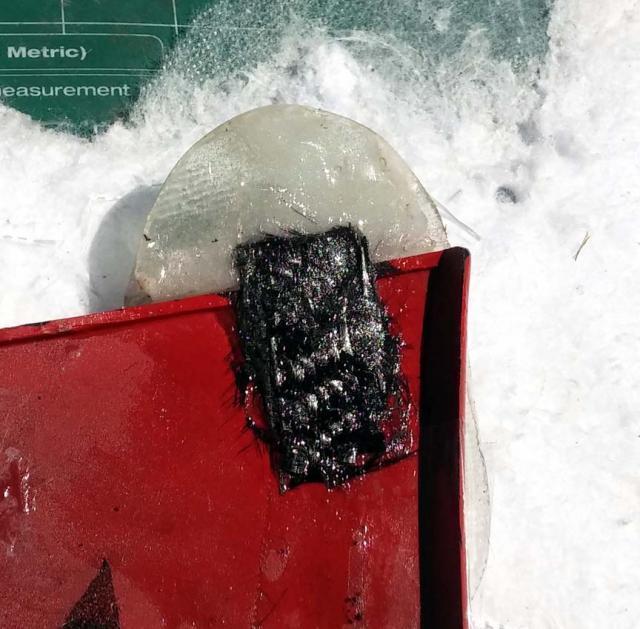
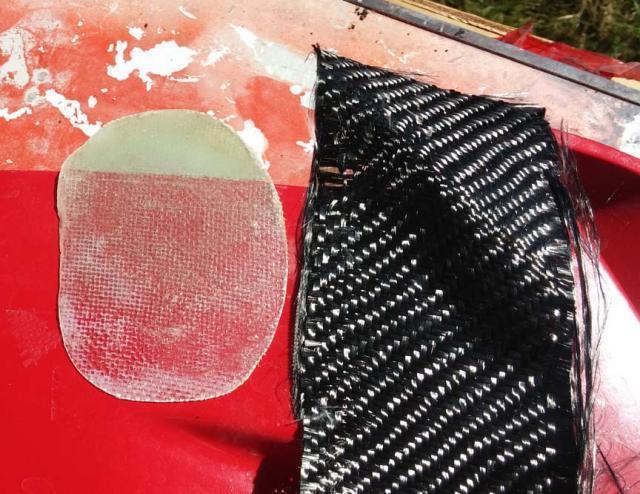
Third photo shows carbon cloth freshly layed into mold.
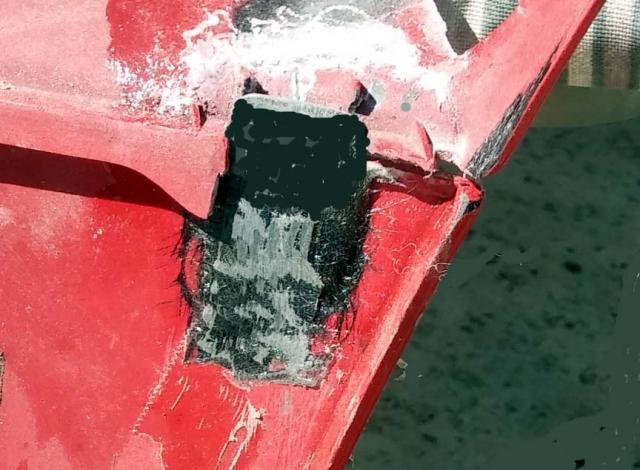
Fourth photo shows tab has been roughed trimmed, locked into upper fairing, and now will require repair of missing segment of upper locking tab.
later I'll show repair of upper interlocking tab.


-
Today I did some glassing. There's a photo showing the back side of an existing tab that will be molded. That tab mold was be a two piece mold (Front & back), but changed my mind. I really didn't think it was necessary to fabricate a two peace tab mold at this time, so I opted to make a simple one piece mold. Apply modeling clay to the back side of a typical near by tad. use a good quality packing tape to the front side of you fairing surface, a tape your tab that's to be molded in a similar way. Later I will deal with the seat cowl tabs separately, but not now. My third photo shows the fiberglass reinforcements, and my spot drilled hole at the end of it's crack. The crack will be first filled with soda, and CA glued as required. This becomes a hard stopping point. Later when I made the second half of my tab mold I'll repair the crack with CA as I just mentioned, and I'll reinforce the cracked area with fiberglass reinforcements. Note: It's recommended to spot drill all cracks!
I repaired the large hole first by making a throwaway plastic form, which was CA glued from the front side of my fairing. Note: I normally try to avoid gluing to the front of any fairing, but in this case, the paint will be sanded away, primed, and repainted, so the CA glue was the method I elected to use. NOTE: when this was done a few days ago. I also glued my fingers to my fairing, and I left a sizeable amount of skin behind when I separated my finger from my bottle plastic throwaway mold, so take care whenever using CA glue!
You Must clean and do all proper preparing for fiberglassing, and thoroughly wax areas as required:
I used a good quality 30 minute pot life laminating epoxy resin. Carefully mix well (not Whip). I use 3 oz. non-waxed bathroom paper cups. The amount used was about 45 grams, separate about 15 grams of mixed resin, and then added some old ground fiberglass material to a consistency of runny warm peanut butter, brushed a light application of your thickened resin to all areas to be glassed, then apply between 3-6 plies of woven glass to all repair areas. The inside hole repair is a clean repair, the outer lip glassing was cleanly glassed, and when cured the excess cloth will be trimmed with an exacto. I suspect my hole throwaway plastic bottle mold will not want to come off very easily. It will slightly mess up the fairing's outside finished surface, but all my fairings will be repainted.
Note: Chopped fine fiberglass installation can be used as a thickening agent. Cut woven cloth on a cutting matt using a sharp exacto, or rotary fabric
cutter.
I added three additional photos. These photos illustrate a clay backed tab, clay backing should be smoother than what I've shown, light weight cloth was attached to a piece of carbon cloth, later to be cut to size for making carbon fairing tabs, and a finished glass mold, ready for use. I waxed surfaces where no resin isn't to be applied to fairing, and used clear packing tape where no resin is to go. Later I'll cover making a fairing tab, and how to properly attach your tab mold to is correct position.
Take extra care not to get any resin on areas where you don't want it. I also must mention next I will also cover the second half on my tab mold.


-
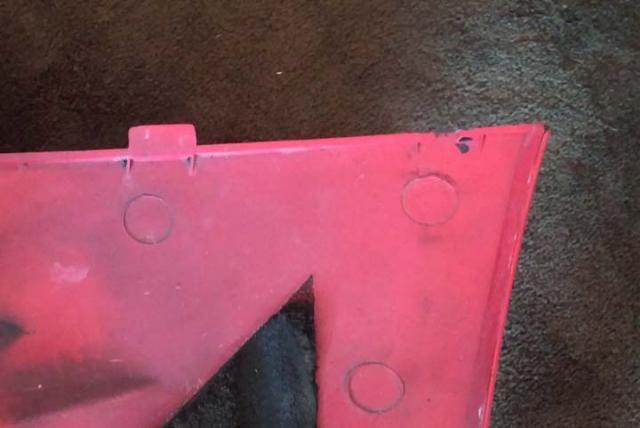
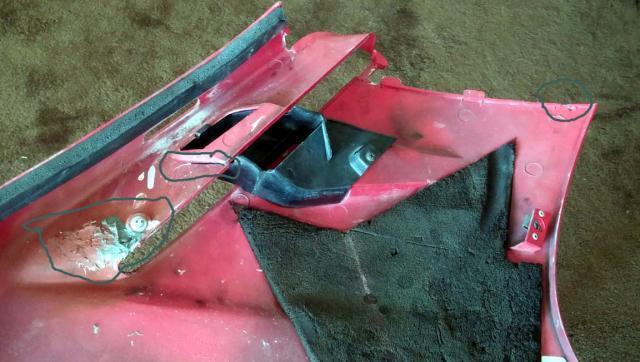
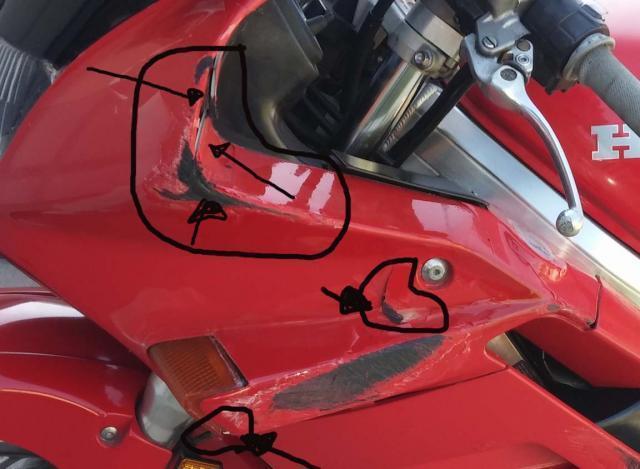
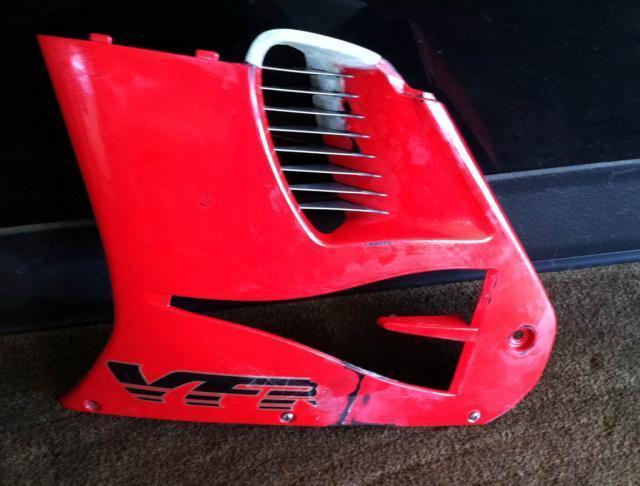
Previously I illustrated a photo of my lower front left fairing where my three repairs have to be made. One of my circled areas shows a missing tab, another a crack near the air intake opening, and a third area shows where a previous repair had been made. I originally thought the repair was satisfactory. Word of caution- be careful in assuming any previous repair might be satisfactory. Today I grounded out the old repair, and it was nothing more than a glob of filler. Note: there wasn't any reinforcement. Observe after I removed the old filler there was a big hole. While I was grinding out the filler, big chucks were popping out, so I removed the old repair, and began I preparing to fix that hole. I made a temporary throwaway mold section. It's quick and simple.
Plastic Temporary Throwaway Mold:
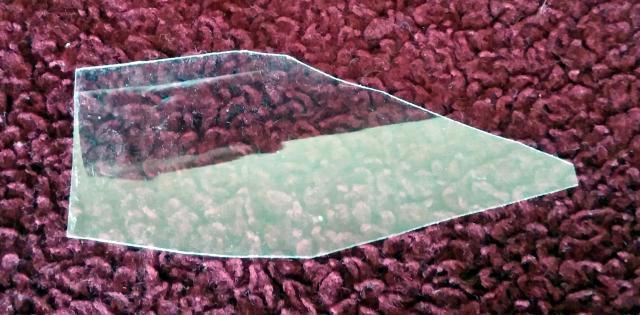
I cut a peace of plastic from a plastic water bottle, trimmed to fit the hole slightly oversize, CA glued the plastic peace to the outside of the fairing, later I'll pop it off the plastic peace after the hole has been repaired. My plastic peace was formed to fit hole, then CA glued in place. This peace can be made from a beer can.
Upper Right Missing Reusable Tab Mold:
Modeling clay was used to form my tab splitter plate. I formed it around a tab. Modeling clay has no silicone, which is preferred, but children's play clay will work.
Fixing Typical Hair Line Typical Crack:
All typical repairs must be cleaned as required, end of crack should be spot drilled, the end of cracks are spot drilled to prevent from further propagation.
Next I cover repairing the fairing's hole, making a reusable tab mold, and fixing the hair line crack.


-
Rush,
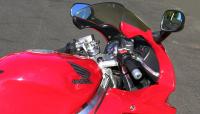
I like your idea of changing to mirrors with signals, and closing in your old turn signal locations.
Please let us know what mirrors, and models will work for your 5th gen. A photo would be helpful. Others will be interested in knowing as well!.
I too plan to close in a 4th gen turn signal areas, and gong to a mirror with turn signals, but this plan is in the distant future.
-
The techniques I use are applicable to nearly all ABS bike fairings. If in question, always make a simple test somewhere on your ABS part to insure you're materials are compactable. Last week I completed a rear fairing repair job on a 5th gen VFR. What part are you trying to repair.
-
My attached photo illustrates three common problems with fairings. The upper fairing shows a circled area where a tab is missing, mid way down you'll notice an open crack near the intake of it's induction opening, and at the bottom you'll see a rough area where a previous repair was made. The previous repair held, but it's not to my satisfaction, so I will completely rework that past repair job. I'll illustrate how to make a simple reusable tab mold, and how to draft your new tab to any fairing. I'll also cover how you can repair a crack, and I'll discuss how to update the old previous fairing repair job.

-
My goal is to help others make their necessary ABS repairs, saved enough money on their repairs, so they can have their bikes properly painted.
Here is a link to a previous posting that contains additional needed material that's not addressed in this posting /Suggest reviewing July 20012
How to repair broken, or missing abs body tabs, and hair line cracks. You'll find helpful material that is not covered in this thread.
-
On my rear tabs, I make them over size then trim to fit.
-
The front fairings were removed, inspected for problem areas. I'm covering the left upper front fairings this evening. Note: bag fasteners, don't loose them!
Photo shows areas where attentions will be required.
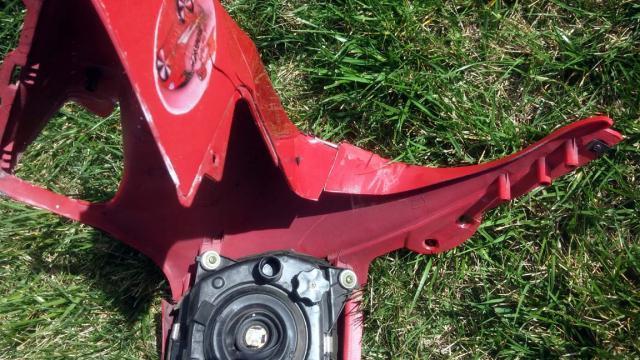
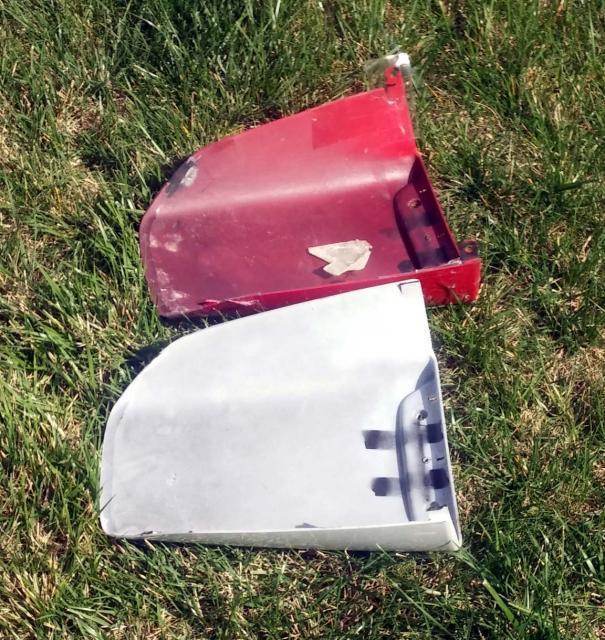
Photo of fairing in grass shows one of the upper damaged area better, required trimming in order position pieces into place.
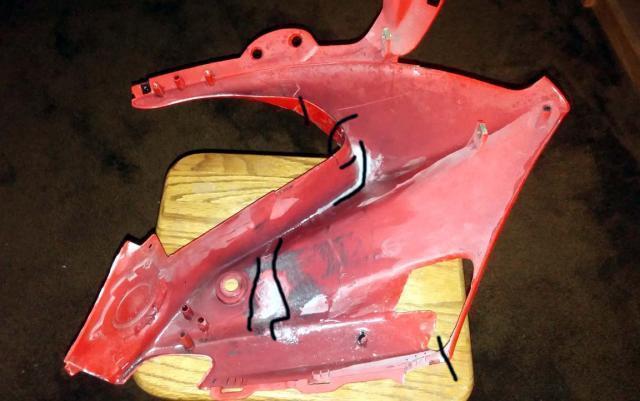
Photo shows fairing CA glued, and filled accordingly with baking soda, and dressed near ready for glassing.
I positioned arrows showing where I made my repairs. All faring's were washed, dried, and prepared for repairs.
The upper two areas were broken pretty good, and they had been pushed out and away, required trimming so I could pop the fractured pieces back into place.
Hand held fairing and carefully CA glued all the pulled away pieces back into place
Photo shows a small area below left turn signal where it had broken and separated from the main faring. Held into placed and glued back,
Filled and CA glued again as required with backing soda, do as required, take care not to glue your fingers as I did.
Grinded all glued areas, and fit checked everything insuring everything will go back together.
Later I will epoxy resin, fiber glass, and add carbon fiber if needed.
For more detailed information on techniques, suggest reviewing my perilous postings.
Next will cover further repair work, reinforcing repairs, filling, and sanding.


-
I've previously made a few other related posting on ABS repairs and fairings repairs. This posting will not cover all the basic techniques on making repairs, and little detail on my exact process, since I previously addressed these issues over a year ago on this form. New fiberglass fairings are available for your 3rd & 4th generation VFRs, You also can buy used fairings, but often they too need repair work, or a complete extensive rebuild. I'm addressing they ways I make my repairs. There are other methods and materials that can be used, but I will primarily address and discuss my methods. The damage fairings were far more extensive than can been seen in my photos, until the fairings were been removed.
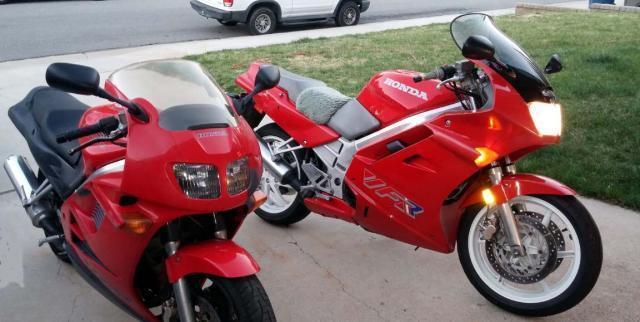
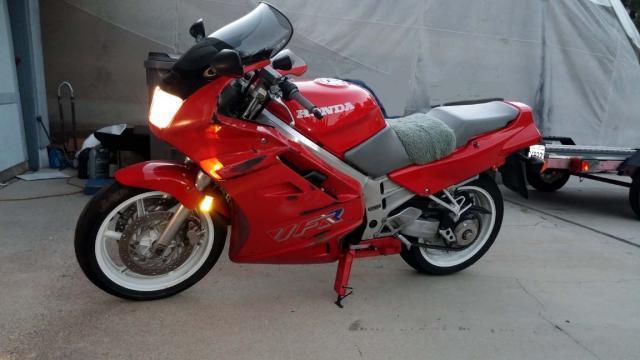
Last week I acquired a very good 90 VFR. The main problem was it had been low sided, damaging mainly the left fairing sides, but after removing the fairings I noted it had been previously repaired. I will cover how to rework previous repairs. and how to make my current repairs. Personally I like the 3rd, and 4th generation VFRs. You can find most parts without too much difficulty at a reasonable costs, but your fairings are their weak points, so I fix or rebuild nearly all my necessary fairings.
My next posting will cover repairing cracks.


-
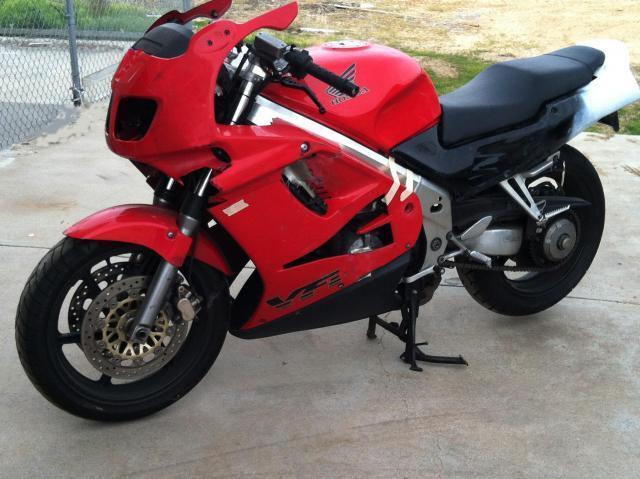
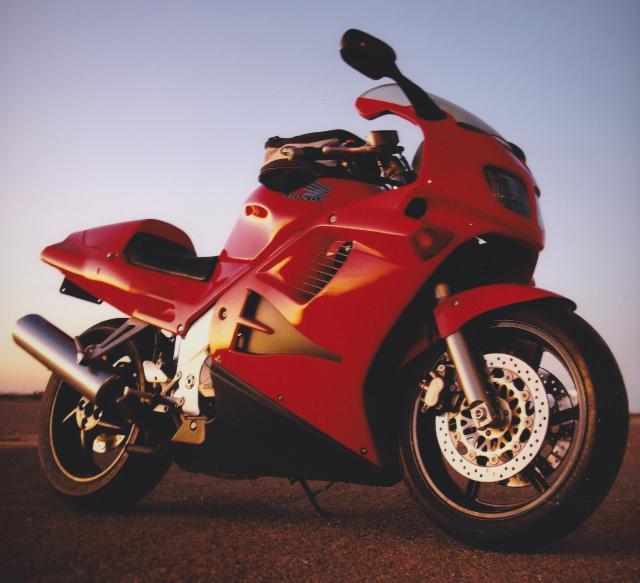
Your damaged fairings can be repaired. I've previously posted ways I have made similar repairs. I have attached a photo of a 95 VFR that was a badly totaled.
Your illustrated photo is a typical repair.
Suggest reviewing my last years postings.
Always first test your materials, prep, clean all repair areas, do a stress test on repair areas, and reinforce repaired areas as required.
Hope my photos are of some help.


-
I've made those seat cowl tab repairs several times.
Resin
-
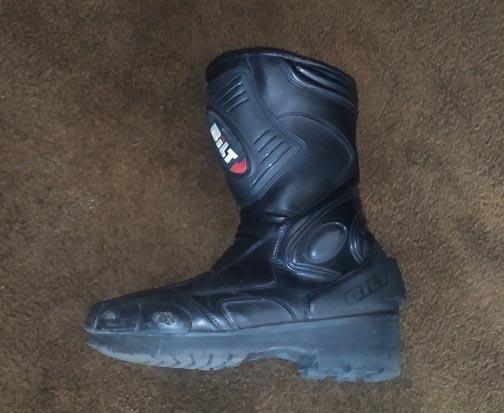
I was able to decrease my seat height by 3 inches by modifying a new set of riding boots. I had a quality shoe cobbler replace my boot sole, and install a taller heel. Be sure to install a good non-slip sole and heel. I also replaced my rear swing arm link using a Lust lowering swing kit. These simple modification has made a world of differences.


-
Sorry to hear about your accident. I had my mishap over a year ago, I've struggled until October before getting shoulder surgery. Now I'm into therapy, hope to be riding again in two more months. Follow doctors orders, and hopefully you'll be riding before me!
Get well!!!!!!!!
-
I mounted a small CPU cooling fan on top of my voltage rectifier. I have no photos, but if anyone is really interested later I will remove the aft fairings for photos. Right now I'm recovering from surgery, so no wrenching.
-
Thanks gr8vfr,
I appreciated your assistance. I purchased my mirror set as suggested. I decided rather than grinding down the mirror's base bosses, I purchased two OEM mirror base pads, and a set of mounting bolts from Honda. I did this, since I was ordering a few other small fasteners. I'm very pleased with everything.
Honda Part Mirror Bolt 4 required 96600-0601607
Honda Part Mirror (Rubber) Base 2 required 88113-MBG-000
-
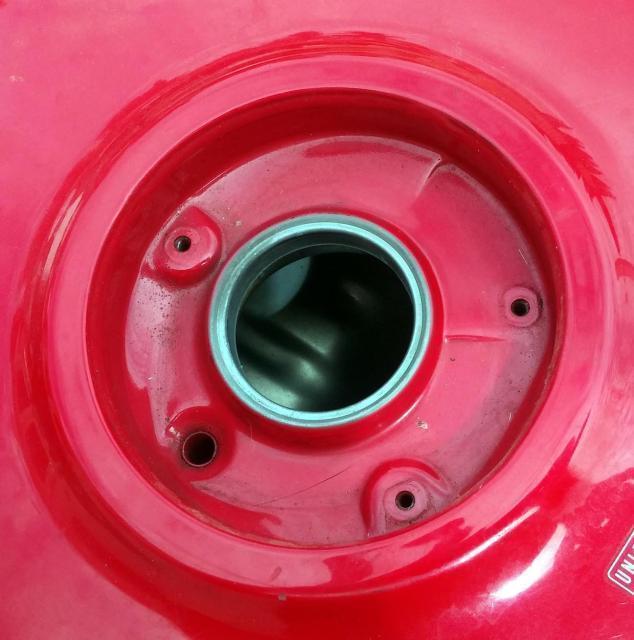
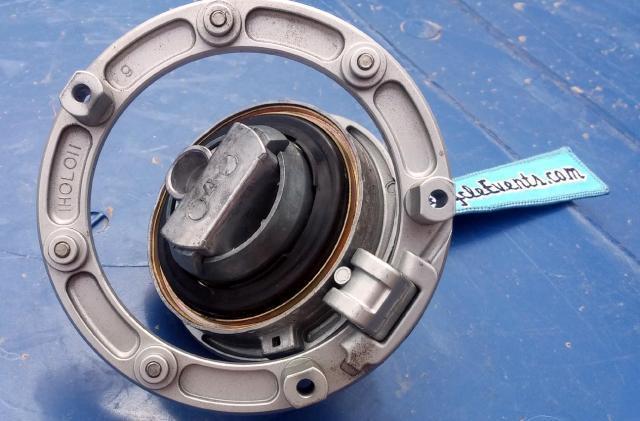
Sorry I'm a day late, I hope I understood your question correctly? If so your gas cap is held on by three allen bolts. One bolt at 12 O'clock, one at 5 O'clock, and one at 7 O'clock. I've attached two photos. One photo illustrating a tank opening, and a removed gas cap. My gas cap came off rather easily after my bike had sat for several years.


-
Are saying you have all your gas cap mounting bolts removed from your tank, and yet your gas cap assembly can't be removed from your tank? If this is true, then tomorrow I'll remove all my gas cap hex bolts from my VFR gas tank, and I'll see what happens.
-
In regards to your tank lock. You might want to remove your tank cap. and hint it with a few light applications of Blaster PB Penetrating Catalyst. This a very good penetrating loosing fluid that can be bought over the counter at most auto supplies. Allow the fluid to soak over night.
-
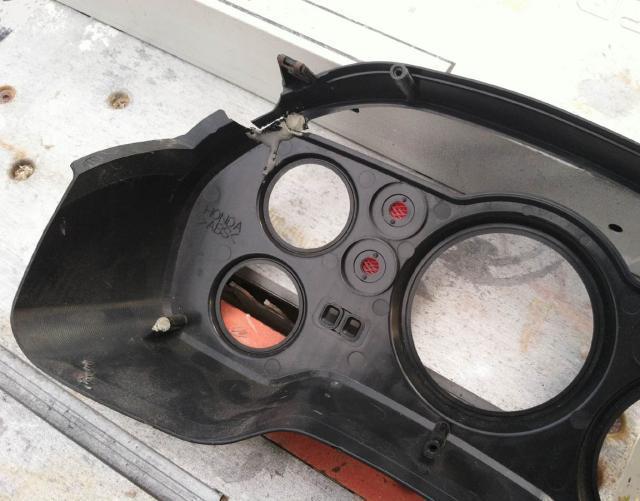
Repairing a thin plastic Instrument cover using two similar parts to make one good part:
Note: This probably will be my last posting on this topic
My black outer instrument cover was broken, and I was missing a large section around my odometer reset knob. Fortunately I was able to locate a used cover, but it too had been damaged. I had a broken screw standoff. My used part was cracked, and it previously had been repaired with JB Wield, but the repair wasnt holding . Unfortunately my used replacement cover had a missing area where one of the attached screws stand offs was. I illustrated this repair, because my used replacement cover had been repaired, but it needed fixing. Often material thats thick like JB Wield, may not work very well when trying to fix thin cracks, or open areas, because the repair agent doesnt get glued between the actual fractured areas, Yes the material gets applied, but it gets globed onto the outside, not into the fracture areas. The instrument cover is very thin plastic much like plastic model kits, so a thin set gluing agent often can do a better bonding. Once the repair has been made, then you apply a little additional material around the broken area, as I did. I made a small fillets of baking soda, then I hit it with CA.
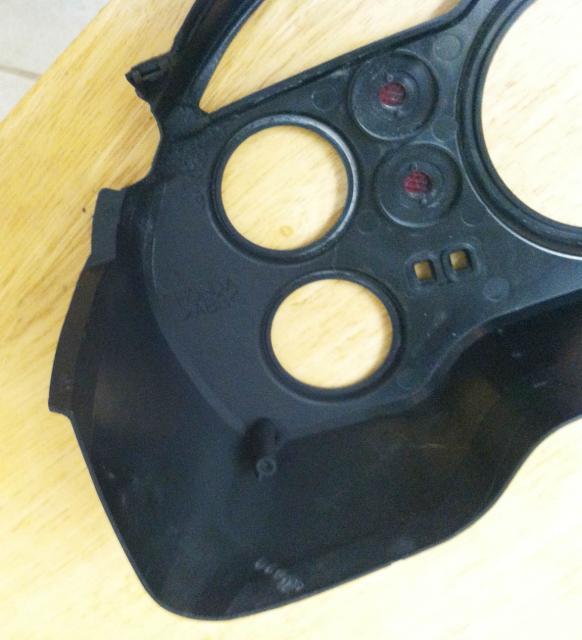
First I cleaned my used purchased cover, with a Dermel, removed the old JB Wield repaired areas, cleaned the broken screw standoff stud area, and Dremeled out my old a screw sand off from my old cover, then I CA glued an old replacement standoff stud to my used cover.
I also reinforced my replacement standoff stud with a small piece of piano wire inside my old plastic standoff stud .
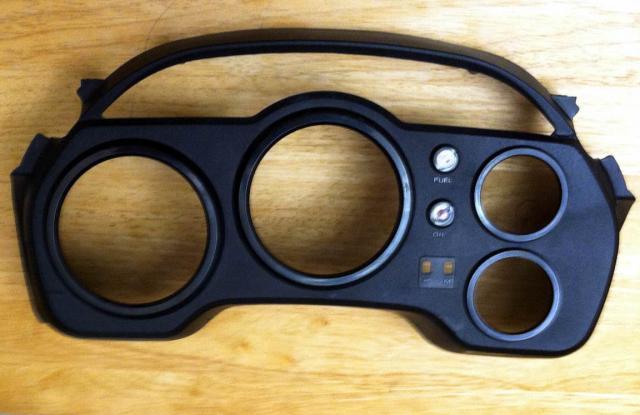
After the repairs were made, I then did fit check, and stress tested my repairs.
I finally touched up repairs with black spray paint.
I couldnt locate a good used instrument cover. However I did come across a damaged similar part that was in better condition than my part.
Sometimes its necessary to make a partial repair using a similar piece from another part.
I imagine most small non functional plastic parts like this cover seldom get repaired.


-
I was afraid I would miss my 95 VFR if I were to sell it, so I bought a back-up bike, which has a few minor upgrades, but it's still a few months away from being completed.

-
Hi Duc2V4--
Take your time, and they will come out great!
fix your smallest crack as a test unit/ then do all the other cracks afterwards.
Be sure to clean everything, prep, and clean again when repairing your cracks.
Tape your cracks on the outside, as I suggested/ make repairs on the inside.
CA cracks/ spot drill ends of cracks/ apply baking soda/ then CA spot drilled holes/ watch the CA smoke off!
Sand the baking soda area, CA the glued area once again,/ sand clean/ prepare for glassing/ glass as suggested.
If you have any further questions/ Send me a note!
-
This thread was generated to encourage VFR owners to make their own ABS body repairs. I covered ways on how Ive done some basic ABS repairs. Like most things, there are many available plastic products. I didnt intended to make comparison test between one product, or method over another. I merely demonstrated, and showed my methods, and suggested ways on how I perform the majority of my ABS repairs. The methods and materials I've demonstrated work for me. Its important to have planning, preparation, and understanding on how to apply your tested material correctly. There have been comments made expressing preference of certain products. I typically try not to endorse a specific product line over another. I do use SEM Products. They have a complete product line of compactable materials ranging from flexible primer, paint, and they have products for both thermoplastics and thermoset plastics. I hope viewers feel more comfortable when they begin making ABS body repairs.
SEM Products
E-mail Question: www.SEM.WS
Technical Support:1800-831-1122


New Member- New to V4
in Third and Fourth Generation VFR's
Posted
Check all ABS body parts check for cracks and correct if necessary. I'm about to change my dash lamps to LED lights, so would you please reference the necessary bulb replacements used?
Thanks and enjoy your new Toy!