Jump to content

Lobster

Member Contributer
  • Posts

    288
  • Joined

  • Last visited

Posts posted by Lobster
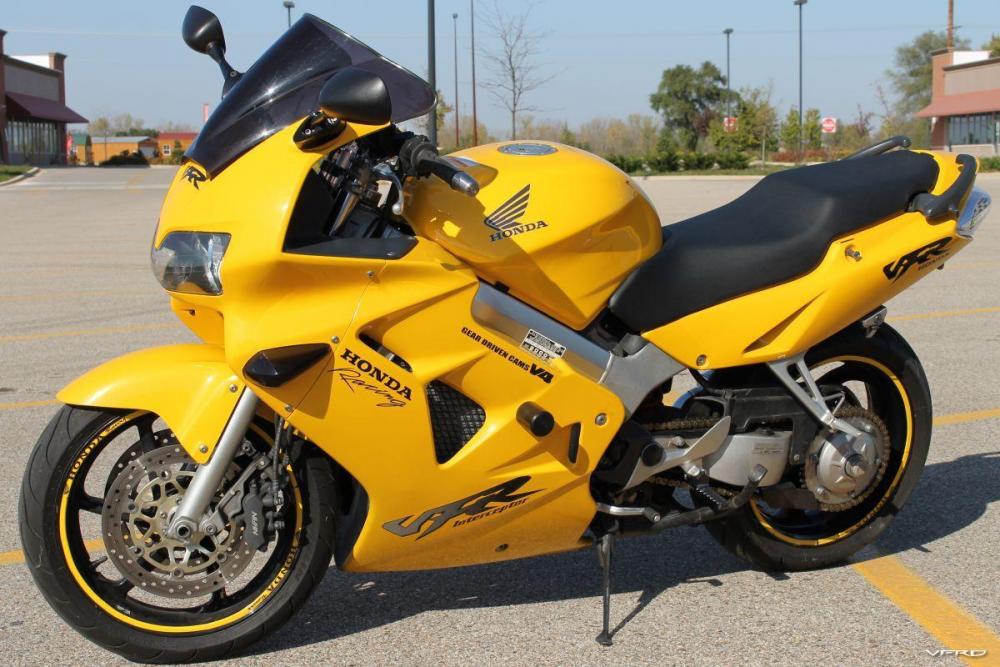
  1. Does anyone happen to know the part number (or numbers) of what needs to be replaced if I were to replace my wax unit on my 2000? I looked at the Bike Bandit diagram and it shows a couple different part numbers referring to wax unit. If anyone happens to know what I need to order, I'd appreciate it. I don't want to get into "cleaning" my old wax unit, find out it is toast and not have a new one handy.

    Thanks.

  2. So it is true then...Yellow VFRs are the fastest!

    Isn't it a little tough living in London and the US? A 10 hour plane ride just to go hop on the Viffer must be brutal!

    The bike looks friggin awesome...no doubt about that. But do you have to undo all that SC plumbing to change the oil filter? (geez...I sound like my Dad...)

  3. Yep...these are leftovers as I figured the VFRD community had been about saturated for this year...haven't sold any yet on eBay.

    Lobster still makes them without the LED!

    Yes I do! If anyone wants to try this I can make a pair for you without the painting and then you can do whatever you want with the light install. I think Rivcyko painted the back half of his black so when the lights came on they only showed forward and not backward.

    To the original Poster...nice job.

  4. OK...at the risk of having some serious flamage thrown my way...I was thinking...

    I'm about to buy back my 2000 VFR from the chap who bought it from me two years ago. I am also planning on a trip up the Dalton in 2012 and the wifey aint too awful pleased about having the VFR back and another bike next year (likely a BMW 1150GS). So my question is, can I combine the two platforms on one bike? Can I make a respectable adventure bike from a VFR? Would I want to?

    Dry weight of a GS and a VFR are within 25-30 lbs.

    Use an LSL Superbike handlebar kit and put on a sweet set of BMW like wide, straight bars with heated grips and hand guards.

    Get new wheels and new spacers of size which would accommodate some DOT knobbies.

    Would have to mod the front fender for said front knobbies.

    Fab a bitchin crash bar system much like I've seen on VFR police bikes.

    Mount some bitchin driving lights to said bitchin crash bars.

    Pick up some fugly big ol' aluminum saddle bags as is so widely used on other adventure bikes.

    Lower pegs with BLS lowering blocks.

    Already have Kanadian Ken top box mounting plate for rear box or extra gas can.

    Am I crazy or might this be a cool project?

    Suspension travel could be an issue for sure, but as long as I keep to fire roads and dirt roads and don't plan on bouncing through creeks and over boulders....

  5. I can now officially speak from experience. I just got back from 3600 miles in 7 days with a Givi V46 mounted to Ken's Solo Rack. Rock solid...you'll never even know it's there...one of the most handy little adds I've ever done. I know Ken persoanlly and can tell you he's a stand up guy.

    This is a good product...buy one if you're even half thinking about it. You will be delighted.

  6. OMG! I don't know how I missed this mod....I've got to have widget!! :salesman: I thought this post was about one of our members making extenders the old way for members....till I desided to check today to see what all the hub hub/chatt was about. Great idea and job. Anyone know or find out for sure these will work with the soon to be avalible "Darth Bling GSXR mirror mounts" and his after market mirrors?

    http://www.vfrdiscussion.com/forum/index.p...c=39029&hl=

    If so anyone want to purchase a pair of the old style extenders...cheap? :idea3:

    That video link doesn't work. Anyone have a updated one?

    :offtopic: Now I feel like I have to spend some time and read all the VFRD posts to see what else I may be missing/ widgets I don't need but got ta have. :goofy:

    edit... :warranty: just read the entire post..this is a DIY project ? LOL I don't have the time...anyone making these in the near future?

    Travis (Rivcyko) is the only one who made a lighted pair, that I am aware of. PM him for more info. He used a set of my extenders and worked from there, so if you have a pair of extenders, he might be able to mod them for you. He does good work and he's a good guy, so give him a shot. He truly will not let you down.

  7. Lobsterman. I want some of your extenders. How can I order a pair? I have sixth gen. No lights necessary. I have enough bling for now. How can I order a pair?

    Just sent you a PM. I have a 6th gen pair already packed and waiting for a new owner!

  8. Thanks for the props, guys. A couple comments.

    As for the drilling on the 5th gen extenders, Citizen is right...it's not seen at all once they're mounted. I make the bolt holes large on purpose for a couple reasons. First, it compensates for the holes if they are not 100% perpendicular to the face. Second, it allows my customer to "float" the extender just before it gets cinched up so the customer can decide just how the joint between mirror, extender, and fairing looks. Third, the 5th gen extenders require a tapered counter bore to clear the mounting pegs on the base of the mirror. (It actually took me a couple pair when I started before I realized this...) So once the counterbore is machined, I have to go back and manually chamfer the edge to allow the mounting peg to sit fully inside the counterbore, thus allowing the mirror to sit completely flush on the extender. If I don't do this, then there would be a slight gap between the mirror and the extender and it will "rock" a little bit. I check every one I make now against a back light to make sure there is zero gap...some have bigger chamfers than others...but again, it isn't seen.

    As for the bolts, I make sure to include stainless steel bolts so you don't get rusty heads. I would honestly have no idea where to get black stainless bolts or maybe powder coated bolts, and in the small quantity I use they would likely be cost prohibitive...and again...they're tough to see unless you're looking for them. Most people don't even notice the extenders much less the bolts.

    As for the finish...nothing special. I've seen some of these things really polished, but honestly, they take a beating on the road, so I don't really see that as necessary. If some of you are more gifted at painting / polishing than I, it would be VERY easy to simply lightly sand off my Rust Oleum finish and finish to your liking. Rivcyko even mounted lights in his...

    I'm also not in this to get rich. If anyone from VFRD doesn't like them, I would be happy to provide a refund if you send them back. (I haven't had anyone ask yet..) I honestly love these things for riding, and I hope everyone who's bought a set does too. I'm not trying to be cocky...I truly want you guys / gals to like them, and I don't want anyone to be stuck with something they don't like.

    I have a couple more pairs for 5th and 6th gen left, and even a couple pairs of "not quite worthy to sell for sull price" if anyone is interested. Just check out the FS thread and send me a PM.

  9. I'm not sure if I am one of the first to put the VFRness on a 2000 VFR, but Tightwad was looking for some fit / finish information for how the kit worked on the 2000/2001 models and I promised him I would take notes and post a quick how to. Overall, the product is well made and Tightwad was helpful in answering a few of my dumb questions.

    I still need to ride around on the bike for a few hours with the new harness just to make sure all is OK (don't ask...work has been hellish) and I also want to check for the signal wire issue and check the charging voltages. I haven't had any R/R problems yet (knock on wood) so I don't expect any issues post install.

    Sorry is a few of these steps are "duh" in nature...

    Remove the seat.

    Remove the tail fairing (six allen bolts and four wire harnesses to the tail lights)

    Remove the battery box cover.

    gallery_1904_3374_165820.jpg

    IMG_0389.JPG

    Disconnect the battery wires...watch the little nut on the bottom side of the connector!

    The R/R is located on the left side of the bikle under the tail fairing. This should be pretty obvious once the fairing comes off.

    gallery_1904_3374_143532.jpg

    IMG_0388.JPG

    Remove the two bolts holding the R/R in place. be sure to watch for the nut on the back to fall off, or be prepared with a long, twisty magnet to retrieve them when they fall...ask me how I know that one.

    gallery_1904_3374_161351.jpg

    IMG_0387.JPG

    There are two wiring harnesses coming from the R/R. You only need to unplug one of them...the clearish colored one. Leave the white one connected.

    gallery_1904_3374_143205.jpg

    IMG_0390.JPG

    I also took the time to gently push / prod the stock wiring harness as much out of the way as possible. You can see here I zip-tied the harness to the frame rail. Take a few minutes at this point to clean things up, wipe off dirt, and generally try to straighten up anything which looks "hangy" or loose.

    gallery_1904_3374_39746.jpg

    IMG_0392.JPG

    Plug in the connectors of the VFRness...one goes into the factory plug, and the other goes toward the R/R. They will only fit one way. Now it's time to start thinking about where you want the extra wires to route. Honestly there isn't a lot of room to play with, and I recommend playing with a few options until you get something neat and tidy with no kinks in the wires. I guess you truly don't have to unbolt the R/R completely, but I think it helps to have that loose to play with wire route options. (The two loomed wires in the center are the new harness.)

    Step 1

    gallery_1904_3374_126713.jpg

    IMG_0393.JPG

    Step 2

    gallery_1904_3374_65023.jpg

    IMG_0394.JPG

    Step 3

    gallery_1904_3374_25935.jpg

    IMG_0395.JPG

    Tightwad recommends bolting the harness ground to the R/R itself...I'm sure to save some wire and some space. I double checked the ground there and it was present as long as I scraped a little paint off things to get a good contact (although the wire has a ground through the harness anyway...I also found). You could perhaps grind some paint from the sub frame and make a new ground if you like.

    The "extra" 20 amp fuse has plenty of wire to be put somewhere you feel comfy with. I chose to put it more or less right next to the stock 30 amp fuse. (Don't forget to change the 30 amp fuse to the supplied 20 amp fuse.)

    gallery_1904_3374_90090.jpg

    IMG_0397.JPG

    gallery_1904_3374_140621.jpg

    IMG_0391.JPG

    I also purchased the access plug panel, and with the Sargent Seat I had plenty of room to install it just aft of the battery box. Install is pretty easy...the purple wires connect the relays to each other...then just wire up pos and neg to the battery terminals.

    gallery_1904_3374_166649.jpg

    IMG_0399.JPG

    Getting the extra wires onto the battery terminals using the stock screw took a little effort. I stuck a small pick under the nut on the terminal so it would be held up high enough to allow me to start the bolt and cinch everything up. I also had to trim a little of the battery box cover away to make it fit over the new VFRness wires.

    gallery_1904_3374_48502.jpg

    IMG_0396.JPG

    Once you get that done, you're done. Check to make sure all the electrics work and the bike starts. Do the charging test (as recommended by Tightwad and many others here...) and then put everything back together.

    I will update this post with my charging test results and the sensor wire fix (if necessary) as soon as I get a chance.

    If I missed something, or you have questions, please chime in.

  10. Radar, I'm very interested in a 5th gen set. I'll PM you to confirm once you have the prices posted.

    I don't think ripped on BMV's riding, but I'm quite sure I probably made a comment or two about his barley soda consumption ability. I thought if any of you Canucks got caught being out drunk by an American that it was grounds for deportation?

  11. Very Cool!! Mmmm yellow LED's hehe. Is the mirror extender cast or a chunk of acrylic?

    Spoon,

    1.5" clear acrylic. I made about 40 sets for 5th and 6th gen bikes for folks here on the forum. I think it's a nice addition as you can see behind you MUCH better. There's nothing fancy about them. If you can find the acrylic, some longer metric bolts and you have access to a bandsaw and a sander, you too can make them without much trouble. I think even GenMar sells them for about $60 / pair.

  12. Bitchin, bitchin, bitchin work...that looks freaking awesome...how does it sound? I have a D&D on mine which I love. Any chance you would be able to compare the sound for me? Nah, forget it...I'll be buying more formula soon and not new pipes...

    Anyway, gotta give you some credit. It looks killer.

  13. I don't have the link, but I seem to remember it was one of Aussie members. Not sure if that helps. he actually seemed to do away with the muffler completely and had a real shorty kinda muffler thingy that just popped out from between the rear tire and the cat. I thought it looked pretty cool.

    Short of that, look out for a nice used can from eBay and make it work. I did some trading through this site and wound up with the D&D...freaking sounds awesome.

    Is this it?

    http://www.vfrdiscussion.com/forum/index.p...c=19224&hl=

    Maybe...but I thought there was another one too, with only one exhaust side exit...maybe it's just my case of CRS...

  14. I don't have the link, but I seem to remember it was one of Aussie members. Not sure if that helps. he actually seemed to do away with the muffler completely and had a real shorty kinda muffler thingy that just popped out from between the rear tire and the cat. I thought it looked pretty cool.

    Short of that, look out for a nice used can from eBay and make it work. I did some trading through this site and wound up with the D&D...freaking sounds awesome.

×
×
  • Create New...

Important Information

By using this site, you agree to our Privacy Policy.