

AnikMankar
-
Posts
908 -
Joined
-
Last visited
-
Days Won
5
Content Type
Forums
Profiles
Gallery
Blogs
Downloads
Events
Posts posted by AnikMankar
-
-
You might be able to get that acrylic @ TAP Plastics.
it is going to be expensive to have shipped here to India.
-
I like this idea, but a question, how thick are your extenders? They look to be about 1" thick.
yes they are 1" thick.
-
Nice, Anik.... Bring a couple of 2.0 inchers for a 6th gen with you on your next trip :cool:...
I've seen that done before with silver and then black paint on the areas where the maker didn't want light to shine through (ie. back at the rider)
thanks Lee but I will need a stencil for the 6th gen which is going to be difficult out here.
Need to check if i can get 2" thick acrylic or may have to stick them together - not sure that will turn out.
-
So i am guessing people may have tried this out...
Block of Acrylic = $2
LED lights = $2
misc expenses = $2
Wire Socket = $3
Labor = priceless
Total = $9 + labor :cheerleader:
Cut out a stencil based on the mirror plate.
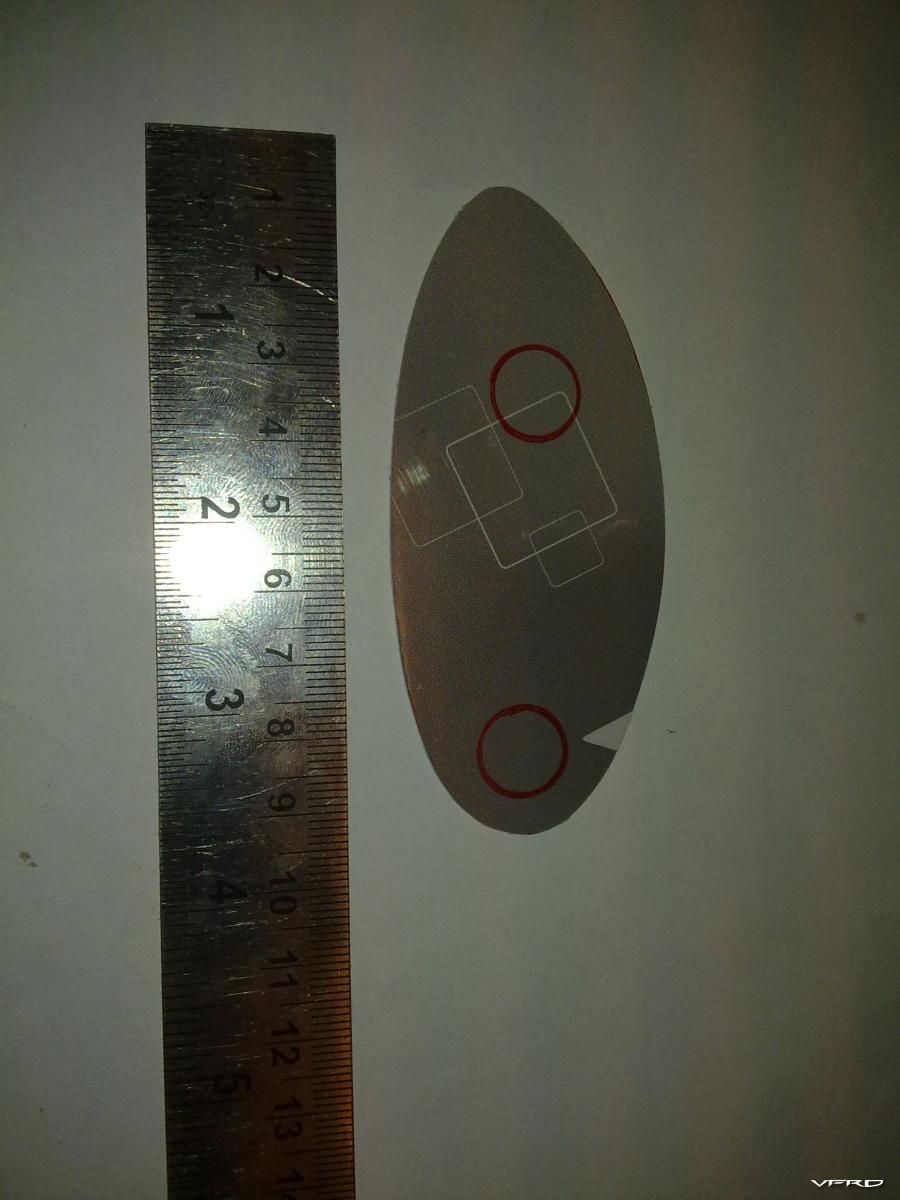
01. Stencil.jpg
Traced out the stencil on the acrylic. Gave it a raw cut.
02. Acrylic cut - raw with stencil outlined.jpg
Ground the sides to match the stencil
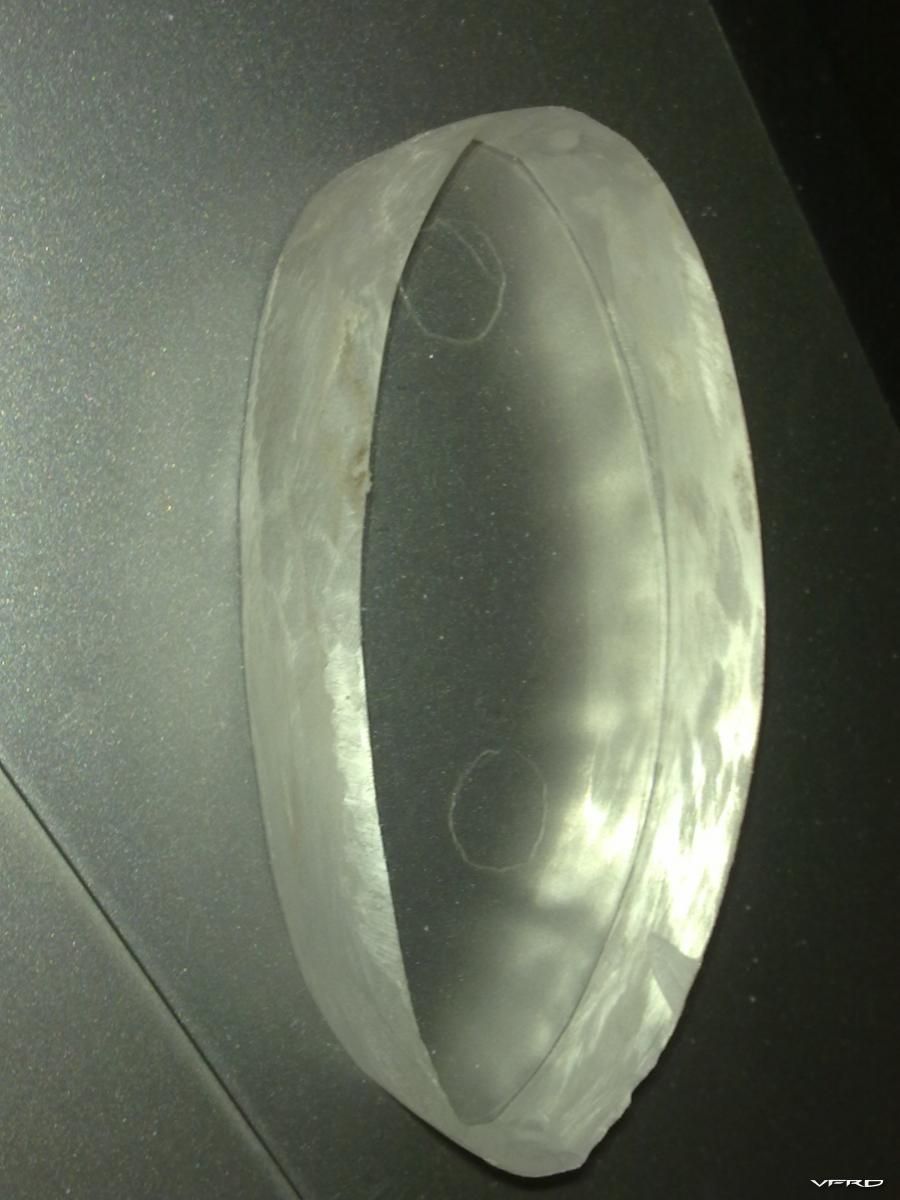
03. Acrylic ground to stencil.jpg
Drilled holes. used a course sand paper to dull the edges, and 2000 paper to smooth out. Needed to give it a frosted look.
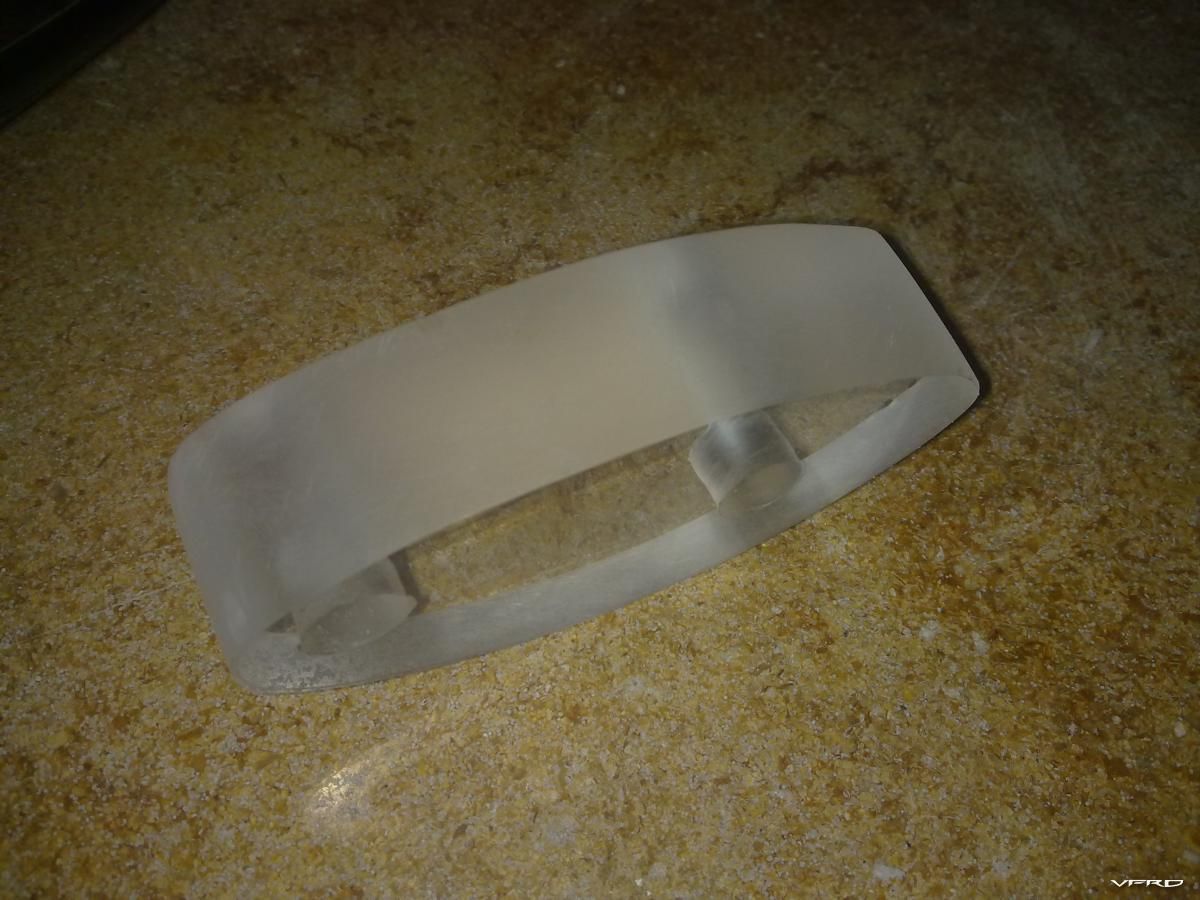
04. Mirror Extenders - with holes and frosted finish.jpg
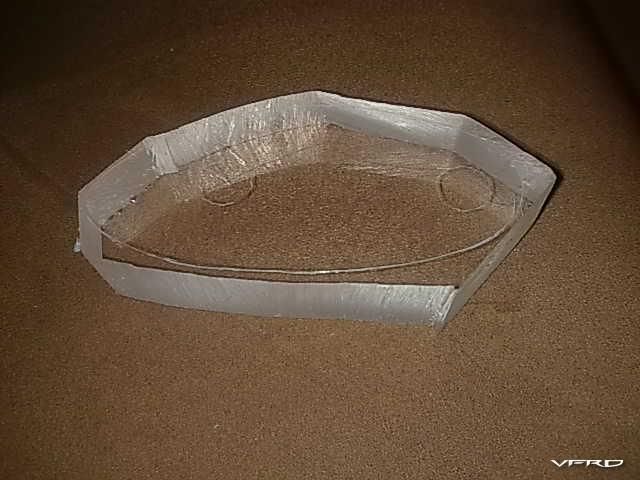
Both side cut out
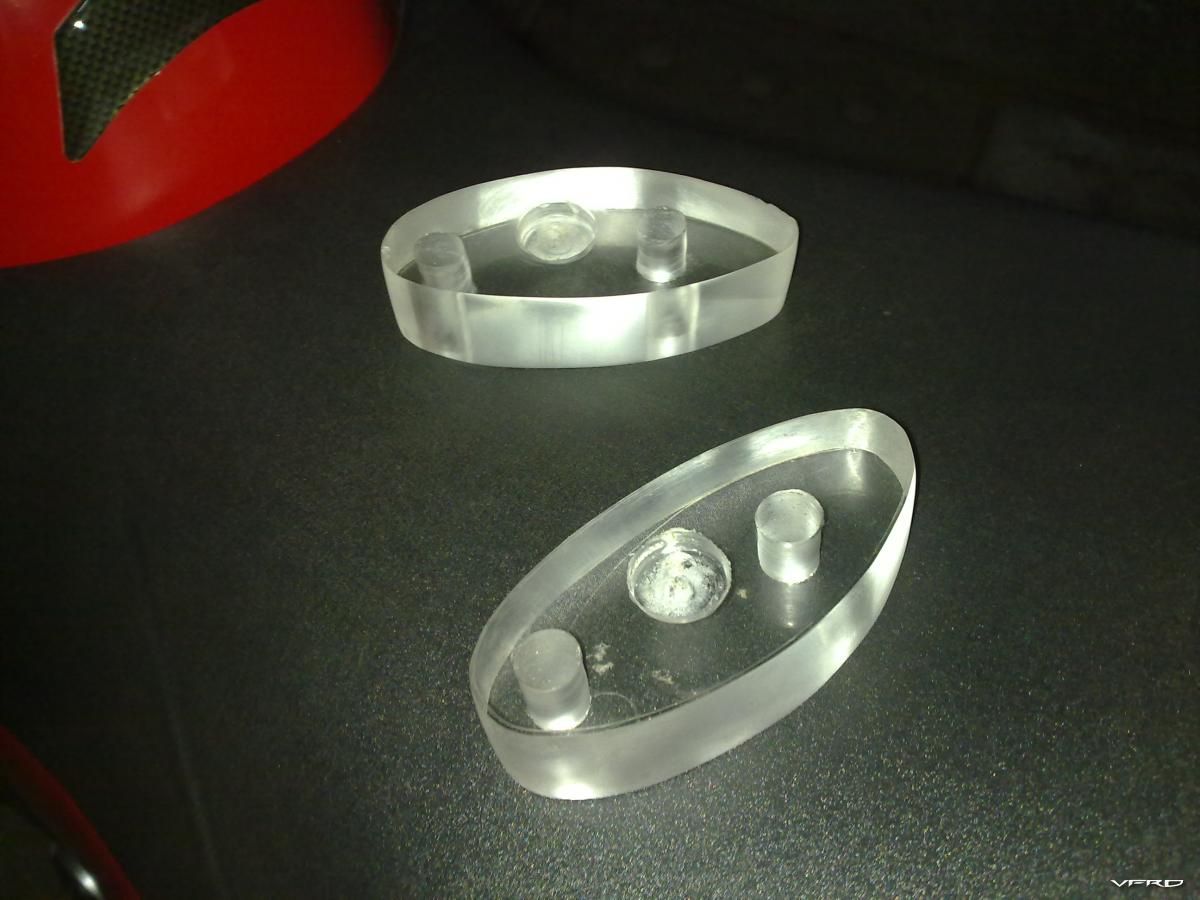
05. Both extenders cut out.jpg
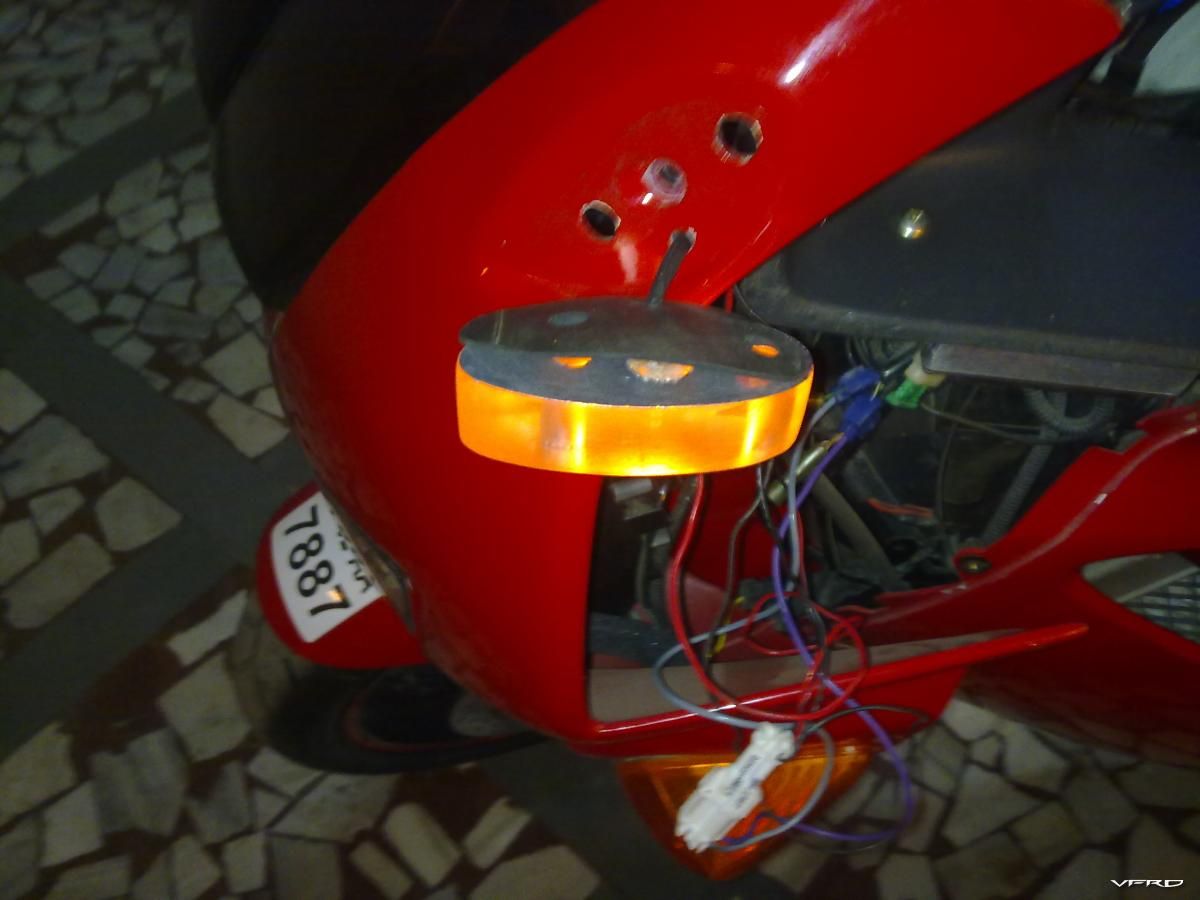
cratered out 4 mm using a dremel, a slight wedge at the side for the wire to come out. blanked out both sides using a reflective tape
06. Cur out for LED's and relfectors.jpg
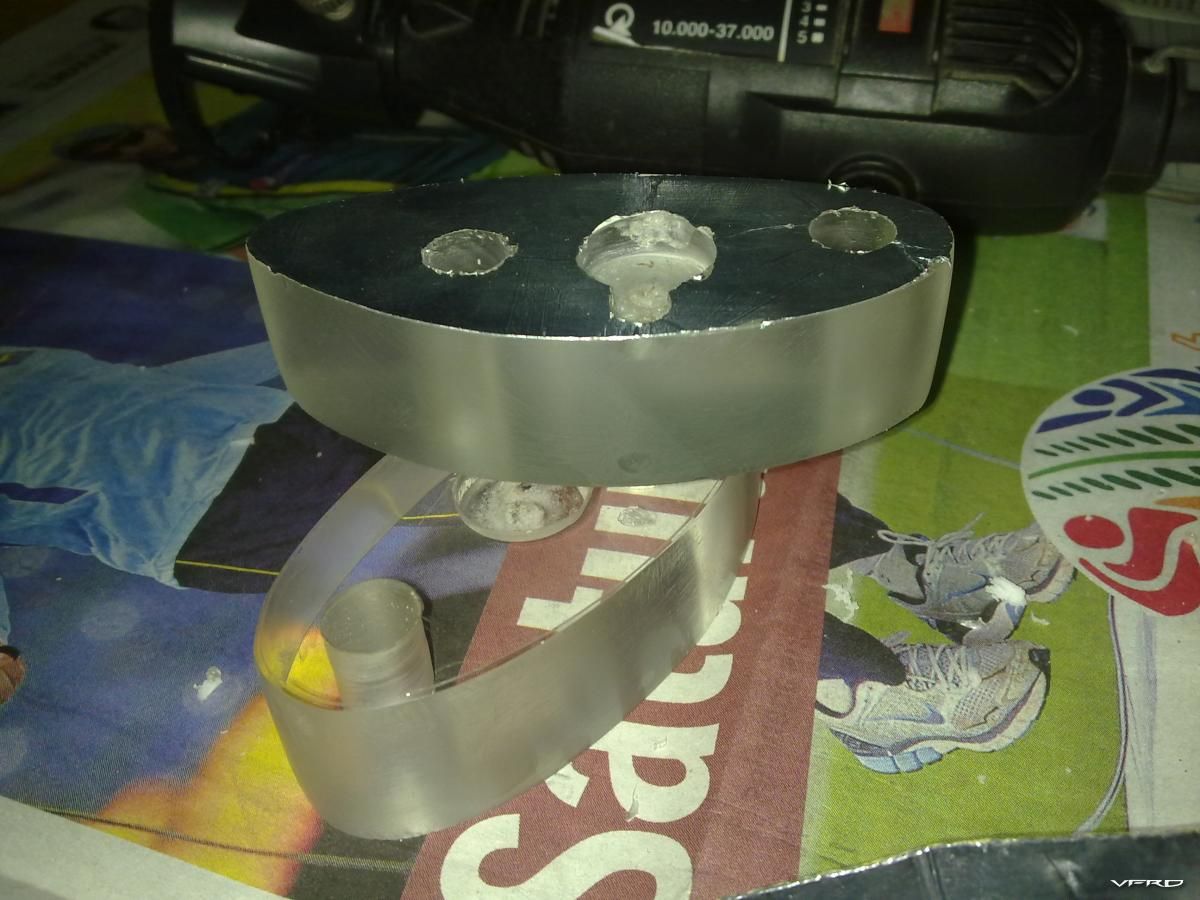
used an old tire tube to cut out the rubber mounts. This will go between the extender and the mirror

07. Rubber Mounts cut out.jpg
With the LED lights in place, filled the back with a glue gun...water proof
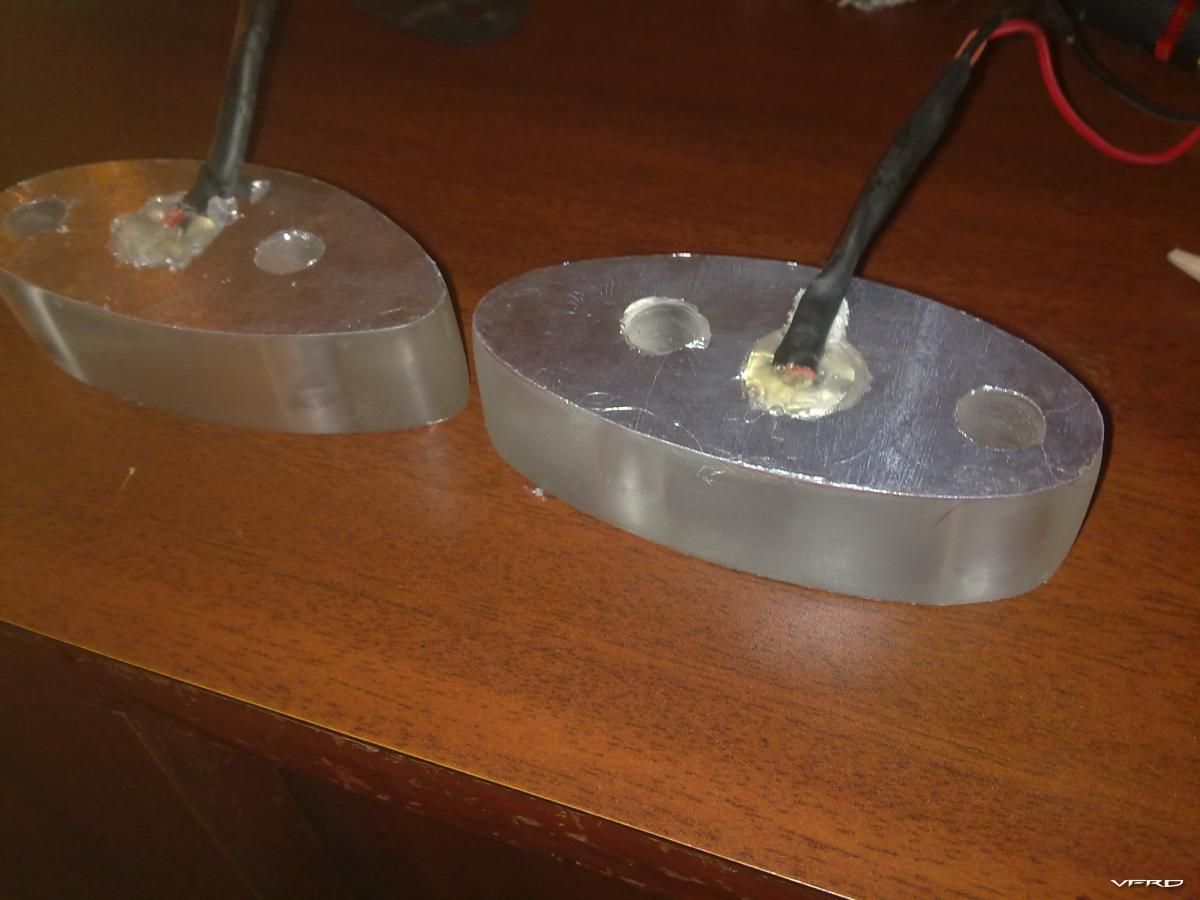
08. LED's in place with Silicon filling for water proofing.jpg
Each unit looks like this.
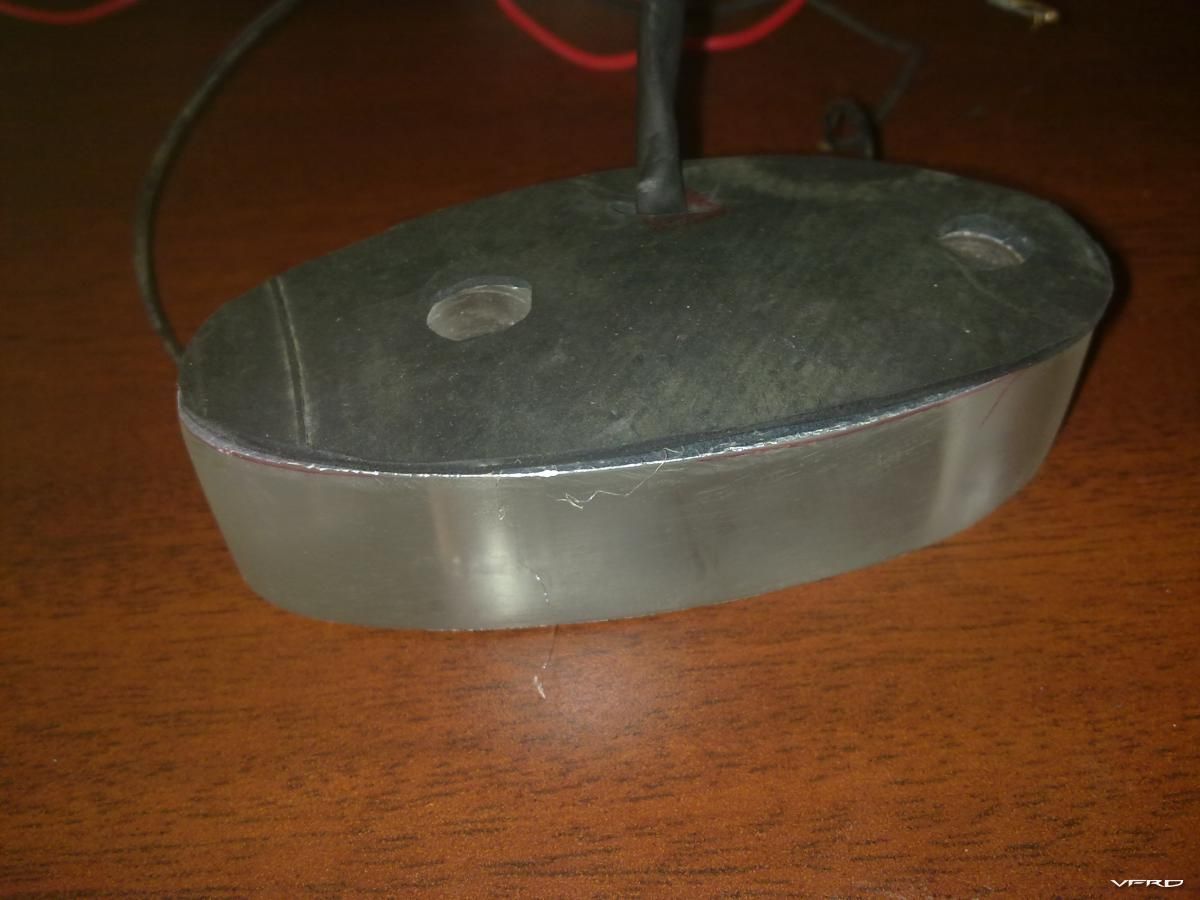
09. Unit ready for installation.jpg
Checking the holes and alignment before final fitting.
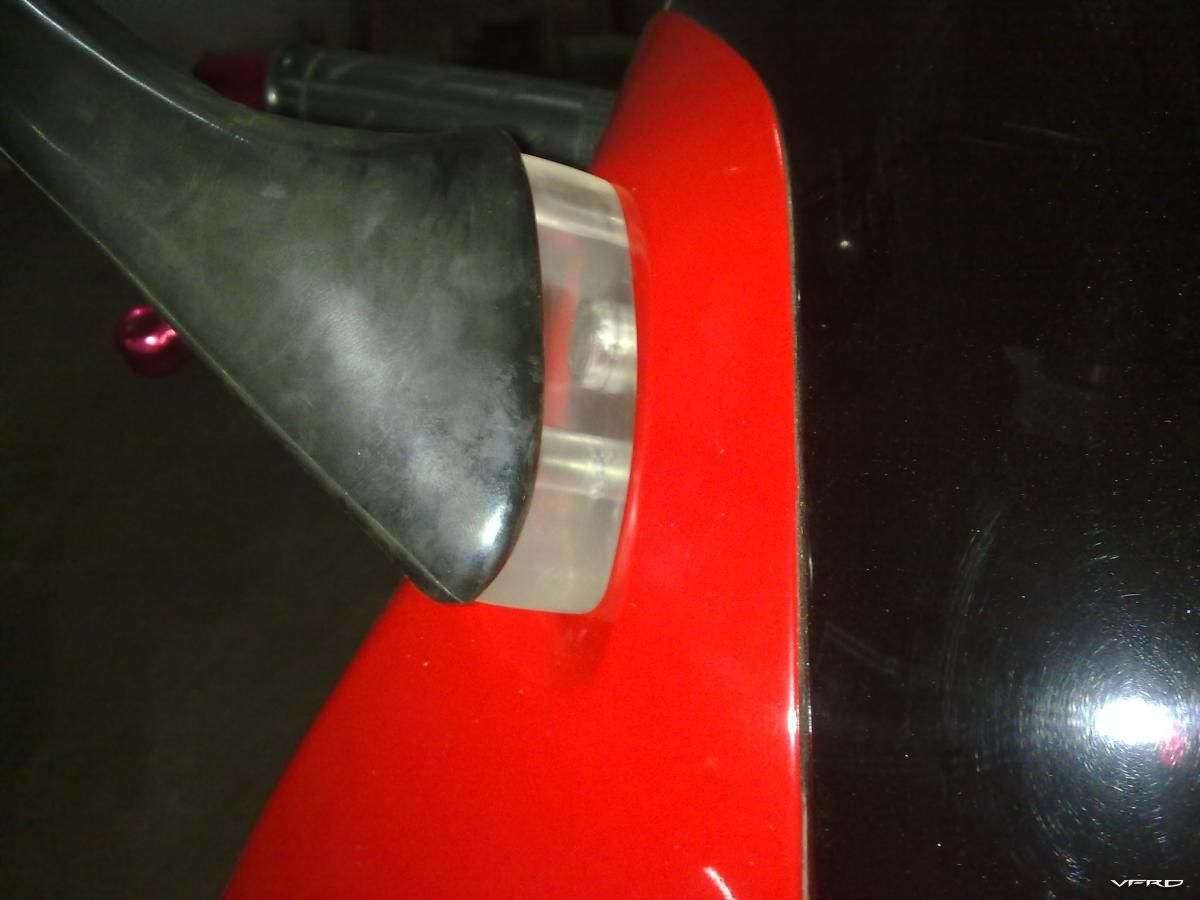
10. Sampling the unit for holes and finish - I.jpg
11. Sampling the unit for holes and finish - II.jpg
tapped into the parking light (as this is an UK model - we have one of those)
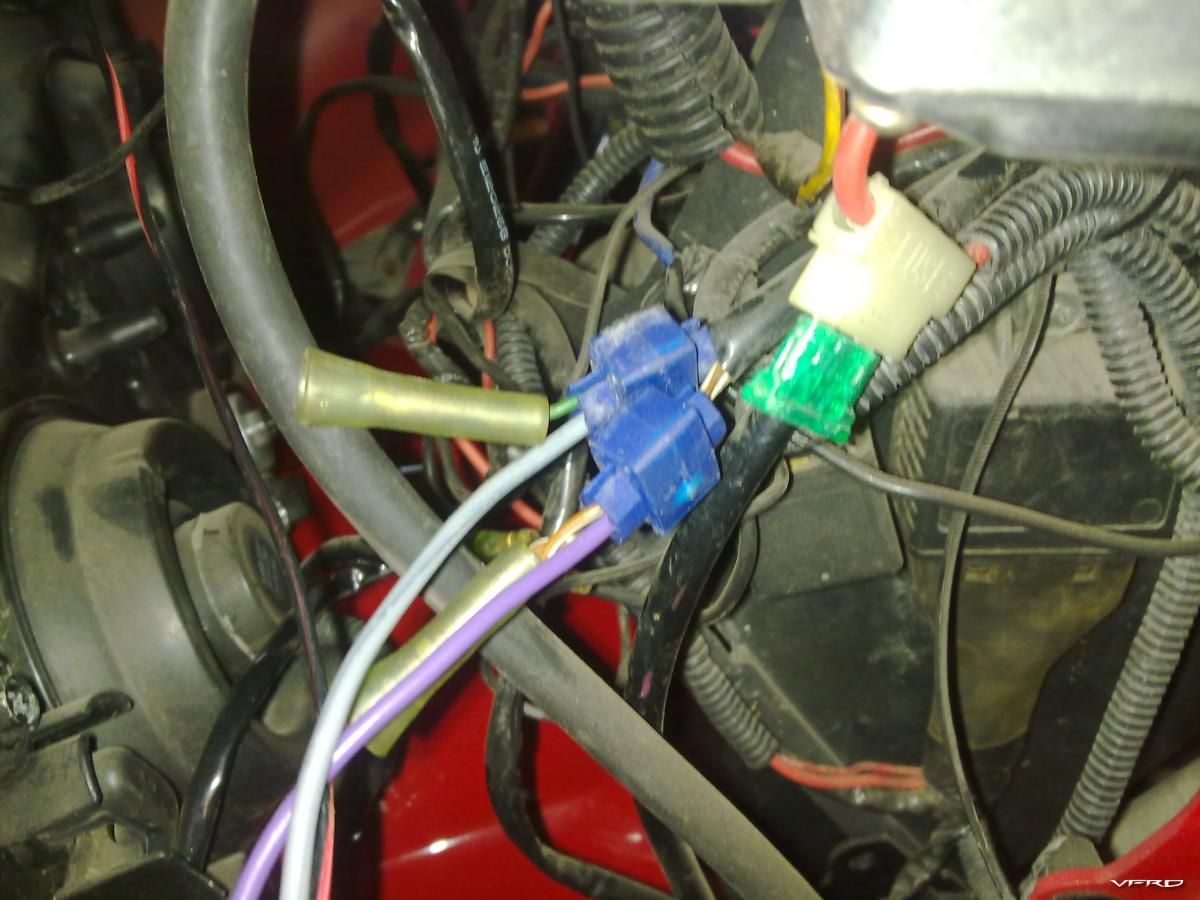
12. tapping into the parking light wiring.jpg
USed heavy duty connectors to join all wires
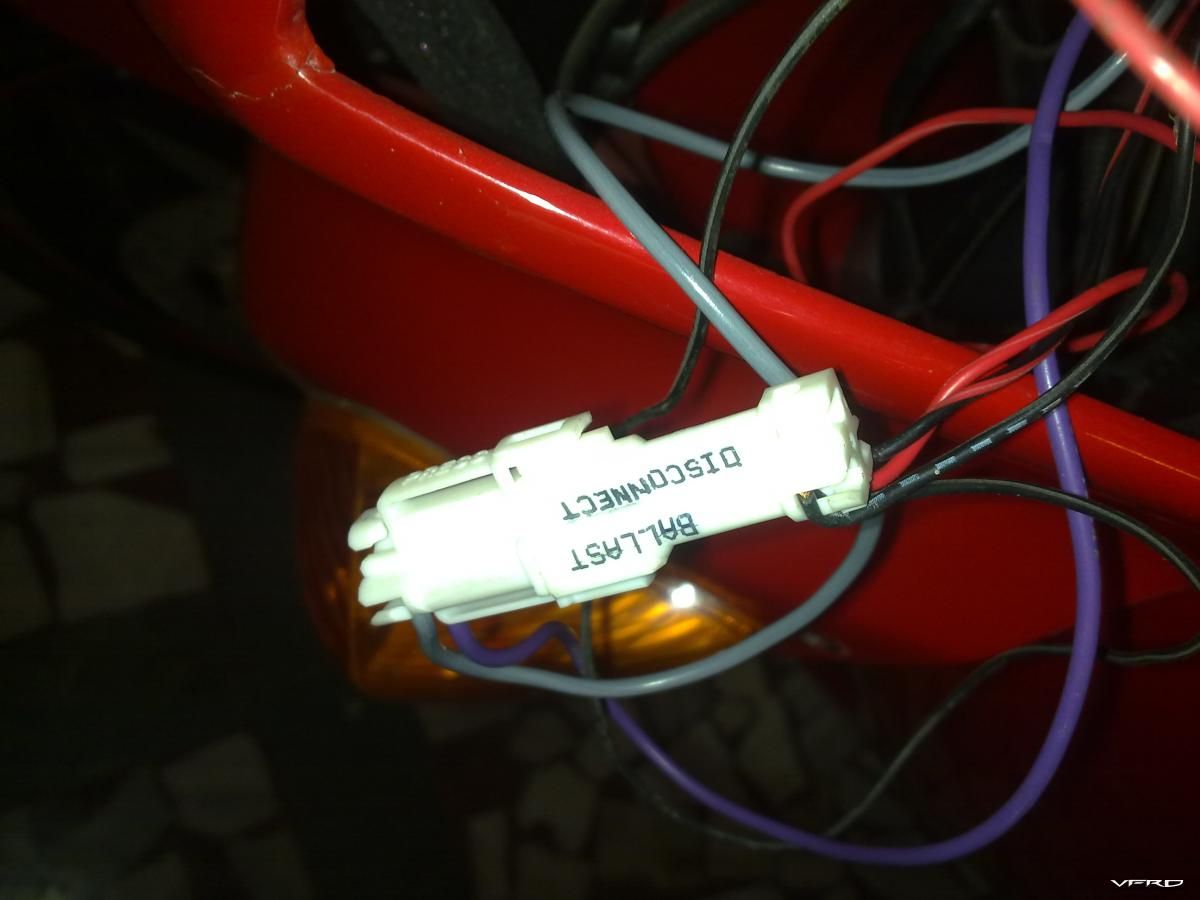
13. using plastic connectors to join all wires.jpg
Checking lights ...
14. Light Checking.jpg
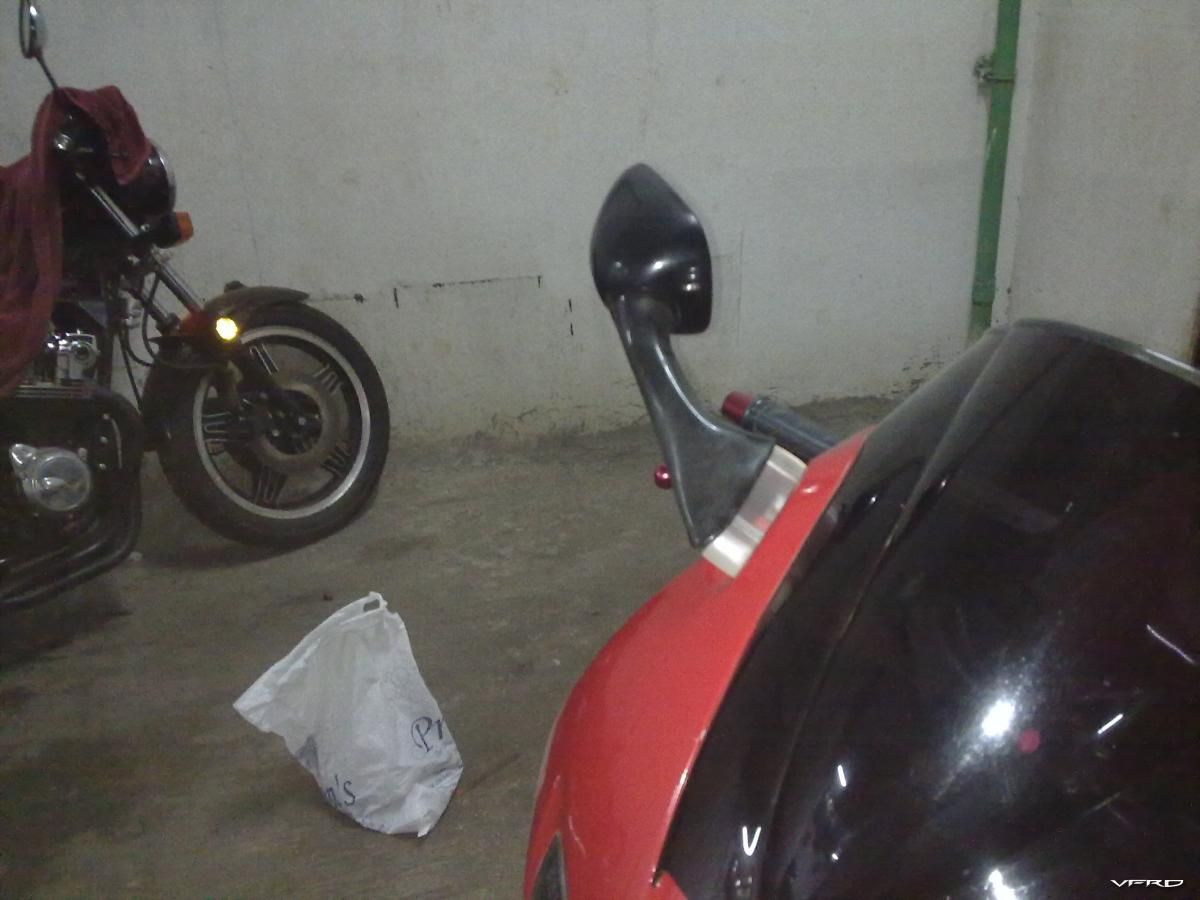
Finished product
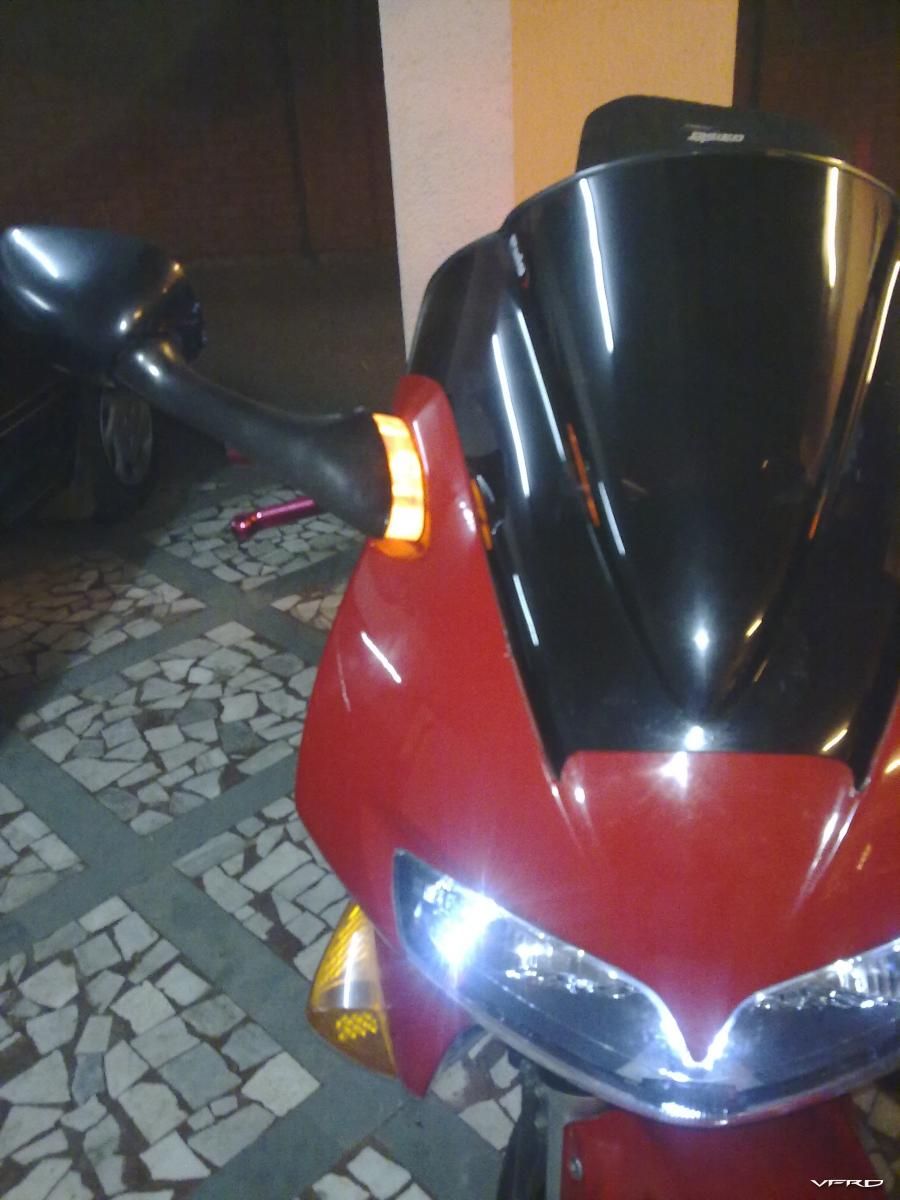
15. Lights on.jpg

16. Lights on - No Flash.jpg
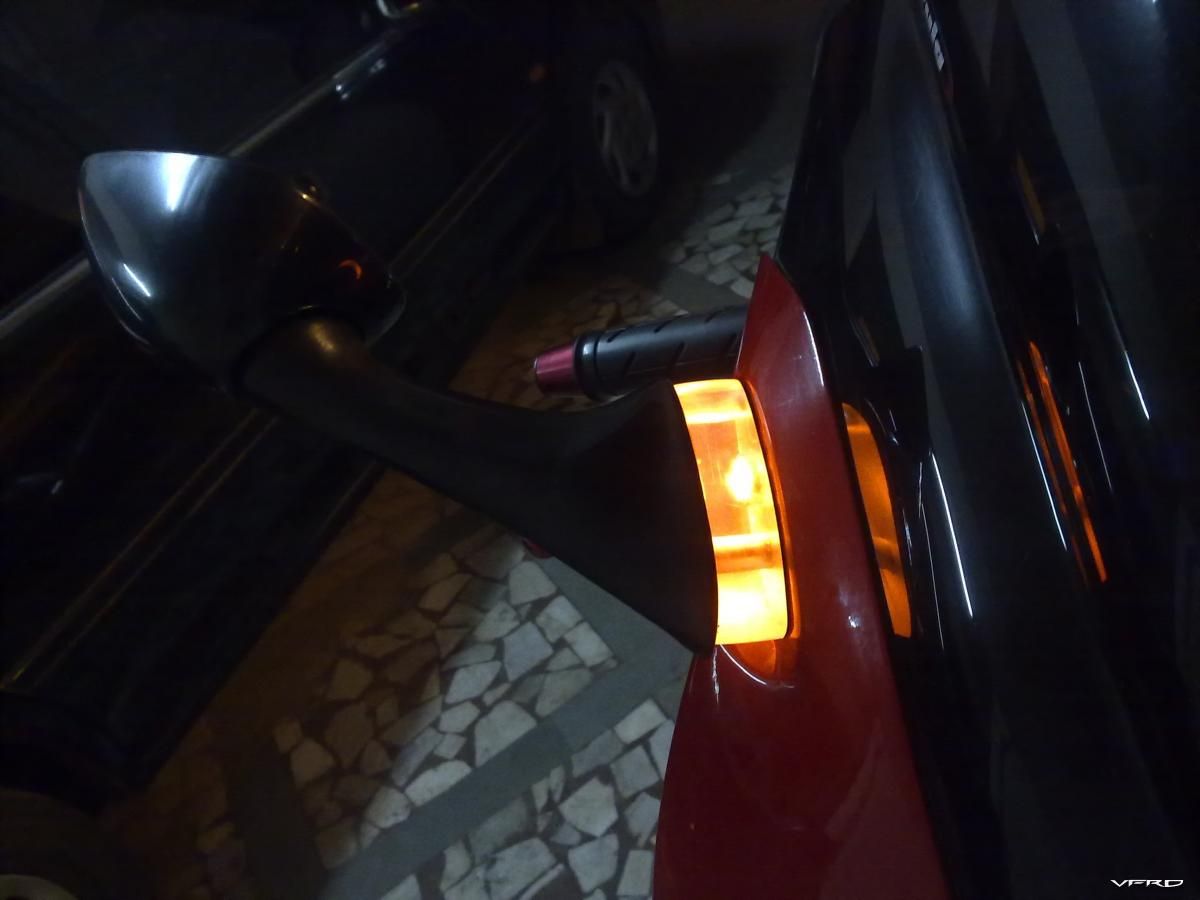
17. Close up.jpg
A buddy of mine (Thanks ! Shiraz ) helped me through this
-
smoother idling and cleaner pick up. sounds better too
-
Looks like an easy way to clean the chain :fing02: Here they sell a similar product: Kettenmax that also has a container to catch the dirty cleaning fluid.
:fing02:
-
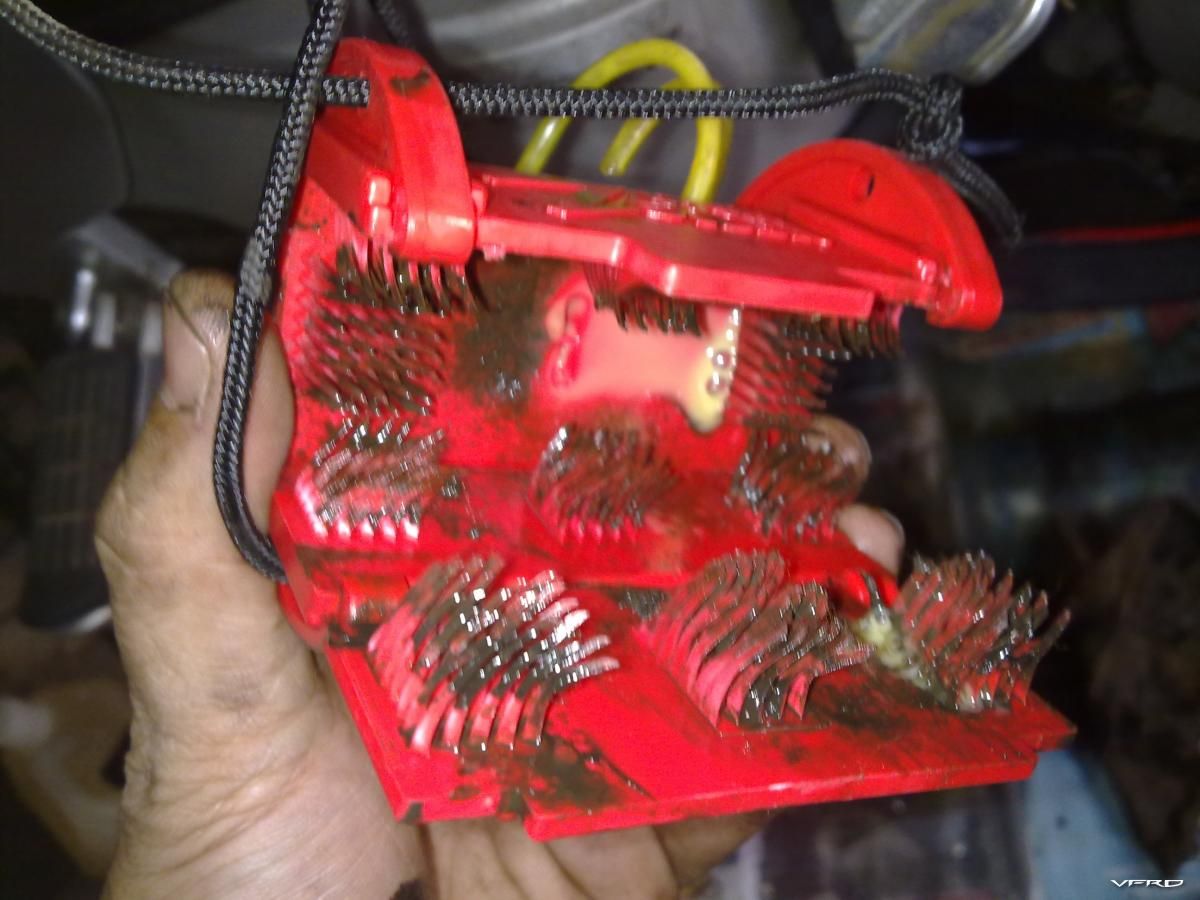
The steel brushes looks like they may be harsh on the o-rings, should it come in contact with them.
This is high grade plastic nothing steel in there ....
-
Where did you buy this from? I was just looking around for something similar to this.
-
Where did you buy this from? I was just looking around for something similar to this.
just hose it with wd40 the take a rag and run through your fingers , It needs no more cleaning than that.
I would not use WD40 on chain as a lube...my experience is that WD40 is more a penetrating agent than lubricant. WD40 will clean the chain but you will still require to lube it else the chain will end up dry.
-
Is that rust I see?
a little - has been there from the time I bought the bike. New chain / sprocket in stock...will replace it when this gets bad
-
Had purchased this "Z chain cleaner" sometime back but never got down to use it. Must say it does make the cleaning process a little easy.
The kit comes with the plastic cleaner, transparent tube, a cord to hold the kit in place.(You can see how dirty my chain is)
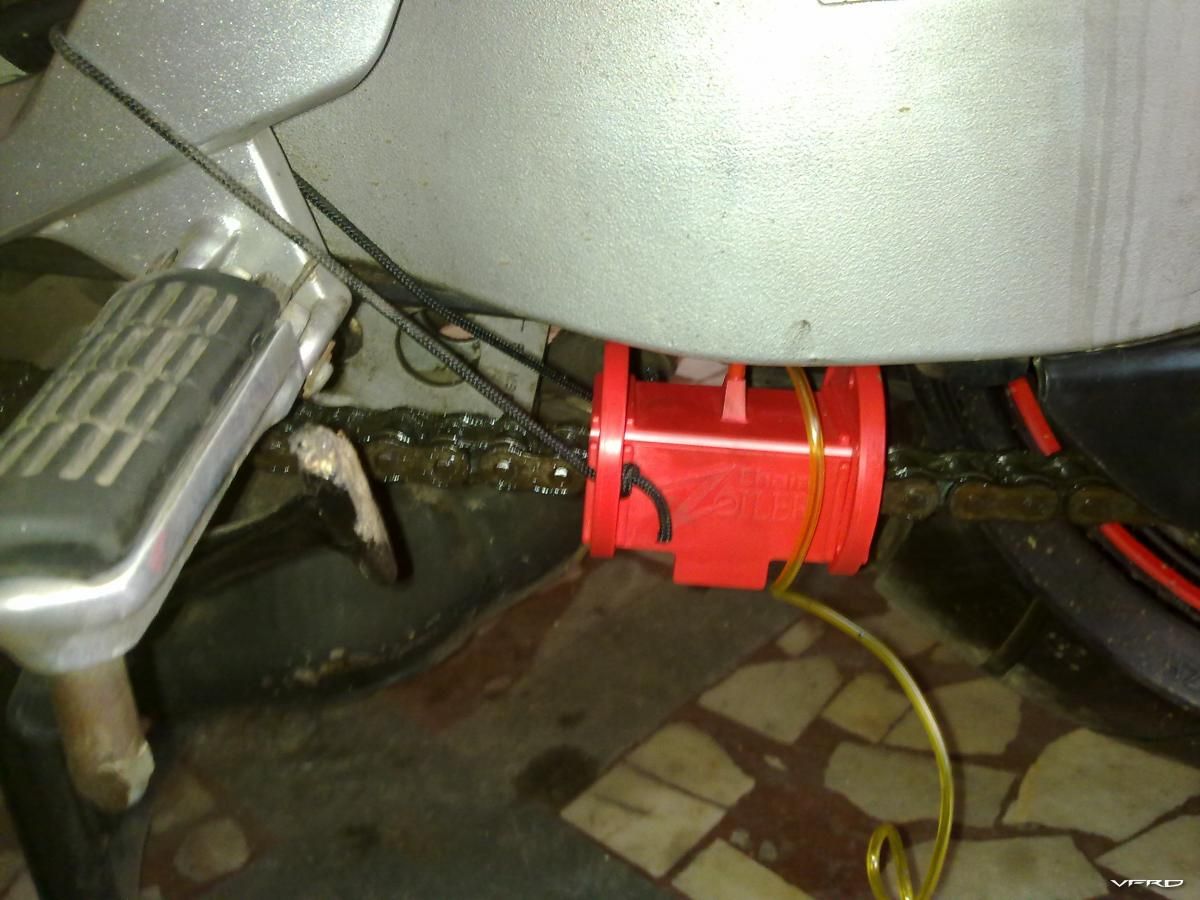
01. Z Chain Cleaner attached.jpg
First the dry cleaning. After installation turned the wheel couple of times - anti clock wise till all the hard stuff comes out. Purchased an injection from a medical store. This was used to pour the kerosene in.
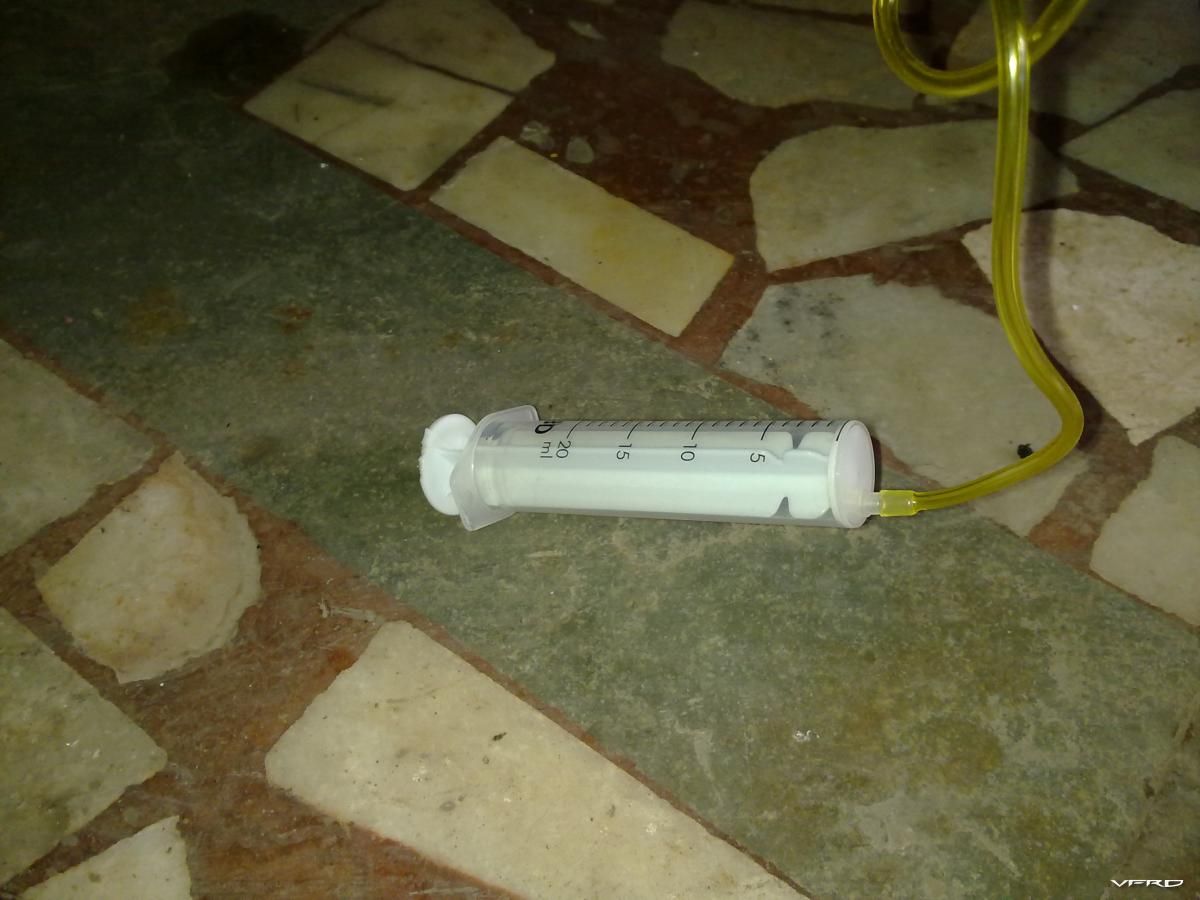
02. injection used to control the cleaner.jpg
Turn the wheel around again while simultaneously pressing the injection.
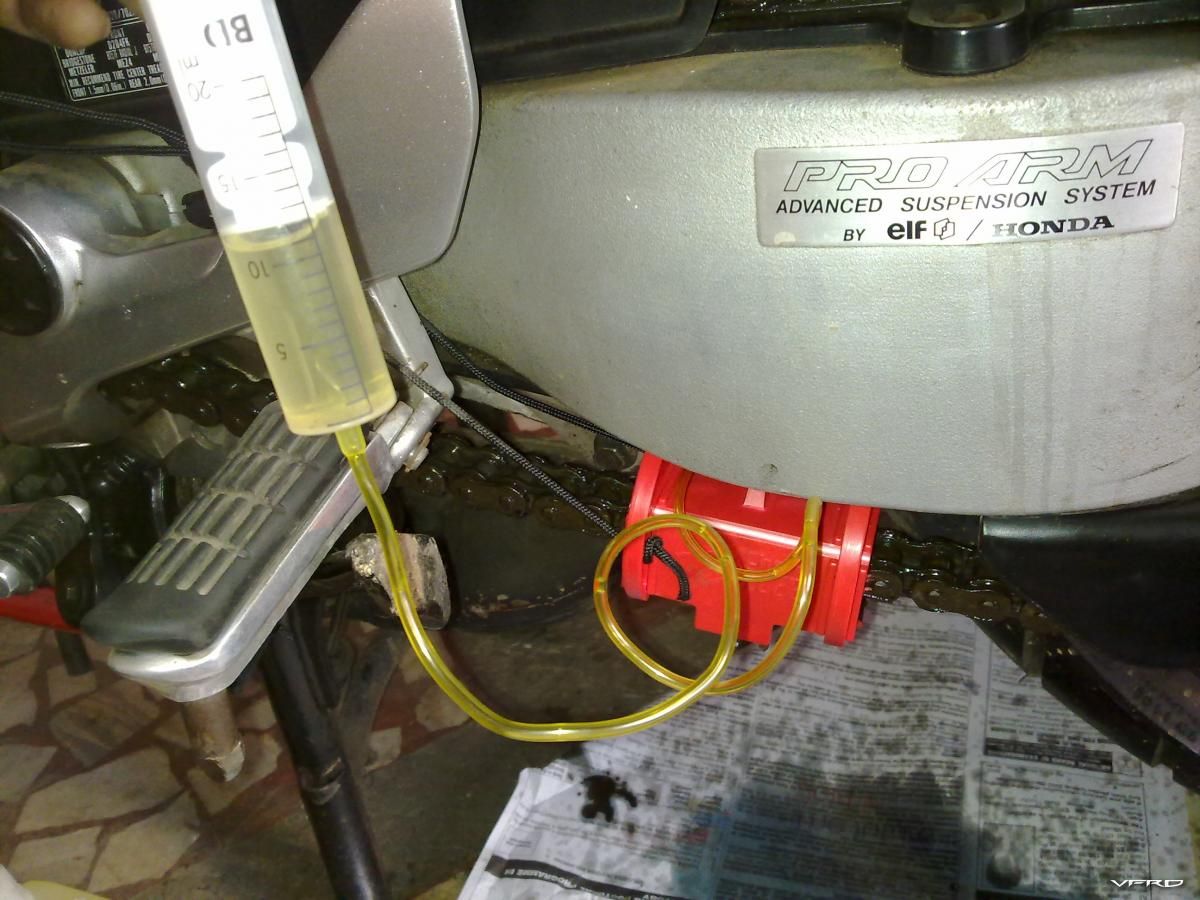
03. Kerosene-paraffin to clean.jpg
couple of turns and 5 min later, the chain was clean
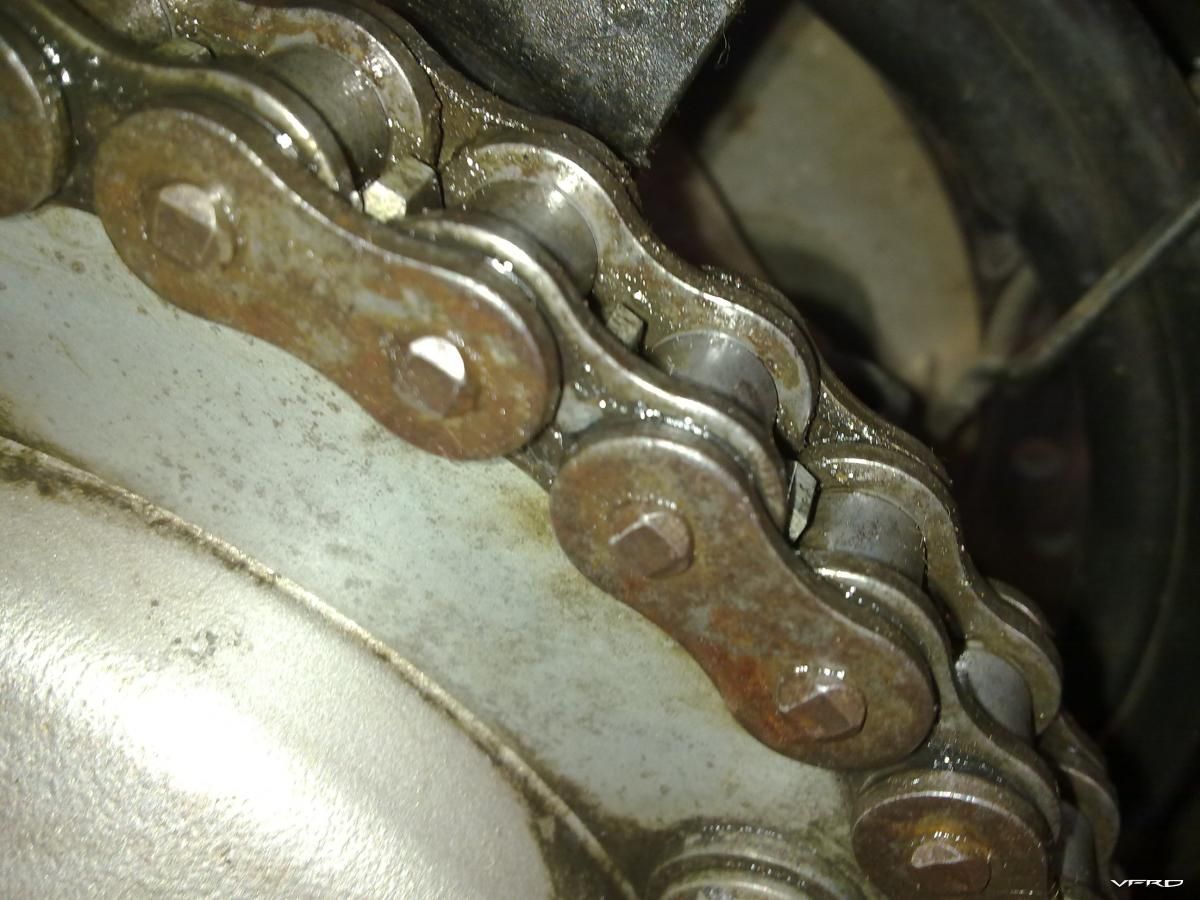
04. Cleaned chain.jpg
05. Z chain cleaner - after cleaning.jpg
the mess cleaning (I) left behind
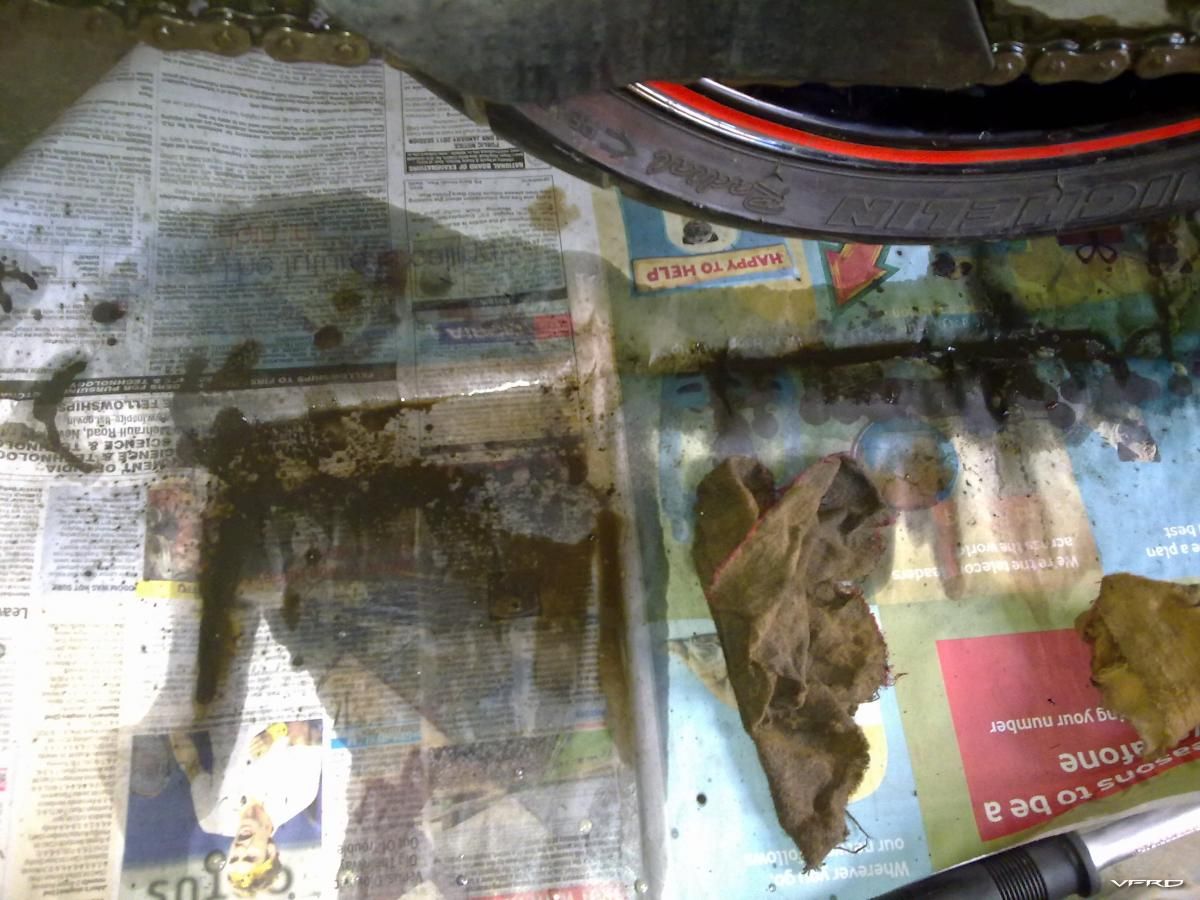
06. junk on the floor.jpg
Replaced the injection with the chain lube and same process again. The lube was evenly spread around the chain no wastage on the rim or else where.
-
What I did differently was instead of using screws to mount the ballasts I just used the stronger two sided tape and mounted the ballasts to the inner upper fairing. That is a clean write up with great pics!
thanks...
I have used double sided tape also but it gets hot here plus the engine heat makes the glue soft. these pictures are old. I have replaced the X head screws with allen type (used on the fairing )so now it looks like part of the bike :)
I have seen smaller ballasts so if these go bad i would go for them untill then i am enjoying what i have.
-
I wanted to give this topic a bump since it took me a bit of searching to find it. Good writeup on the install...question for Anik however...did you have to trim the tabs on the bulb for it to fit?
My orignial head light assembly fit well - the tabs aligned as the bike is EU model. I had ordered a new head light assembly from the US - where the tabs didnt align. I did it the hard way...used a dermel to shave of a little of the housing so the tabs could align, eventually i got tired and just bent the tabs ...so one side i have the housing altered and the other side the the holder tab is bent. Have not noticed any difference in the way the beam focuses.
-
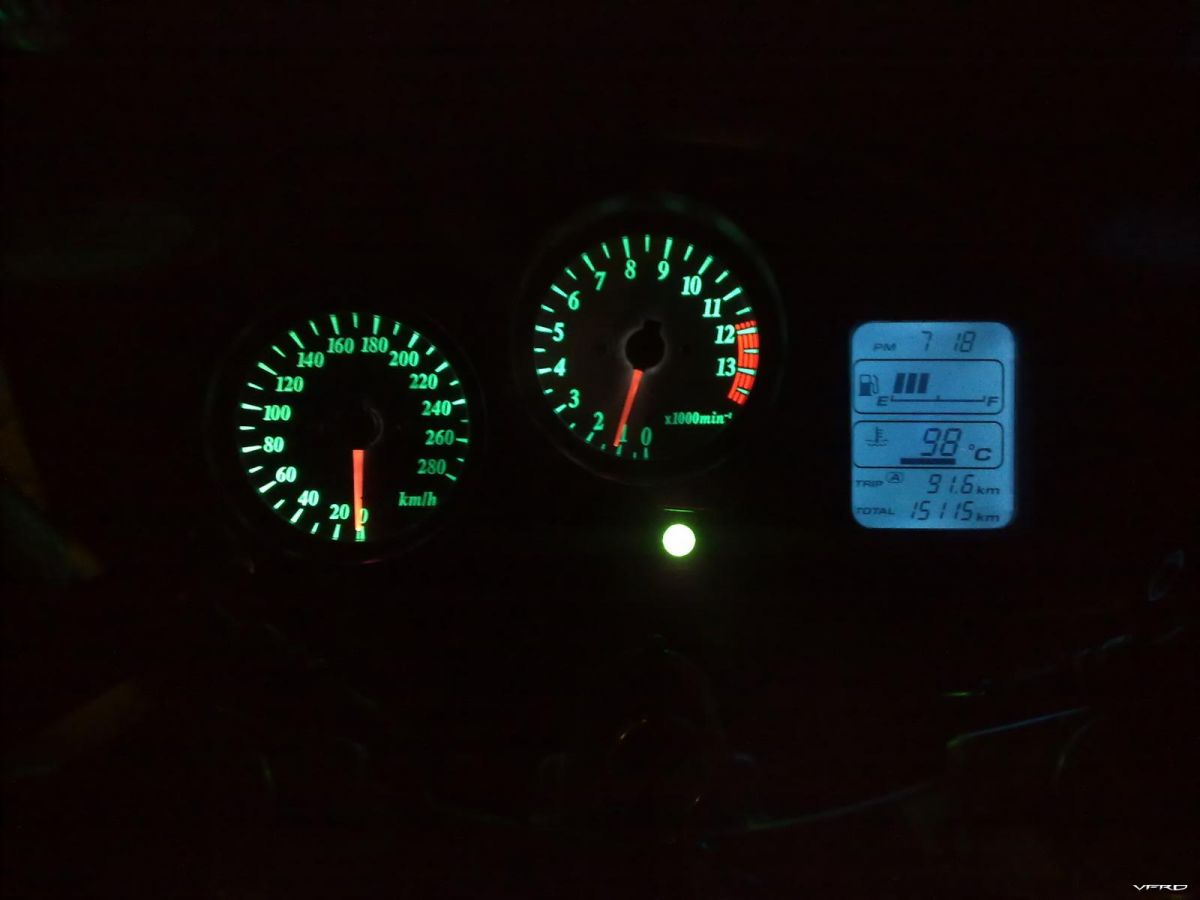
So what settings have you all kept the Shift light at ?
SHIFT LIGHT @ 5900 x 2 = 11800 RPM
LAUNCH RPM @ ?
LAUNCH LIMIT @ ?
Was wondering if i could use the LAUNCH RPM to check the correct idle speed @ 1200 RPM as disabling this is easy.
-
Which one of the three versions is the correct one? :unsure:
Bleeding order
- Front Brake
- Right outer
- Left outer
- Rear brake
- Right Center Front
- Left Center Front
- PCV
- Rear Center (if you can't access the bleeds, may have to remove the wheel and caliper and move it to 2 o'clock position)
- Rear Outer
Get speed bleeders fitted - saves time and effort.
-
Added the Raptor Shift light over the weekend. Wiring done as follows..
1) Power : Didnt want to take chances with anything related to engine so tapped into the "Black/Red" wire heading to the Flasher. Its a direct power source from fuse#3.
2) Ground : took it straight to the frame
3) Pulse : connected to the coil.
4) Launch Mode : Wire left it open (not connected to anything)
One QUERY
- WHAT is the difference between LAUNCH mode and SHIFT mode ?
- Anyone used this feature.
No one ?
-
Added the Raptor Shift light over the weekend. Wiring done as follows..
1) Power : Didnt want to take chances with anything related to engine so tapped into the "Black/Red" wire heading to the Flasher. Its a direct power source from fuse#3.
2) Ground : took it straight to the frame
3) Pulse : connected to the coil.
4) Launch Mode : Wire left it open (not connected to anything)
One QUERY
- WHAT is the difference between LAUNCH mode and SHIFT mode ?
- Anyone used this feature.
-
Great stuff
for novices like me this sounds very volatile - hope you have fitted a fire extinguisher on the bike or near by
good luck - interested to know the dyno numbers
-
Scratch this idea!
I washed the bike the other day and barely got the LCD screen wet... and suddenly it's showing that my bike is only putting out 9 volts. Once it completely dried out, it consistently shows that it's getting over 15 volts. My multimeter tells me that my custom voltmeter is lying to me...
Oh well, it was a $30 learning experience!
guess it picked some moisture during the washing
-
-
If a bulb is blown its resistance is infinite high? How can low impedence give you a blown indication? Do you mean the opposite? They probably have a 470 ohm reisister in there. I have been changing these darned things out seems like twice a year now, LEDs and 100,000 hours sounds much better to me. IF THE FI LIGHT IS BLOWN how does the ECM deal with that, is this just speculation? Dont tell me the fi light comes on HEH :cheerleader:
You are right - its the other way around...brain :biggrin: not thinking straight in the heat of excitement :goofy:
Just a speculation - let me know if it works for you
-
I ordered white LED replacements for my dash today, I dont care about changing the color I just wanted to save a few watts and help extend the life of my stator, ordered the mini ones too for the nuetral, highbeem, fi lights too, I ordered an extra of each type in case I get bad ones
6 | WLED-x4 LED bulb | $ 2.59 |
90 Degree White WLED-W4-x 1.00 - DASH BACKLIGHTING
----------------------------------------------------------------
3 | WLED-xHP High Power LED bulb | $ 4.95 |
Pure White WLED-WHP - TURN SIGNALS
----------------------------------------------------------------
5 | 24-xHP Wedge Base LED bulb | $ 2.49 |
White 24-WHP - FI, NUETRAL, OIL PRESSURE, HI BEAM indicators
----------------------------------------------------------------
Recommend not to change the FI bulb - since the resistance is so low on the LED's the PCM will assume its blown
rest should be fine. I had done the same. they look great - have put the 6 LED bulbs on the dash - they are nice and bright.
Will post pictures later
-
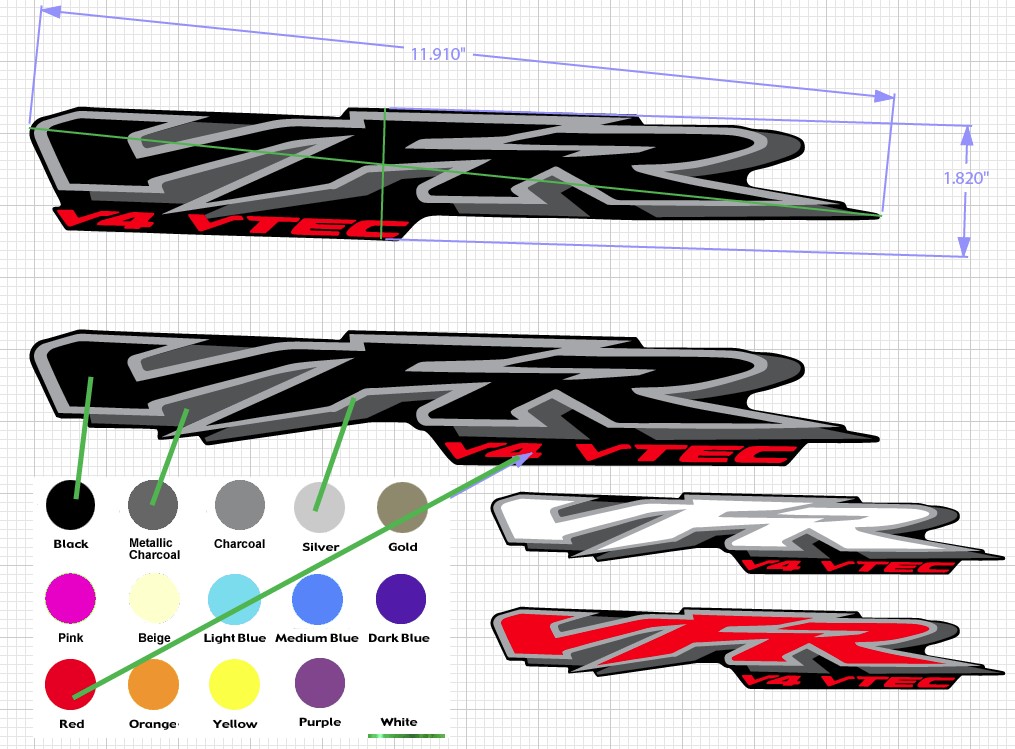
I've just received my fairings, luggage, tank and fenders returned to me from the painter and am now in need of some decals. I'm looking for anyone who has success finding the larger decals (VFR V4 VTEC) which fit on the left and right body panels. I can get the Honda wings easy enough but haven't had much luck finding the others. I've included a post from another forum which is exactly what I'm looking for.
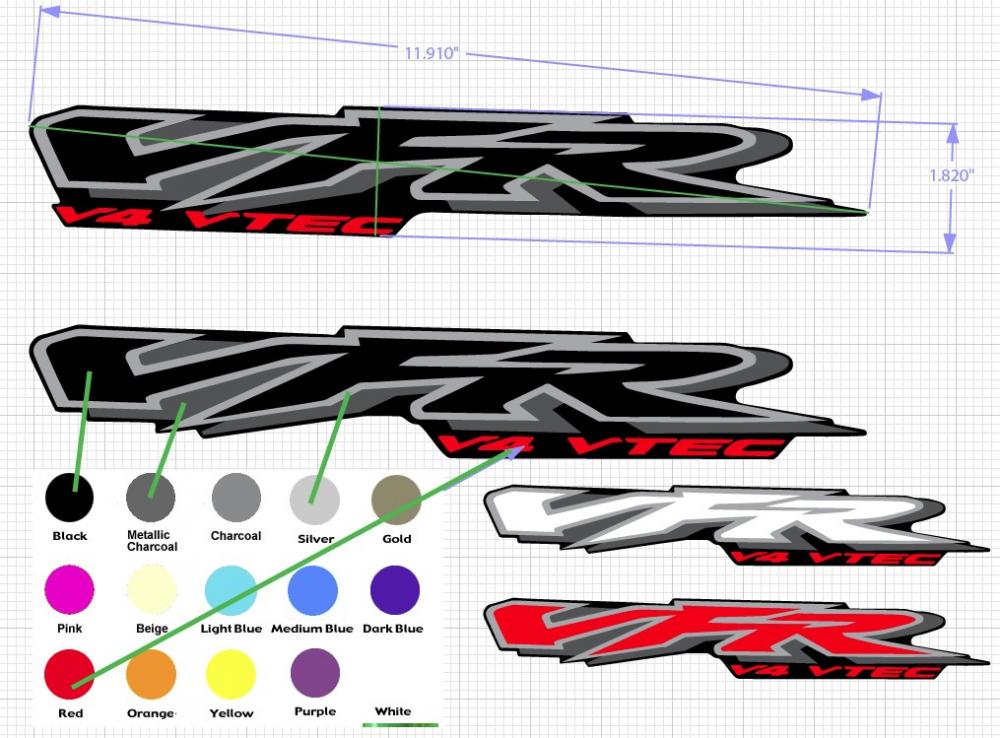
Try here VTEC Decals
you may have to scroll down
-
so which type of PIN was used / thanks
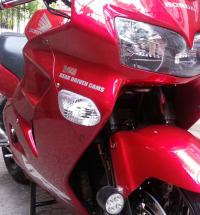
Acrylic Mirror Extenders - with LED's
in Modifications
Posted
I was looking at a flushed / glow and frosted look. With the LED in the front - the lights will be seen...