


y2kvfr
-
Posts
941 -
Joined
-
Last visited
-
Days Won
1
Content Type
Forums
Profiles
Gallery
Blogs
Downloads
Events
Posts posted by y2kvfr
-
-
This week is REALLY dragging at work.
No kidding! Gah this stinks!
-
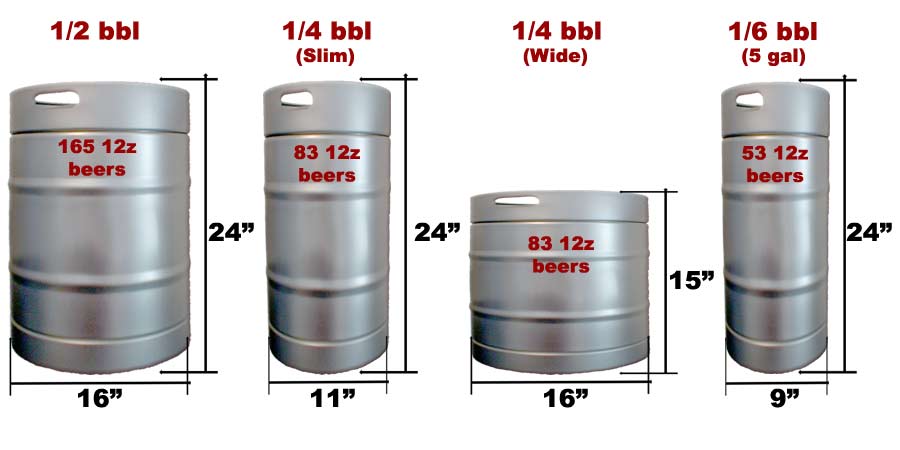
Tap is negligible for size. Are these half barrels or sixtols? I run two sixtols (5 gallon each) in my mini-fridge. Pic below shows dimensions.
-
True... true... curiosity and all that
-
perhaps I should use a computer and not my phone....
Just scroll down on the Eventbrite website. At least I can see them there.For some reason I can't see the attendees list. Years before I could...
-
For some reason I can't see the attendees list. Years before I could...
-
and you cannot choose the "Honey Badger 200"
The Honey Badger chooses you..............
Ain't that the truth...
-
Crud. Was hoping for more local. Been to Ft. Drum a number of times (former infantry)
-
I would love to do it. Where in NY, Poughkeepsie? I will have to see if the funding is available....
-
Oh my. I've been wanting to take this class for years. Poughkeepsie isn't too far from me...
-
Where's kkkken? I hear Jimmy Stewart voice... wh***s...
-
Never! ;)
-
Nope. This is a big azz ground connector. About 20 wires. The 'ness doesn't affect this block, but it is near it.
-
Timmy, for the love of God, take the time to get access the stupid orange ground plug and check it out. It is buried under electrical tape near the RR.
-
Registered. And, if I'm not mistaken, I'm finally at 1500 posts. Only took a decade.
-
I'm sure we can make that happen, Ken
-
In. Route to be determined. I just have to remember to register
-
Mine broke when I had the Givi tail rack w/o the upgrade (upgrade added some flat stock). I put some thread rod in, drilled a couple of holes along the that pipe, and tacked the rod in (well, a friend did, as I don't weld). He then welded that 'bung' back on with the rod in it. IIRC it was 3/8" threaded rod.
I took the subframe off the bike so as not to mess with the electrics when welding and to be able to clean everything up for the welding process.
-
I still have my Army issued poly-pro bottoms. I wear them when hunting. Unfortunately the top crapped out after several years of misuse.
Ebay is littered with the sleeping shirts... I'll have to check the local Goodwill. Thanks for the tip Timmy
-
Suzuki TS250. 1973 maybe.
My first bike was a '78 TS250... oh the
memorieshorror. -
Might have to burp the coolant since it got sideways. The fall could have introduced air via the overflow, no?
-
Gah. I'll be in NJ for a wedding prep. Boo. Riding has been crud for me this year. The only riding I've done is bicycling events - AngelRide & Jim Calhoon in CT and the Josh Billings RunAground in the Berkshires MA.

-
Mine slides about a 1/4" with the pillion seat on, so I imagine there will be quite a bit of slop without it. Timmy rides with the solo cover and a sargent front half. Hopefully he'll chime in (but that thing is a death trap anyway)
-
Scott,
Check the connections at the starter relay as well as at the starter. Make sure your battery connections are good and tight, and that the battery is of sufficient charge. If it still persists, go through the electrosport trouble shooting guide.
Do you have a voltmeter on the bike? I just added one to mine (fleabay special from China, it was somewhere around $7 shipped and is waterproof) It is handy to have to check every now and then to make sure your voltages are consistent.
-
New In Ct, Usa
in Official Welcome Forum
Posted
Doh! You didn't tell me you joined up! Welcome. We'll have to plan a wrenching session sometime when I get back from TMAC.
Of course, two yellers in the garage, something might explode.