


CHUCK2
-
Posts
585 -
Joined
-
Last visited
Content Type
Forums
Profiles
Gallery
Blogs
Downloads
Events
Posts posted by CHUCK2
-
-
 Why are they called 3D printers? They don't print. They do something more like create, true?
 -
Does anyone have these on a '98? If so, I'd like to know if these would keep the fairings from making contact with the ground in the event of dropping the bike.
-
-
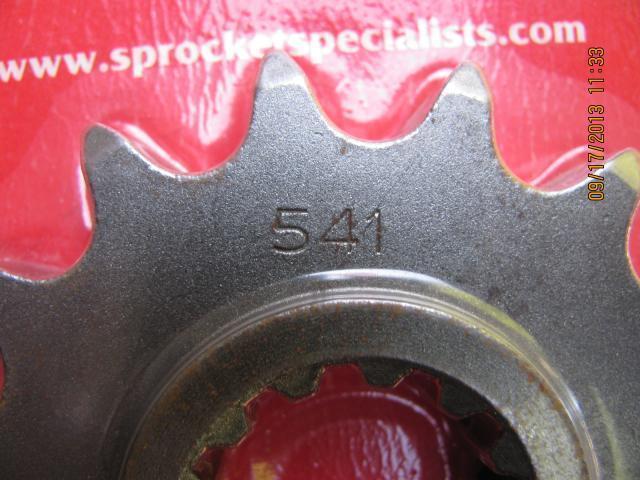
Thanks Naked. Your probably right. I suppose that I should just ask Sprocket Specialist. I was concerned it might be a reference to the chain it was designed to be used with. It does fit but moves a small amount on the shaft. Not sure if that's ok or not.
-
My 15t sprocket has the #541 on it. Does that mean anything?

-
If they were available from a company here in the US for that price, I'd most likely buy them. So, yes I do think it is a good price.
-
My K&N came with a very flexible rubberized frame. Did anyone else's come that way?
Or you taking about K&N 33-2700?
No. I'm referring to K&N HA8098.
-
Is there anything similar available that are easier to install that would provide enough protection just from the bike being dropped?
-
My K&N came with a very flexible rubberized frame. Did anyone else's come that way?
-
Boneman~
I understand now how you connected to the neg.battery post but(unless I'm comfused) you connected directly to the positive post. I'm just kinda curious, why the difference?
Also, with using the tail light as your switched source, does it matter any that it also functions as the brake light which of coarse isn't always on?
-
Boneman - I'm wondering why you didn't run the negitive wire to the battery terminal like you did the positive?
Also, when you spliced into the rear tail light, did you need to determine which wire was for the tail light & which was for the brake light? If so, how did you do that?
-
dutch - is that a piece of plastic that you cut off?
-
Veefer, are your pegs now located some what forward from their factory location as it looks in your pics? What year is that part of your bike?
-
Thanks Boneman. I'll be installing one of these soon so this info should be helpful.
-
Thanks vfrcapn for the idea. I do have hose clamps of various sizes but I wouldn't like the way that would look. For now, I tightly wrapped a thick layer of electrical tape around the stand where it hits the lowering block. Being black on black, it's hardly noticable & creates a nice soft sound when contact is made. Instead of the bang of metal to metal. Time will tell how well it lasts.
I do like how your mod is done & looks. That will last forever & is easily adjustable. If I had the means & ability I might do that myself. But for now, I like my simple way.
How do you put the stand down without the peg that you cut off?
Thanks again. I do appreciate your input.
-
I finished adjusting the brake pedal & would like to share some things I found to be interesting.
The black lever bracket is threaded. I sure would have liked to have known that to begin with. Then I could have understood how this adjustment works. It did not create any problem & became obvious right away. Perhaps this would be common knowledge to most but I don't do this sort of thing everyday. I realize now if that bracket was not threaded it would have required a nut to be below it. The 2 nuts were easily visible on my bike. But in the pic above, the top nut is mostly hidden by the black rubber boot. I see it now but I did not before. I was confused. I was thinking the adjustment was made by only these 2 nuts some how & how could removing one make any difference. But now that I know the bracket is threaded, it makes perfect sense as I had mentioned it probably would once I got working on it.
I'm glad the threaded rod spins freely as long as the top nut is tightly treaded as far as it can be toward the master cylinder(which mine was not since I had loosened it when trying to make this adjustment originally) & can be moved around. This made removing that bracket & nut easy. Veefer, was the reason you used lock-tite because that threaded rod can spin? I made the adjustment as far as I could without cutting the rod. I end up having to lift my foot alittle bit off the peg for it to be on top of the pedal but it is less than before the adjustment. And no big deal to me.
I'm also glad that brake fluid does not leak when that rubber boot is removed. That would have rotted my socks big time.
Once that is all reassembled, adjusting the brake light switch was easy. I still have space for more adjustment without having to do anything to the spring.
Another interesting thing to me is, in the pics above, it appears that the foot pegs are positioned closer to the shift lever & brake pedal after the installation of the lowering blocks. Mine are located further away which I think I prefer. I'll be trying to post some pics I took soon.
-
Thanks Veefer but I DID understand that much from your first very well written & illustrated post. Doing it that way is beyond my capabilities though. And I think it would be easier & cheaper to pay someone to put a bead of weld or weld something in that same area to accomplish the same thing your bolt does.
One thing I am able to do is simply put a thick layer of electrical tape on the stand where it contacts the peg block which I'm considering doing at this point. That way,at least, it won't be metal to metal & they won't mar each other up.
With the brake pedal, I believe I understand how to take it apart to remove one of the nuts on the rod. But I can't quite picture how that will provide more adjustment for the pedal to be lowered though. It seems to me it would have the opposite effect. But I'm rather simple minded these days. It's probably one of those things which once I have it apart it will make perfect sense.
Can you confirm for me though that these blocks are NOT identical to each other? In other words, one will only fit on the right side & the other will only fit on the left side.
-
I just installed a set on my '98 & am having some of the same issues with them as other members have had. At the point, it's abit disappointing.
First though, there is a right & left side with these blocks & they will only install one way, correct?
One issue I'm facing is the kick stand hitting the block. I'm considering checking with a local welder to find out if a bead of weld(is there is such a thing?) or some object can be welded to the kick stand to prevent this unwanted contact. Does anyone here have welding expience to know if this is possible? If so, does it seem to be a good solution? I'm thinking that if the object is too thick, I could grind/file it down till I'm satisfied with the kick stands position when up.
Also, can anyone tell me if the stand is difficult to remove/install on a '98?
And the brake pedal is another issue. What needs to be done to remove the nut to provide more adjustment?
TIA.
-
Hopefully this isn't another one of my dumb questions, but why does HS refer to his bike as "veefalo"? A combination of VFR & Colorado?
-
Thanks Rice. It would be nice to have the tank completely out of the way. But I prefer there to be zero chance on the tank getting dropped,knocked over, or whatever & then having a messed up tank & a fuel spill to deal with. Siphoning sounds very easy anyway.
-
What a buzz kill you are, Veefer!

-
Thanks Sebspeed & Ripper. But I'd rather get these items installed before I get out & about on it. Although, it would sure suck if, after spending a lot of time on installation, there was an unknown problem beforehand. I'll take it on a short run to be sure all seems well first. That will also get everything up to temperature for the oil change which I'll be doing first.
-
Oh Farkle Me! I have several electrical accessories to install & my fuel tank is Fully-Full !!
Well....A siphoning I shall go. A siphoning I shall go. Hi Ho A Mary O A VFR O, A siphoning I shall go.
Just thought I'd share that with ya.
I did read several posts about different ways to siphon so I think it will easy enough to do.
-
Well,at this point they're going to be Spring time Mods apparently.
When the time comes that the weather is finally warm enough for me to work in the garage & I'm in the right frame of mind,I'll be installing(or at least trying to install) the following:
-TPX Radar Detector & LED Alert on a Control Mount
-FuzeBlock
-Gear Indicator
-Head Light Switch
-Volt Meter connected to a switch
-Peg Lwr.Blocks
I still have to figure out which colors of wire to get & where I'll use each color.Along with some how determining what length to buy. I do know the different gauges I will need.So I guess that's a start!
As for maitenance:
-Oil change with Mobil 1 Full Syn.10w40 & a K&N filter
-visually check,clean,lube various other things
I've never done much electrical work at all before so it's going to be interesting. Once I get started,which I'm getting anxious about, I feel as if things will go smoothly. Or so I hope. If I remember, I'll take pics as I go along.
Hmm..I still have to make room in the garage to be able to do this work. I guess my XR will have a new home on the patio under a tarp while I do all this. Perhaps the Honda mower as well.

Anyone Played With 3D Printer? Make Custom Bike Parts?
in Modifications
Posted
Well...I just don't understand. I mean...isn't printing like the act of putting something on paper? Either I'm missing something here or in my brain. Probably both.