WackenSS
-
Posts
234 -
Joined
-
Last visited
-
Days Won
6
Content Type
Forums
Profiles
Gallery
Blogs
Downloads
Events
Everything posted by WackenSS
-
That link does not work for me. My oem clutch was good and measured fine, I had some gunk in the slave but nothing serious. Seem that the springs from Dan is actually worn out and also seem like Barnett disc is worse than OEM 😐 Can't beat Honda OEM!
-
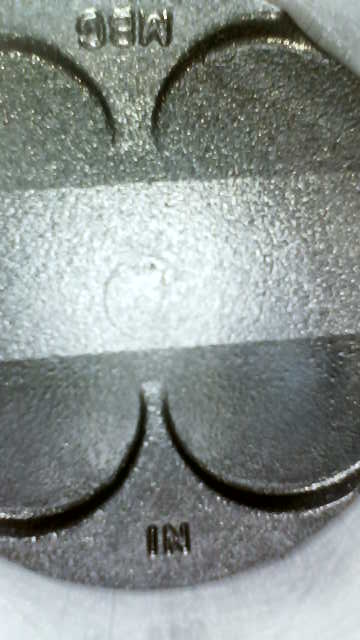
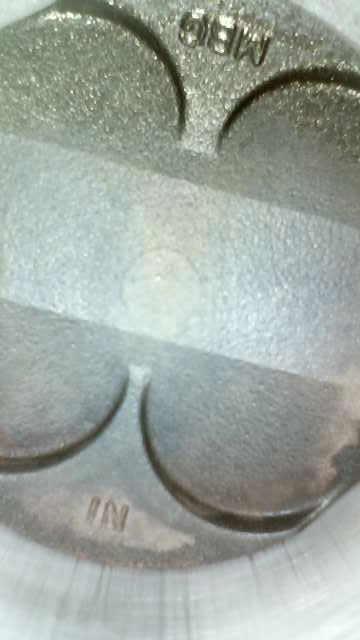
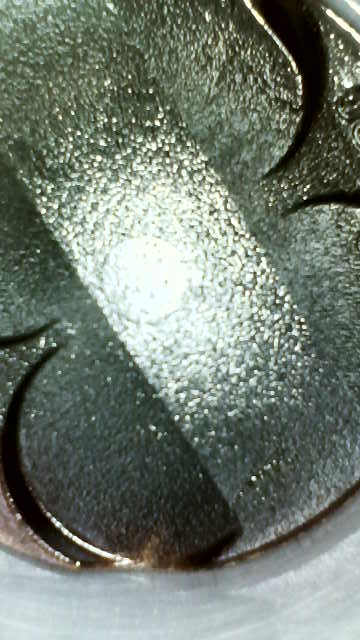
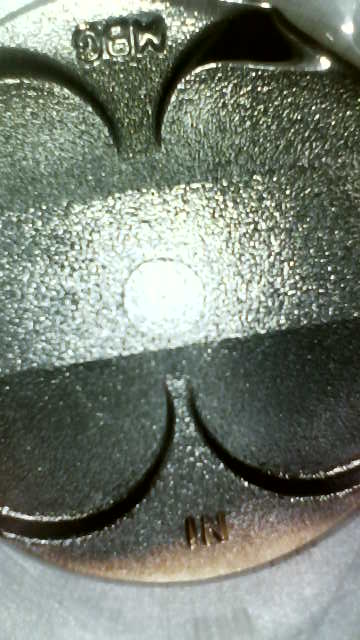
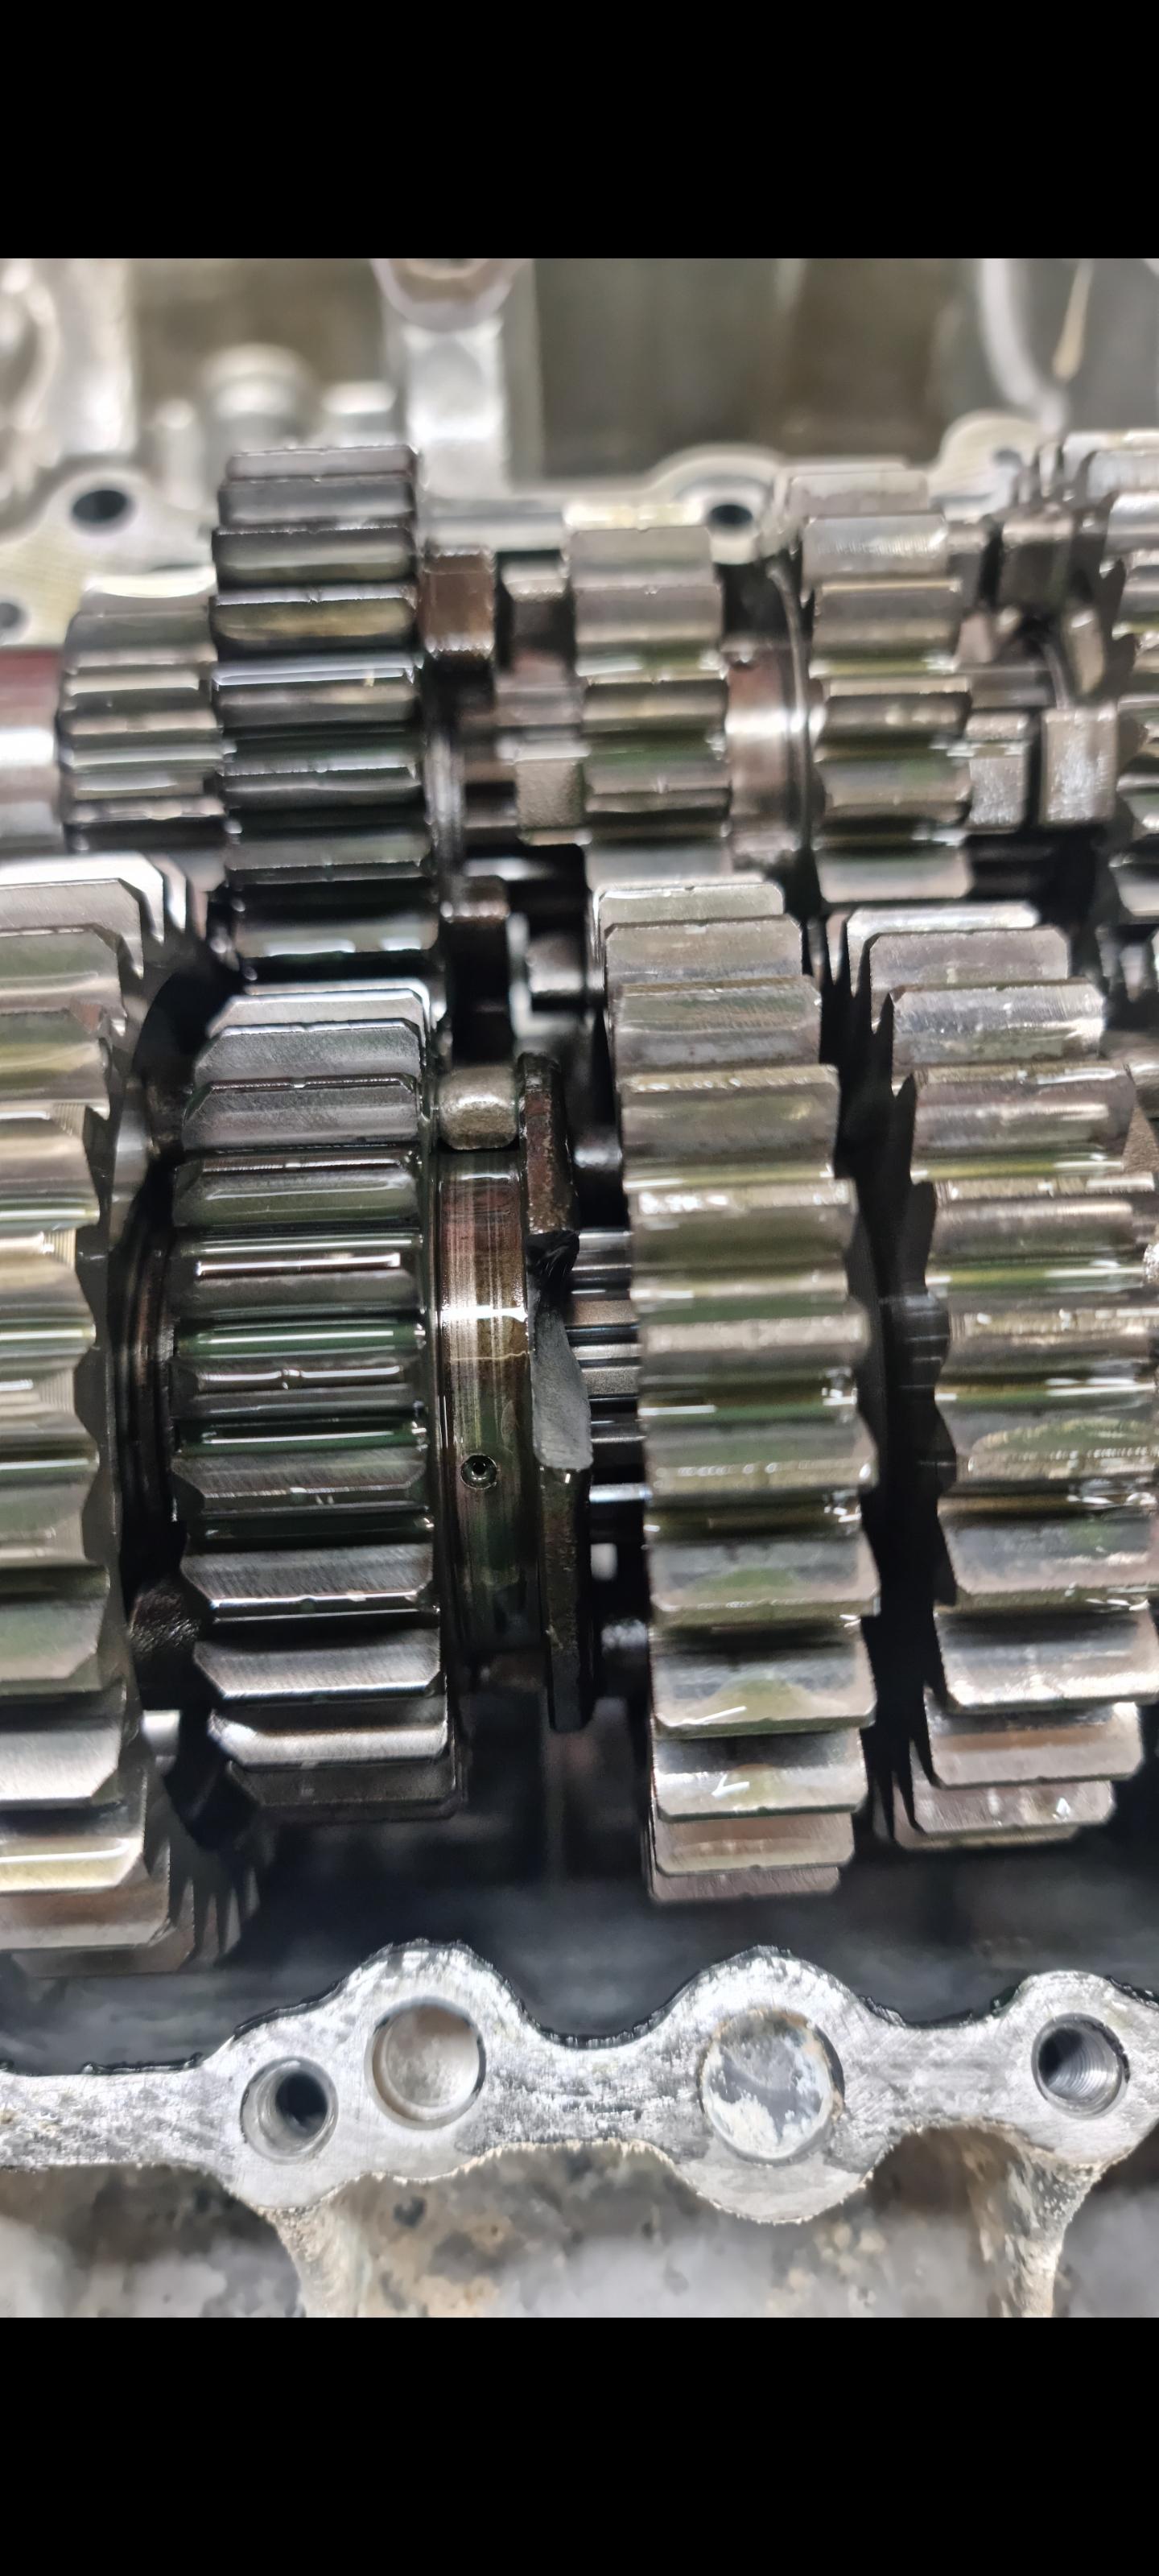
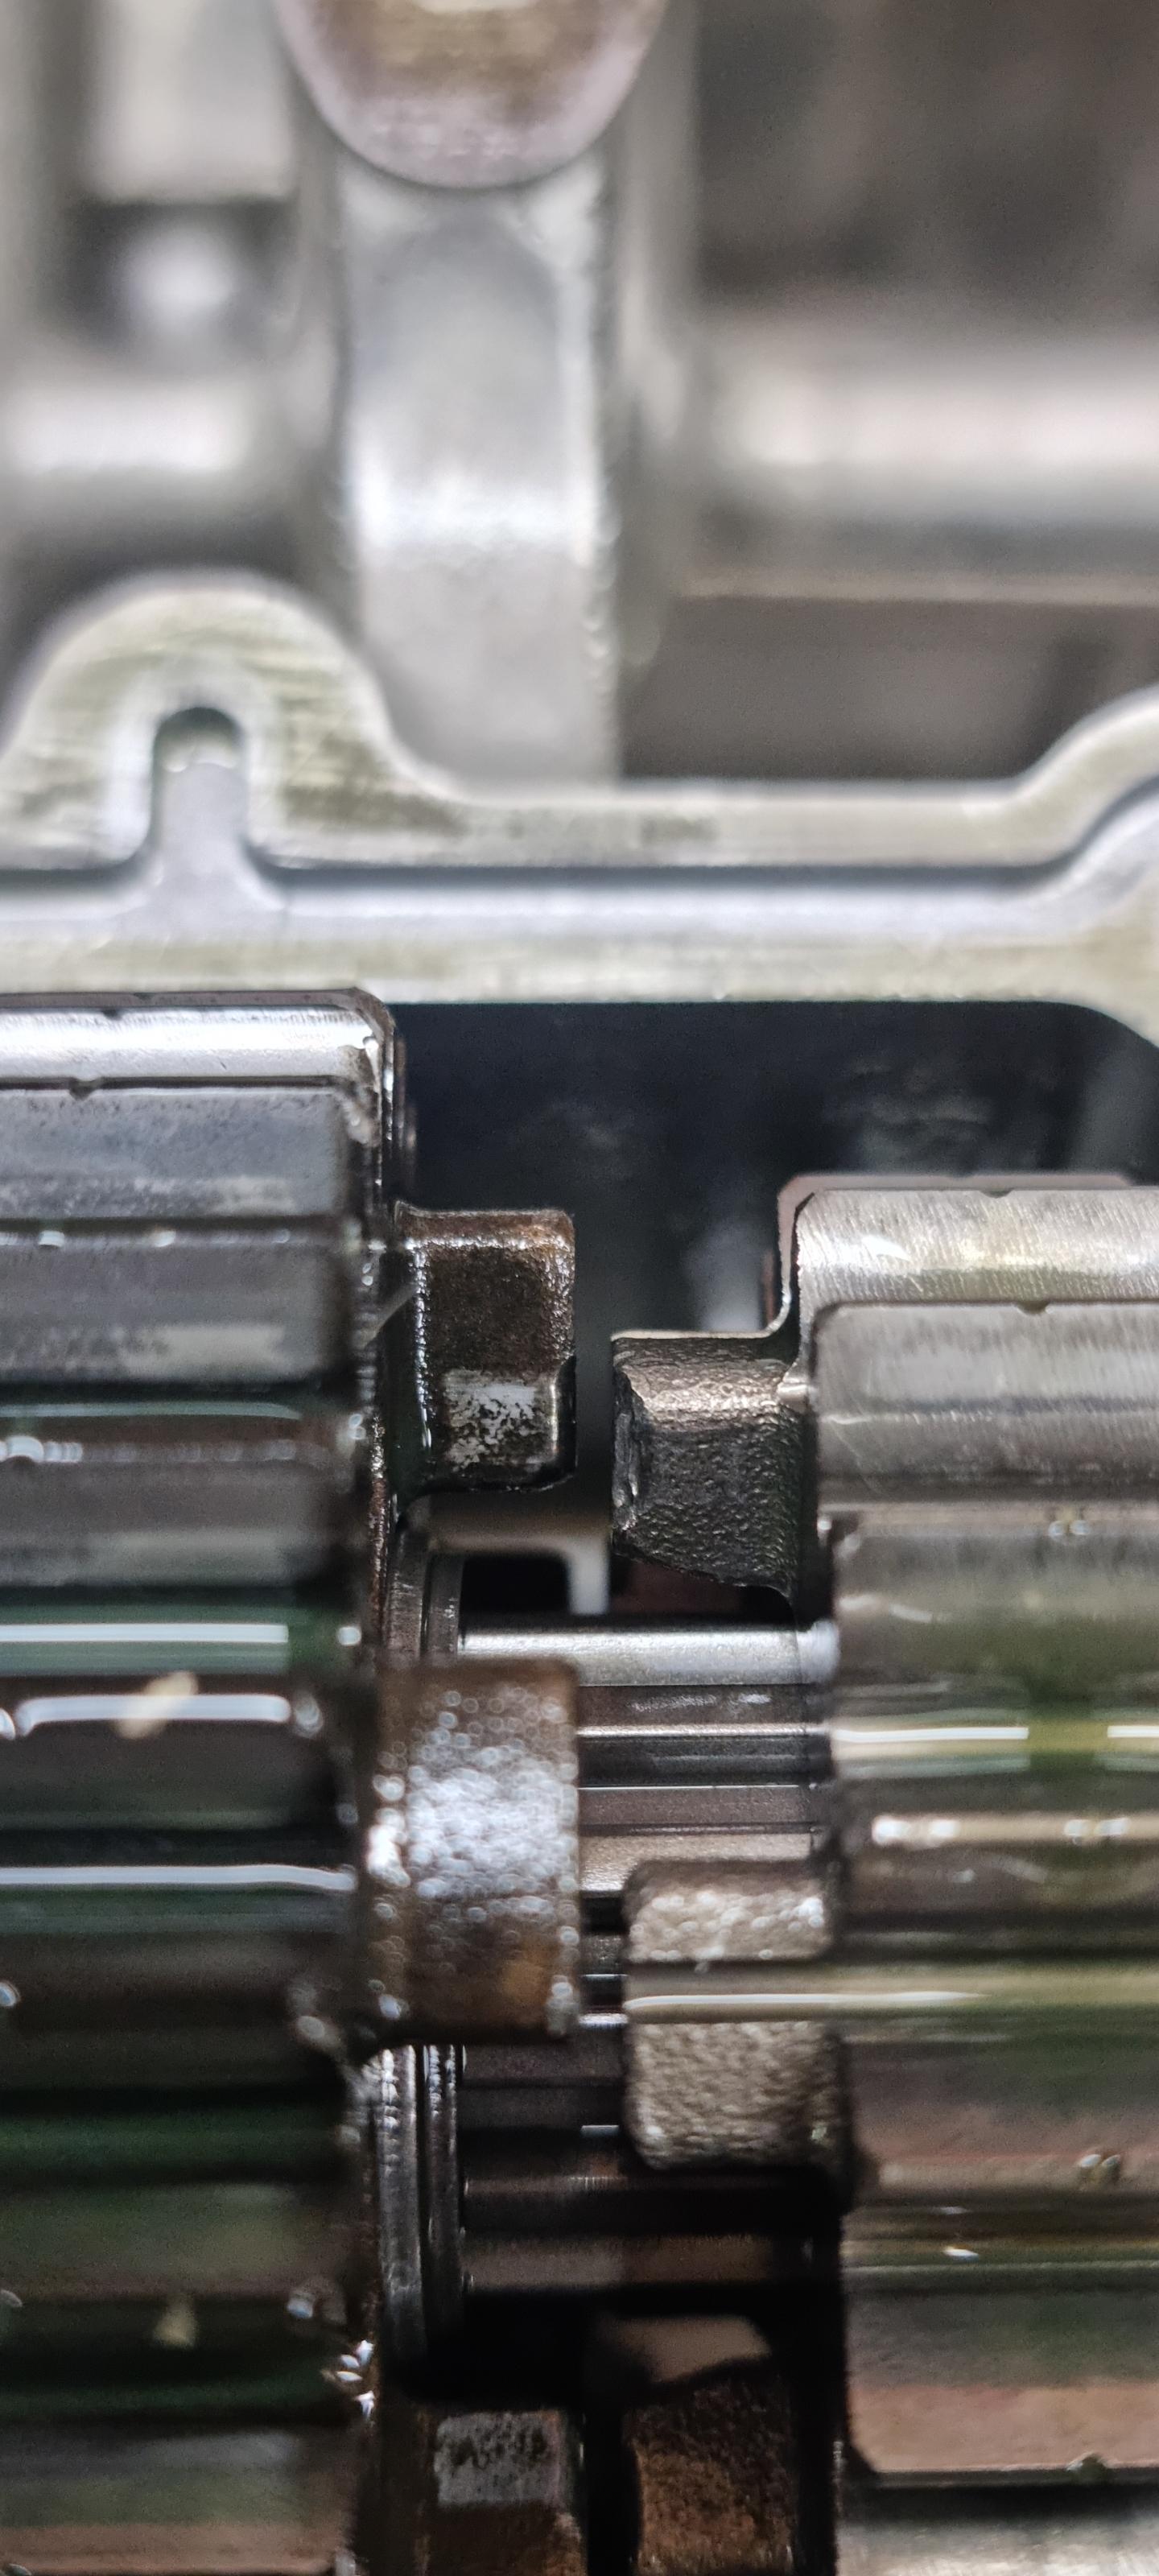
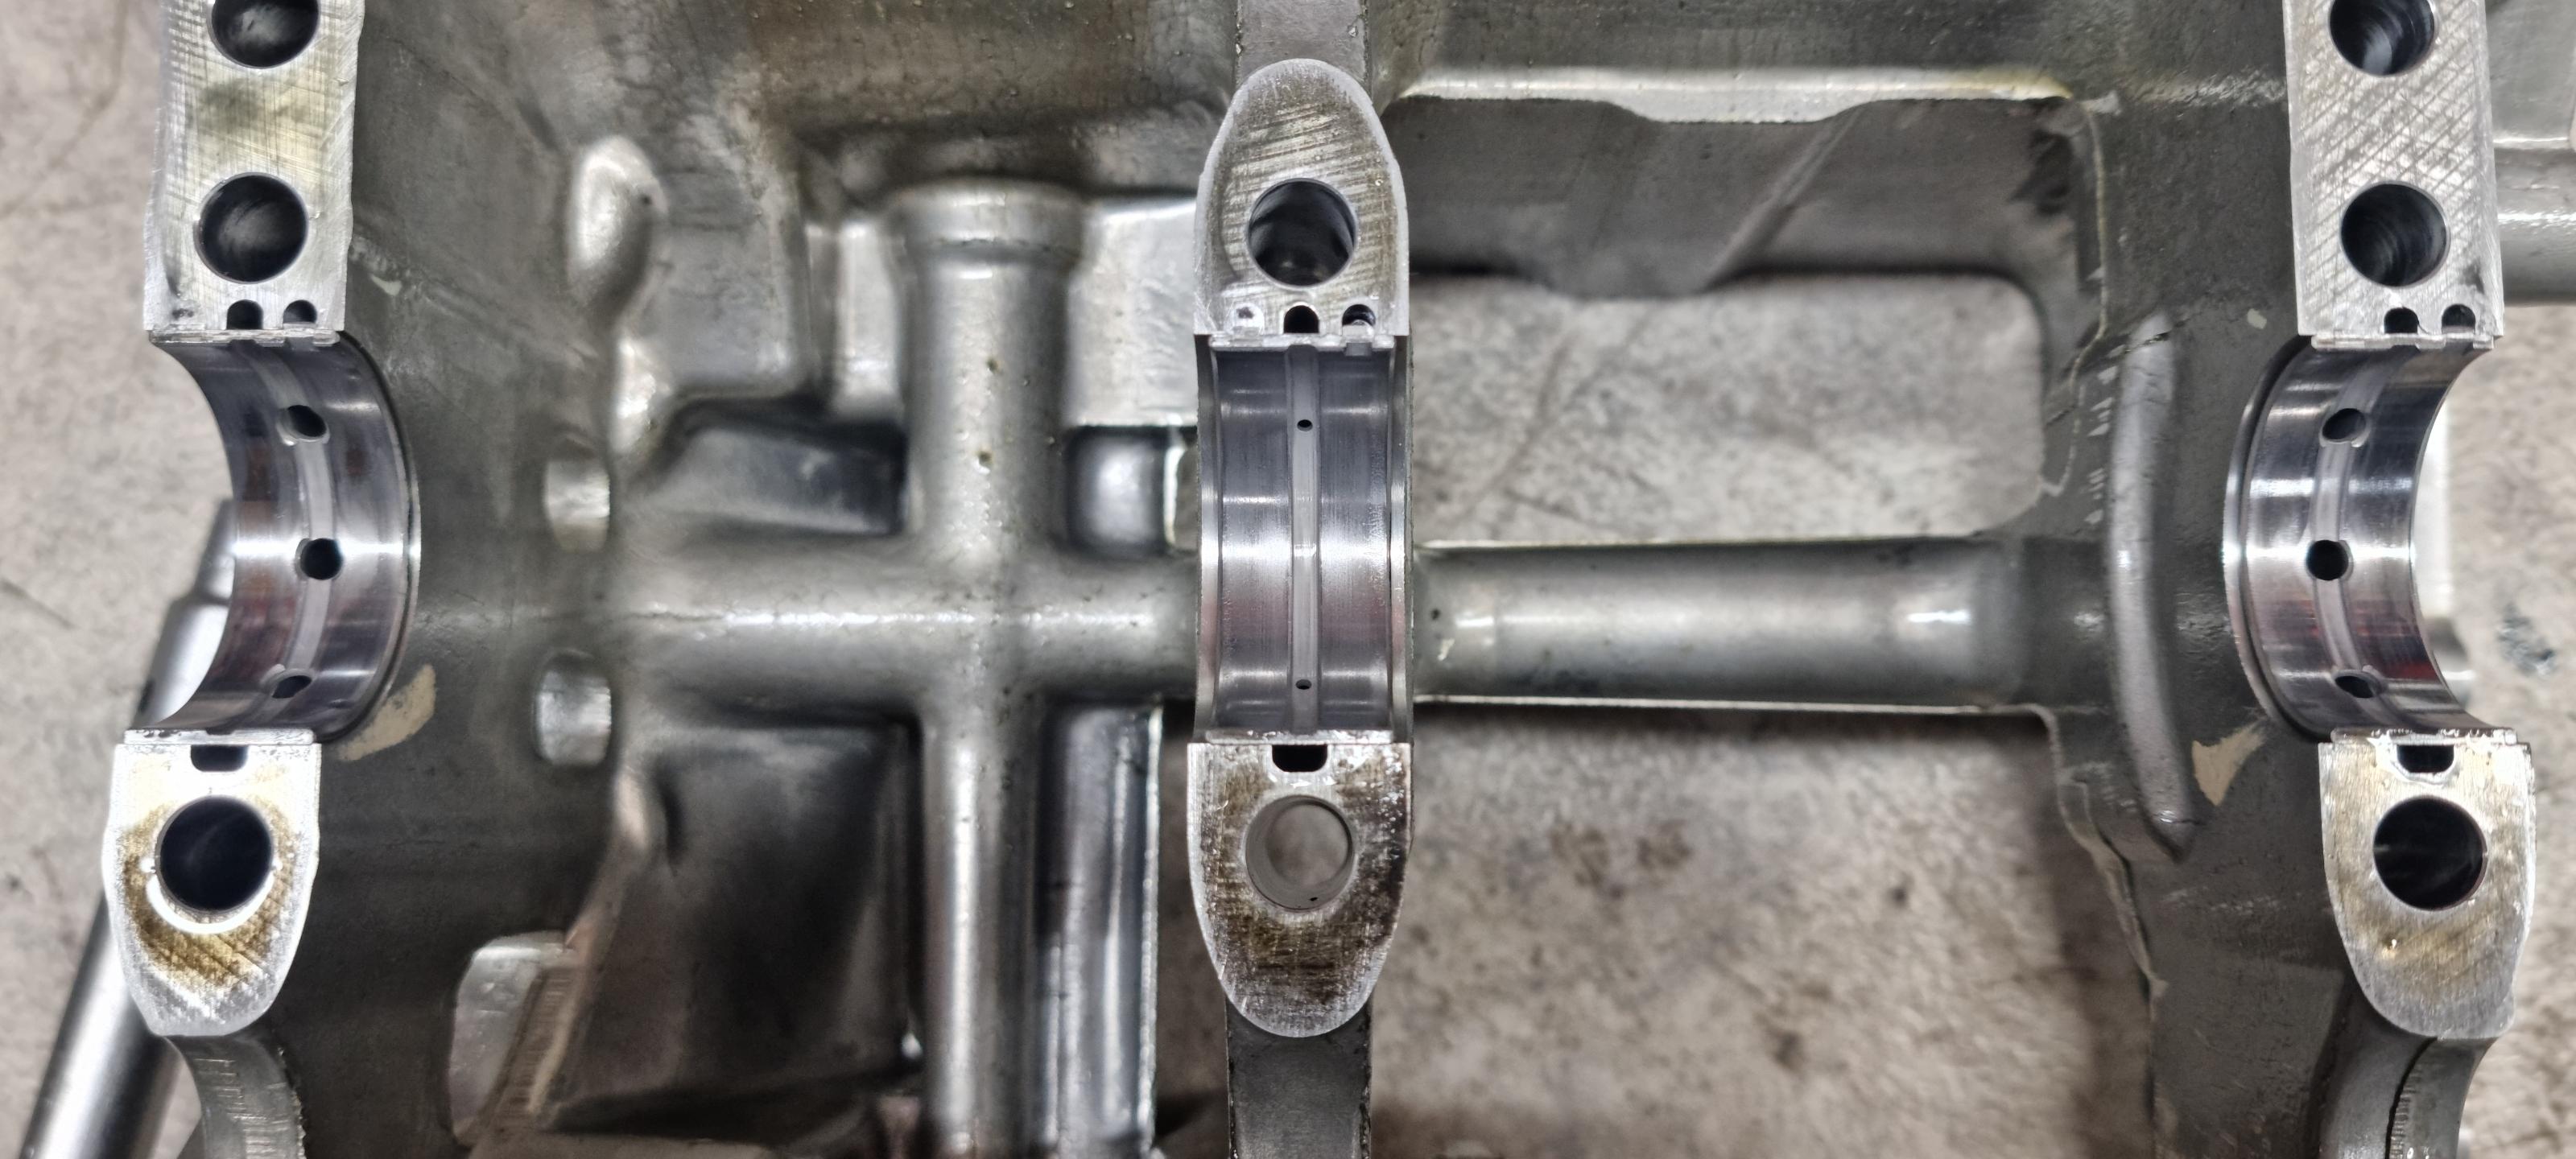
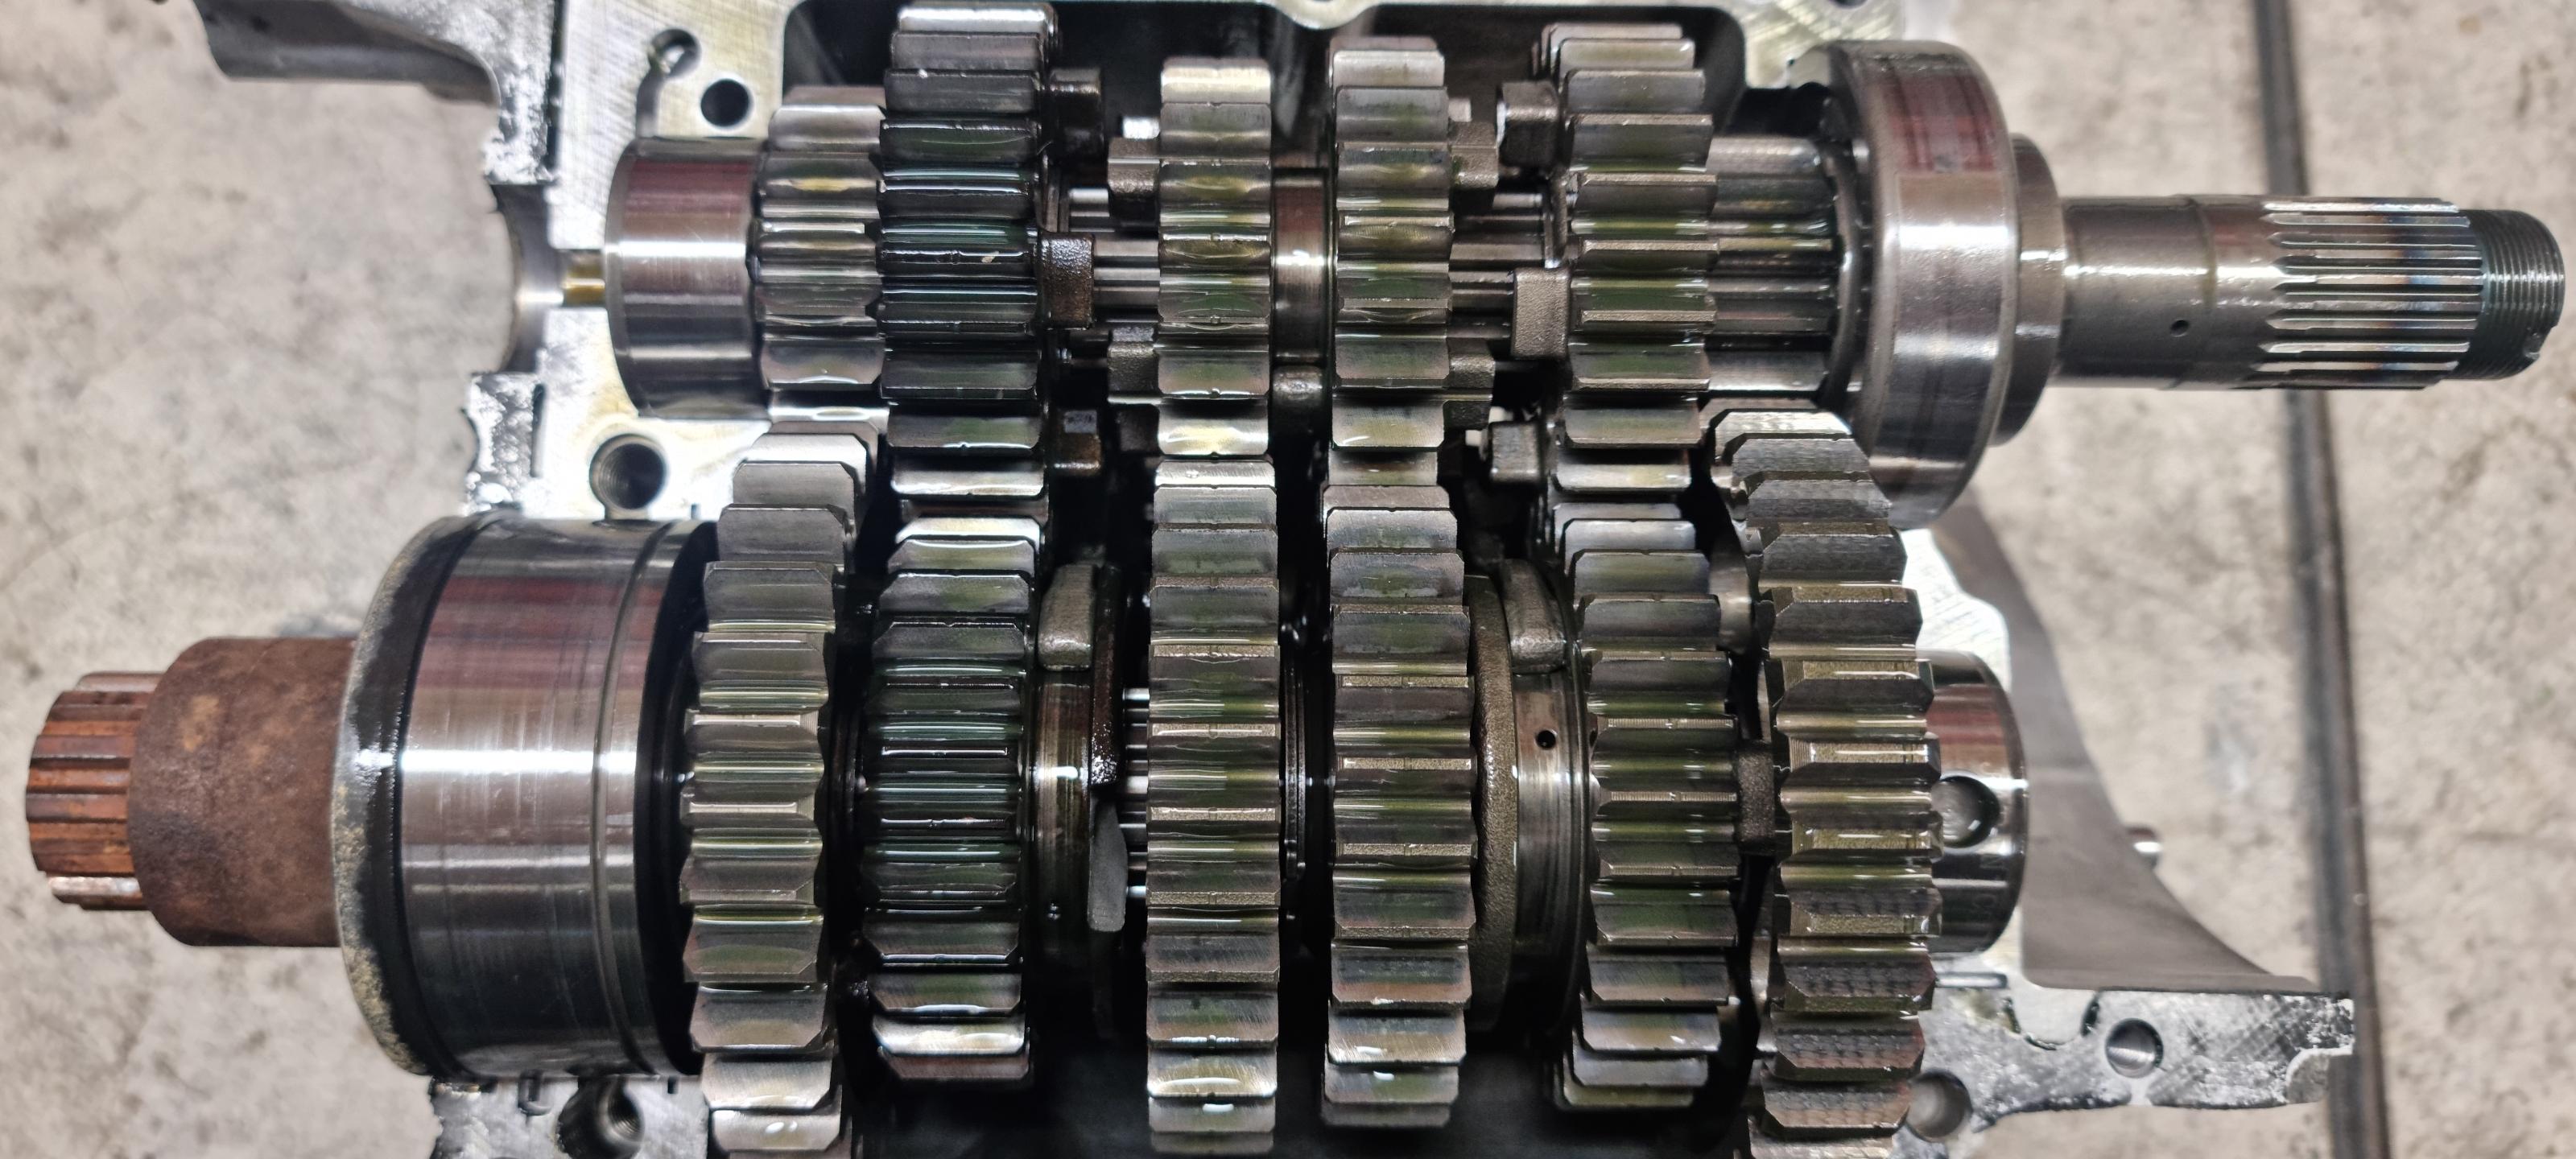
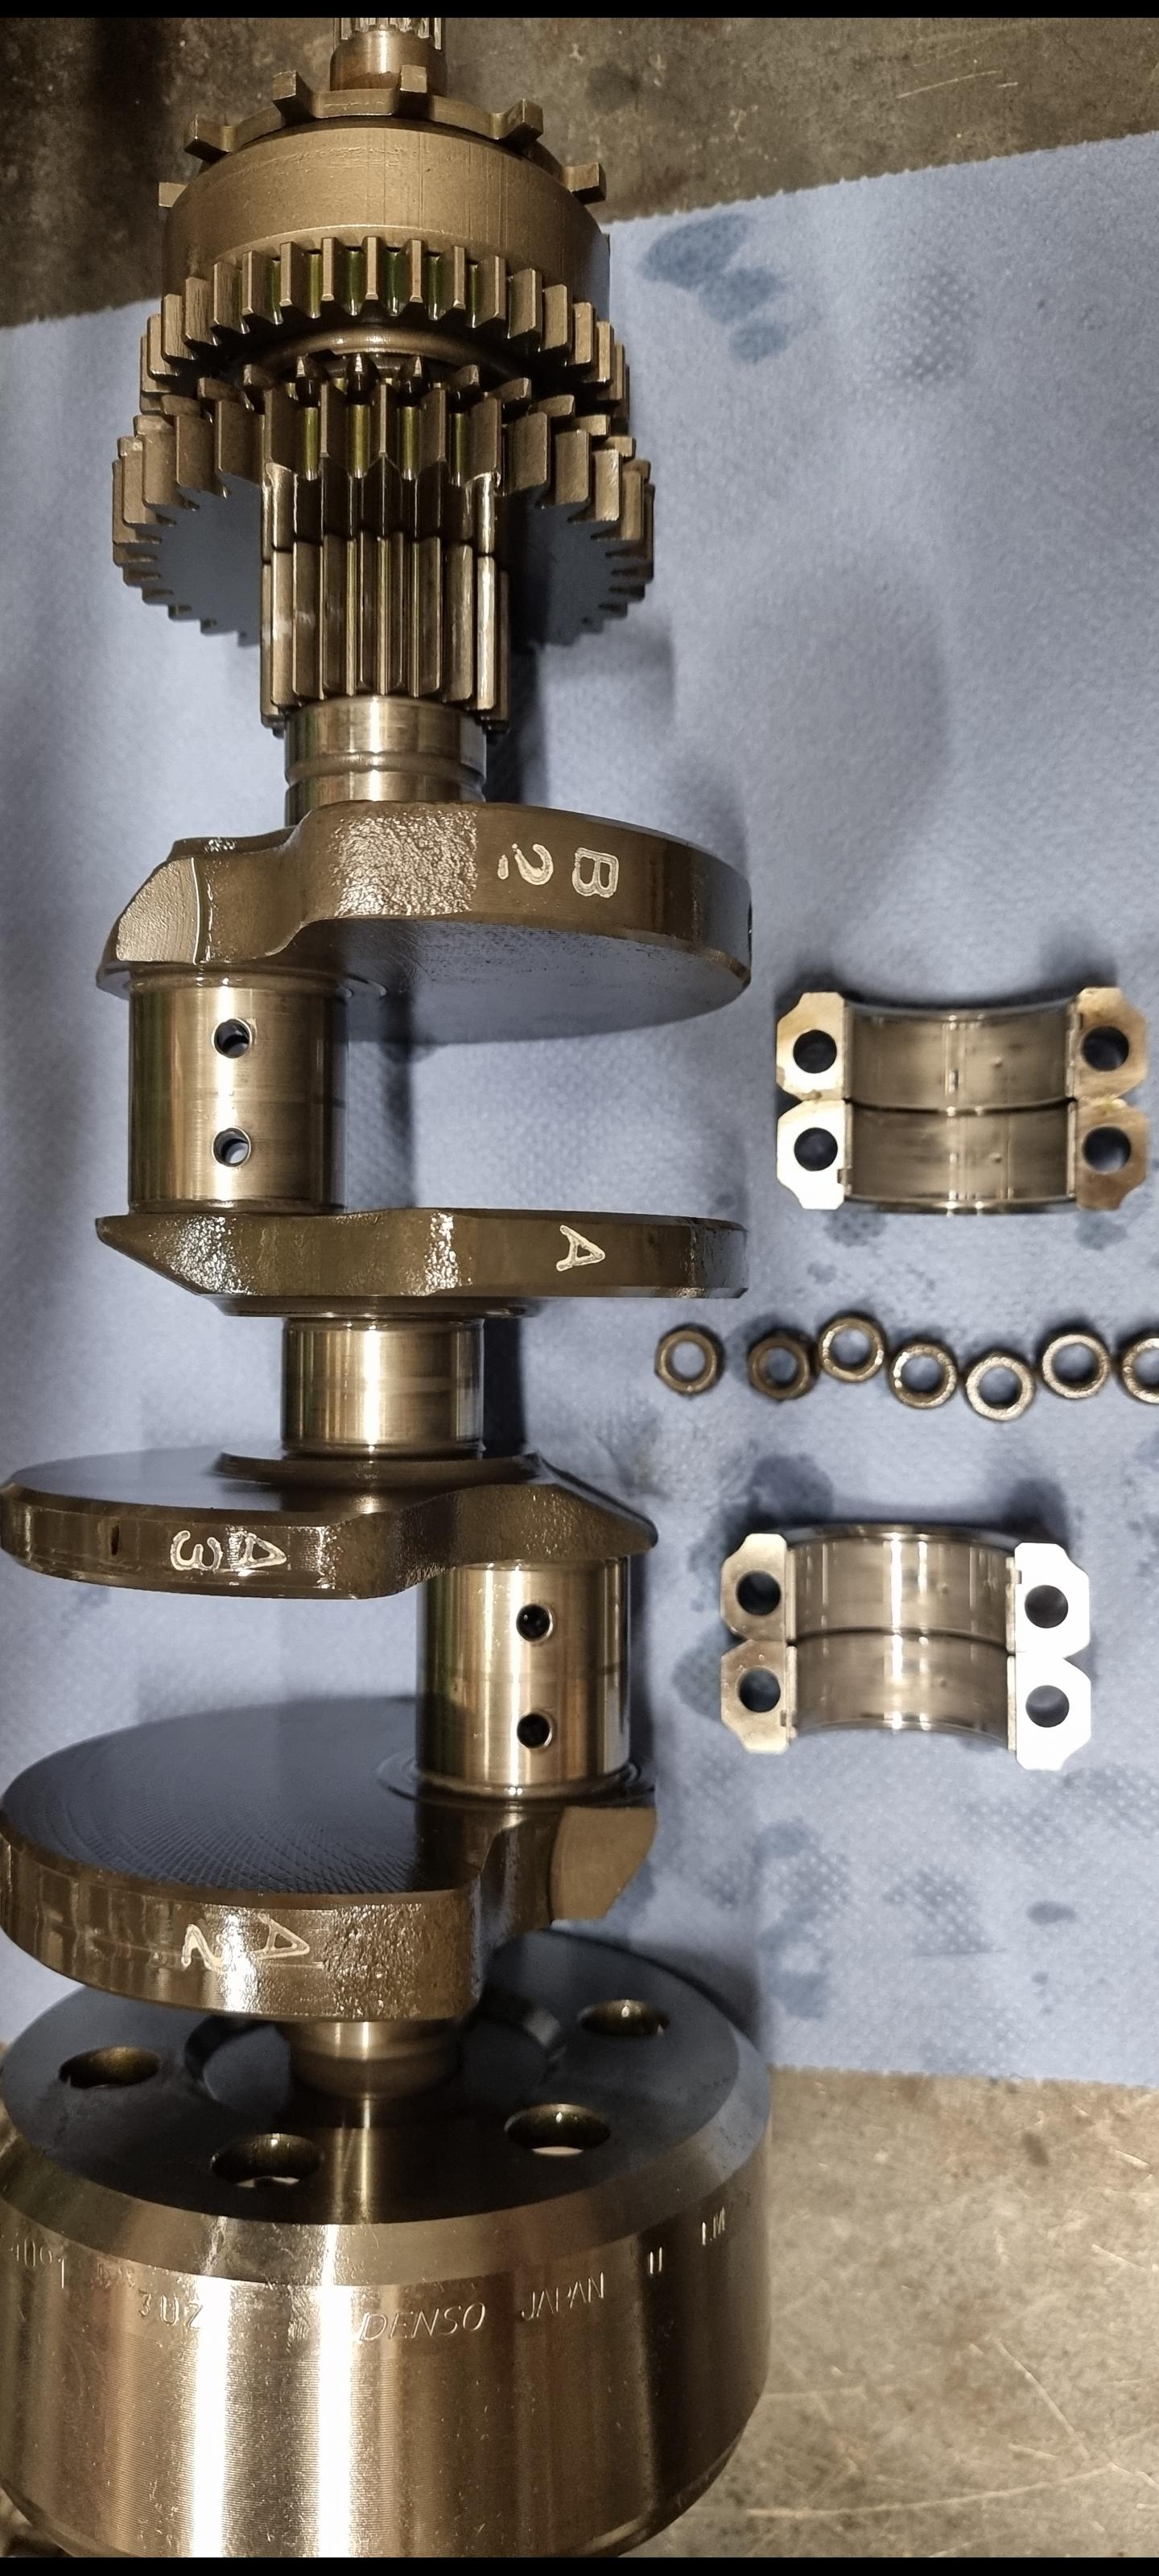
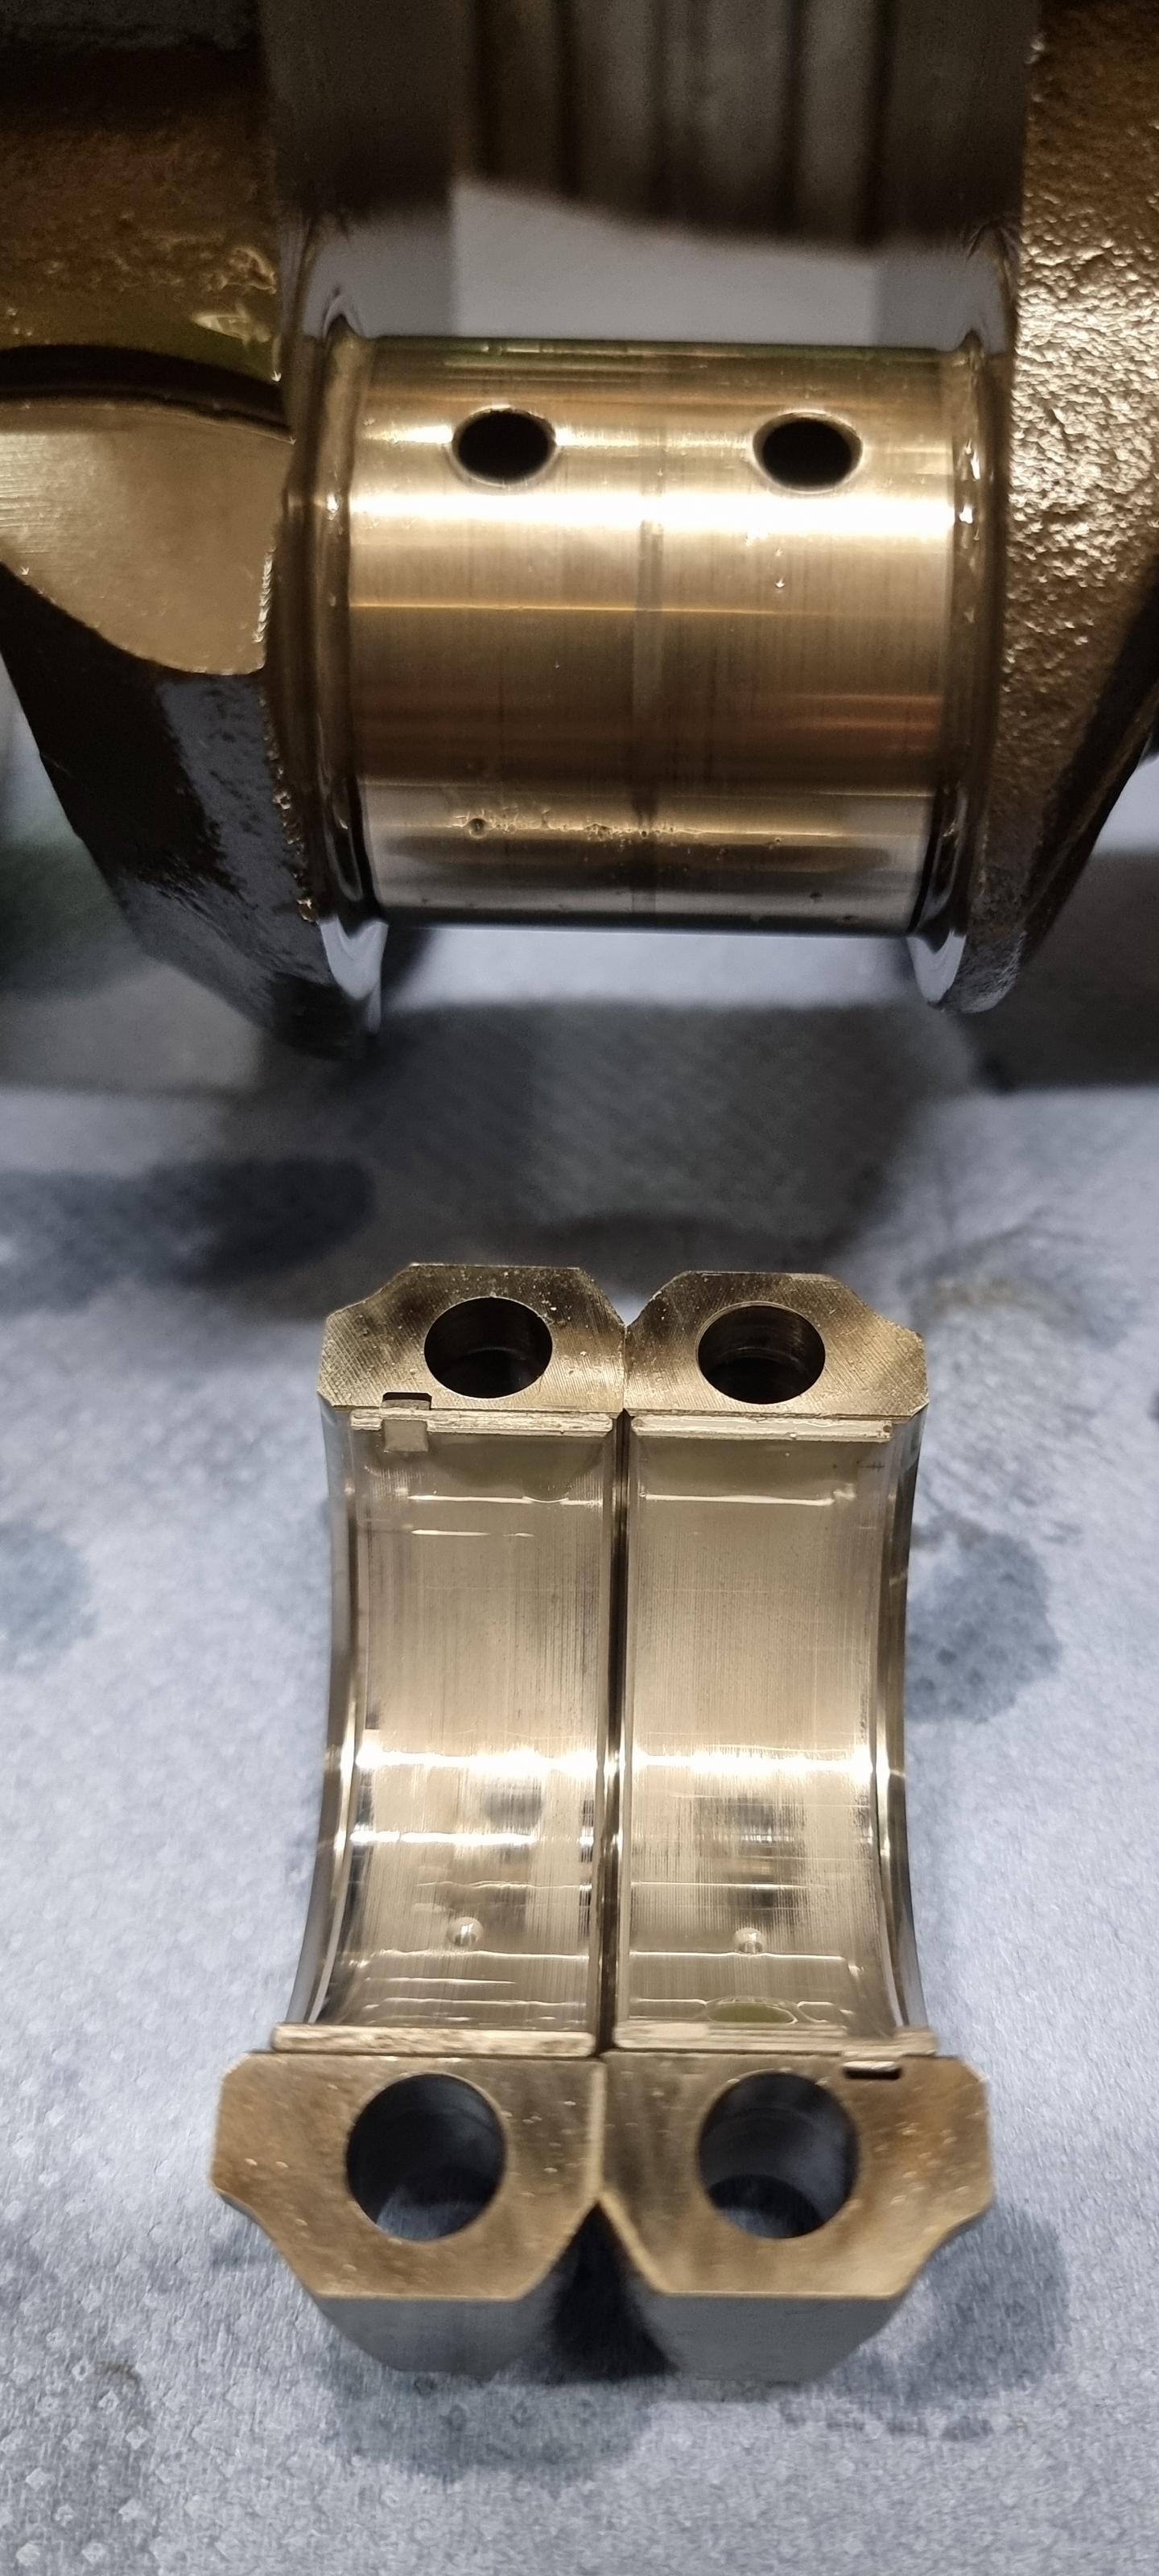
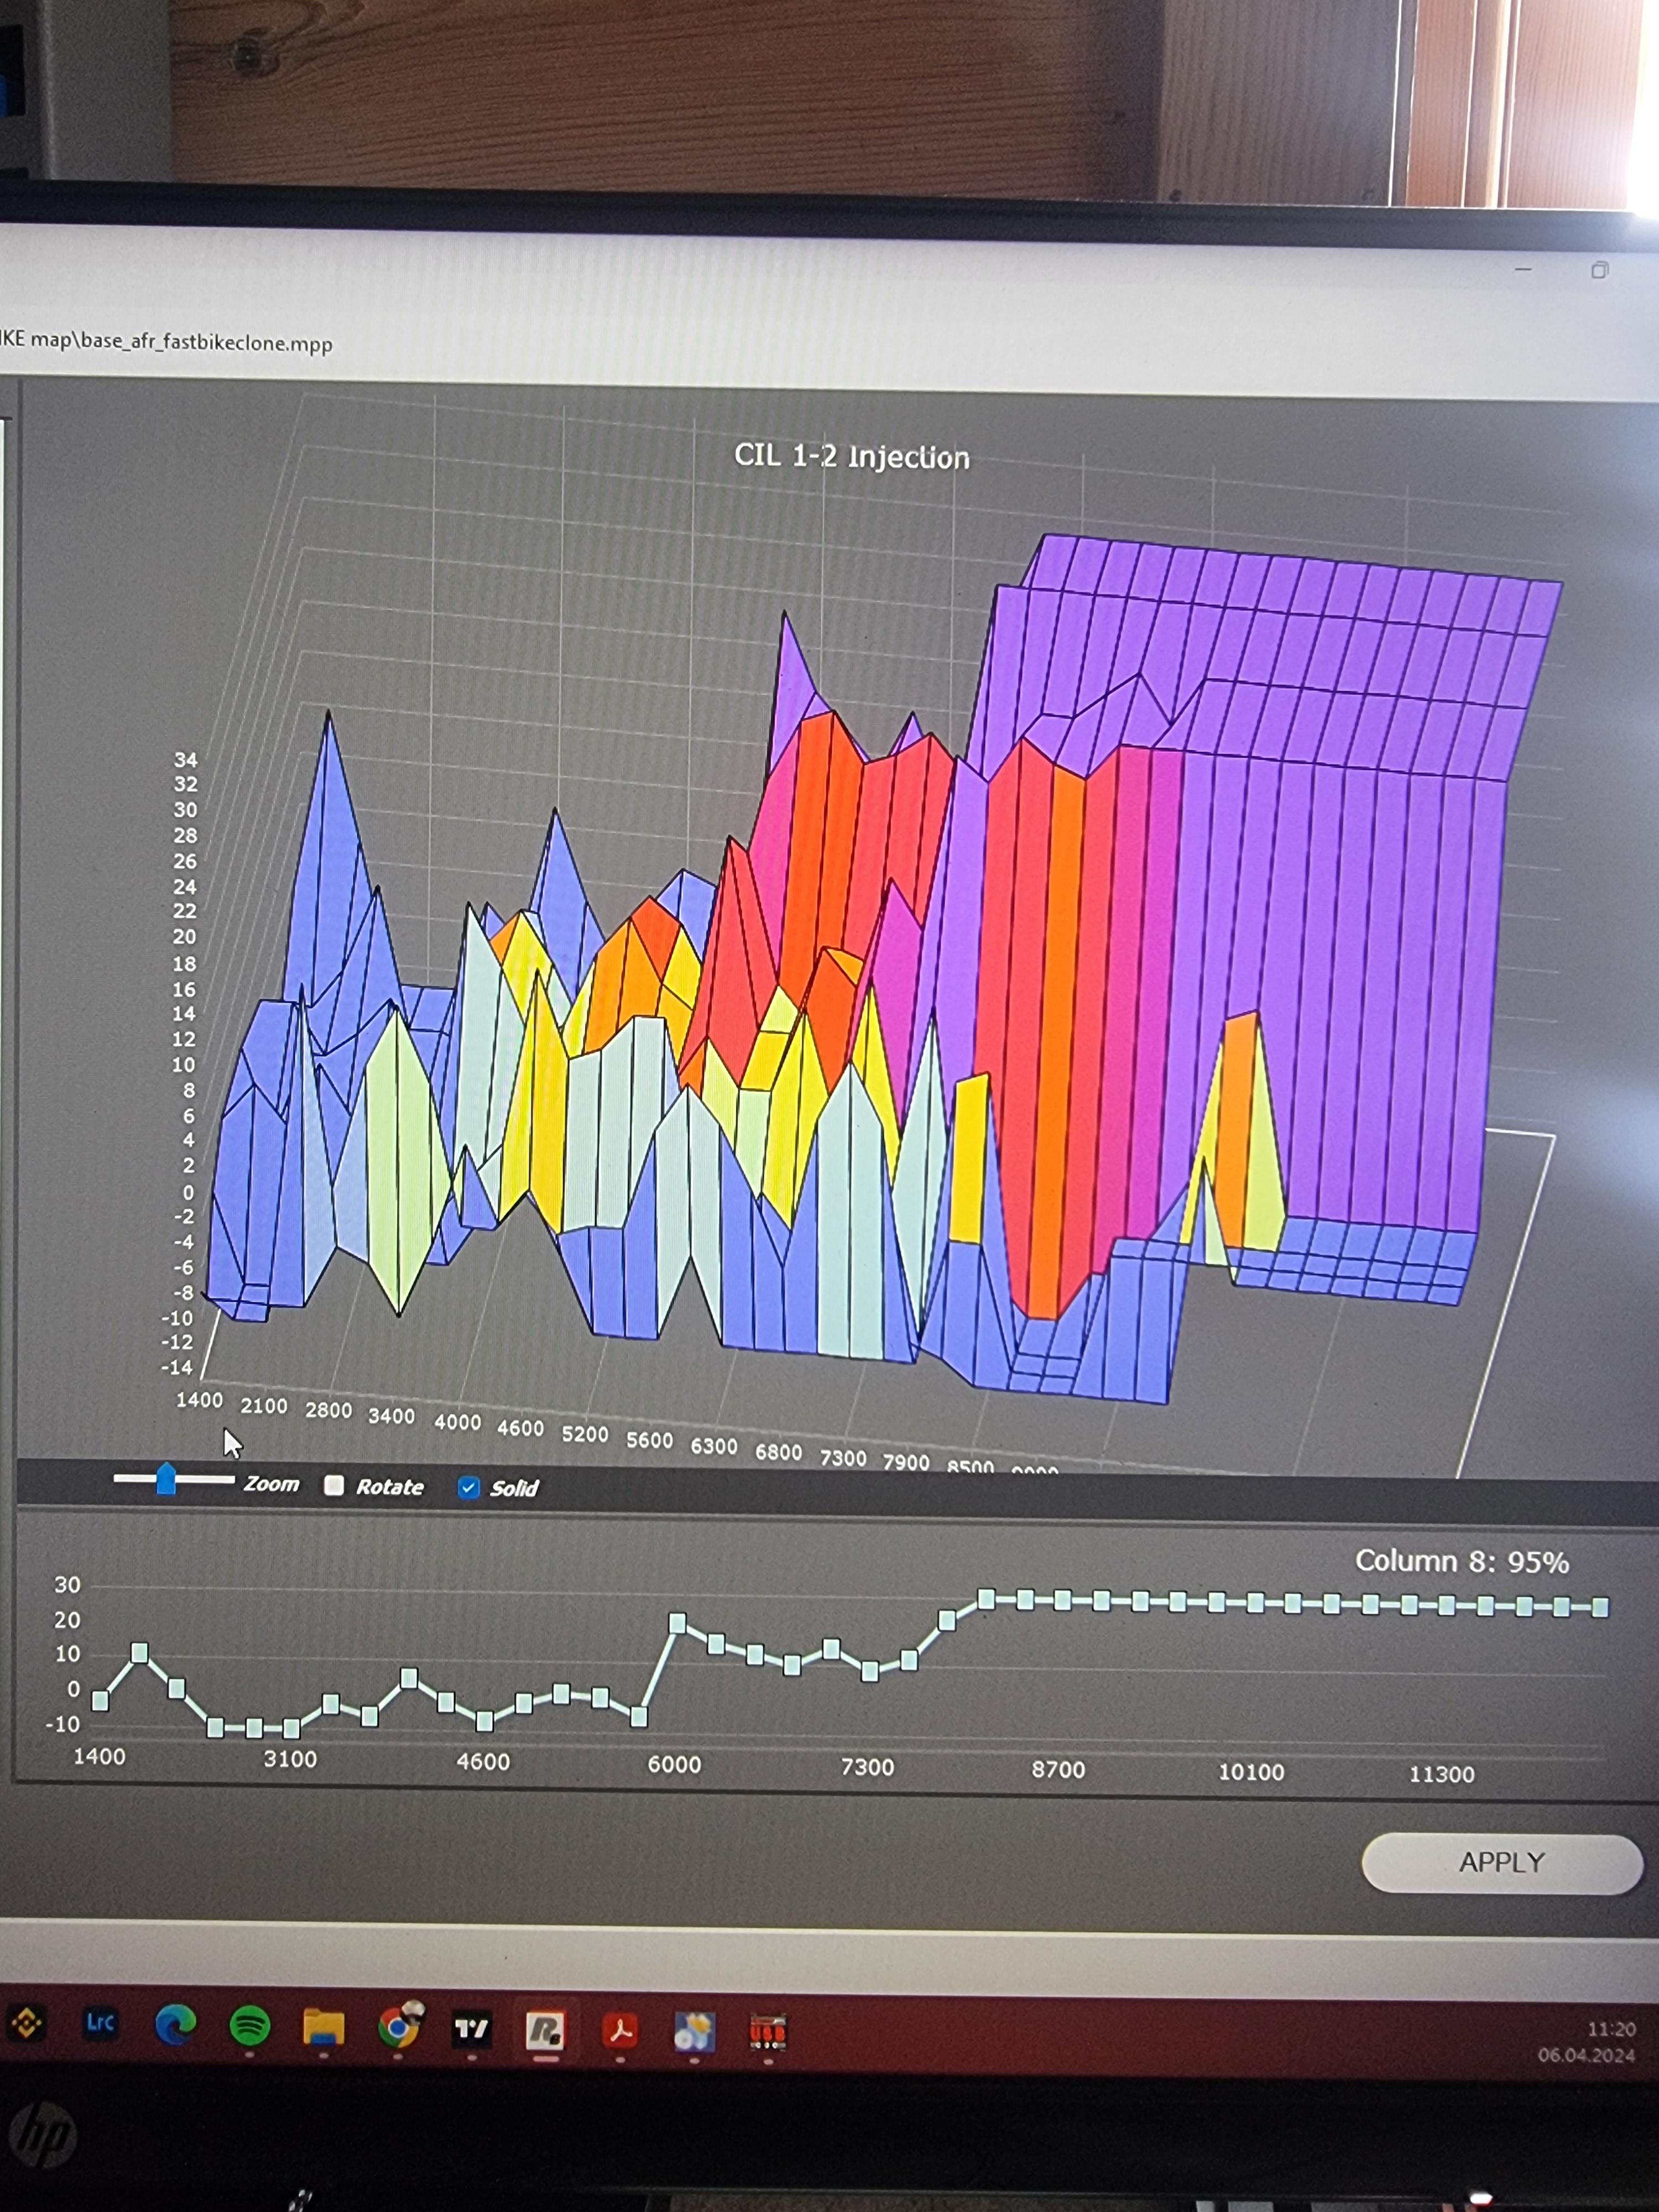
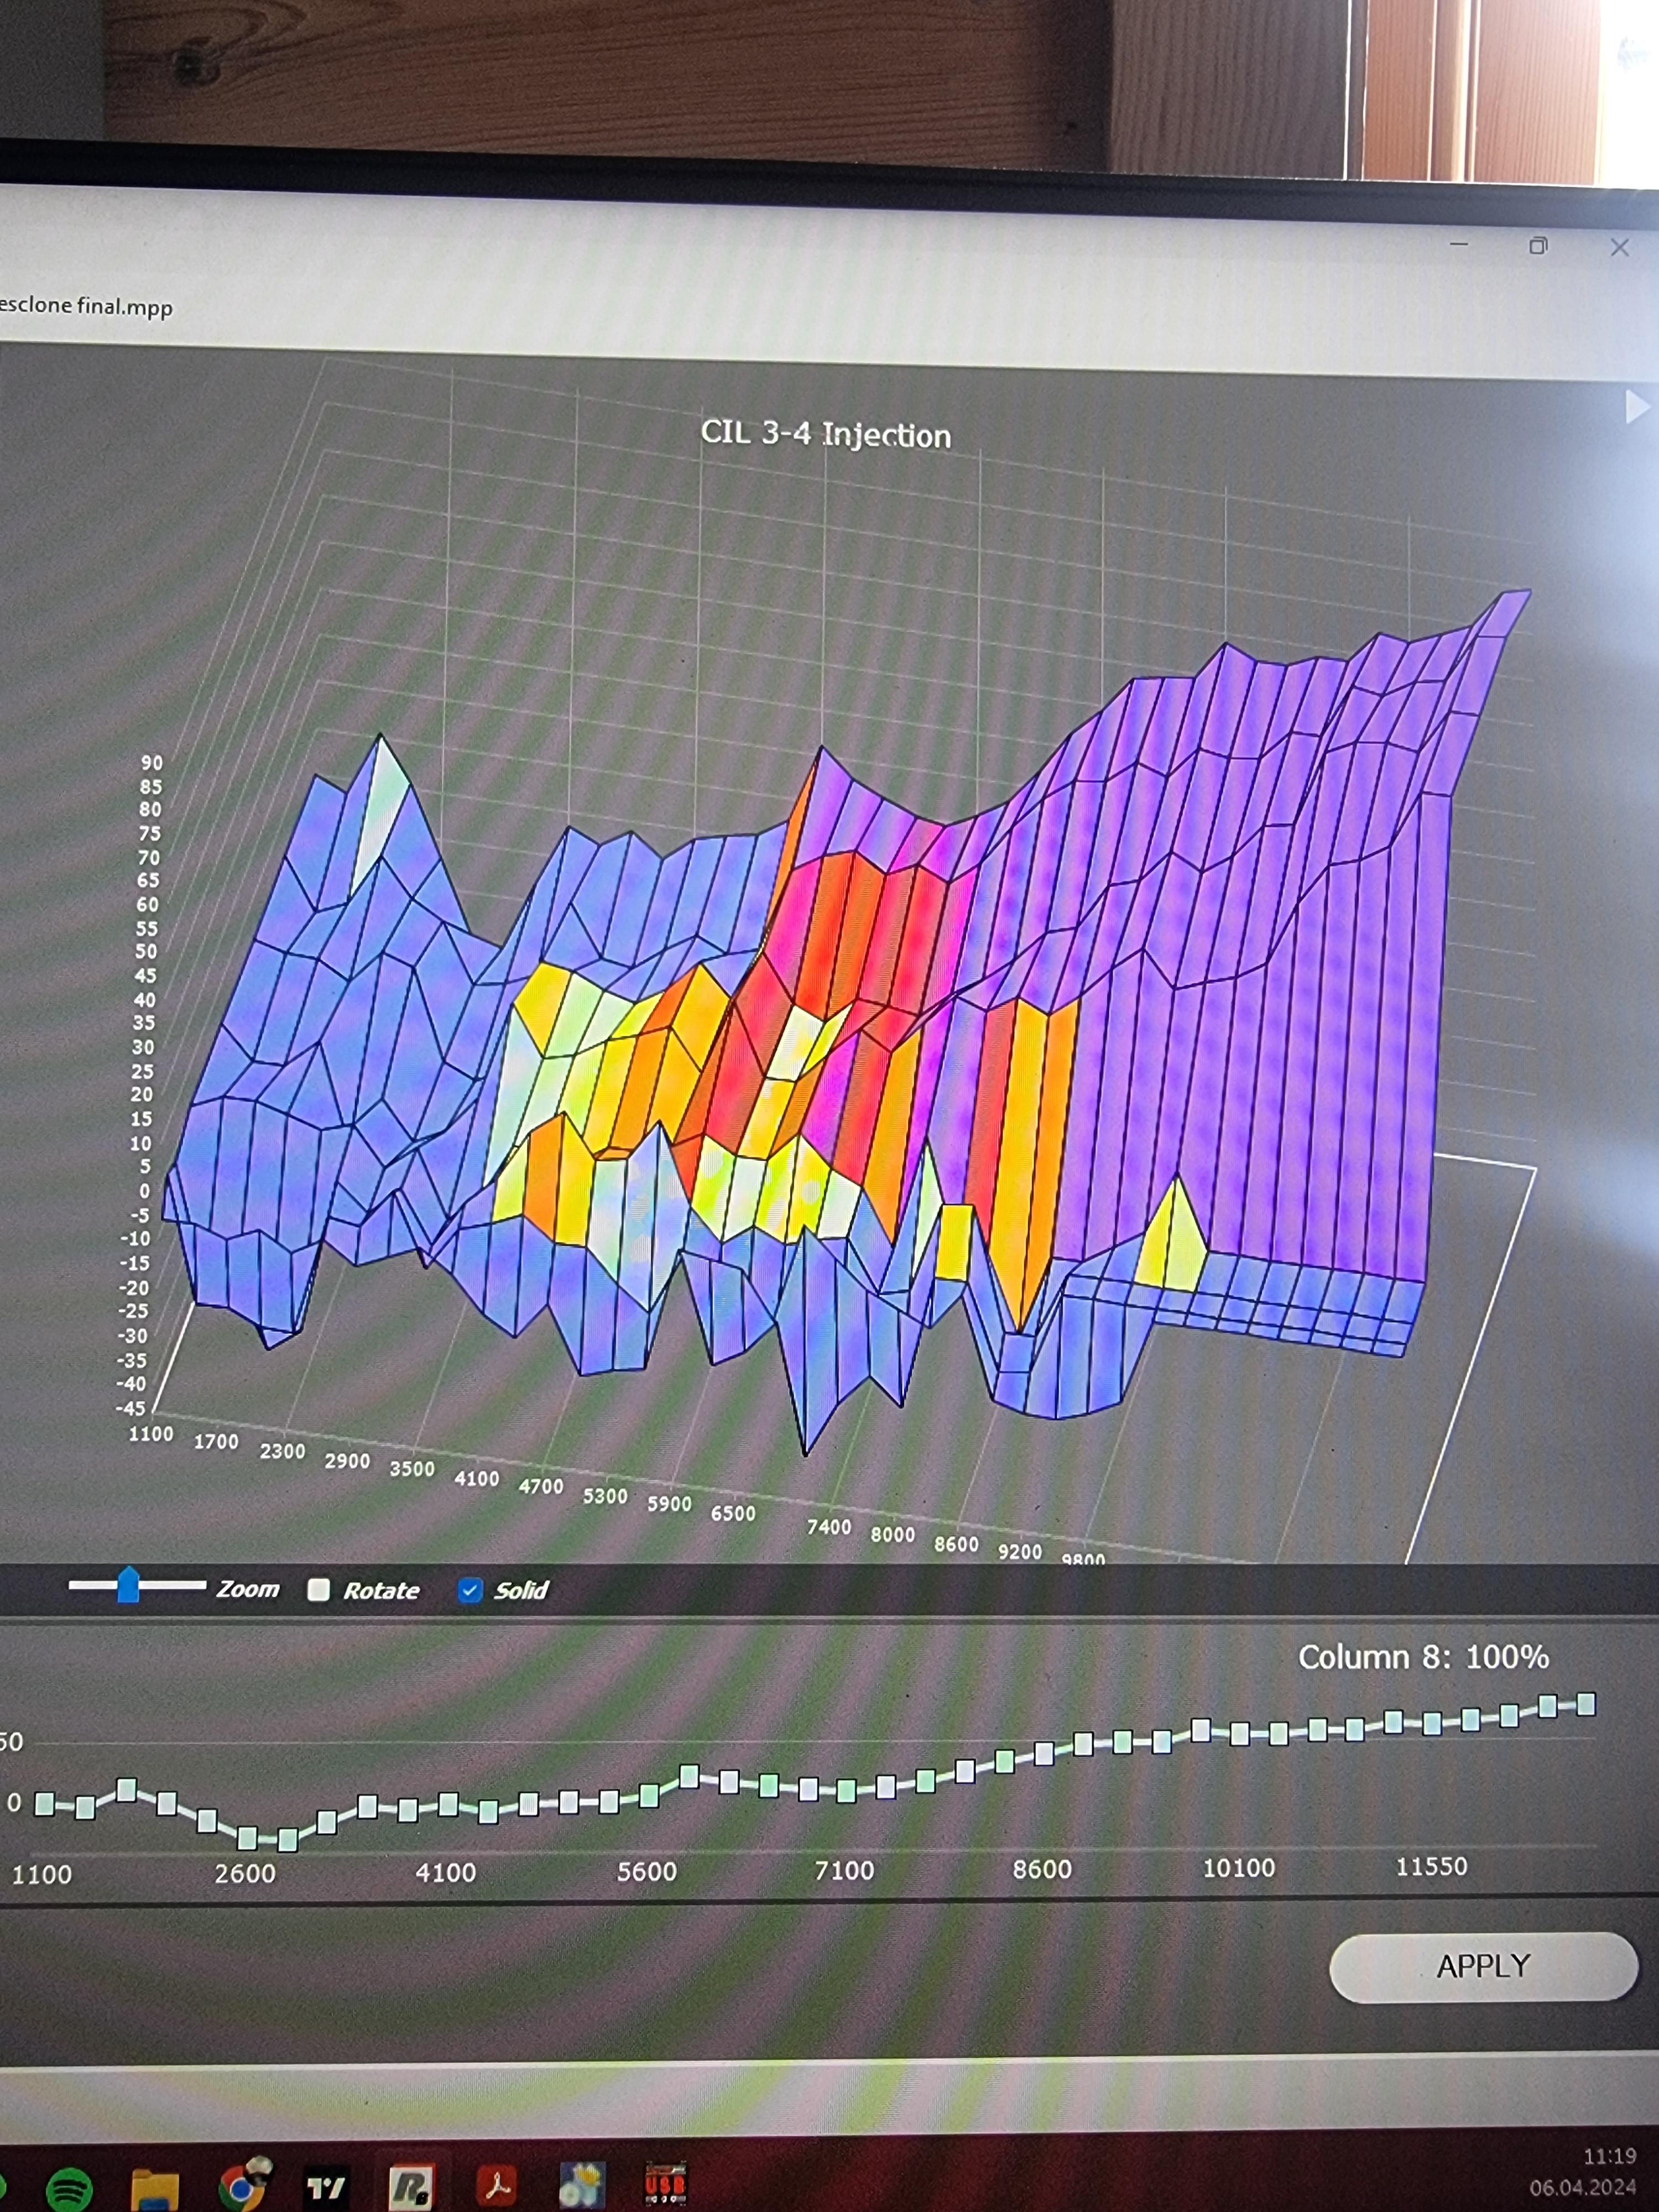
Update and the first drive story. I built a map usig RB sw and ran it for 3 sessions with no load over several rpms at max 20pst tps-ish and watched the rapidbike do its thing. Firstly it was way to rich in the lower department so the Powercommander numbers are not directly translatable. All the time watching the AFR/Lambda values, i managed to build a functioning "test" map for road use. I spent around 20 minutes on the road and god damn what a bike this has turned into! i have kept the ignition table from RB for now, as im not running it very hard and going for the 98oct ron with no ethanol. The closest bike i can think of for comparison is the response from the aprilia v4. Also the weigth loss is really noticeable!!! Brake upgrade is nice but not exceptional but that might change when pads ar seated properly. Suspension upgrades are mind blowing actually, but its just a first impression. A lot less dive and you can now feel the surface your riding on and that was not possible before! All in all, you dont need to buy a modern bike, just throw all that money at your old vfr 😂 Anyway, this all ended rather surprisingly in my driveway. On the last trip i noticed AFR 18, this while within my 20pst load run on the road. We have all seen those dyno runs right? Steady throttle and let it run up in the rpm? This is how i run while adapting the map. So got home, parked in my driveway, tok a 10minute break. Fired it up and there it is, a Big end bearing noise. Back on the table i took of my clutchcover to rule out any transmission issues, remowed the clutch and kept the input shaft still with my hand - noise still present... So yeah, i had severe detonation on this 18:1 afr run an thrashed a rod bearing was my tought. Thinking i could inspect a rod bearing i remowed the sump and found the piece of shift-dog. So i tore it down and found what you have seen in the picture. absolutely no rotating parts that can explain this. Also, my oil is kind of shiny so there are definitly something going on. i have not remowed the heads yet. Also, on this startup i had wierd lambda values and on my last startup i had no lambda values. I hope this is not going to be a LSU4.9 eater, that gets expensive really fast!!! I dont know when RB starts heating the probes but if this starts to early it will kill the sensors due to moisture. I have to do some investigation. Inspecting cylinders with a camera shows wet right cylinders, but fine left ones. Evidence of lambda issues... For all i know, the shift dog found in the sump can be vintage - anyones guess, 10 years? last season? 1999? Never had a transmission hickup. Also, I had major clutch slippage on my first and only 50% throttle. New Barnett, fully rebuilt clutch system, damn, and worse than ever! I only noticed it slightly before - like "was that a slipping clutch, hmm I have to test again, nothing ok." Now there is no doubt! Those 99lbs clutch springs are not really available as far as I can google. Anyone know where I can get them?

-
We have all wondered how a vfr engine with forced induction takes this abuse right? Well at least I have! So to all those who have told me over the years that this is not going to last, the vfr can not handle this - you are wrong! No measurements have been done, I have just glanced over everything - season has started. This engine will be shelved waiting parts and getting ready for the next stage. A 17000km engine will be put in it's place. I don't have more time this week to tell the story but it will come 🙂 Have a good one guys - ride hard but mind your 3rd gear 😅
-
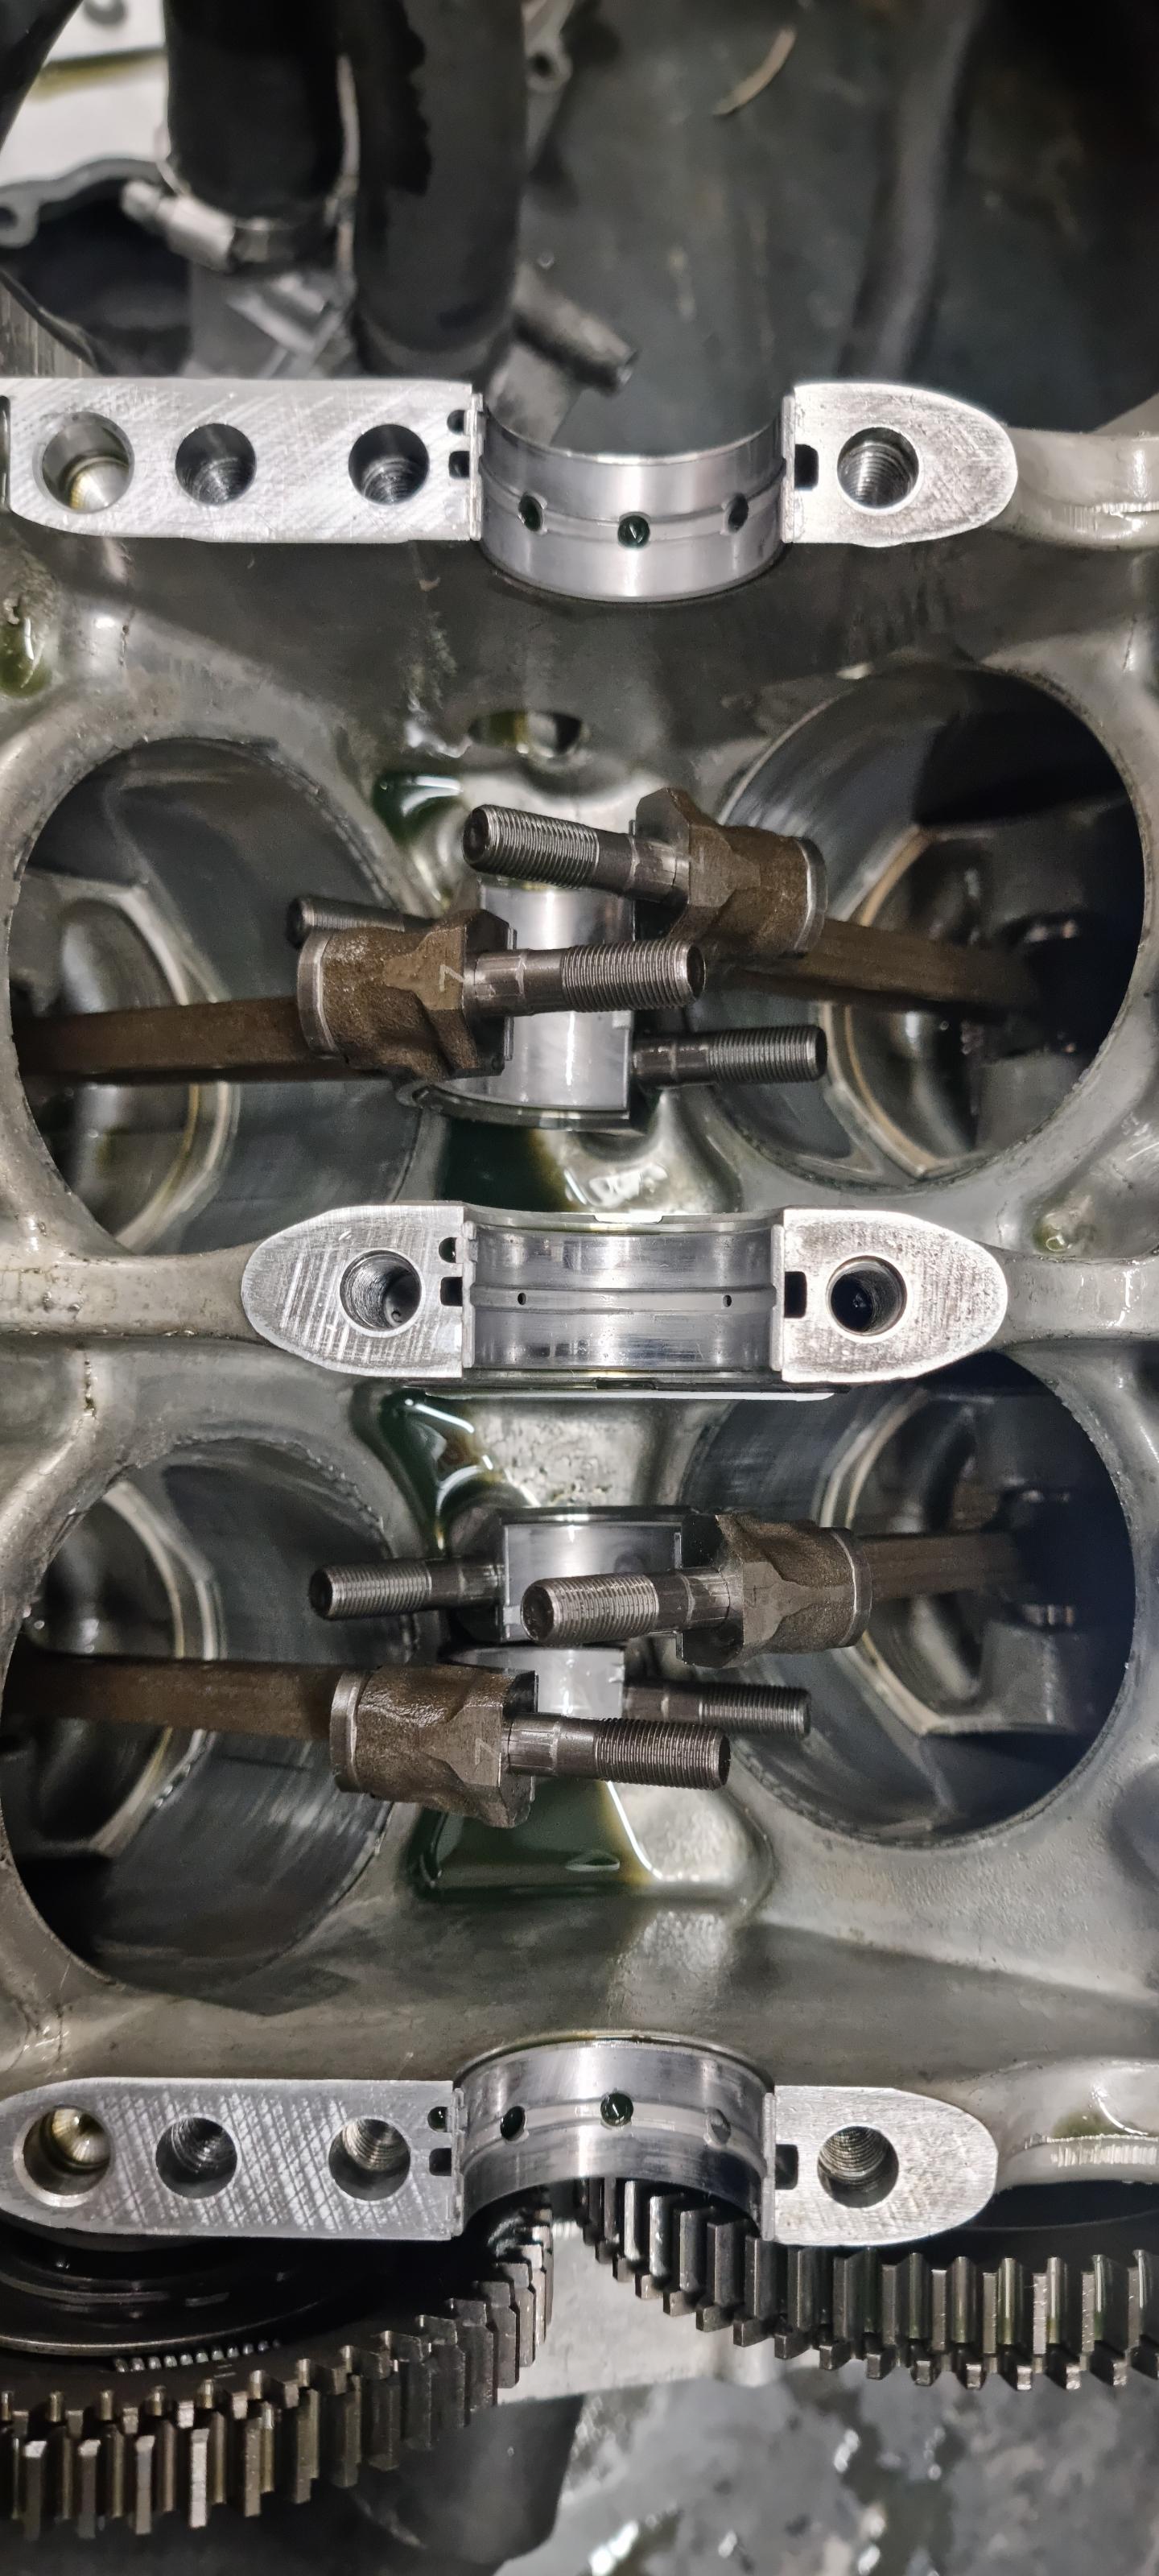
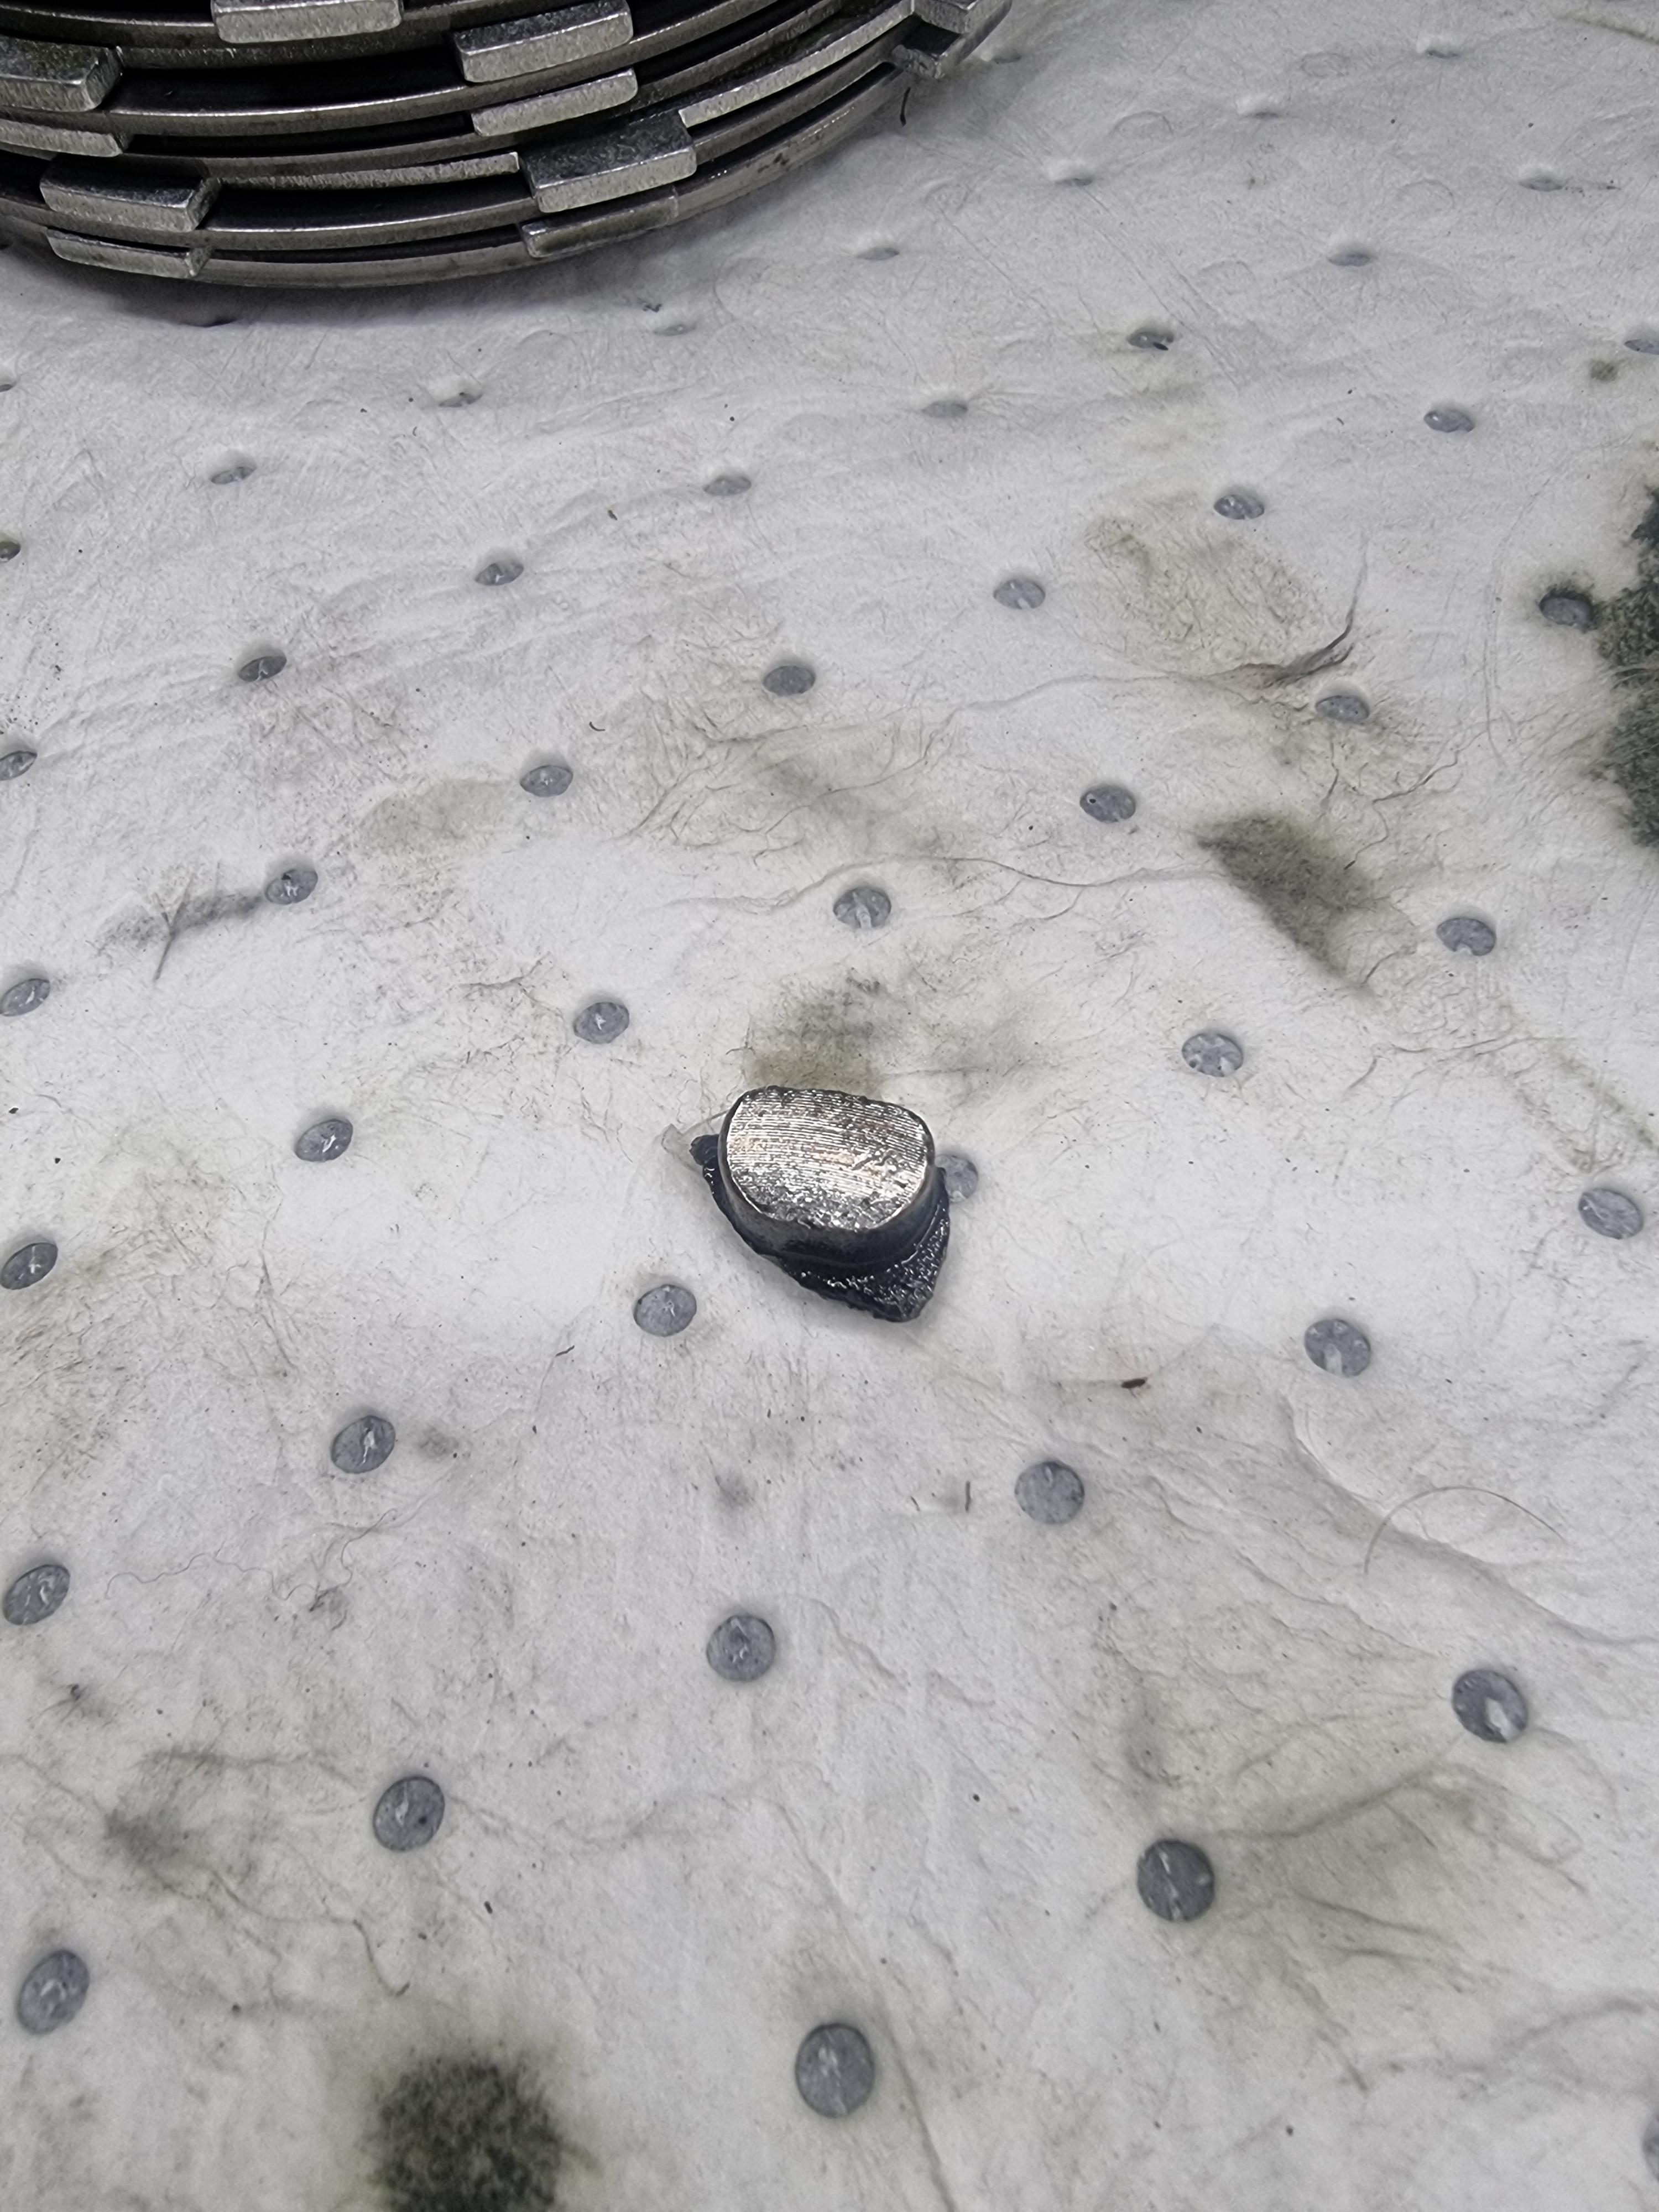
I'm kind of flabbergasted to hear multiple stories about the transmission issues here. Im sure theese are Na bikes yes? I have absolutely abused my bike for 30k km with 100% power increase in mind just making Shure of proper shifts before wot. Absolutely no hickups before and now that I'm building a map slowly I have transmission parts in my sump. Can't wait to see this with my own eyes!
-
Just love your History lessons Mohawk. Valuable info ❤️ Would you happen to know how the gears are designed? I know from somewhere the rc45 atleast was undercut. Ratio closer to the 5th gen than the 6th/8th gen?
-
Yes most definitely! However the vfr is known for its over engineered everything - but doubling its power will expose every weak link. I'm not worried, its probably one of the most sold bike in its era so plenty of spares to be found.
-
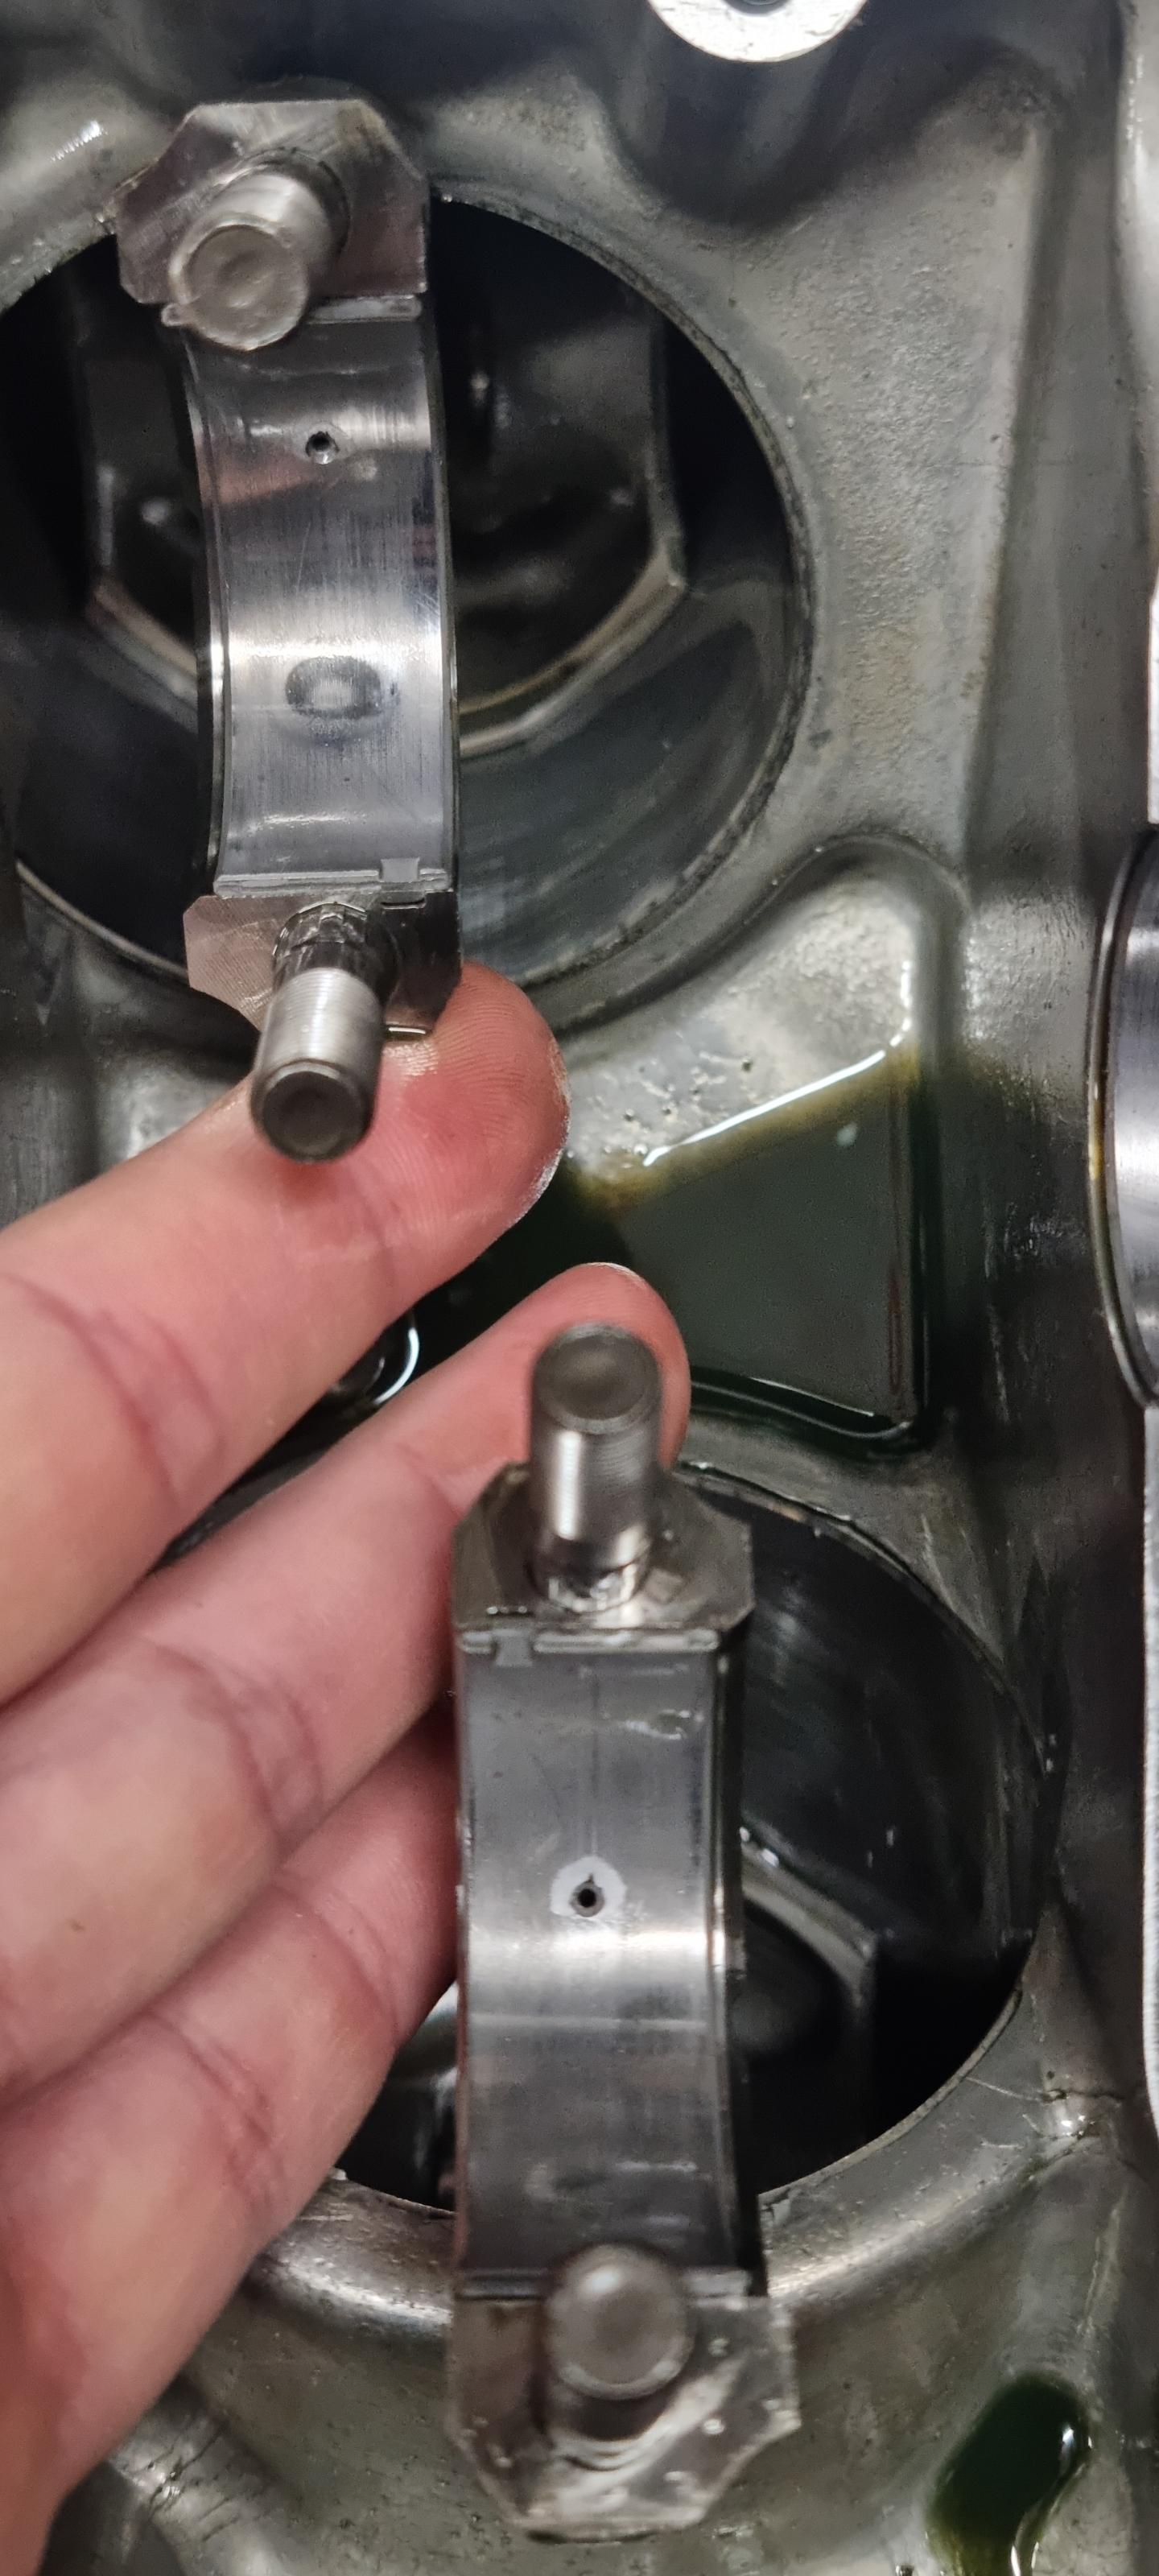
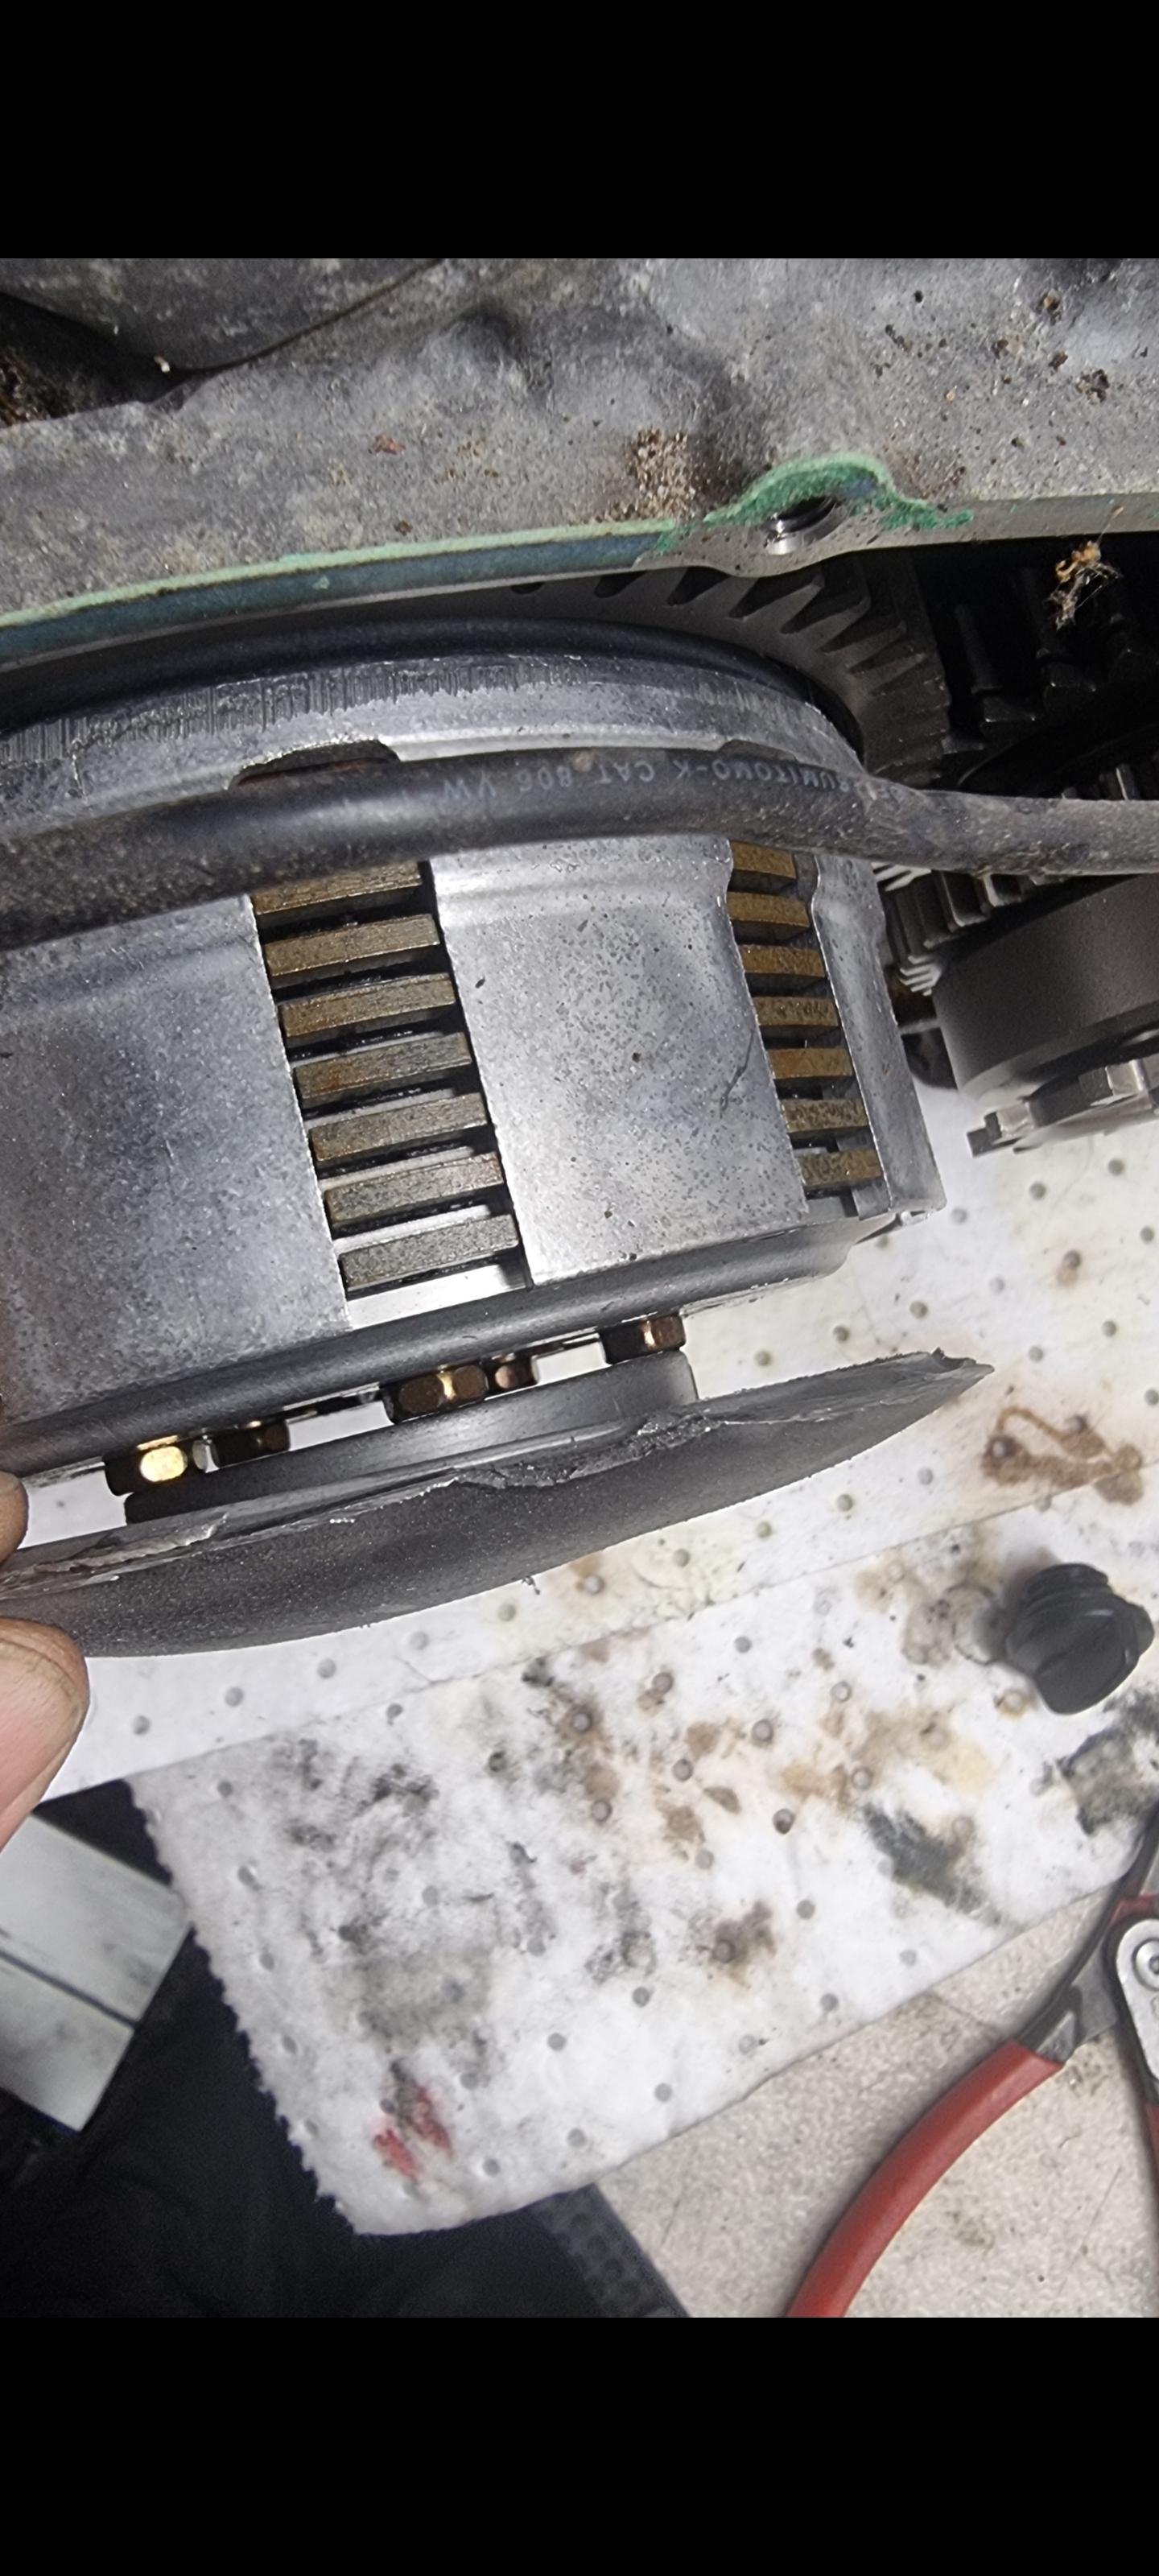
It's not disassembled yet but it's been diagnosed as one of the dogs on any of the gears. I'll tell the story when it's in pieces as I hope it will tell me the story on wtf has happened. As of now it utterly mindboggling as nothing is out of order and transmission is working fine. It was found in the sump after I heard a noise dangerously close to big end rod bearing knock... Exciting times ahead 😬
-
I'm just going to leave this here ⚙️🤷
-
Wierd. I have not found this to be the case at all. I guess the 6th gen have a very different mounting system?
-
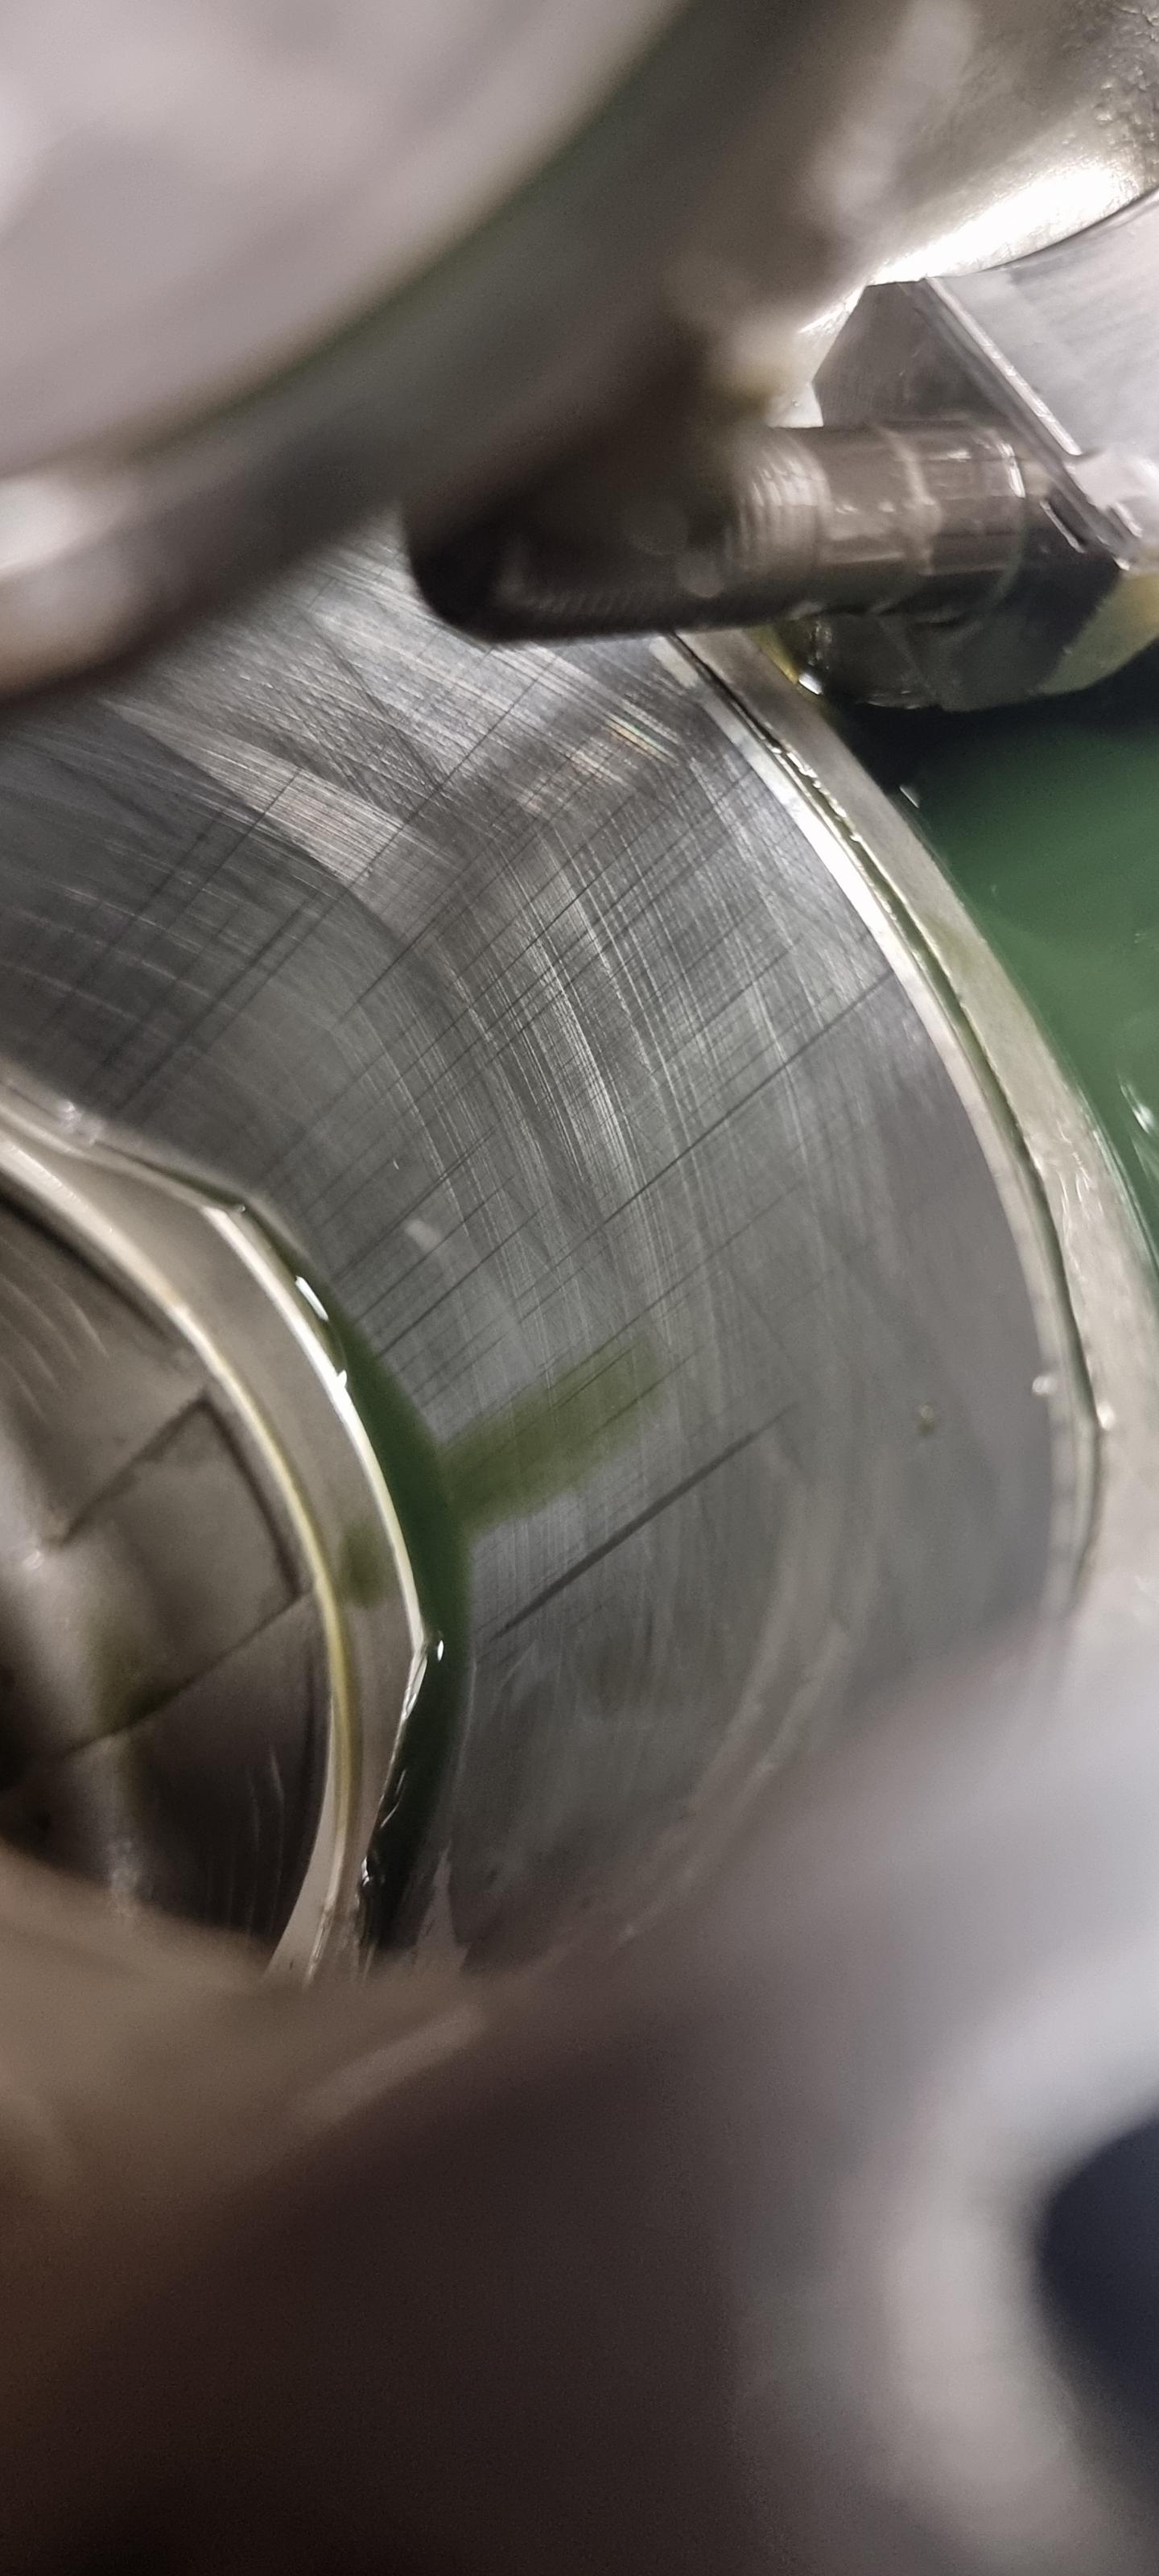
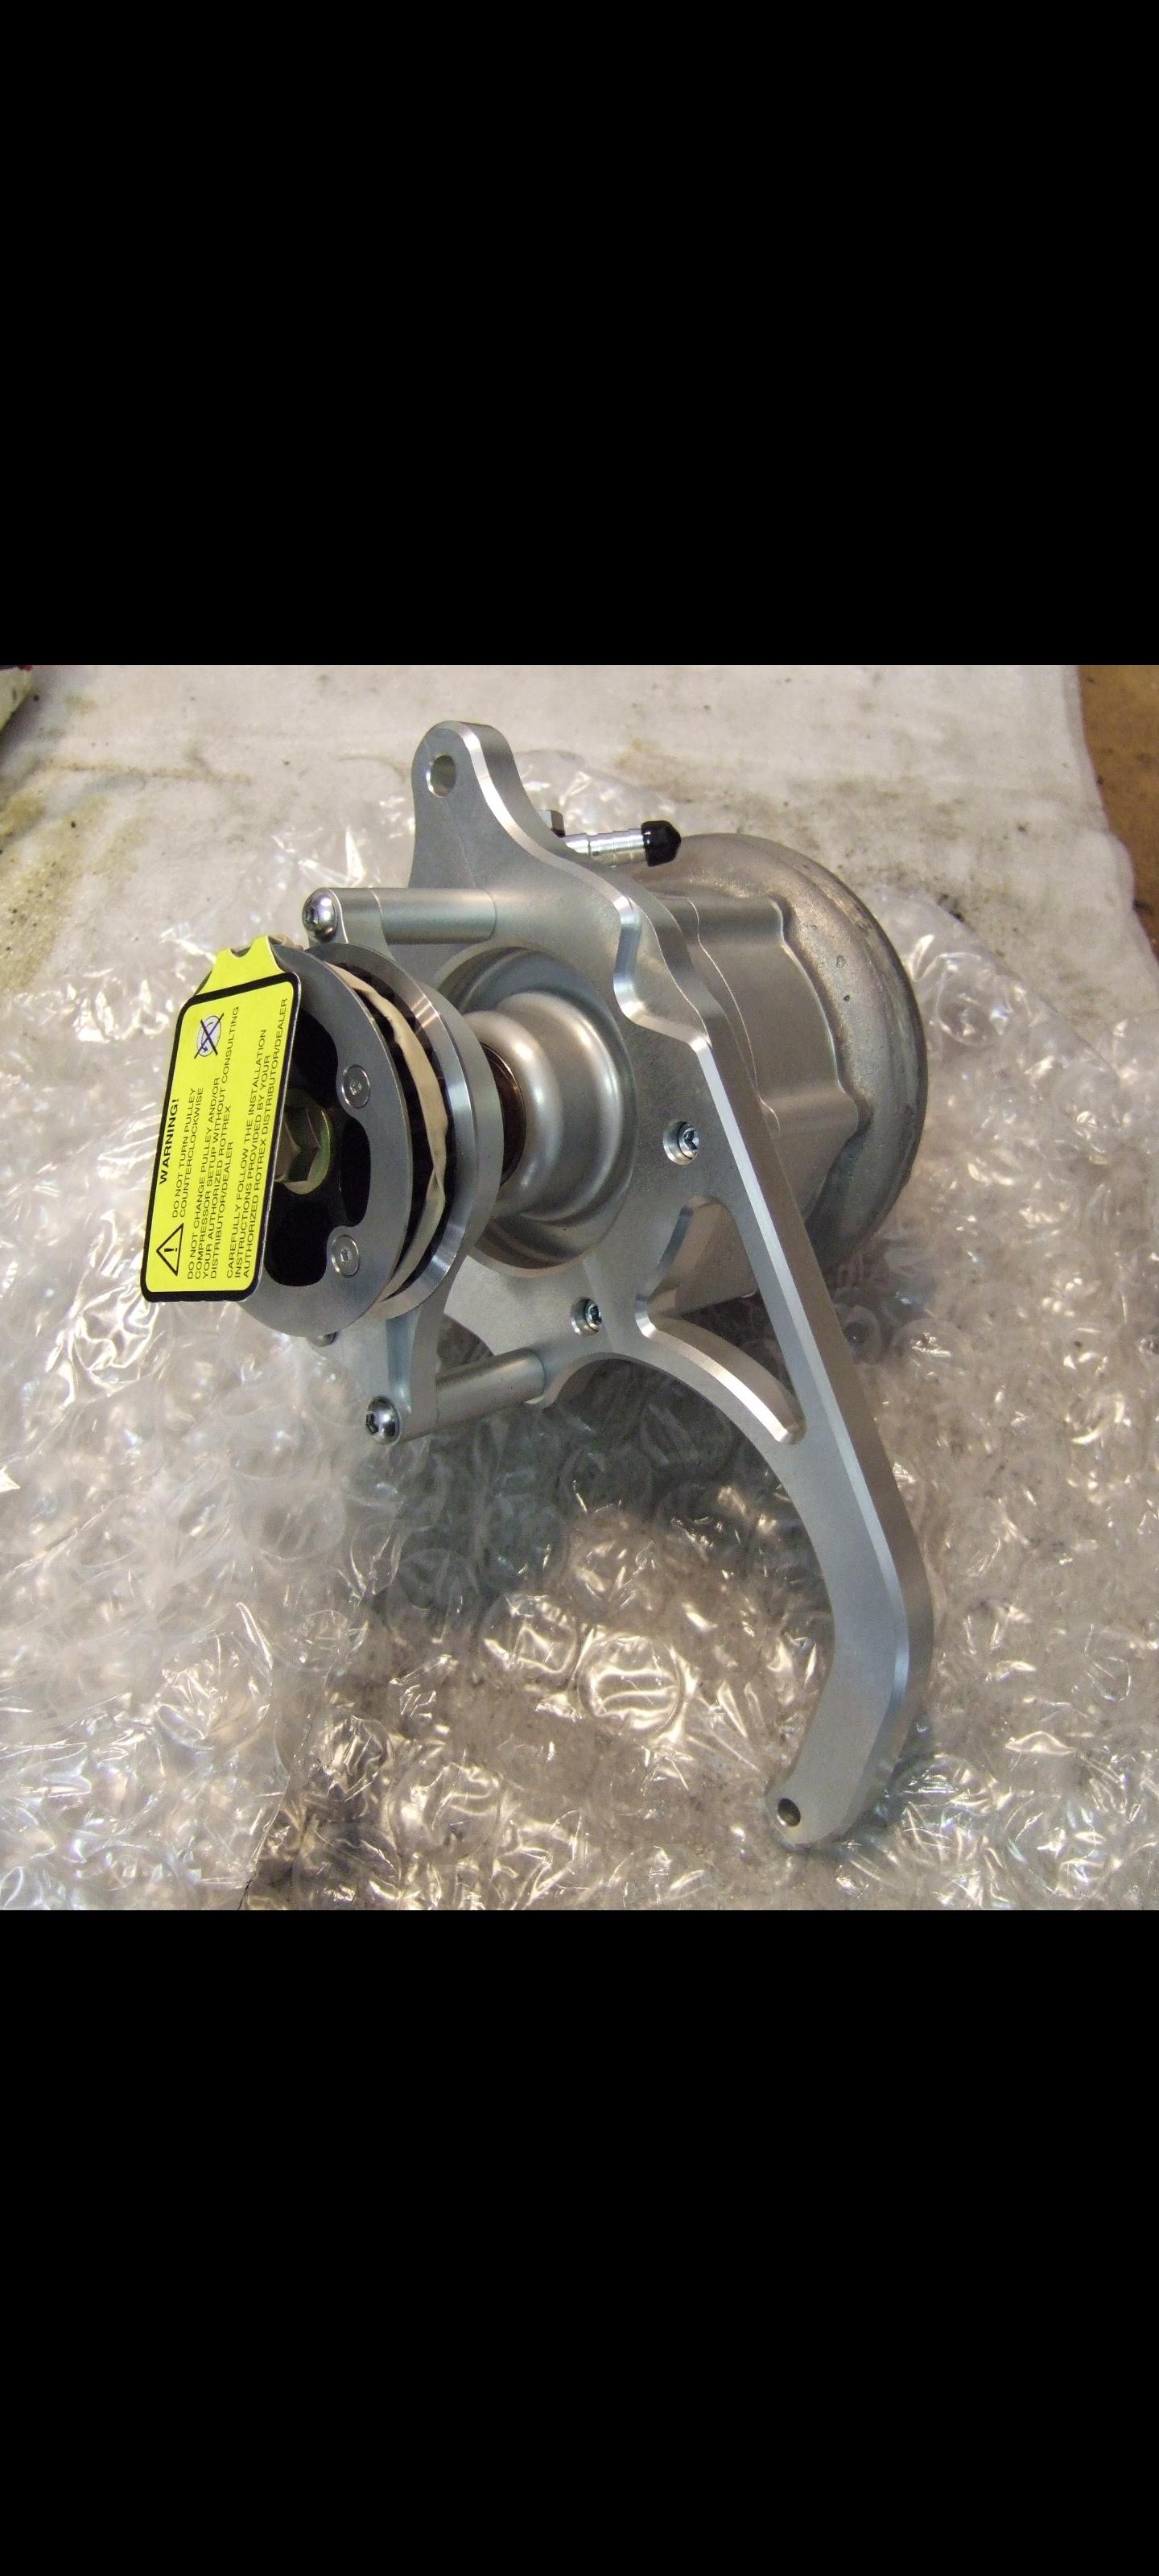
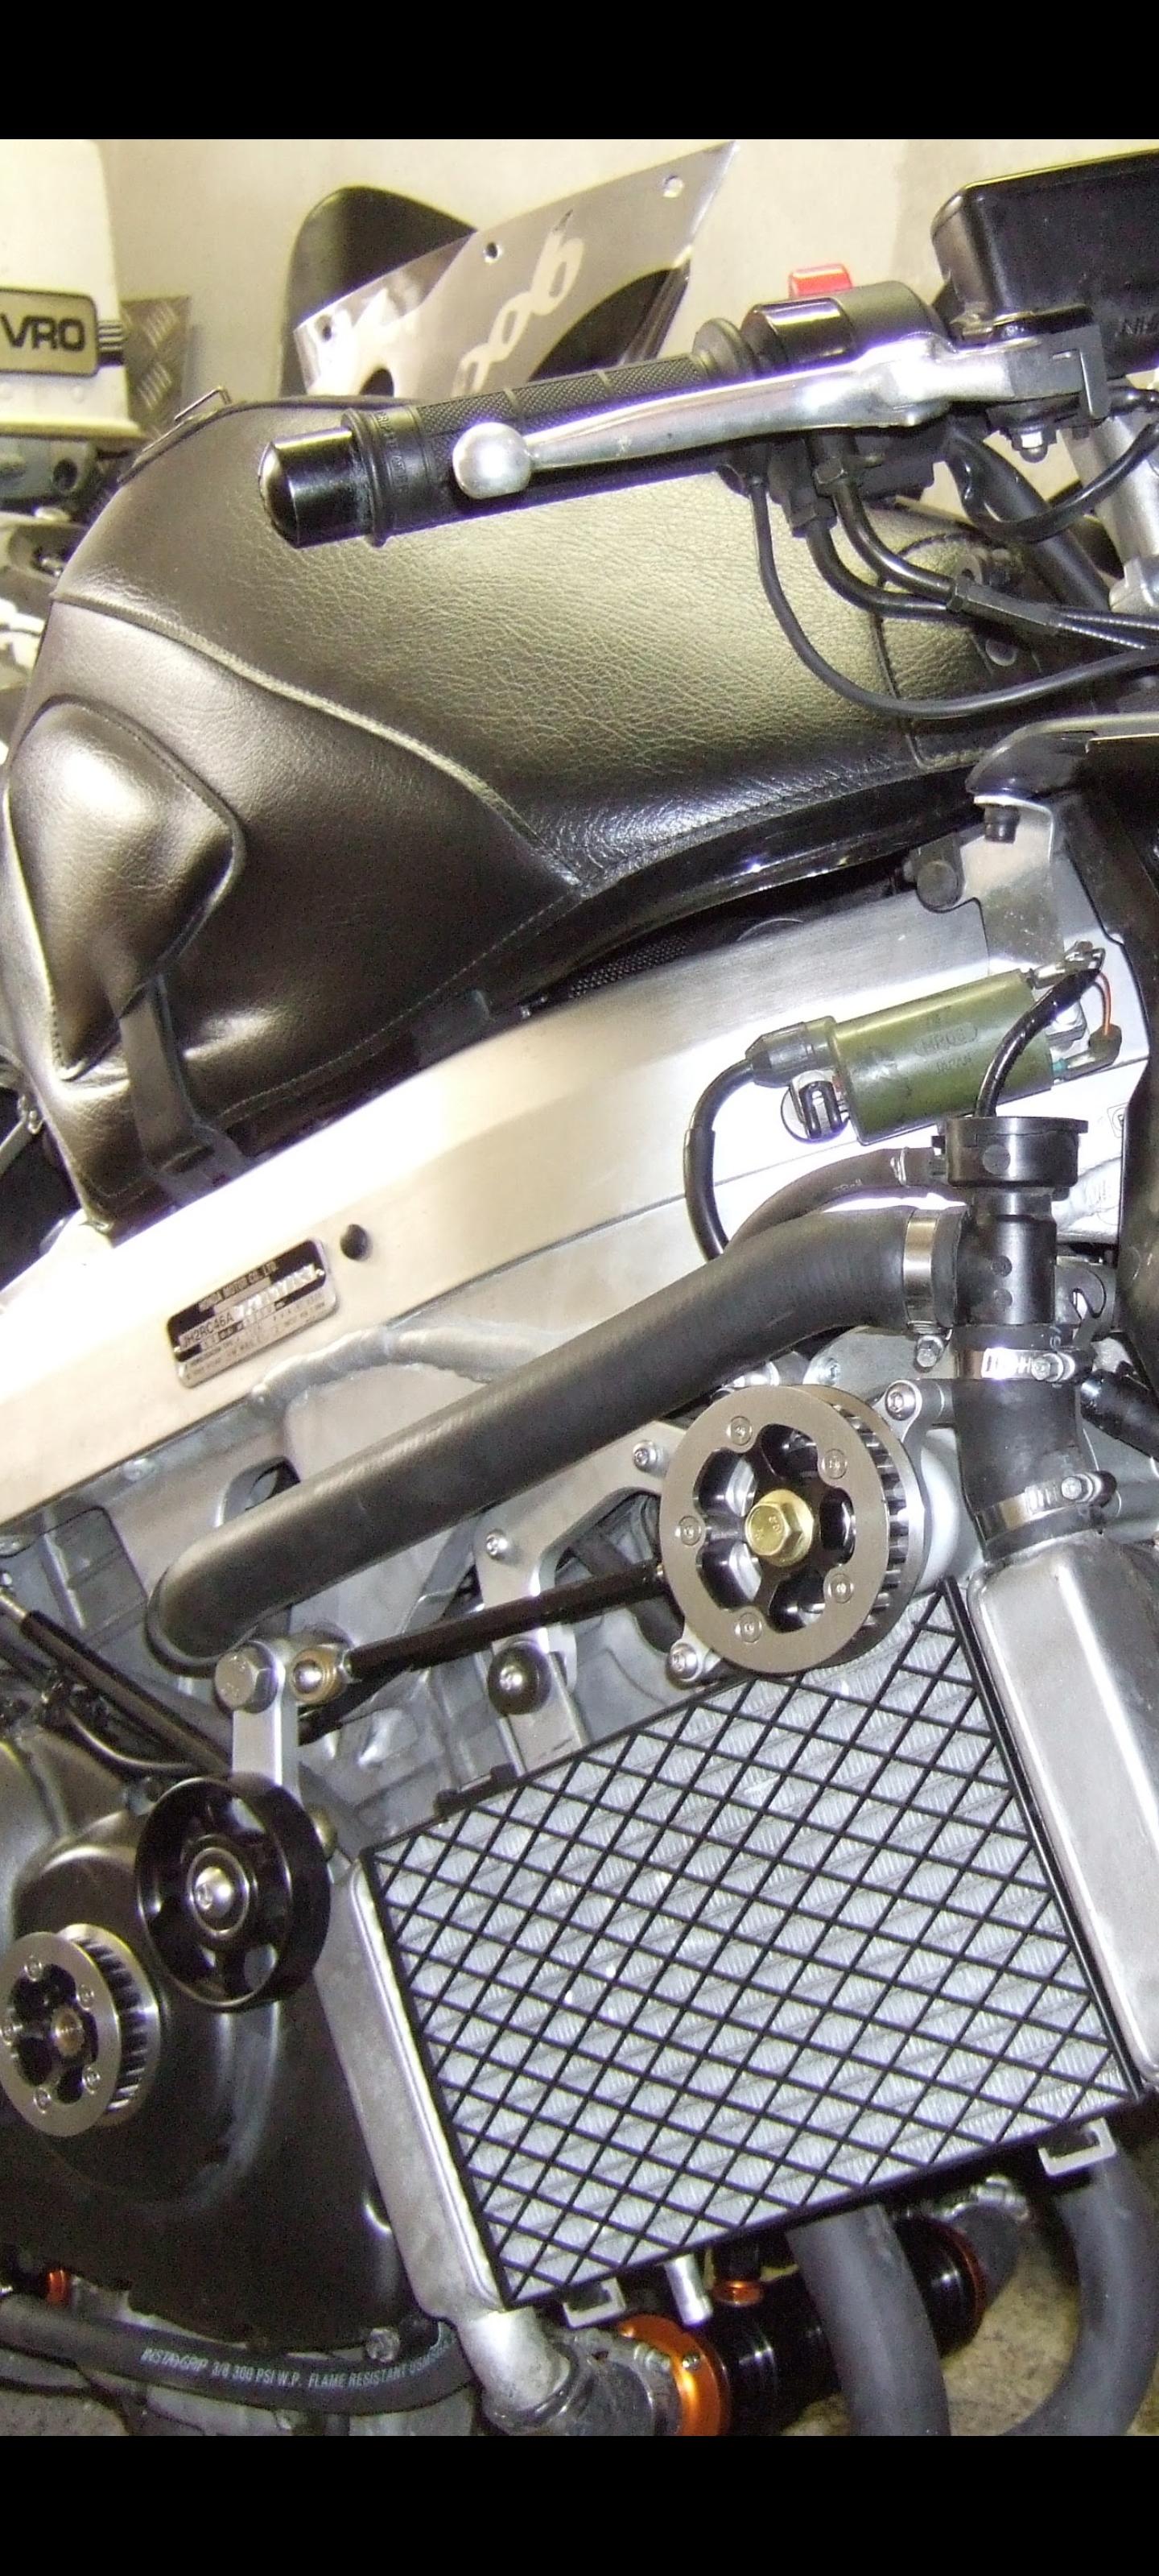
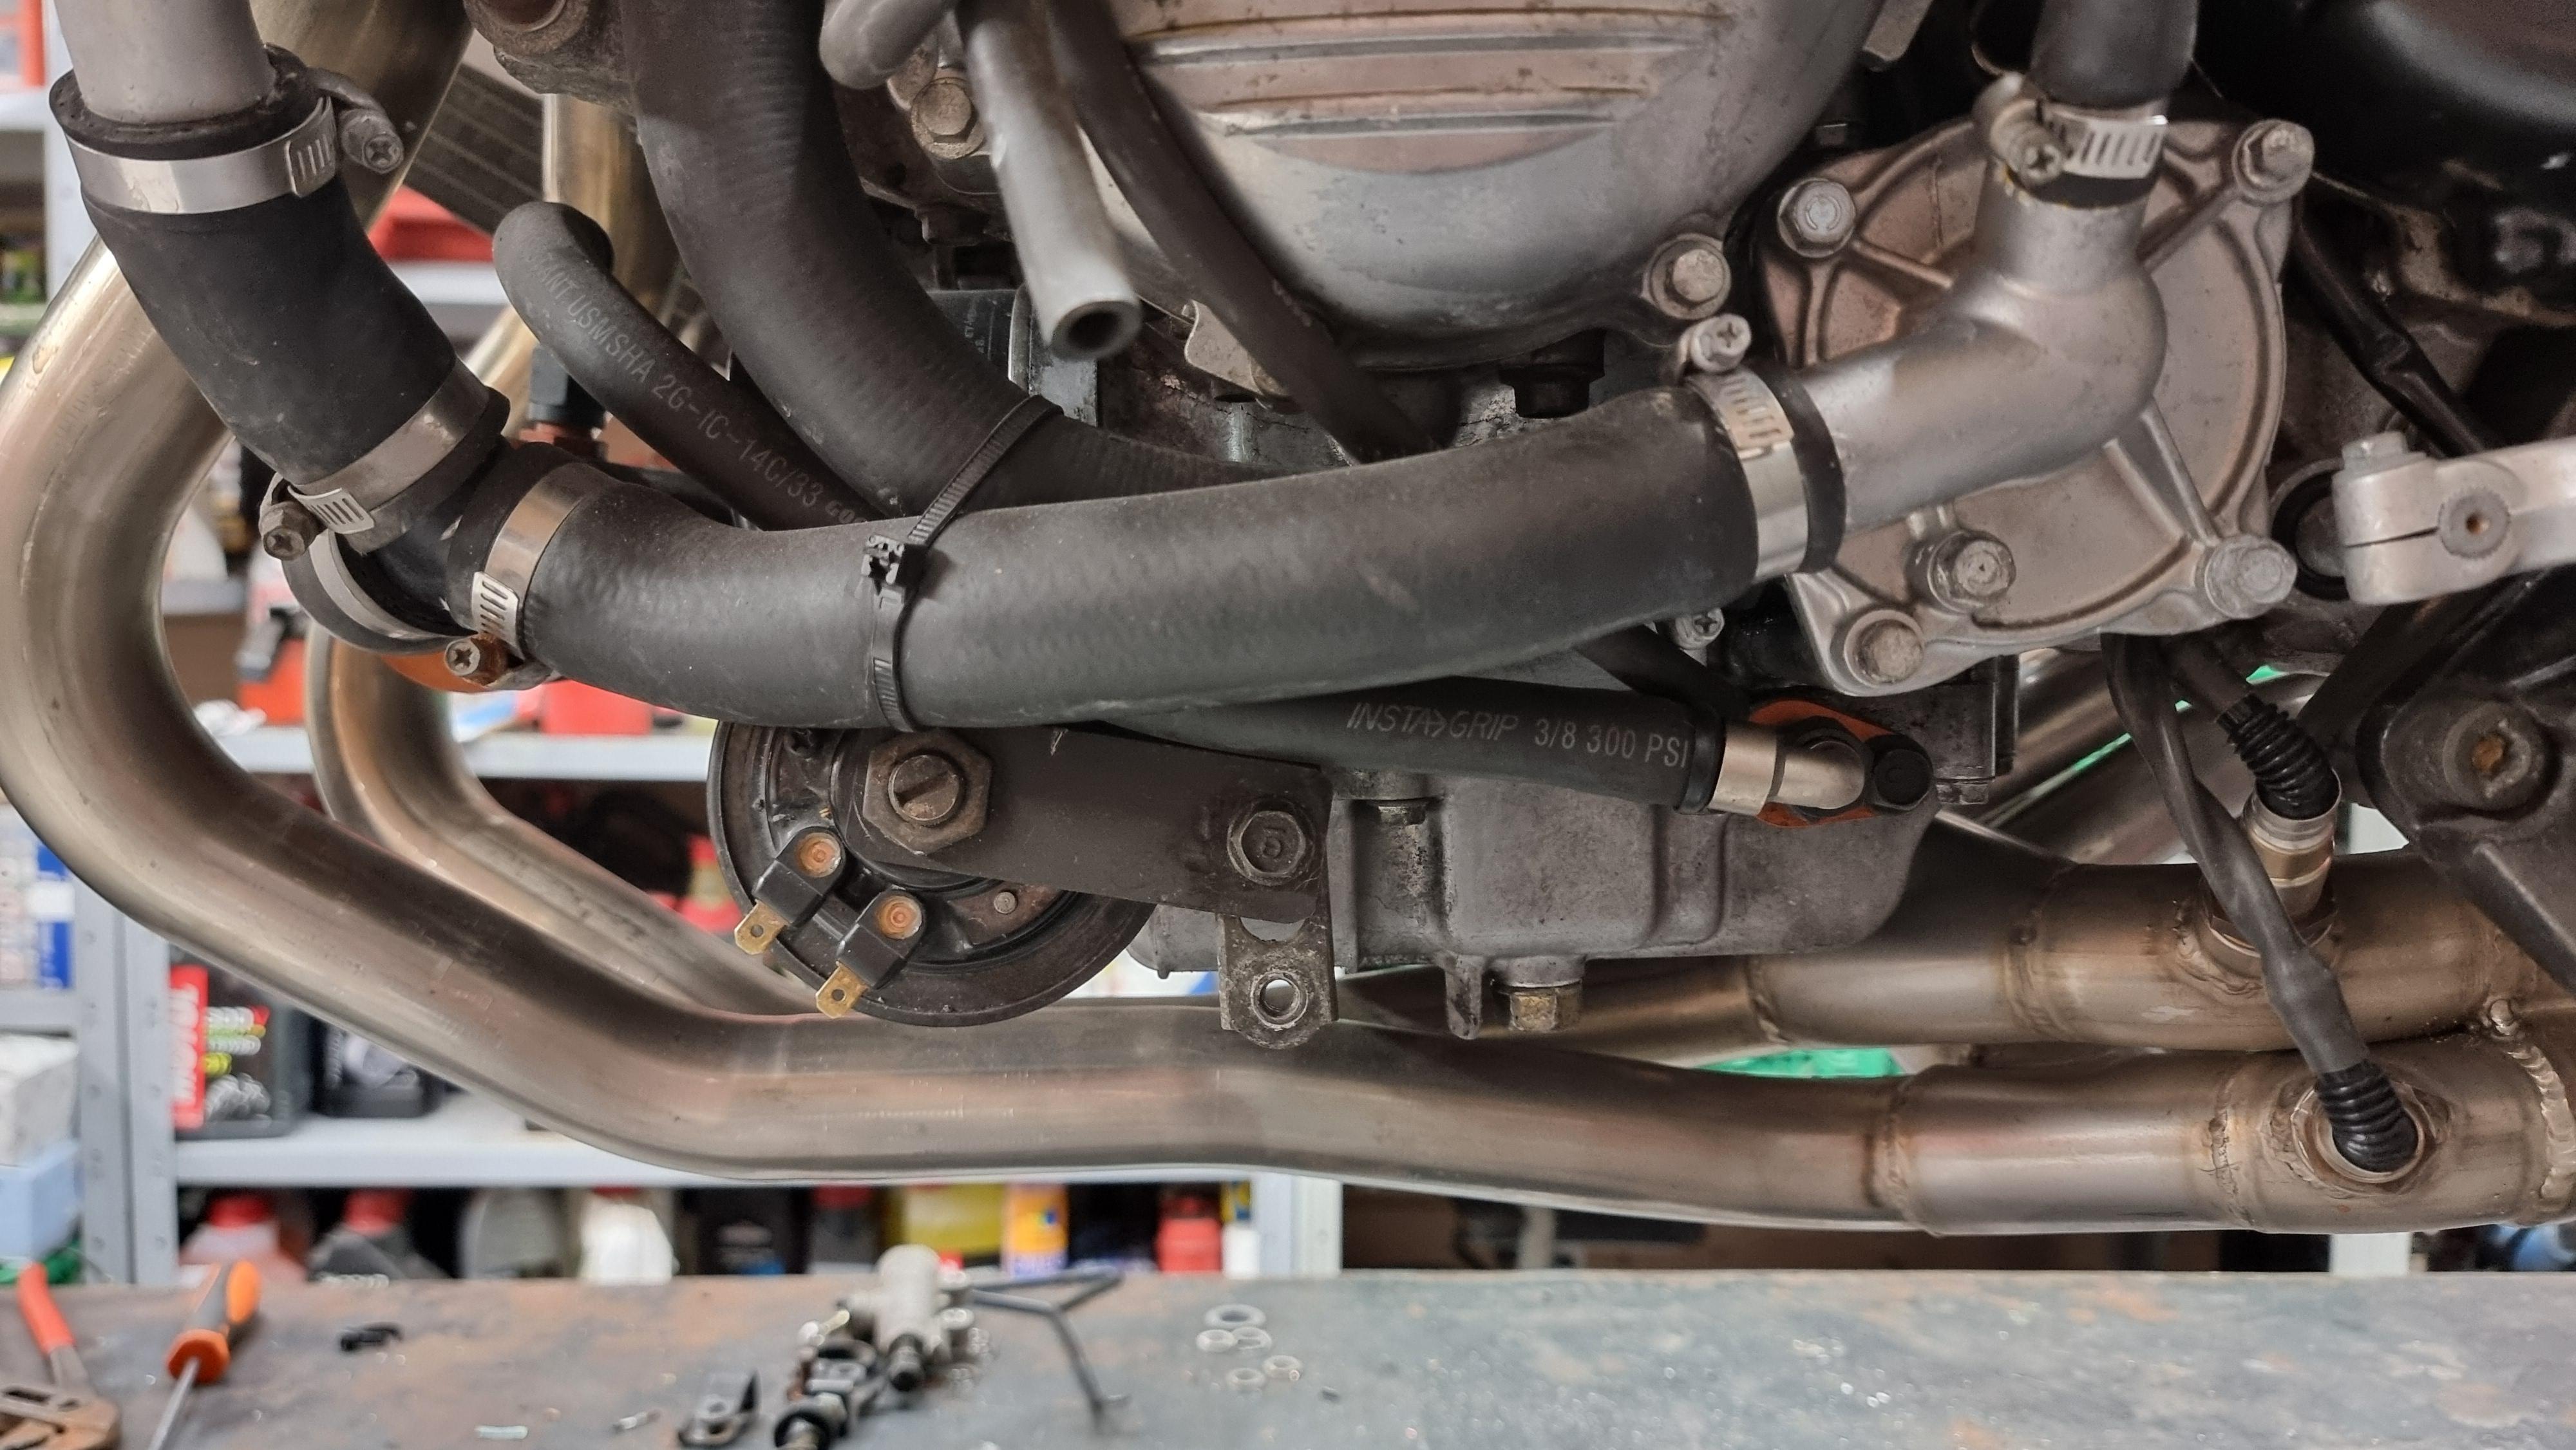
oh, and kind of promised to give my toughts on the Rotrex and the cause of my problems. Here is what i wrote during my diagnosis and repair. Id love some input on this! So here are my findings, thoughts and experience from running this kit for a decade. I don't know if there are some engineering guys in this thread but I'm not one but i will present my thoughts on what rotrex could have done better, also some ideas for improving the belt system. I would love if we could come up with something together on this part! Some prehistoric information: This is my second rotrex and the bike has a total of 30000km force fed, the second unit (this one) has around ⅔ of the mileage. The first one was changed due the pulley bolt coming loose within the first year. It was covered under warranty. What has happened is a total failure of the output shaft. My theory is that a traction drive supercharger is not very fond of the rapid changes in rpm it is put through being fitted to a motorcycle engine. I have no idea if there where changes made to better handle this in the c15-60 current production. My second newer unit has an aluminum nut to reduce rotating mass, also the balancing of the impeller is somewhat changed but is still cast. The output shaft is cross drilled for oiling purposes, and this is where it sheared. The radiusing of the transition between the driven face of the shaft and its thrust/support surfaces looks good but there is room for more here! There is almost no radiusing on the mating surface where the impeller seats. The shaft has broken in 3 pieces and its anyone's guess which part broke first but i suspect that the output shaft has gotten surface damage causing unbalance. There is a couple more things that can destroy a rotrex: # Overspeeding. Not possible with this ratio. # Lack of oil / maintenance. Never been low, dirty or run over the recommended km interval. At this rate it never will as there is oil included in the box when you buy a new unit 😅 however the oil have a couple more years than recommended… #Oil surface breakdown due to temperature. I'm sure this oil will be fine agewise after 3 years. There is no evidence of overheated parts as one normally think would be visible, however rotrex says a maximum of 80 degrees, so here comes the oil surface breakdown possibility. The output shaft is badly damaged but also have some areas that is good. The initial lockup happened after filling gas, idling for a couple of minutes and pulling somewhat inspired out on the road. Sudden high-pitch screaming and then lack of power. Could it be residual heat from the engine soaking the rotrex while filling causing a breakdown of the oil film? I will do temp surveillance this year in multiple spots to get an idea. However i have had a louder than usual unit for at least one season and i find no outboard bearings i can blame. The input shaft bearings are divided by an oil seal, the inner bearing (oil pump side) is a bit noisy while spinning it on my finger while assembled in it's housing. The outer one is perfect. This can be debris from the damage, but i suspect not. This takes me to a bit of history and what i think is the kits weakest part. I am on my 3 belt, the carbon belt where gone the first year (around 8000km) After about 20000km the outboard bearing startet making noise, and i changed it for a equal but not ZZ (double sealed) The pulleys are really small, this does not help belt life. A ribbed belt would help together with increasing the diameter. It will also quiet everything down, I'm sure some would appreciate that, i wouldn't. It would also help outboard bearing life by decreasing the tension the belt needs to run at. I'm not sure if a toothed belt is better at efficiency?
-
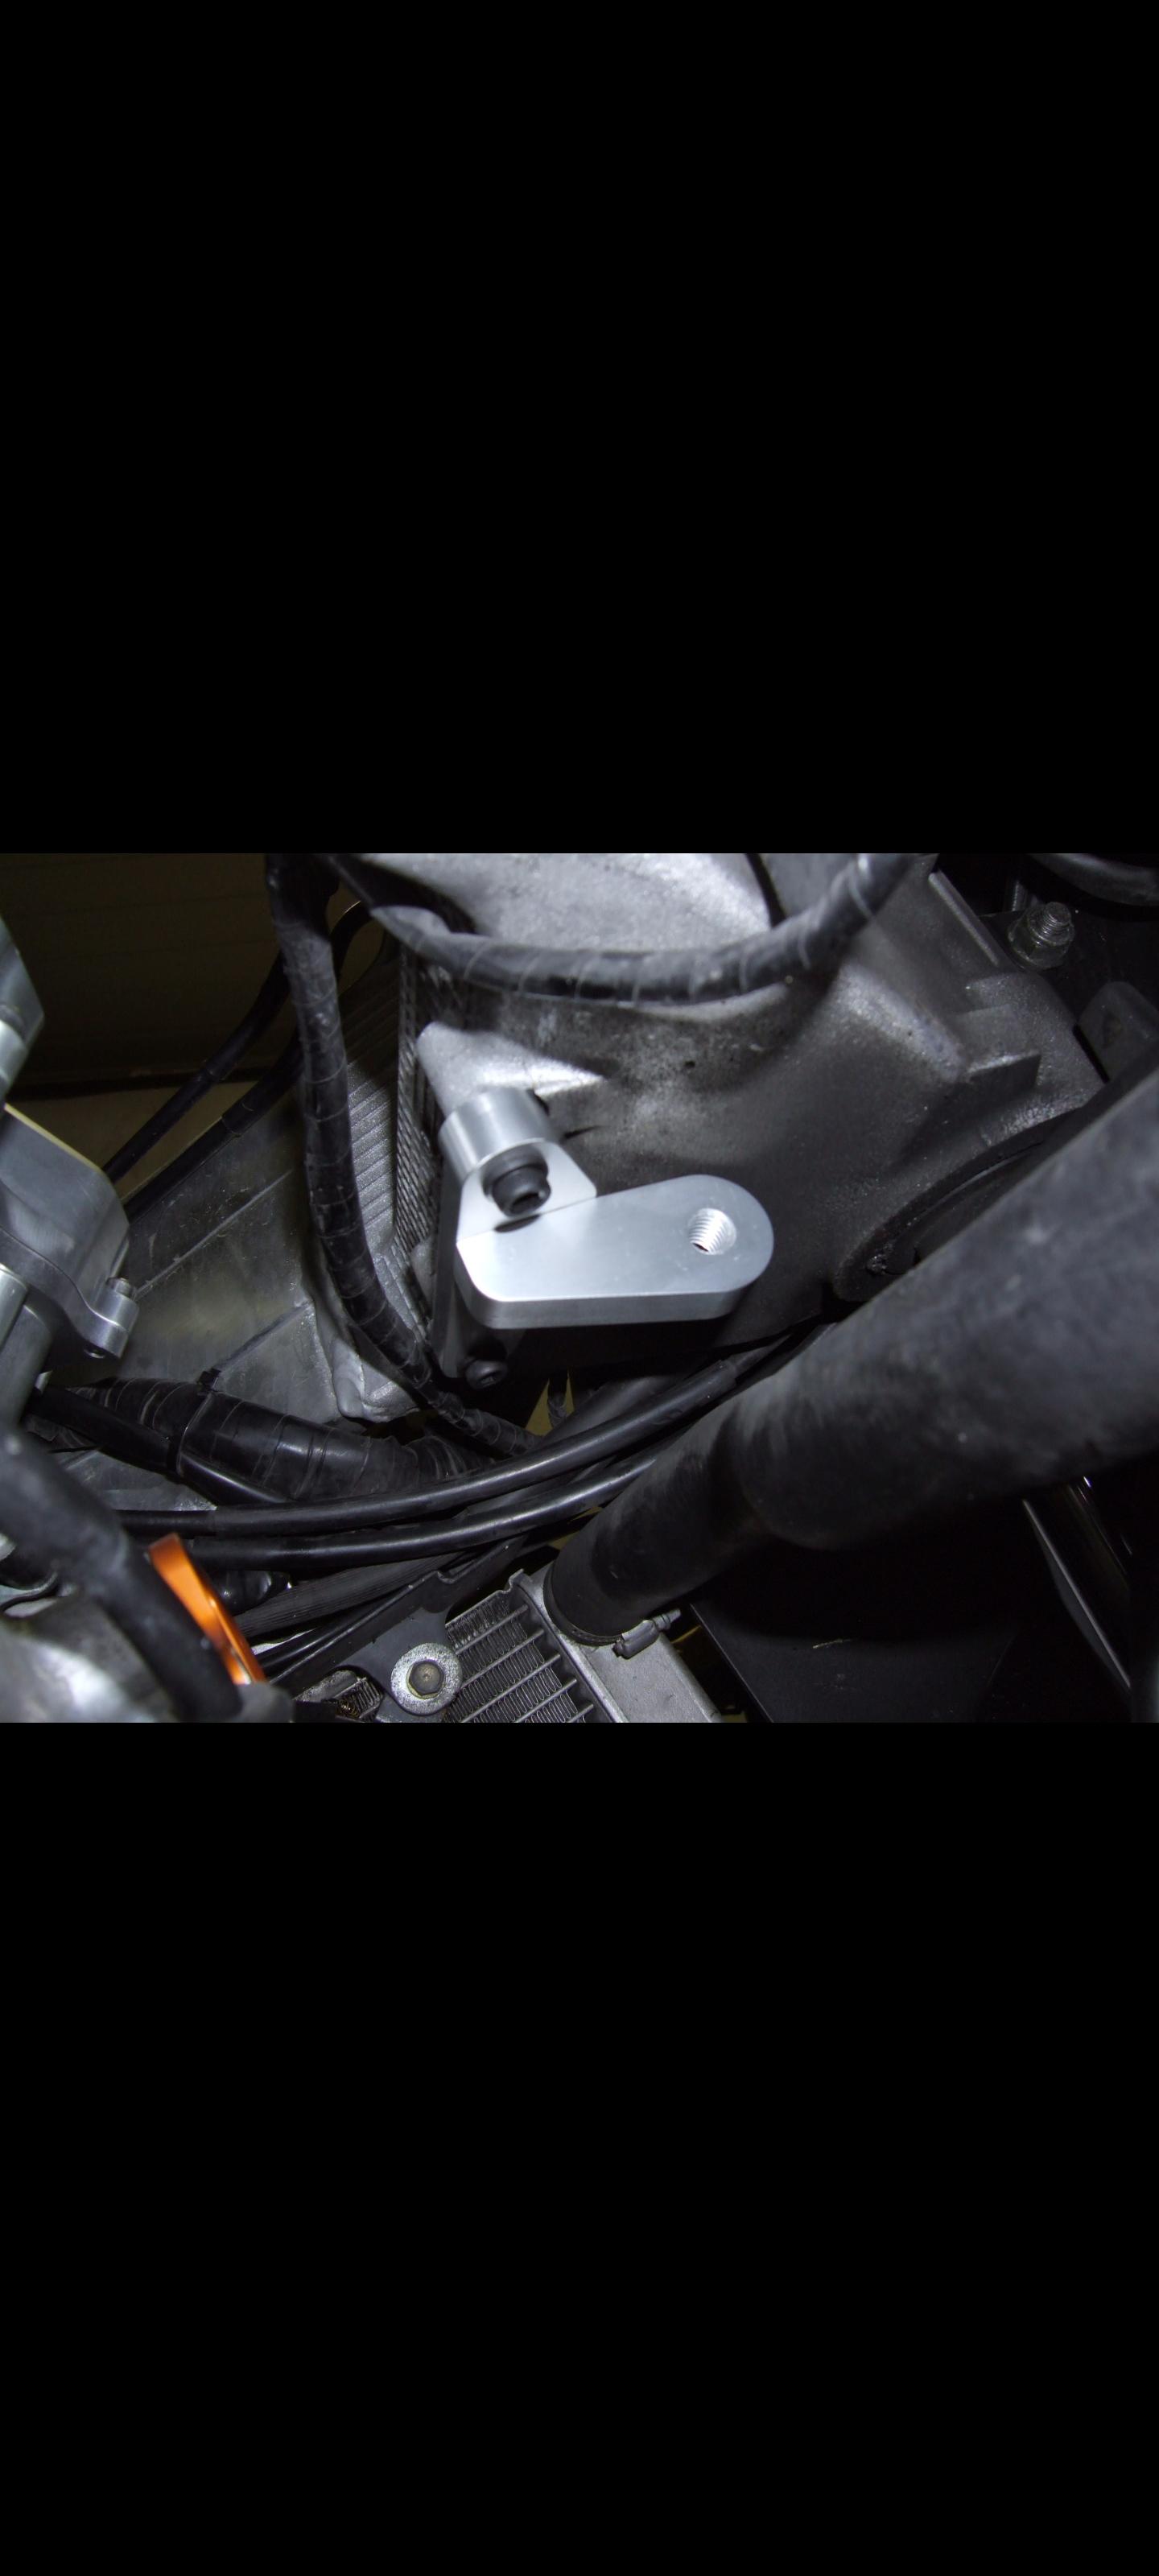
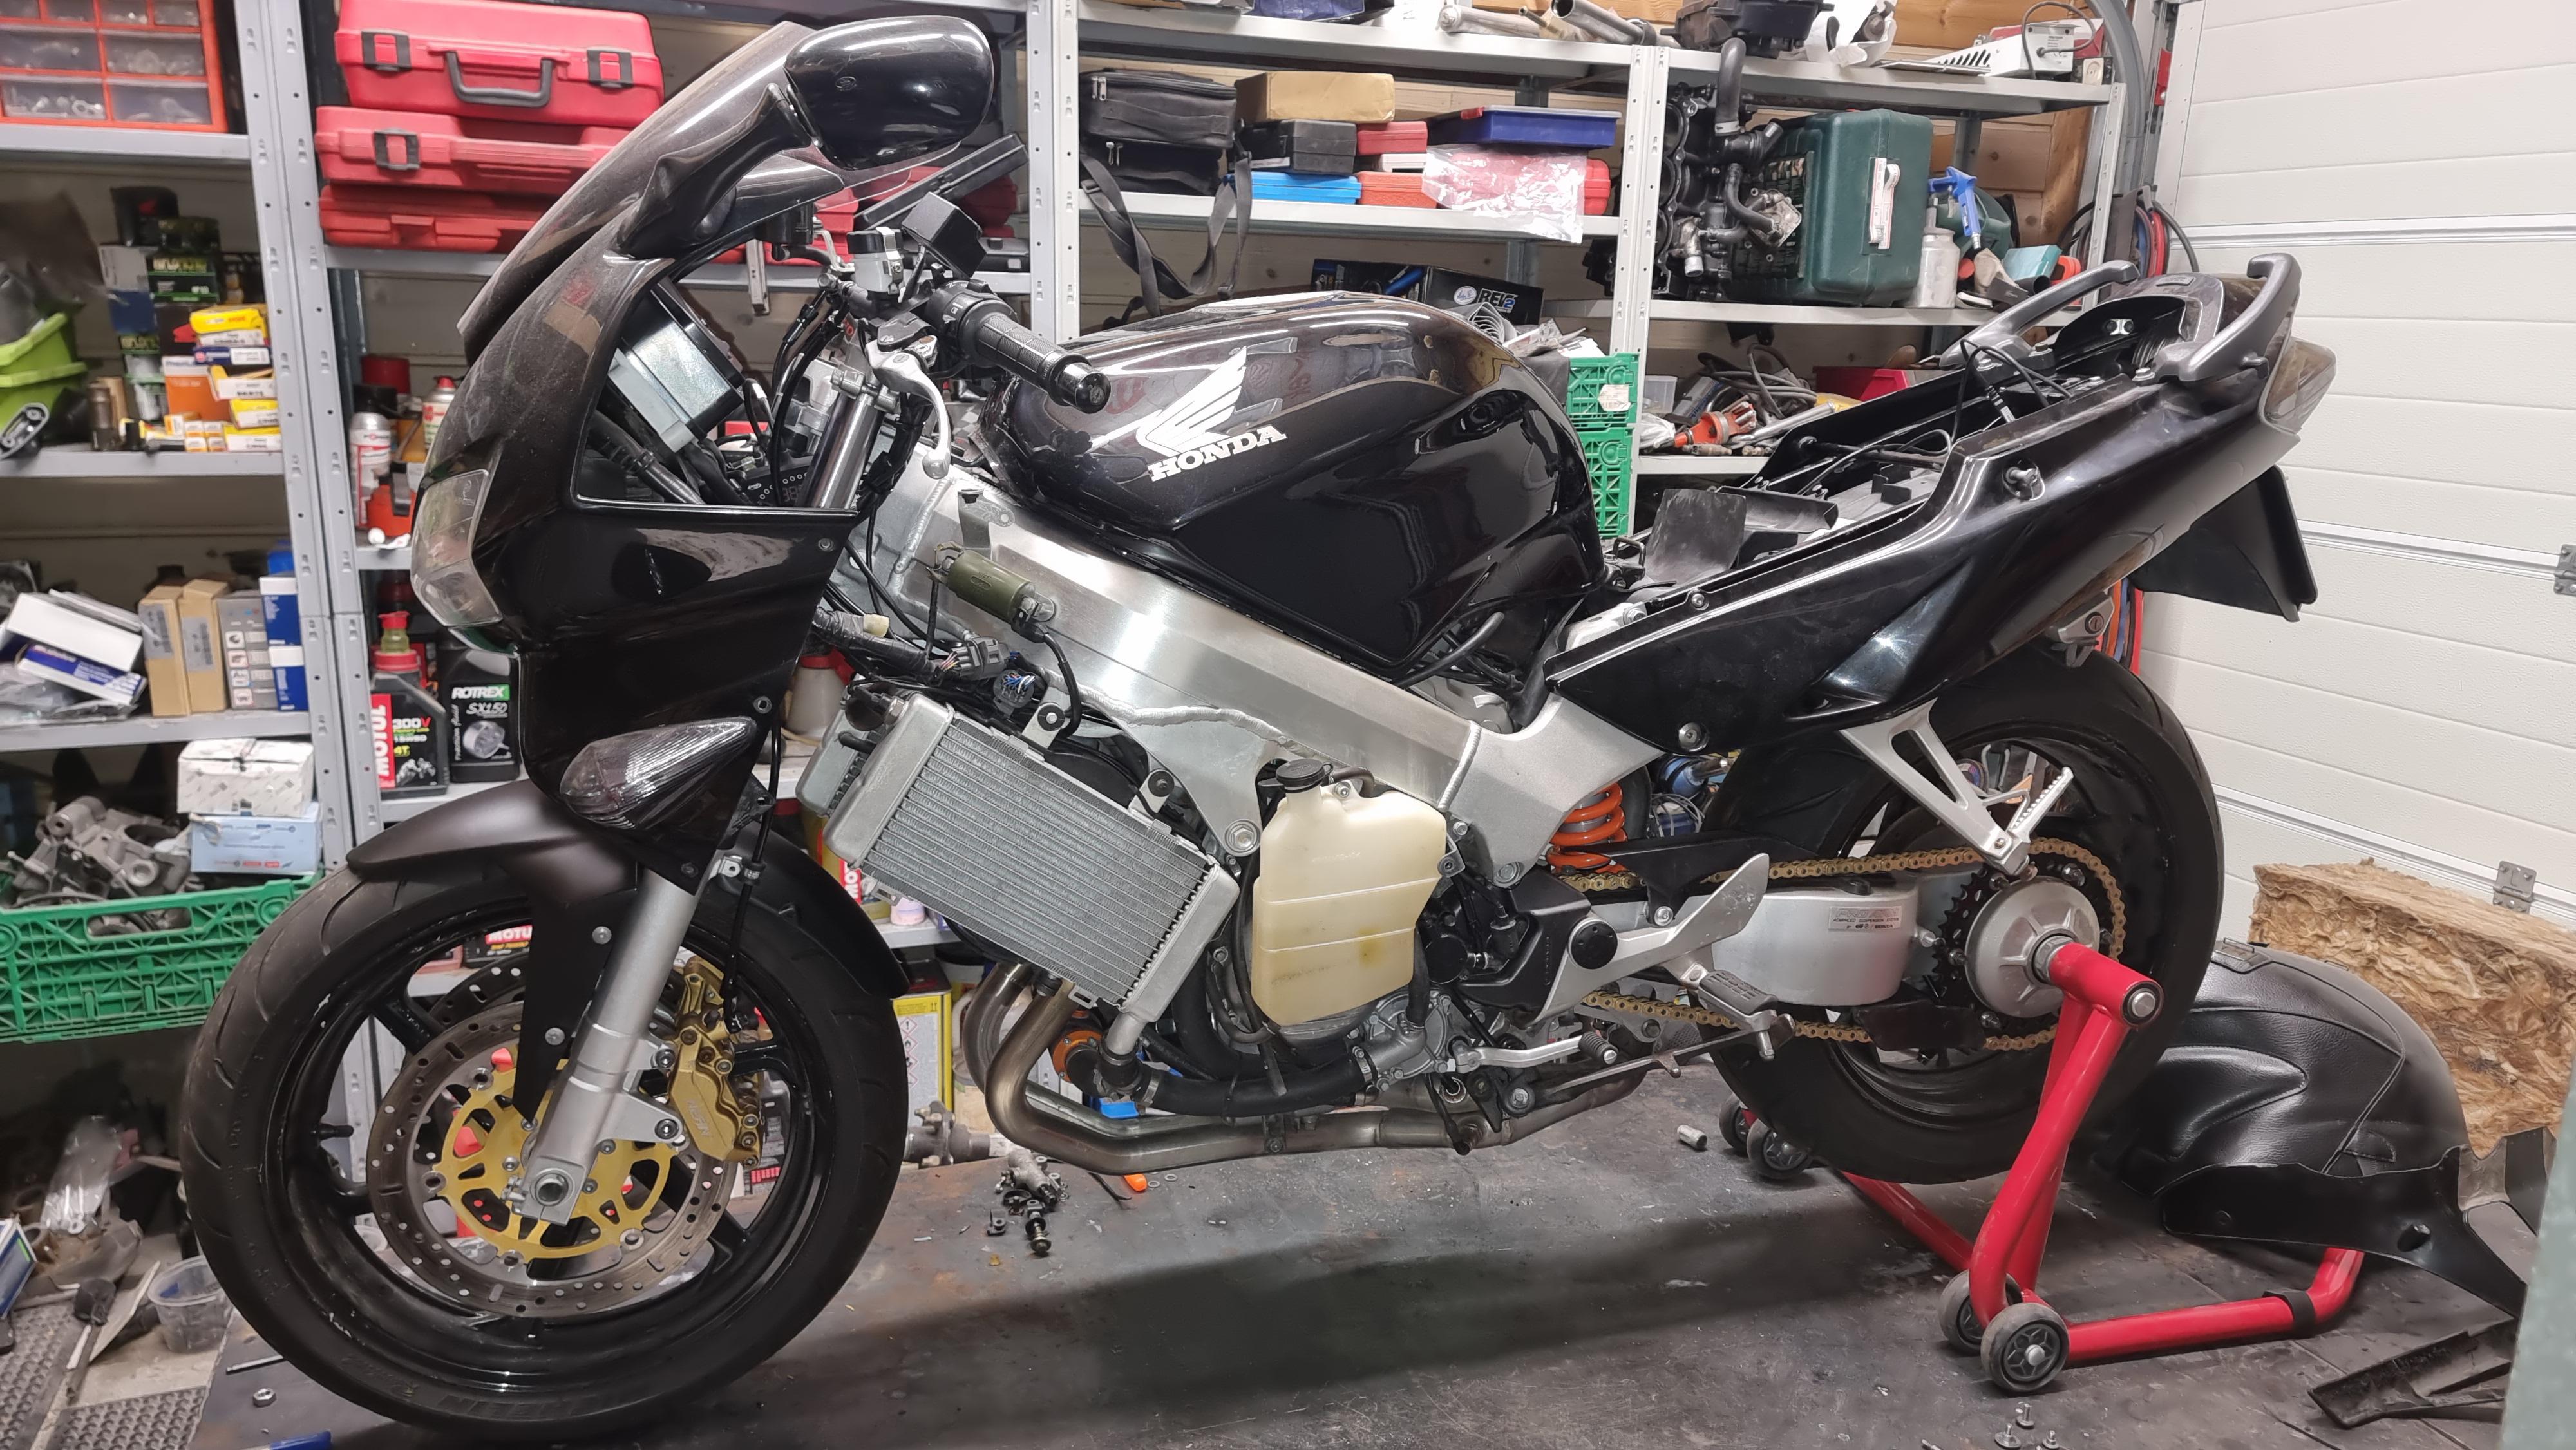
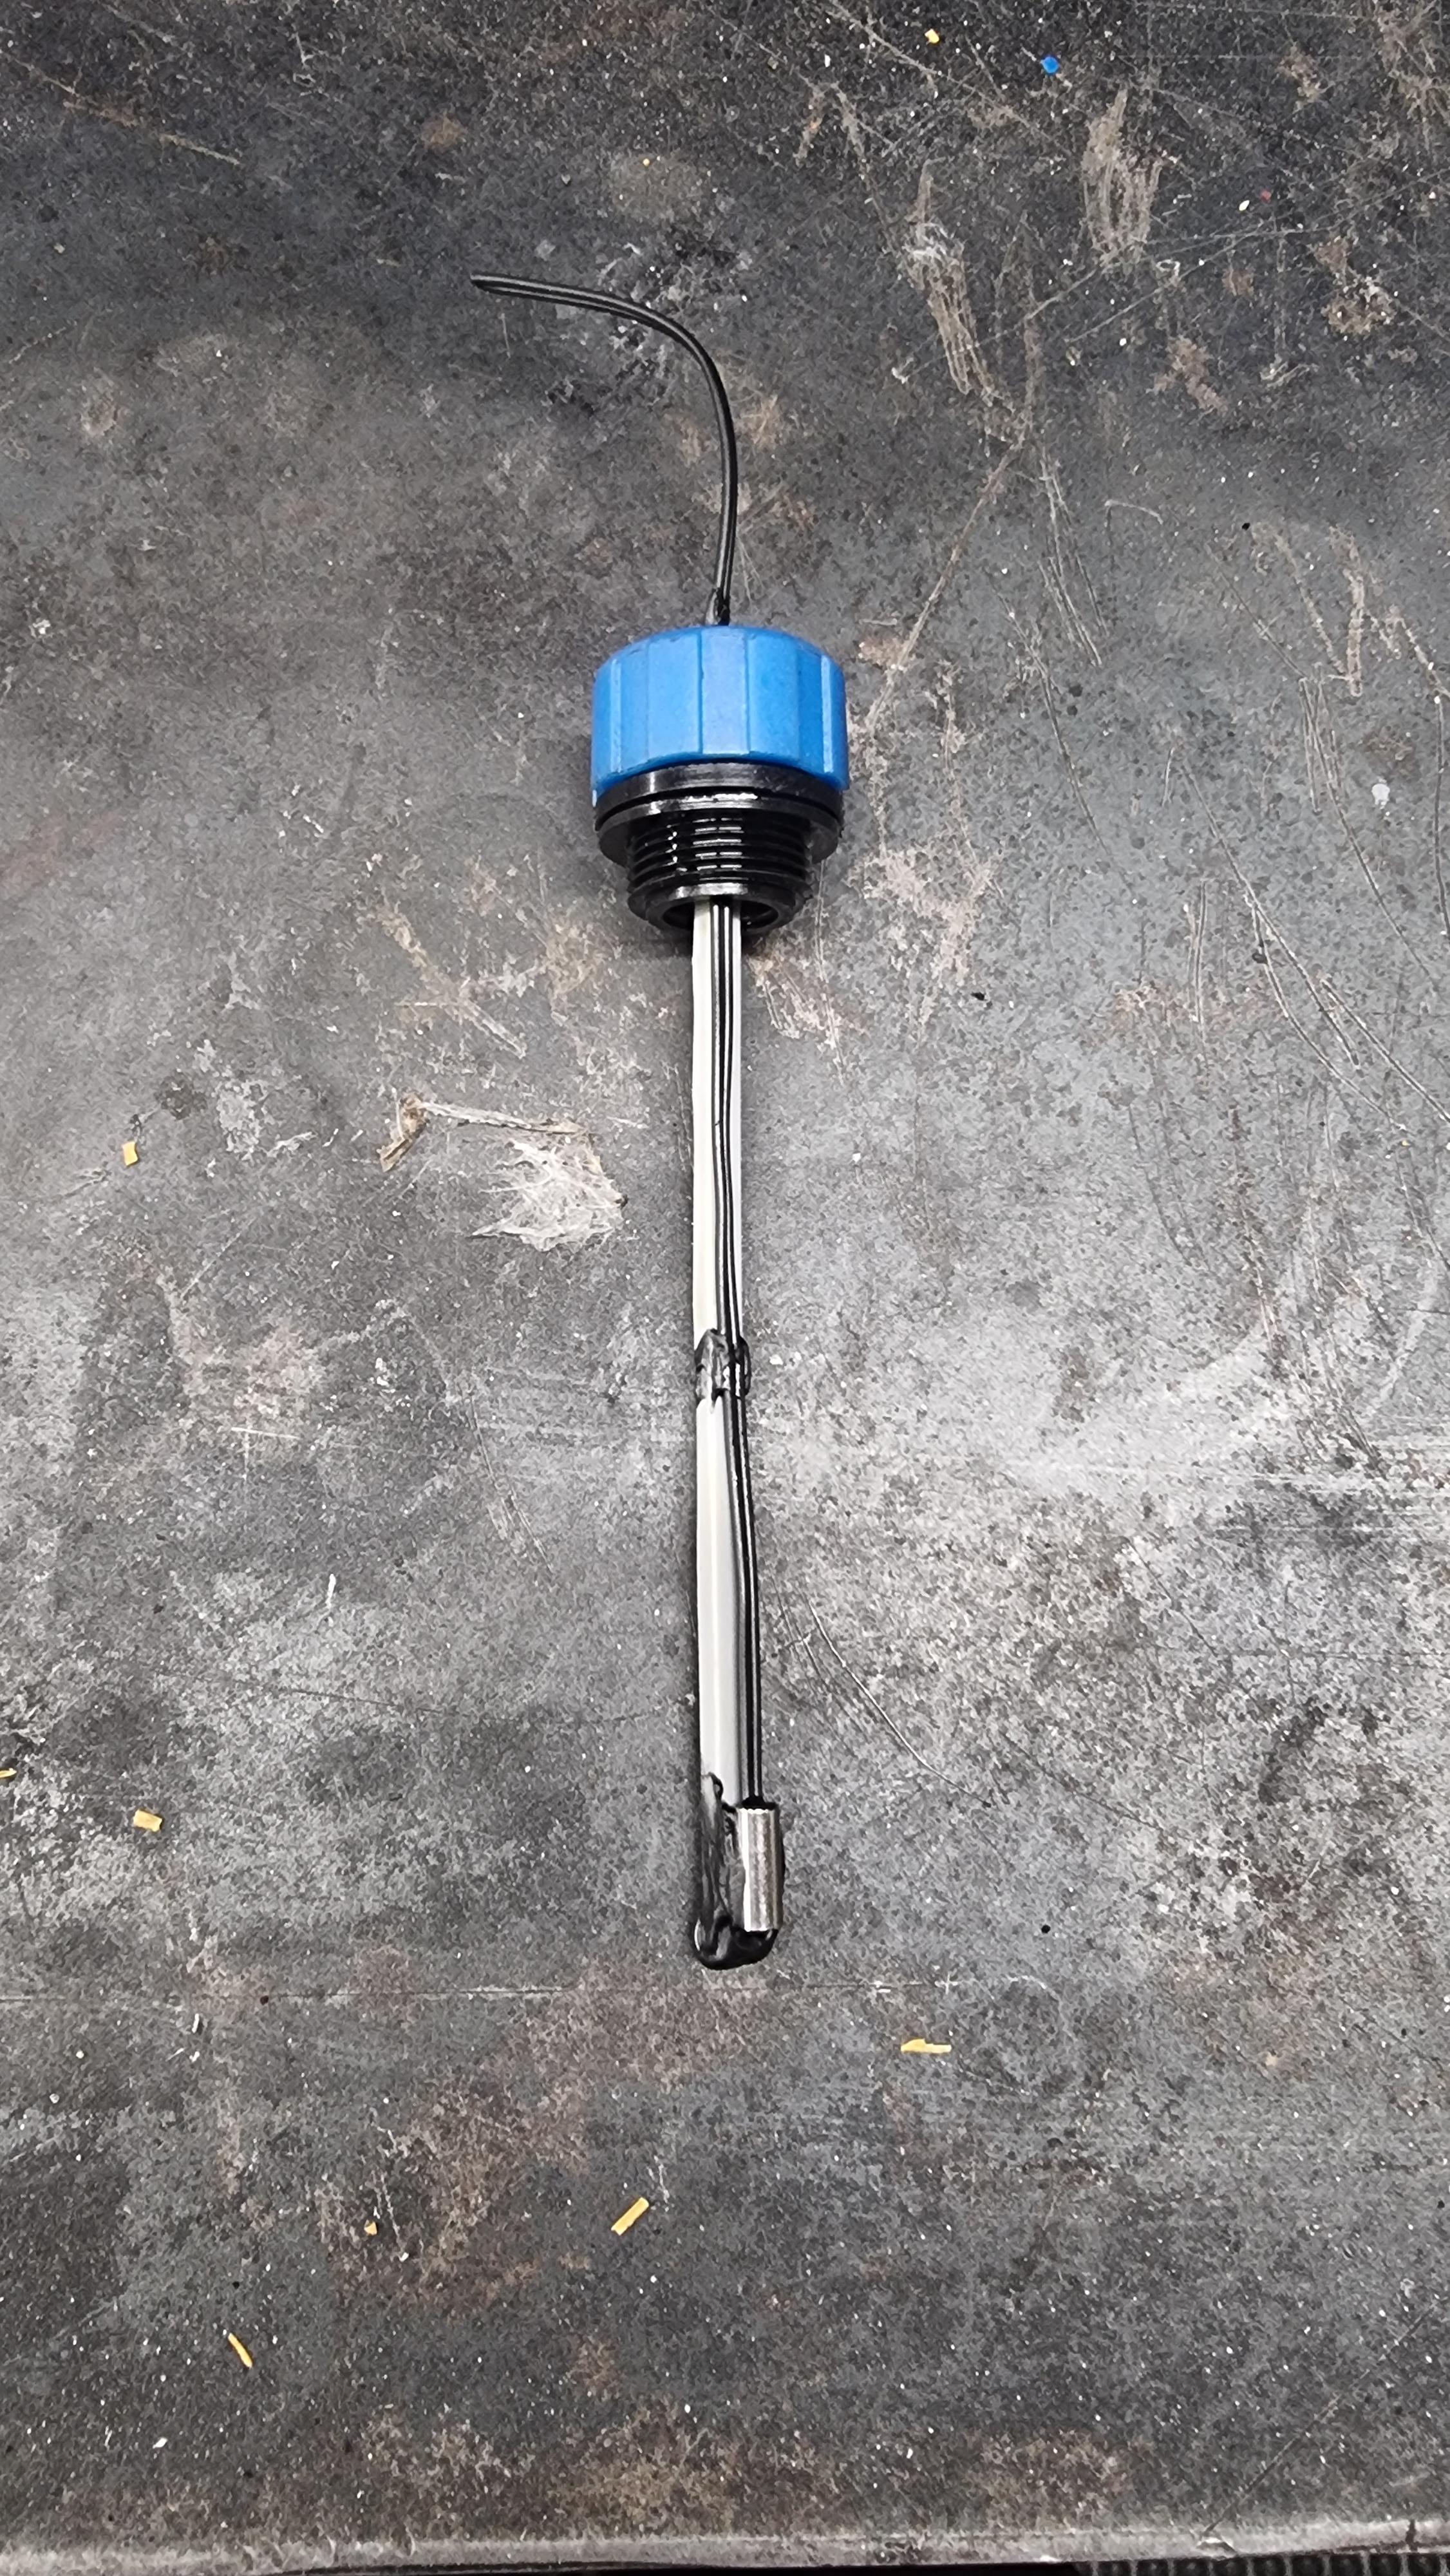
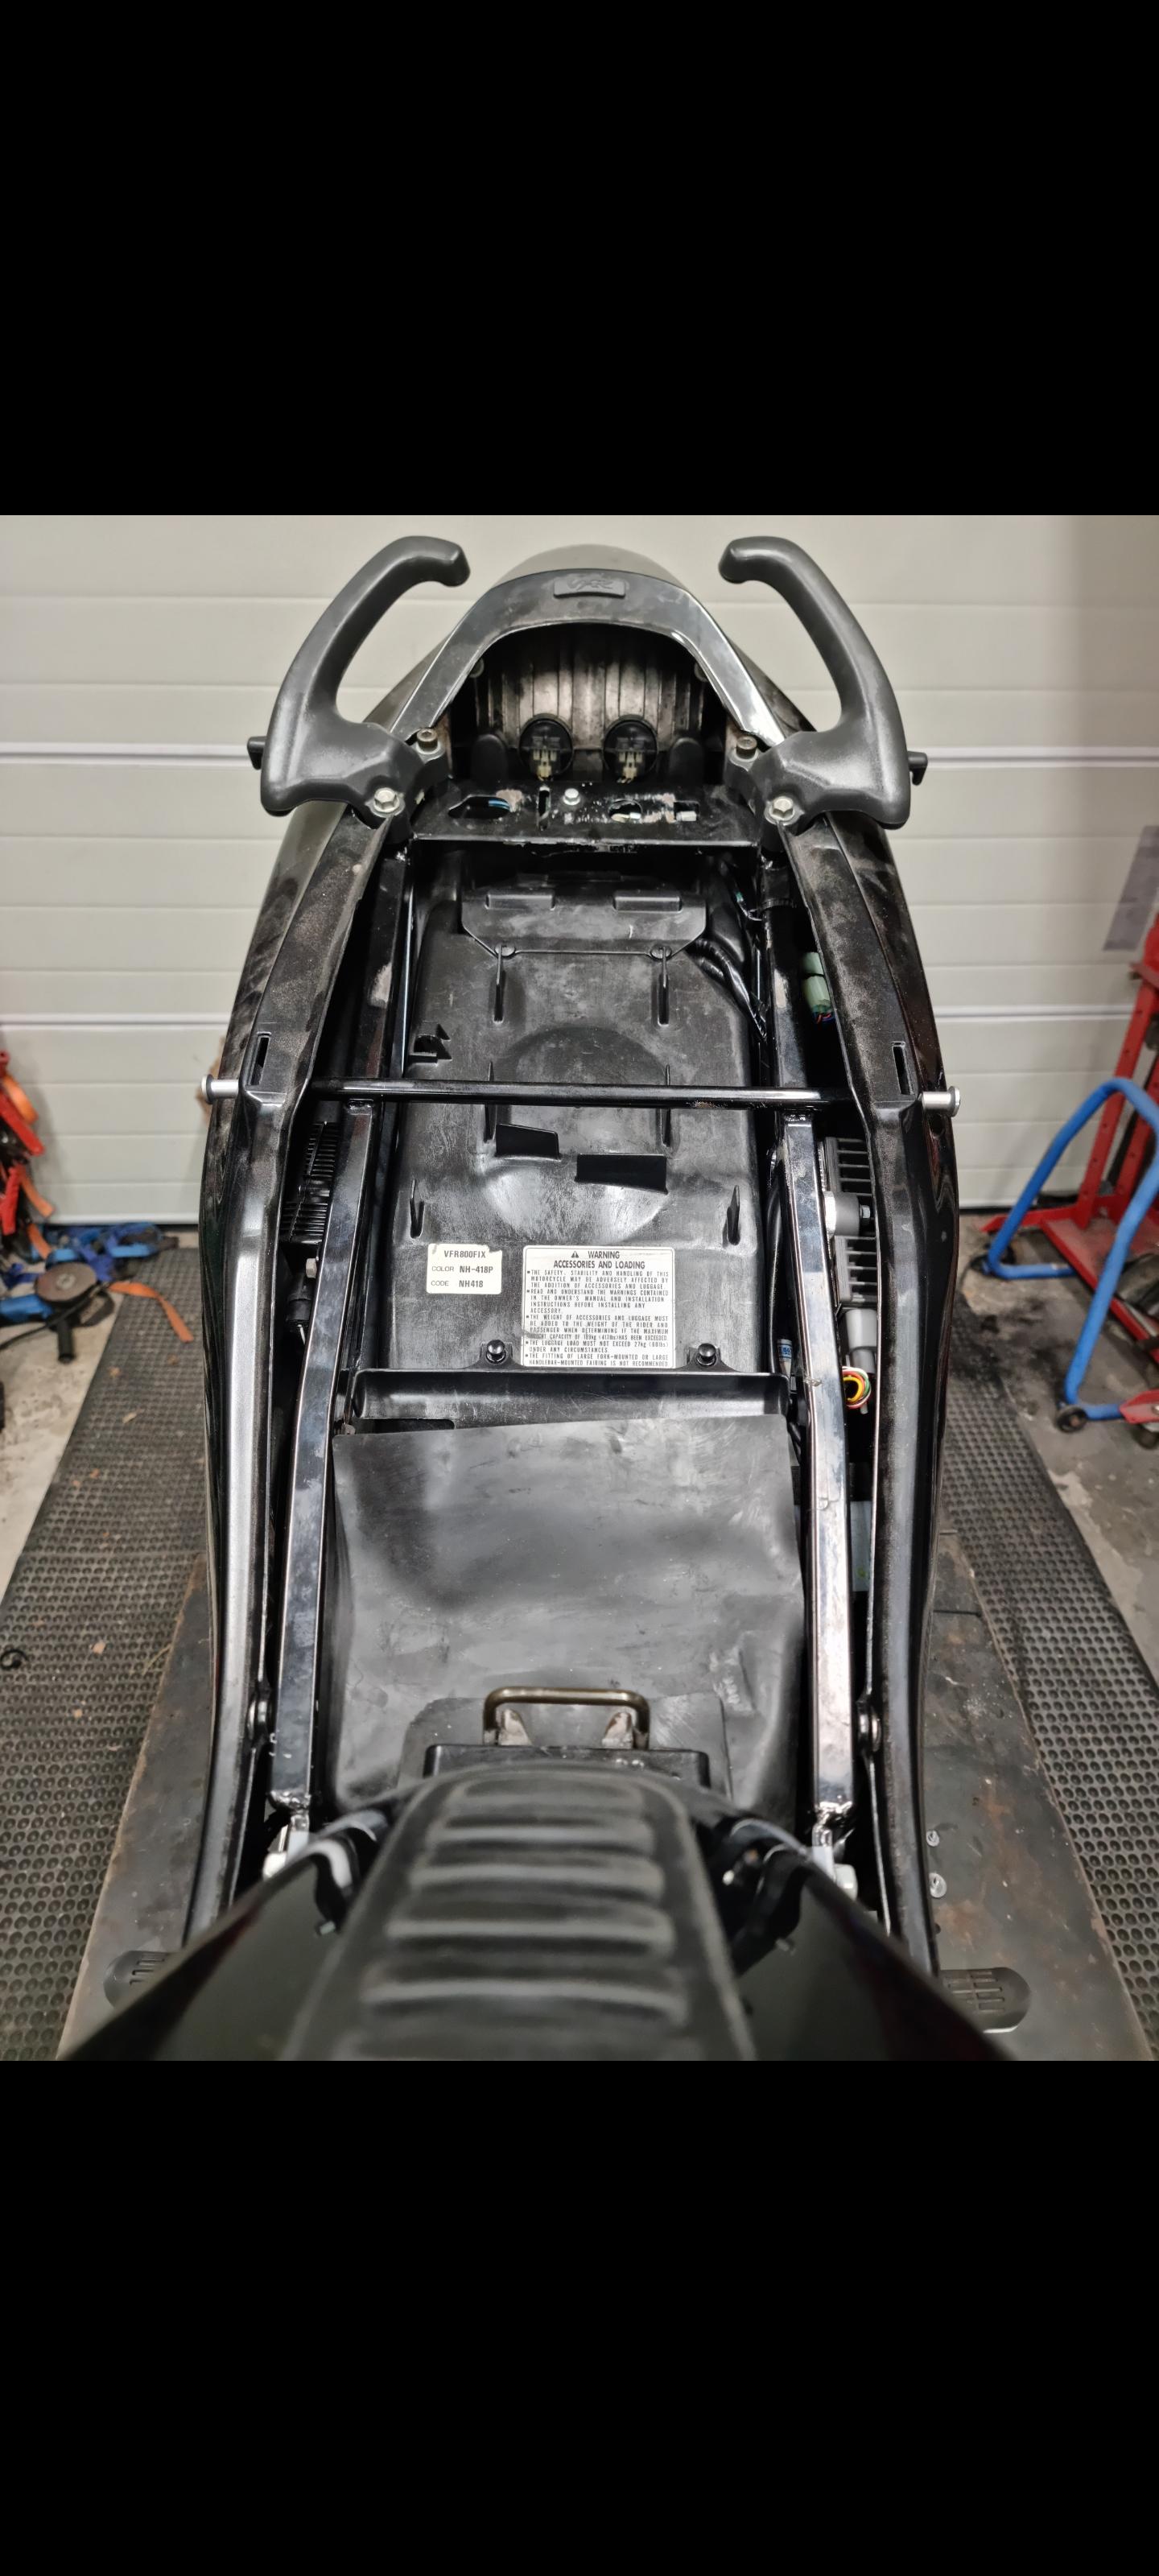
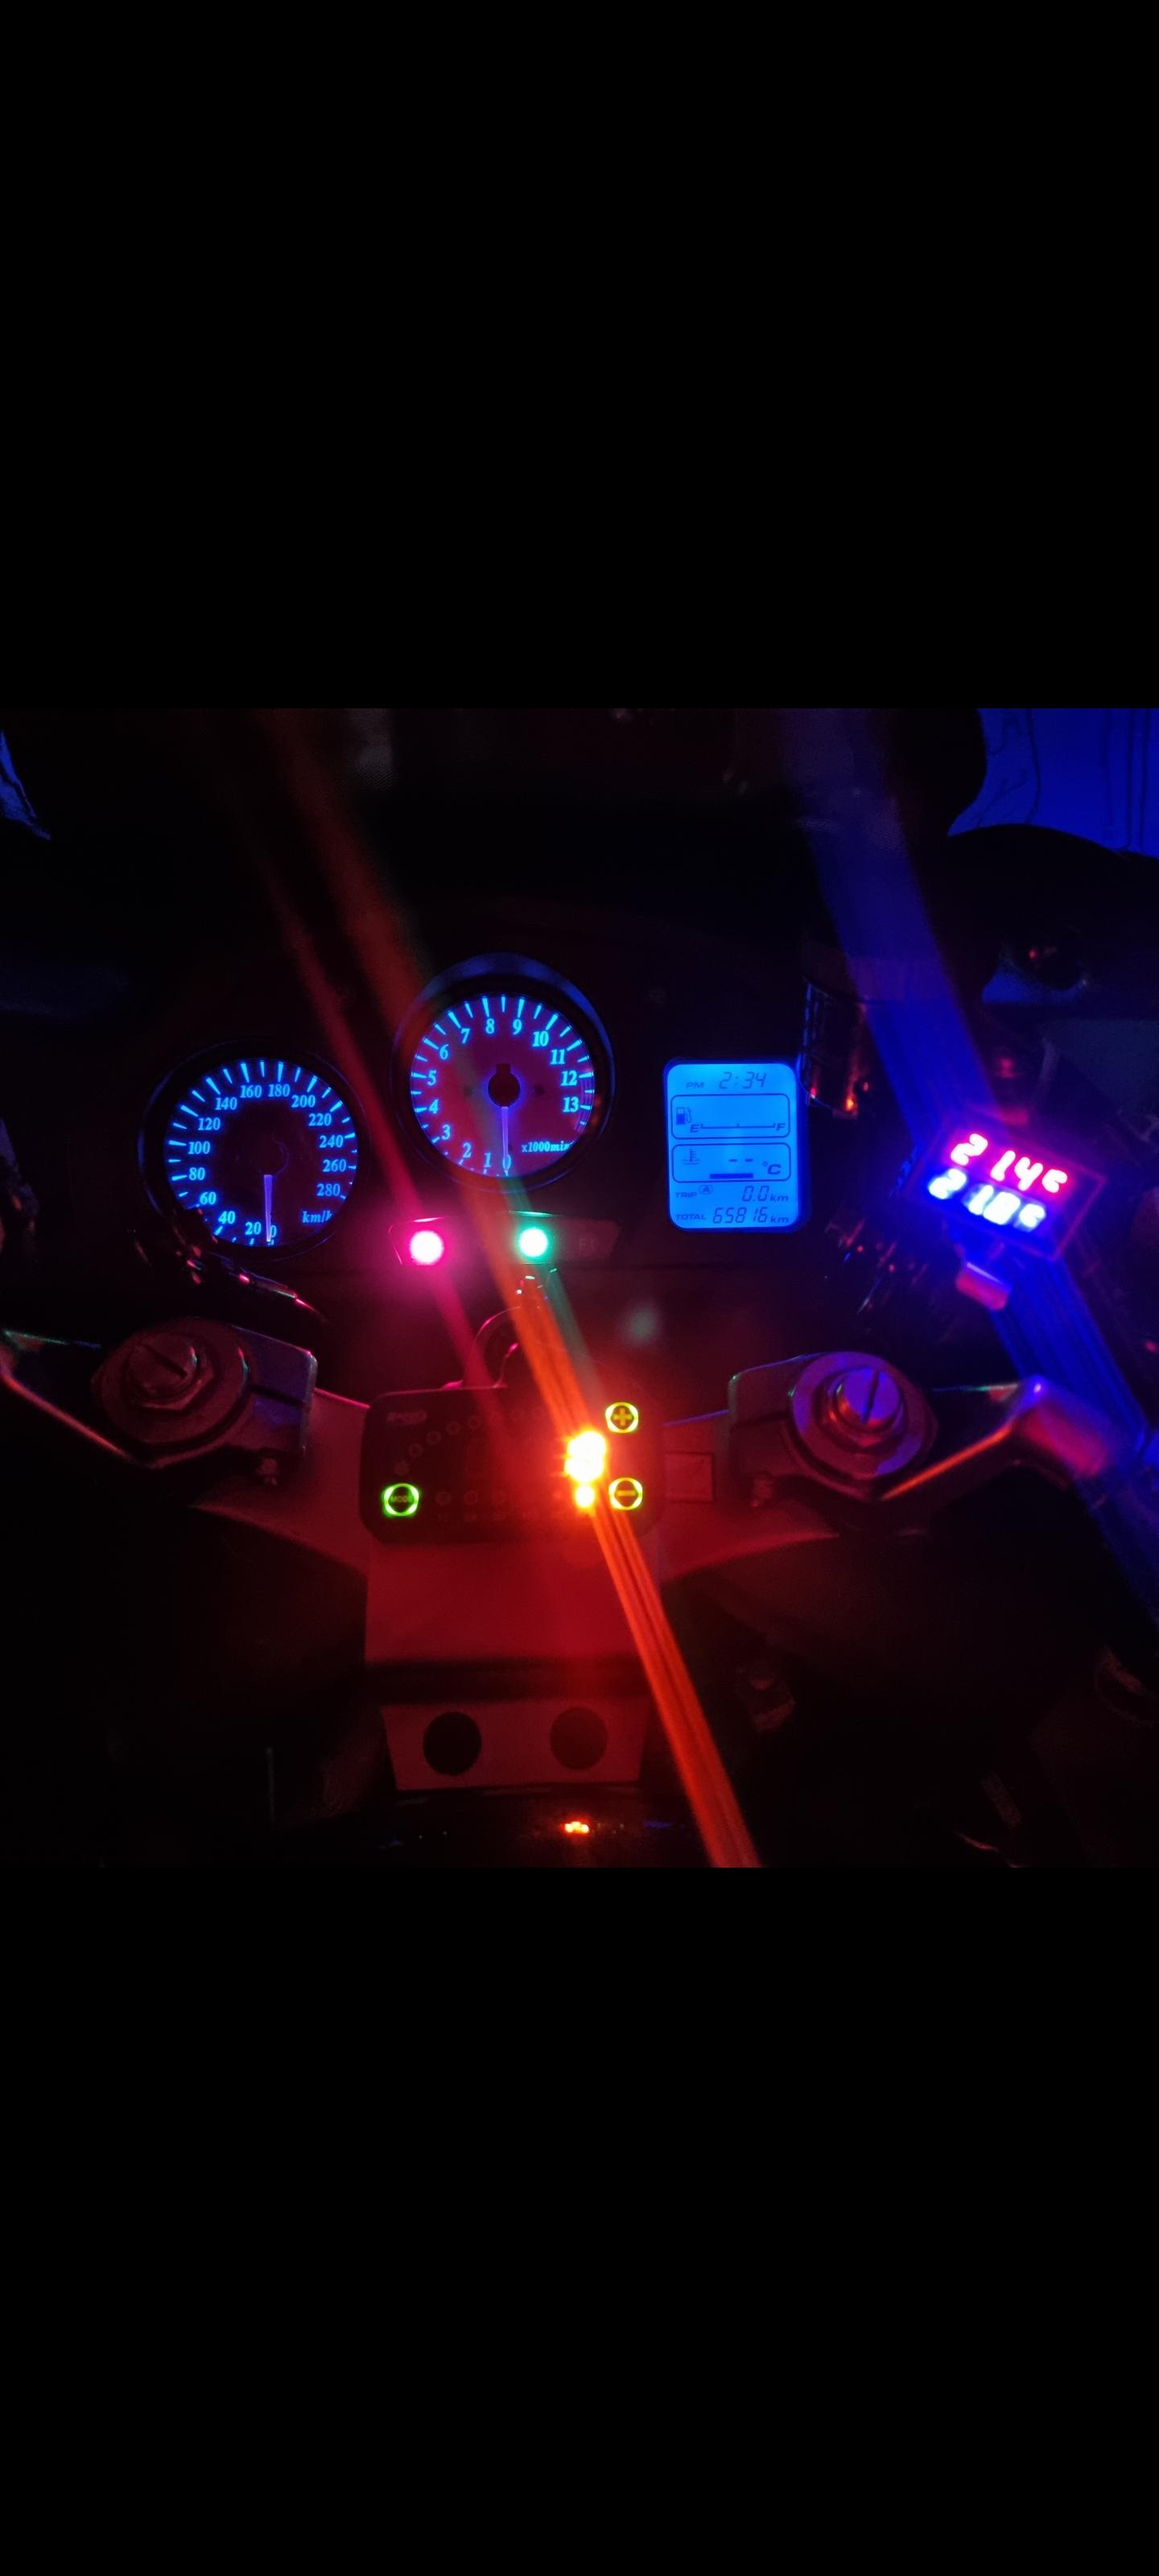
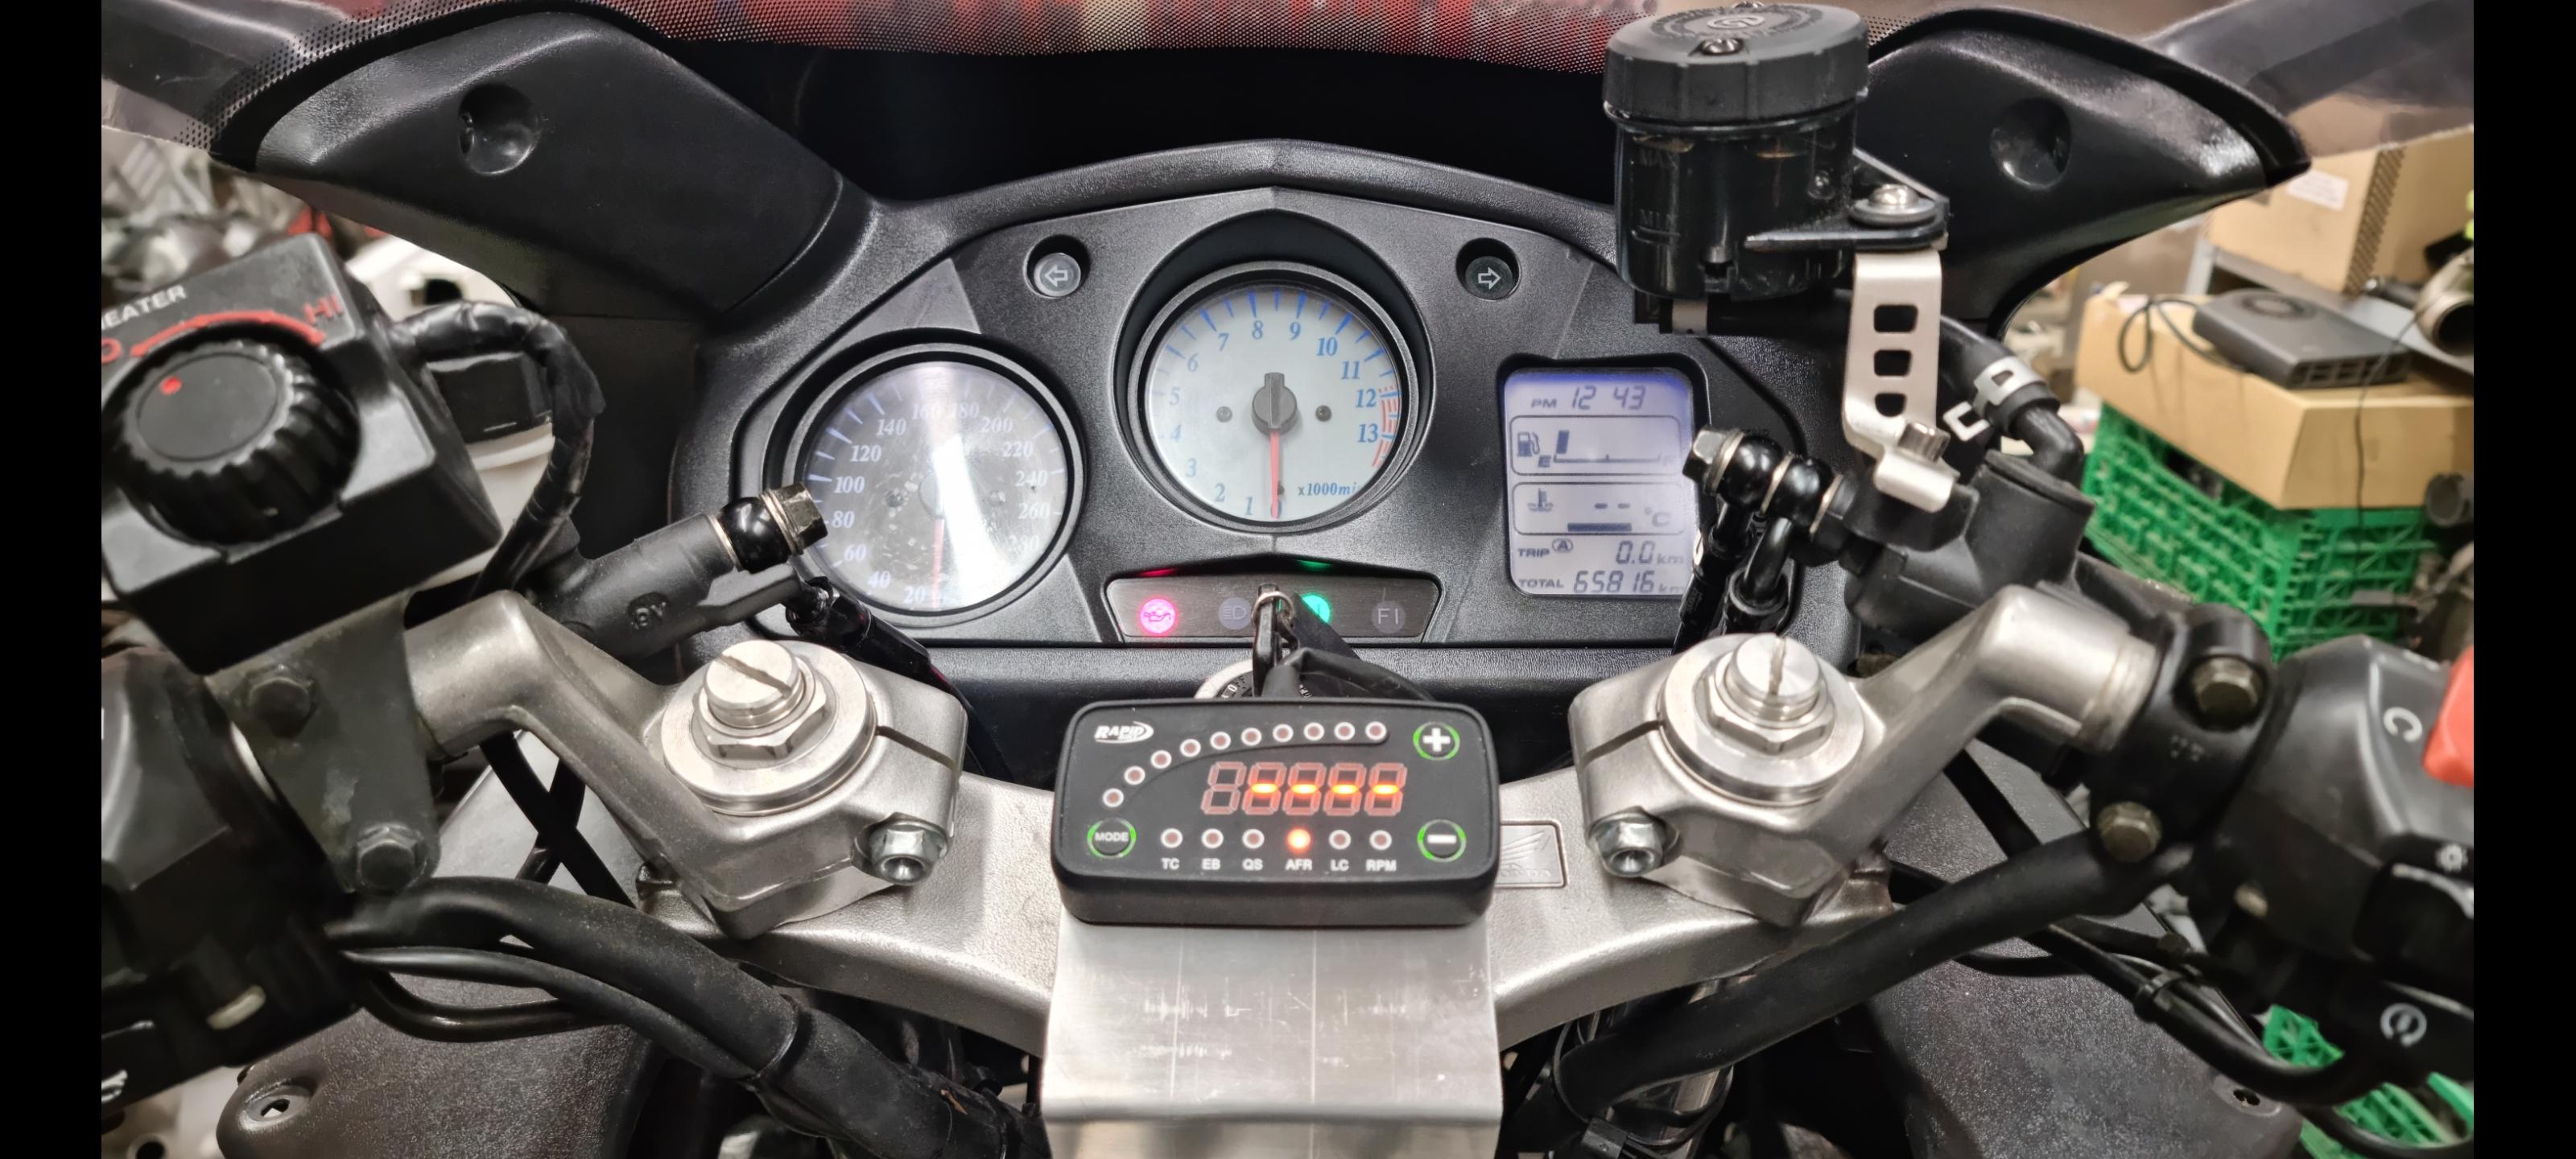
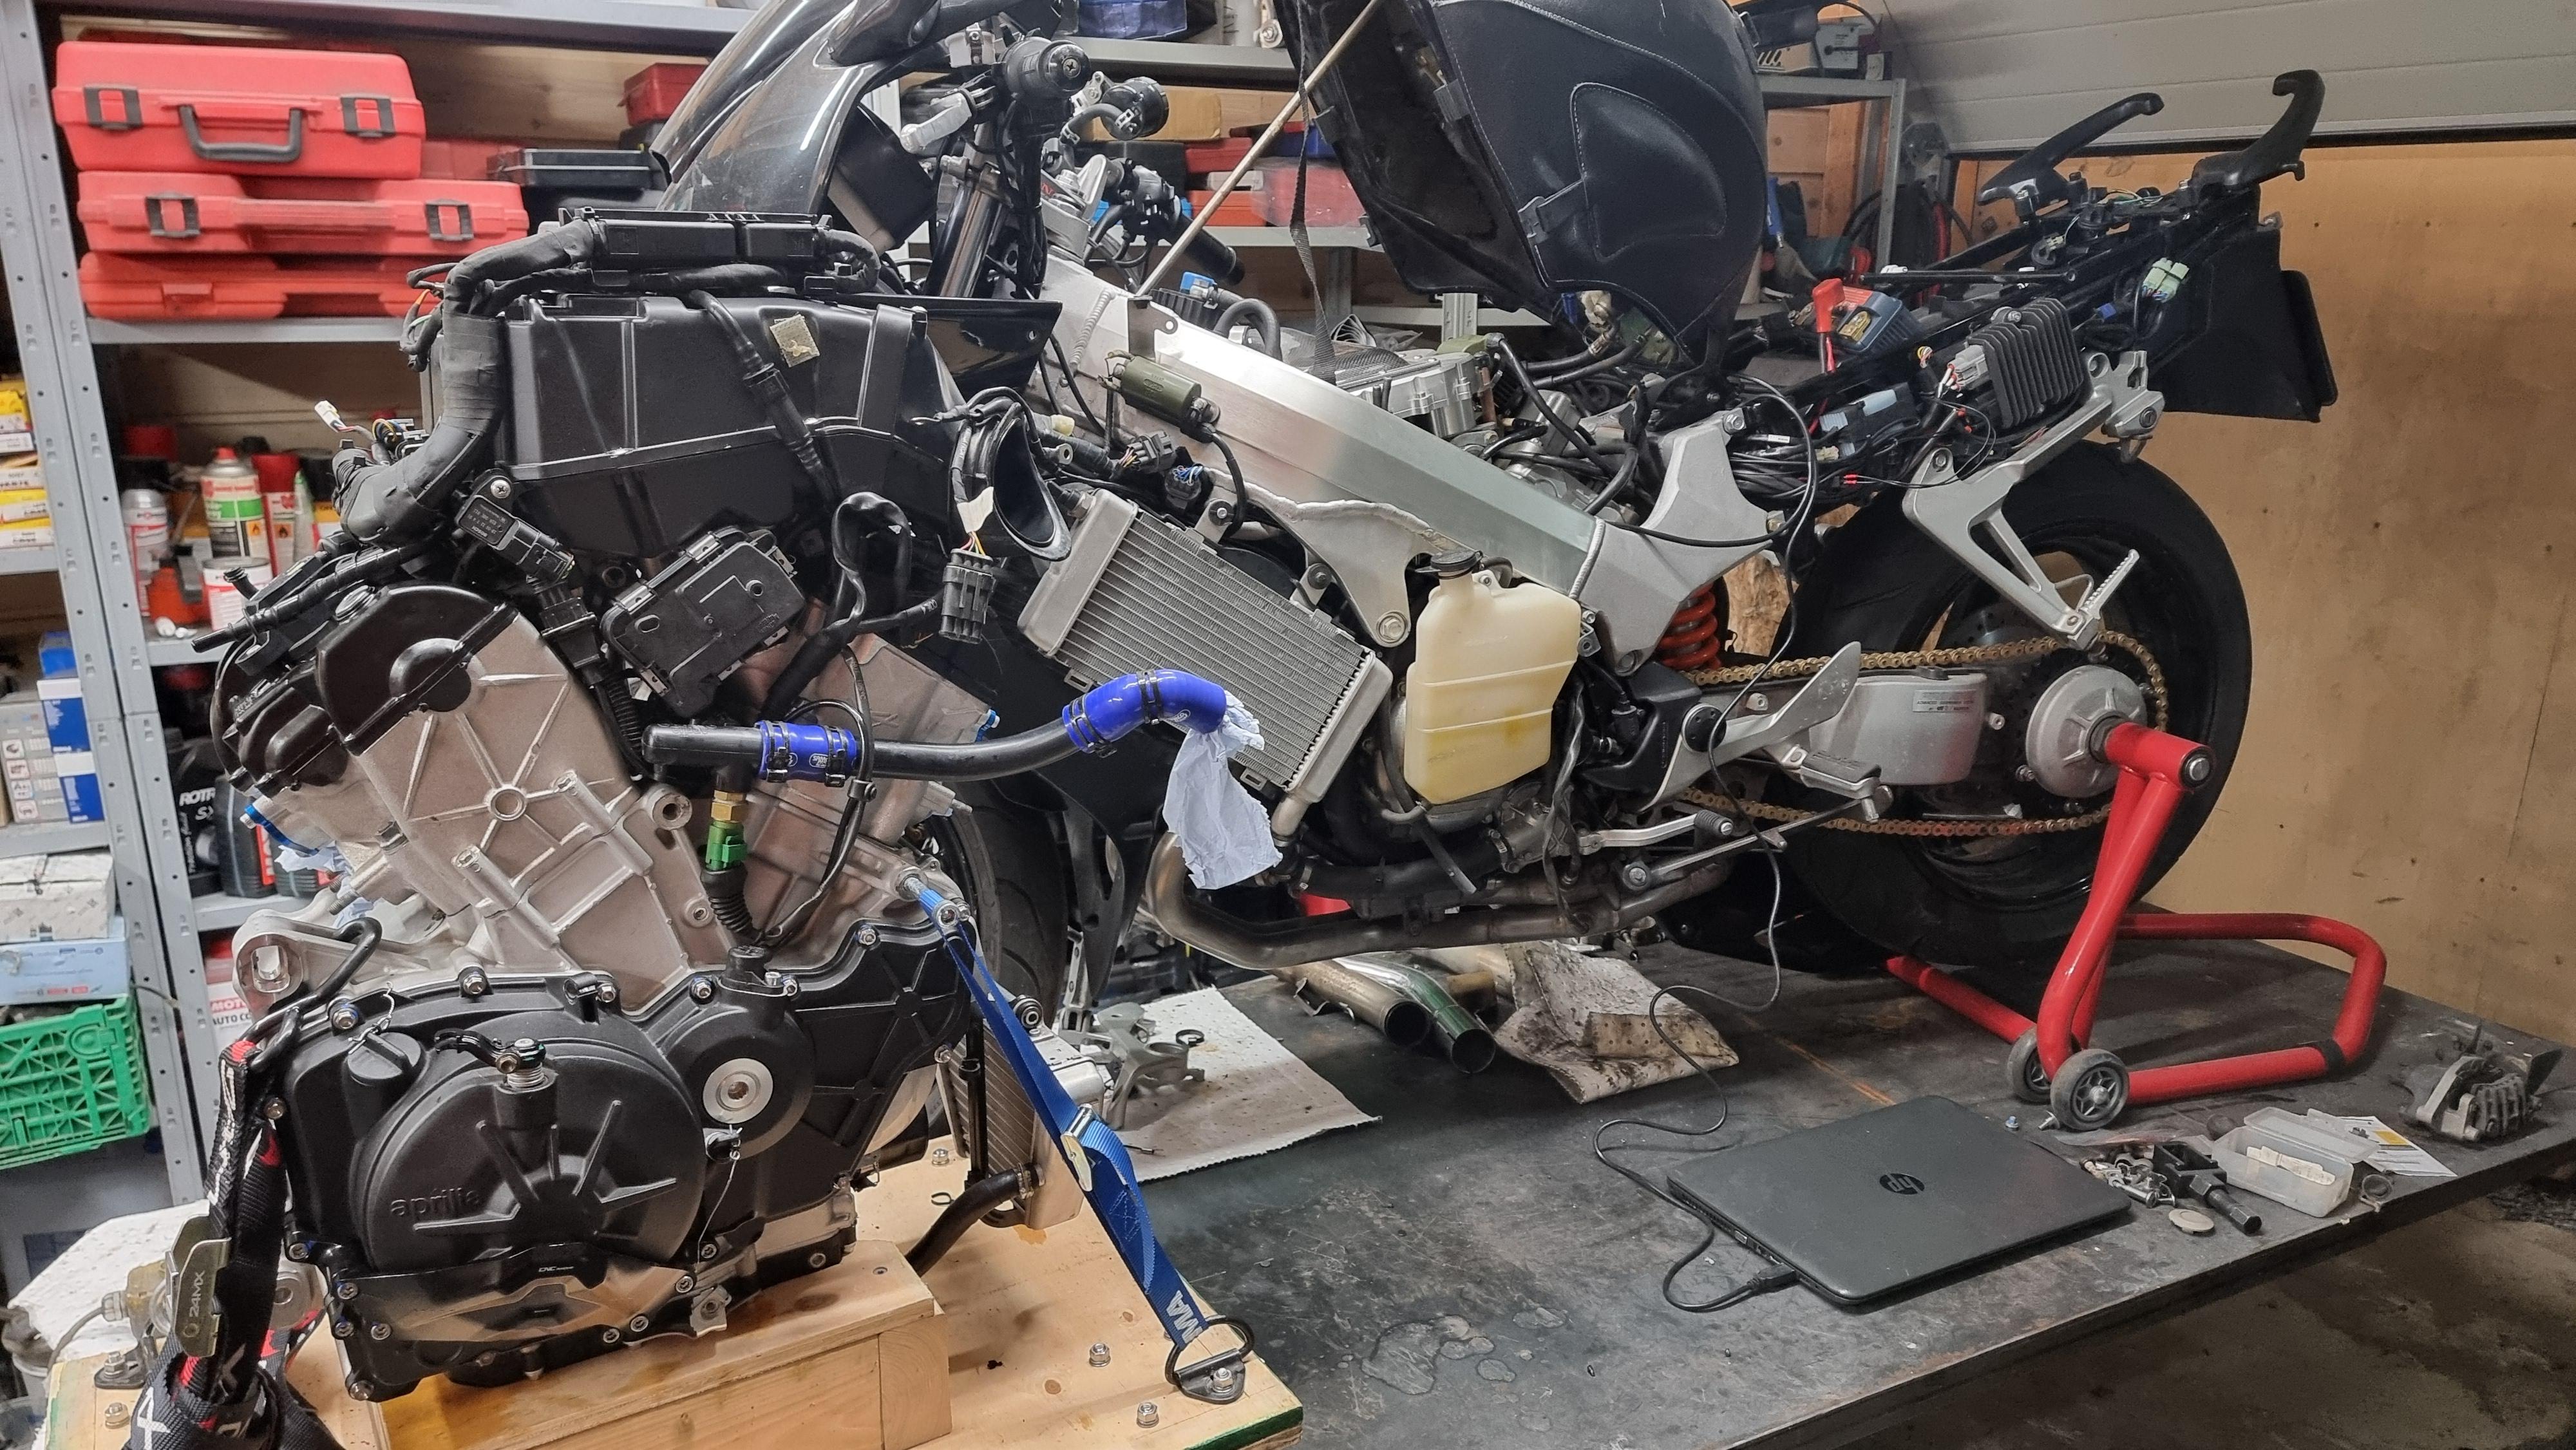
This going to be a bit of a wrap up post on this first round of this build. She only needs clothing, belt tensioning and a wash. Horn weight is better down here. It's kind of very heavy! Also re the vfrd headers,the lower of the wideband sensors hit the fairing. clean and OEM looking! RB controller/display for on the fly adjustments and afr watching. Also a small temp gauge for the rotrex oil and another probe on the outside of the charge pipe just because it is a two channel and id like to see what ballpark numbers there are. I could make an iat eventually but it's kind of temporary zip tied for getting a feel for temps and then it will be remowed. The smallest chain guard ever. Let's see what my clothes have to say about this... Modified rotrex dipstick with temperature sensor. Now I will be able to see if I truly need to add a cooler.
-
Shoot me an email with the file and what you want and I'll see if its open for me to adjust 🙂
-
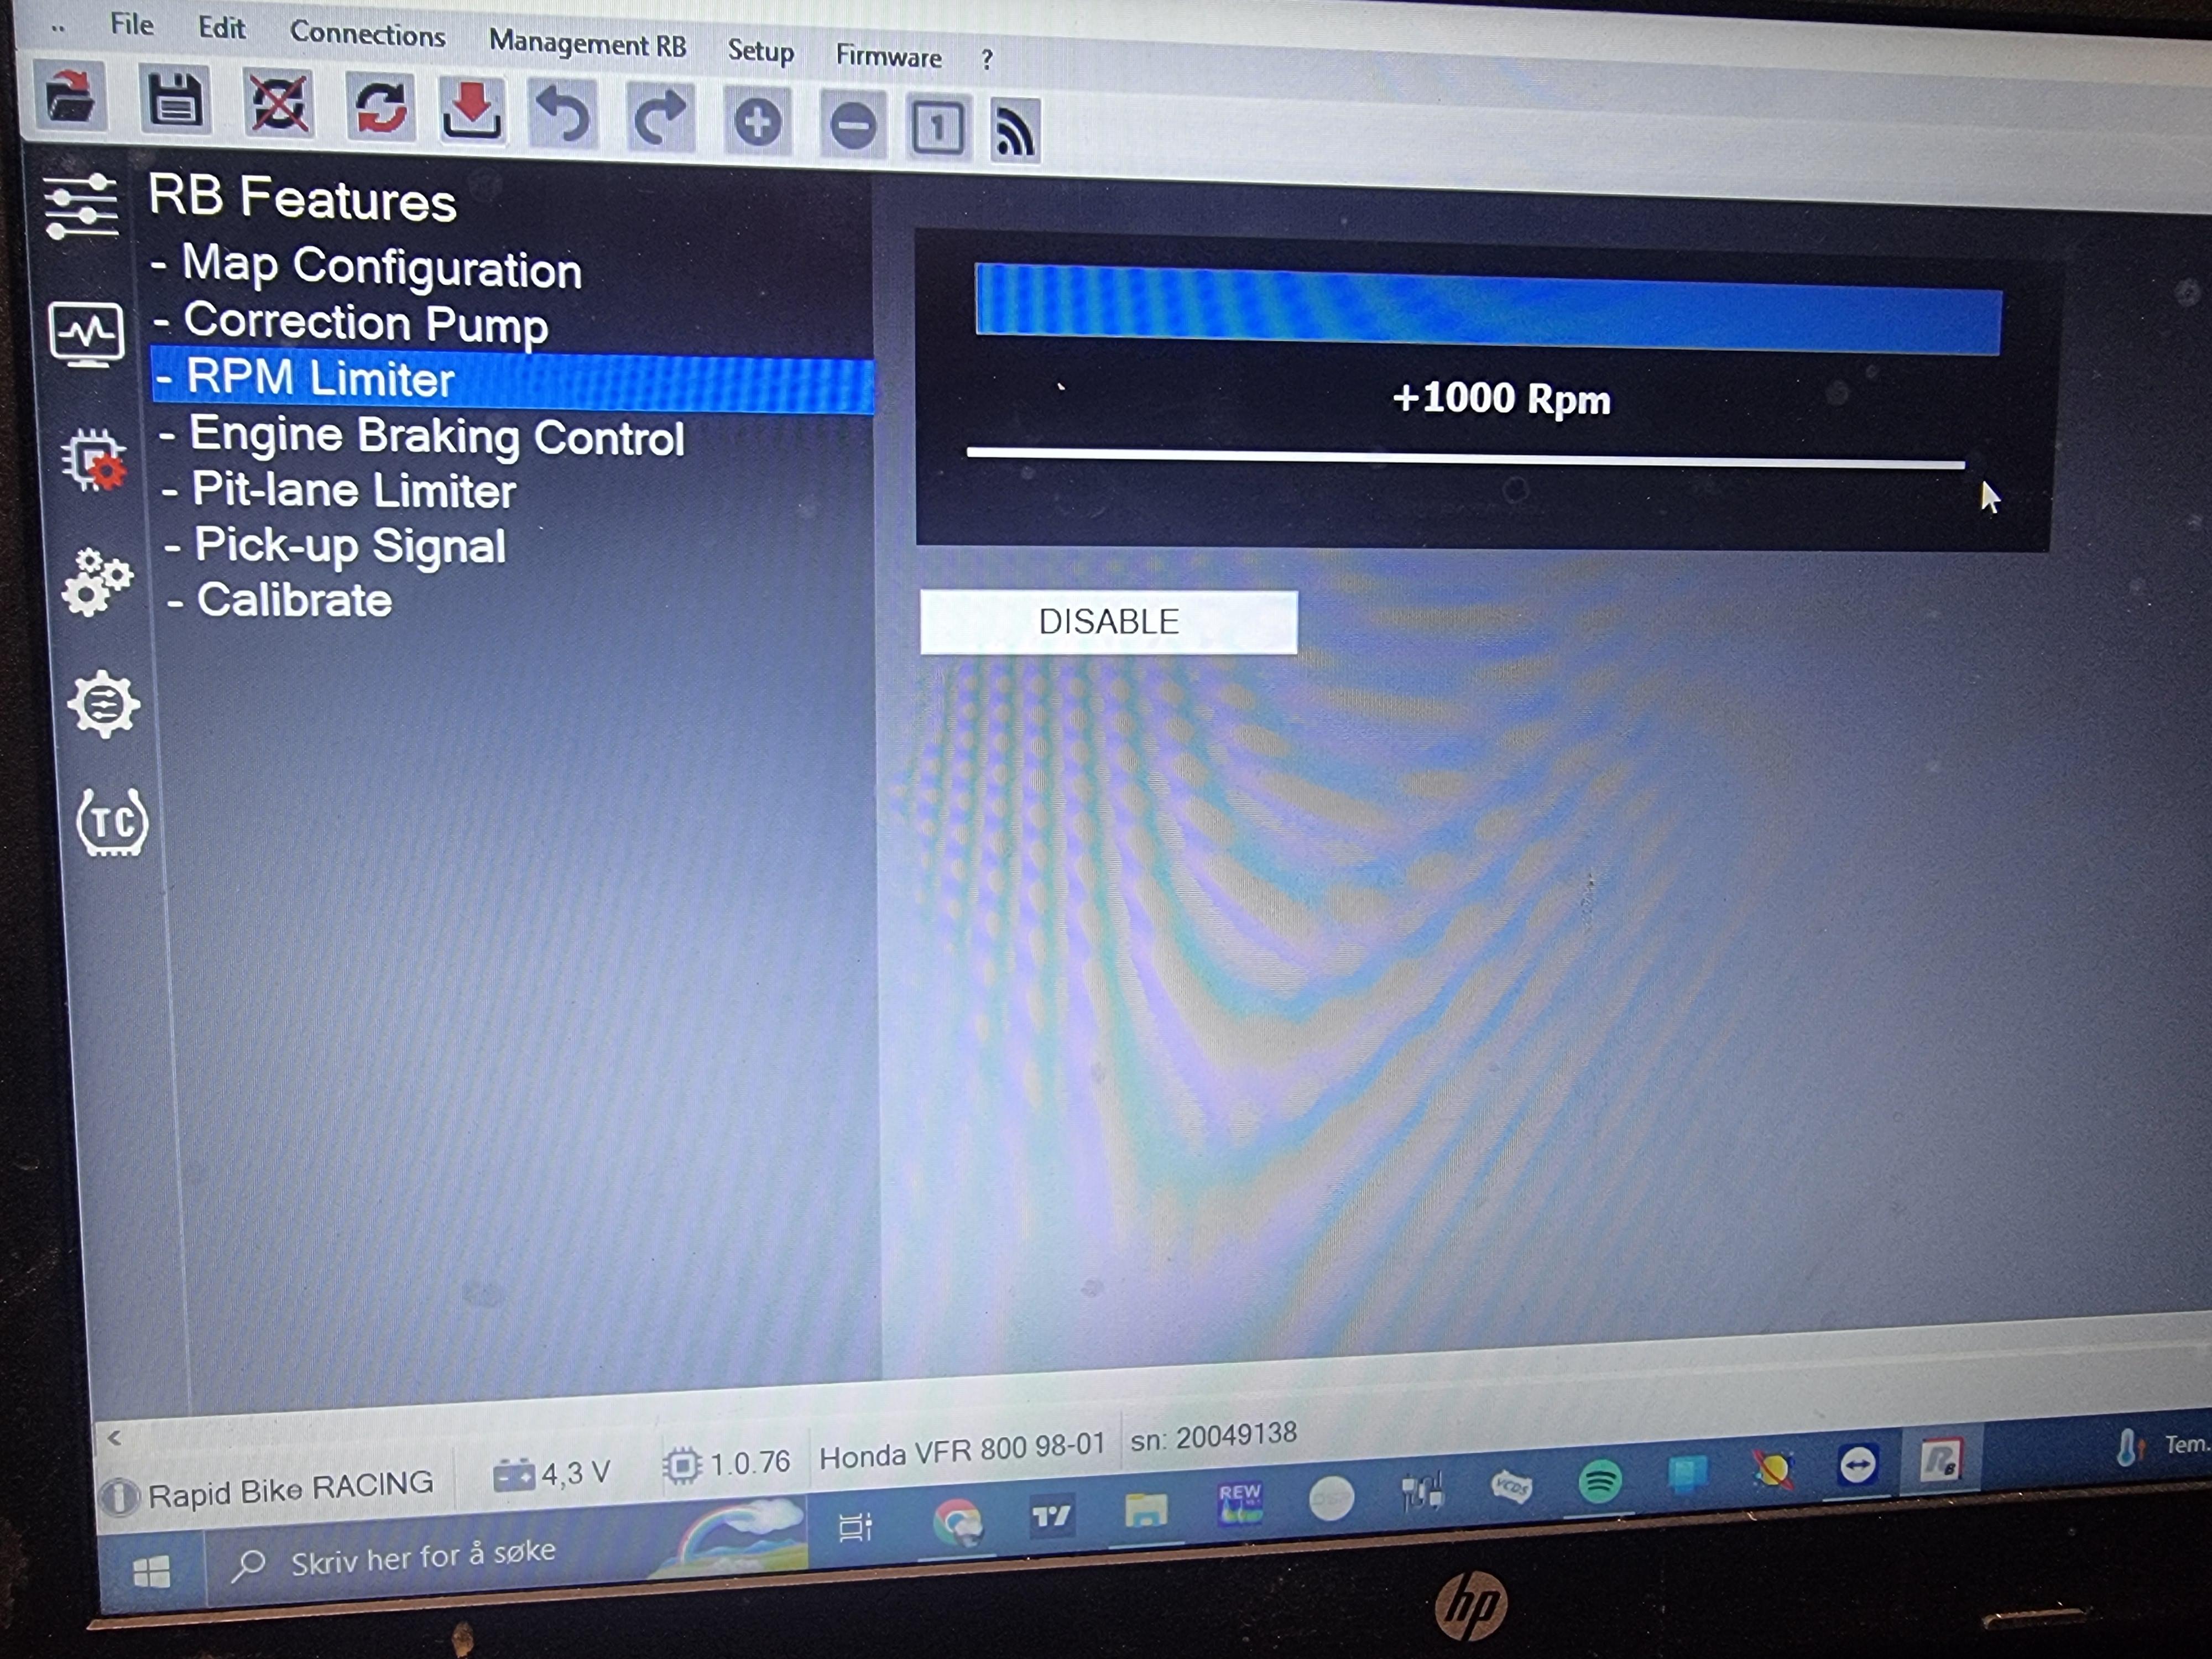
I am a dealer so got the pro version eventually. If you need any adjustments made I can help you with those "out of reach" numbers from the freeware 🙂 Just tell me what you need. It is rarely needed with the self adaptive feature, but for heavy modifications there is no way around. This does not replace a Dyno! Do you use the target afr from Dan?
-
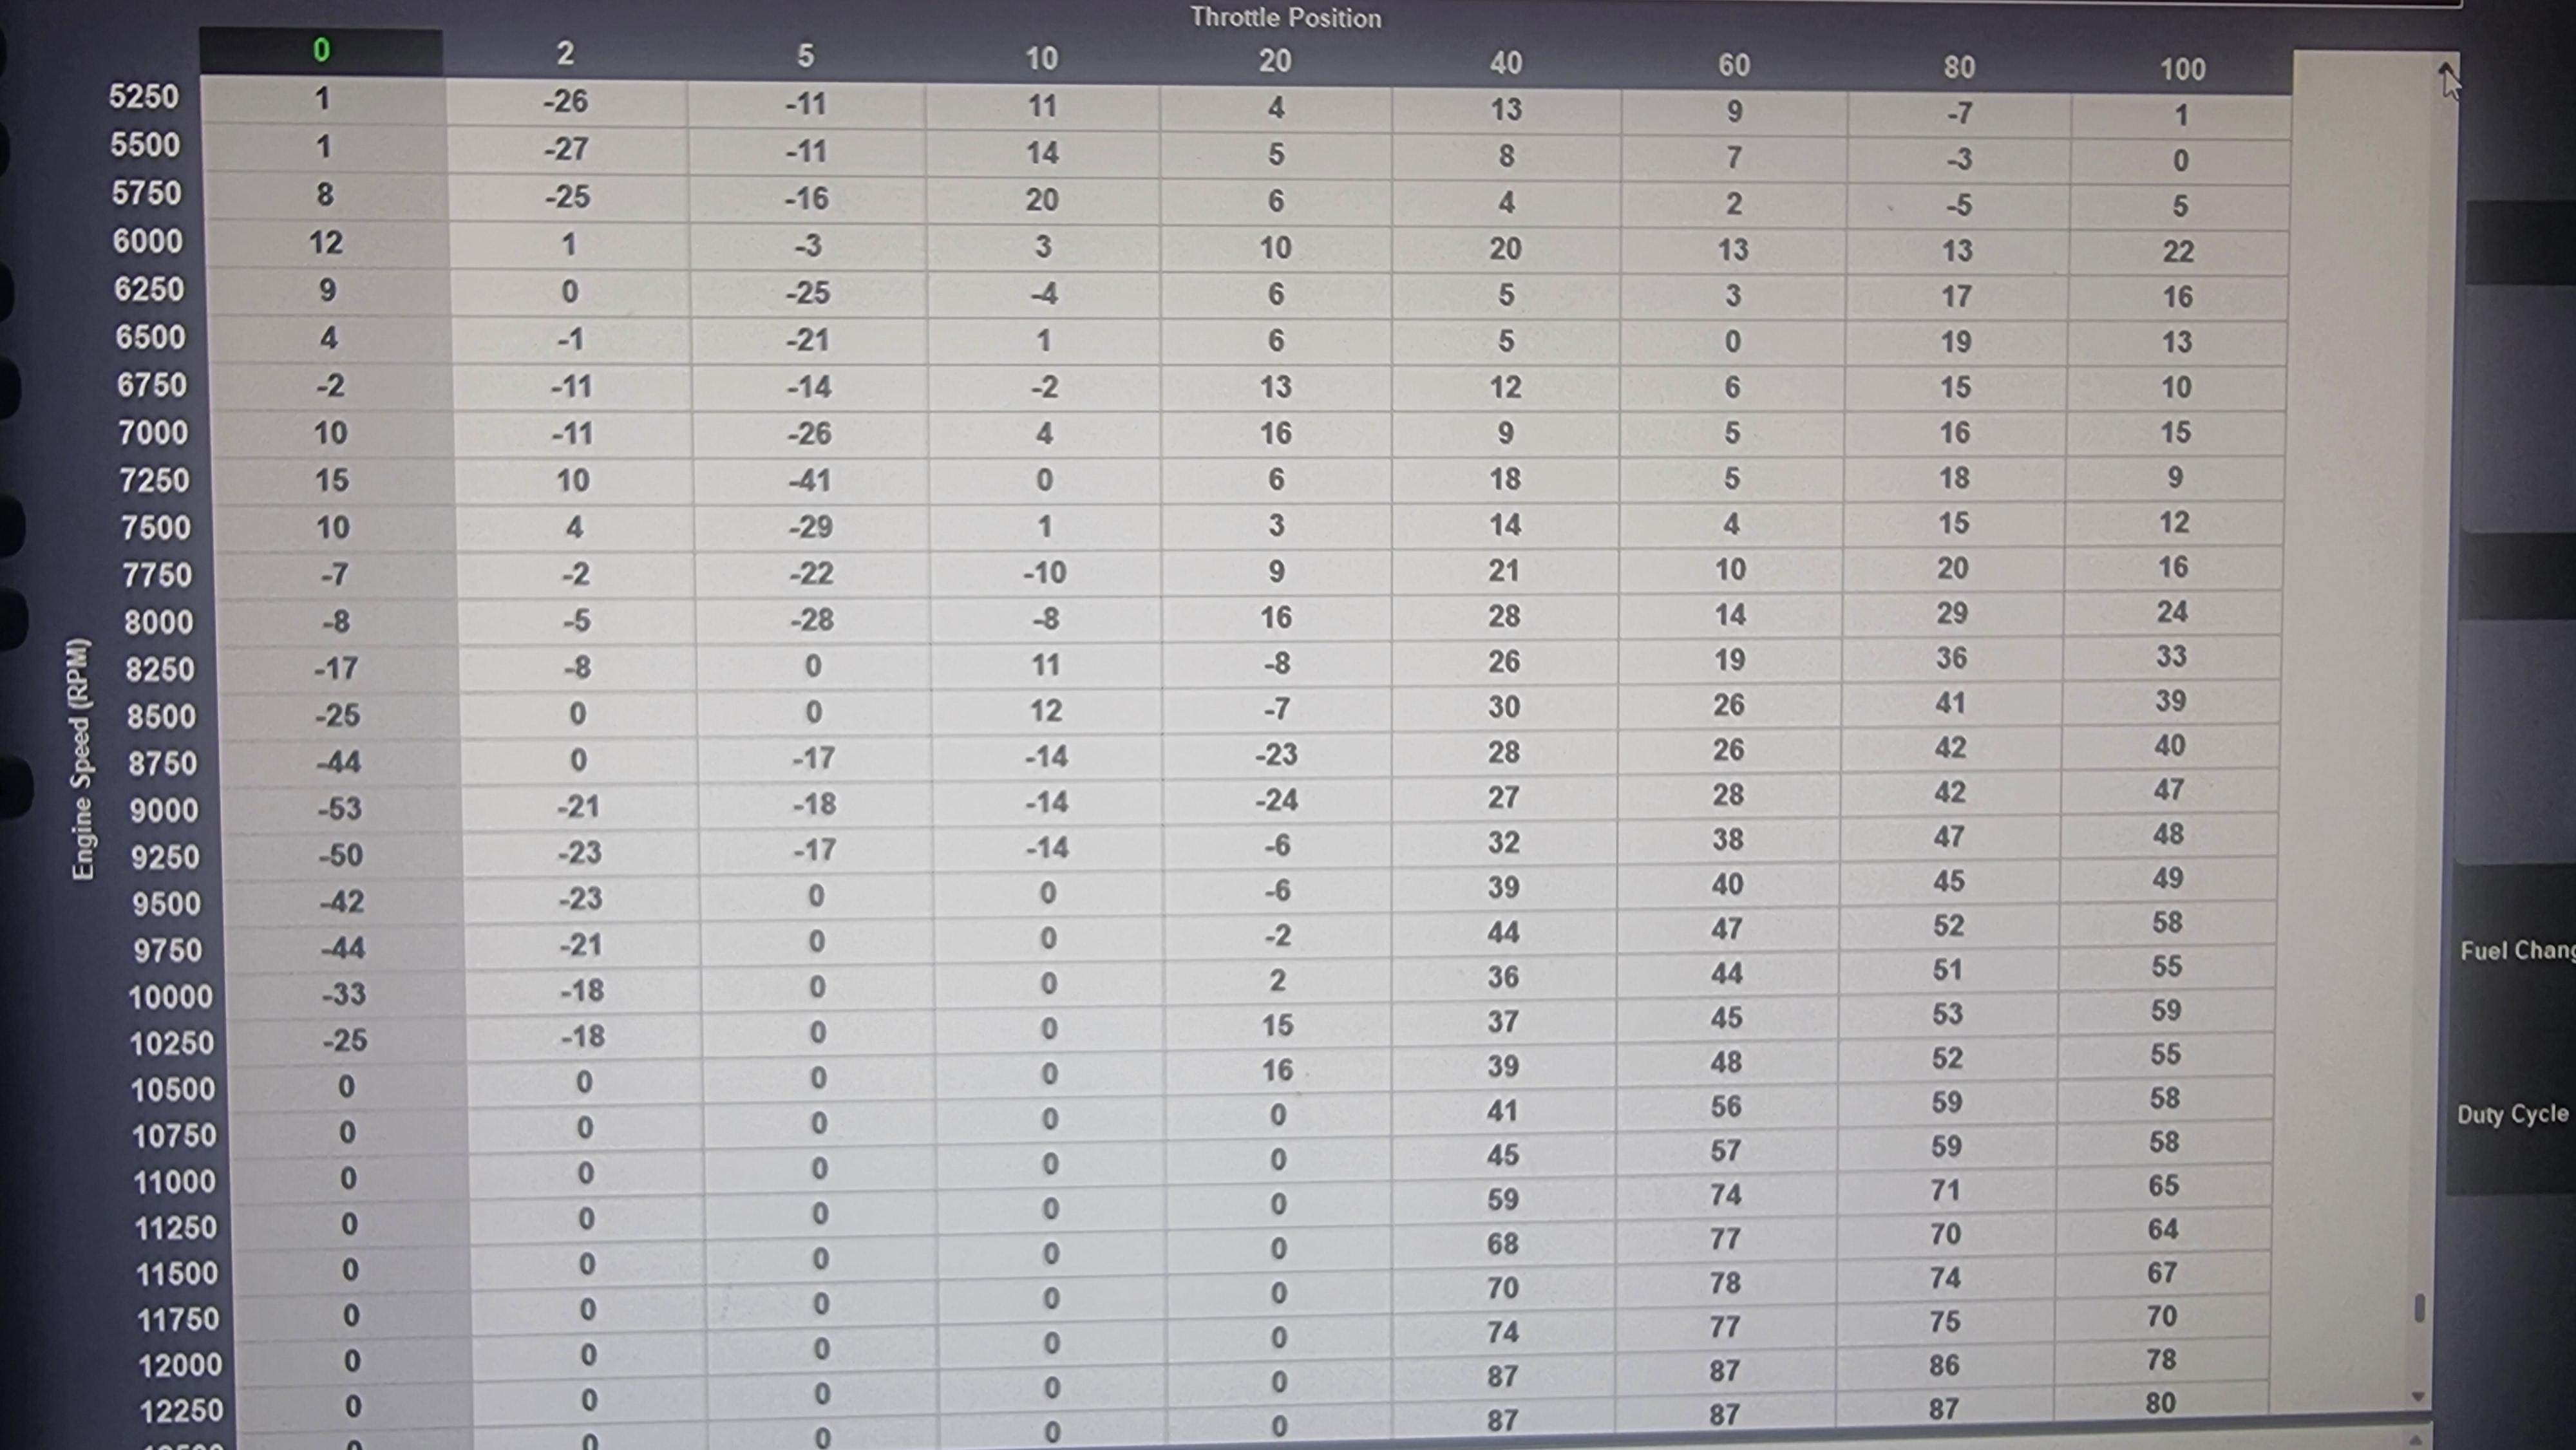
This is my conversion of the PC3 map before it was possible to adjust more than negative 10 / positive 30. Looks like shit because it is. This is with the ability to adjust negative 100/positive 150. A lot less shit... RB mytuningbike have the ability to adjust +-15 in all cells based on my target afr. It will be very exciting to see what has happened to this map after my first test on a road with no snow! Also there is this 🤏 dont worry, it's just a photo 🙃
-
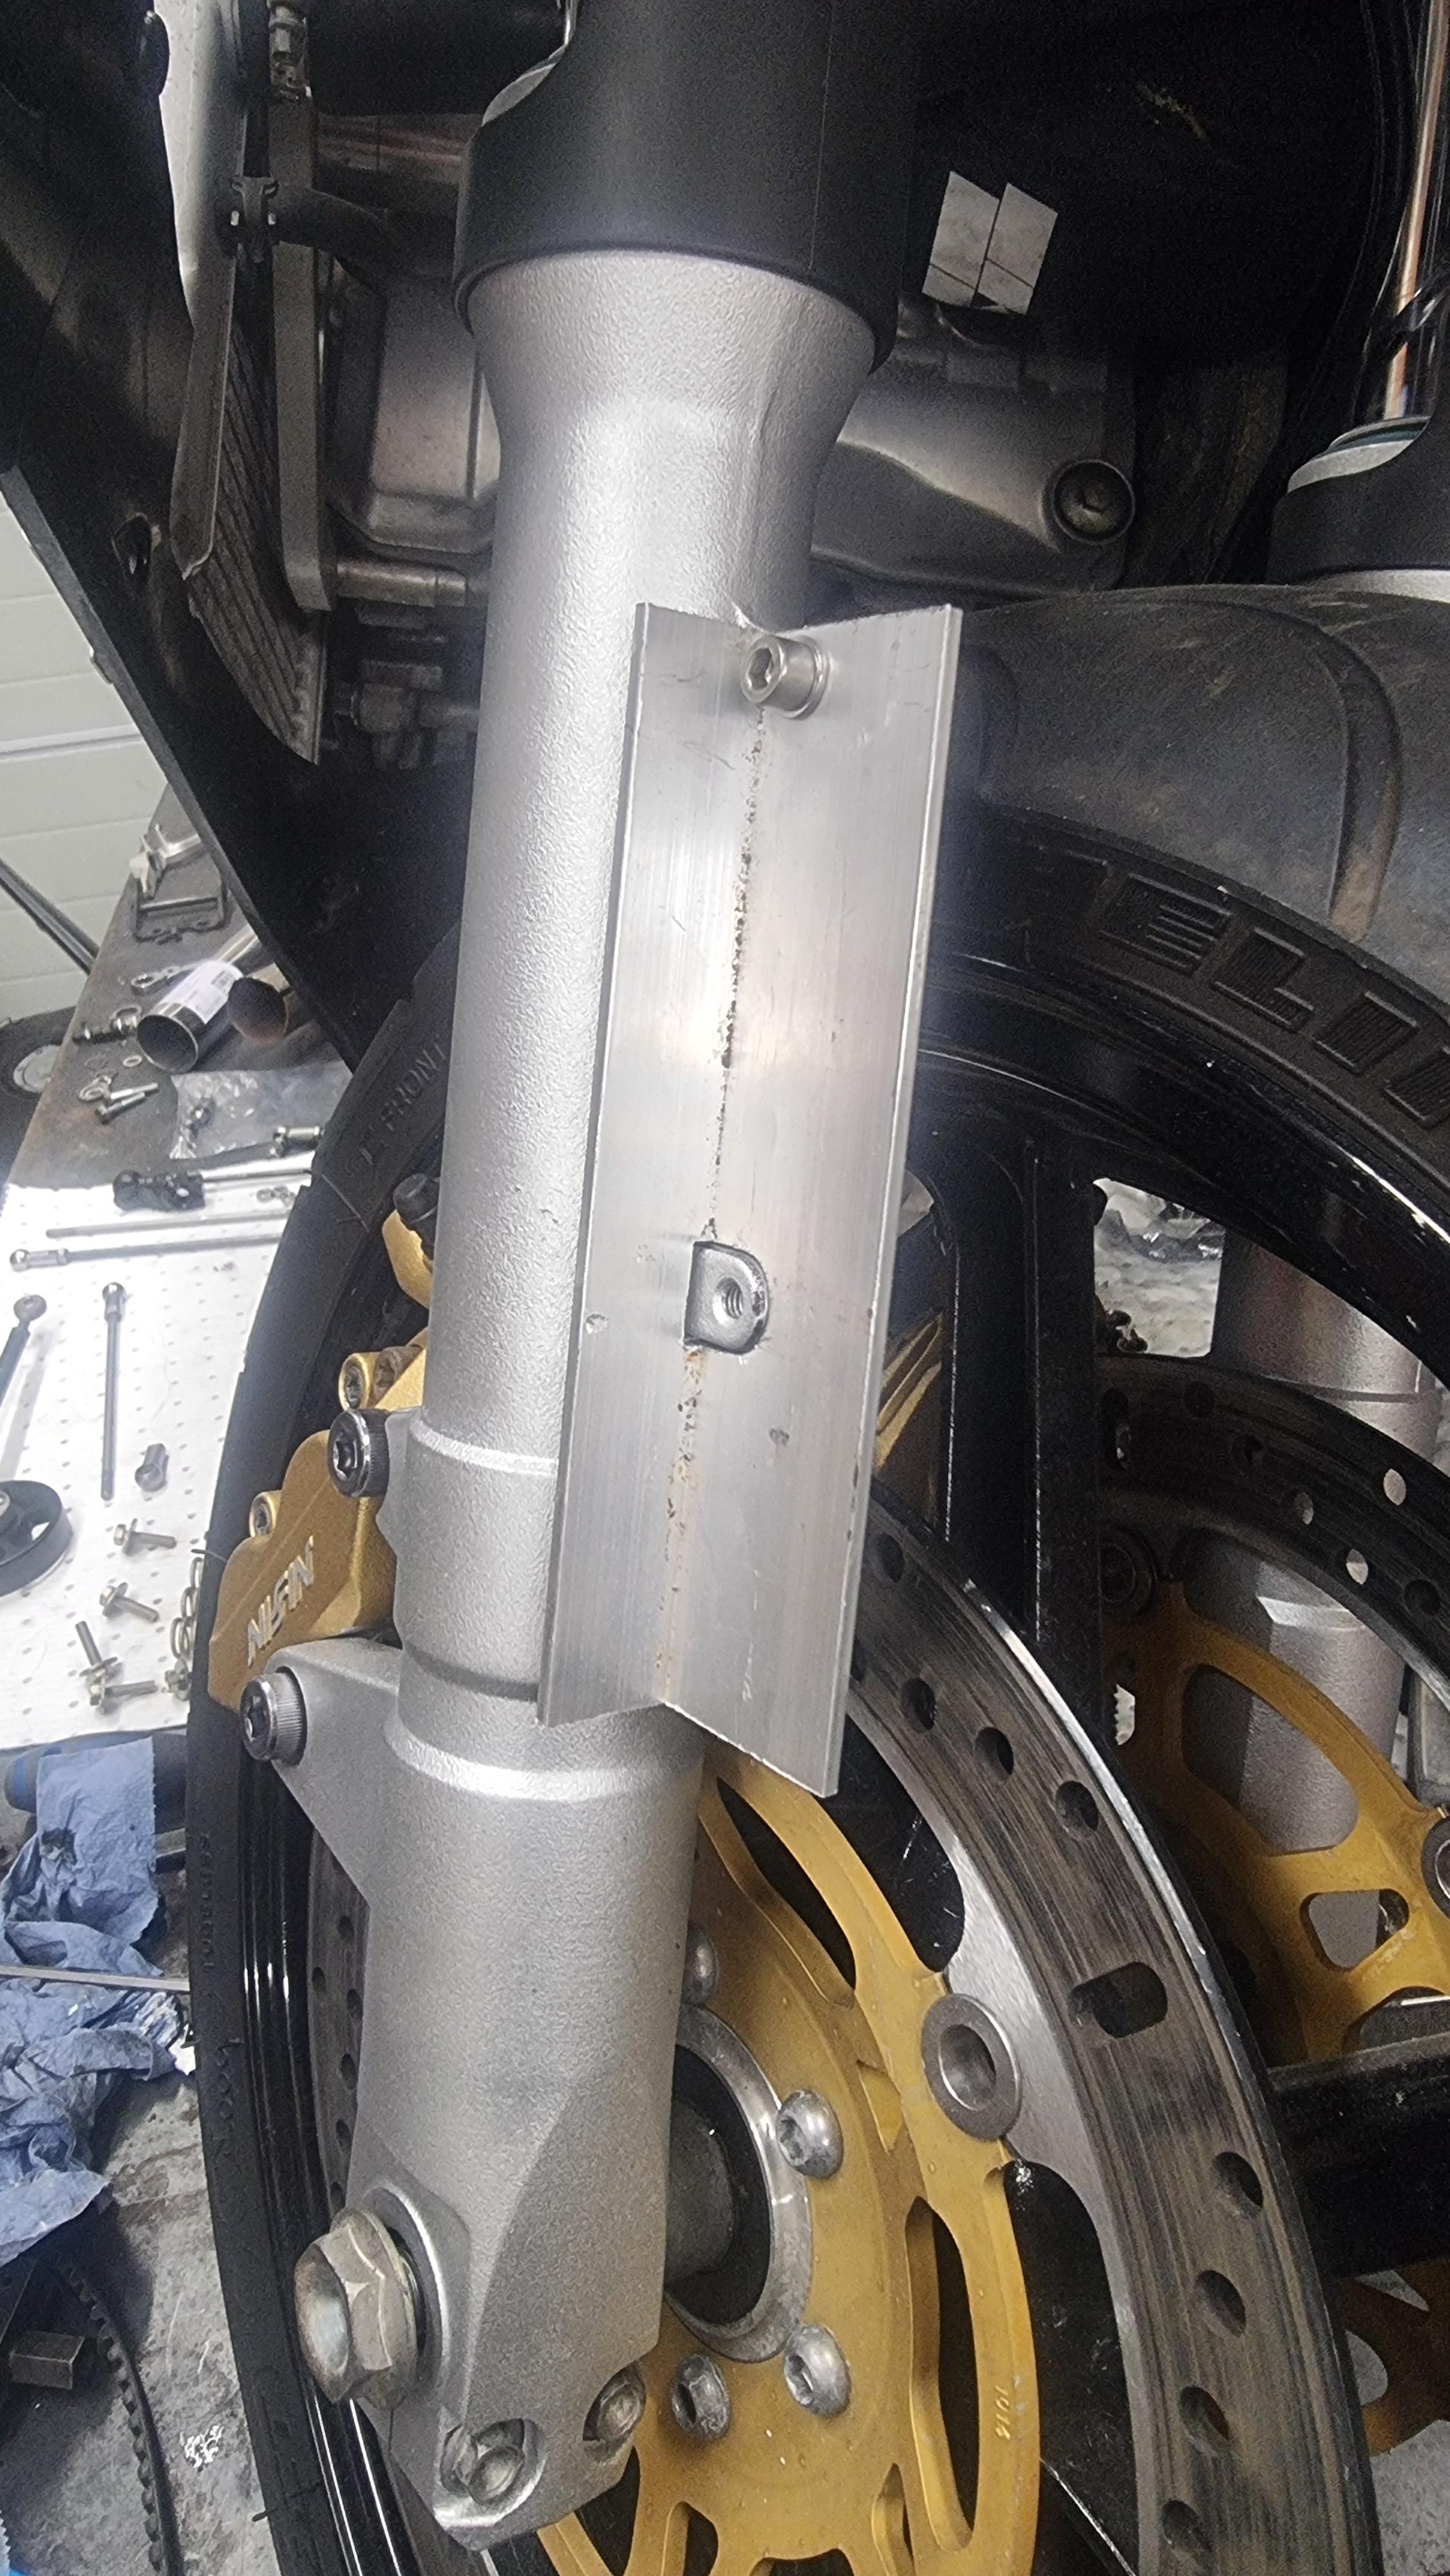
That's a keen eye👏 Yes sir. There is some minor adjustment needed on the brackets when I fit a new tire. With 20cm of snow today I guess there is some time left to fiddle 😅
-
I'm sorry but I can not find anything on this, and I was quoted a heft price with our distributor. Not a word on registering, and I can't find a registration page other than the one below. I suspect they have devided this SW in to two - free and pro in recent years and you have to buy to get. I find a CD PRO version for sale on the interwebs as well. Also they have a "reserved" spot on the homepage which I got quite dizzy from when reading 😅 but it seems like a knowledge base only. Yaman did actuall tell me 5 mins ago (reply to an email from before Easter) that Dyno is required as they have the PRO sw at hand. 🙁 We dont have a RapidBike dyno available afaik in Norway. I won't listen to the "experts" as I'm gonna try this my self first. I'm not that novice and I have the dash telling me the AFR live at all times. I'll just start riding it then... https://reserved.dimsport.com/kb/Filemanager.aspx?id=1032
-
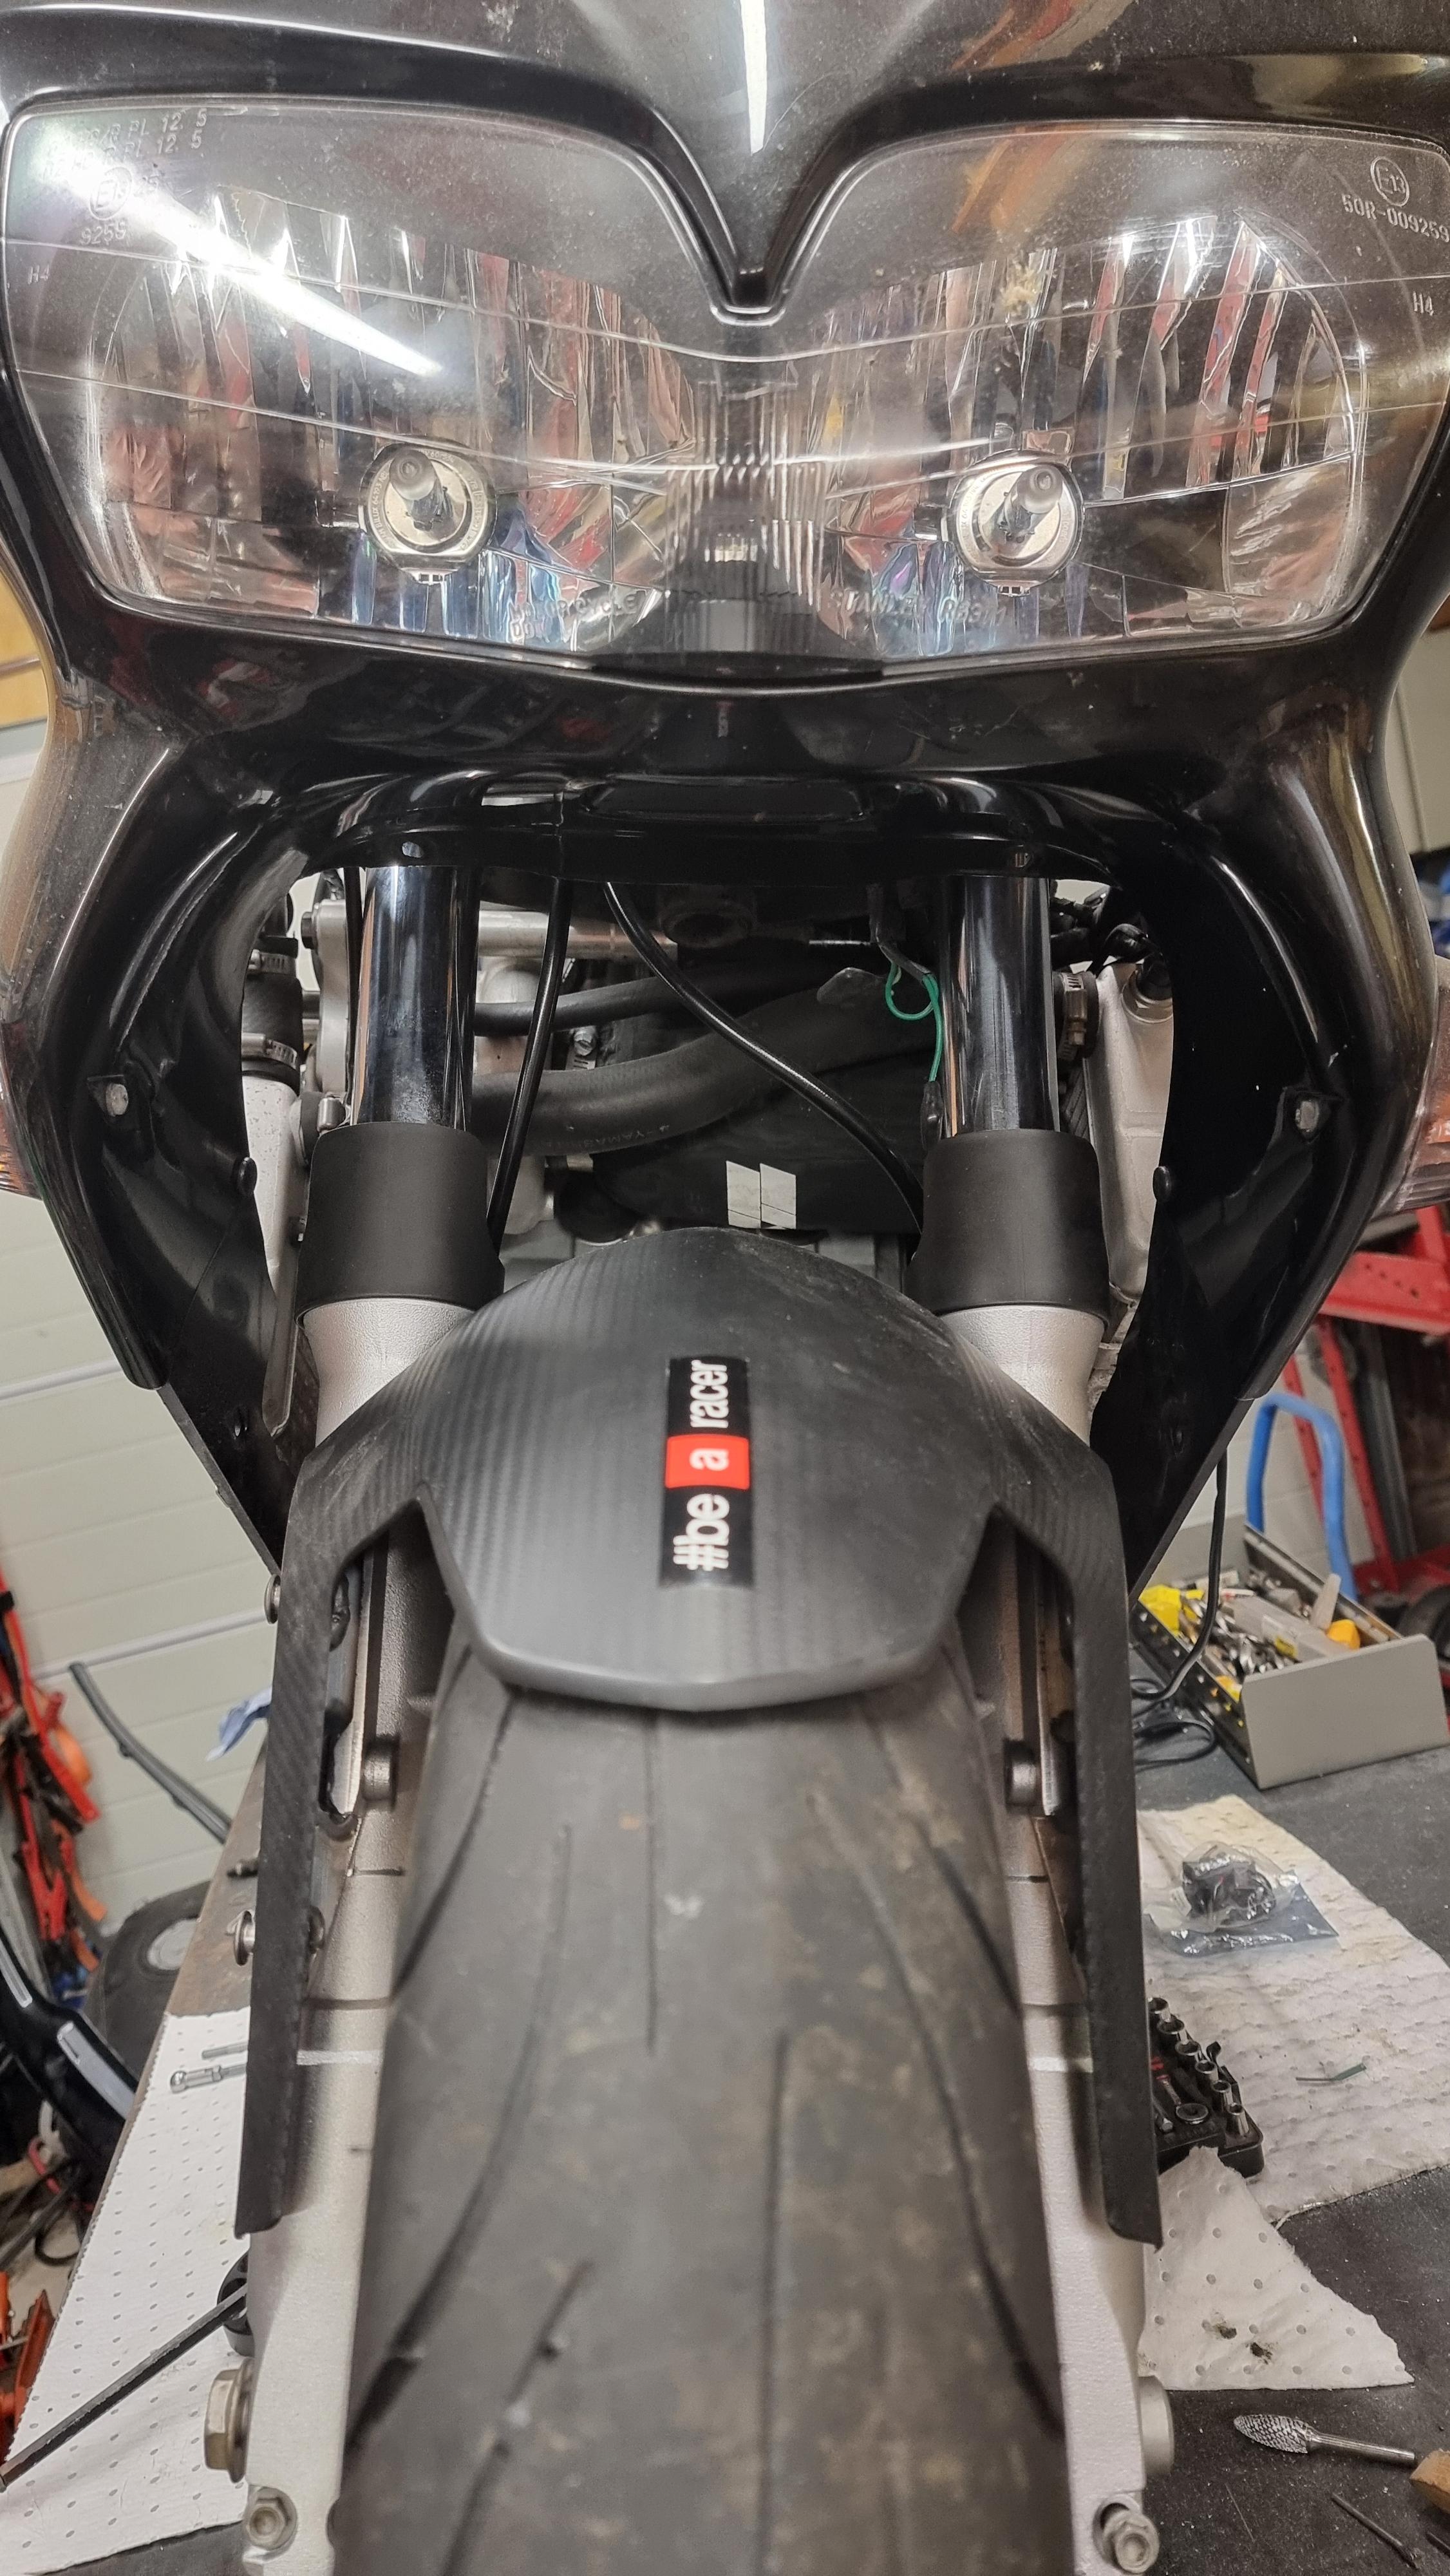
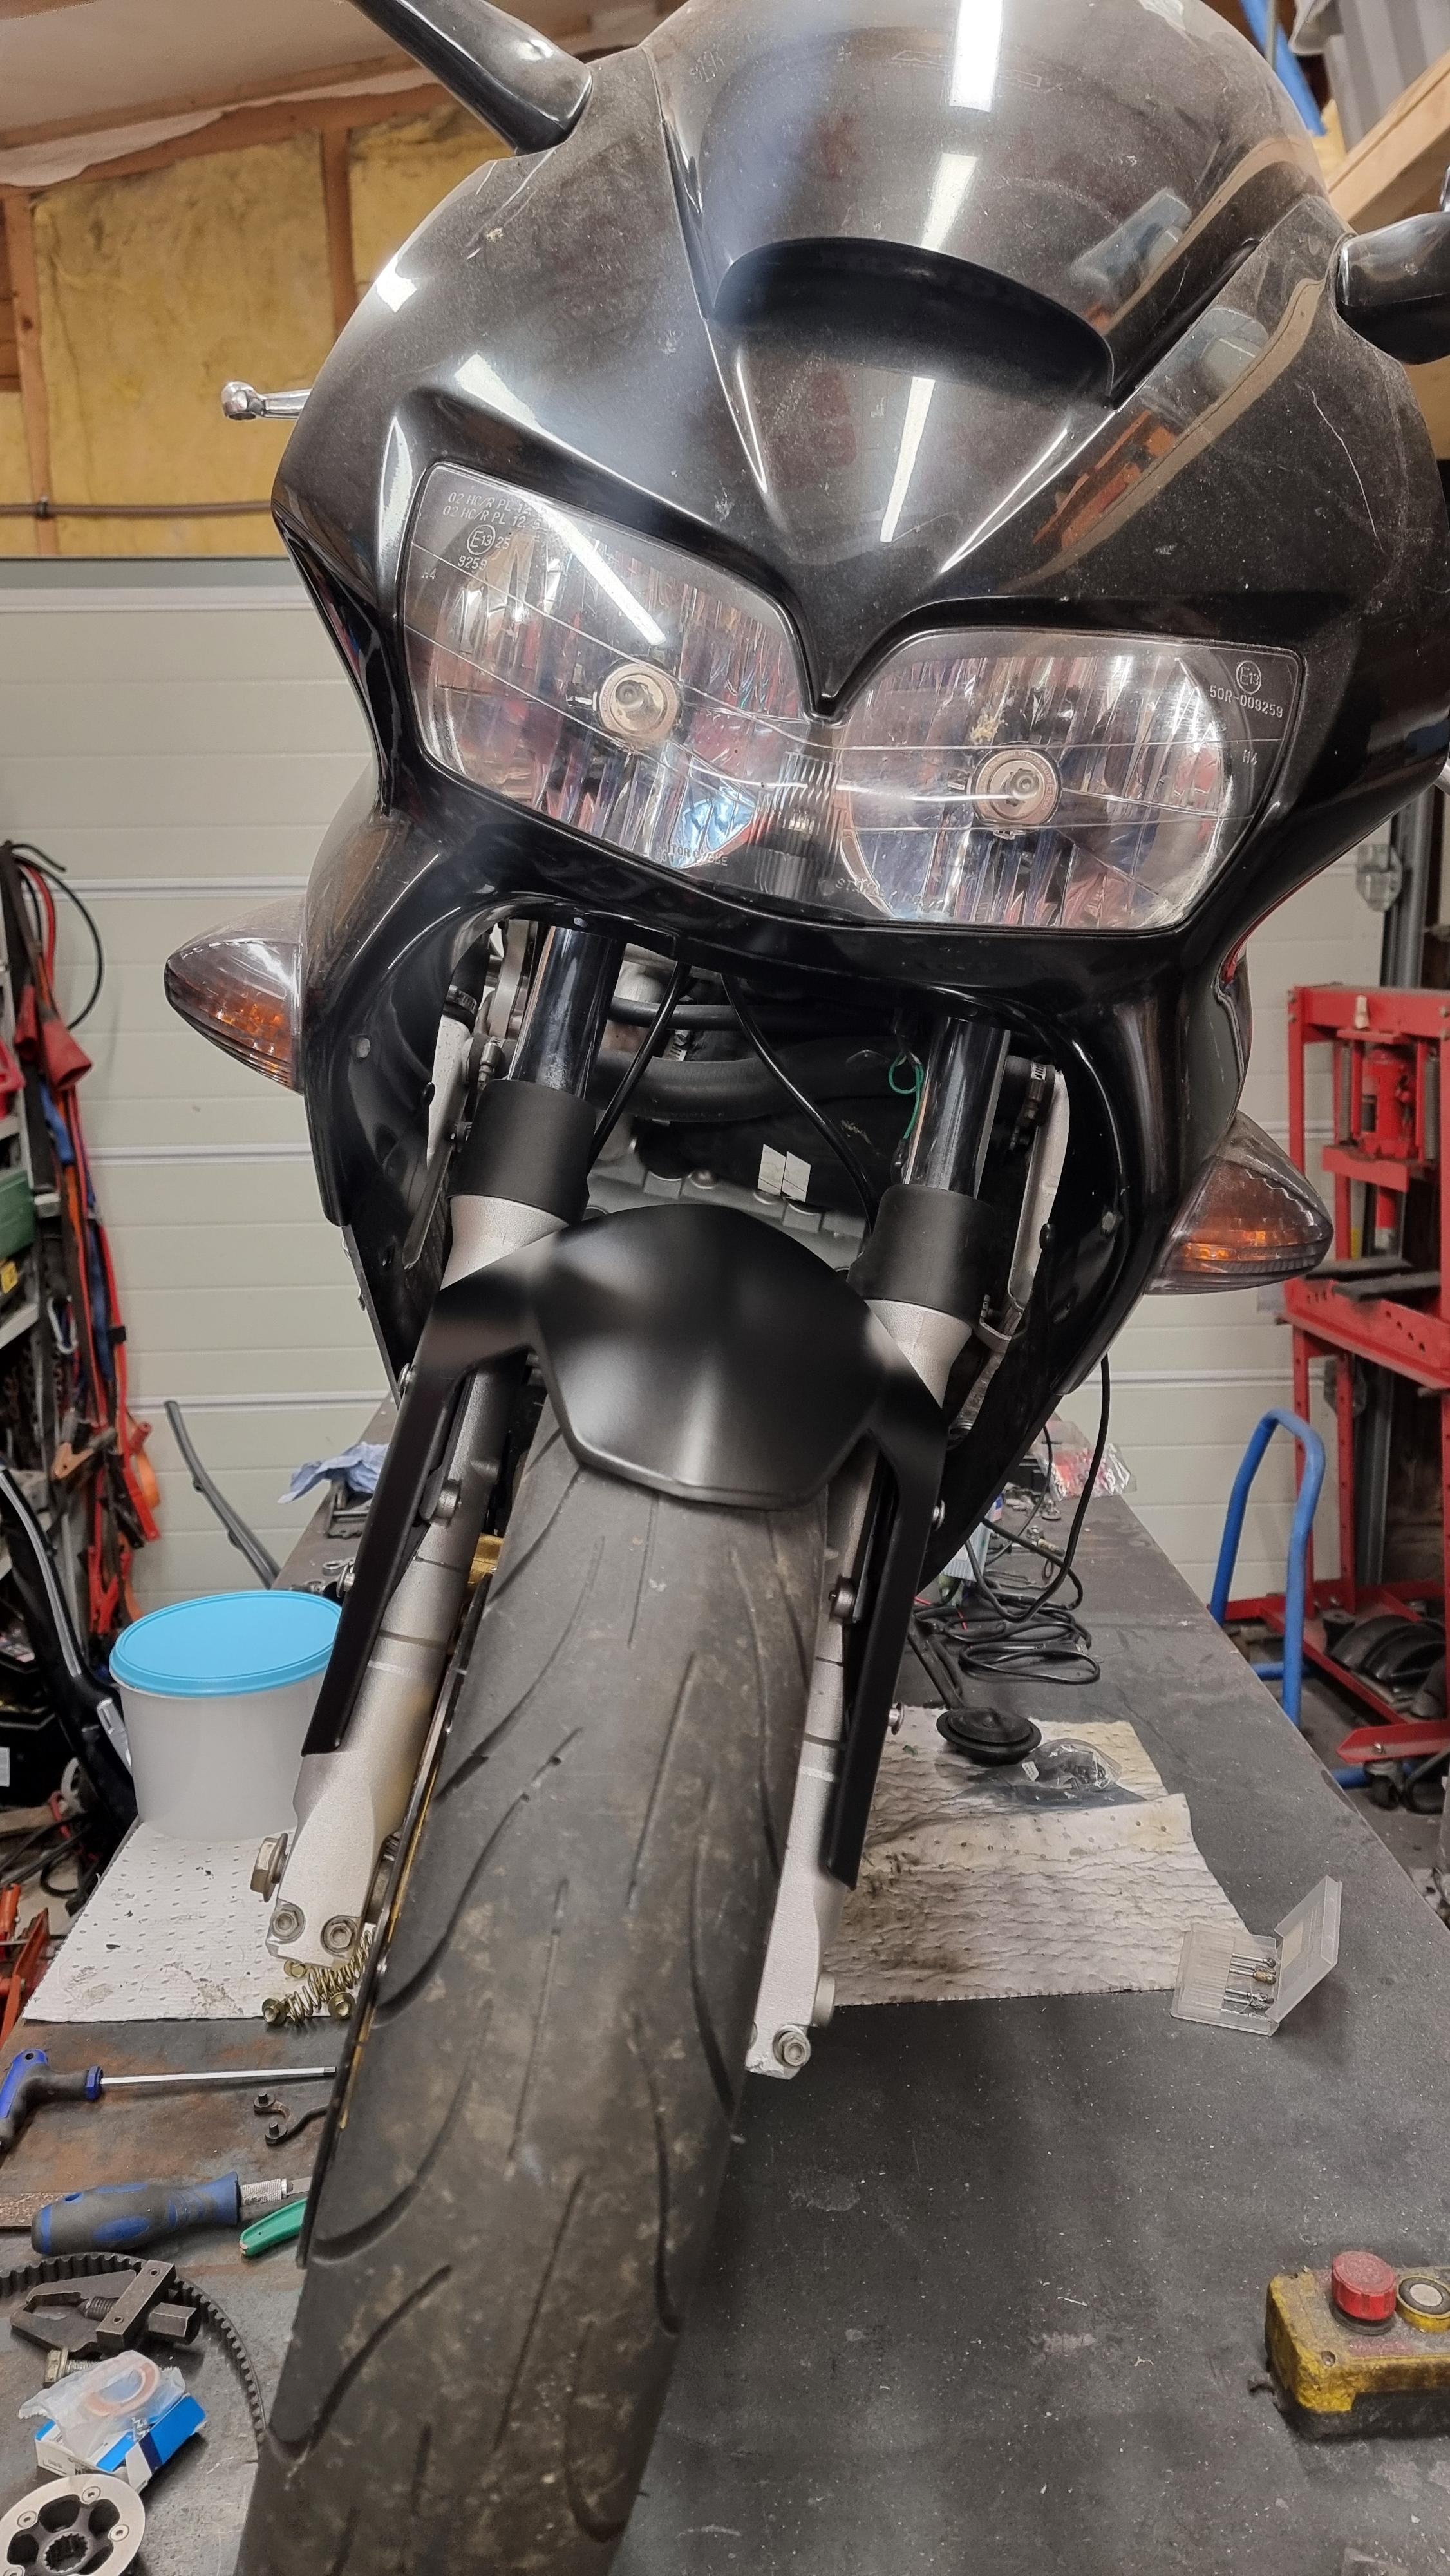
Front fender done - donor aprilia rs125. Matte black for now but might be permanent. I think it's a nice addition to the all glossy black fairing. Saved around 100g. and added a bucket load of modernization. As a bonus it's shaped in a way that send air upwards almost straight in the intake of the rotrex and might help with pushing air through the radiators. Next up is wraping up a lot of small things like wiring and putting her clothes back on, some heat shielding and trying to get the rapid bike map to behave. I reached out to yaman but afaik I have to drive the bike to get another chance at adjusting a fresh base map. So 200 miles with afr 11.1 at cruise could be to much. Hoping for another solution. To adjust what I want I need to buy the RB SW at over 400 USD 😬
-
ok, so might cost me a right boot after some time. The looks are worth it! It looks clean and a lot less heavy without.
-
That seems more natural to me, the bend you have there instead of my hardline! some googling must be done 🙂
-
I only have 90° left, and i tried a straight one, but did not want a hose this close to the bare headers. Are you also running without the heat shield? If so, is the heat radiation ok?
-
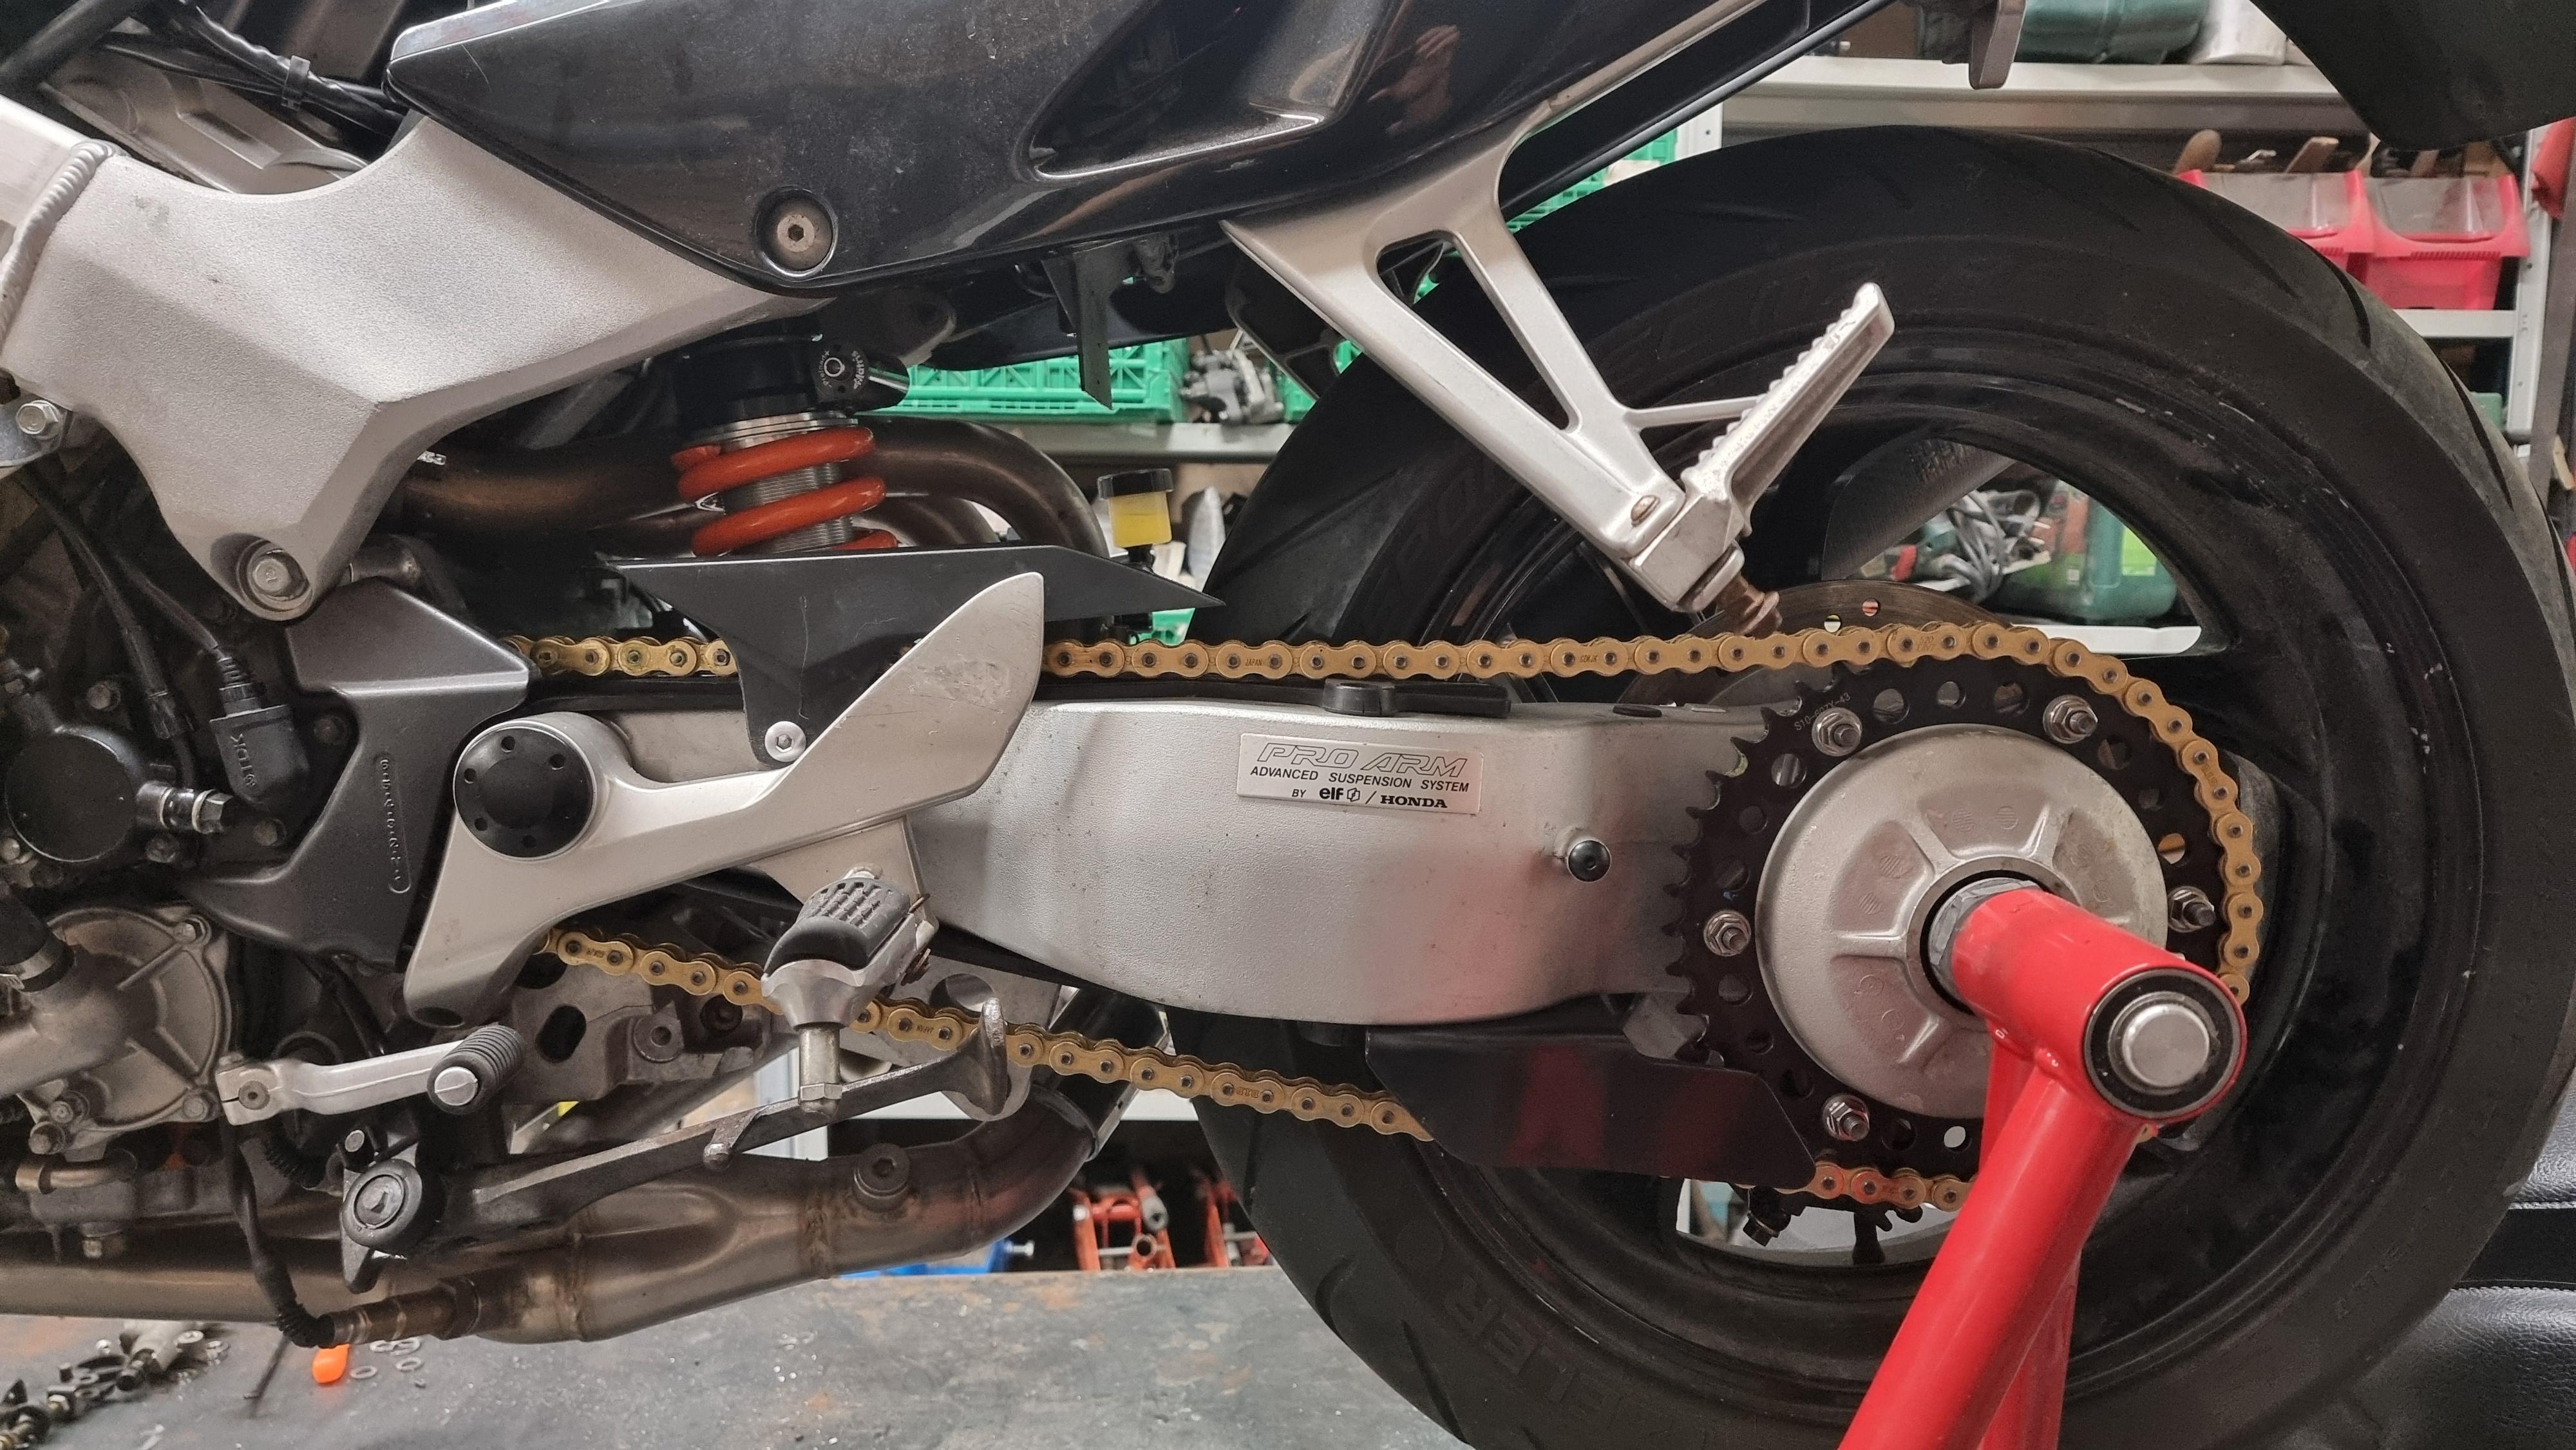
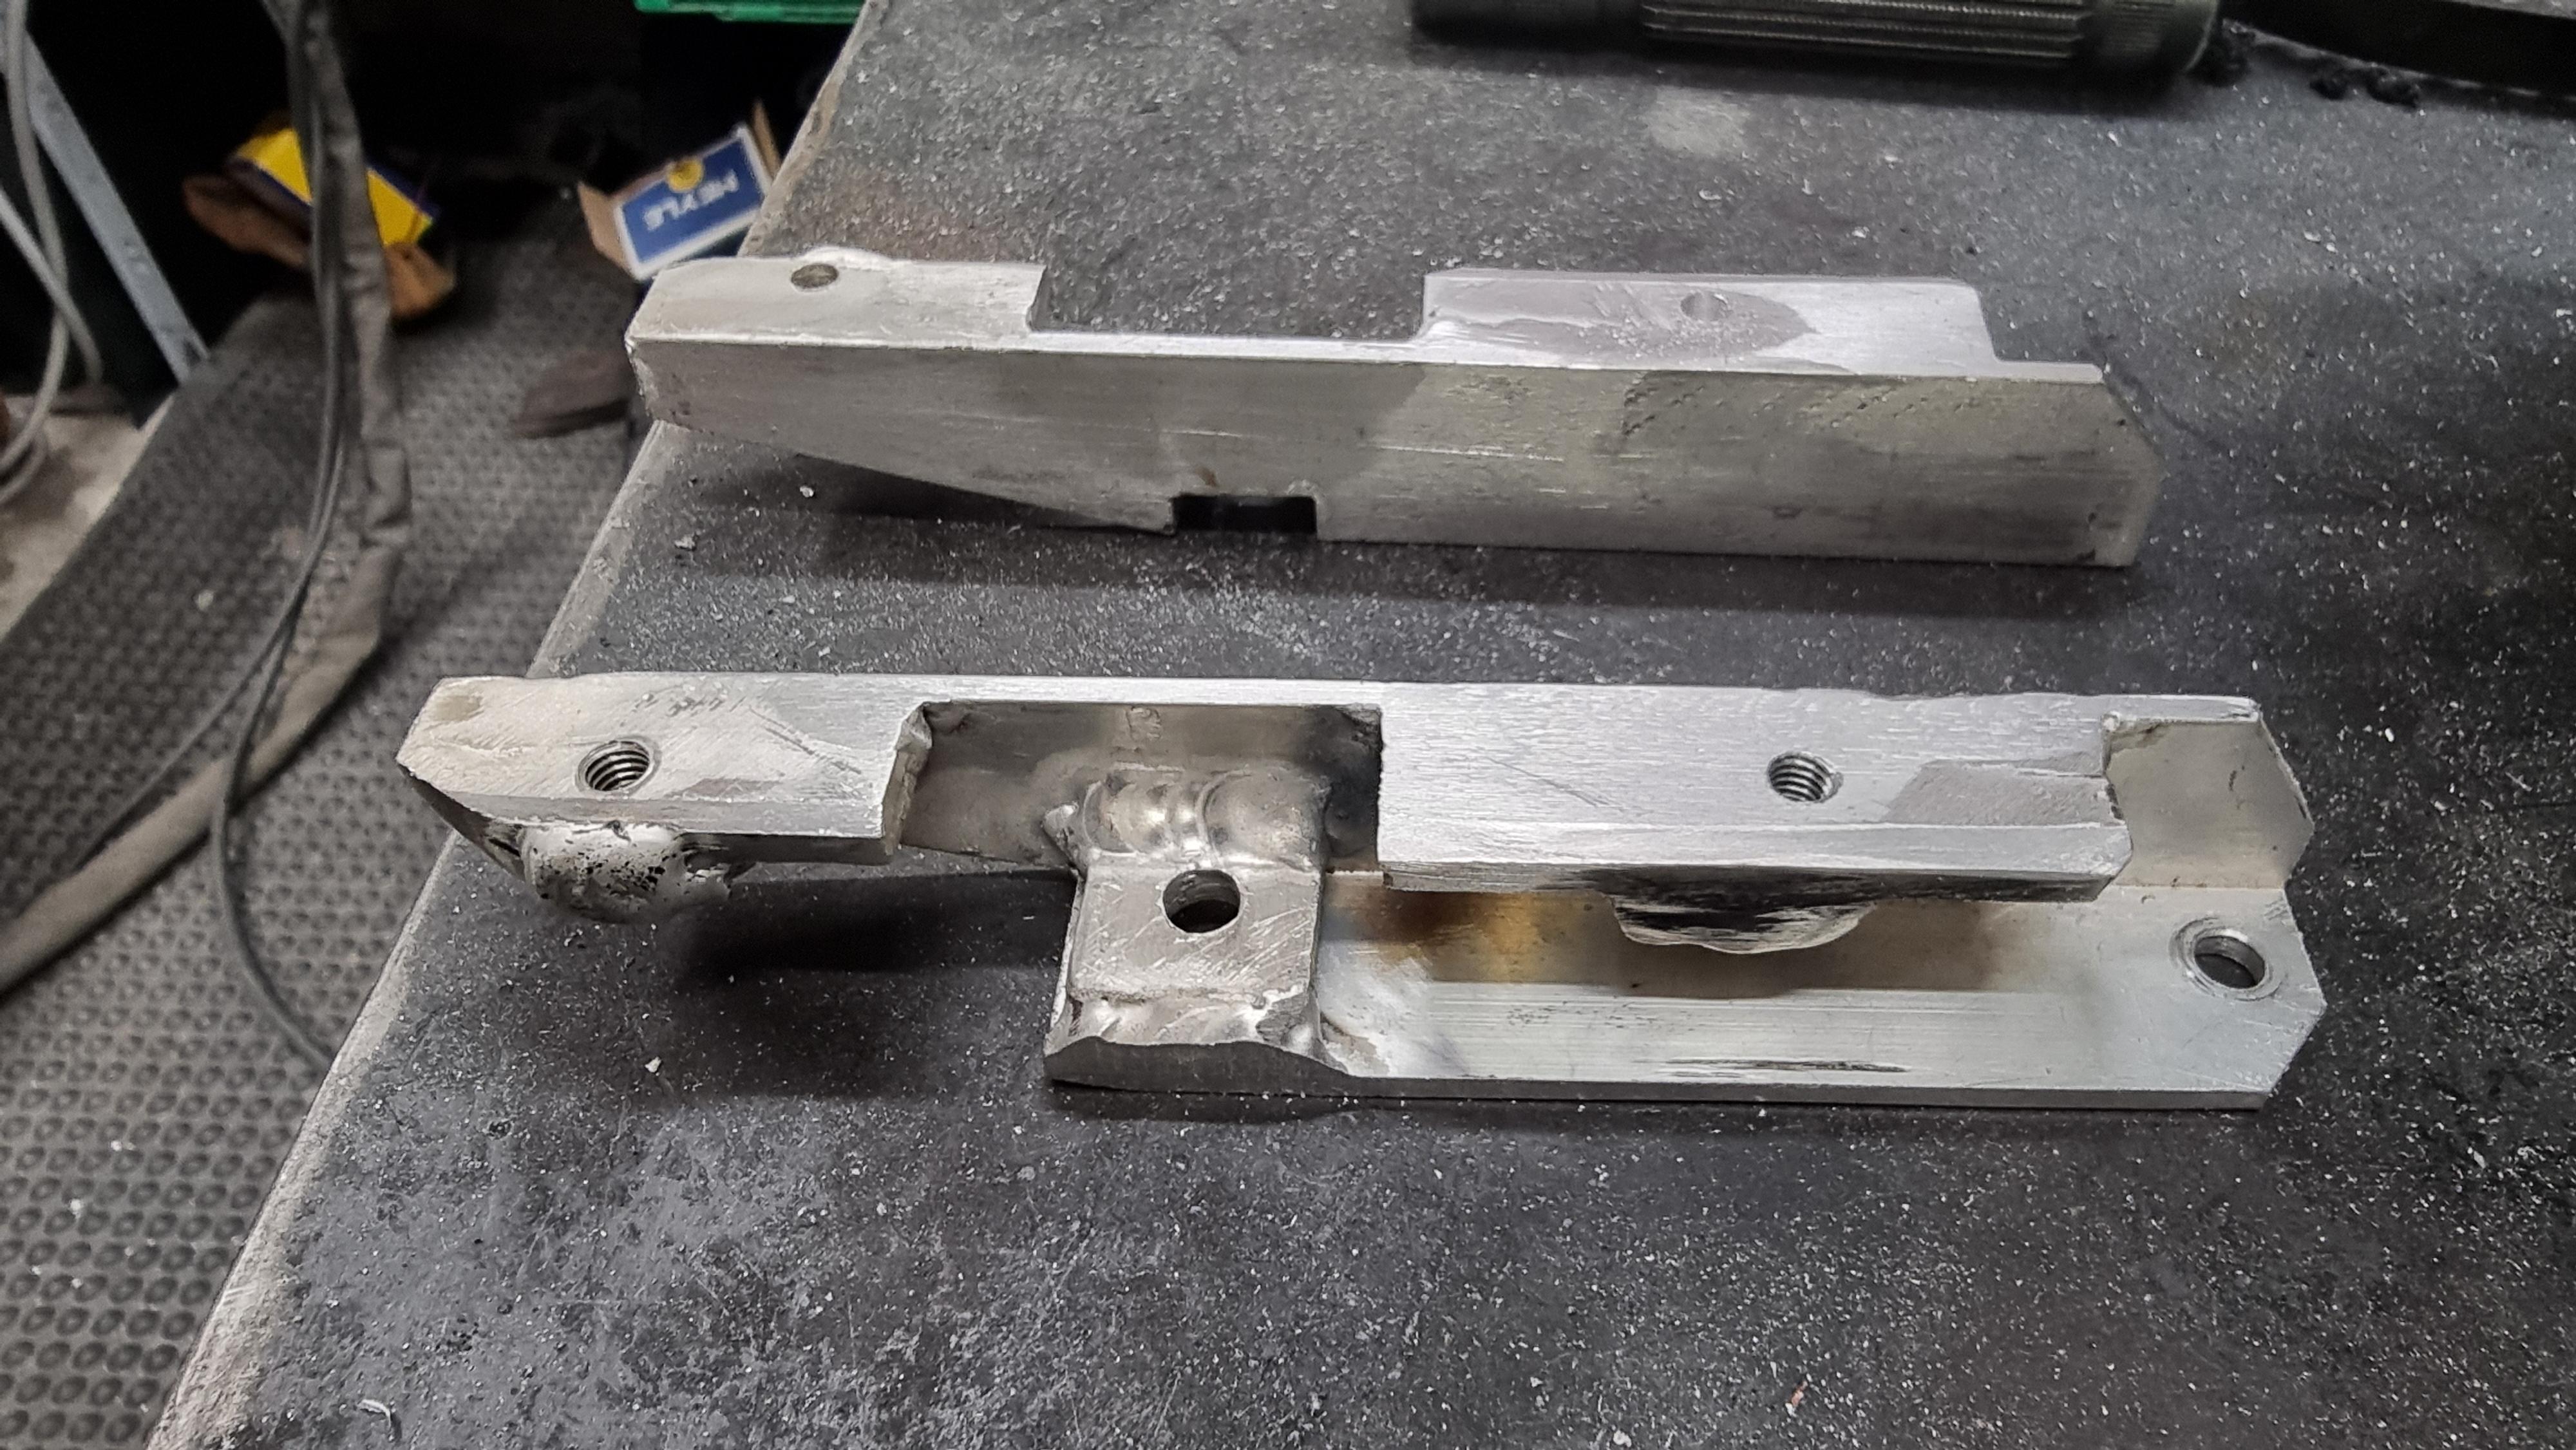
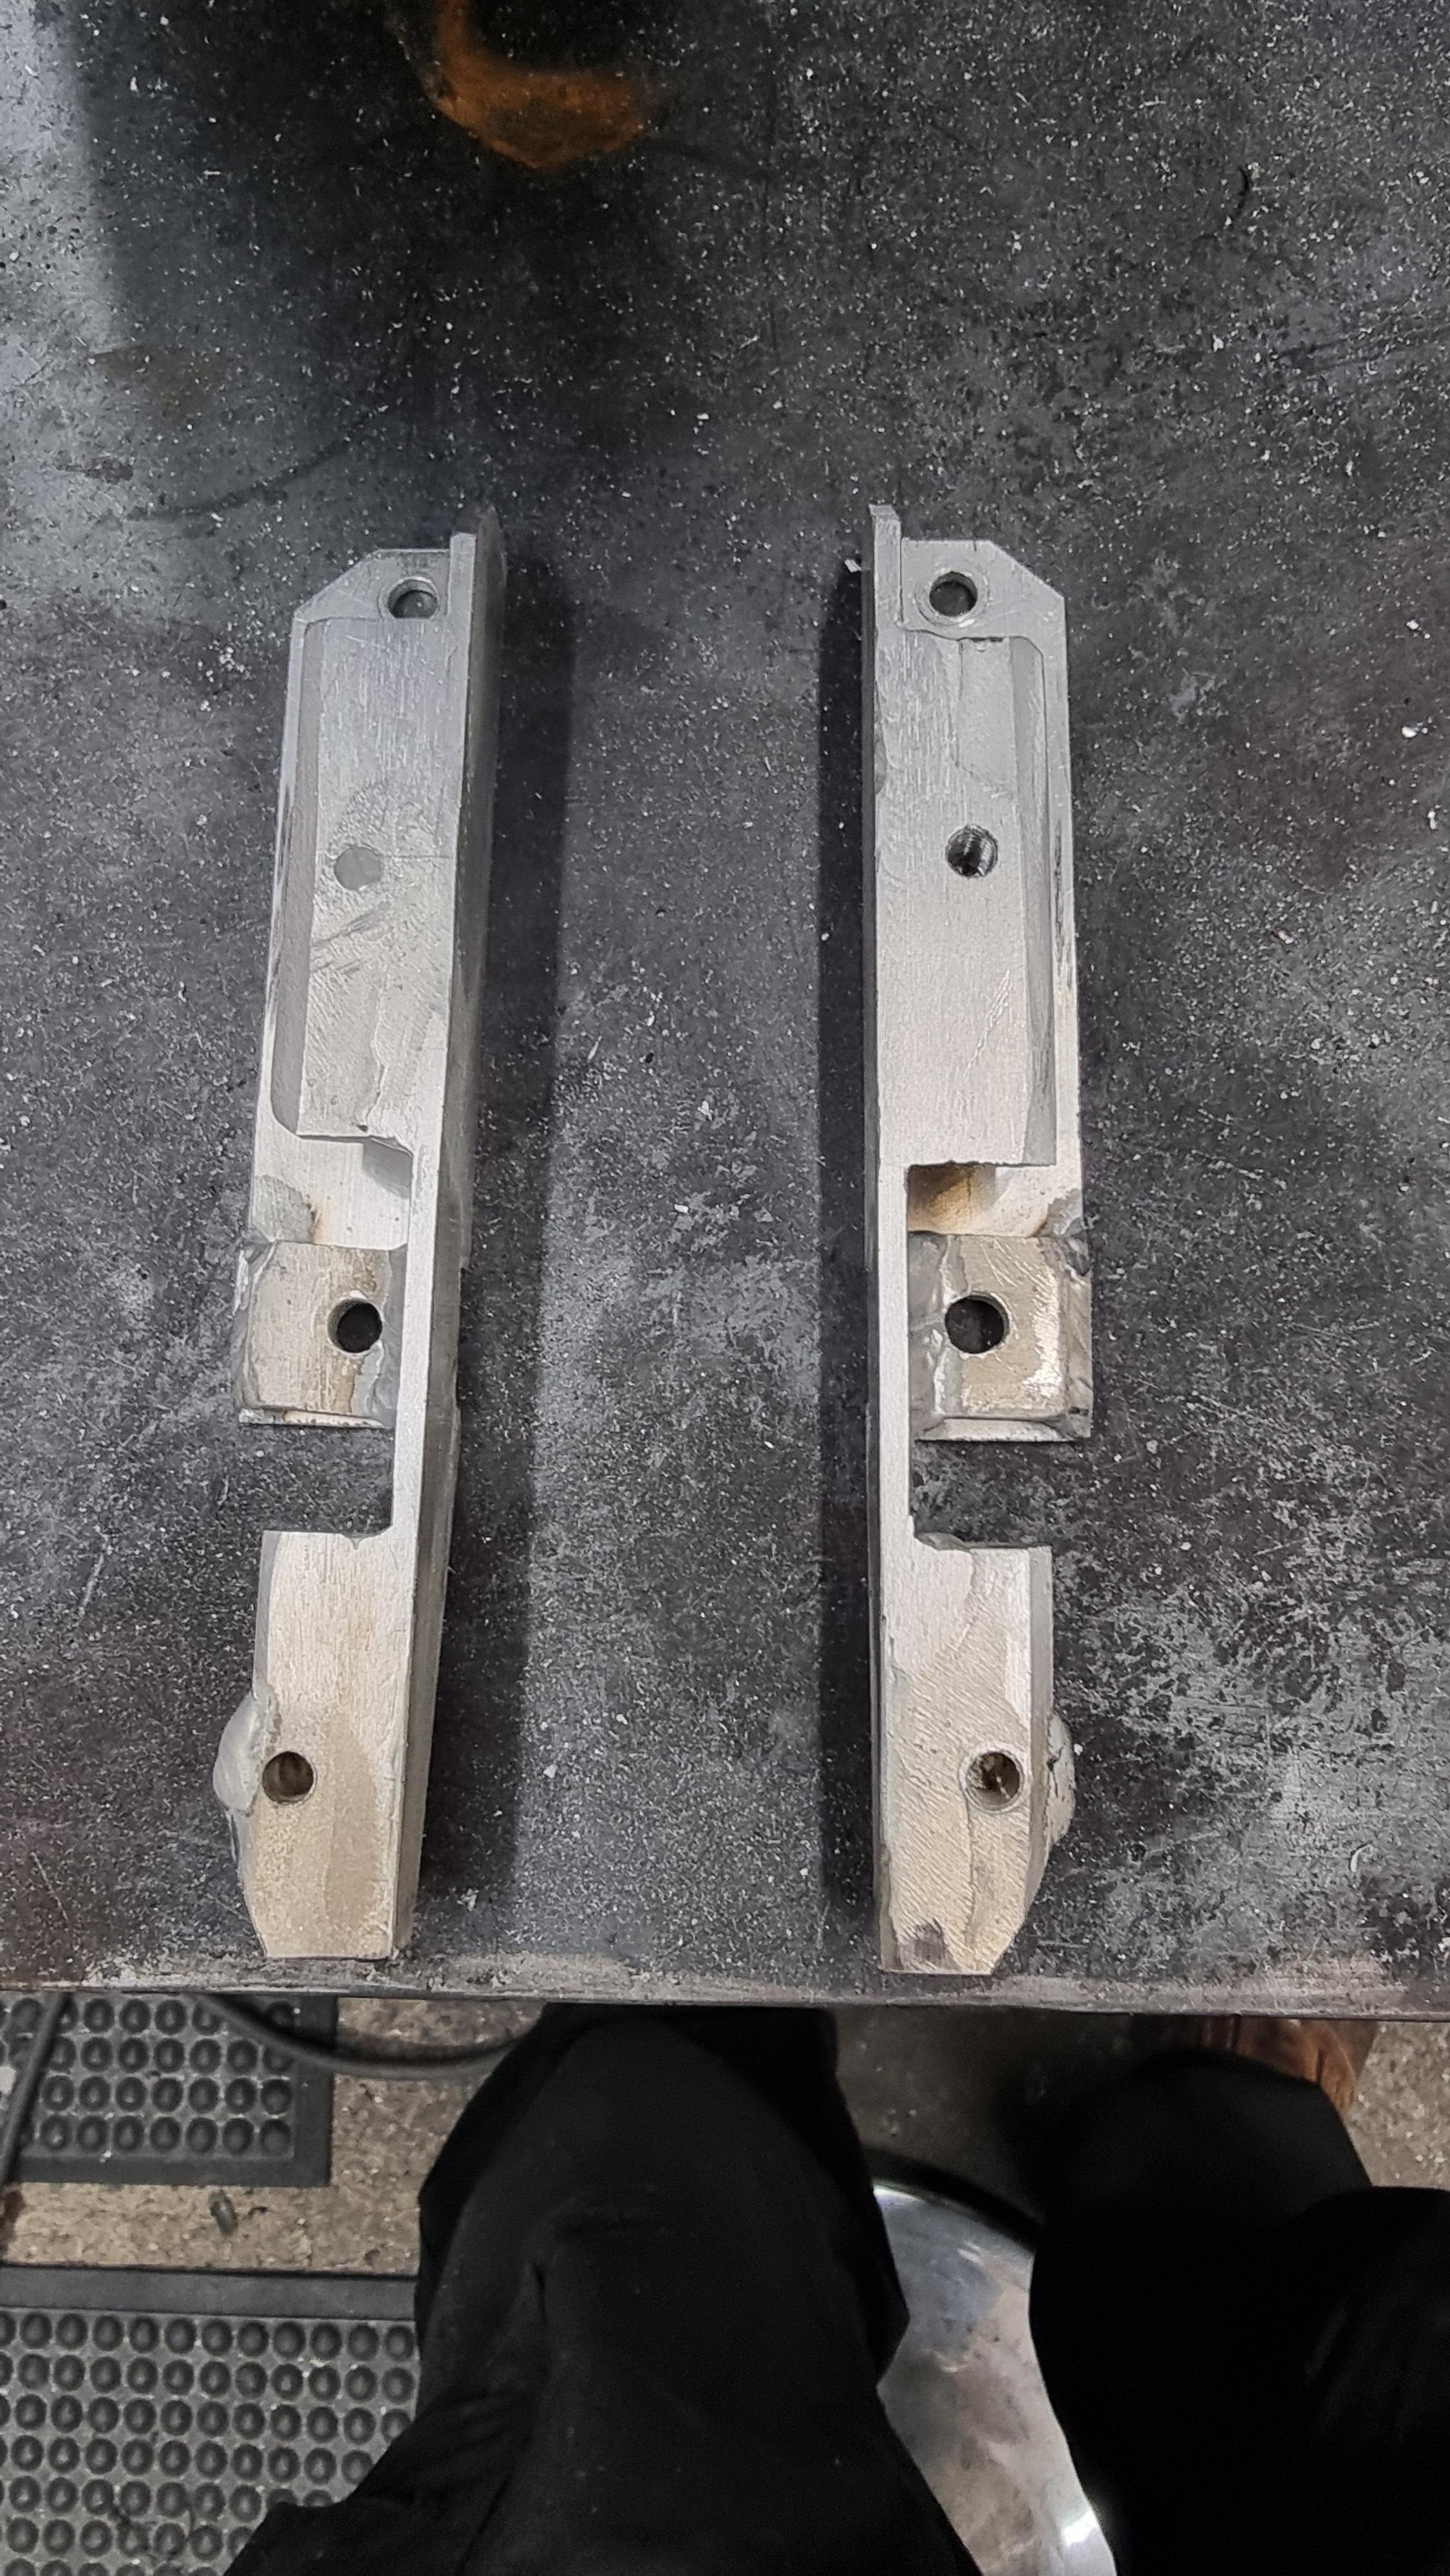
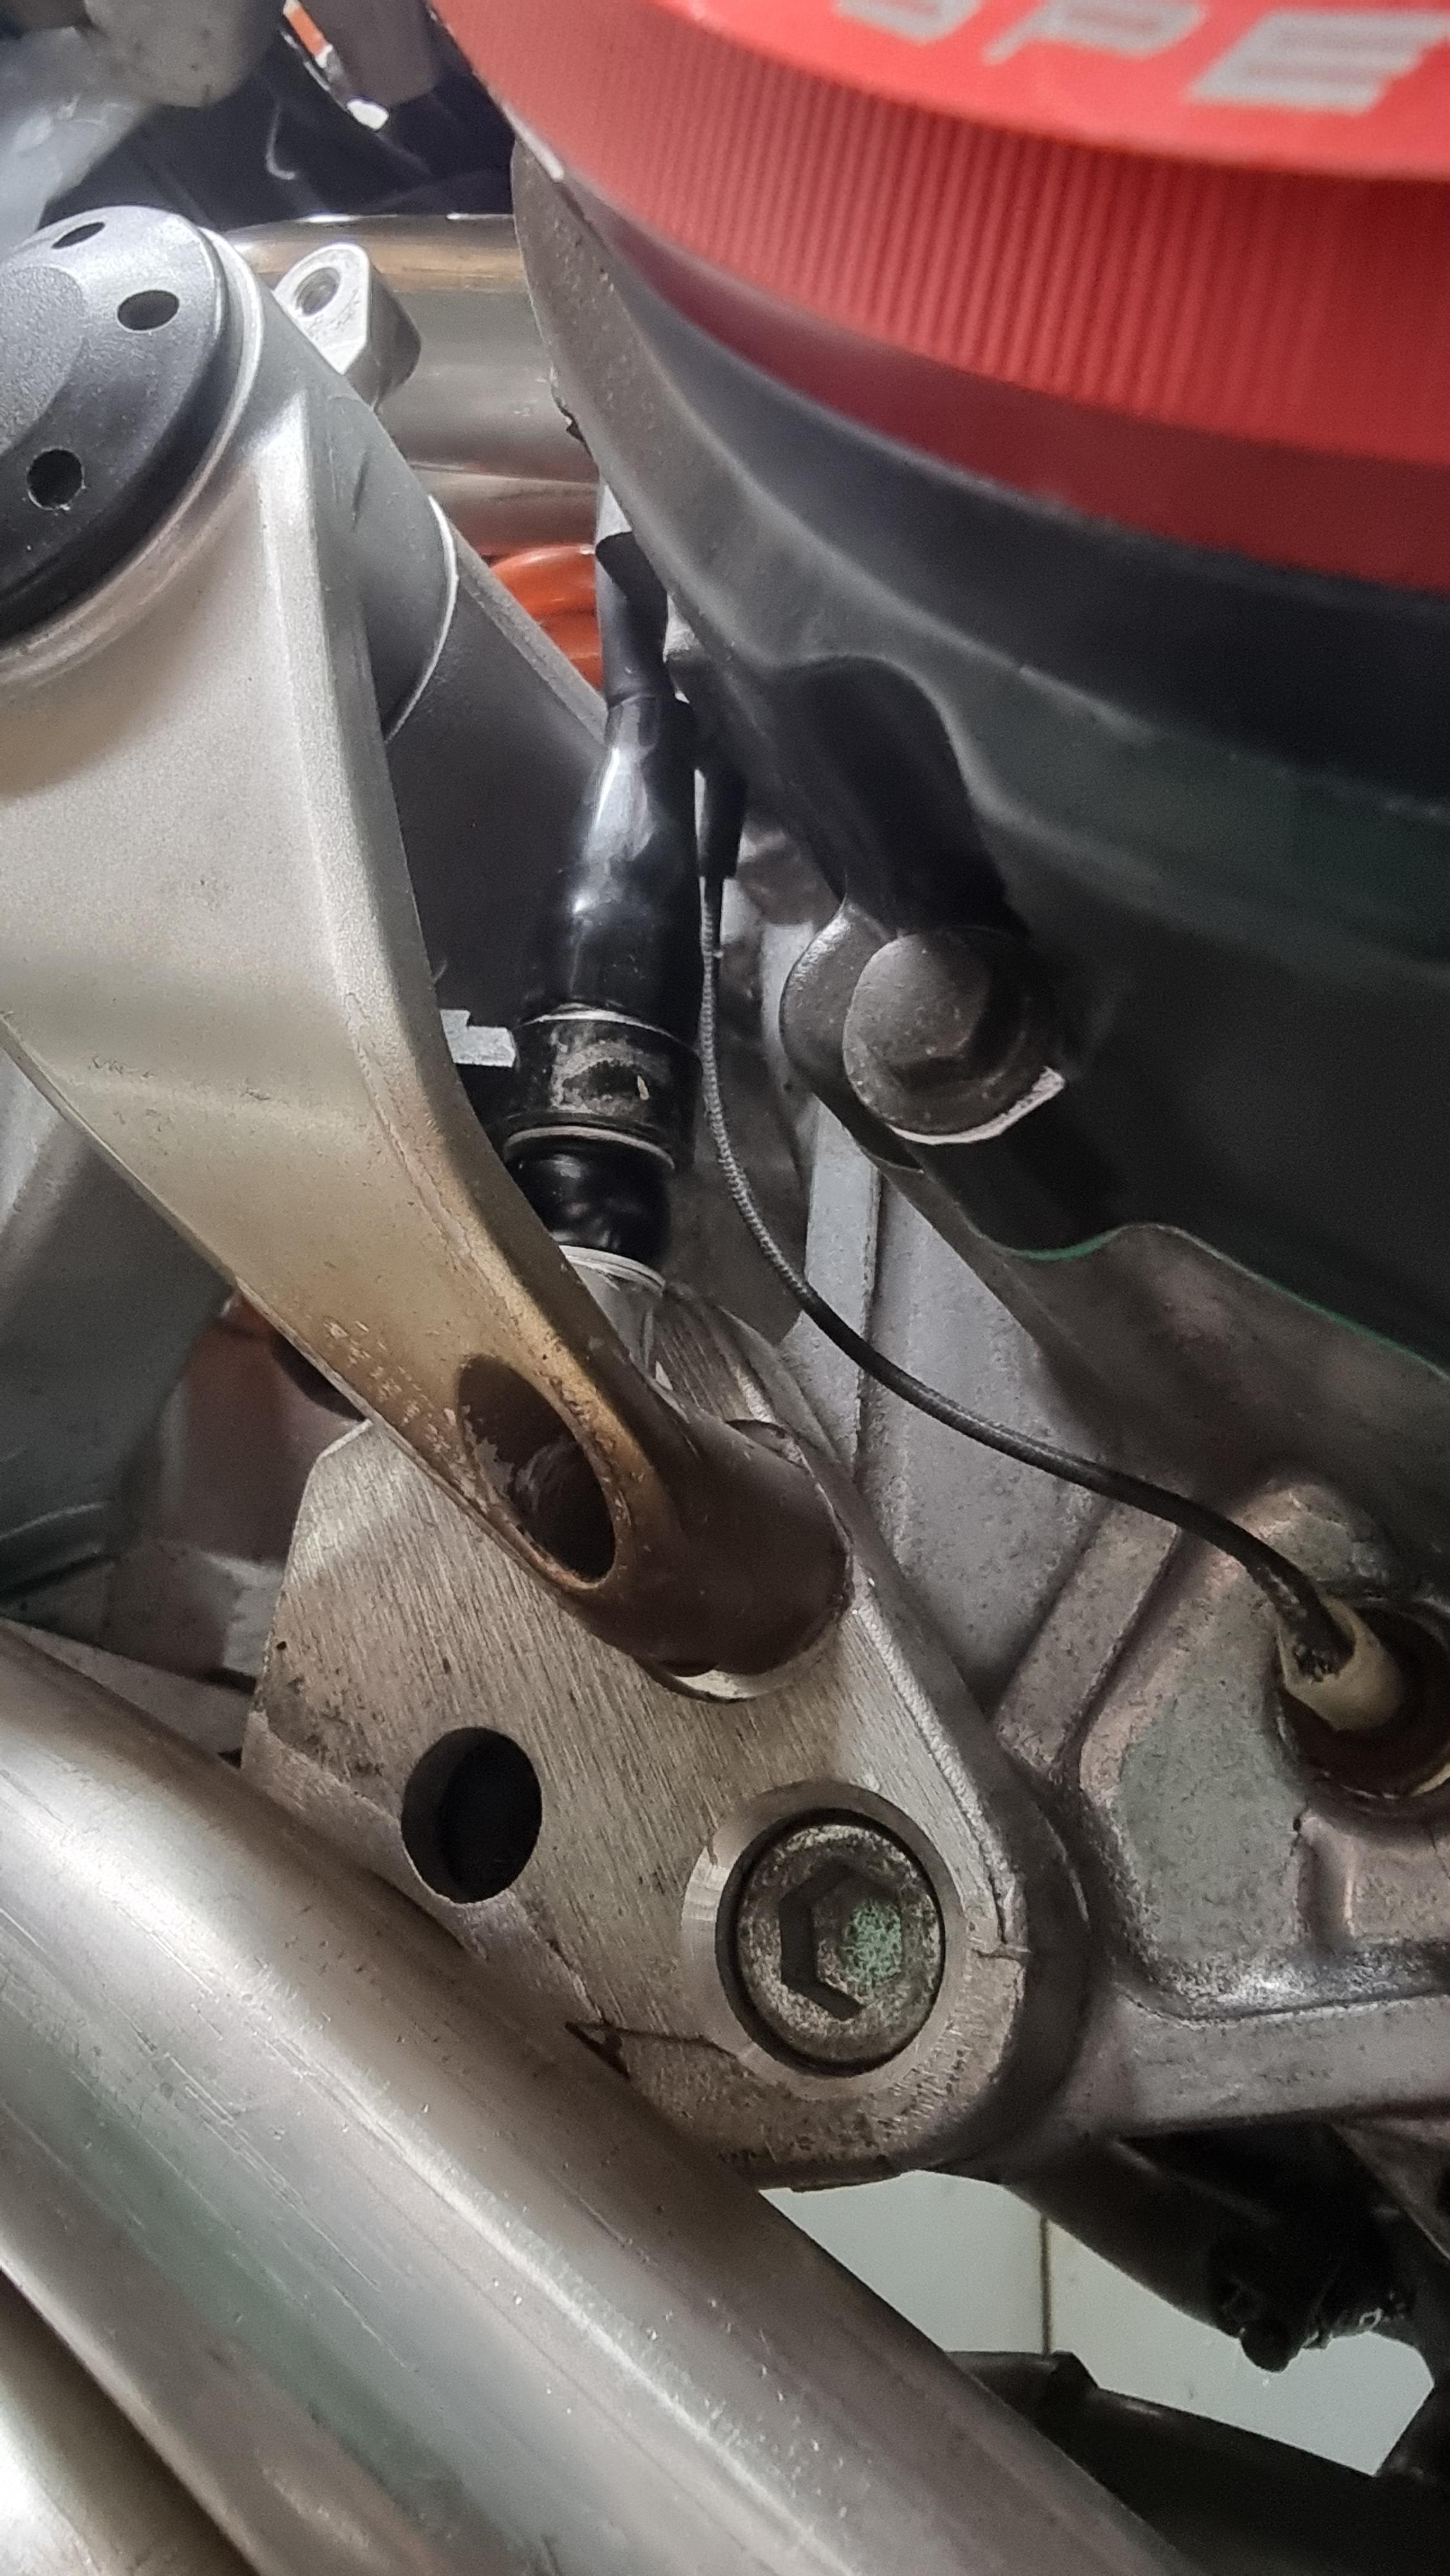
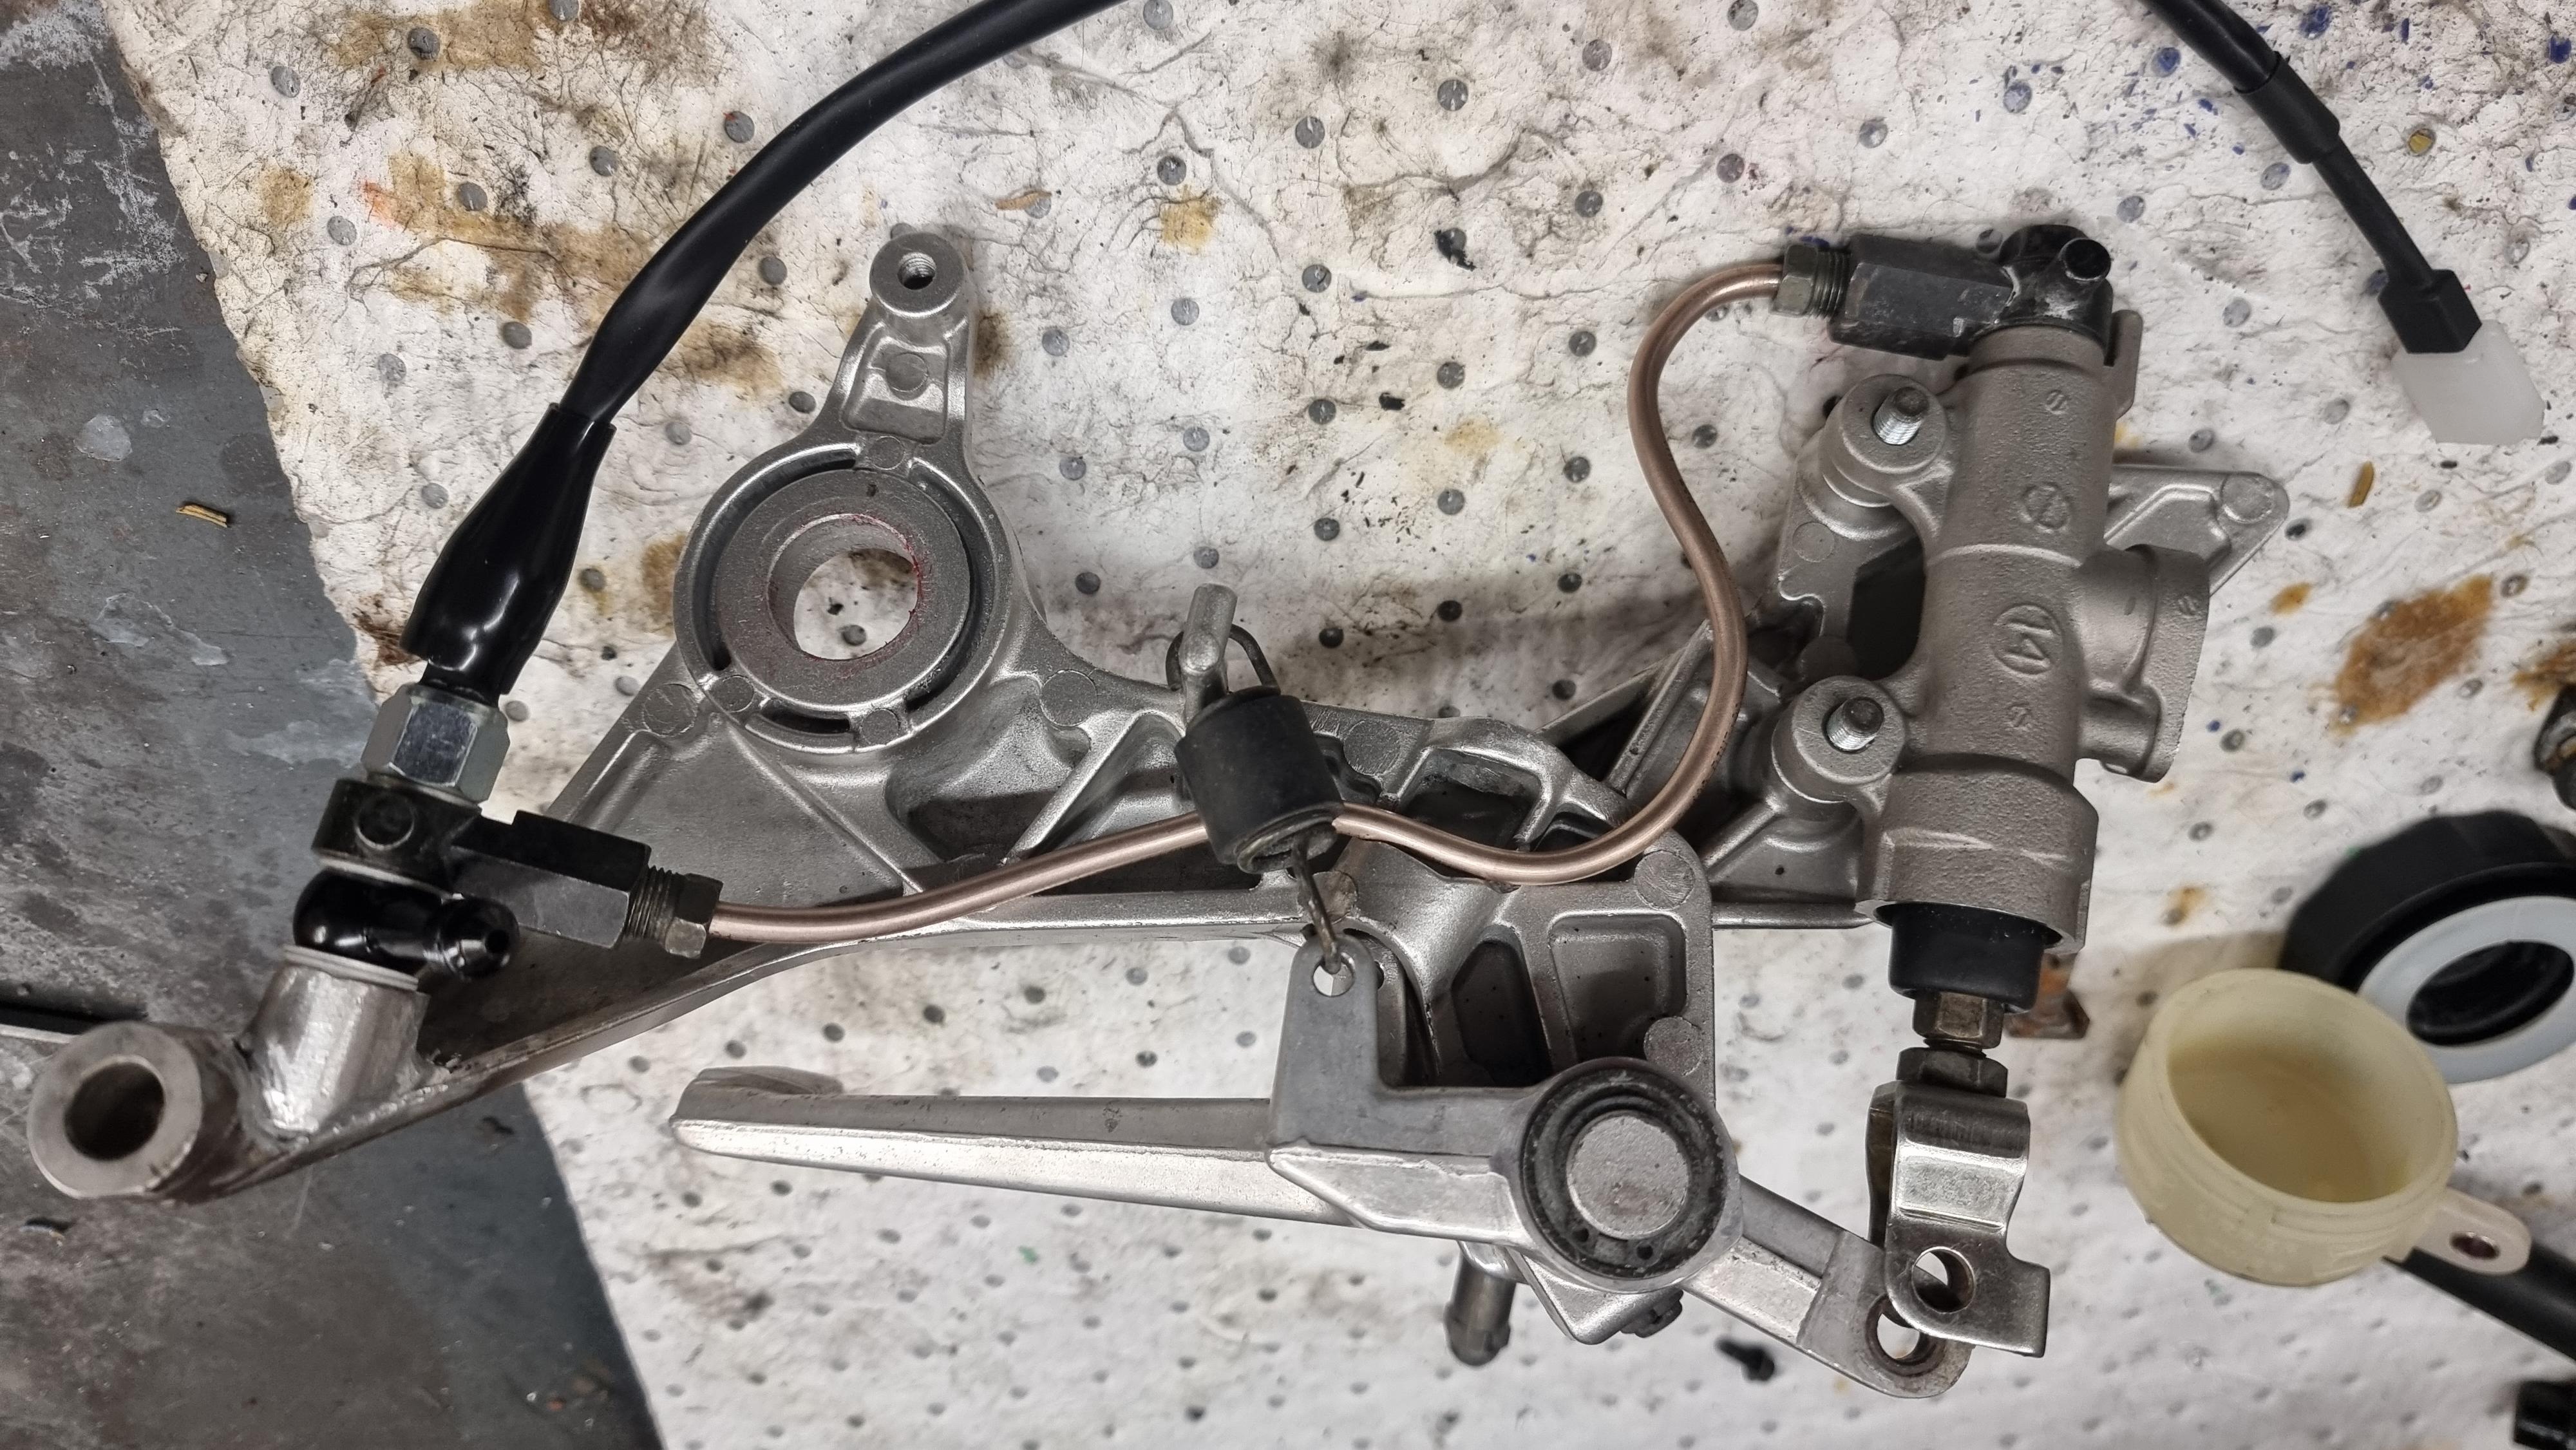
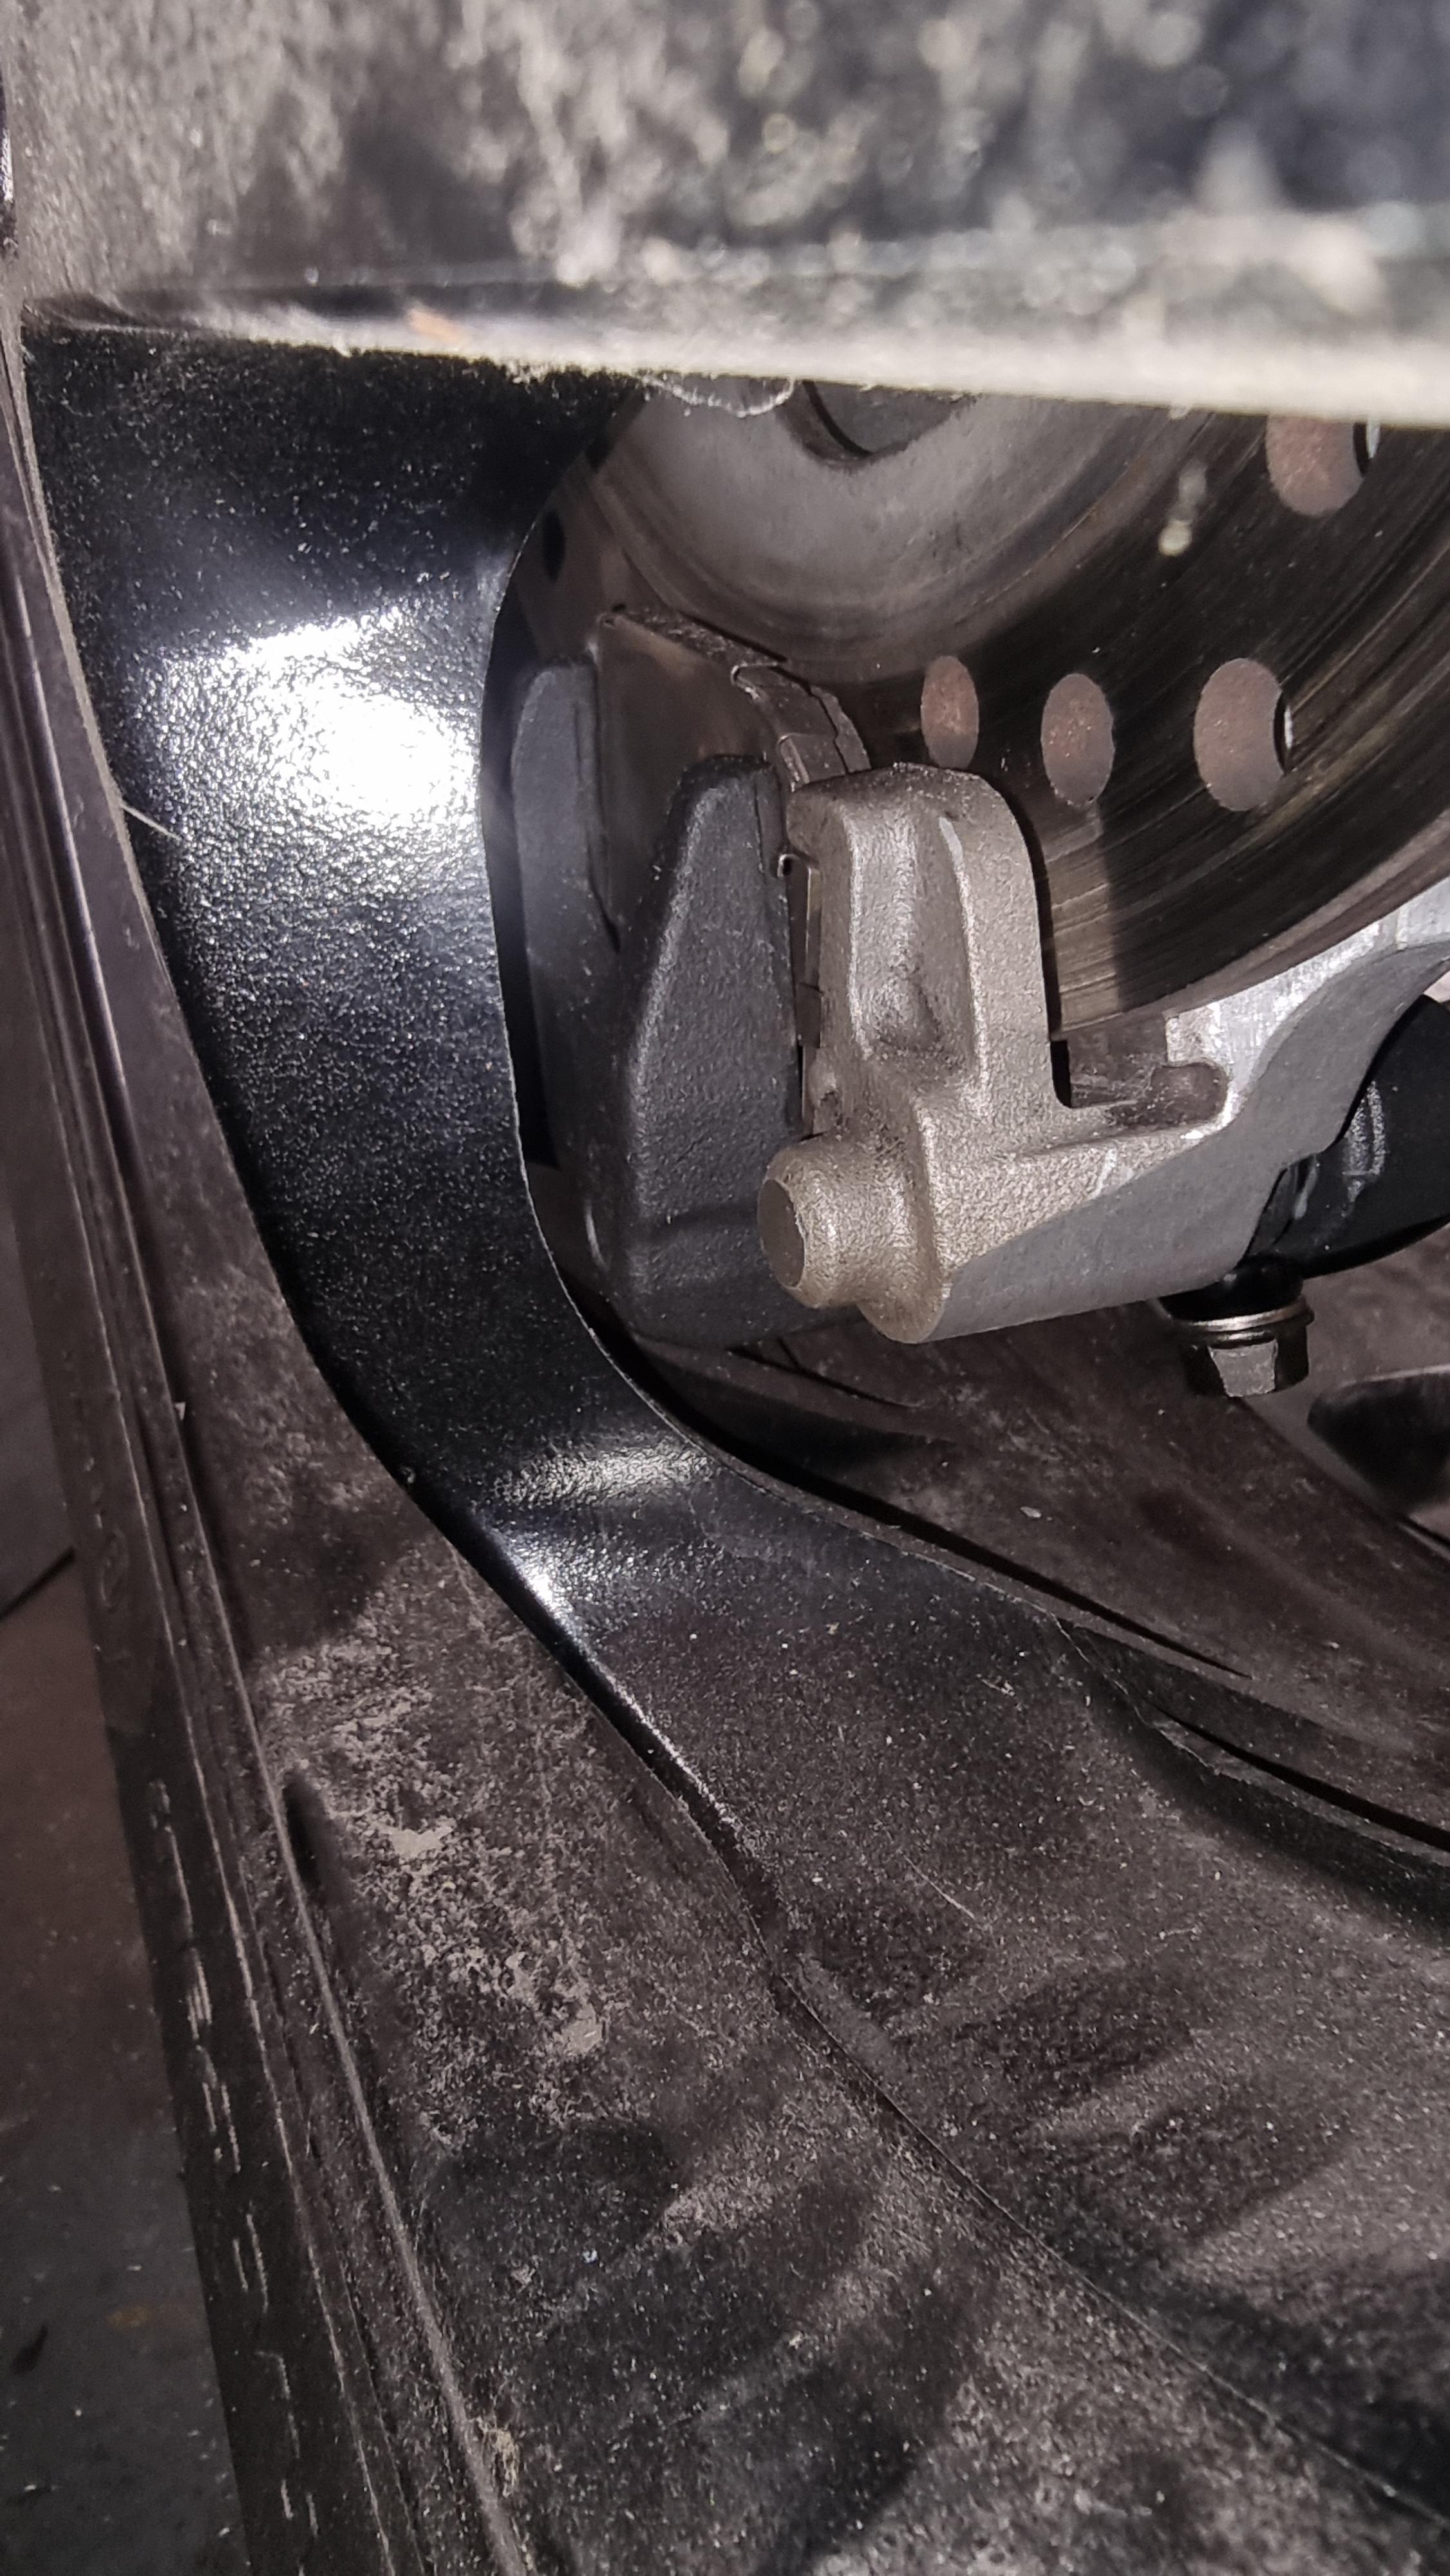
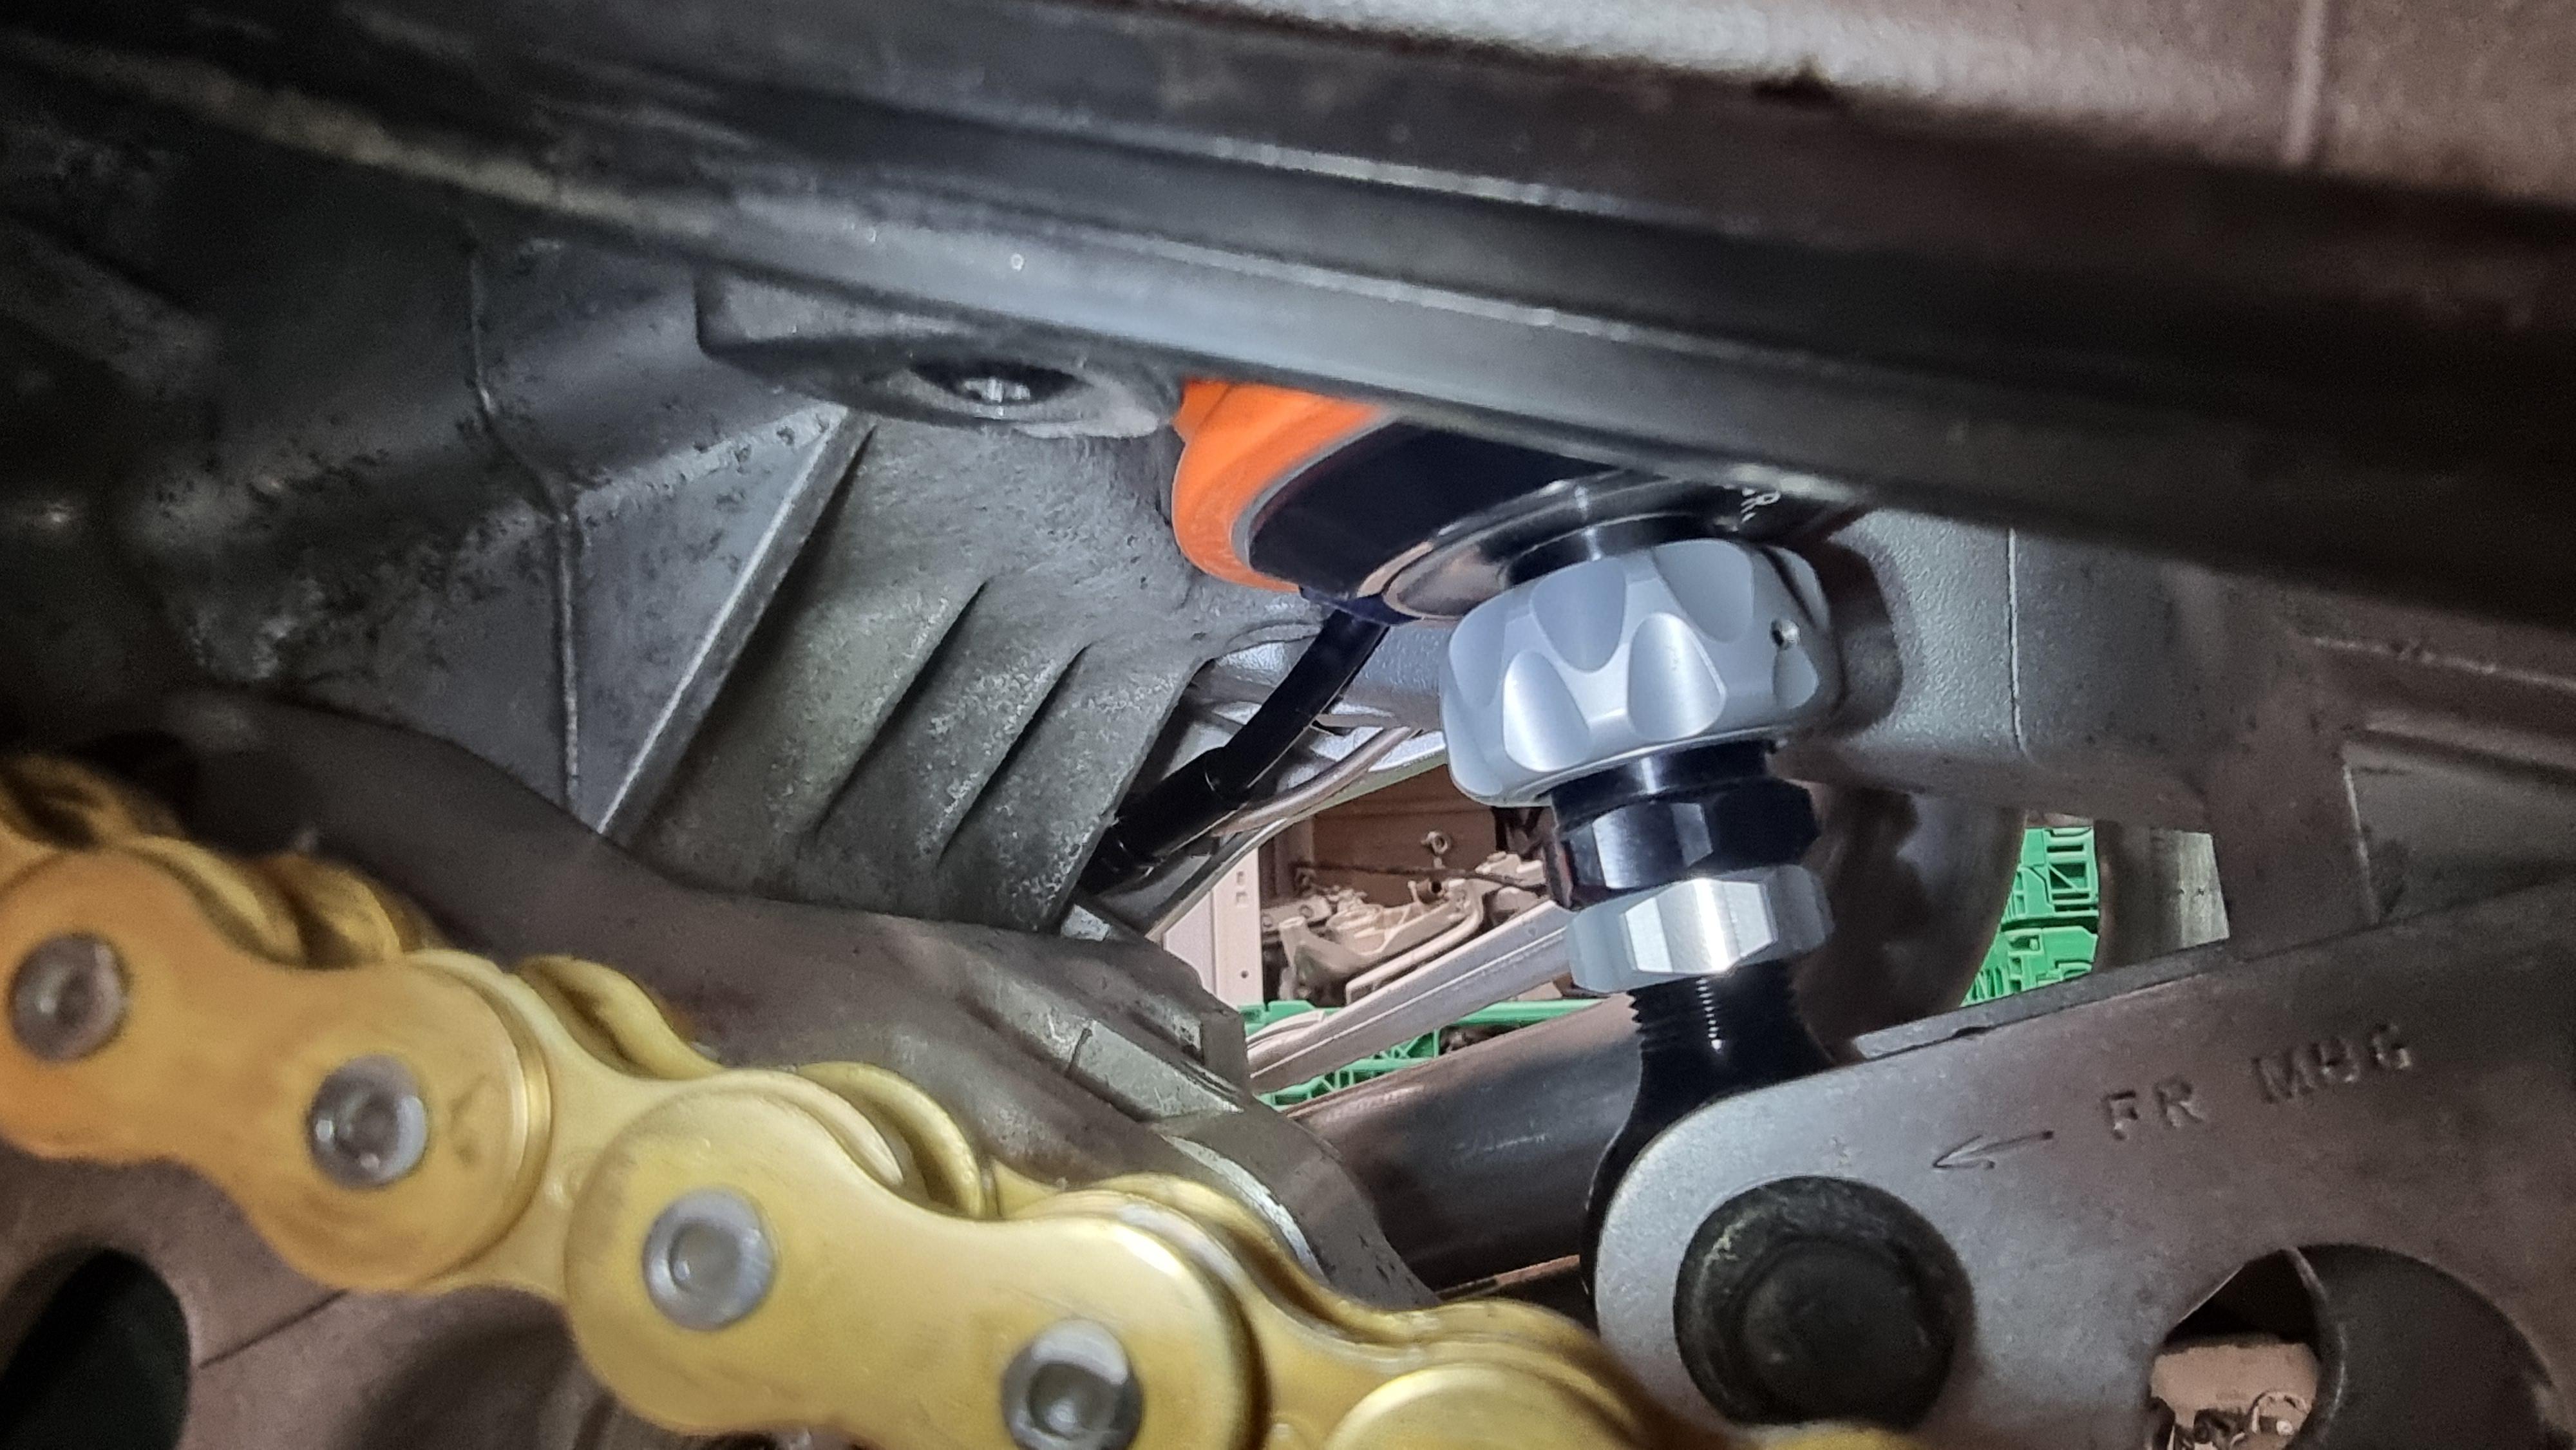
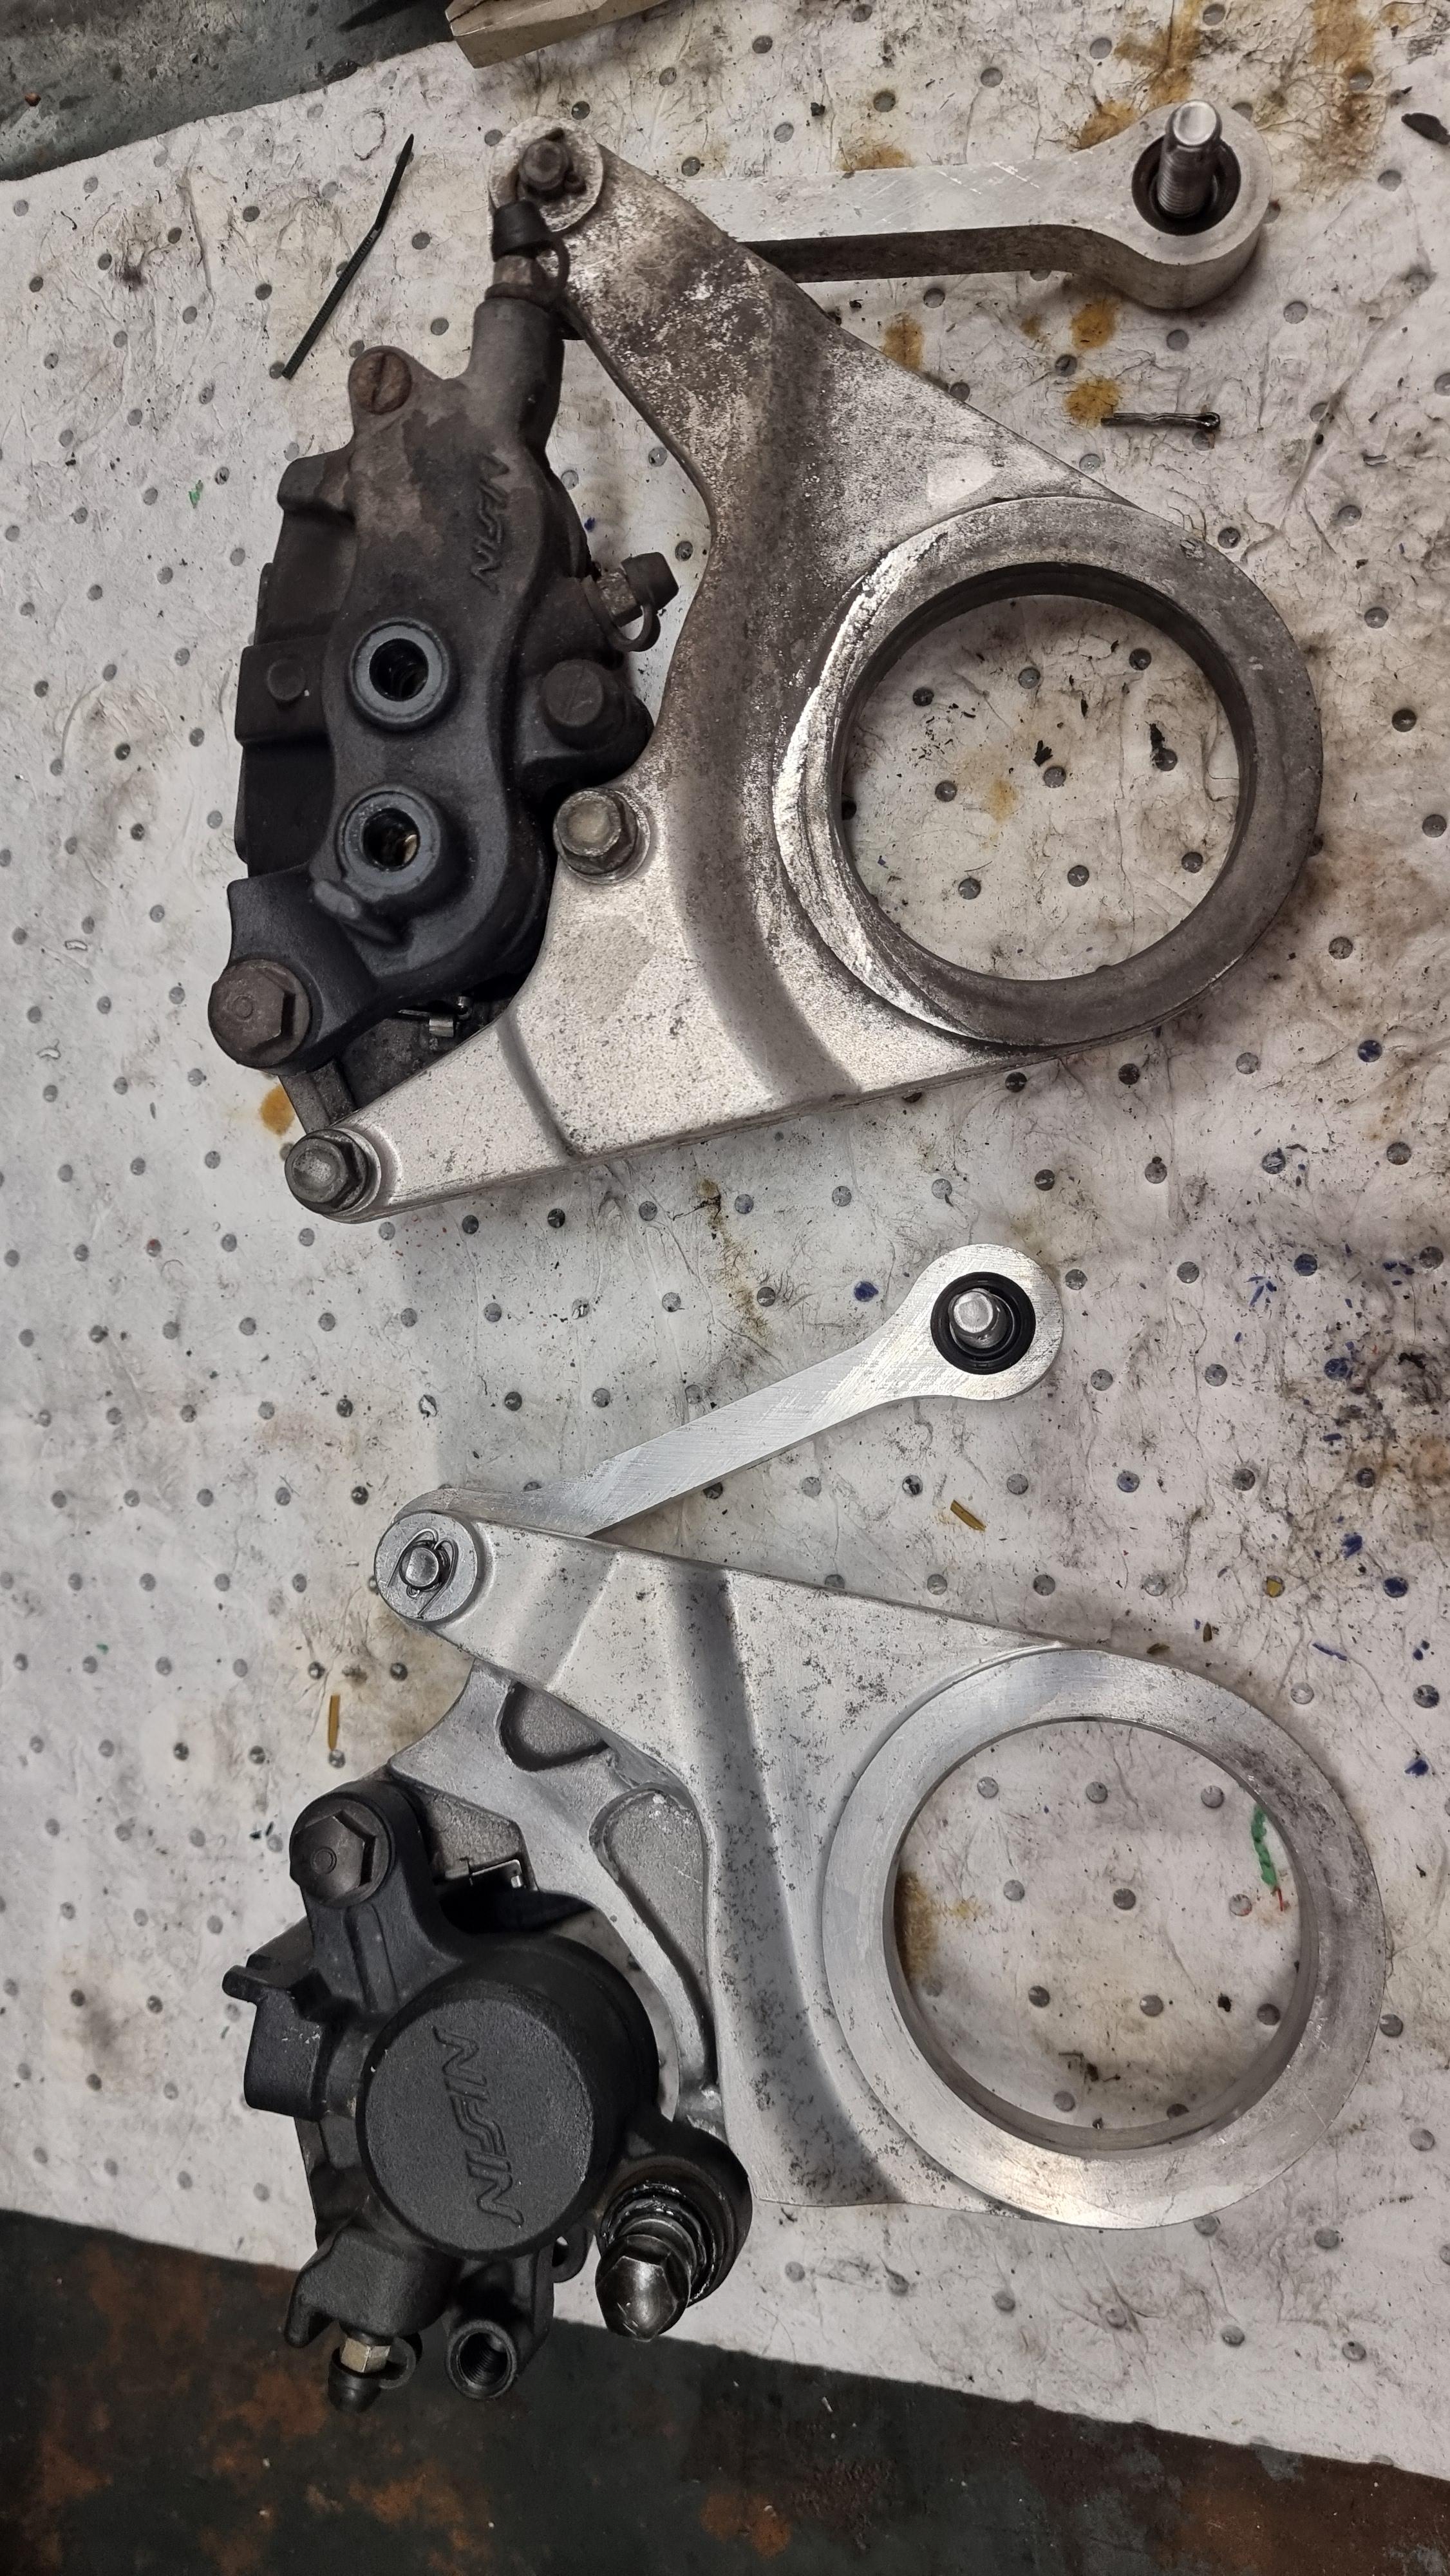
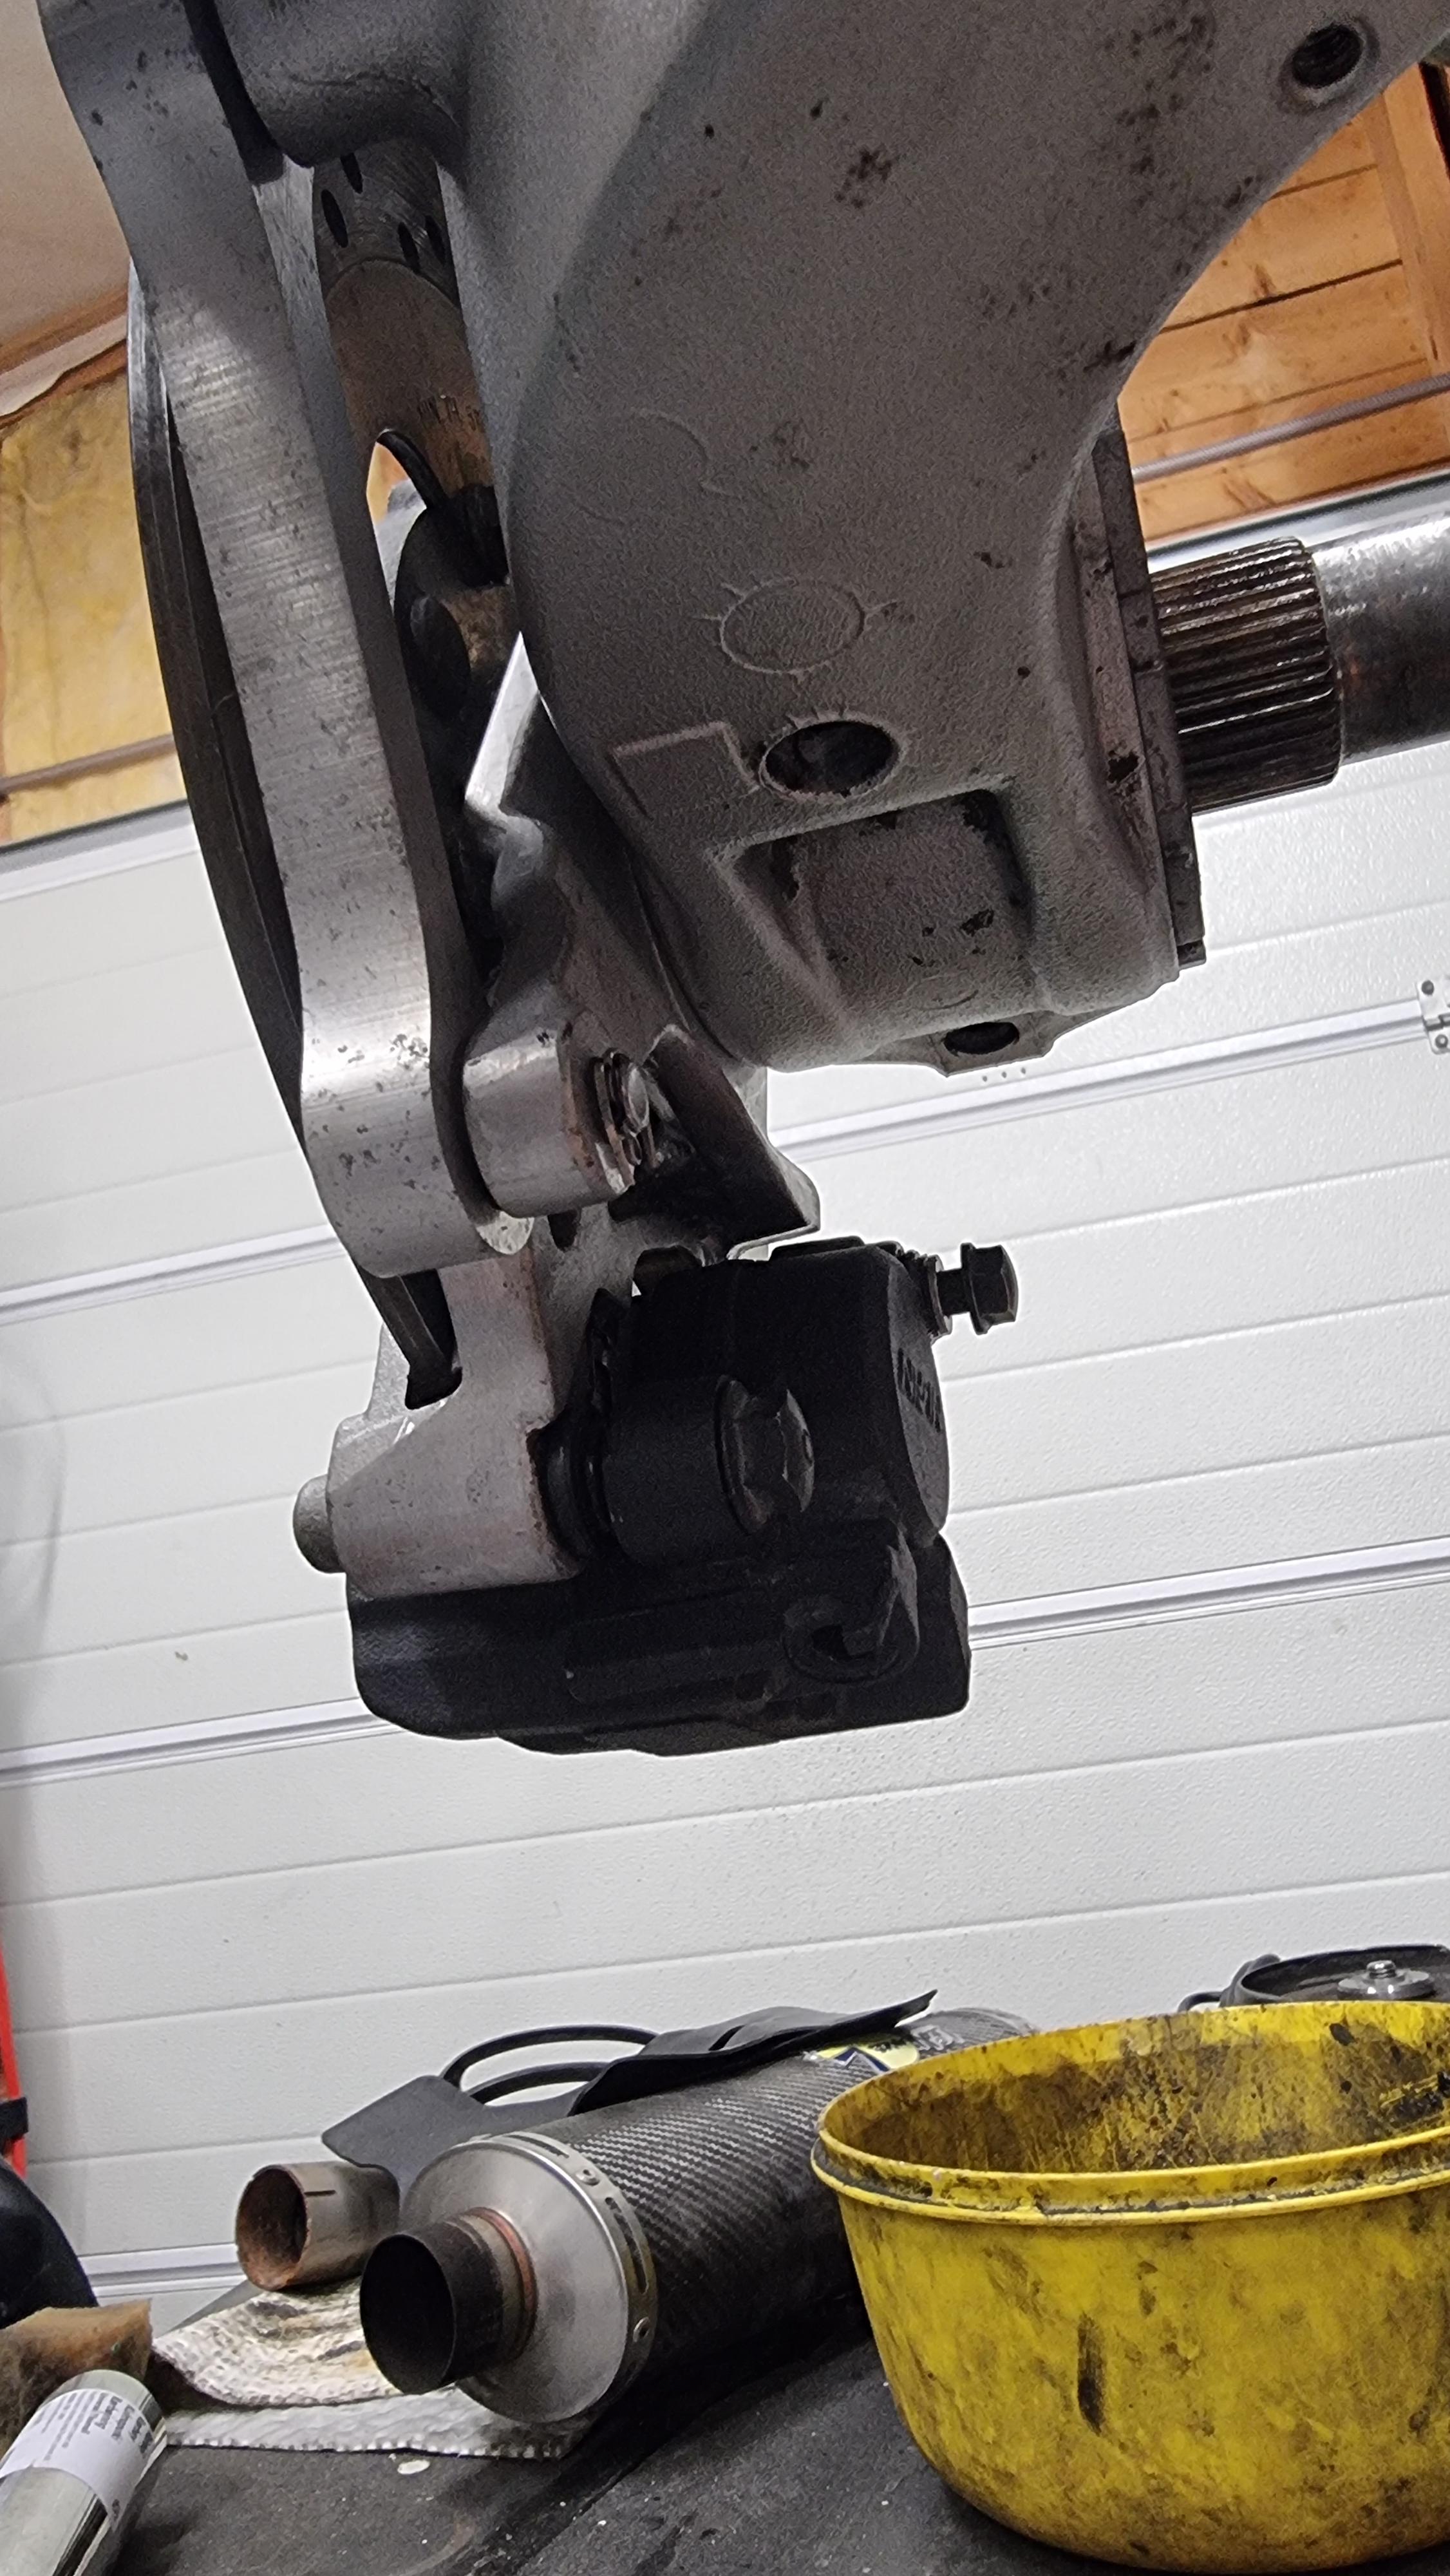
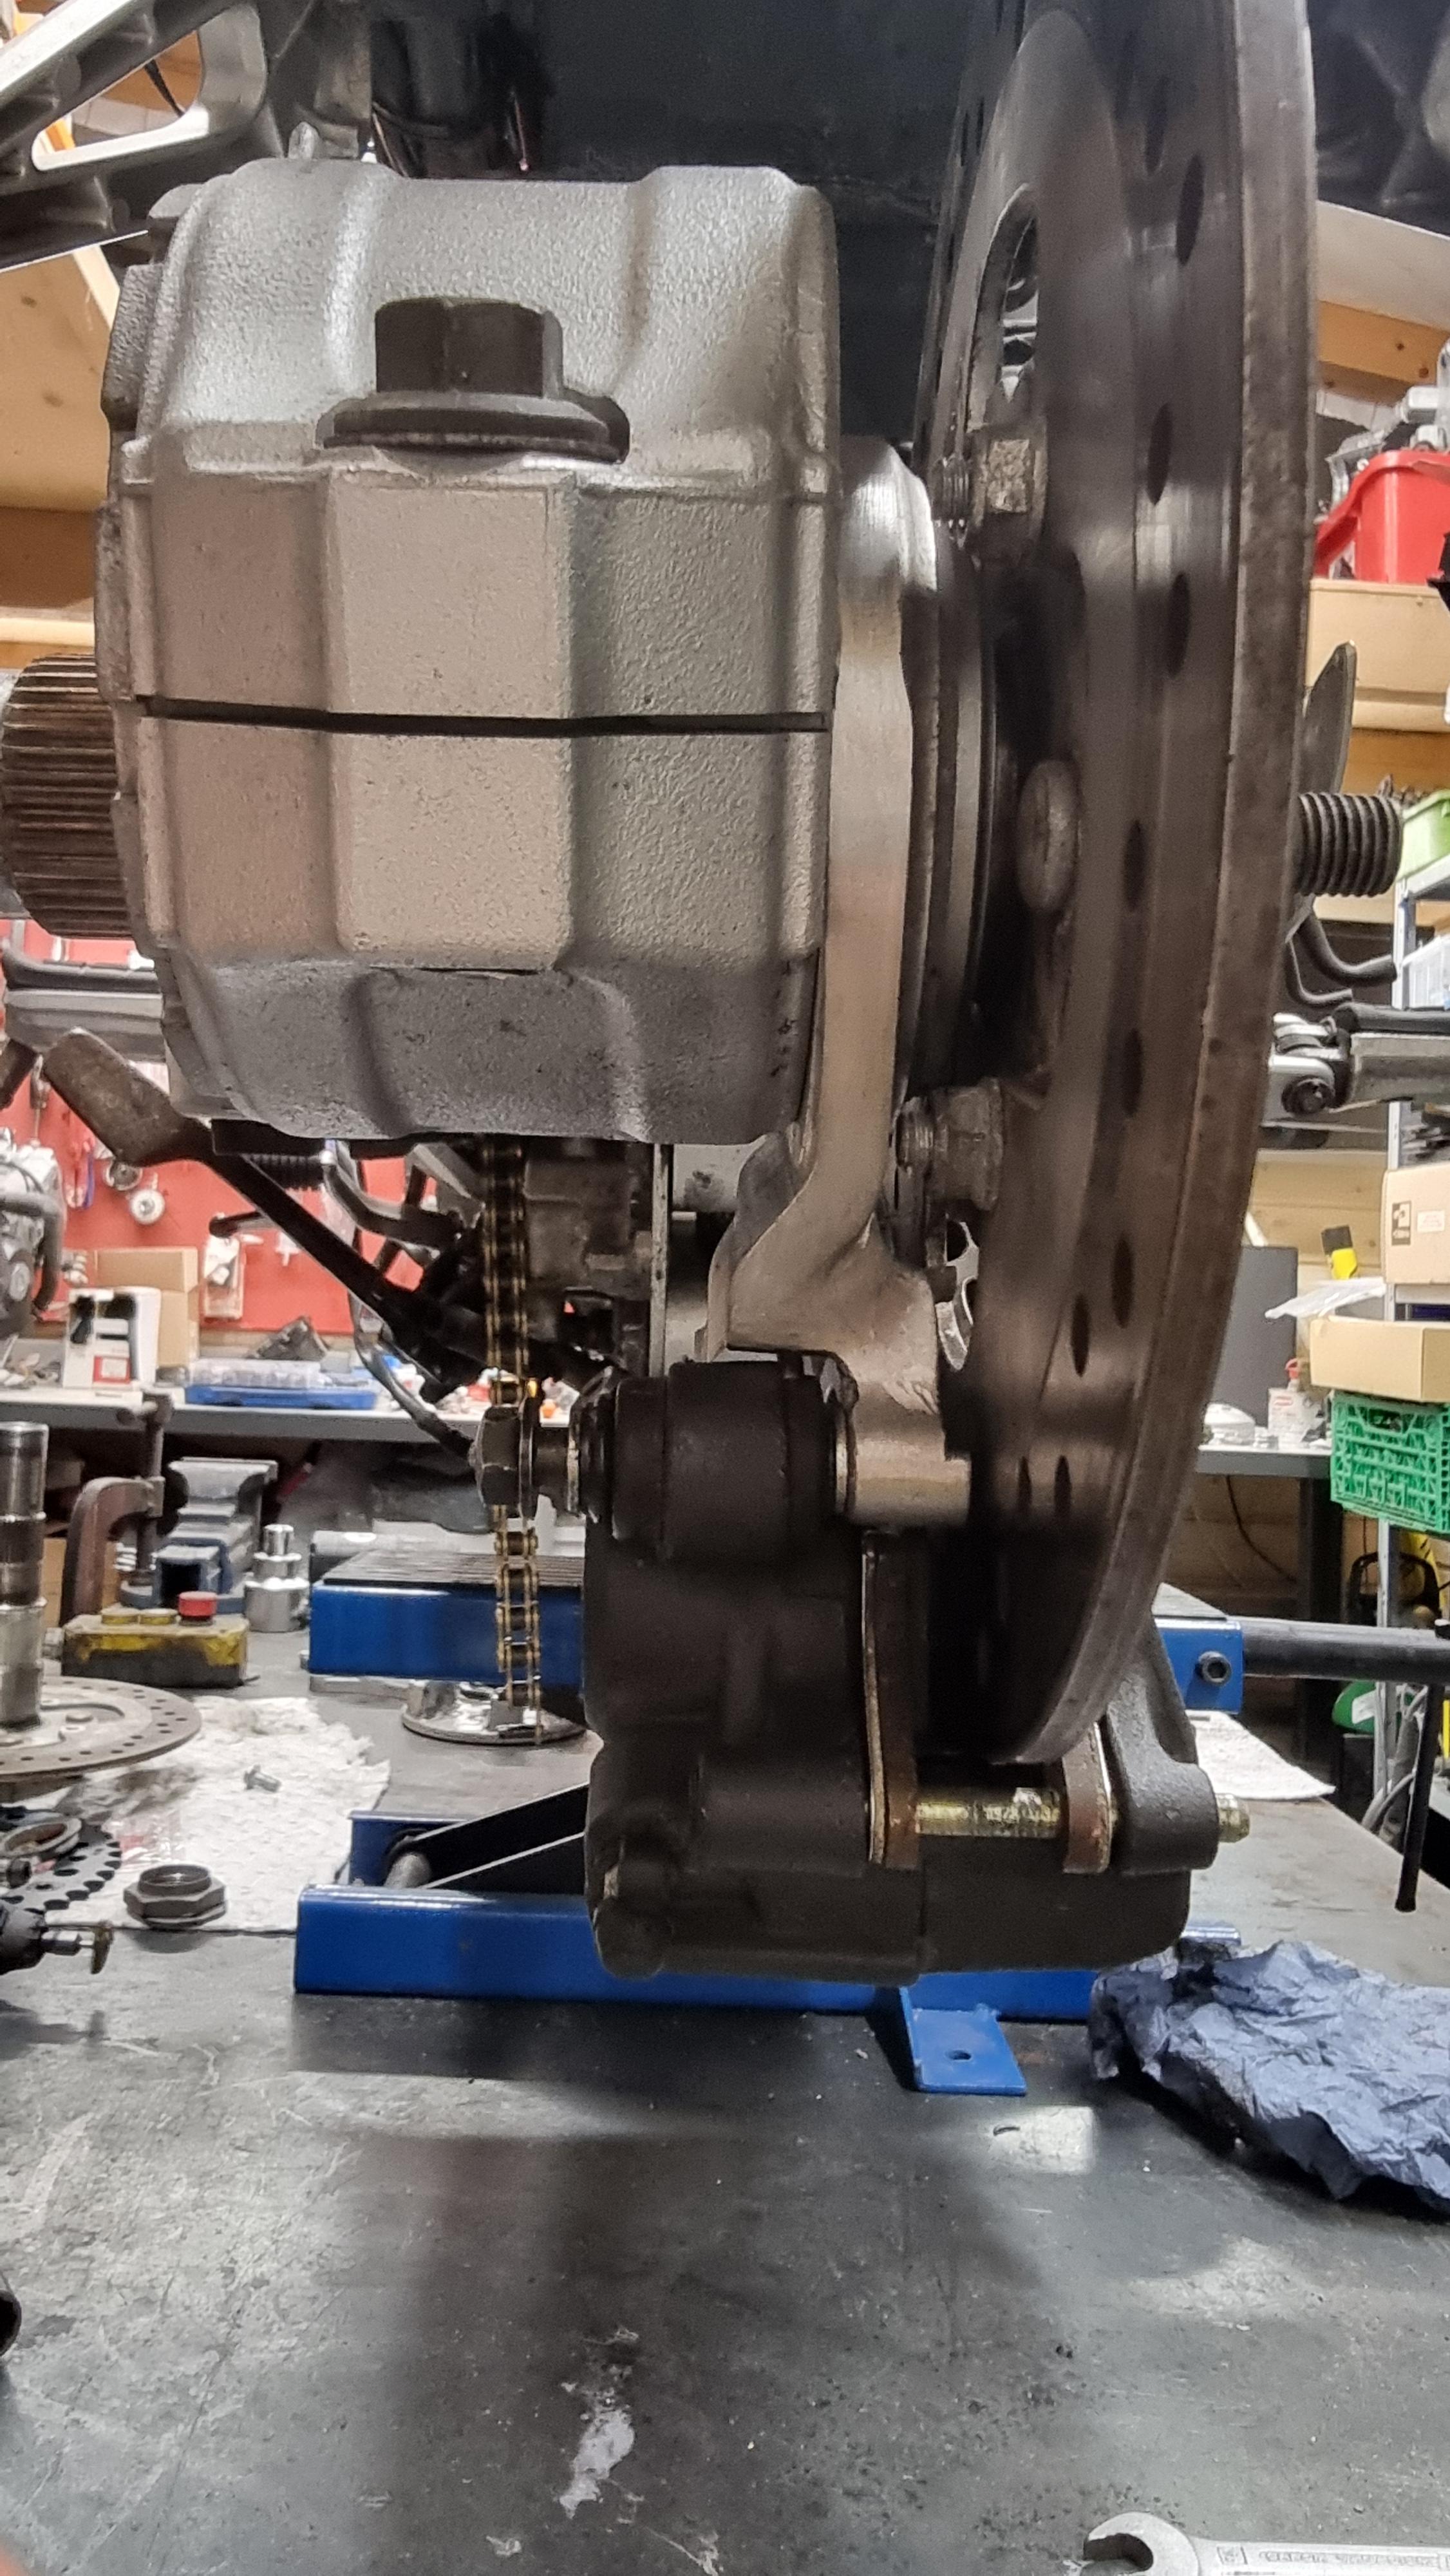
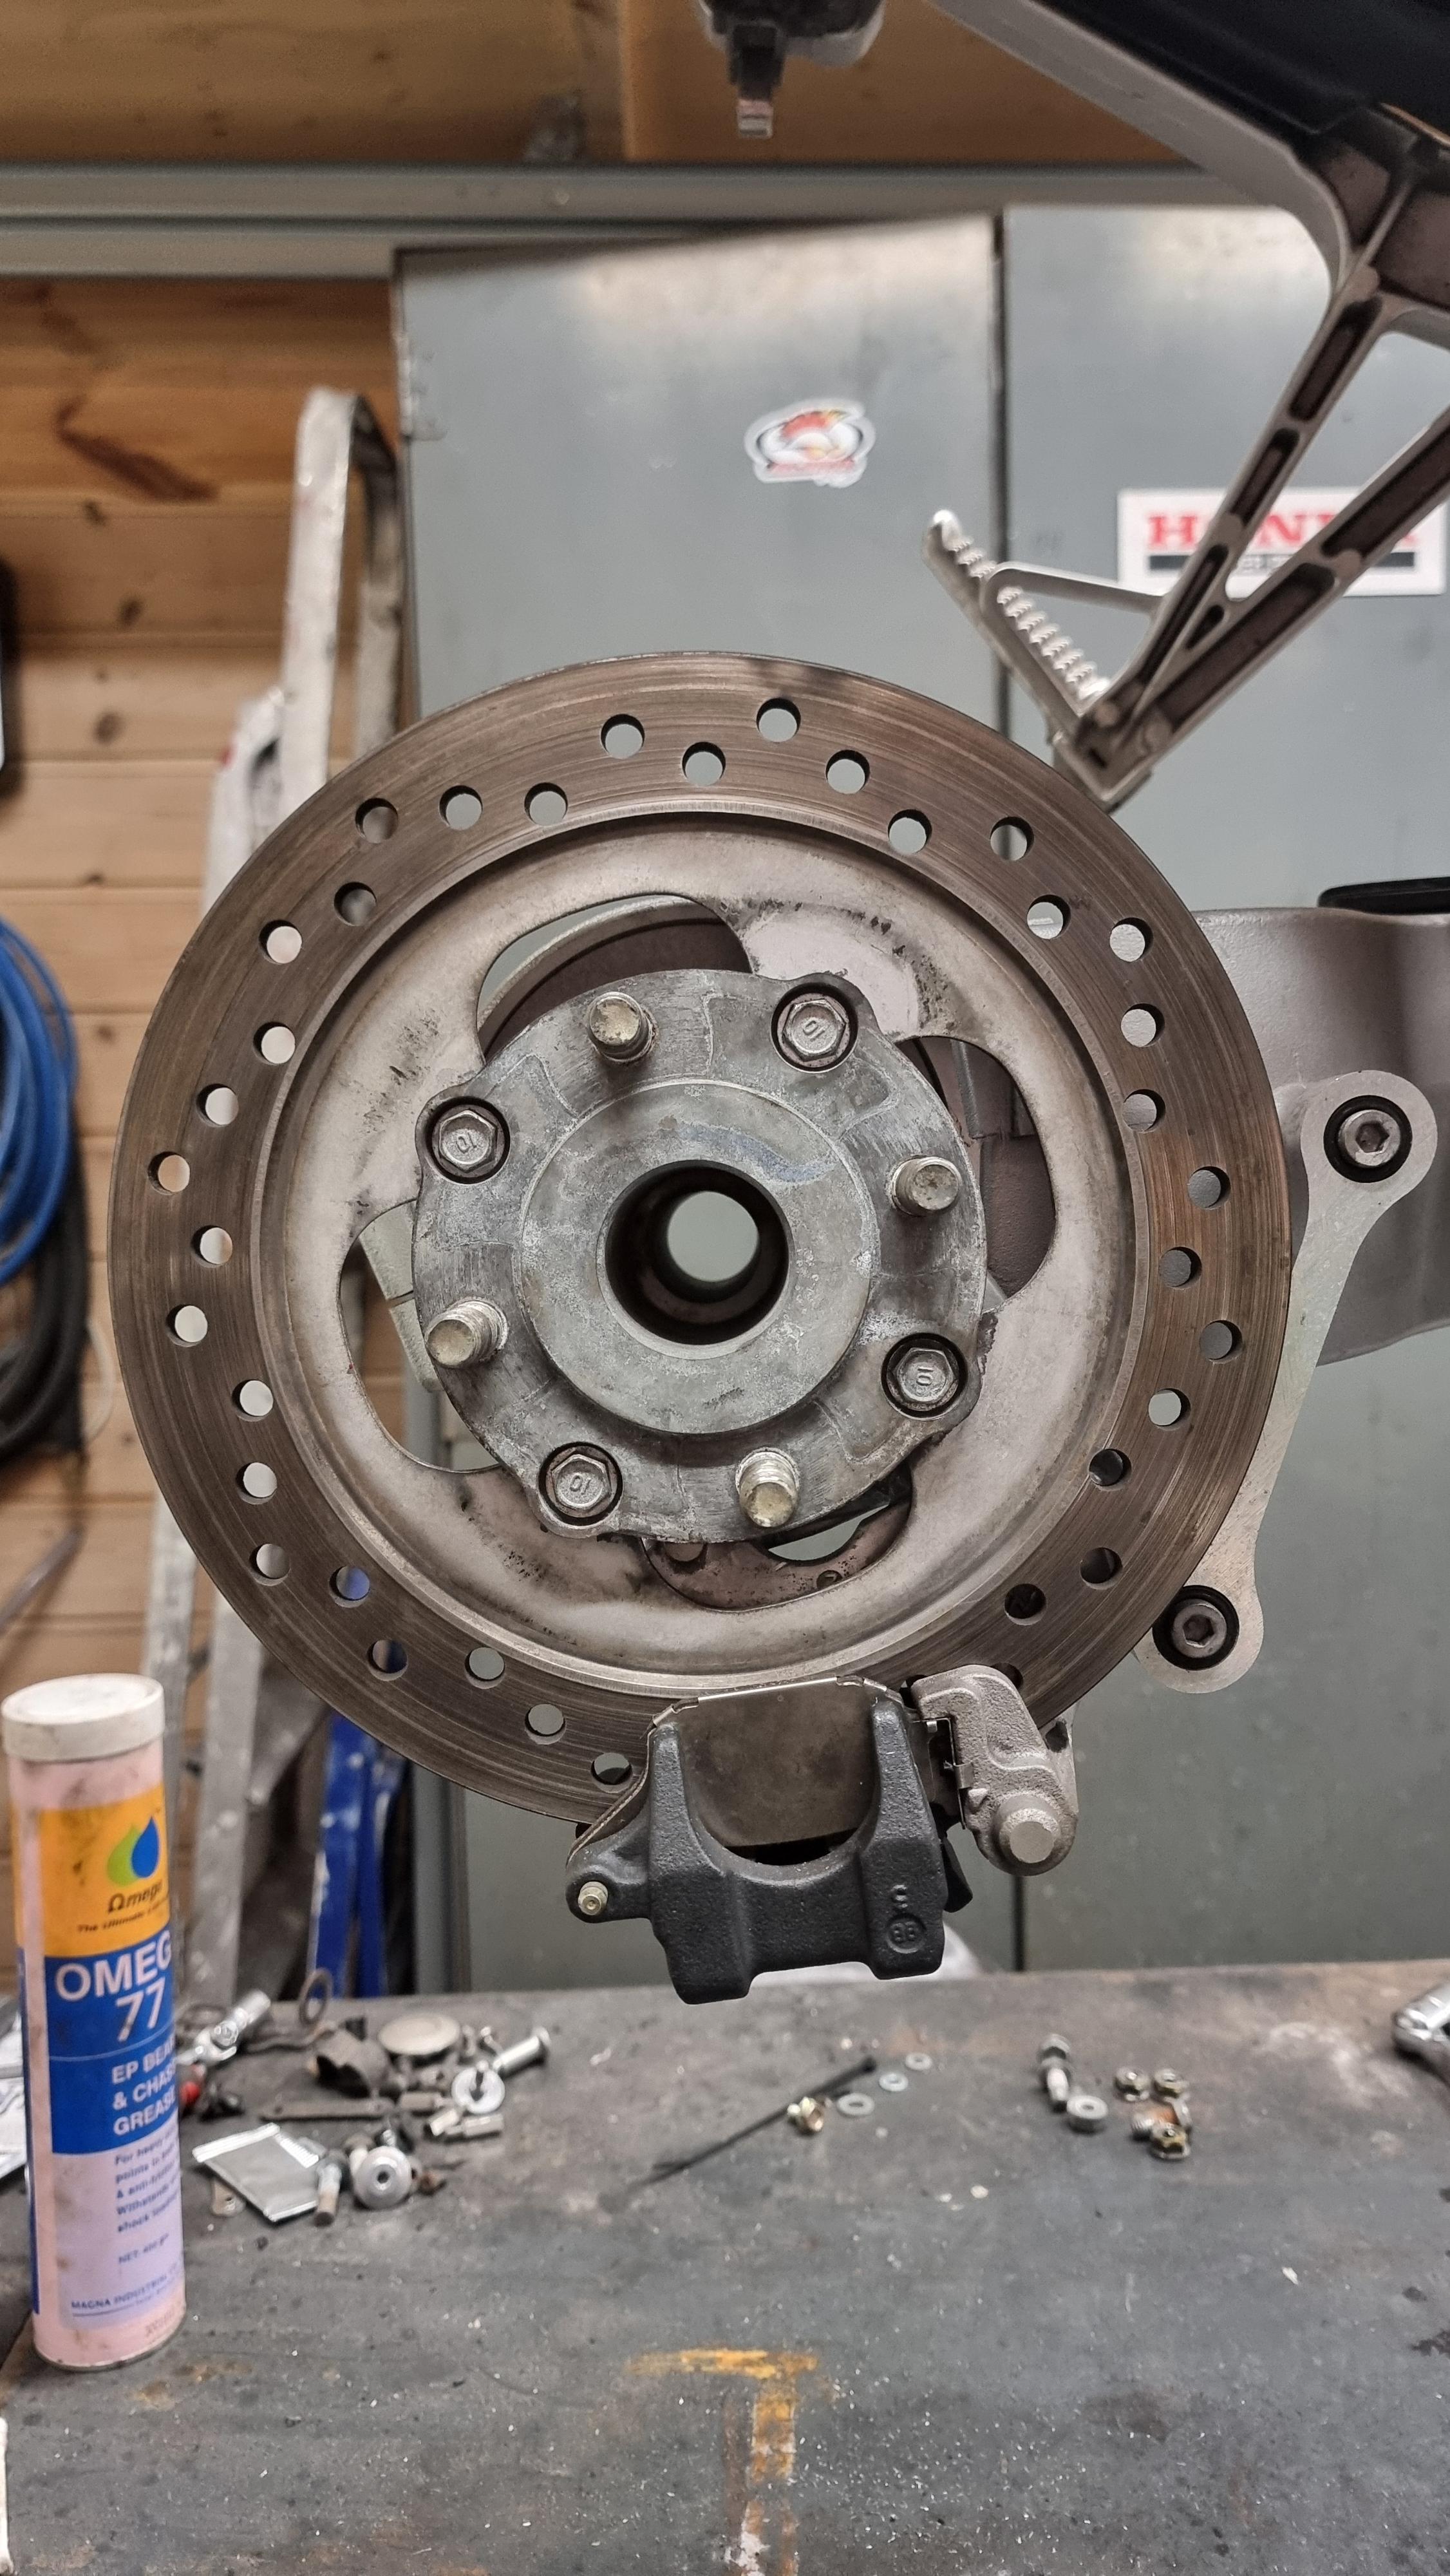
This is the final product of the rear brake. Happy with it but I absolutely hate the brake pipe! I see no other solution as of now, so let's see when revision 2 comes around. Would be nice with integrated reservoir too, again revisions... It feels more and more like I'm making a protype and this is R/D. I was able to hide a lot of everything behind the footrest, got rid of the horrible hoses and brake light switch wire going everywhere. I don't want to cut of the heat shield mount on the footrest before I have testet that my pants will survive, so currently around 400g gone 👏 the brown paint will stay on for now and is due to me welding material on the lower part of the rest so I could have a threaded base for the brake switch and the banjos. I absolutely love the design of the footrest on the 5th gen so I would like to keep them as long as possible! It sure is a tight fit with the CBR caliper. I can not see a dual piston caliper ever making its place here with the 5spokes! Breakeline going to the banjo.
-
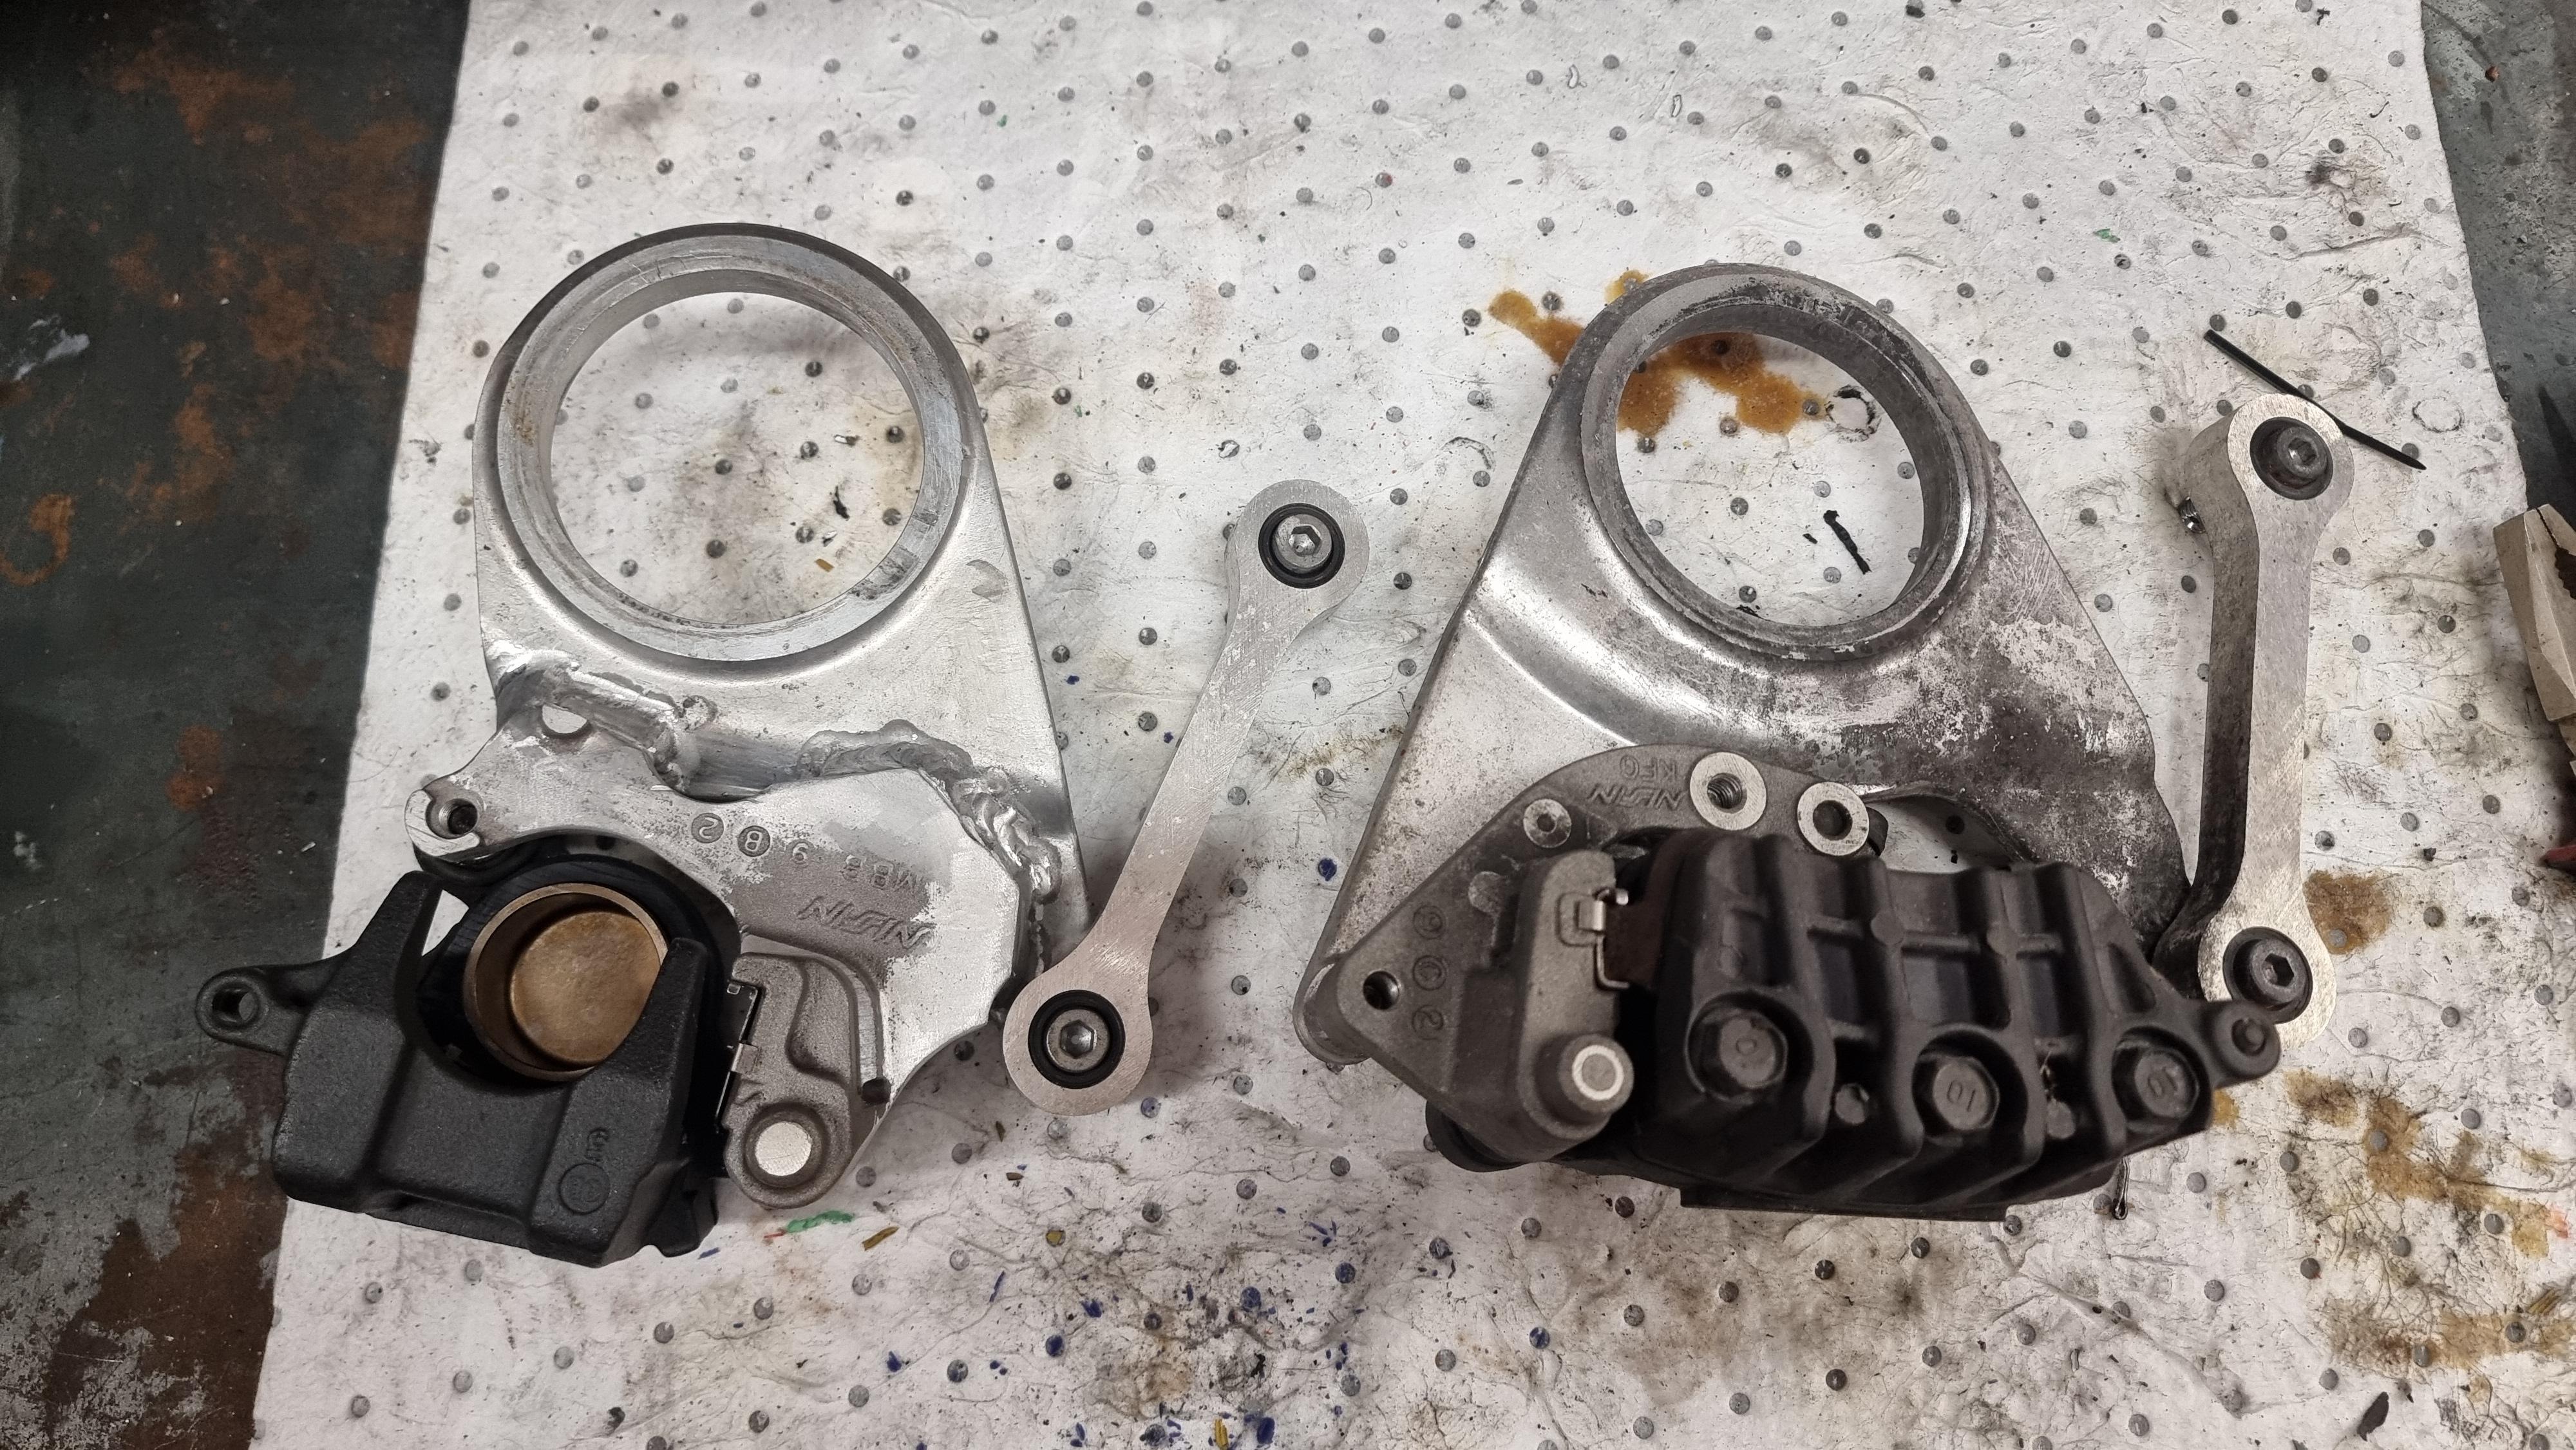
Rear brake done. Mint cbr600f4 parts, 25 usd from eBay! Well within budget an 735grams lighter including the "spacer" Honda put between brake disc and axle. Of course I had to offset everything because that plate builds some. Turned out nice, and as usual - welds don't fit my "OEM look" style so its ground and shaped. I know it's not meant being for being upside down which means that bleeding is a biatc and the brake force pushes on the pad pin instead of the caliper holder, but its not often used and it will have to do as stage one of my brake upgrade.
-
Idle issues after coolant flush
WackenSS replied to sebthenorwegian's topic in Fifth Generation VFR's
If it a 2001 with o2 sensor it has a wax unit. Also, mice might have made dinner of your hoses and thus created an air leak on your throttle body. The wax unit regulates cold start idle based on coolant temp so a blockage or air will make it behave weird. God helg og lykke til. -
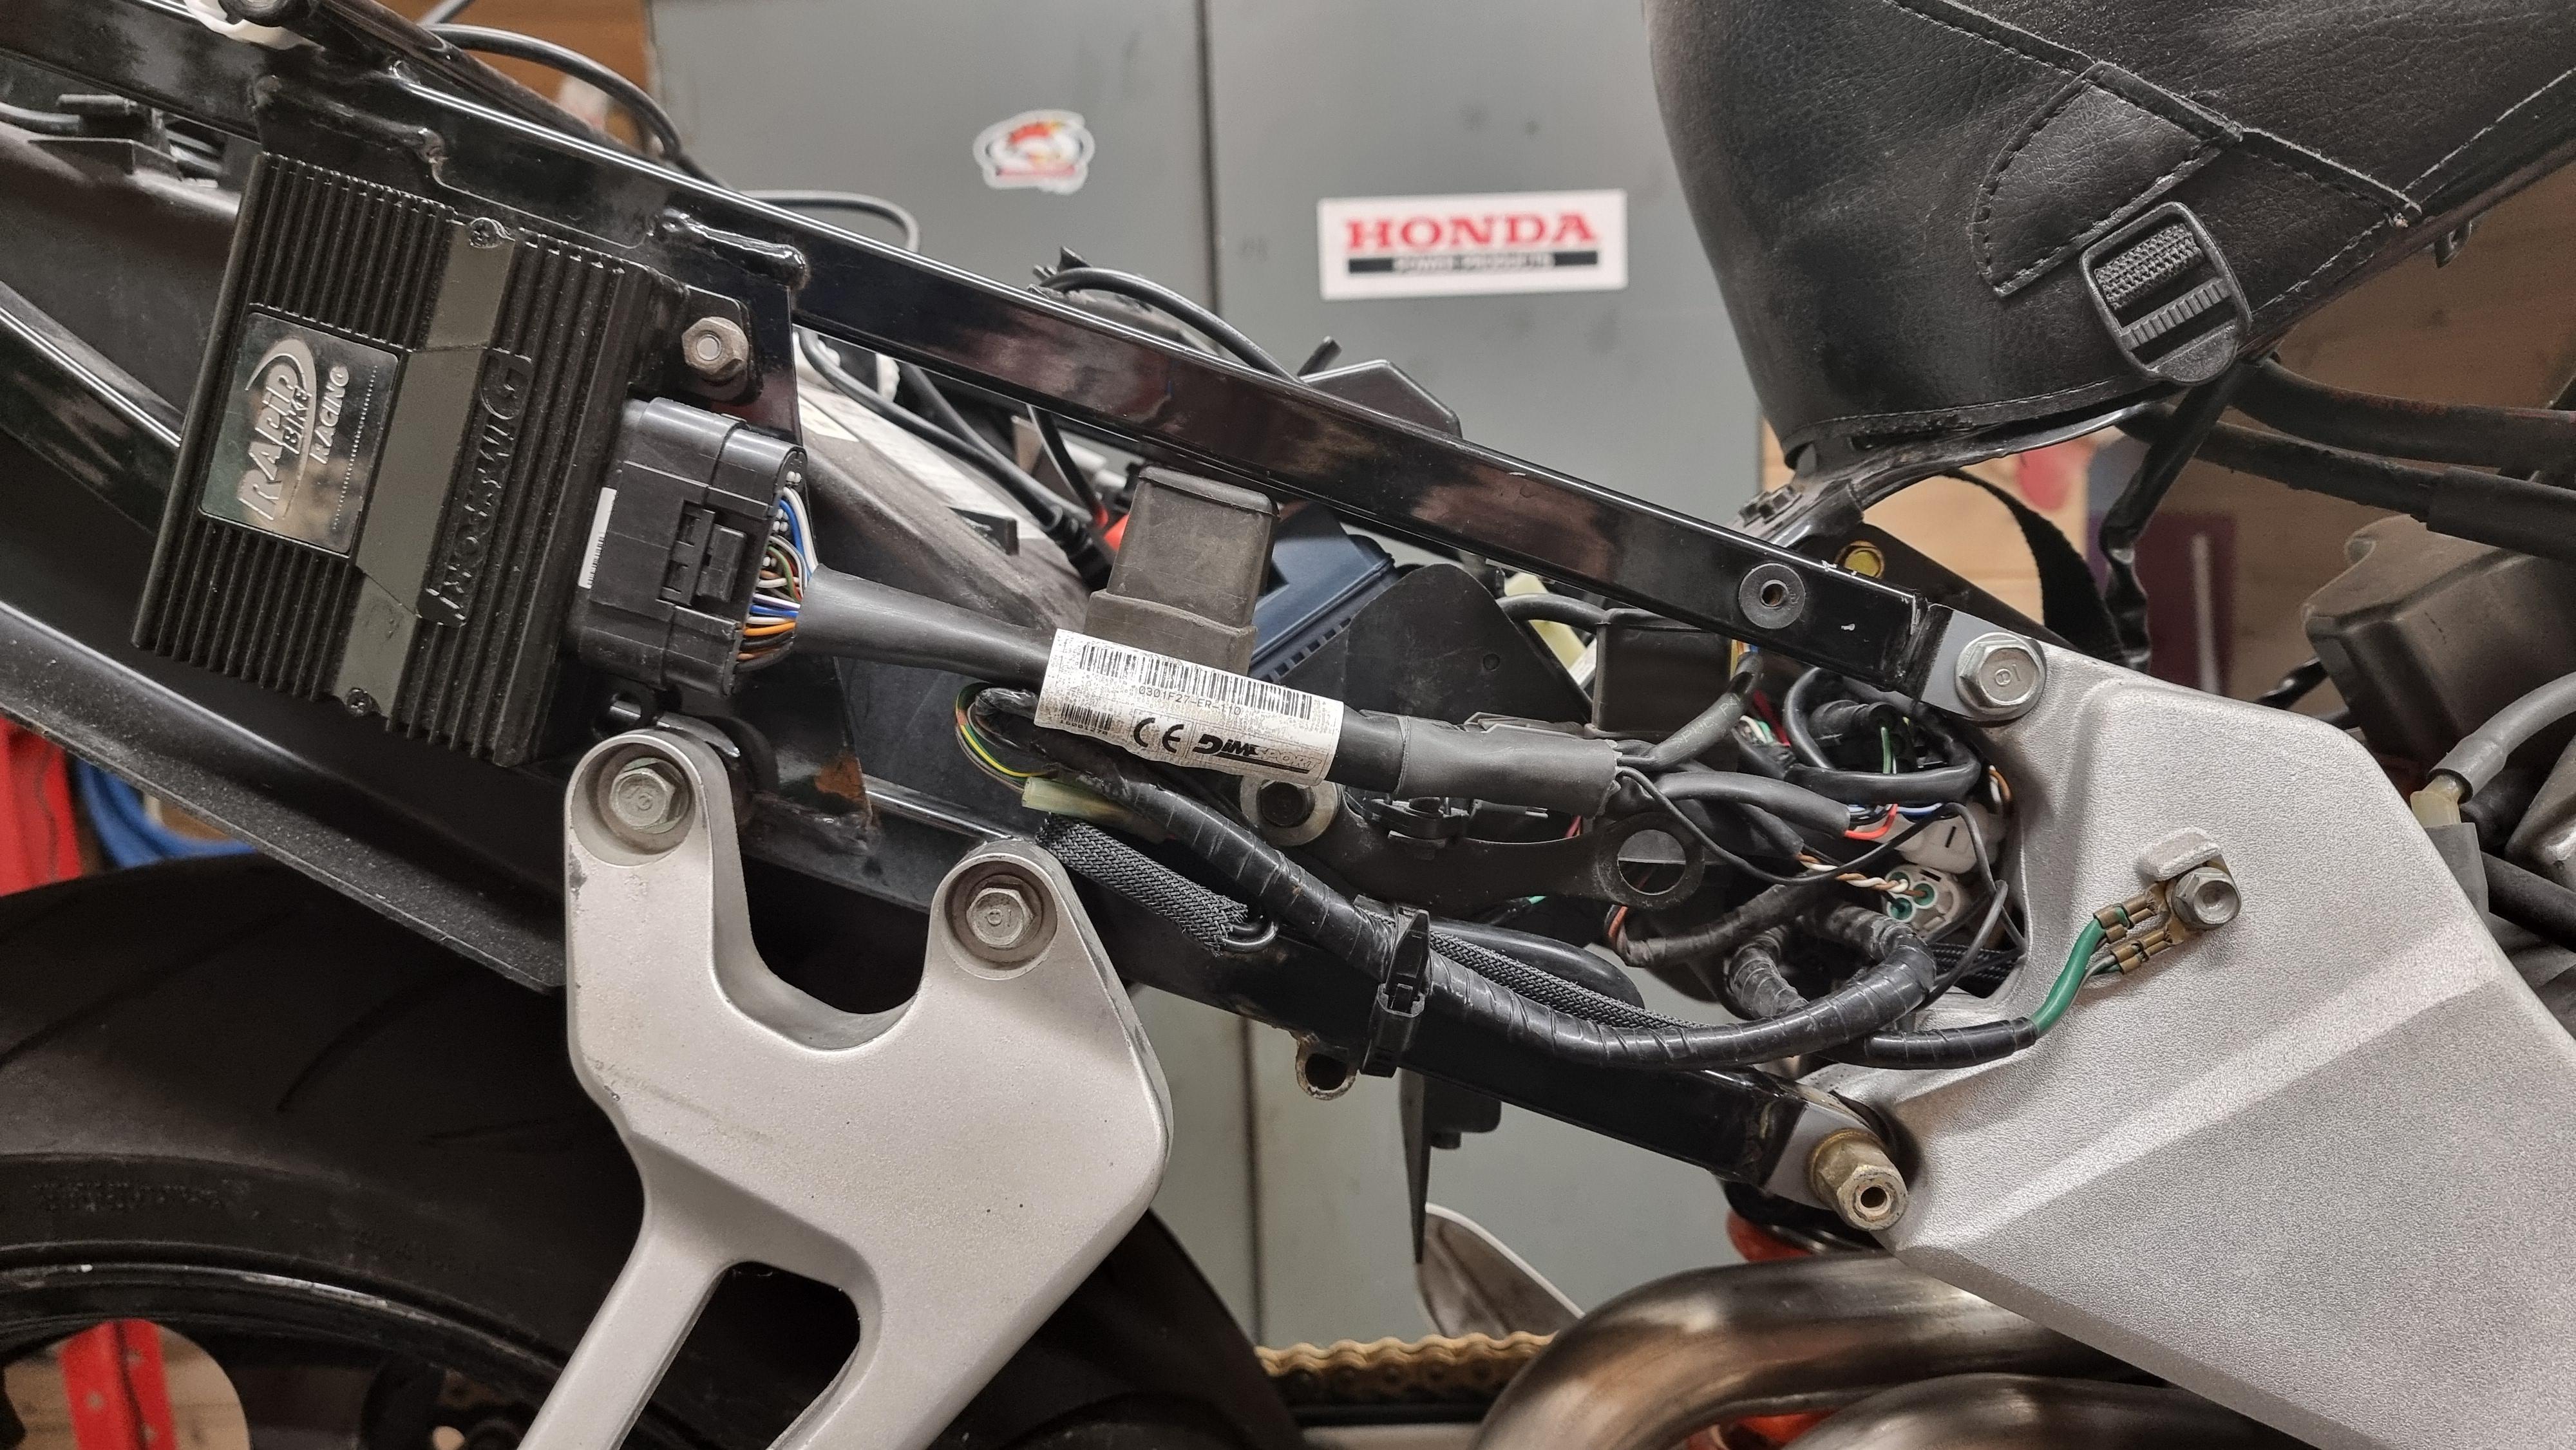
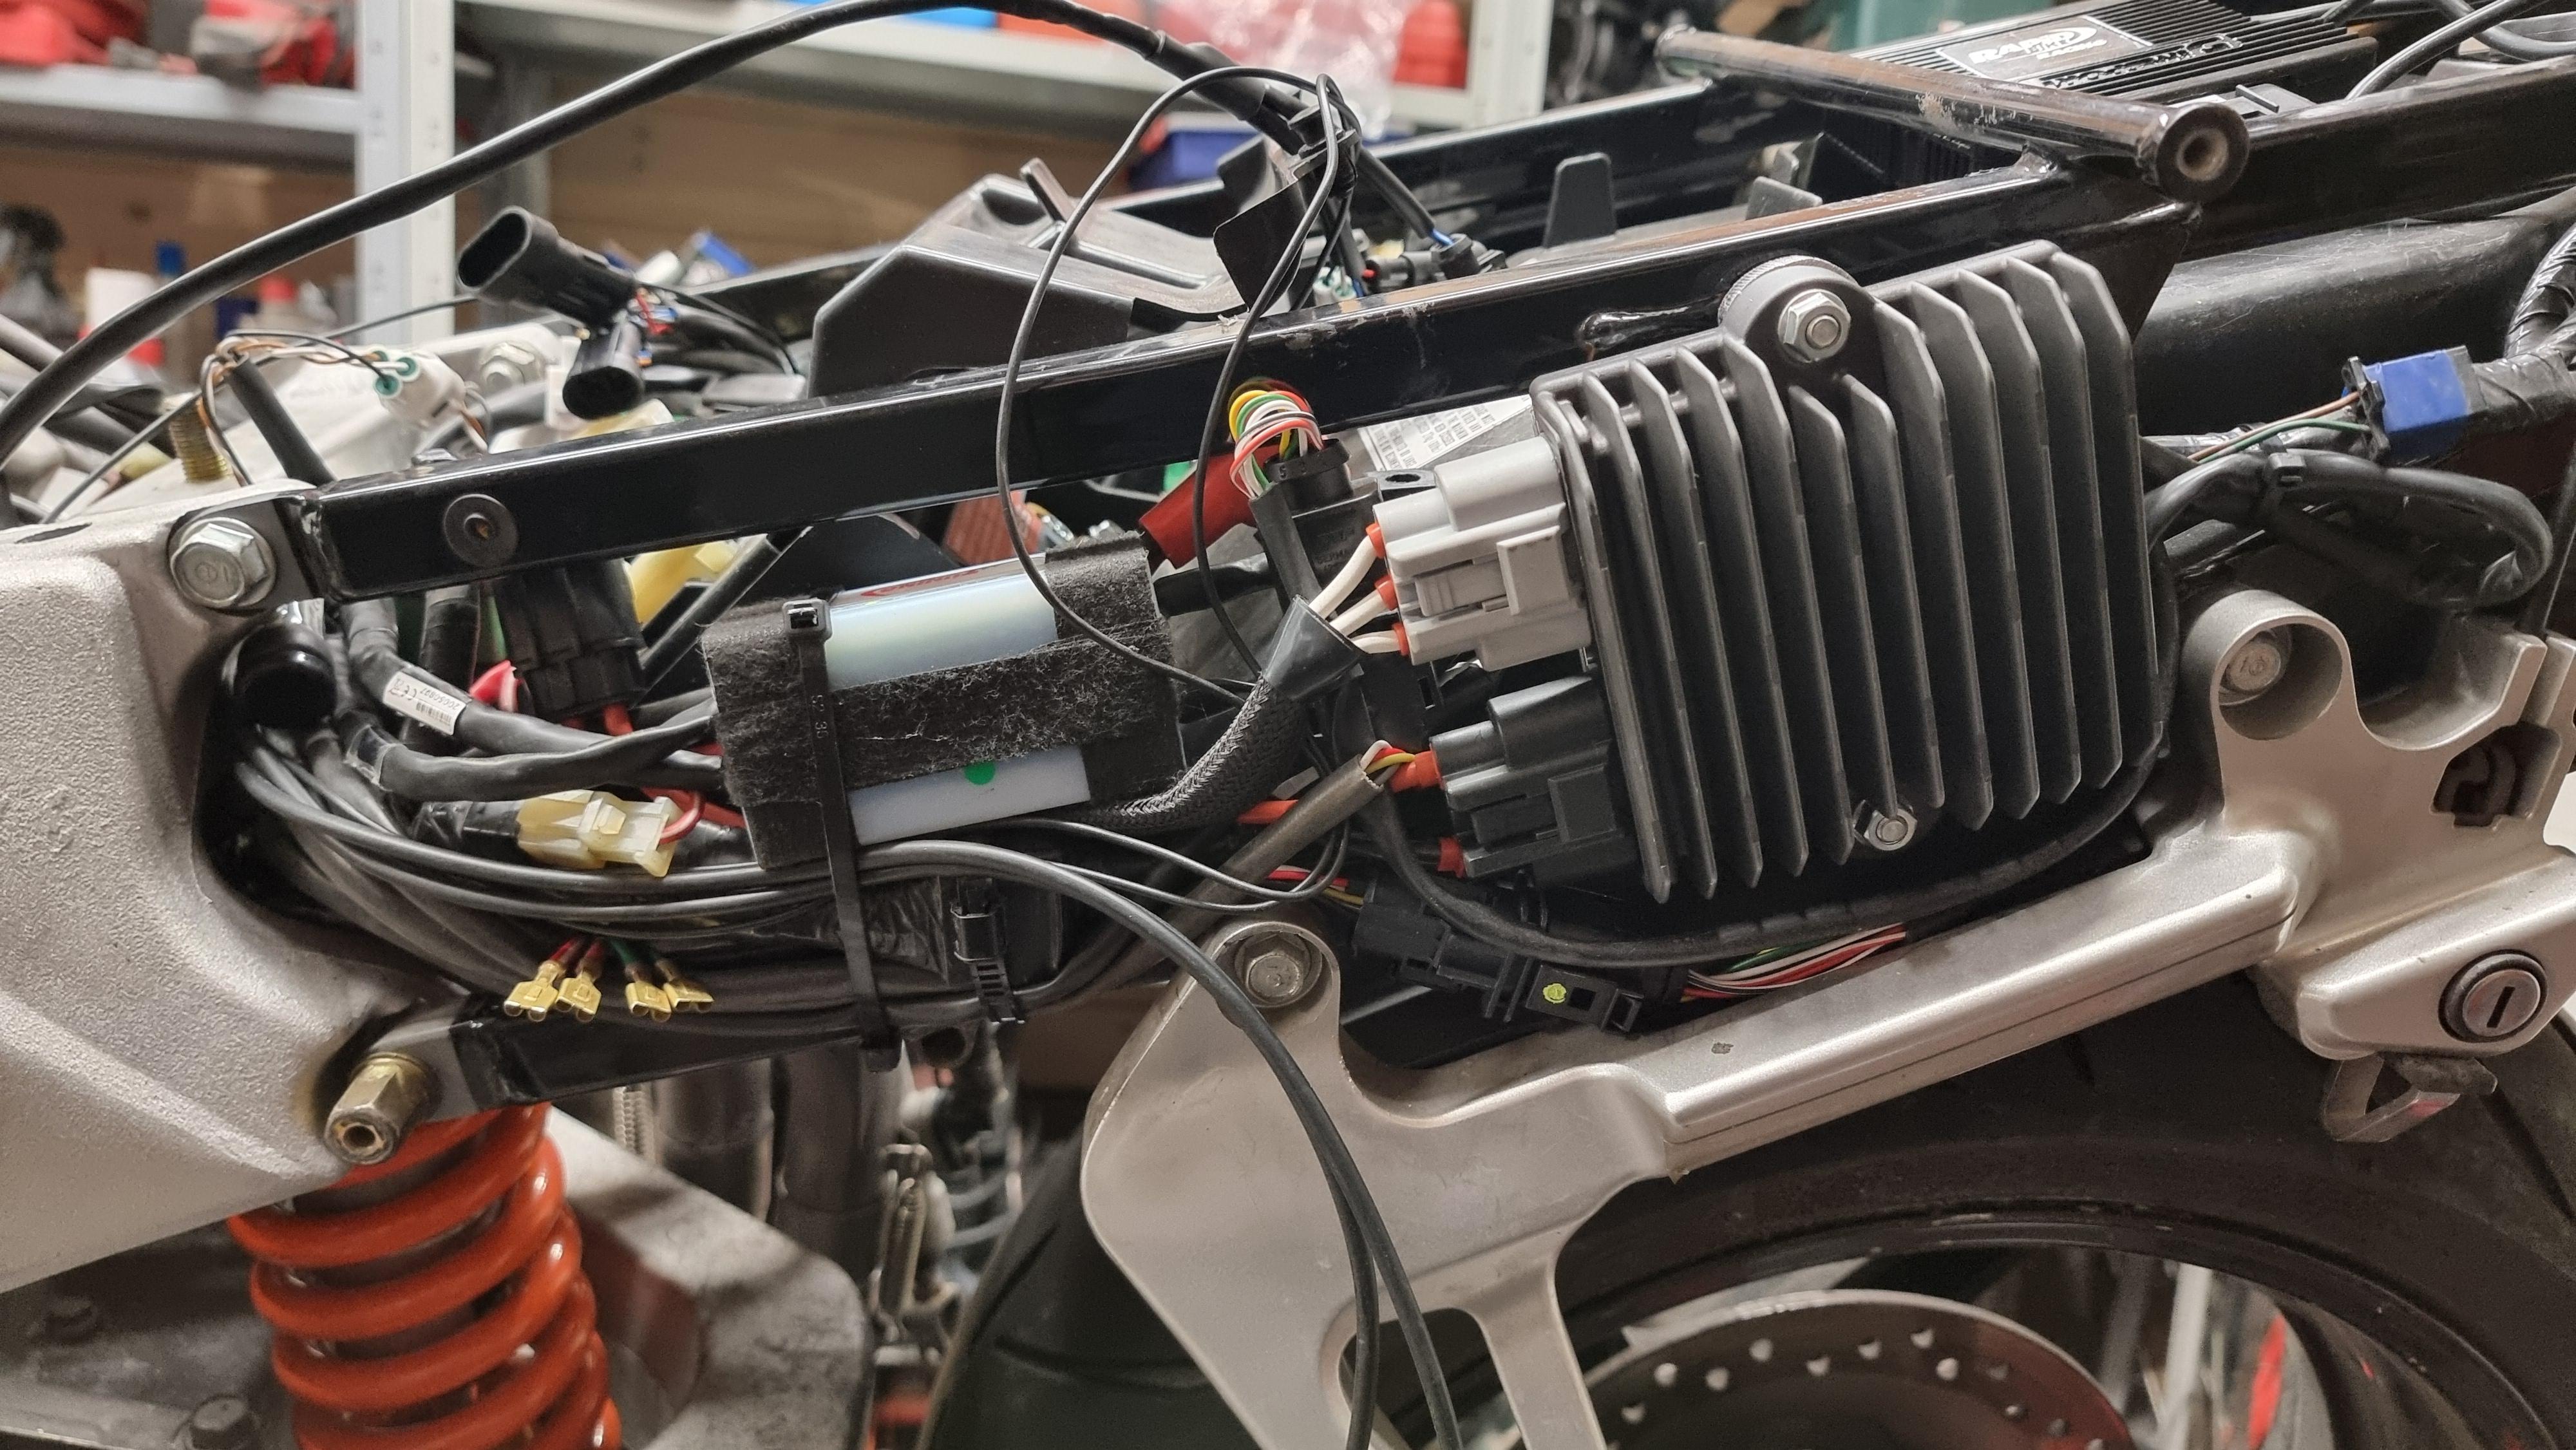
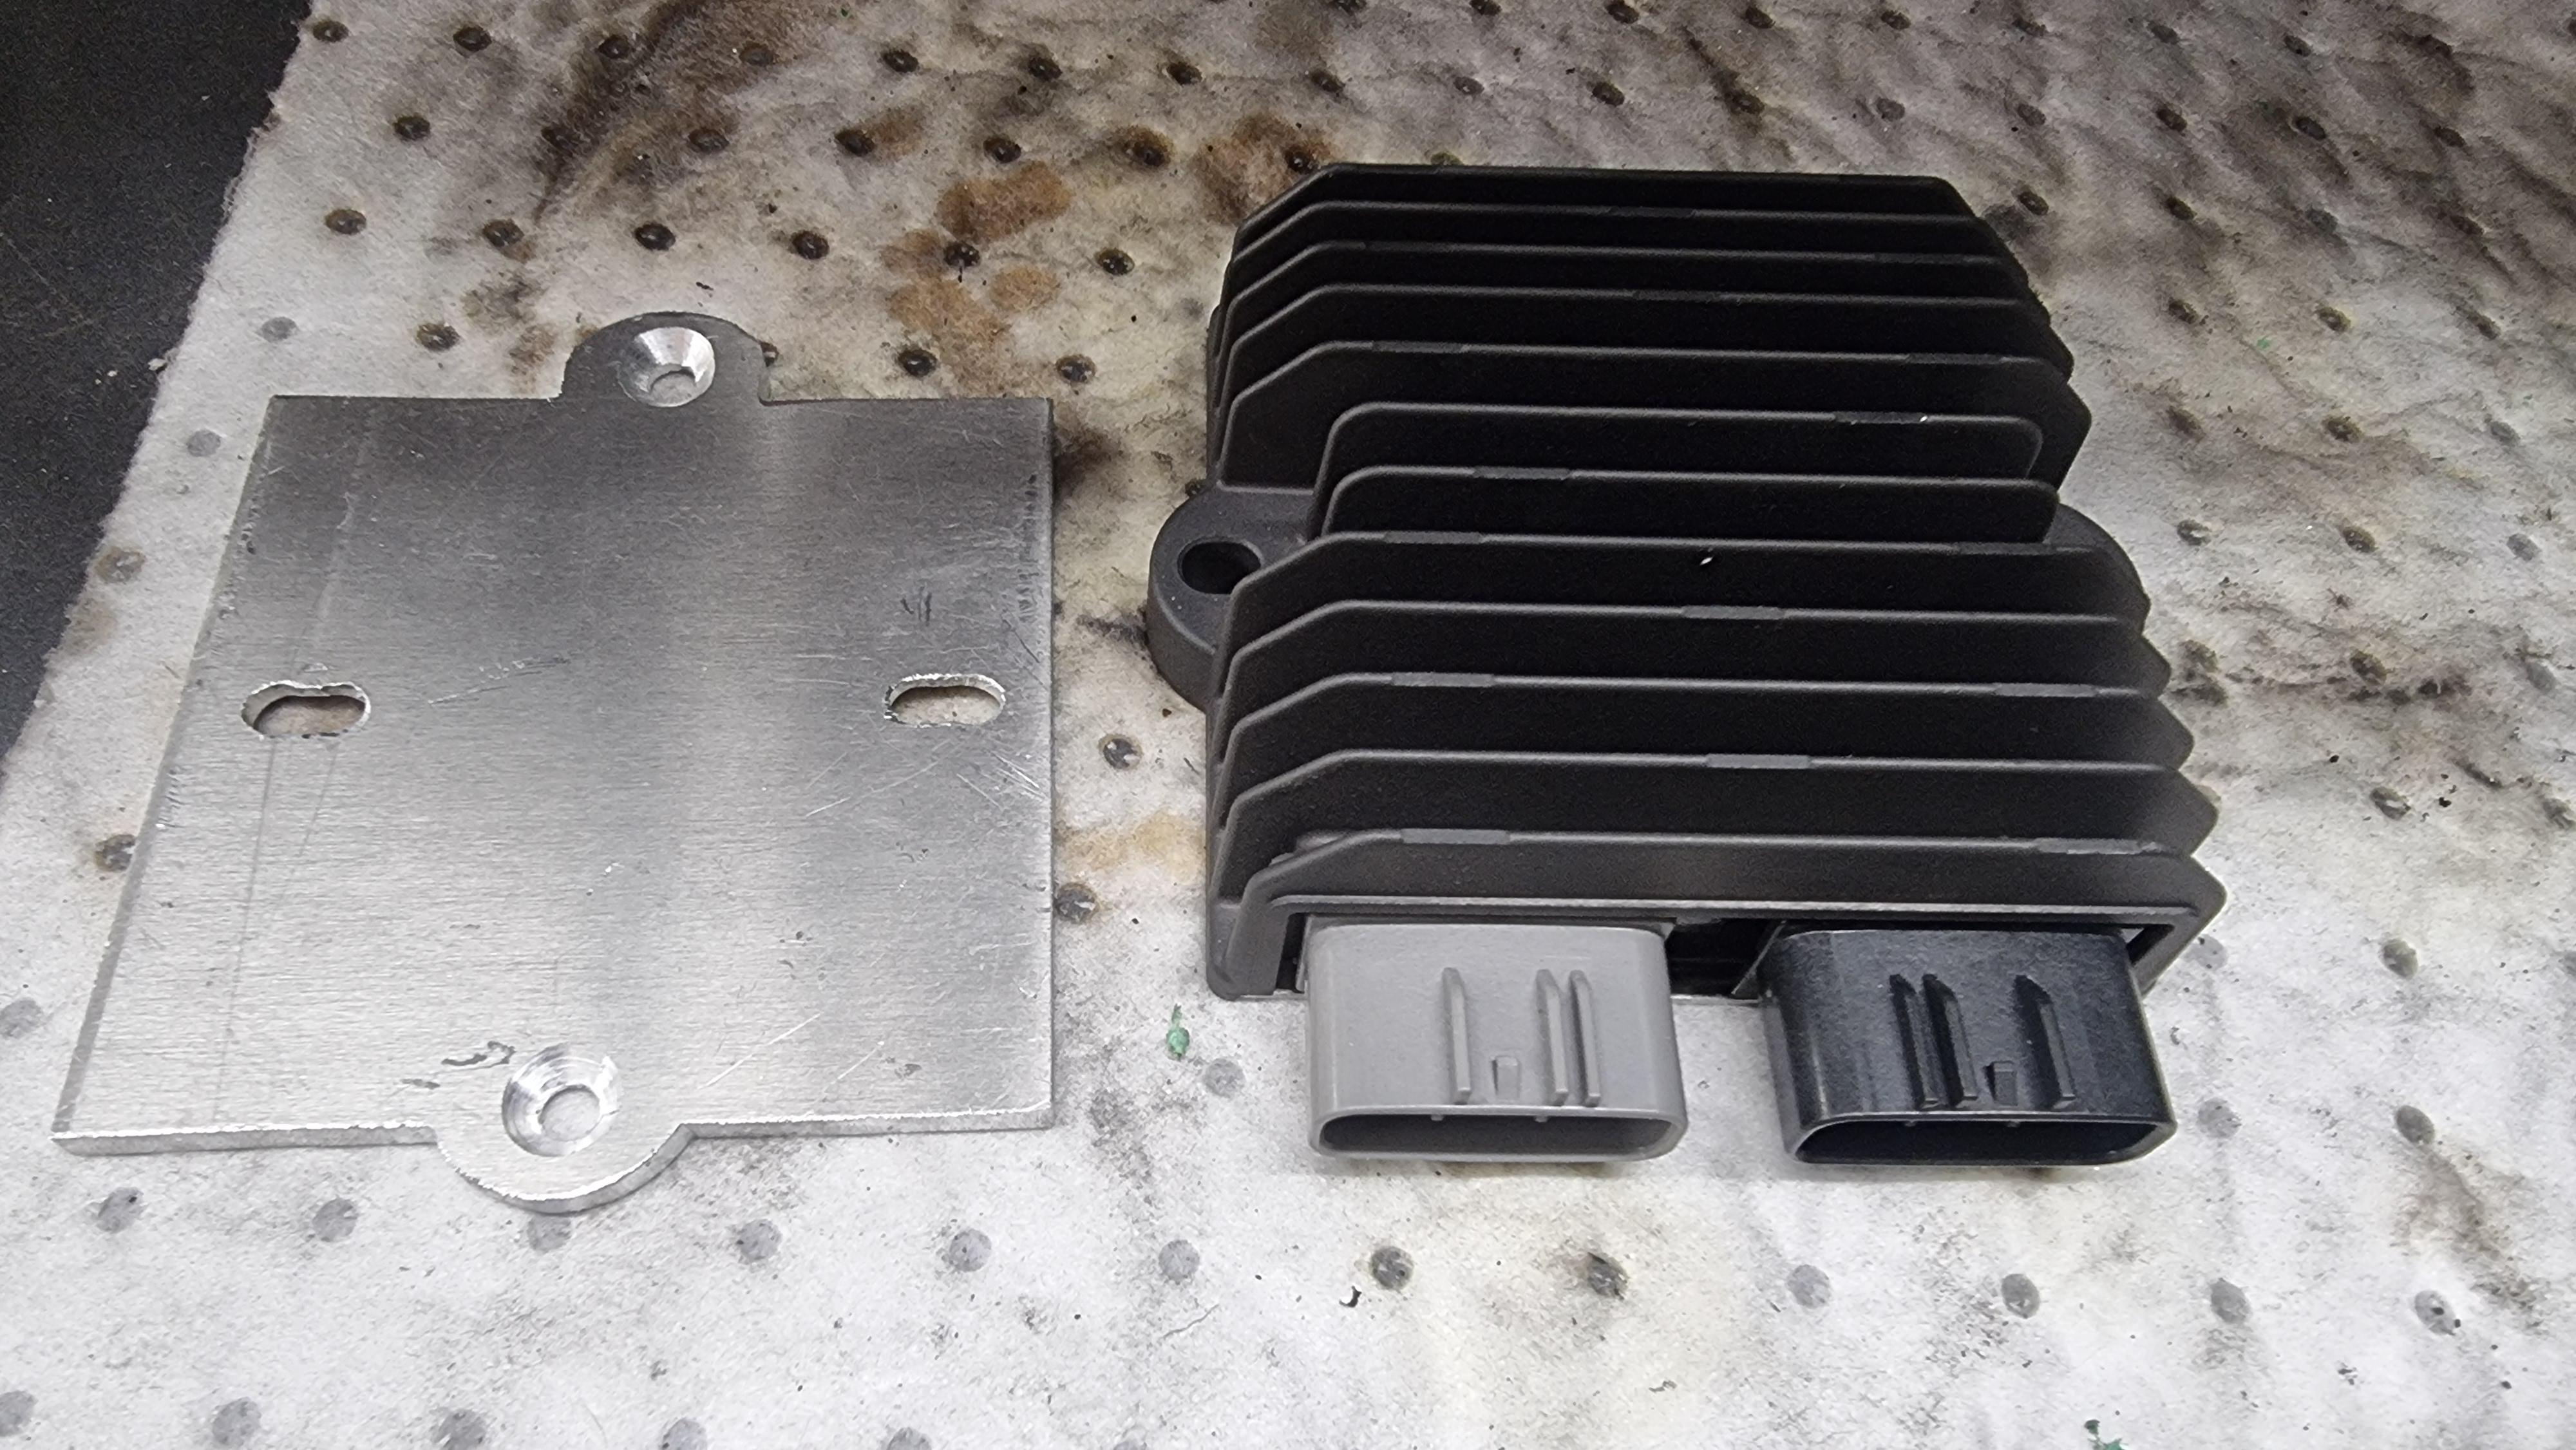
So mowing forward. Rapidbike, youtube with LSU.4.9x2, Series regulator with homemade mounting plate, rewired with 40a fuse and lithium battery is now in its final location. I only have to fabricate a mount for the rapidbike ECU but I could not resist firing up and see what could be done to the MAP. After guesstimating some fuel cells based on my custom PCIII map and what Dan sent me as test maps before the custom one, sadly as I suspected all along, the rapidbike does not allow big enough numbers! Negative 10 or positive 30 fuel trim is all I'm allowed to adjust. This results in afr 13.2:1 on idle and reving send it down in the 11 area. Before putting -10 in the 0 column i had AFR 12.1 on idle! This is no good so I am inspecting what can be done. I am certain that the youtune will not be able to add another positive 40ish to already maxed columns. Also, and did this not occur to me before now (huge facepalm) rapidbike has linked 1-4 and 2-3 which is great for the vfrd headers but my plan was running front and rear on separate MAP for obvious reason. Darn it... Should have gone 4 bungs in production. But it's good to hear her fire again 😁 The PCIII trim are negative 40's and positive 80's as reference. is there room for the RSV4 1100 engine?
-
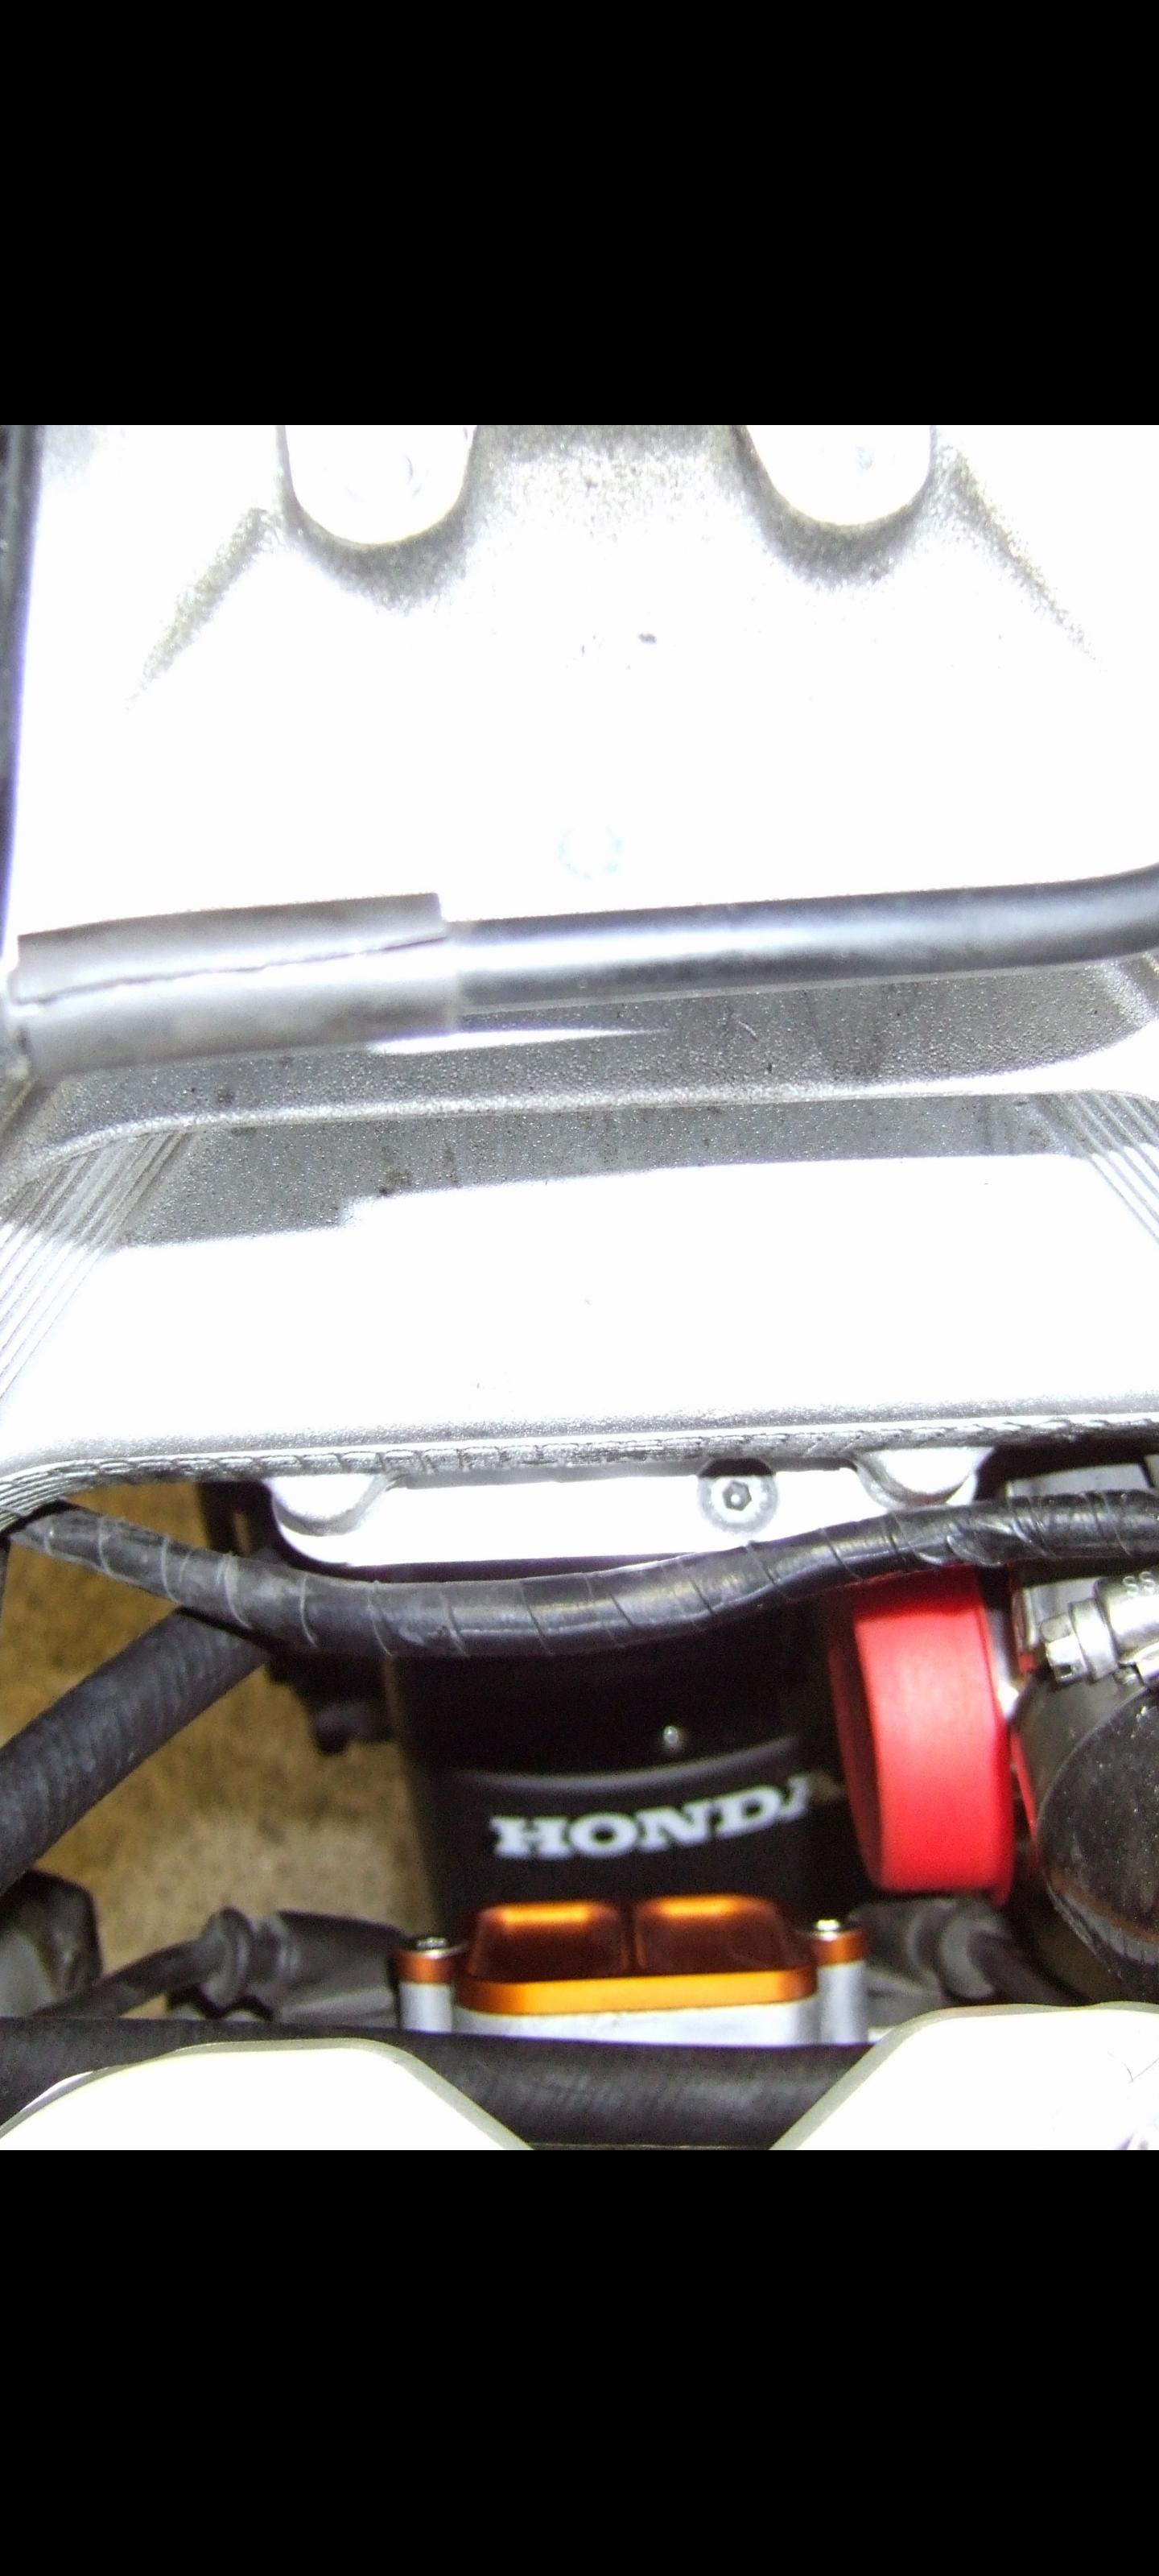
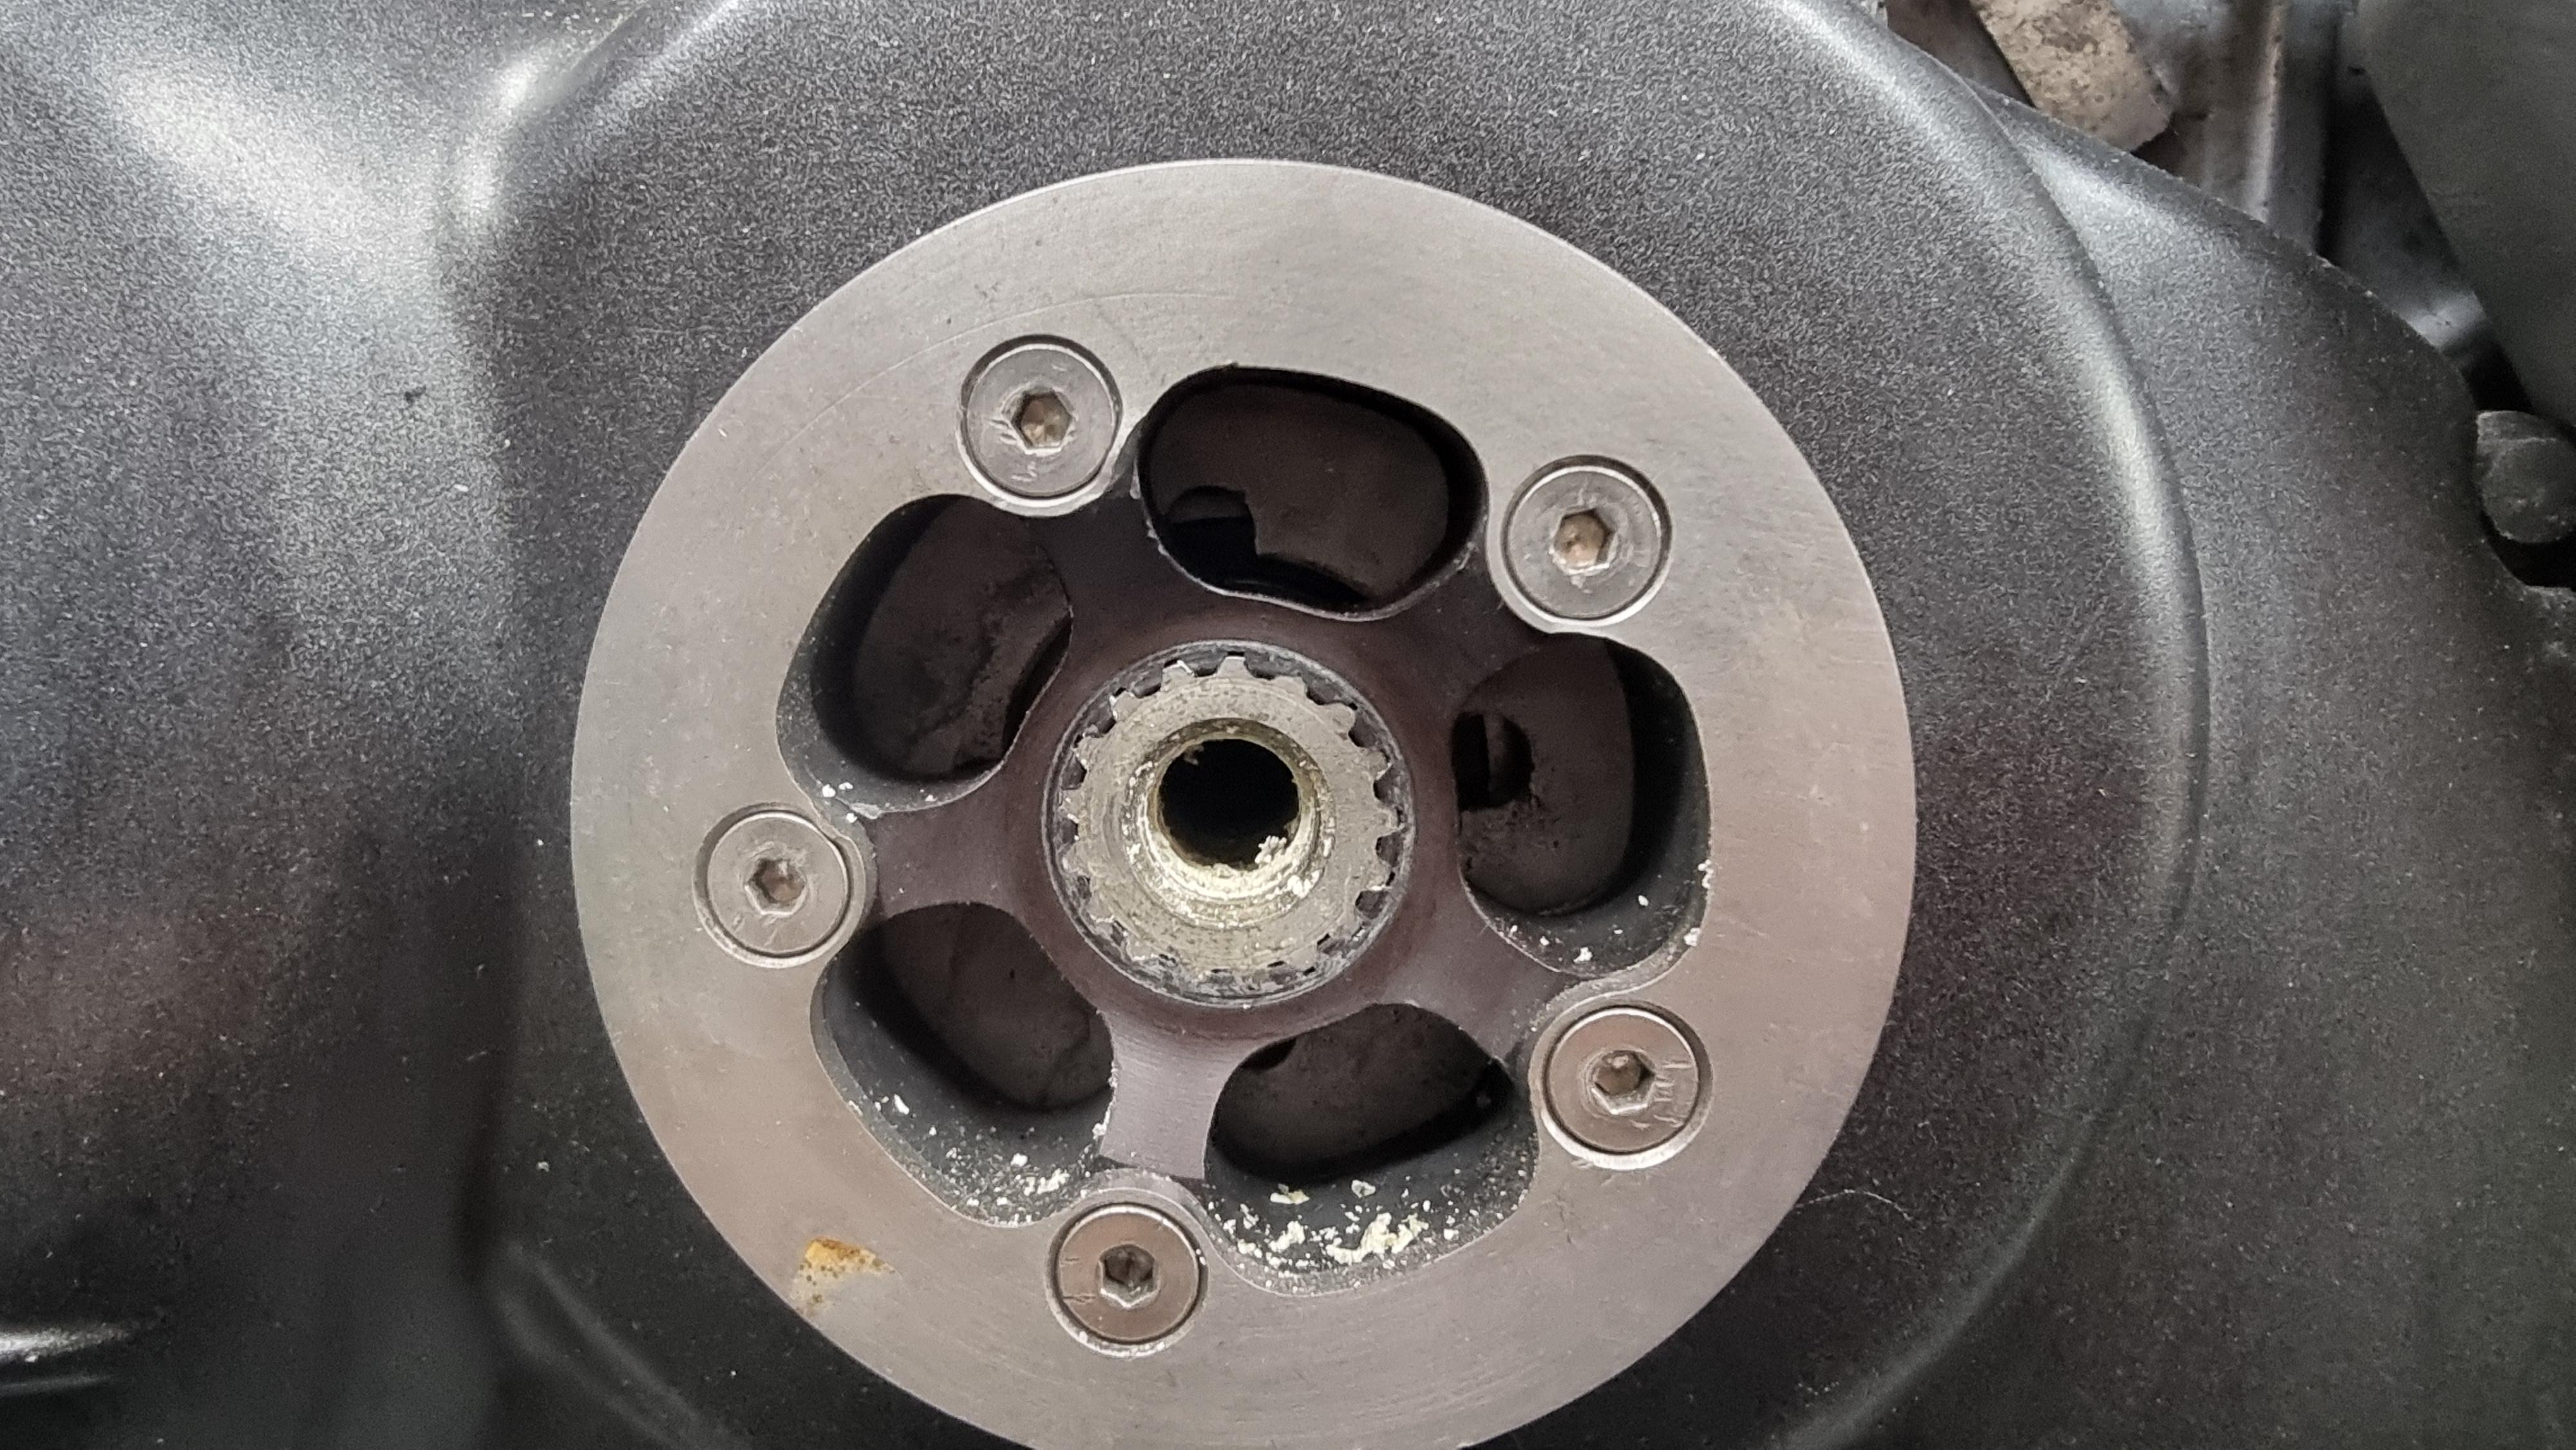
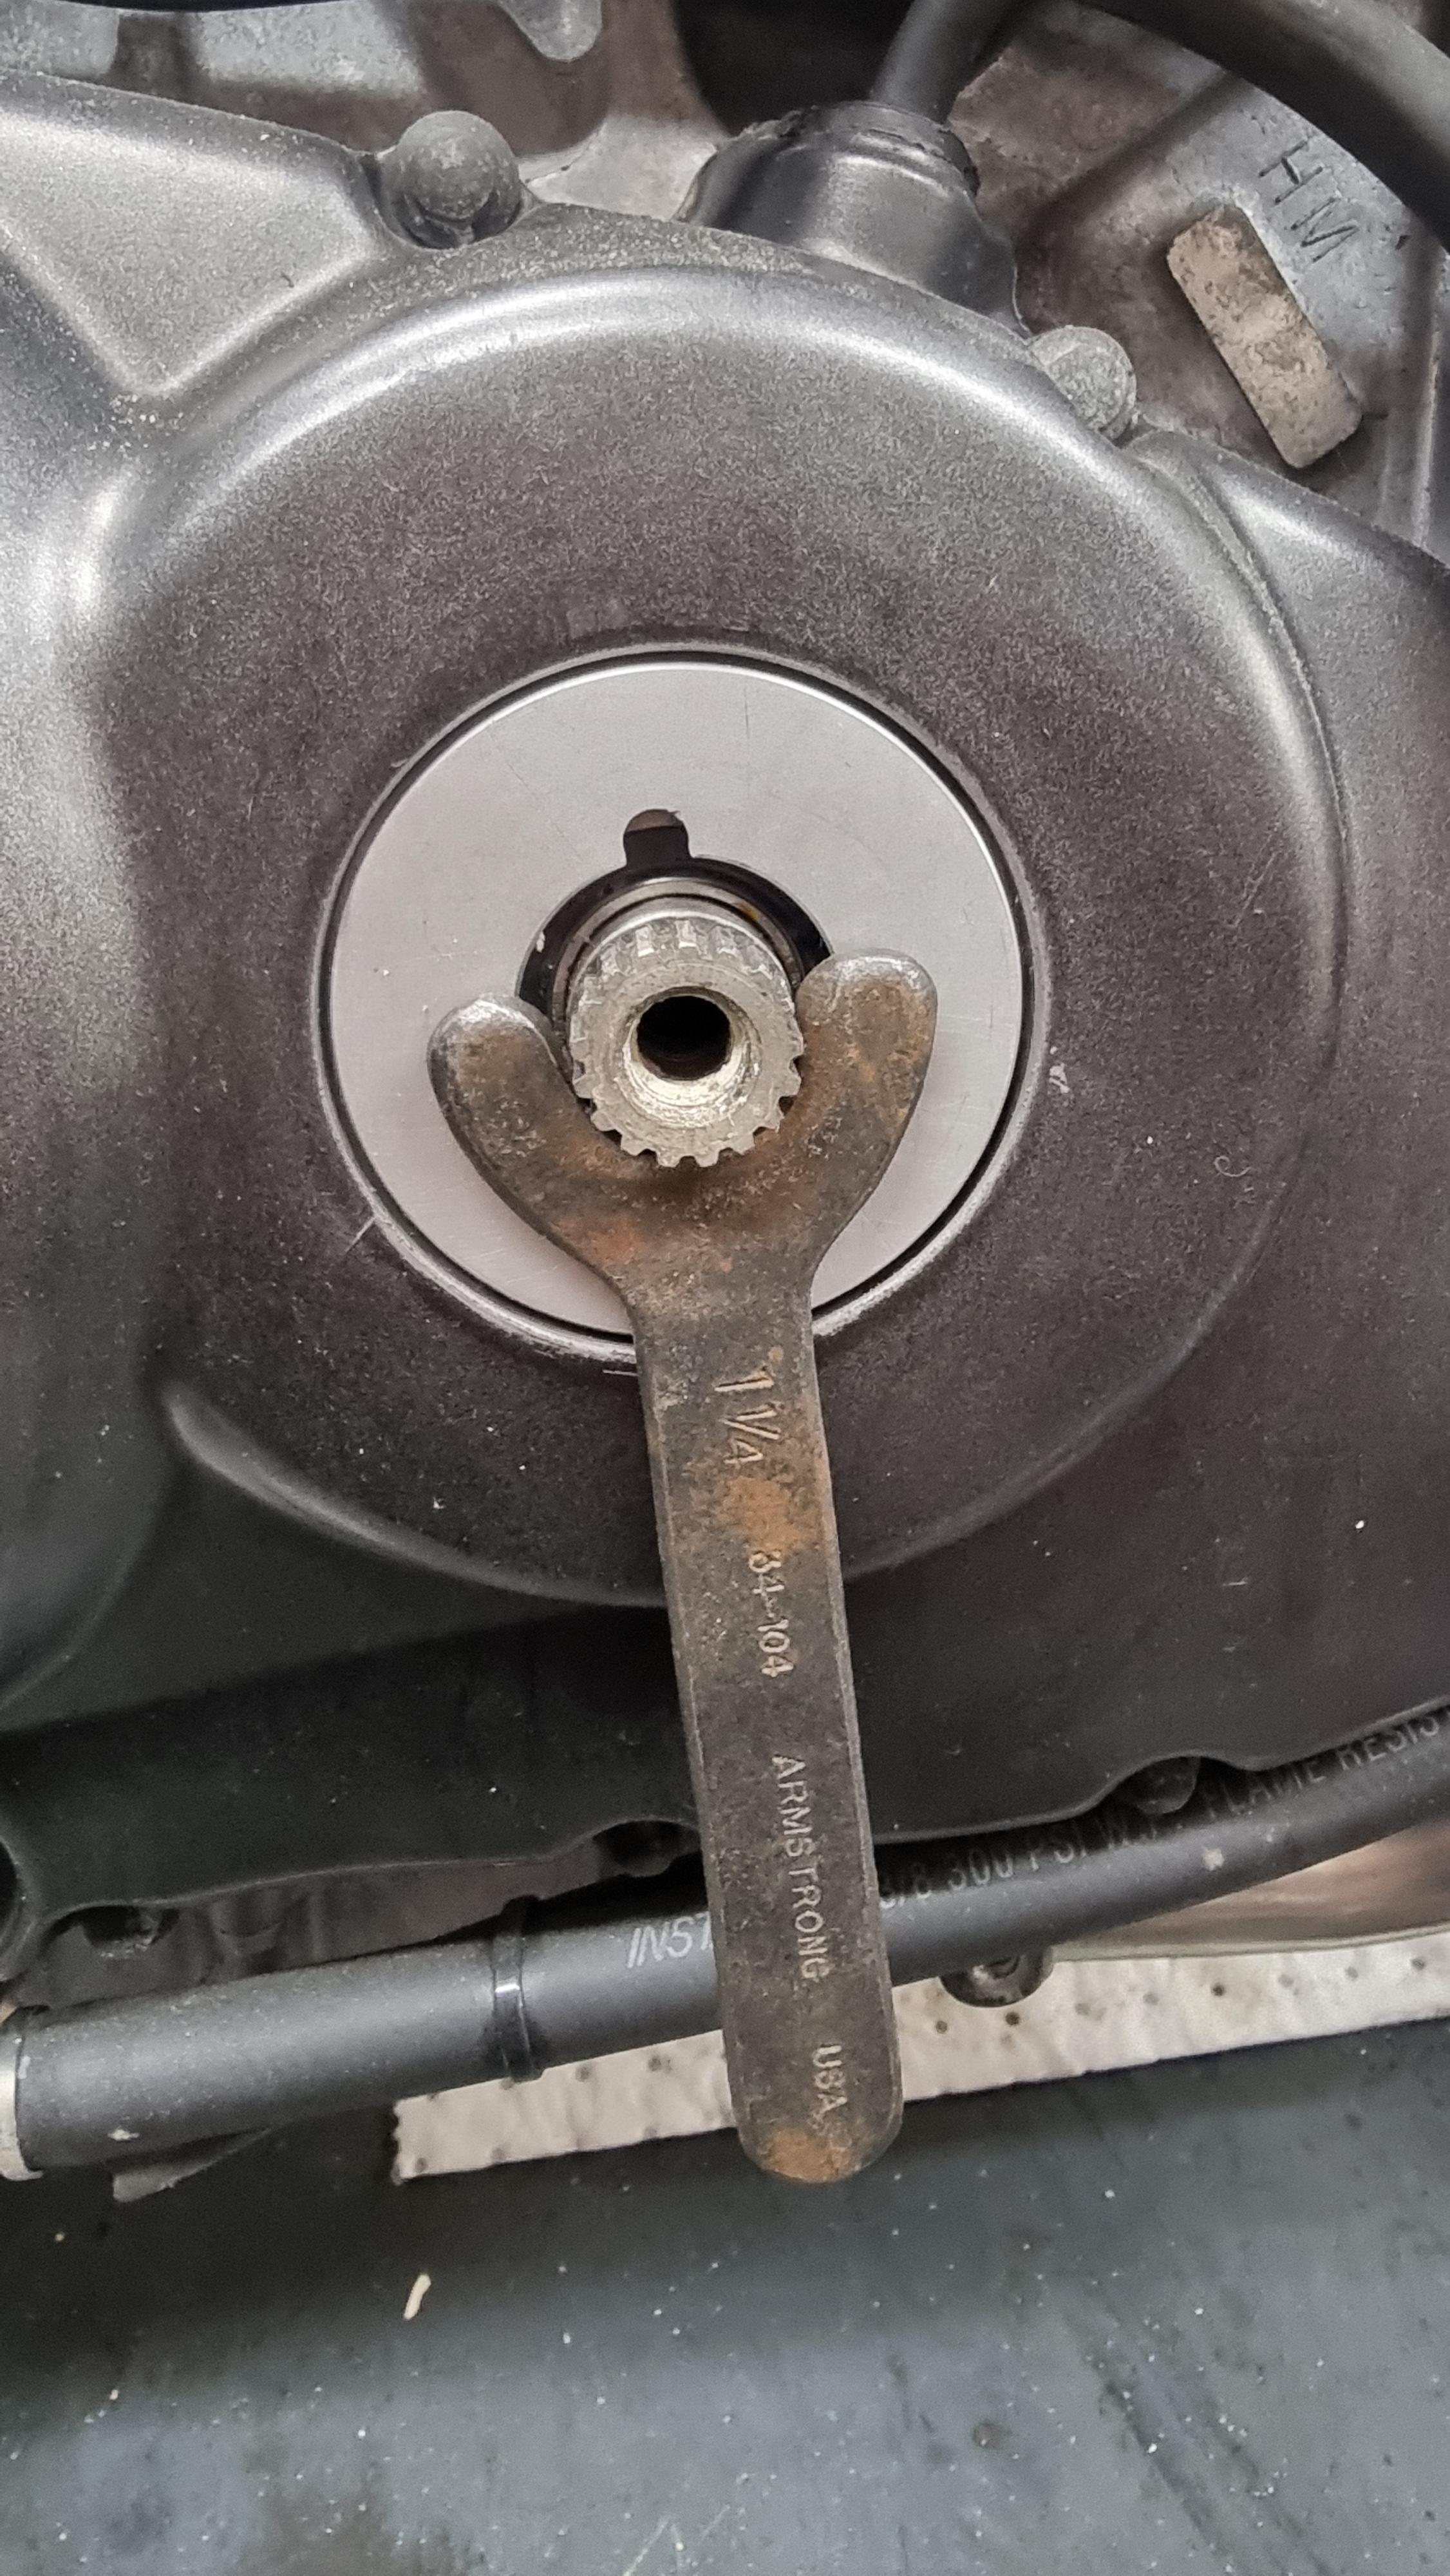
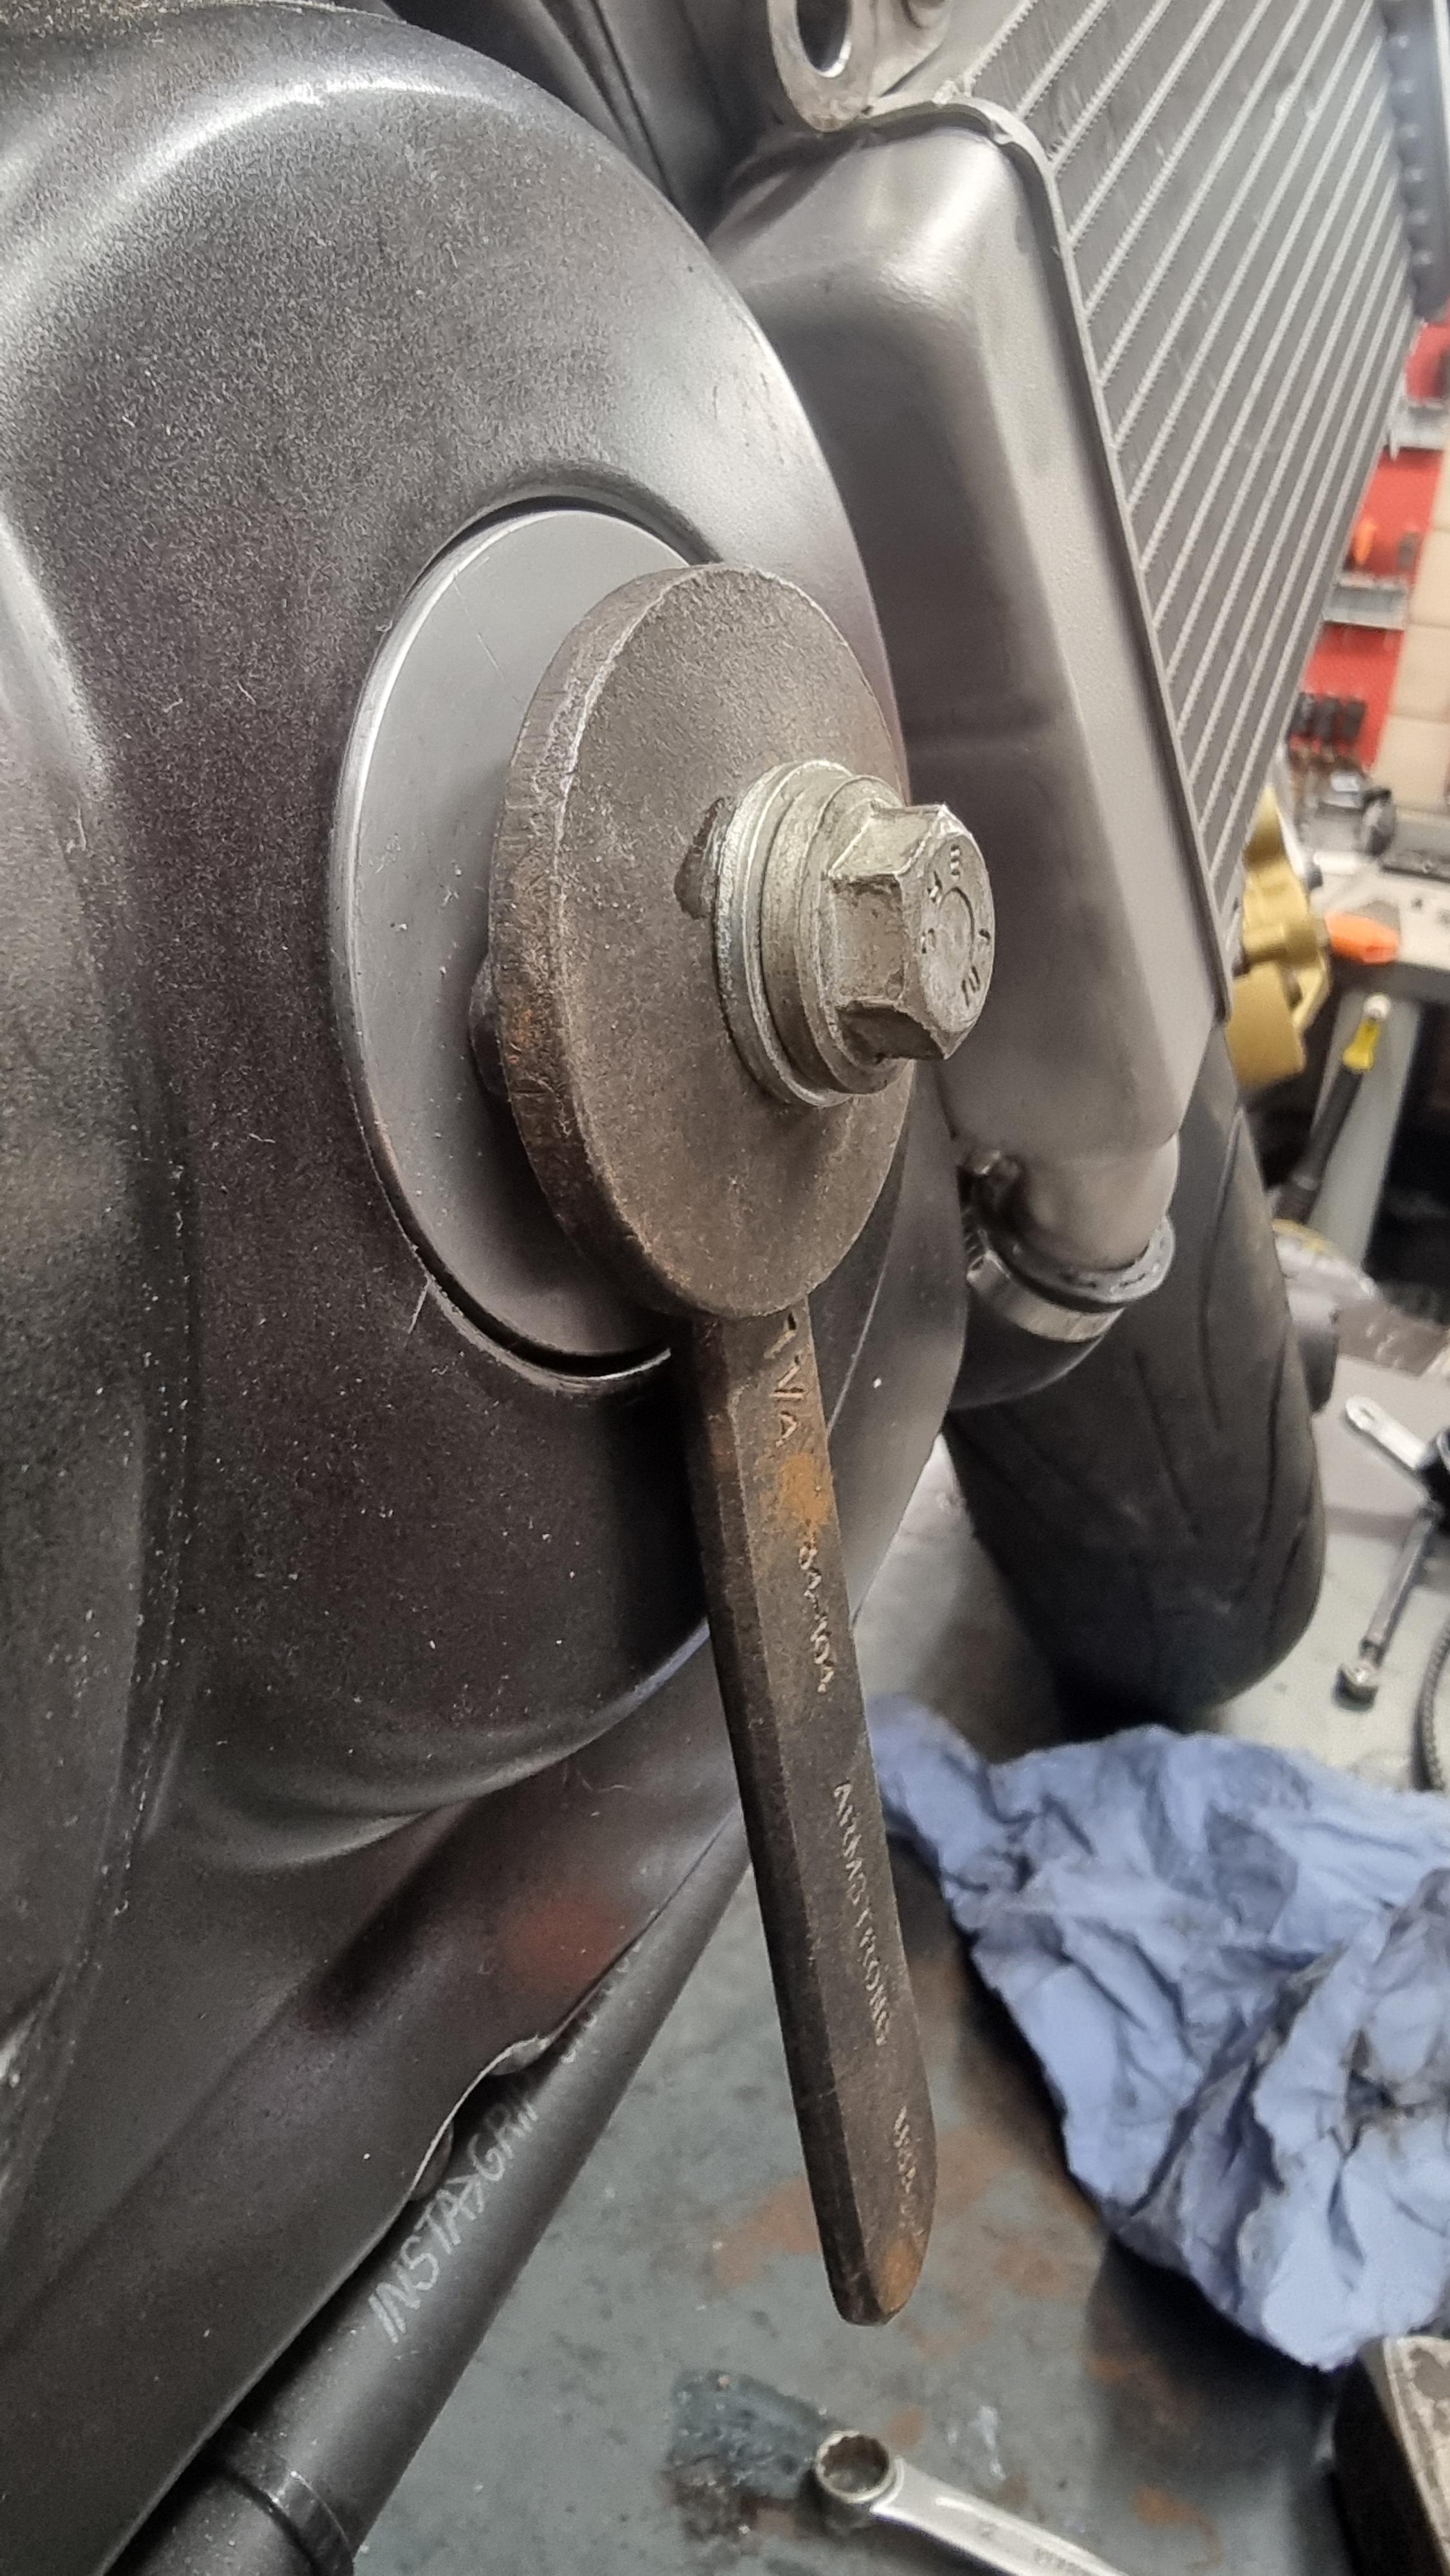
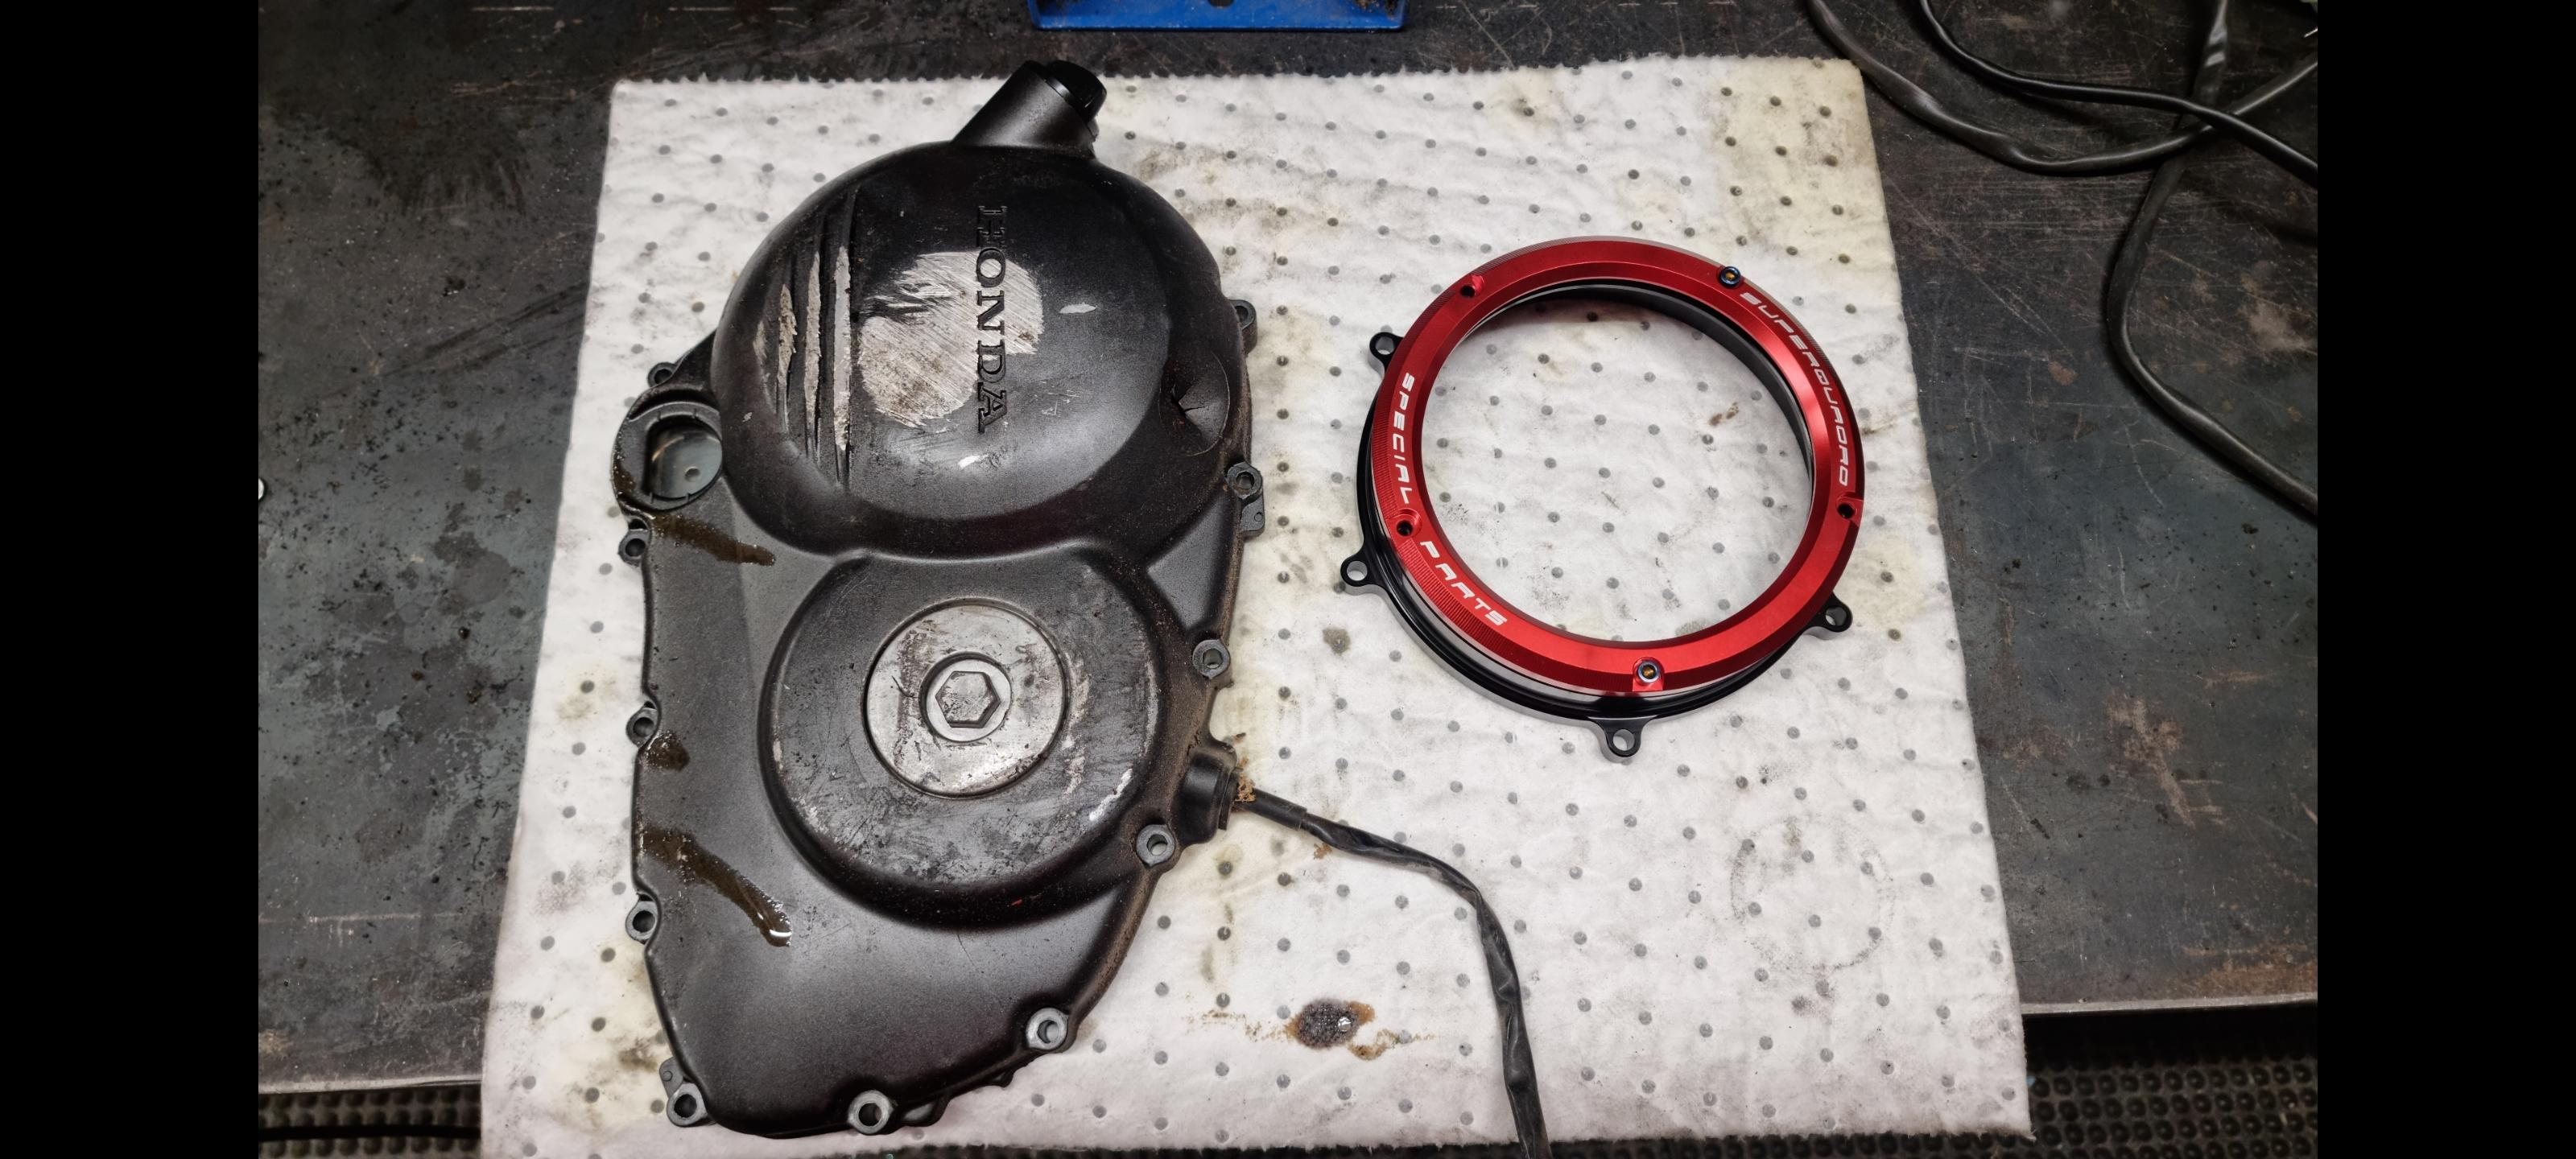
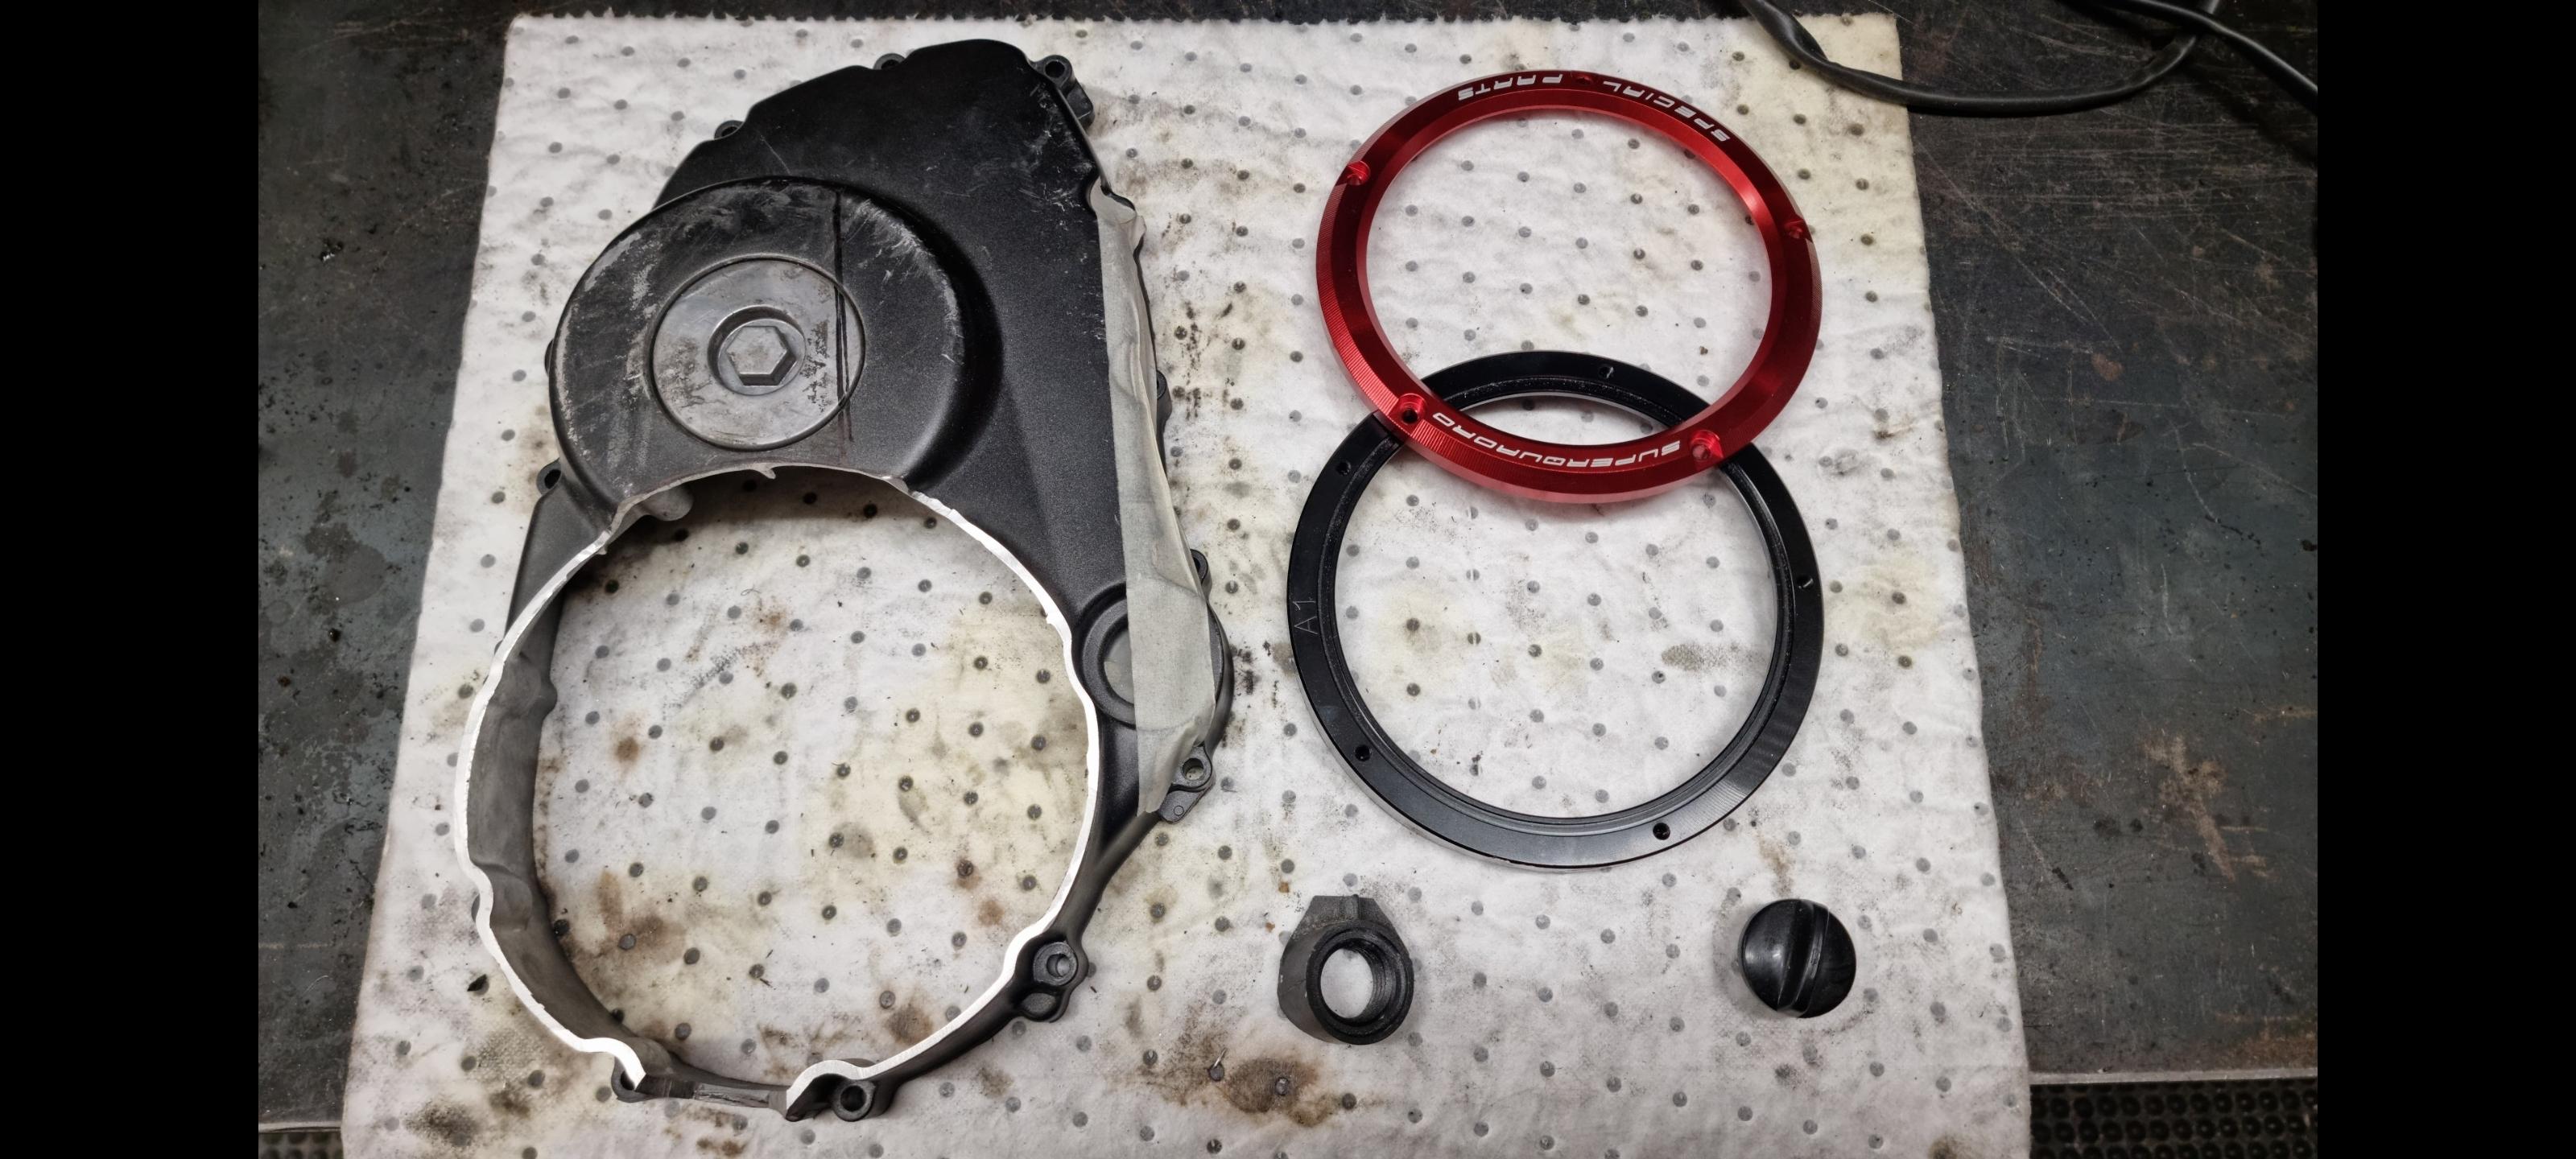
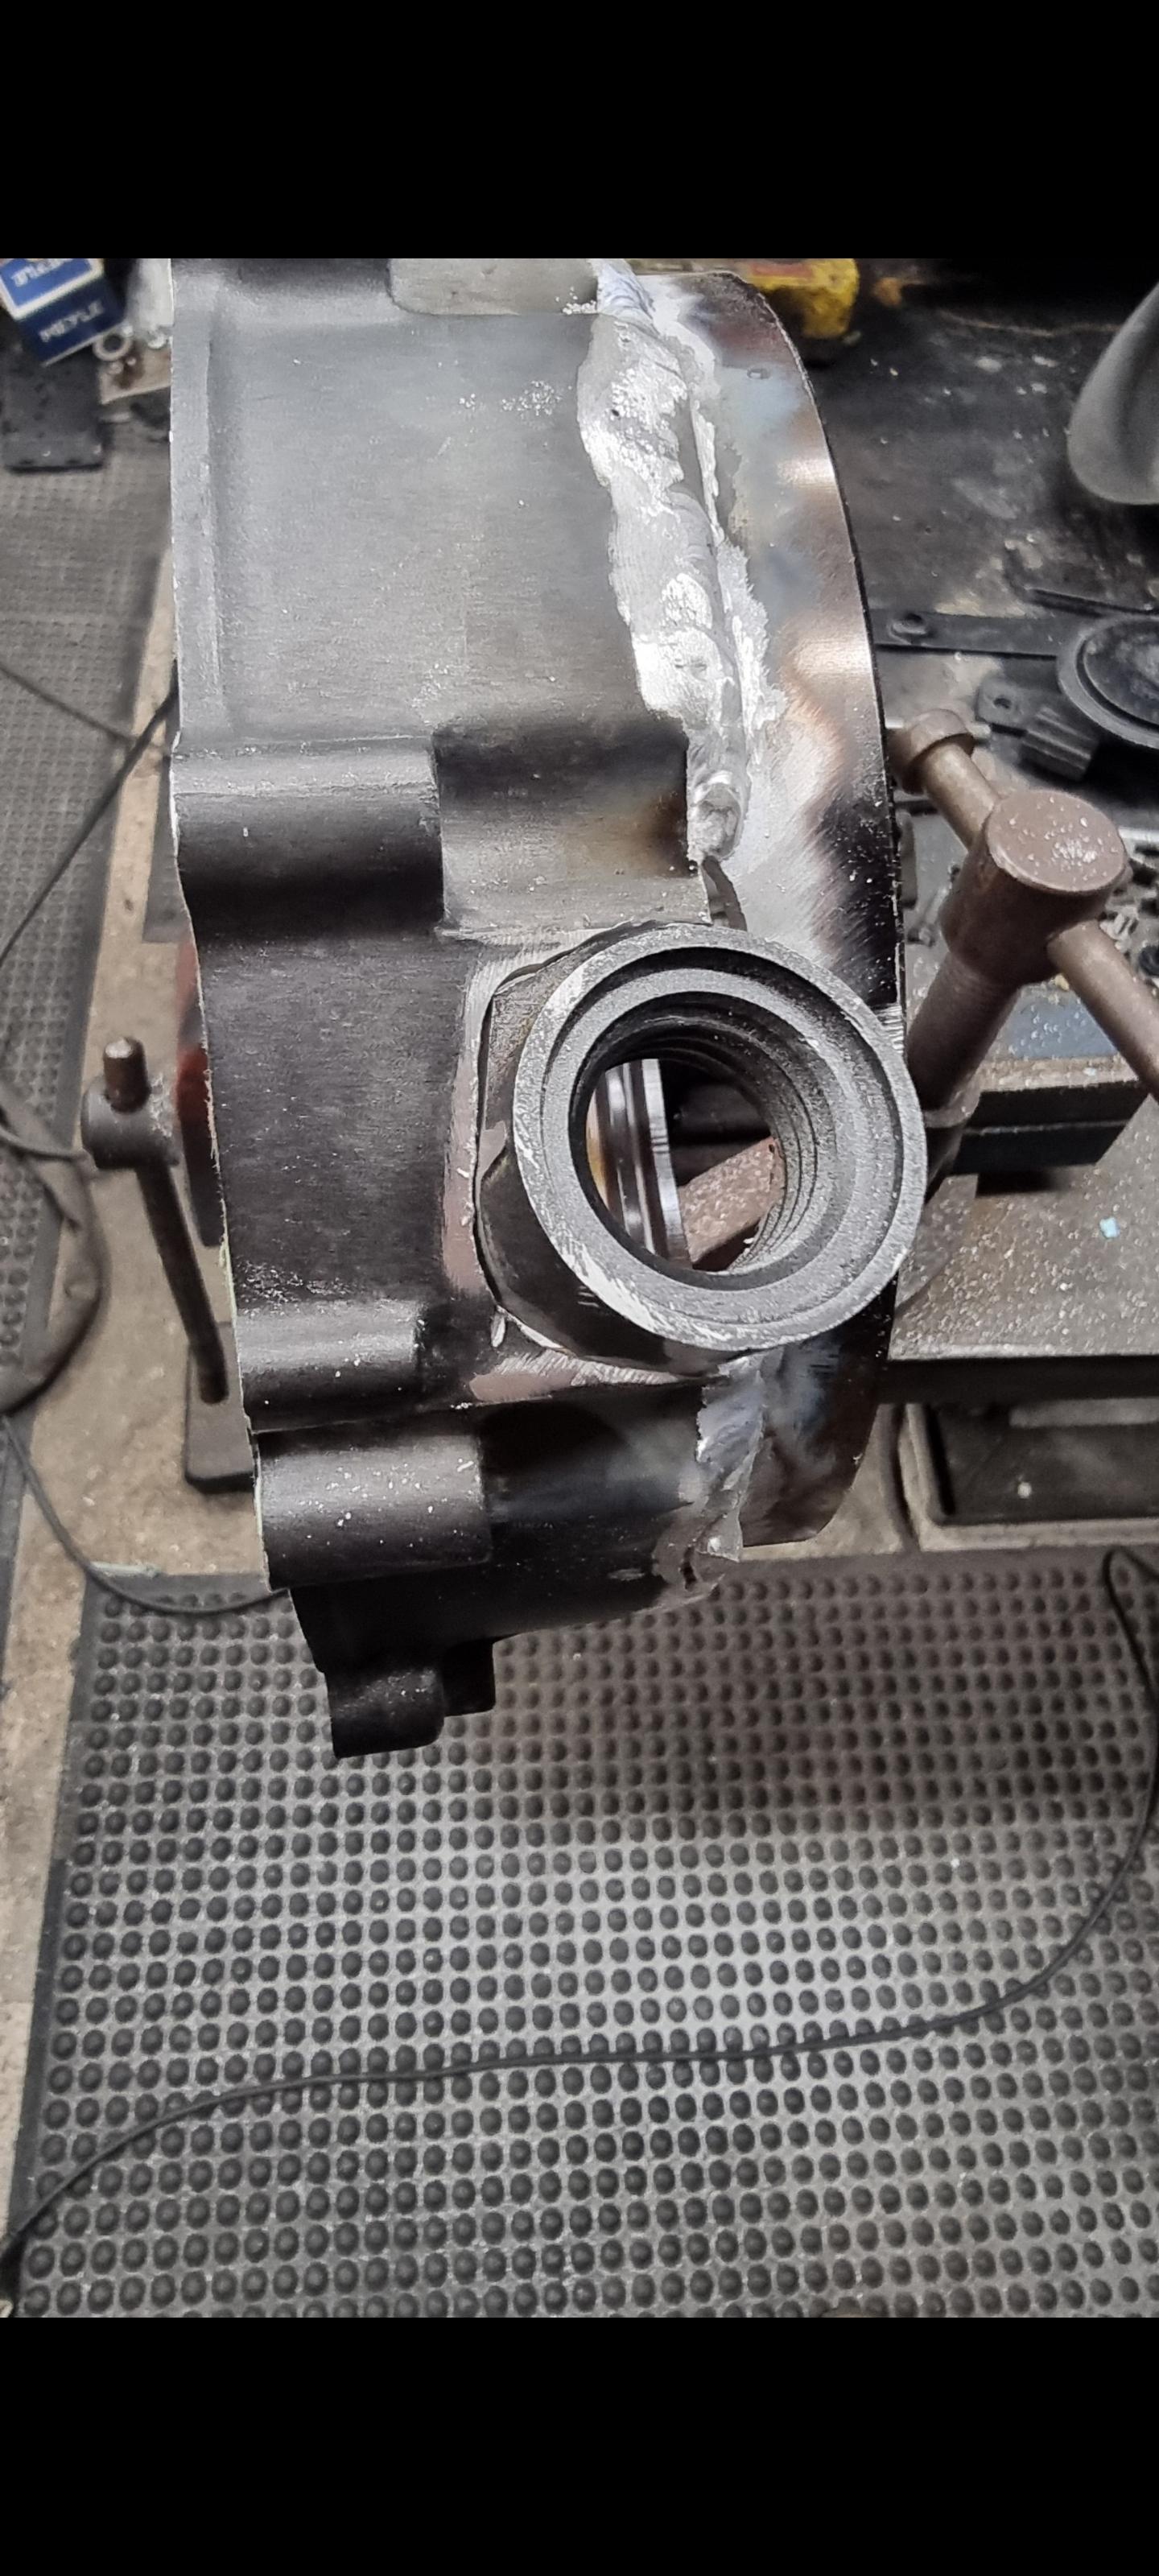
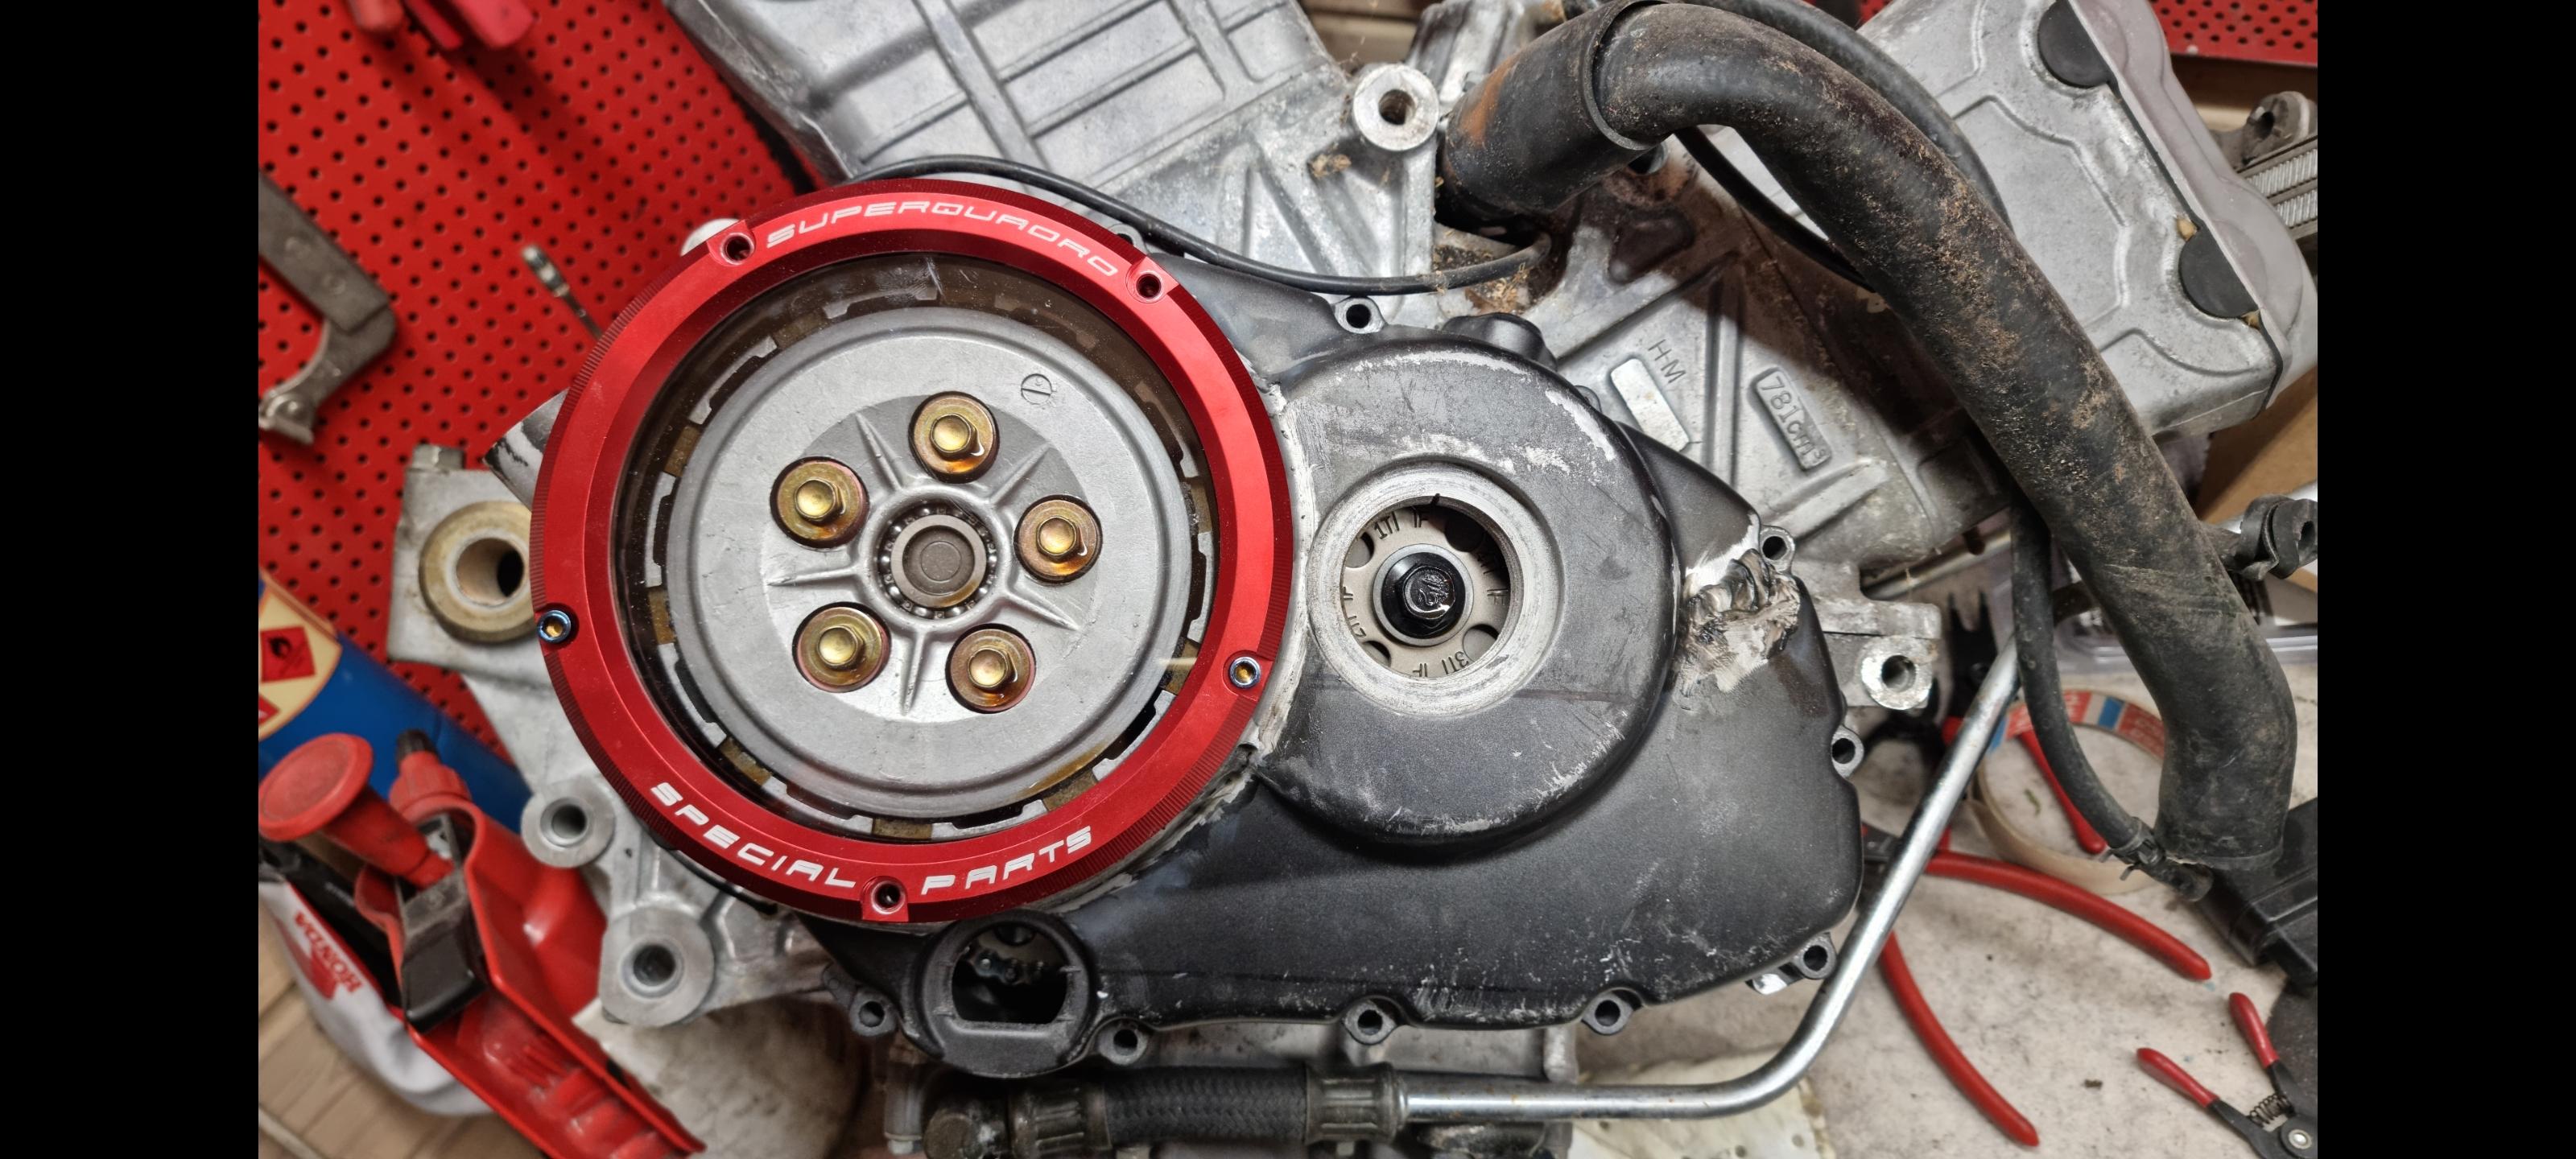
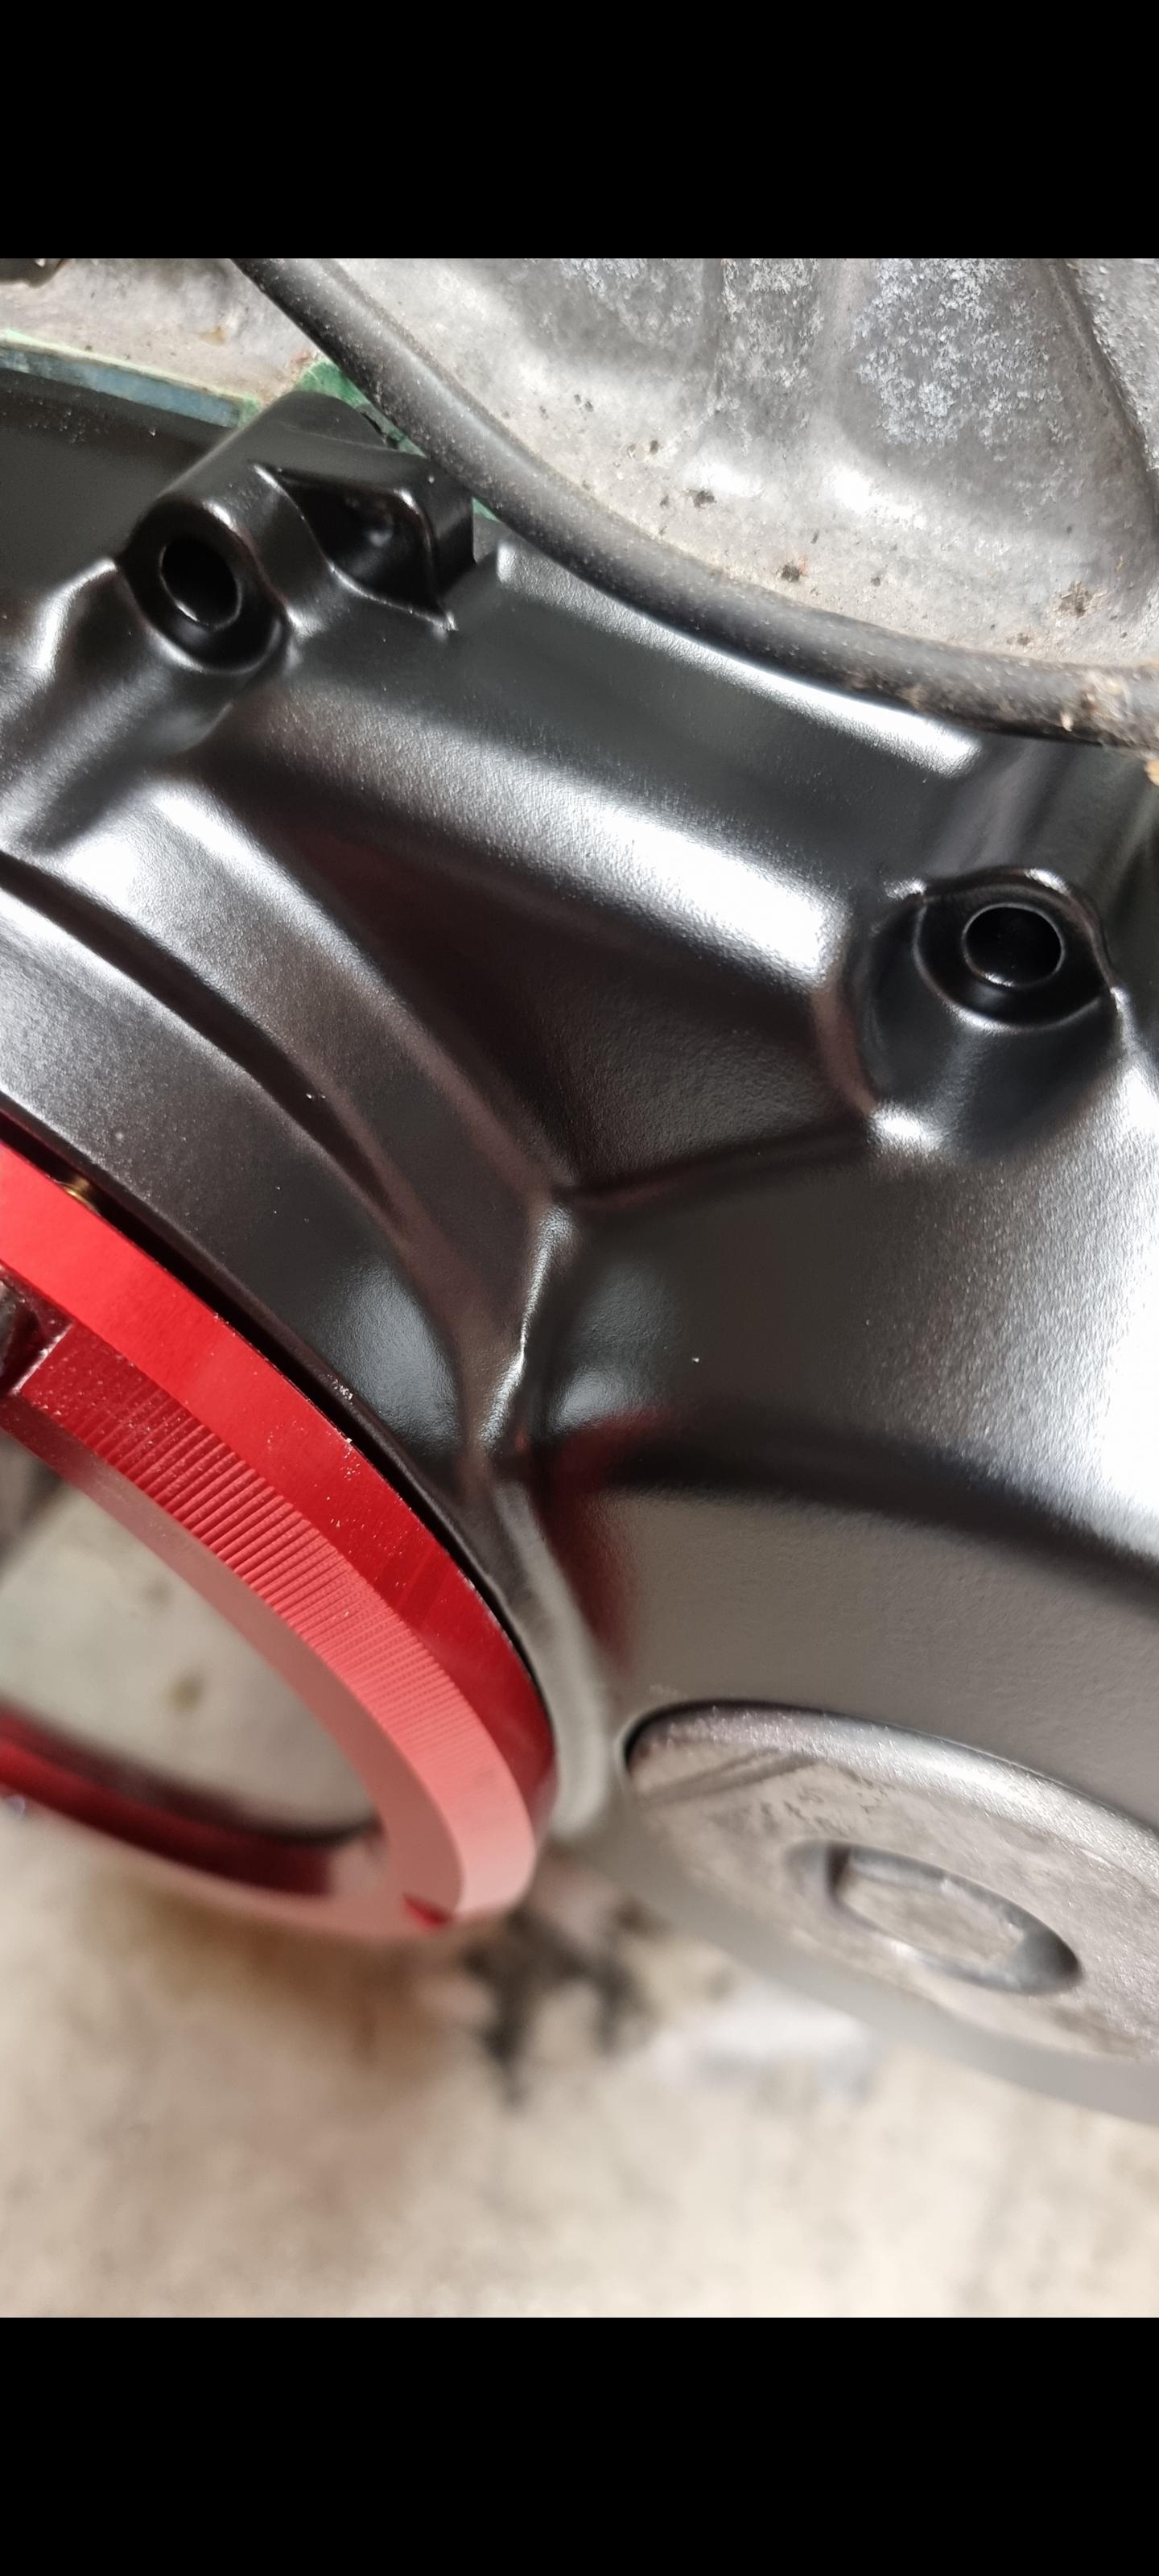
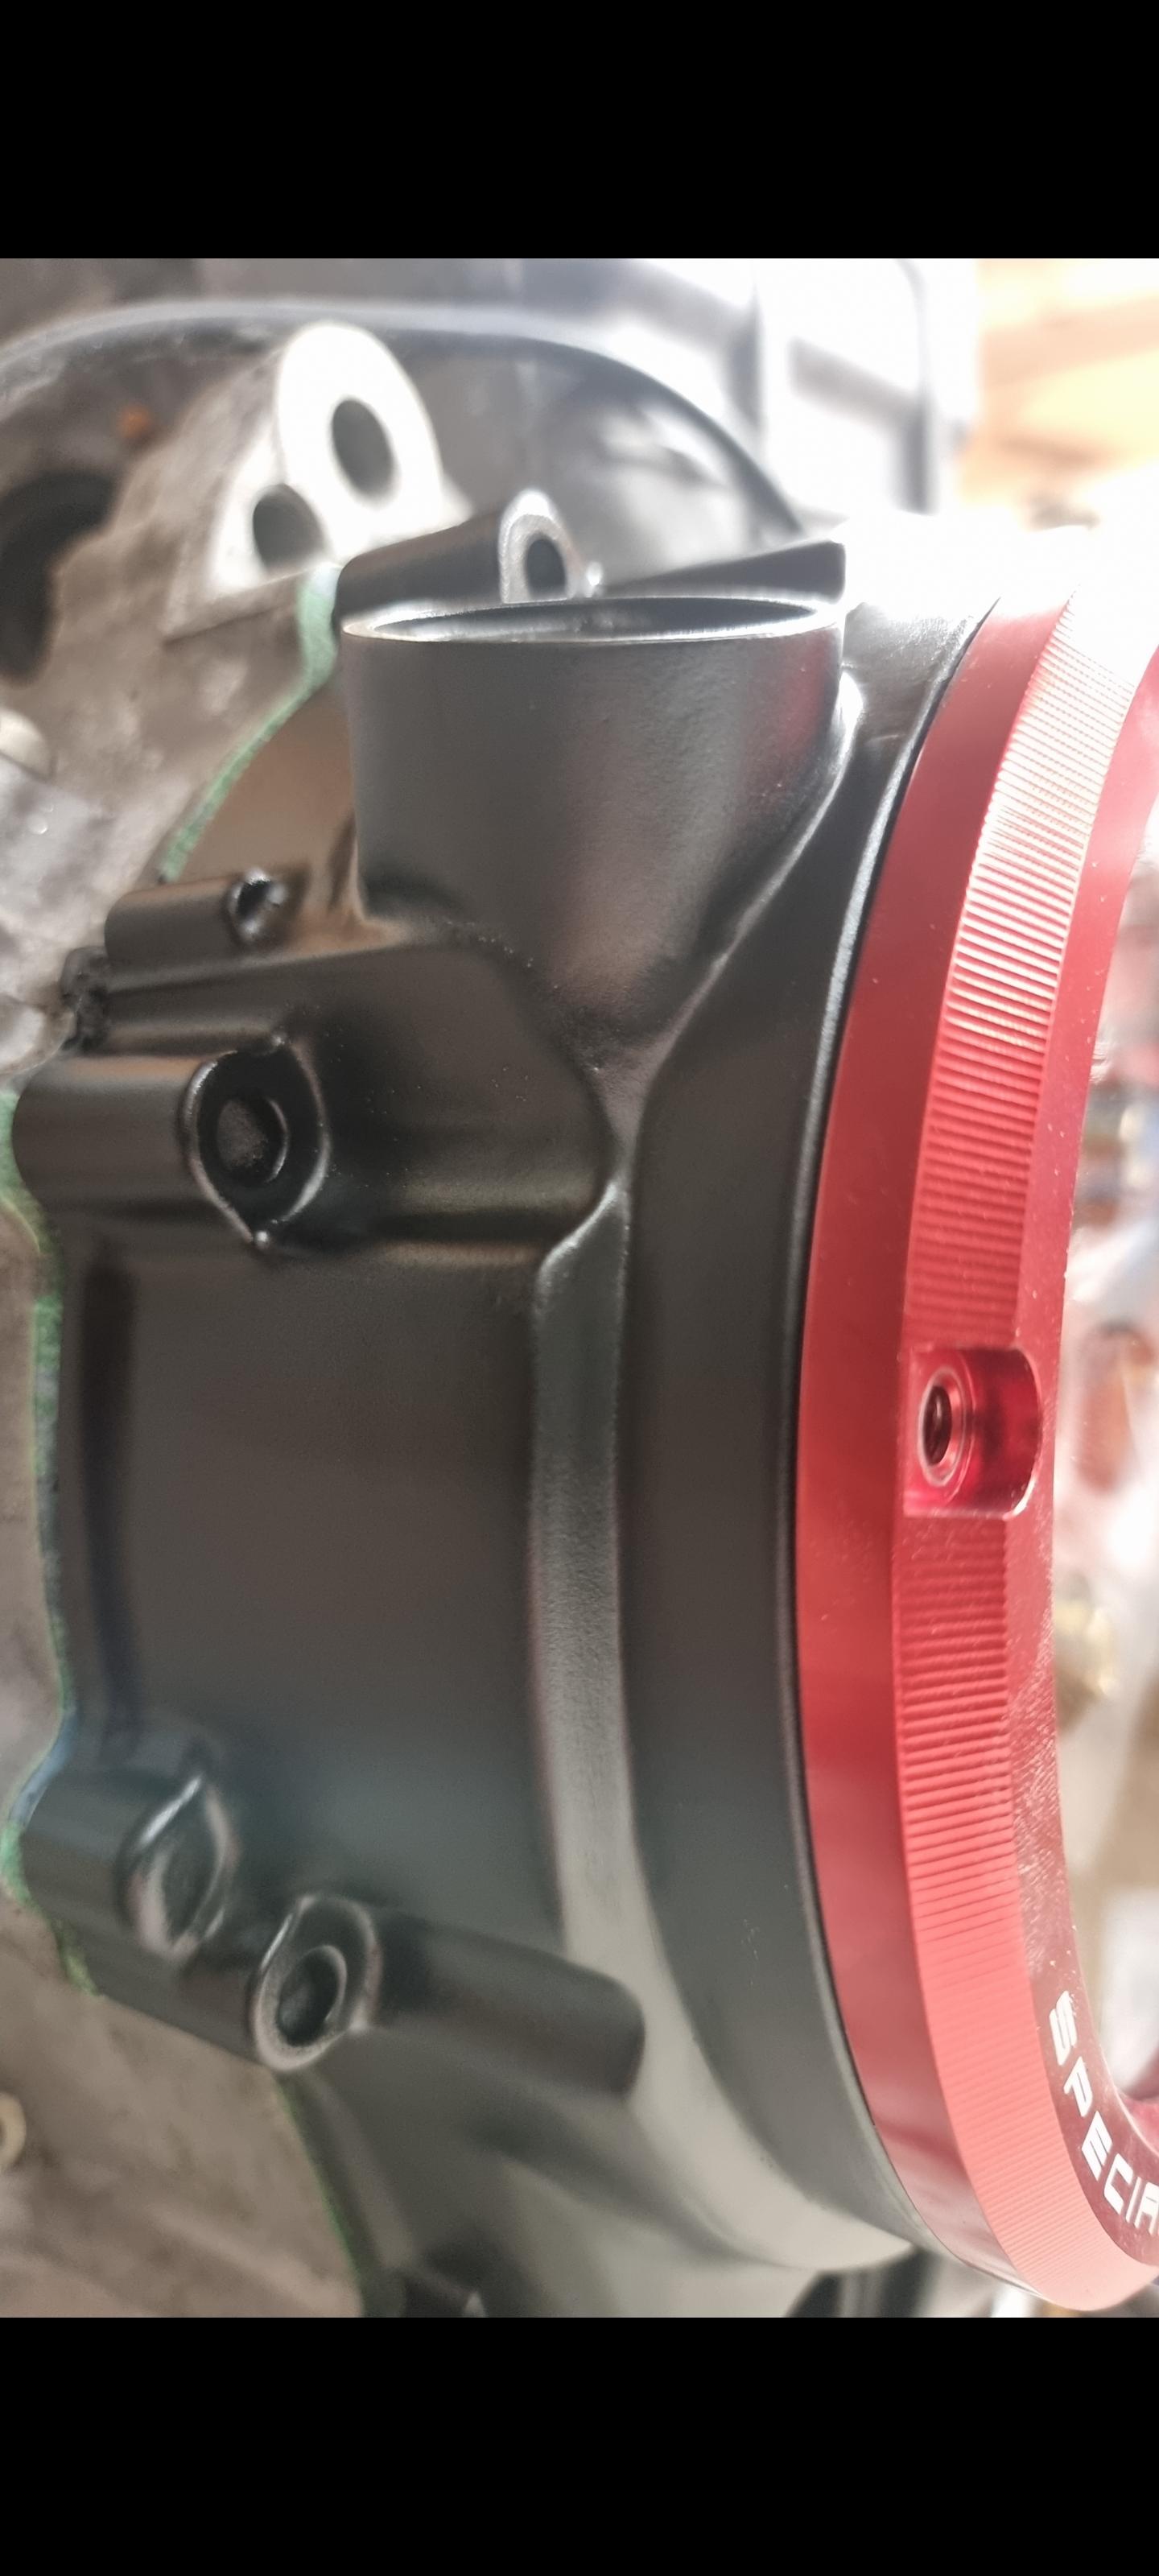
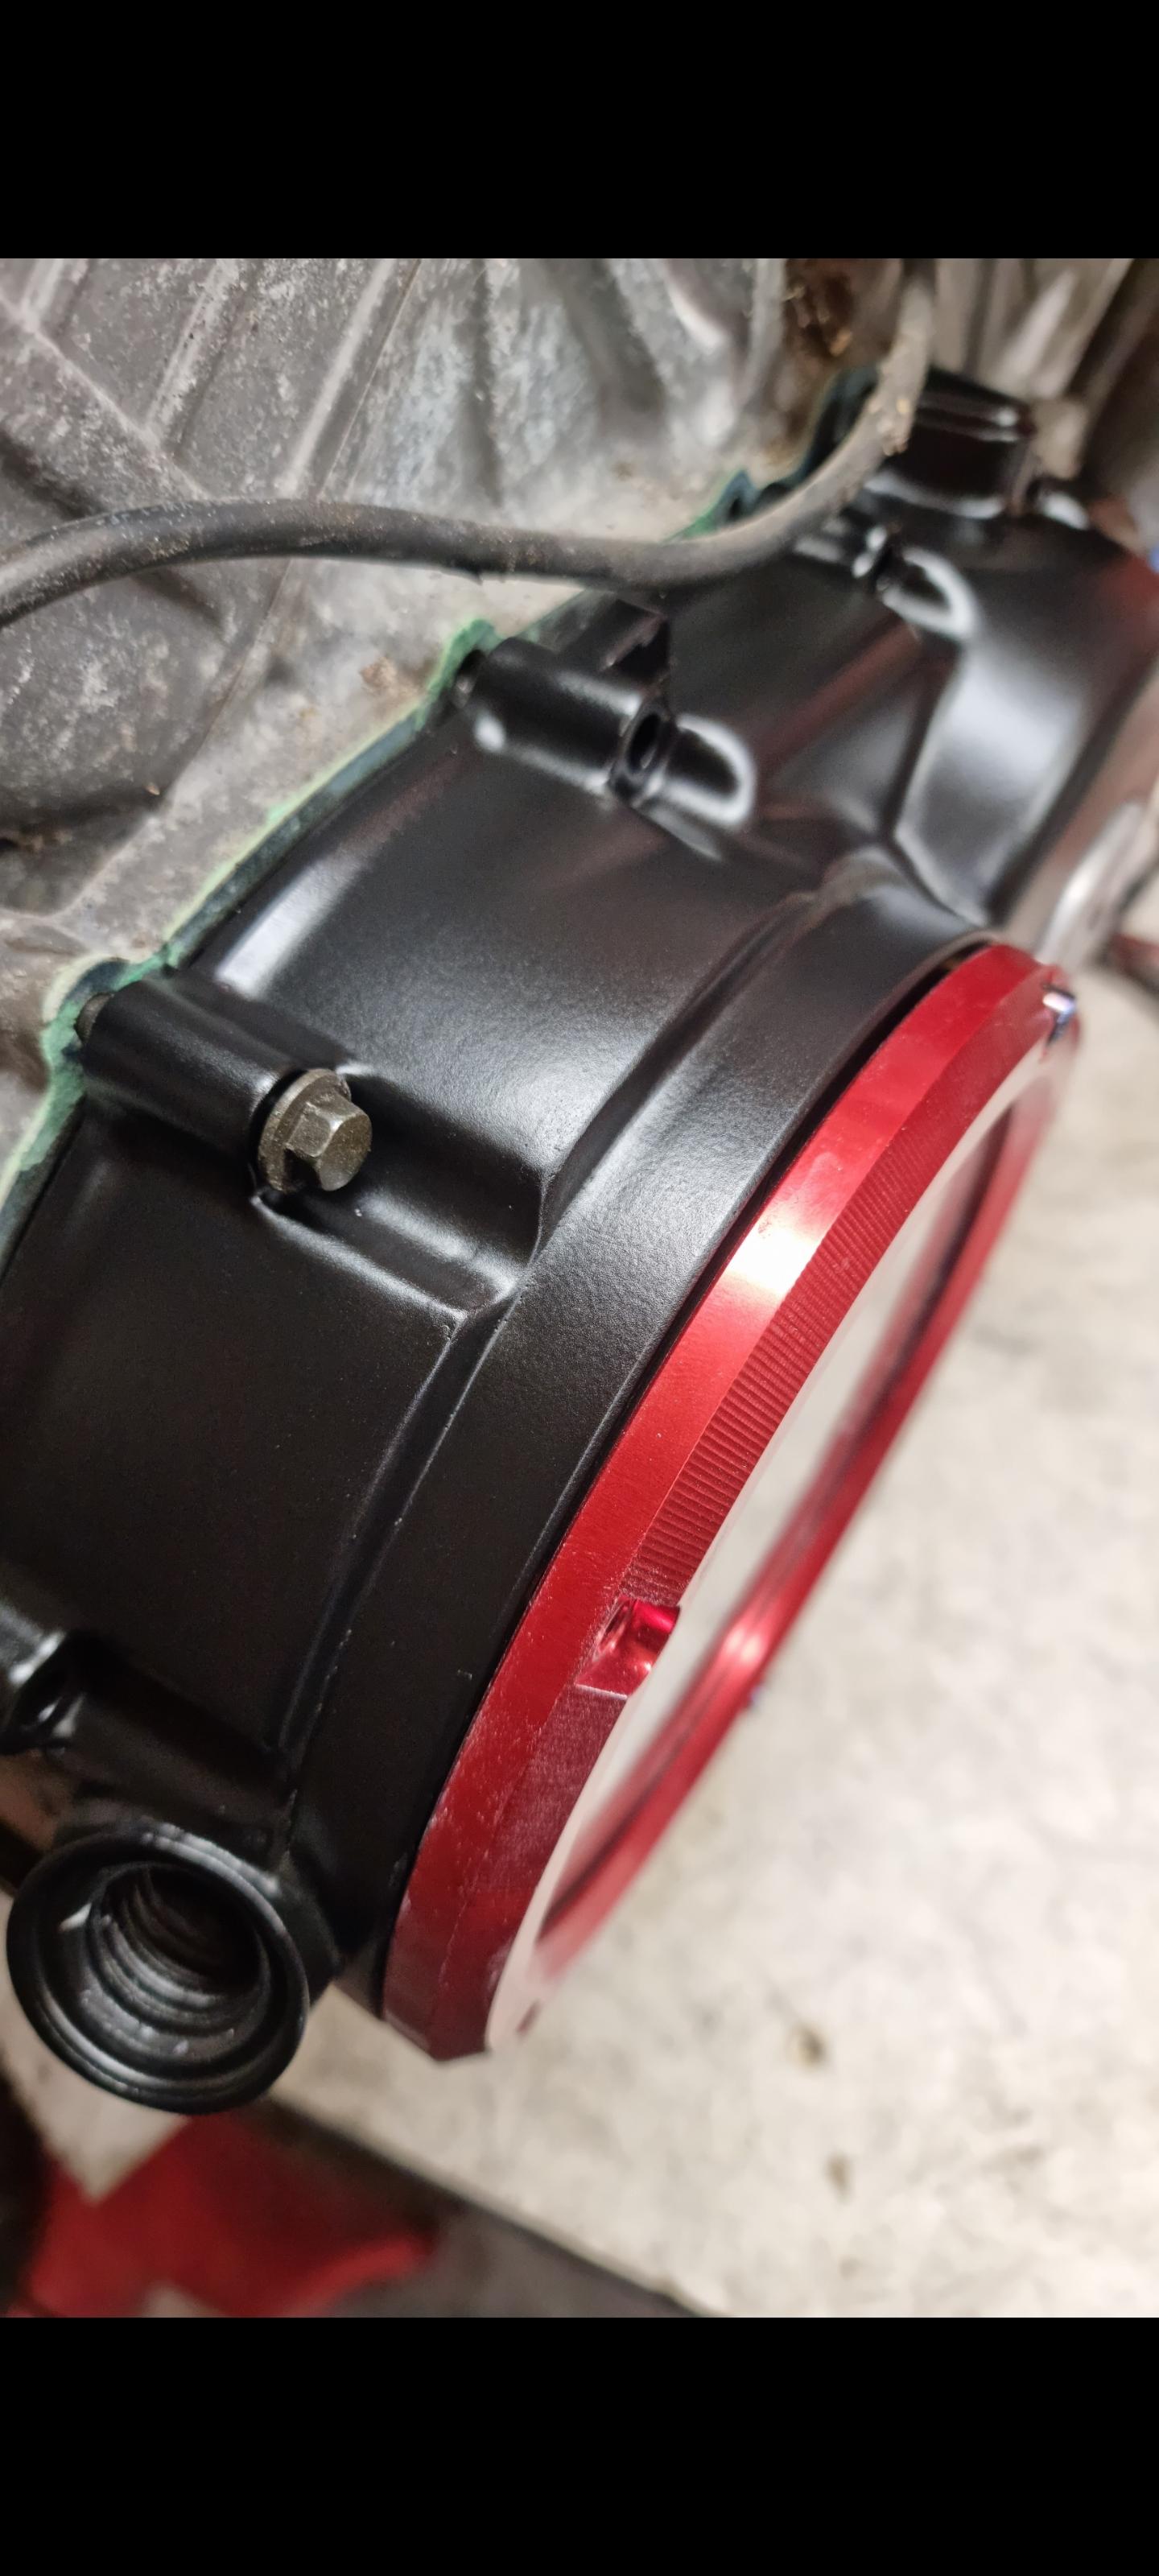
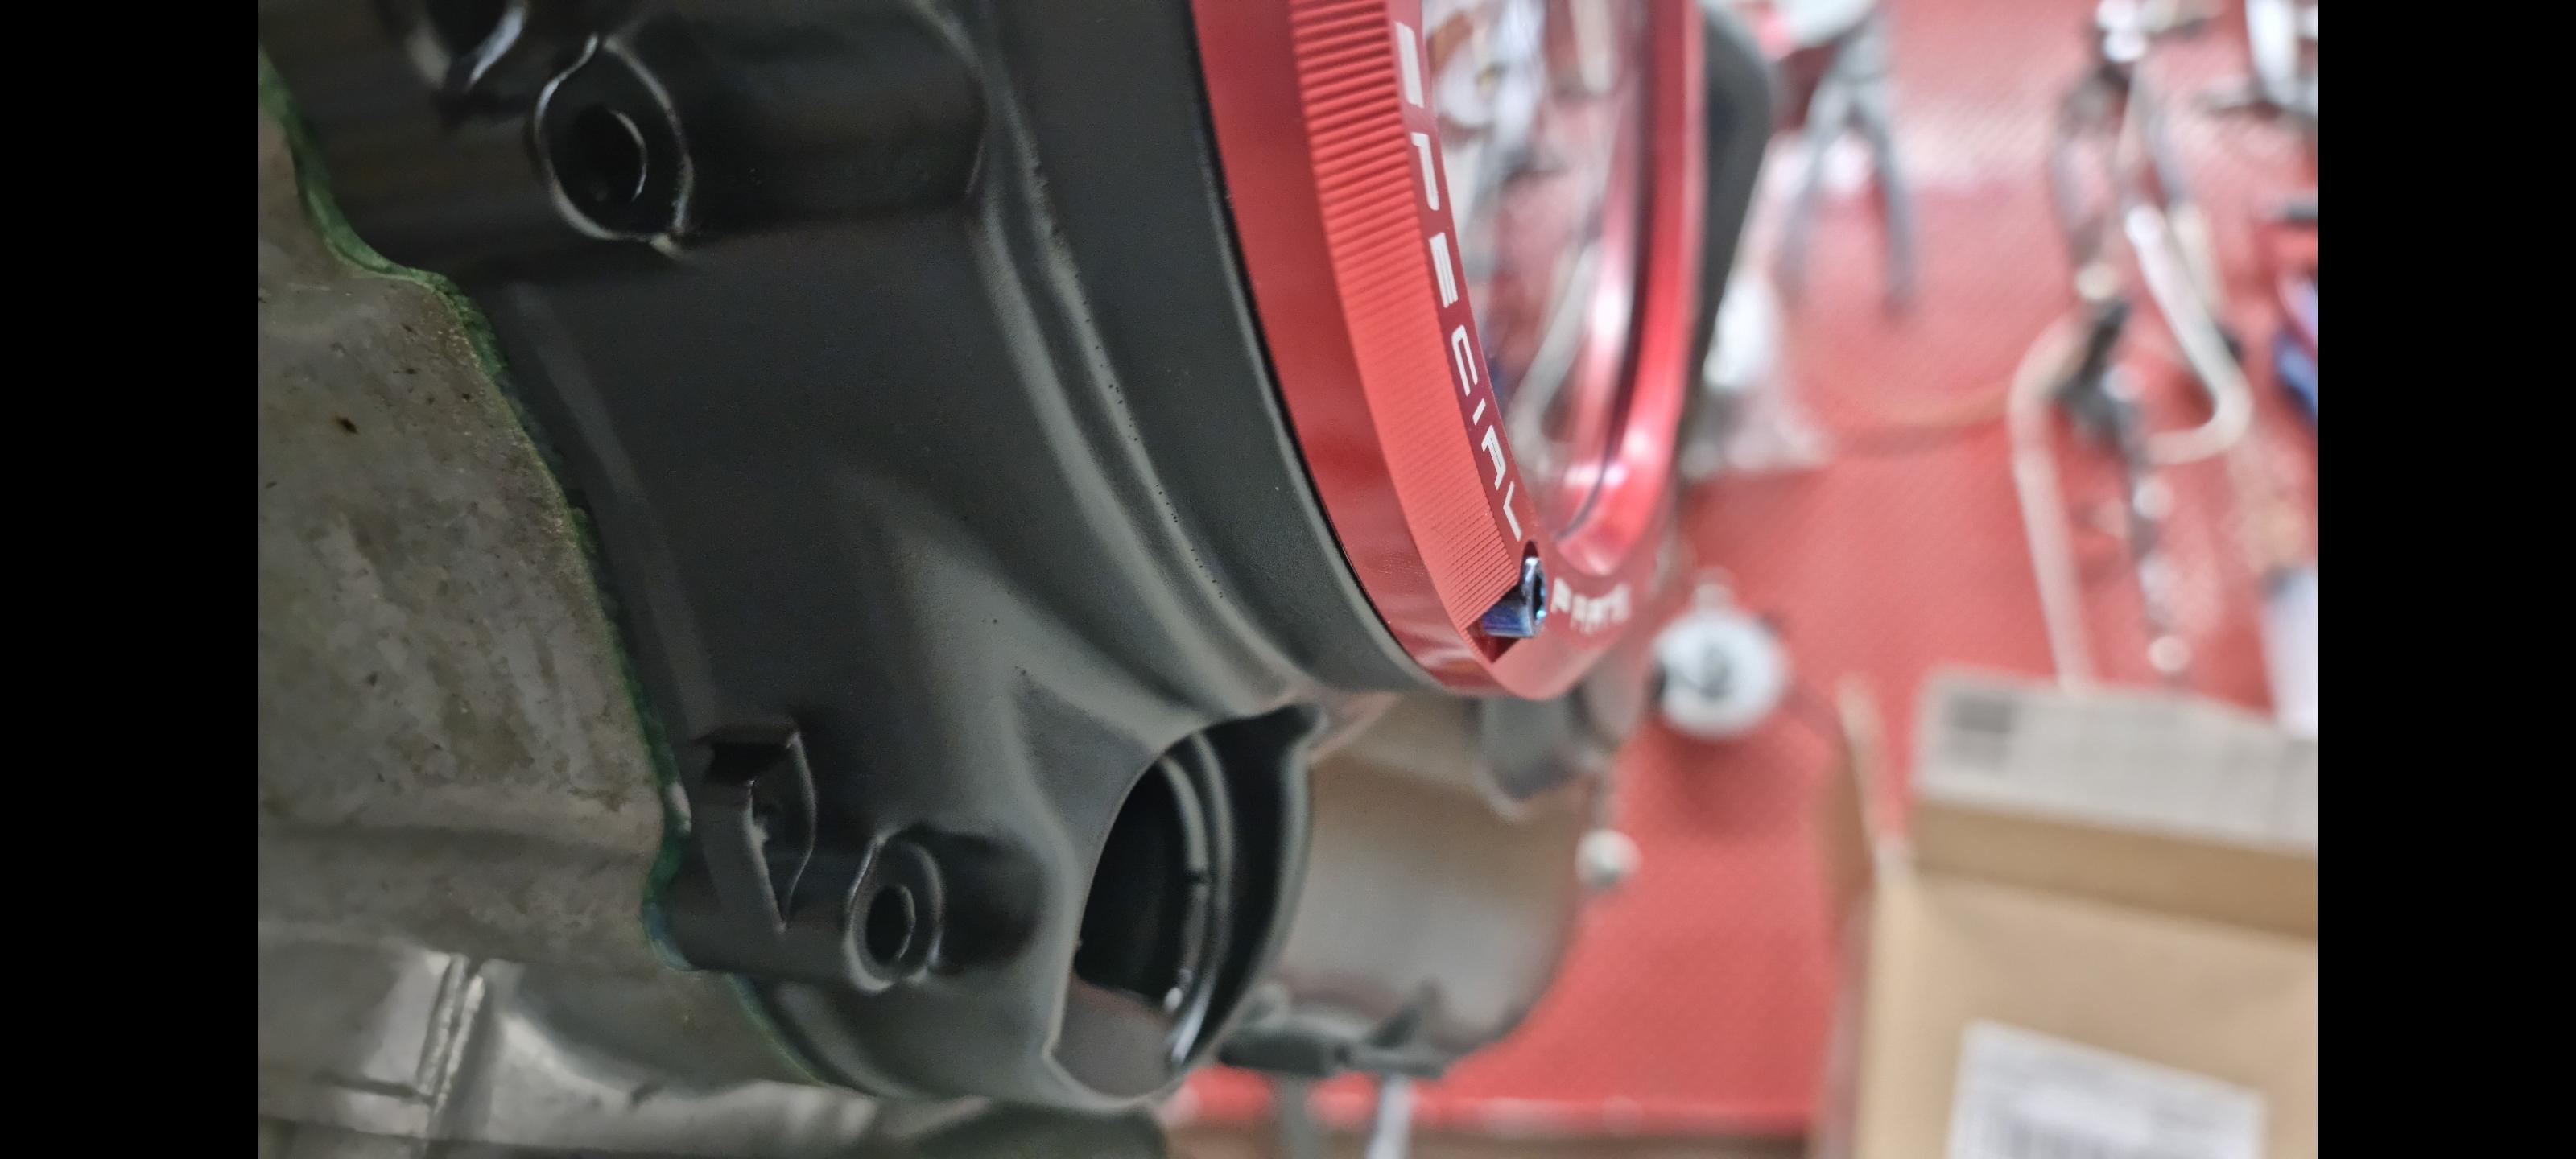
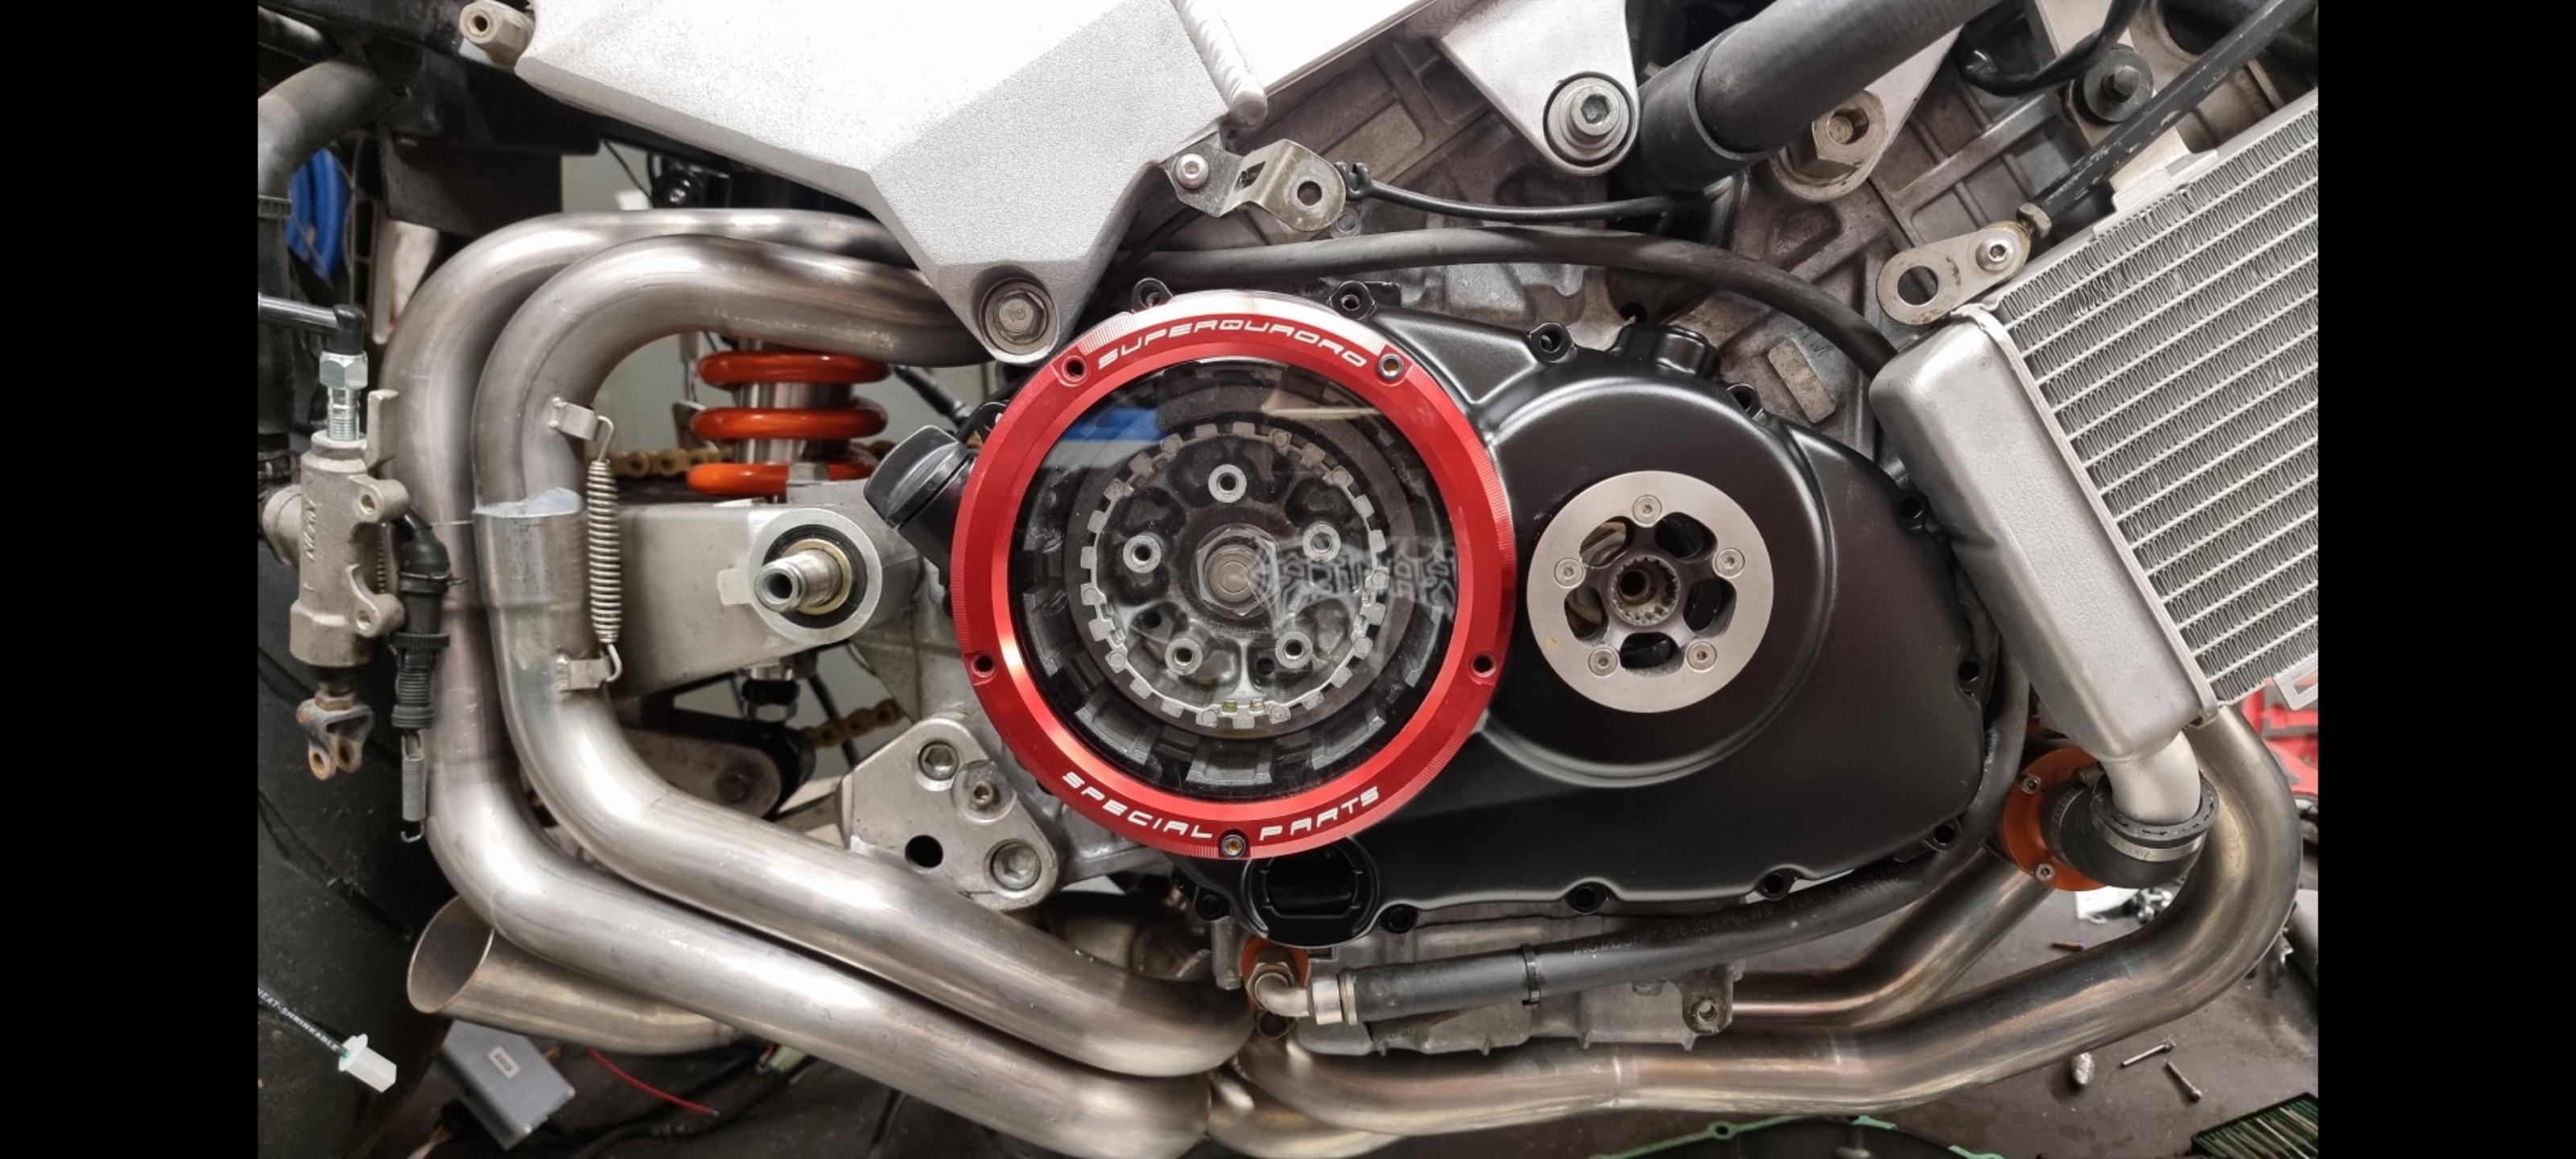
A tiny big update. I wanted to do this for a long time but there is not alot of options for keeping this priced within my budget - untill I realized this was something you could buy as bolt on mod for ducatis. So one week later my panigale bolt on cover arrived and it turned out perfect. I wanted make this as low profile as possible so I had to move the filler neck inwards. The ring is welded on the outside and the neck from the inside. This makes me able to inspect the clutch and watch it rotate with ease! You see it's kind of a hassle to remove the clutch cover as the supercharger pulley is glued, the belt needs tensioning and of course the right fairing needs to come of. Now it's a 10 minute job to change the clutch. If someone know how to remove the text on the anodized ring id like to know how without having to re-anodize the whole ring. It's not engraved and it's on top of the anodozing.