toro1
-
Posts
470 -
Joined
-
Last visited
-
Days Won
2
Content Type
Forums
Profiles
Gallery
Blogs
Downloads
Events
Everything posted by toro1
-
From the album: The New Mods
-
From the album: The New Mods
-
From the album: The New Mods
-
From the album: The New Mods
-

From the album: The New Mods
-
From the album: The New Mods
-
From the album: The New Mods
-
From the album: The New Mods
-
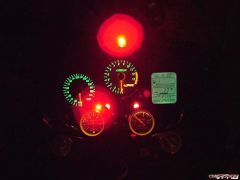
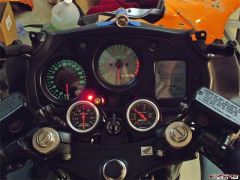
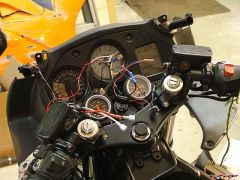
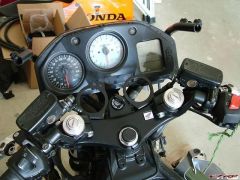
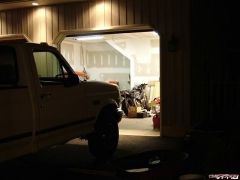
First off, thank you so much for your kind words Dan -- I take your compliments to heart. To think that I just thought I was a kid souping up his bike...wow. I hope I don't let you down. :blink: Finally, finally, finally, I got the gauges done. I thought I was going to go crazy on more than one occasion trying to keep everything straight... lots_o_wires.jpg ...but I got it figured out. gauges_done.jpg To record data with the Wideband Commander, you simply flip the toggle switch down; the LED I wired in comes on to let you know when you're recording and when you're not. The housing taped to the top is the knock light/shift light -- it will be permanent once I get the bodywork back from paint. It was too dark to get any good pictures of this setup, but I have to admit, it looks trick in person. What you can't see are the gauge cups that match & blend in with the rest of the bike -- I wanted just the faces to draw attention, and that's what I ended up with. Here's a final shot in the dark with the gauges lit and the knock light showing red: gauges_all_lit_up.jpg
-
From the album: The New Mods
-
From the album: The New Mods
-
From the album: The New Mods
-
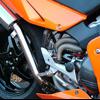
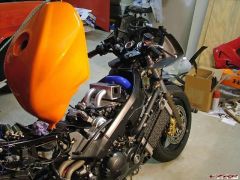
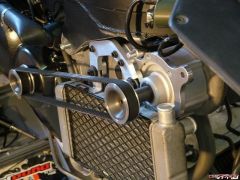
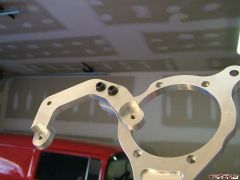
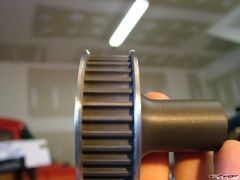
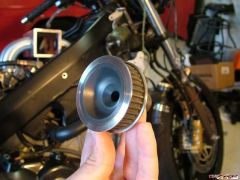
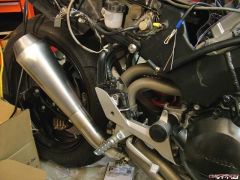
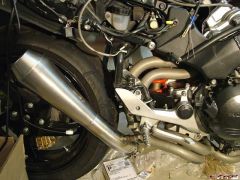
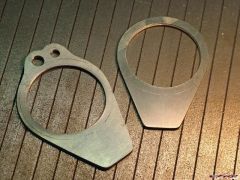
The past week has been frustrating. Parts I need still haven't come in, and everything I do seems to take longer than expected. Oh well, I've just got to keep plugging along. Here's what's new: I figured out where the gauges needed to go, grabbed some sheet aluminum, layed out a design, and cut away: gauge_brackets_just_cut.jpg Brought them back to the house, drilled the top tree, painted everything, and bolted them up: gauge_brackets_mounted.jpg I so badly wanted to have a shot with everything in place, all lit up, but the wiring is insane and I couldn't get it done tonight. I have so many wires going to so many places, it's really hard to keep track of everything -- it's like a jigsaw puzzle figuring out what has to go where and how it all fits together cleanly & properly. A few more hours tomorrow and I should have it done. Wondering what those little holes in the left bracket are for yet? Now for everybody that was wondering how it was going to be done... finished_pulley.jpg flanges_inside_view.jpg I had to get the pulleys hard anodized first. Machining the stainless flanges came next, and they were then heated significantly & dropped on the pulleys. I allowed them to slowly cool back to room temp and shrink onto the pulley, into the machined groove -- they are going nowhere fast. The 20º inside angle is per Gates and should allow smooth tracking even if the pulleys are out of alignment slightly. Finally, I'll post up some pics of the completed exhaust and O2 sensor. O2_hidden_wires.jpg Hey, where are the wires? There's actually a huge connector hidden behind the foot guard and I was able to thread the rest of the wire through an existing hole in the engine block. exhaust_shot.jpg You have no idea how badly I want to hear this thing roar. It's so close, yet so far away. I still need the radiator bracket machined, I need to make the idler, the intake and upper bracket need to be welded, the intake connector tubing needs to be completed, I've got to remount the coils, yadda yadda yadda, hopefully it won't be too much longer... :blink:
-
From the album: The New Mods
© ©vfdiscussion.com
-
From the album: The New Mods
-
From the album: The New Mods
-
From the album: The New Mods
-
From the album: The New Mods
-
From the album: The New Mods
-
From the album: The New Mods
© ©vfdiscussion.com
-
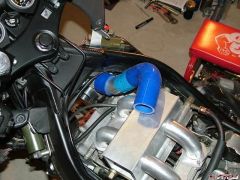
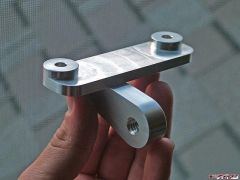
Thank you Rob! Here's the upper bracket, just off the machine. This part bolts where the oil cooler bracket used to reside & will very rigidly tie-in and locate the top of the supercharger bracket. upper_bracket.jpg It's actually two parts - I need to get the lower section welded to the top section, but otherwise, it's ready to go.
-
From the album: The New Mods
© ©vfdiscussion.com
-
From the album: The New Mods
-
From the album: The New Mods
-
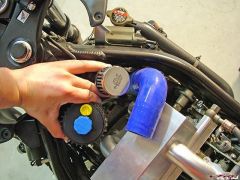
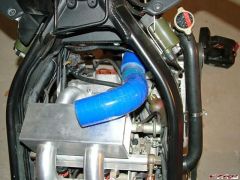
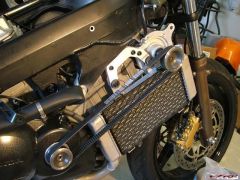
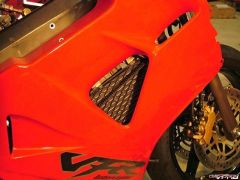
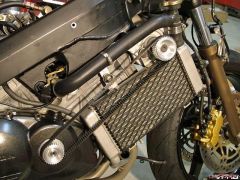
Just to clarify an earlier statement I made, check out this picture: belt_rad_clearance.jpg Pay no attention to that bolt sticking out the end -- it's only temporary. Anyway, you can clearly see there's a good 3/4" of space between the radiator and the belt, and the radiator is even spaced out from the engine a bit, so there should be no clearance issues.