

checksix
-
Posts
320 -
Joined
-
Last visited
-
Days Won
1
Content Type
Forums
Profiles
Gallery
Blogs
Downloads
Events
Posts posted by checksix
-
-
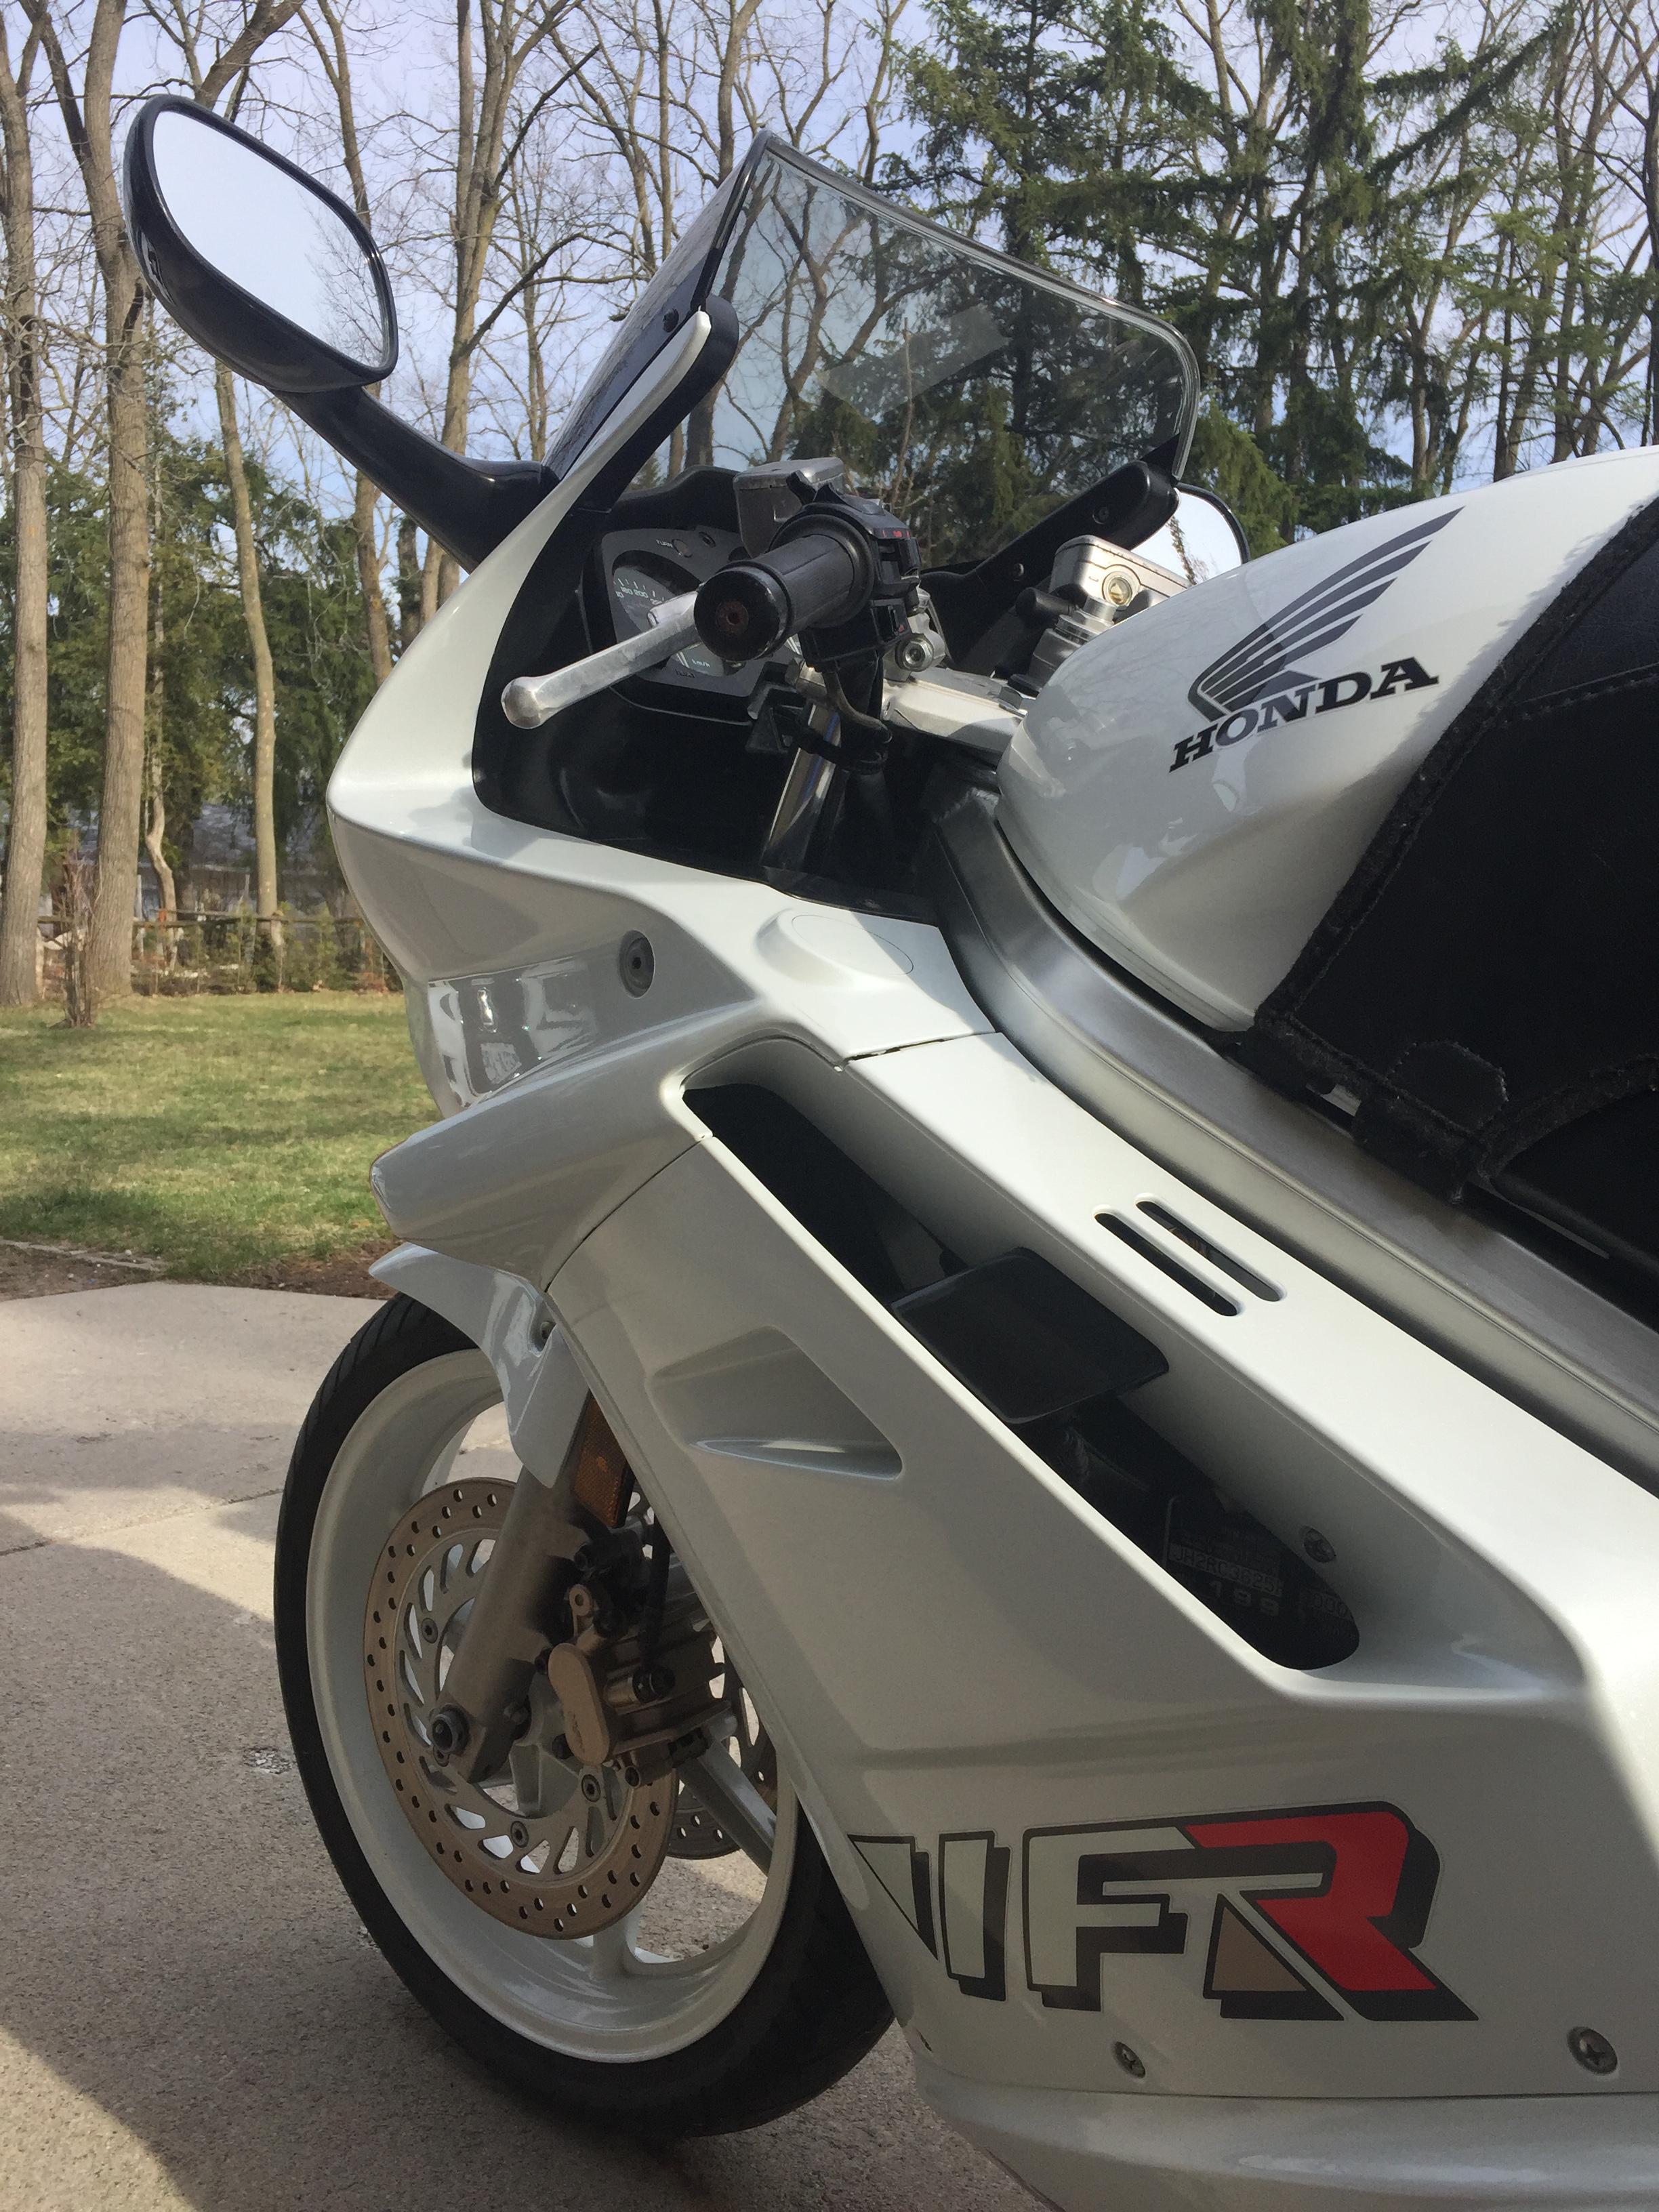
You've got a sharp, clean looking example there. You made a great choice. I actually prefer the manual fast idle because I can warm up the bike gently on cold days without having the automatic fast idle zoom the rpm up to 2k on a cold engine. Enjoy your new purchase!
-
So the "break" lock "broke" ?
-
What a fantastic looking bike. Thanks for showing it to us.
-
Sounds very reasonable. Count me in.
-
Thanks for the info. Of course the big question is price. Do you have a ballpark estimate for a pair of "raw" (no anodize, just bare metal) brackets?
-
Also interested but a bit bedazzled by all the bling in your earlier picture :)
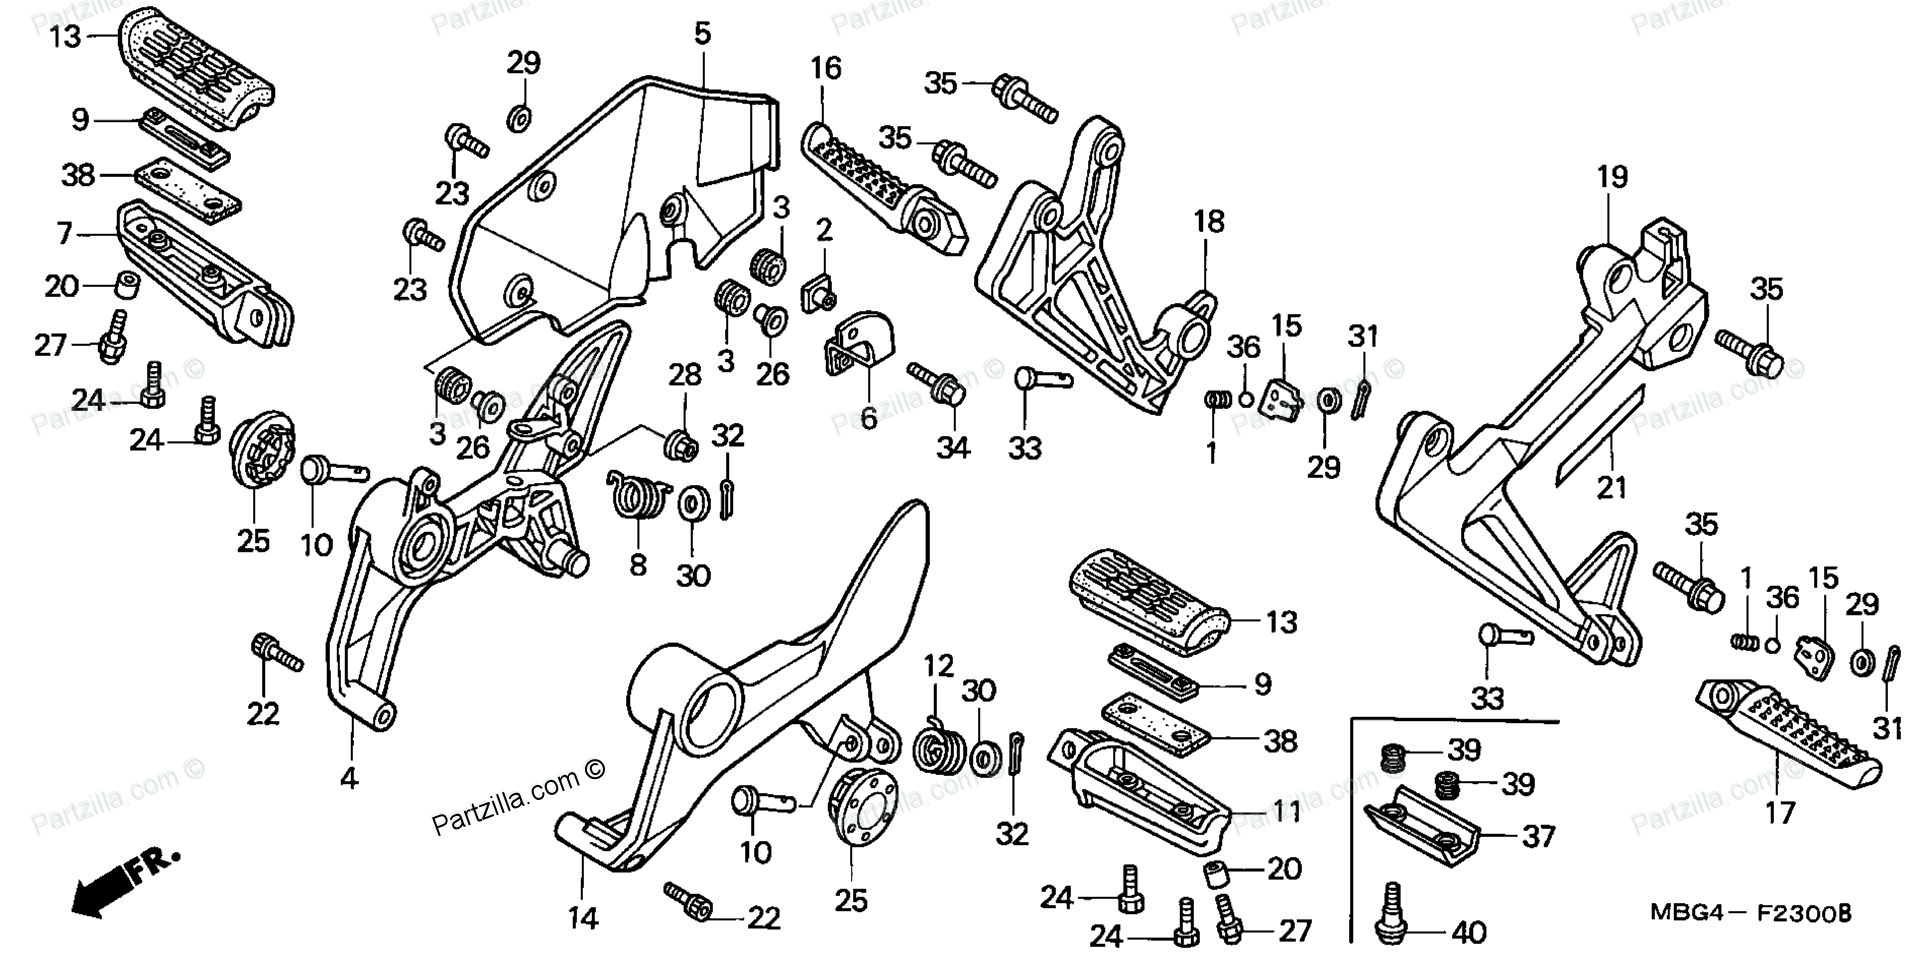
Could you clarify: am I correct that what you're talking about is a bolt on replacement for items 4/14 in the attached picture?
Ie. a straight swap using existing cushion, bolts, etc.

-
Funny you should mention the Miata. My wife has one and we sometimes pick a scenic destination and "meet for lunch". I take the viffer and she takes the Miata. But like you said, it's really more enjoyable when we both take the car together.
-
14 hours ago, Devo83 said:
Here's my white 93. 24k on it, new to me this year.
Hondaman what length is that Delk? 18 or 14"??
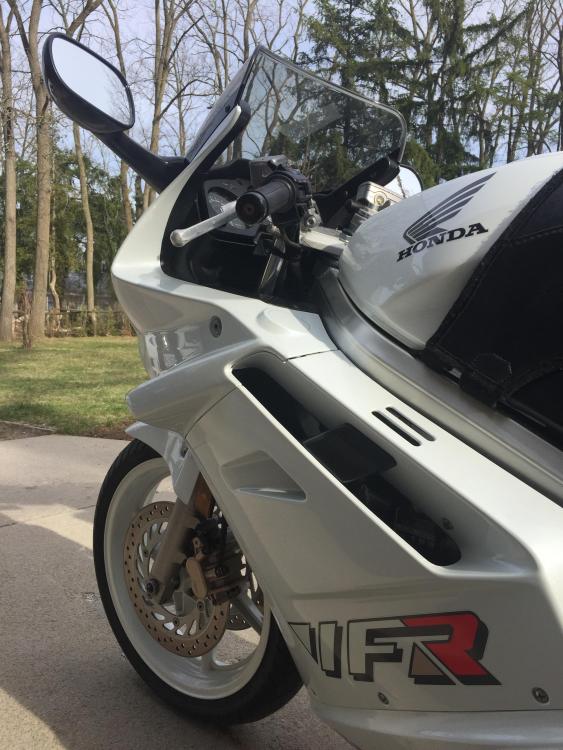
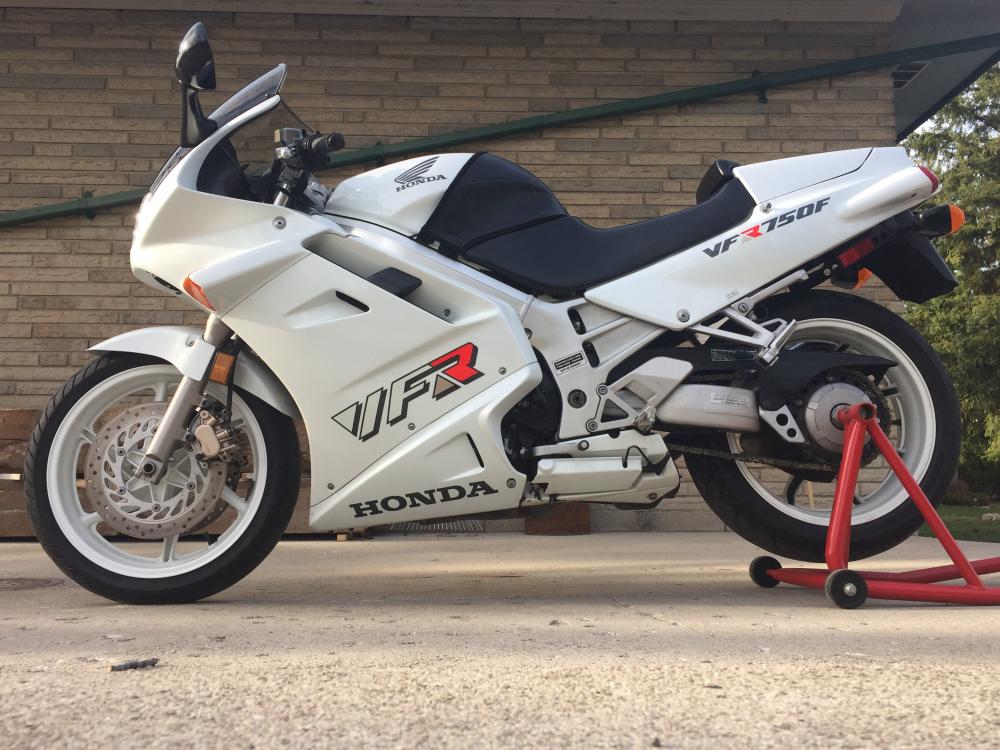
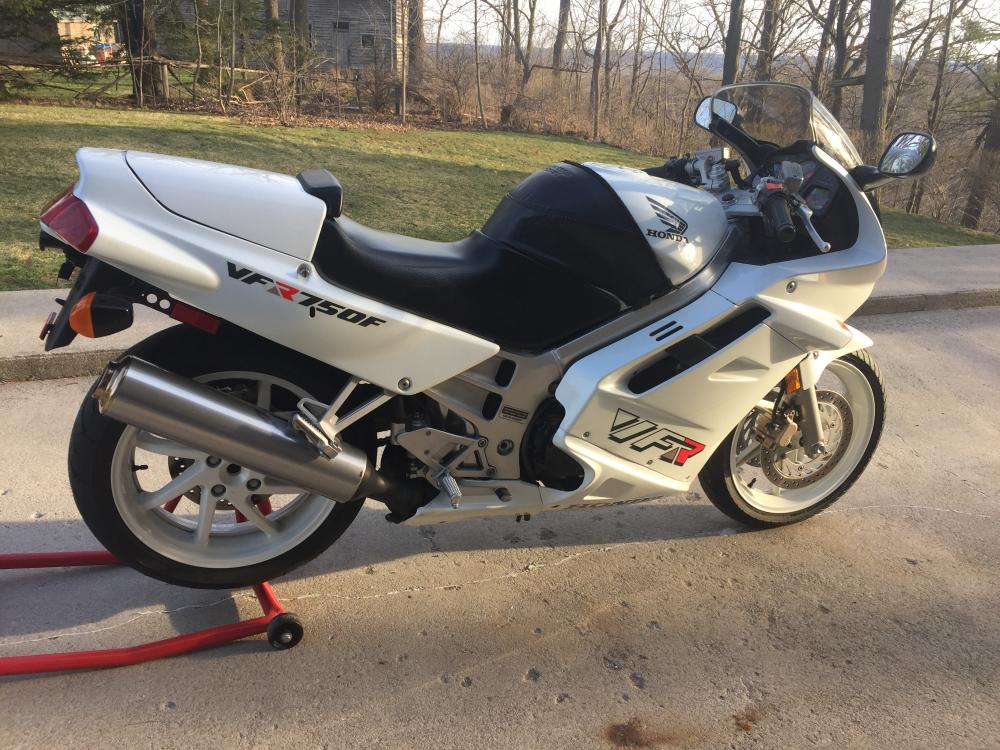
Wow, even has the kickstand cover! Stunning bike.
-
Maybe the fuel tank vent hose is partly crimped or blocked and you're hearing the air as the vacuum in the tank releases?
-
Never buy a product that has the word "monkey" in its name.
-
5 hours ago, fink said:
Have you drop tested the battery? It could be a battery failing.
"Drop" testing will definitely cause a battery failure.
-
The level in the reservoir may have dropped as air worked its way out of the system after your coolant change, due to insufficiently "burping". You might want to just refill the reservoir to the half way mark and then keep an eye on it for a few rides. If the level stabilizes, you're good to go.
-
Change the oil and filter yourself. Save receipts for warranty purposes. The only things that need a "check up" are the chain slack and tire pressures, which you should be doing periodically anyway.
-
I had a set of stomp grips on my 600rr and they really chewed up my leathers at the knees. I switched to tech spec and like them much better. They provide just the right amount of grip and comfort.
-
Untreated = no salt. Good for bikes on warm days, bad for cars on icy days.
-
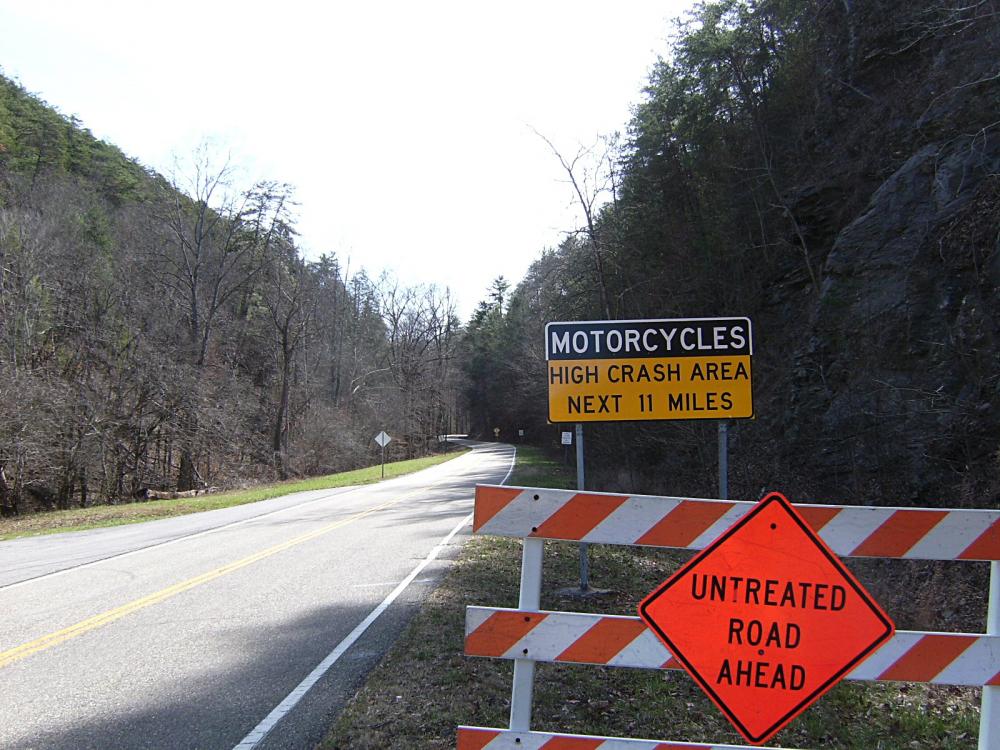
The entrance to my favorite road now has a new sign. Short and to the point, it's located at Tabcat bridge, on the north end of "the dragon" by the river.
Apologies if this is a repost.
-
Before you panic, maybe it's something simple.
Is the kill switch turned on?
Is the battery fully charged?
Did you perhaps flood the engine while trying to start it?
Maybe hook up the bike to a car battery (car turned OFF) and try to start your bike that way.
Hold throttle fully open and crank for ~15 seconds to clear the cylinders if you think they're flooded (strong smell of raw fuel).
-
Don't use epoxy. Use ABS cement on the back side of the crack, after sanding off the paint to get a good bond.

-
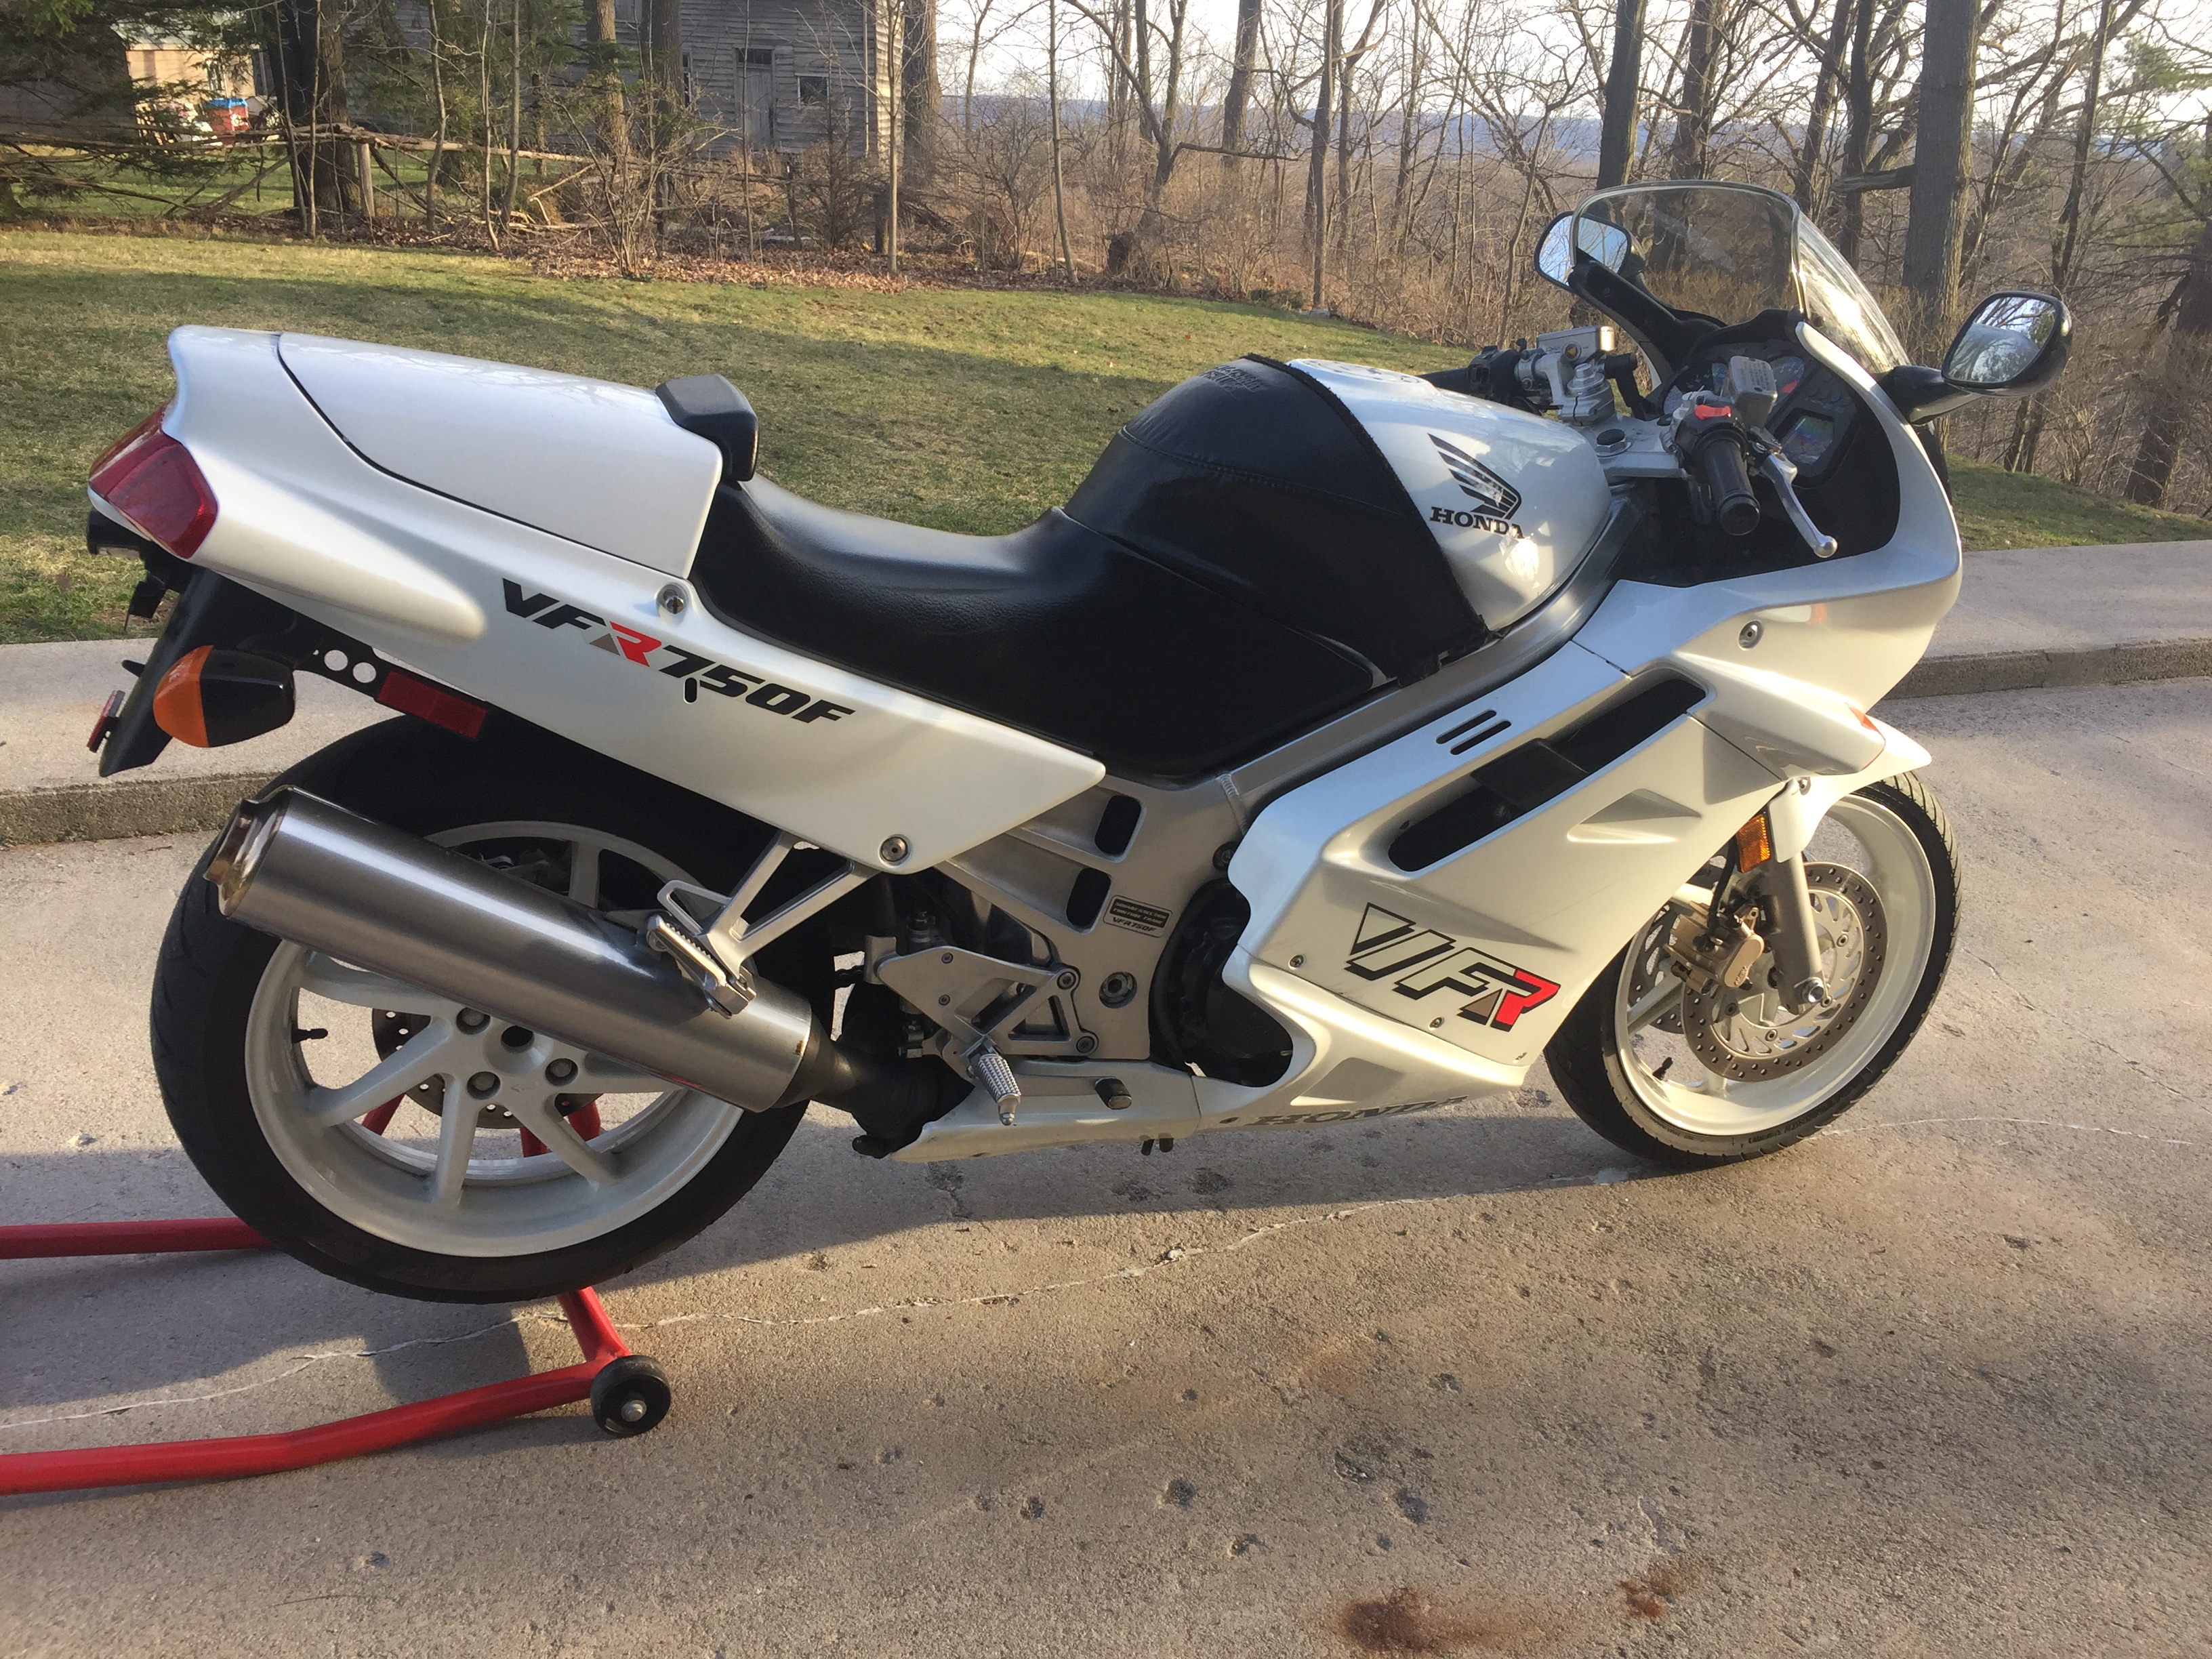
For price reference, I bought my '98 with 39K miles for $2600 two years ago (craigslist, Lenoir City). Very nice for riding the Cherohala Skyway and 68. A little "porky" for Deal's Gap, compared to my CBR, but way more comfortable. Currently has 54K miles and climbing.
-
Sounds like a tired battery, in spite of whatever "testing" the auto parts store did.
12V with switch off is too low. Should be about 12.8
When the bike is running it should be about 14 or thereabouts.
-
For sure check the air filter for critter nests. Some of the posts around here have amazing pictures of what mice can do.
-
Maybe just run some more fresh gas through it, mixed with a strong dose of seafoam. See if things improve after a few tanks.
-
Don't use windex. Use "RuGLYDE" lubricant, sold at NAPA auto stores specifically for changing tires.
Put the rim protectors on before you start mounting the tire. Use four of them, spanning 10 oclock to 2 oclock.
Apply the lube with a paintbrush all the way around the bead initially and add a few more dabs as you work the tire onto the rim and/or rim protectors.
Get some curved levers (see pictures in link below). They'll allow you to get a better angle without hitting the brake rotor.
Use your knees at the 6'oclock position on the tire to press and hold the bead in the valley of the wheel. My 60+ year old knees don't like this very much either, but it's the only way to free up enough room to get the tire over the rim at the top of the wheel.
More info:
http://www.vfrdiscussion.com/index.php?/forums/topic/79443-tire-changing-for-cheapskates/
-
I'm so sorry to hear of your misfortune. I'll miss the redslut pictures and stories. Hope you heal quickly. Ignore the armchair quartebacking. There's absolutely nothing you can do when someone pulls out in front of you like that (still my biggest fear even after 30+ years of riding). Hope you get a new bike and we get new stories and pictures!


6th Gen Refresh
in Sixth Generation VFR's
Posted
Just finished reading this thread from beginning to end. Great job and thanks for sharing your saga with the rest of us. Enjoy your (pretty much brand new, now) ride!