


VFR800R
-
Posts
137 -
Joined
-
Last visited
Content Type
Forums
Profiles
Gallery
Blogs
Downloads
Events
Everything posted by VFR800R
-
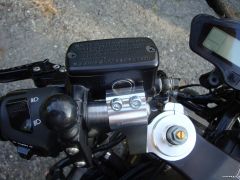
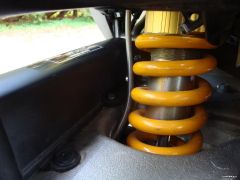
From the album: Inverted Front End Installation
-
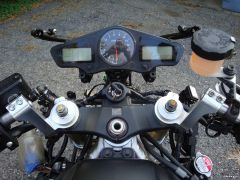
From the album: Inverted Front End Installation
-
From the album: Inverted Front End Installation
-
From the album: Inverted Front End Installation
-
From the album: Inverted Front End Installation
-
From the album: Inverted Front End Installation
-
From the album: Inverted Front End Installation
-
From the album: Inverted Front End Installation
-
From the album: Inverted Front End Installation
-
From the album: Inverted Front End Installation
-
From the album: Inverted Front End Installation
-
From the album: Inverted Front End Installation
-
From the album: Inverted Front End Installation
-
From the album: Inverted Front End Installation
-
From the album: Inverted Front End Installation
-
From the album: Inverted Front End Installation
-

From the album: Inverted Front End Installation
-
From the album: Inverted Front End Installation
-
It's done... Stand by for more to come...
-
From the album: Inverted Front End Installation
© ©vfdiscussion.com
-
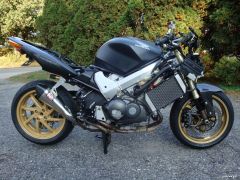
 As the photo title says, this is not my bike. I believe it was built by a friend of vfroem's, Rob Lindemann, and was subsequently sold on. I'm not sure about the bodywork, but based on the custom nature of the rest of the bike, I would bet they are custom painted stock fairings. More photos here: Motor-forum.nl I have tried to email the builder about the bike (I would kill for a copy of the undertail panel he built), but have not heard back from him. Lacy
 -
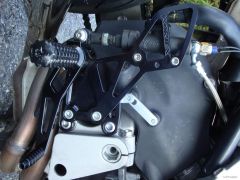
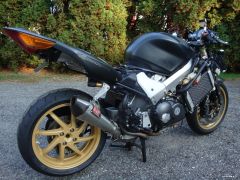
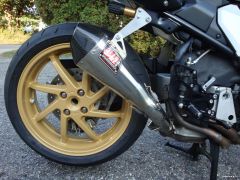
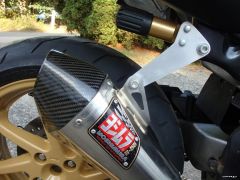
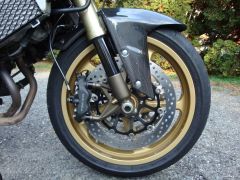
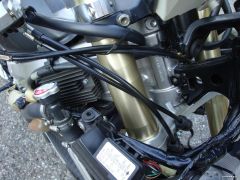
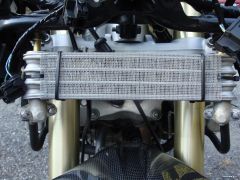
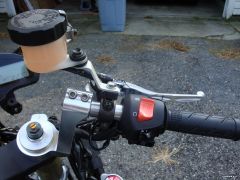
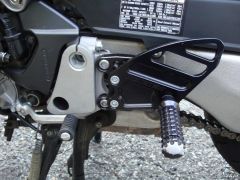
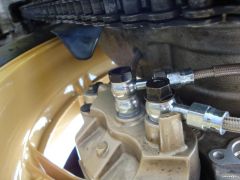
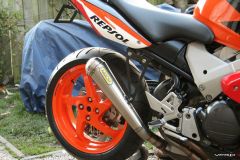
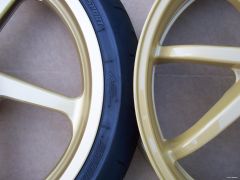
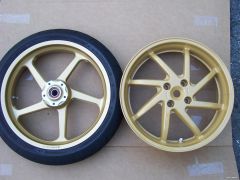
All right, time for some beauty shots... I found a place in New Bedford, MA, that does powdercoating and machining (Allpage Inc.). They stripped the 8 spoke Enkei 3rd generation VFR750 wheel I had mounted to my VTEC and powdercoated it Sahara Gold. I (somewhat impatiently) had them order and coat the wheel without getting a paint chip (powder chip?!?) to check the color better against the Marvic magnesium front wheel I was trying to match it to, so the color is further off than I would like. It doesn't come out well in the photos, but the newly coated rear is somewhat brighter than the Marvic, which looks like a dirtier color of gold. Oh well, I kept telling myself that the two wheels would be 5 feet apart, the front would be partially covered by the rotors/forks/calipers/fender, and that it would only be really noticeable on the right side of the bike. We'll see how it all looks when it's bolted together in the sunlight... I also had them strip and coat the aluminum nuts I have been using, which is awesome except... the powder is thick enough that the socket doesn't fit, and unfortunately there isn't a standard (English unit) socket that is slightly larger. I'll probably wrap some paper around the nuts and try to use the next higher metric size, and if that doesn't work I may have the shop strip them again and have them anodized instead (as they were originally). Speaking of stripping powdercoating, I forgot to have the shop mask off the mating surface of the wheel (where it mounts to the hub), so I'll be sanding that off prior to mounting the rear. Rookie move... The rest of the parts came out very well. The titanium front axle spacers look fine; I originally intended to have complete spacers machined that would replace the stock ZX-10R spacers and give me the additional 12mm I needed, but after talking to the machine shop I decided to minimize how much titanium cutting I was going to ask of them to reduce cost somewhat (so these will be in addition to the stock ZX-10R spacers). I have since discovered that the spacers are a little bit too wide (about 0.1mm each), so I need to re-measure everything and get them shaved down. The ZX-10R axle is different than our VFR (and most Honda) axles; it doesn't shoulder against only one fork leg, instead it compresses both fork legs together, so my spacer/wheel hub width needs to be right on so I don't end up tweaking the fork legs and adding stiction (or blowing out my fork seals). The rotor spacers are 5mm thick, to correctly place the Ducati 848 rotors within the 2004-2007 CBR1000RR calipers. I measured up the 848 rotors and had the spacers machined to match the contours of the rotor, so they don't stick out; since the machine shop was going to cut them on a CNC mill, I didn't feel too bad about adding a longer cutting profile. With the spacers, the rotors are no longer precisely located on the wheel hub shoulder, so I eyeballed that when torquing the rotor bolts and had the wheel balanced again after installing the rotors. No weights needed! Finally, the rearset brackets. These adapt 2004-2007 CBR1000RR/2003-2006 CBR600RR Vortex rearsets to the VFR800 VTEC. The original Vortex relocating brackets are angled and space their mounting bolts too far apart for the VFR, so I redesigned them to fit correctly. I couldn't get a position that exactly replicated the stock peg location because the Vortex peg brackets are pretty long, which meant the holes to provide a stock location were way too close to the relocater bracket mounting holes. So, instead they feature a "stock" location that is the same height as the stock VFR pegs but 10mm back, with additional positions from 10mm down to 20mm up and up to 30 mm back. In the photo below, the Vortex brackets are on the left (with the angled mounting holes) and mine are on the right. If anyone is interested, I can provide SolidWorks or .dxf files of the brackets. In my case, I got a good set of used rearsets (Vortex part number RS205) from eBay for $125, then paid around $140 for the machining of the brackets and $40 for the anodizing. I also bought another Vortex part, a shifter bracket, to try to get the rearset shifter system to work. I'll report on that when I declare success or... well, I won't declare failure, but will try another angle. Your costs may vary, but it is a viable alternative to the Sato Racing rearsets if you have access to a CNC mill and don't mind fiddling to make the shifter work. I also have a CBR600RR rear brake master cylinder to go on the rearsets, which would probably not be the right move if you were keeping the linked brakes on your VFR. Again, some of this may not be for the faint of heart. So, that's where I am, still assembling and with a couple of outsourced jobs yet to complete. Once the axle spacers are shaved, I can bolt the front end together for good. I'm currently mounting the controls to my Cycle Cat clip ons, and need to drill a few holes in them. Then, it's time to strip the rest of the ABS parts off and weigh them to determine how much I have really lost; based on my (very incomplete) spreadsheet, I will be very lucky to reach 50 pounds total removed at the end of this set of modifications. That all depends on how much the remaining ABS parts weigh (both ABS control valves, the ABS computer, lines, and whatever proportioning valve is resident under the seat). Once my accounting is complete, I will share it so we can compare measured weights of the stock components and the new stuff I bolted on. Then, it will be time to ride... Lacy
-
Rusty, Thanks! The wheel paint turned out awesome; I was just going to leave the triple bare, but guilt took over and I decided to shoot it despite its out-of-the-way location. The Duplicolor primer and paint looks good; we'll see how it lasts! Lacy
-
From the album: Inverted Front End Installation
-
From the album: Inverted Front End Installation