Search the Community
Showing results for tags 'sh847'.
Found 1 result
-
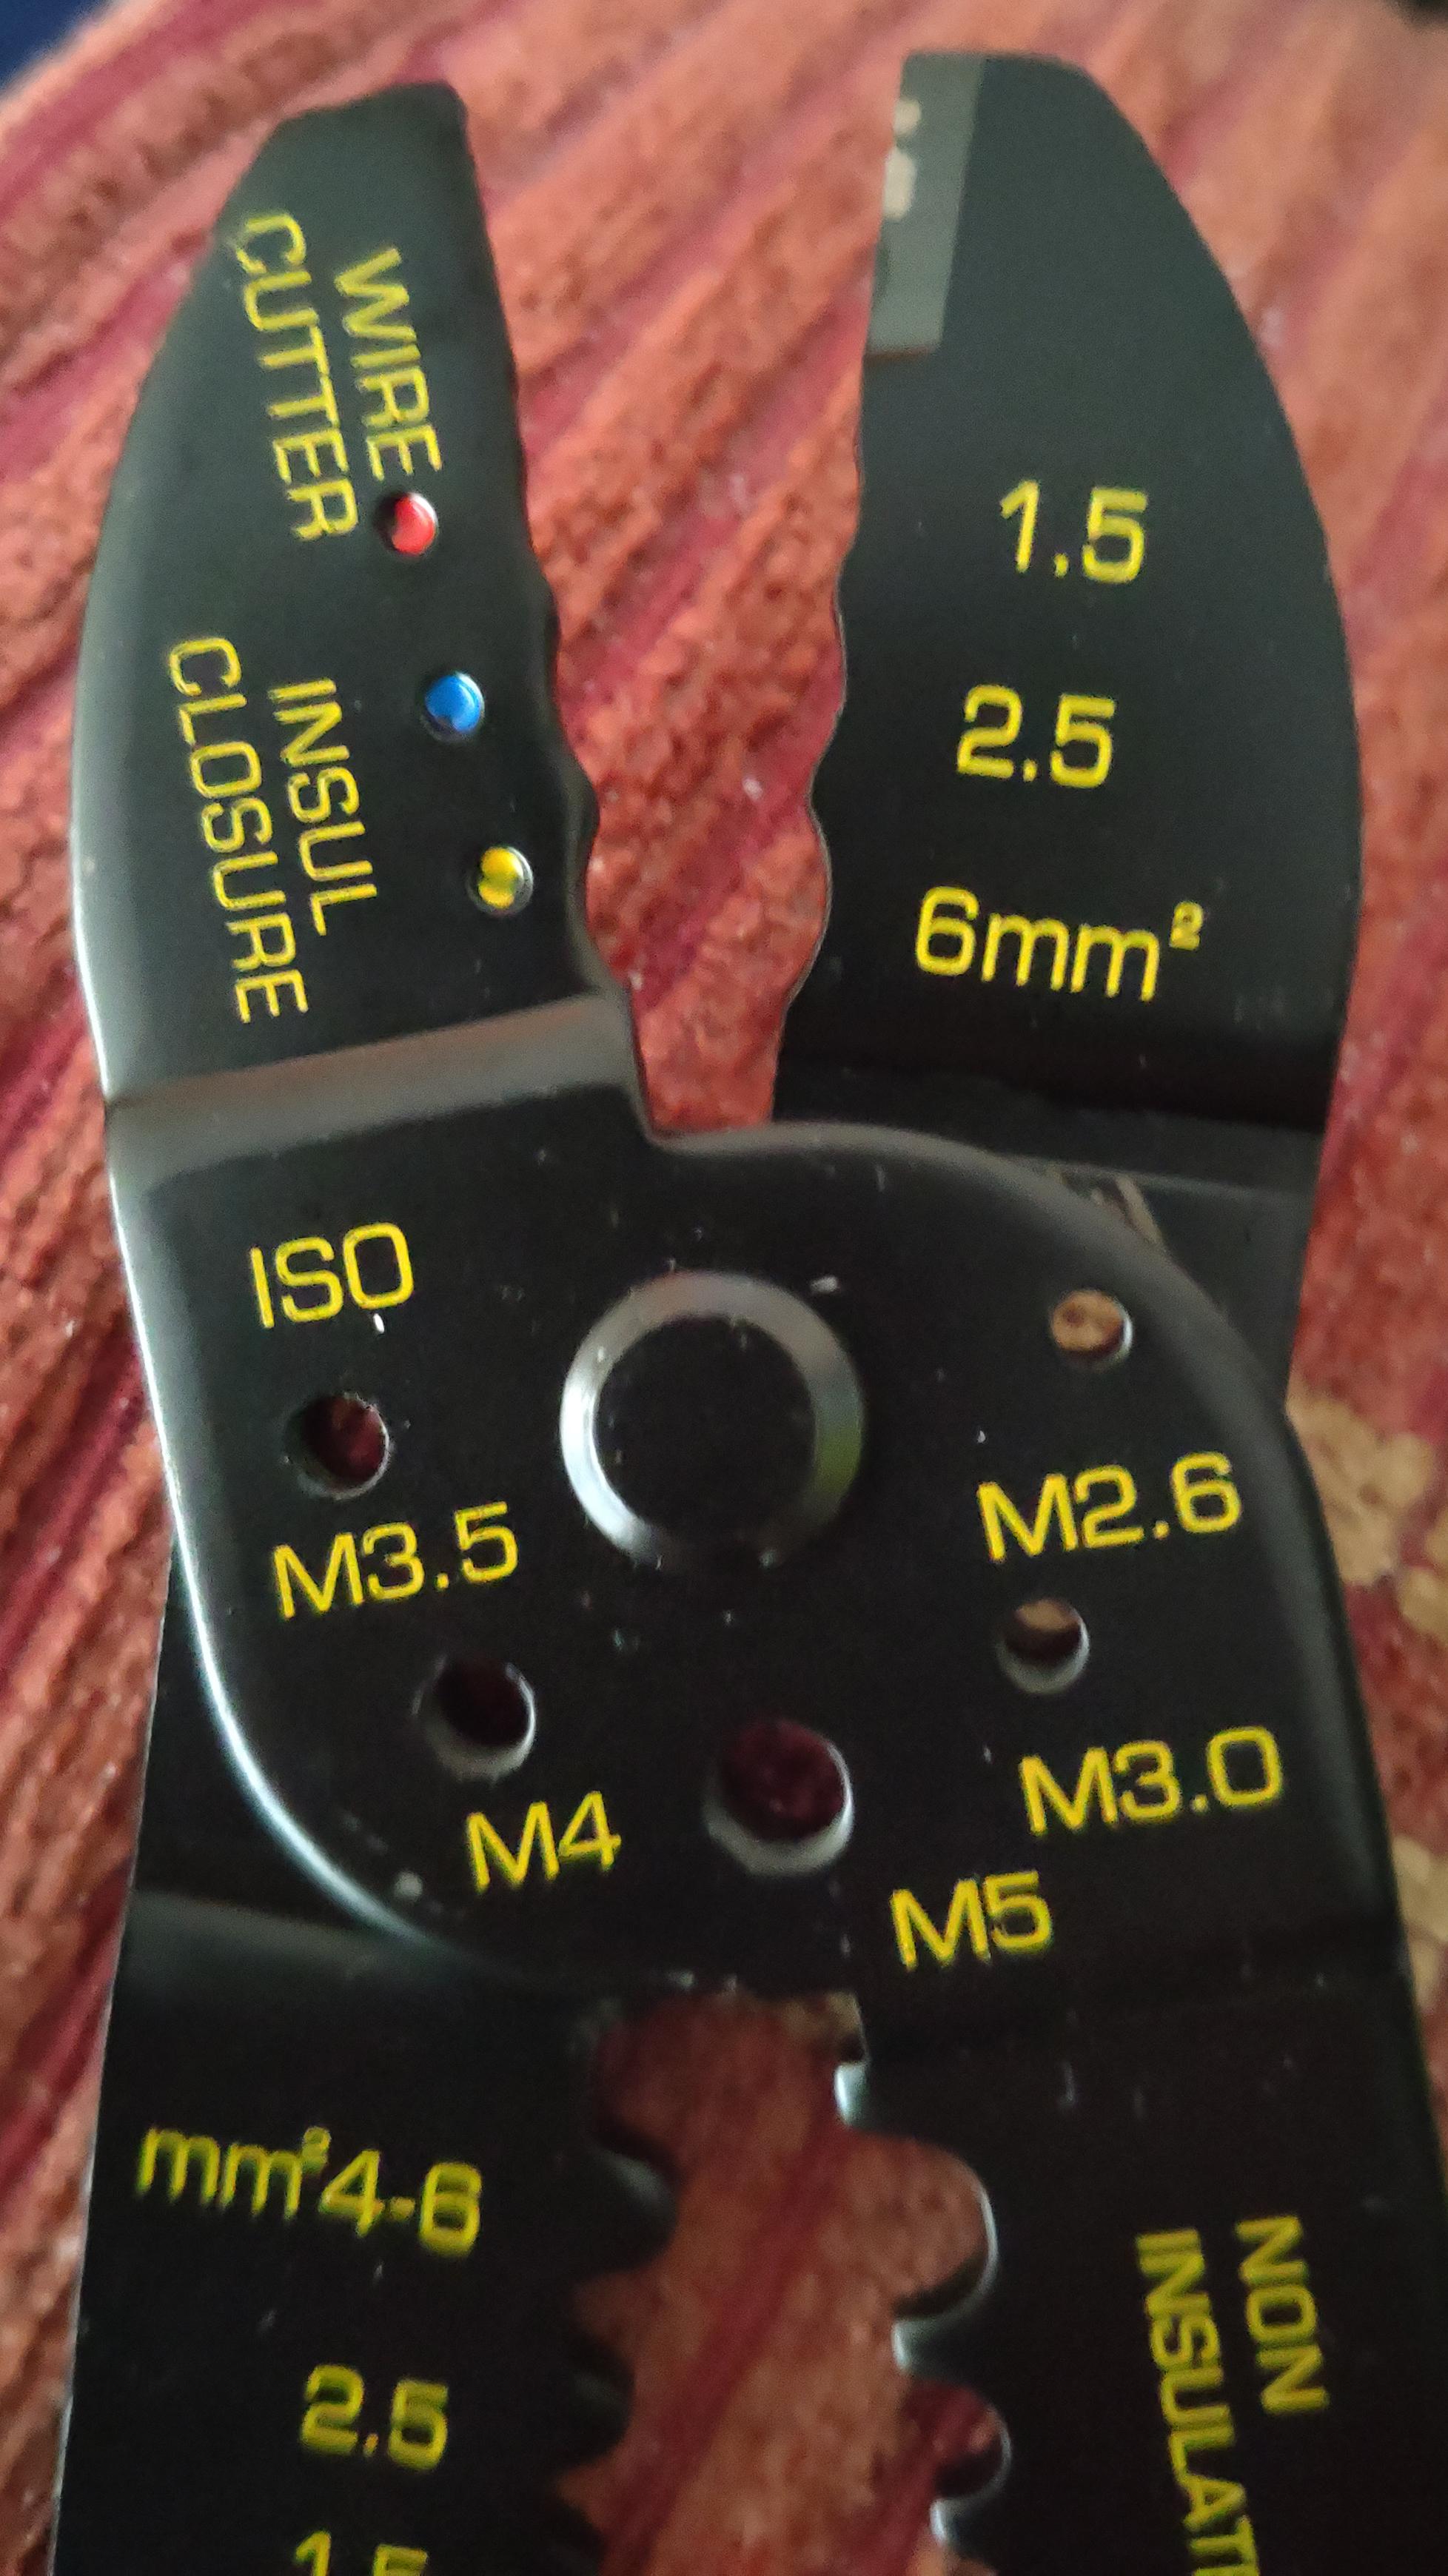
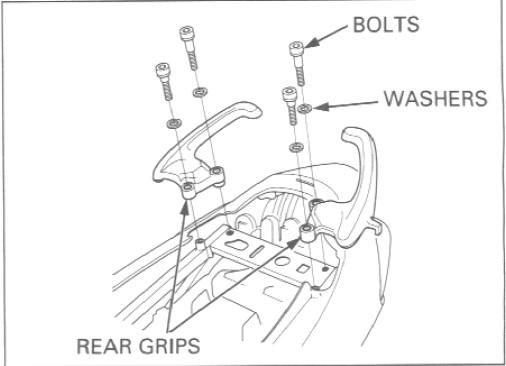
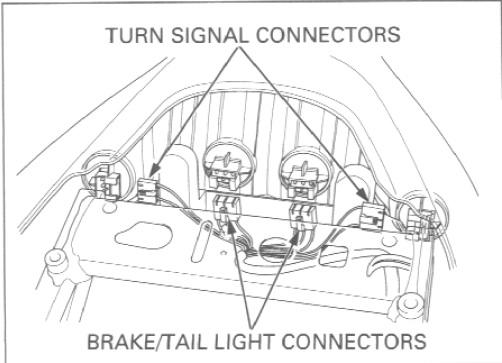
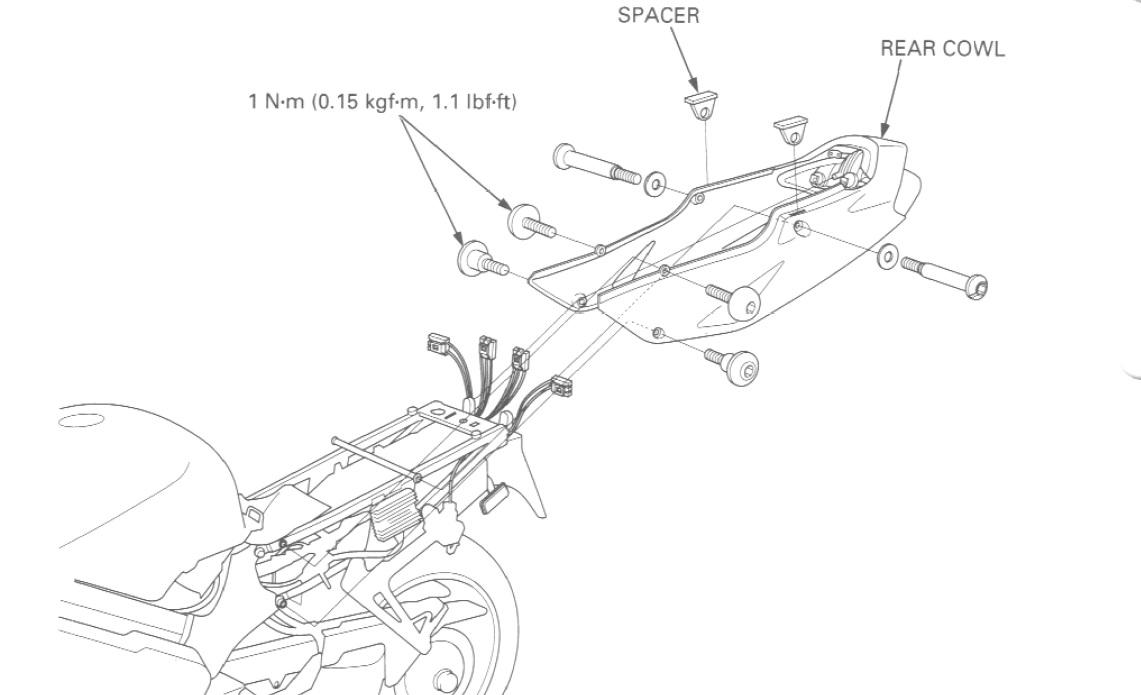
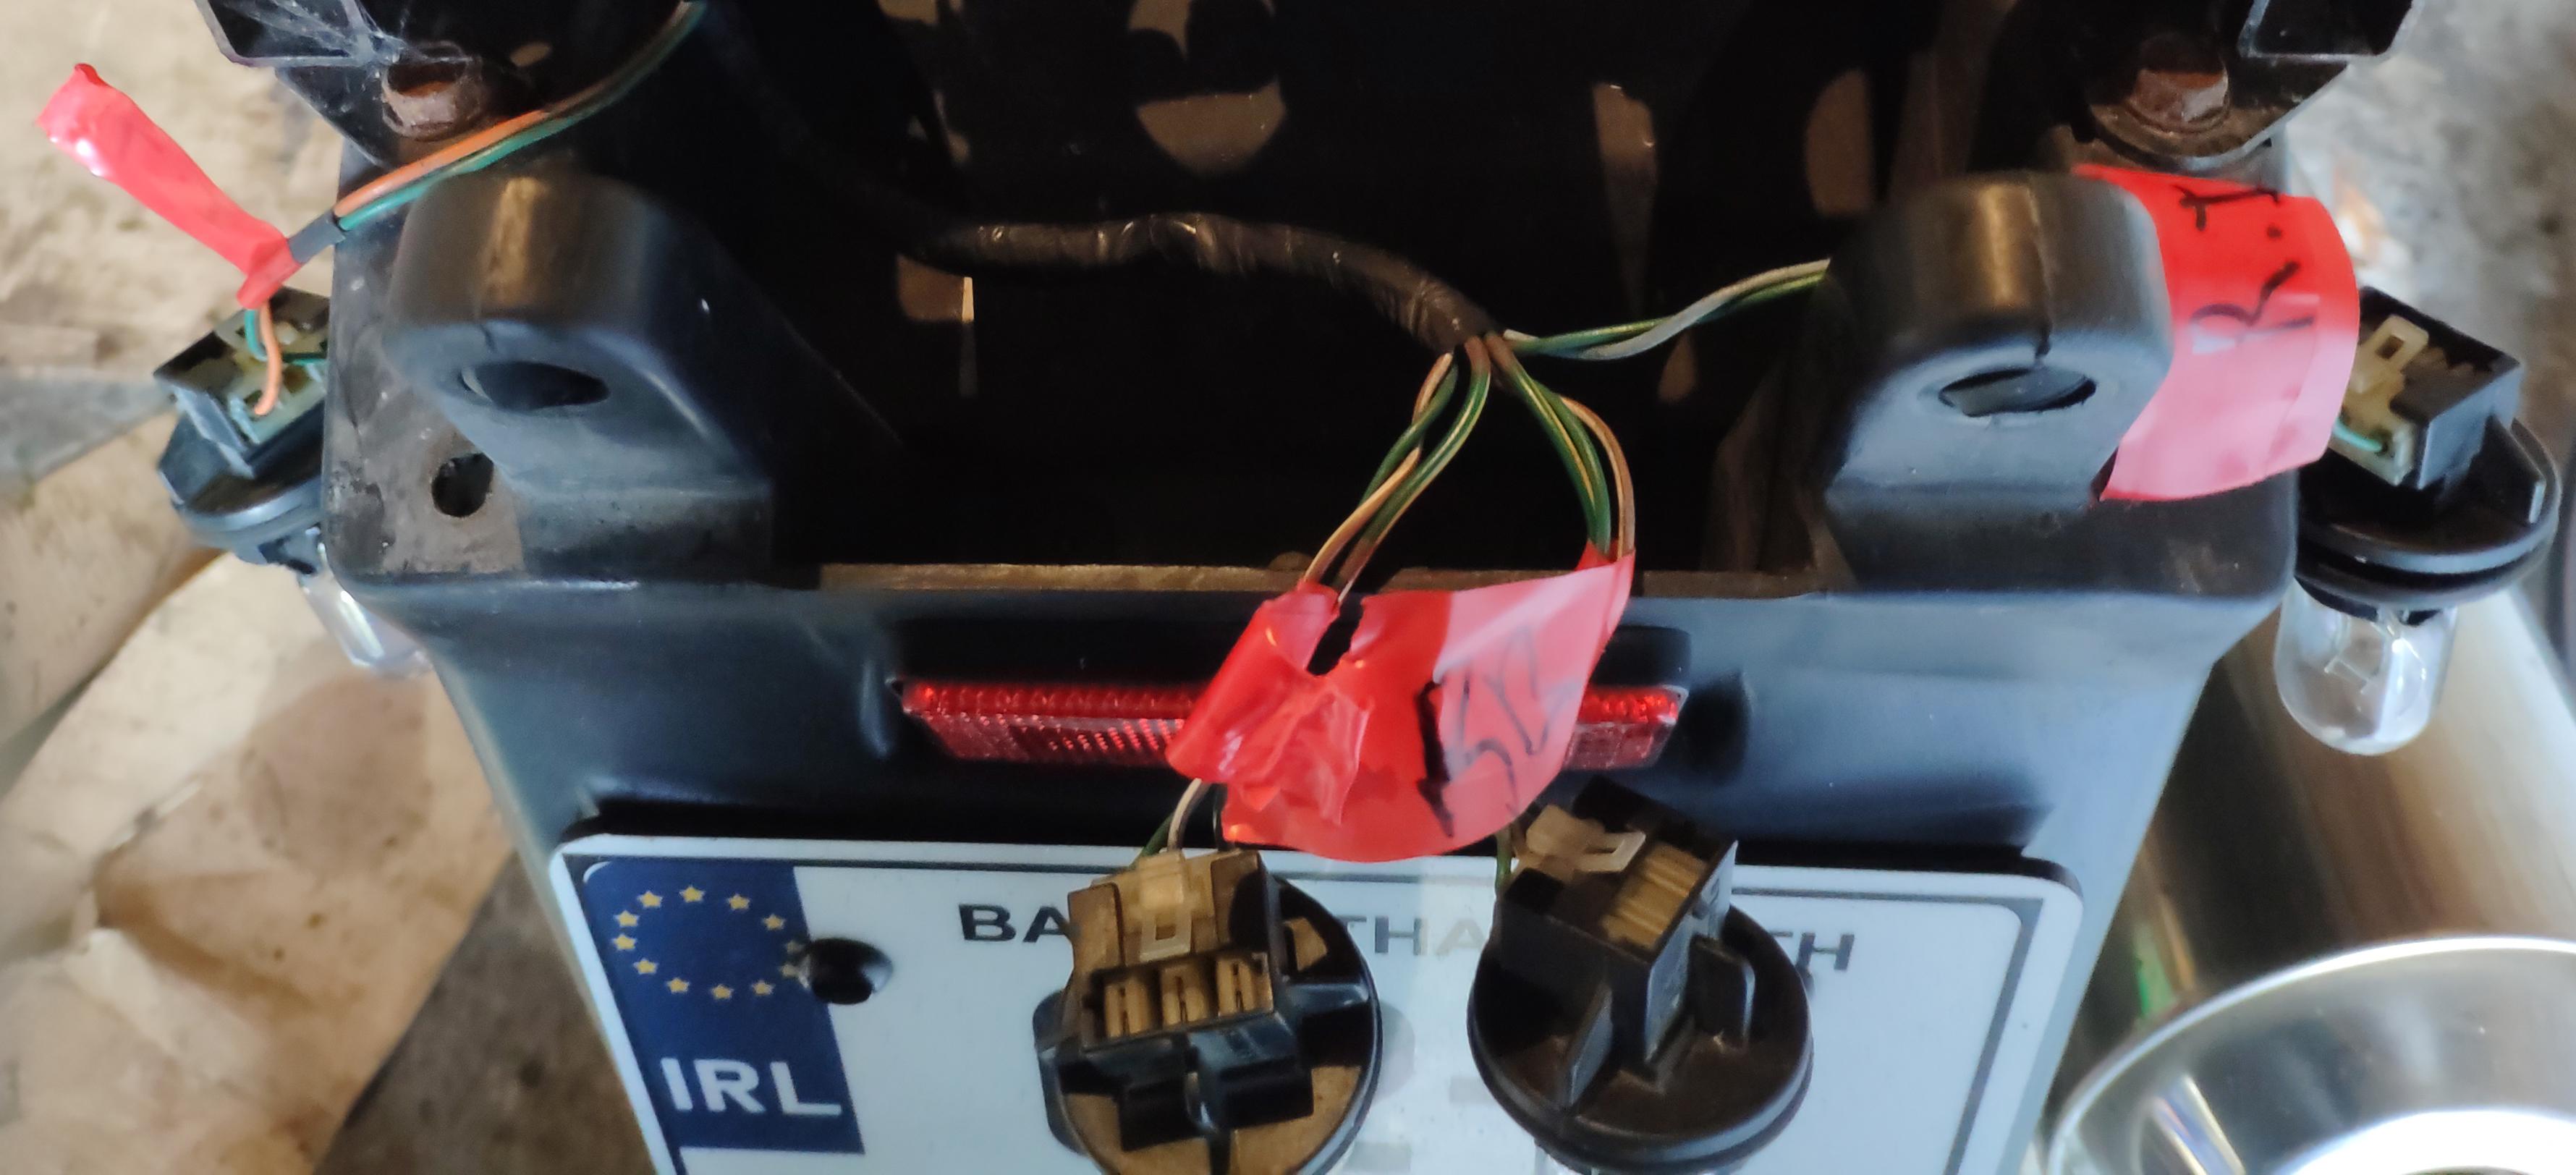
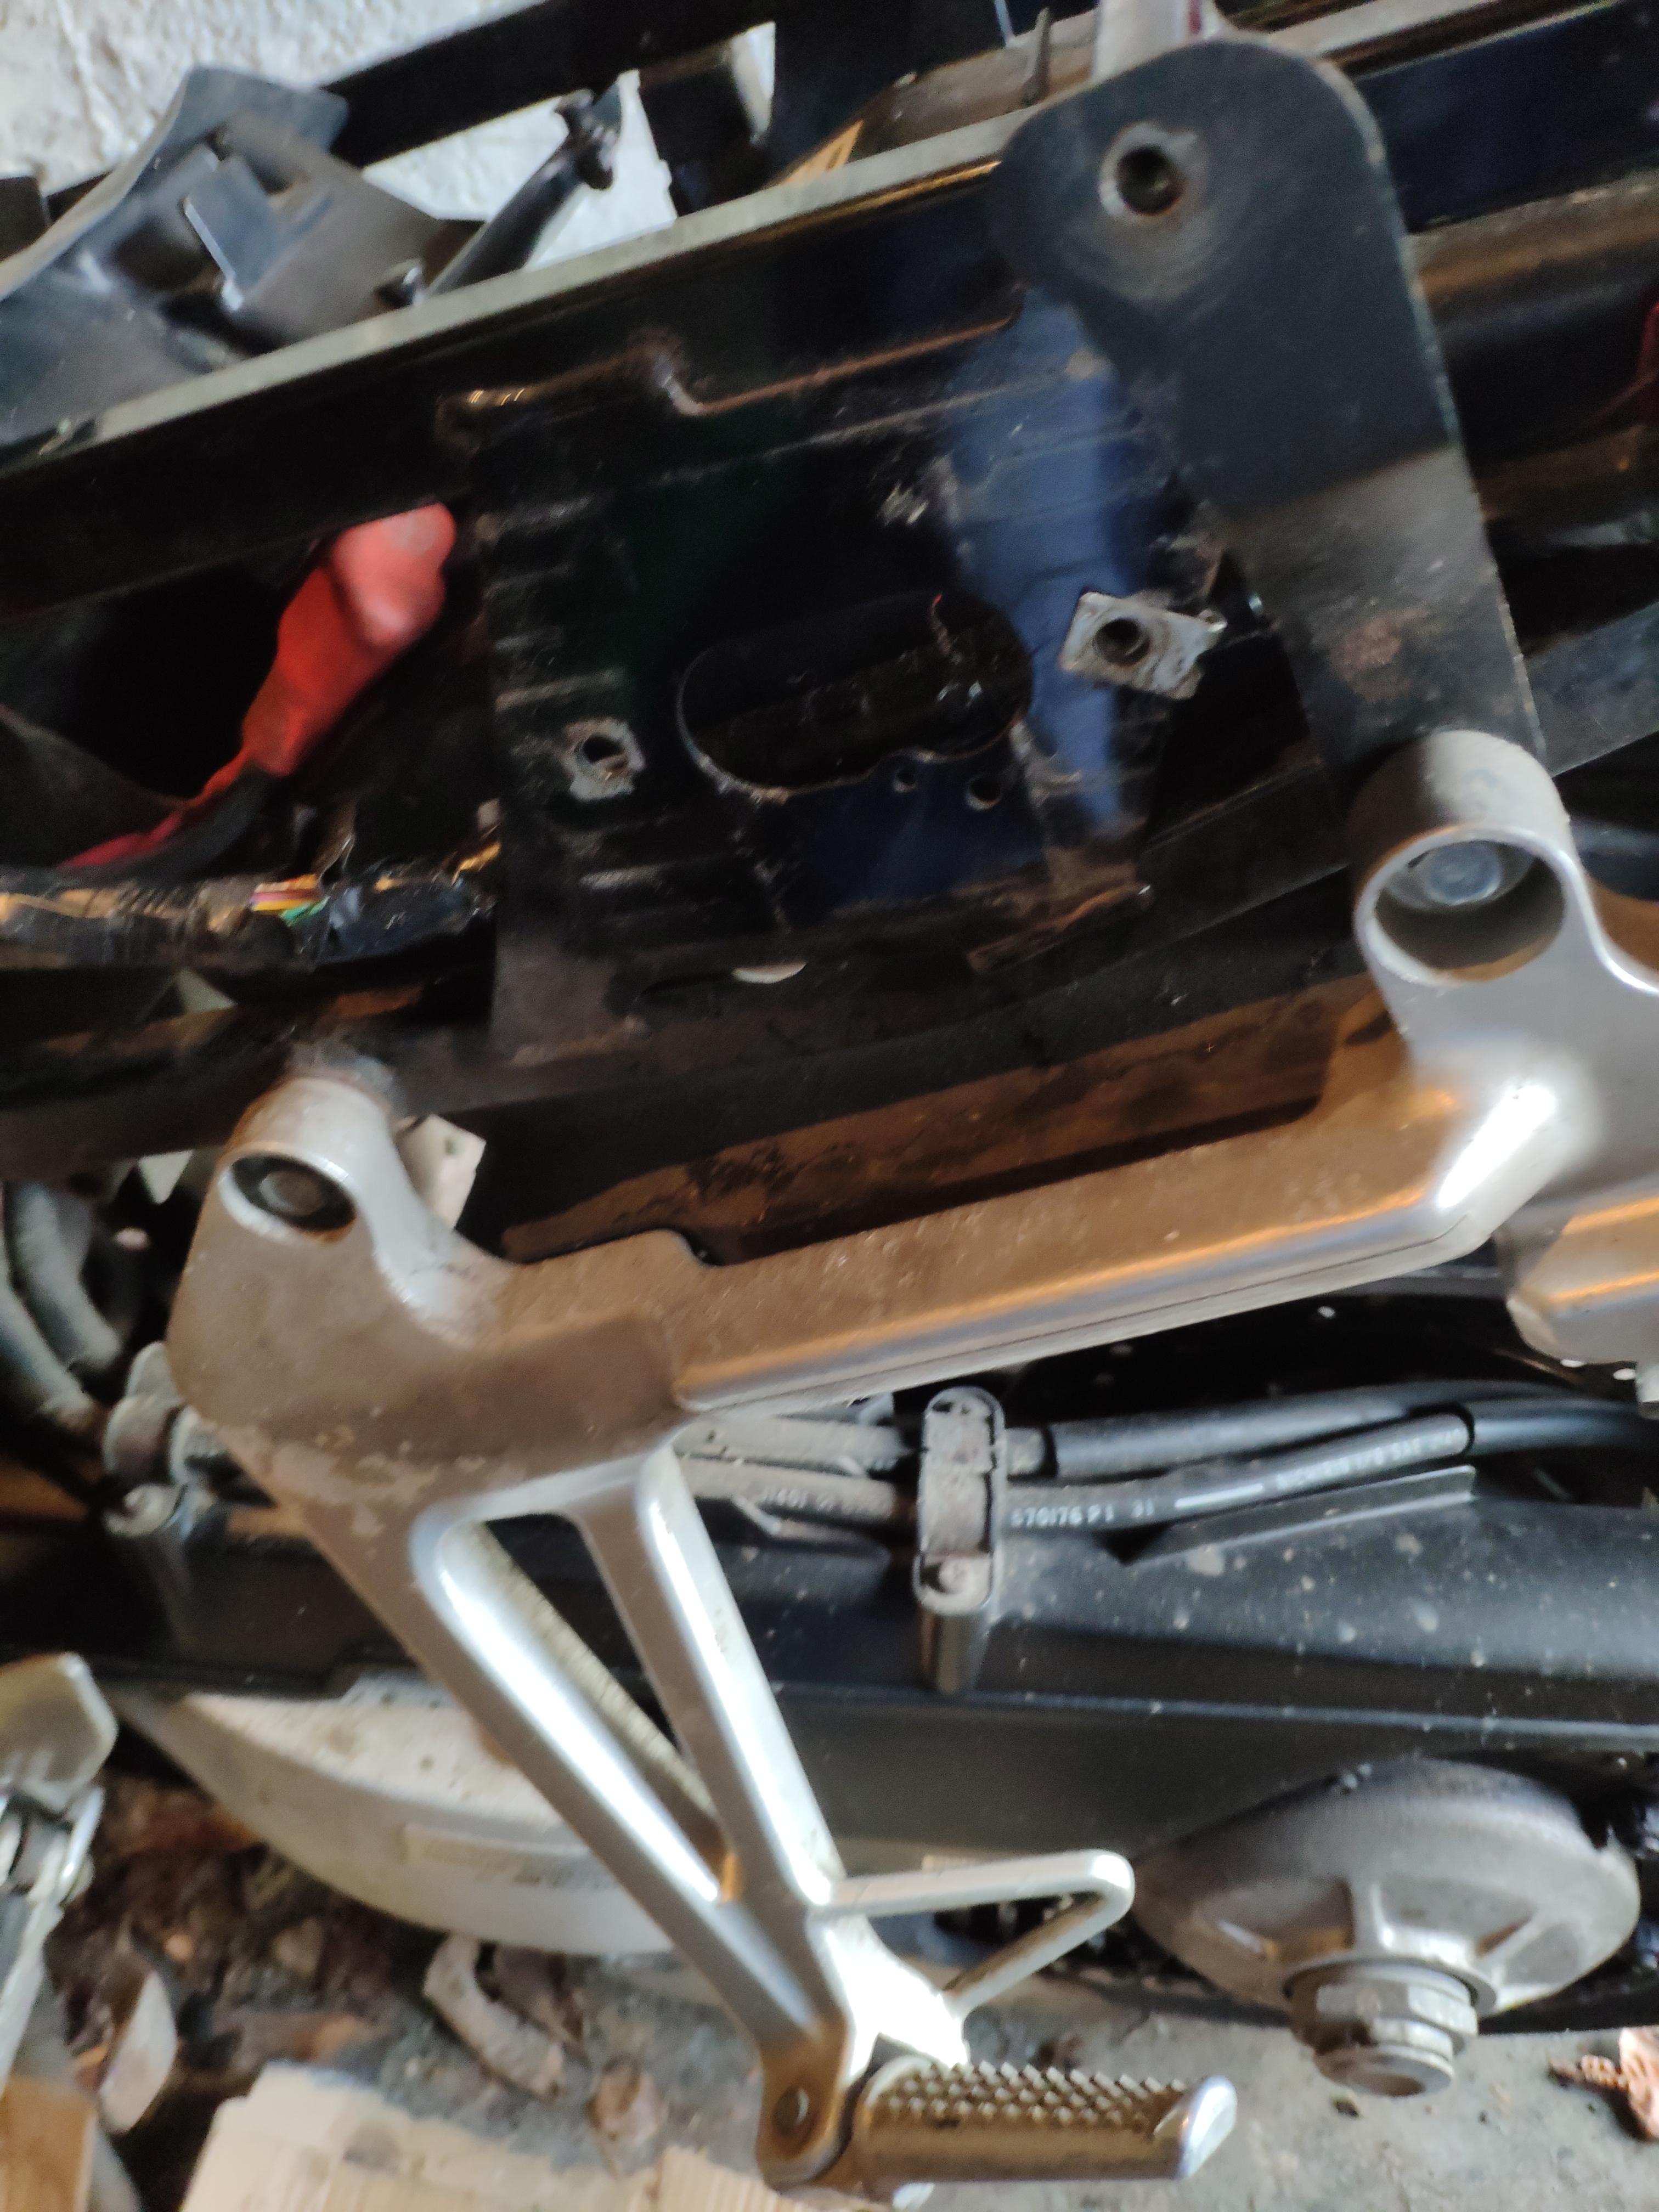
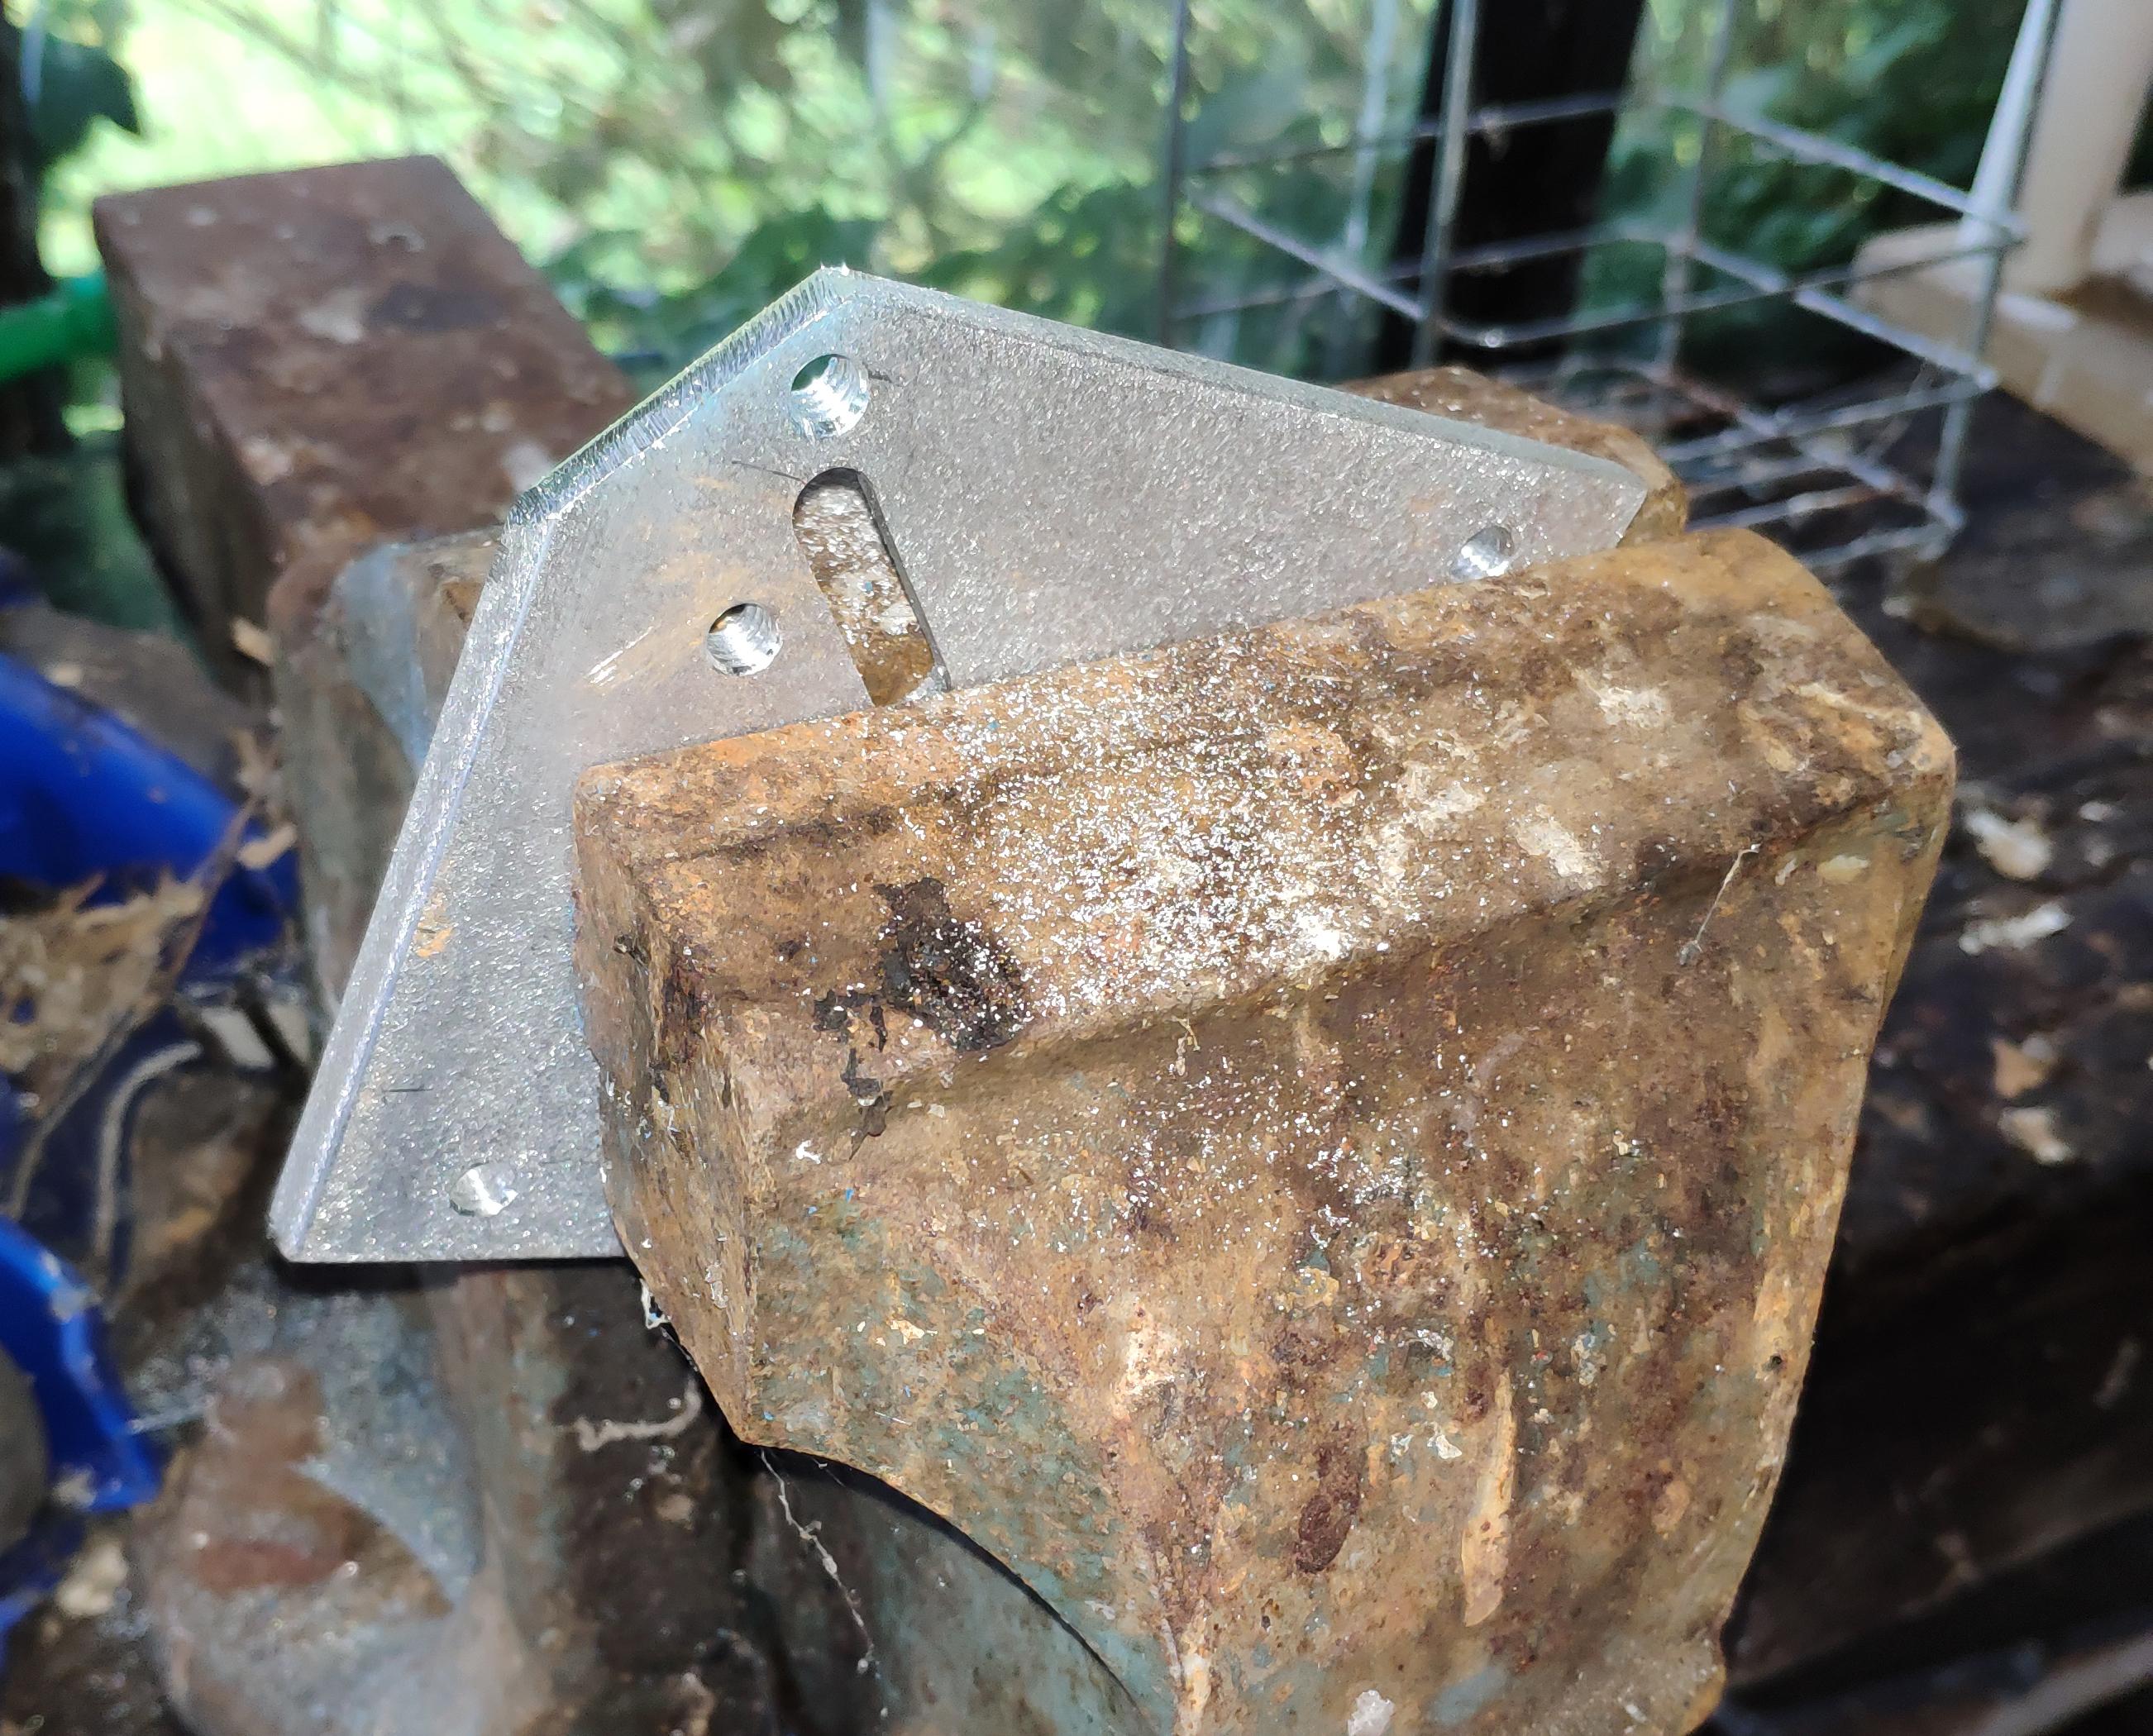
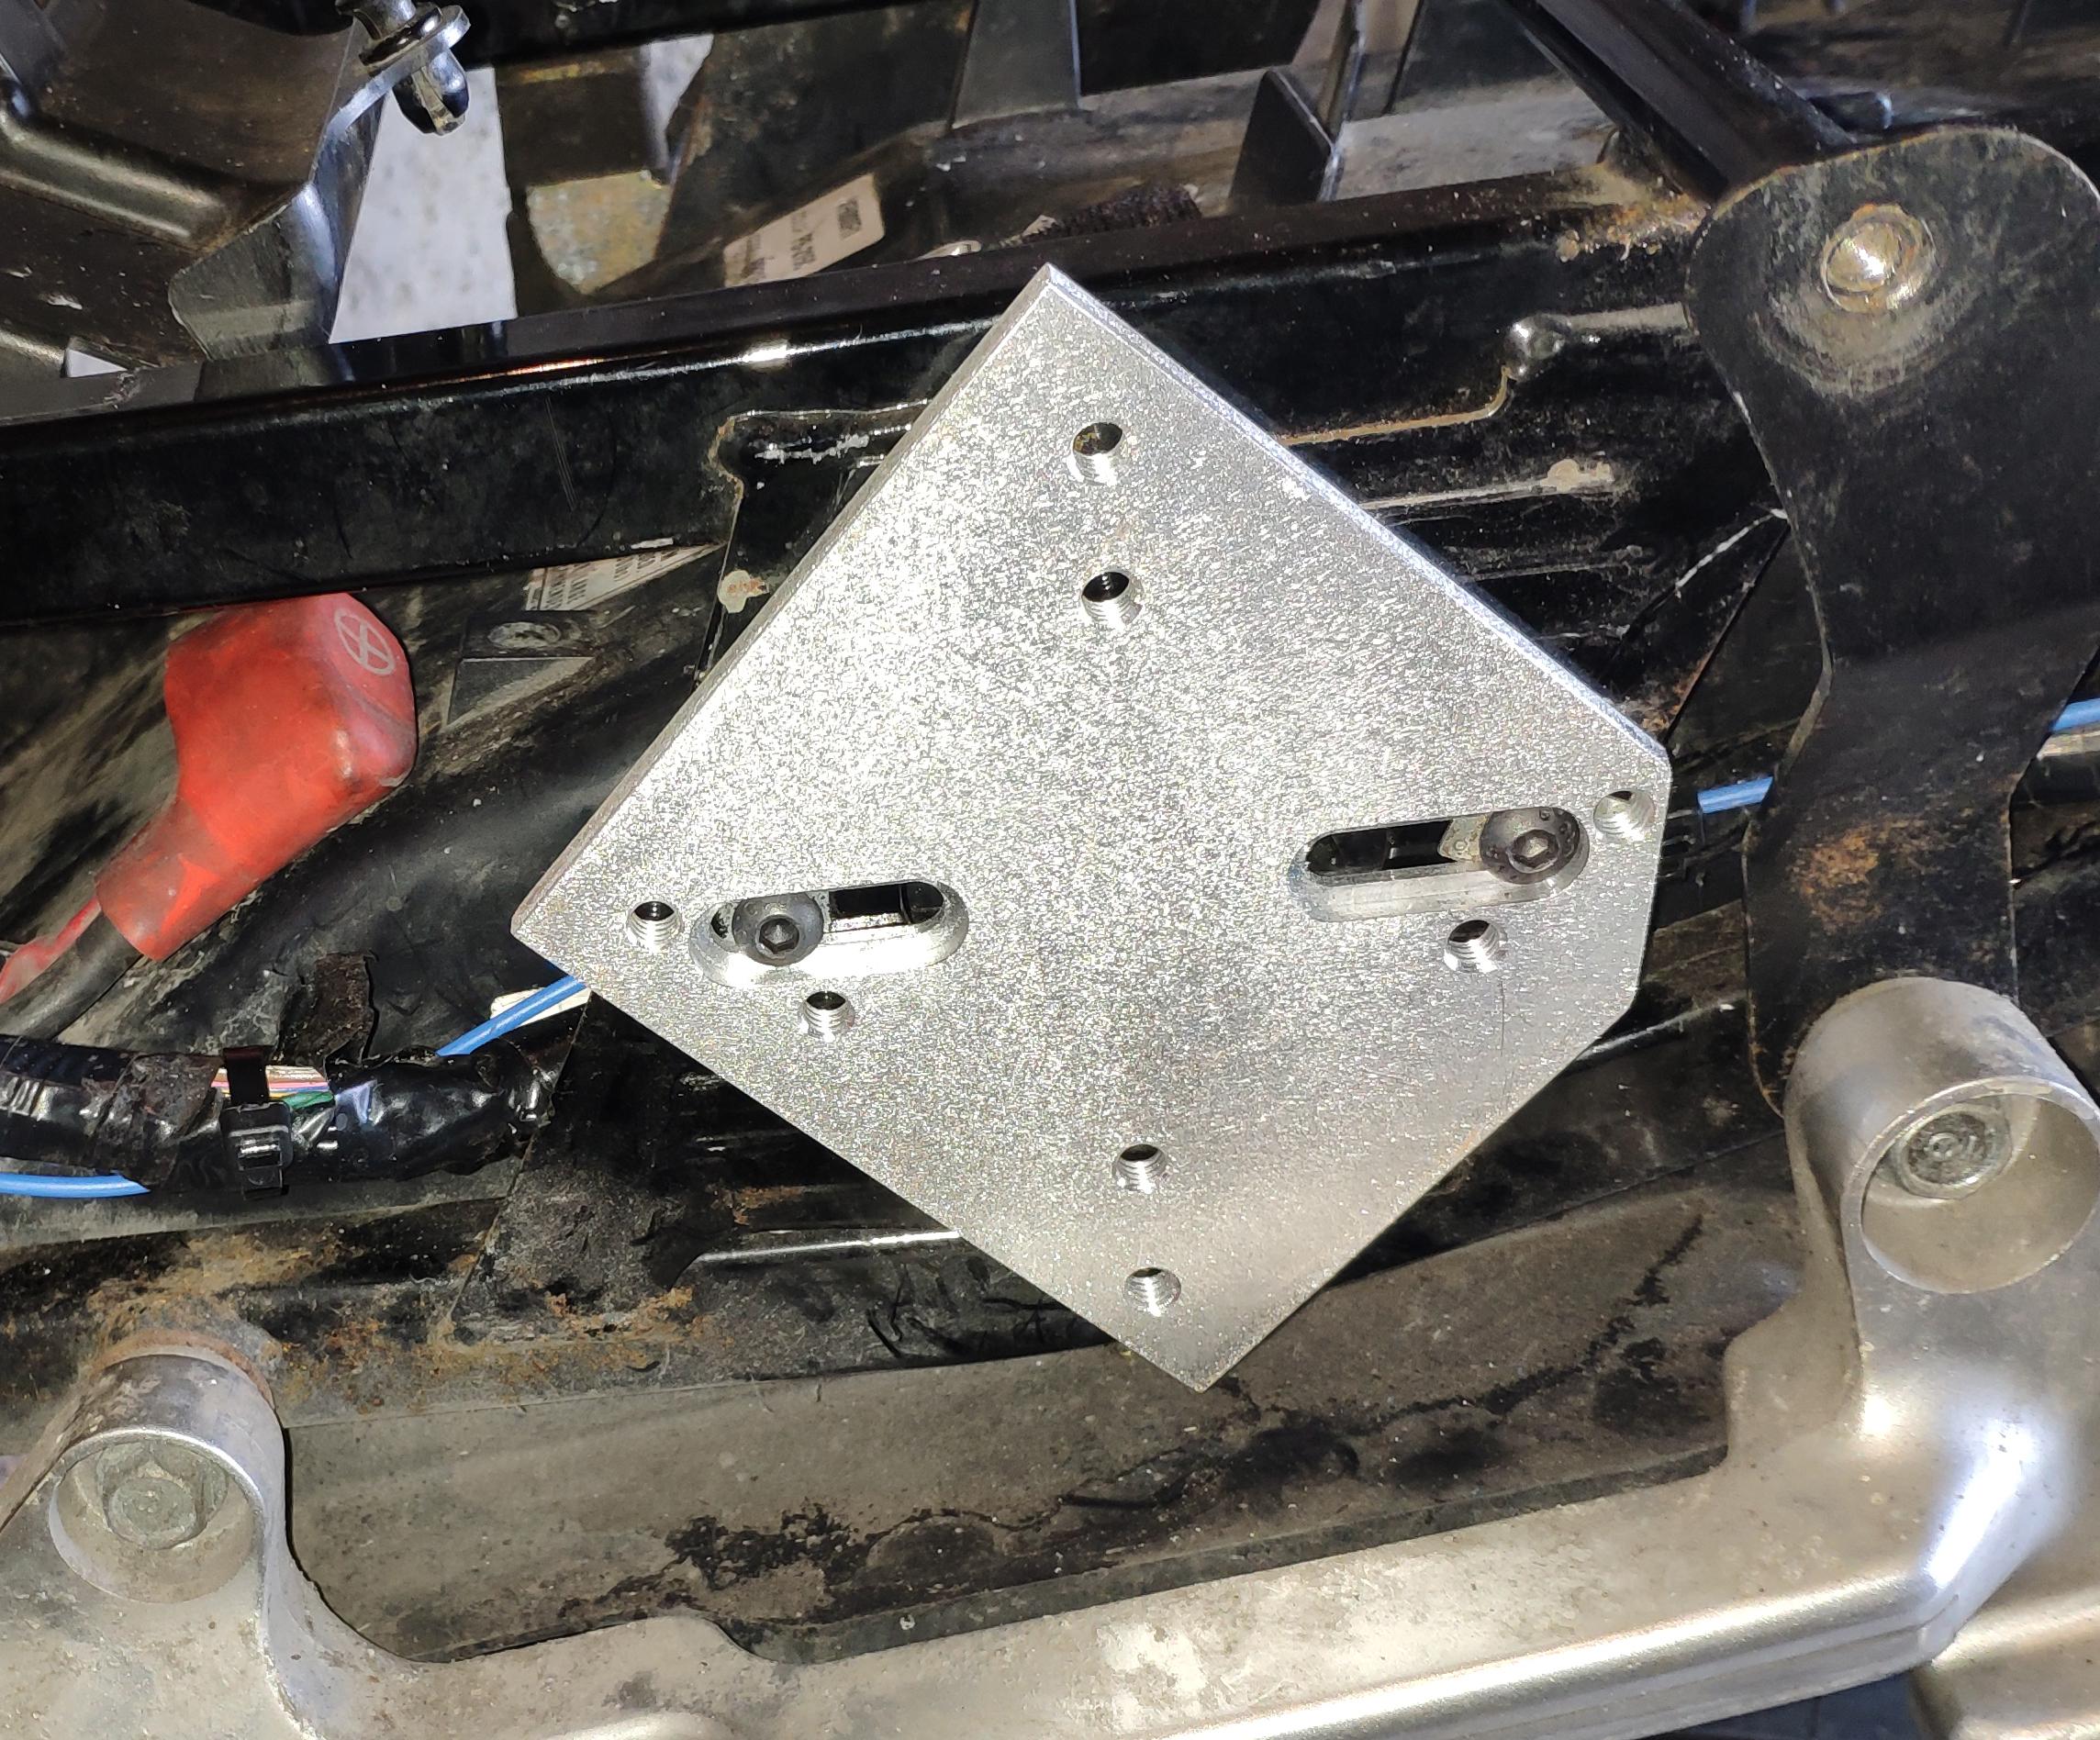
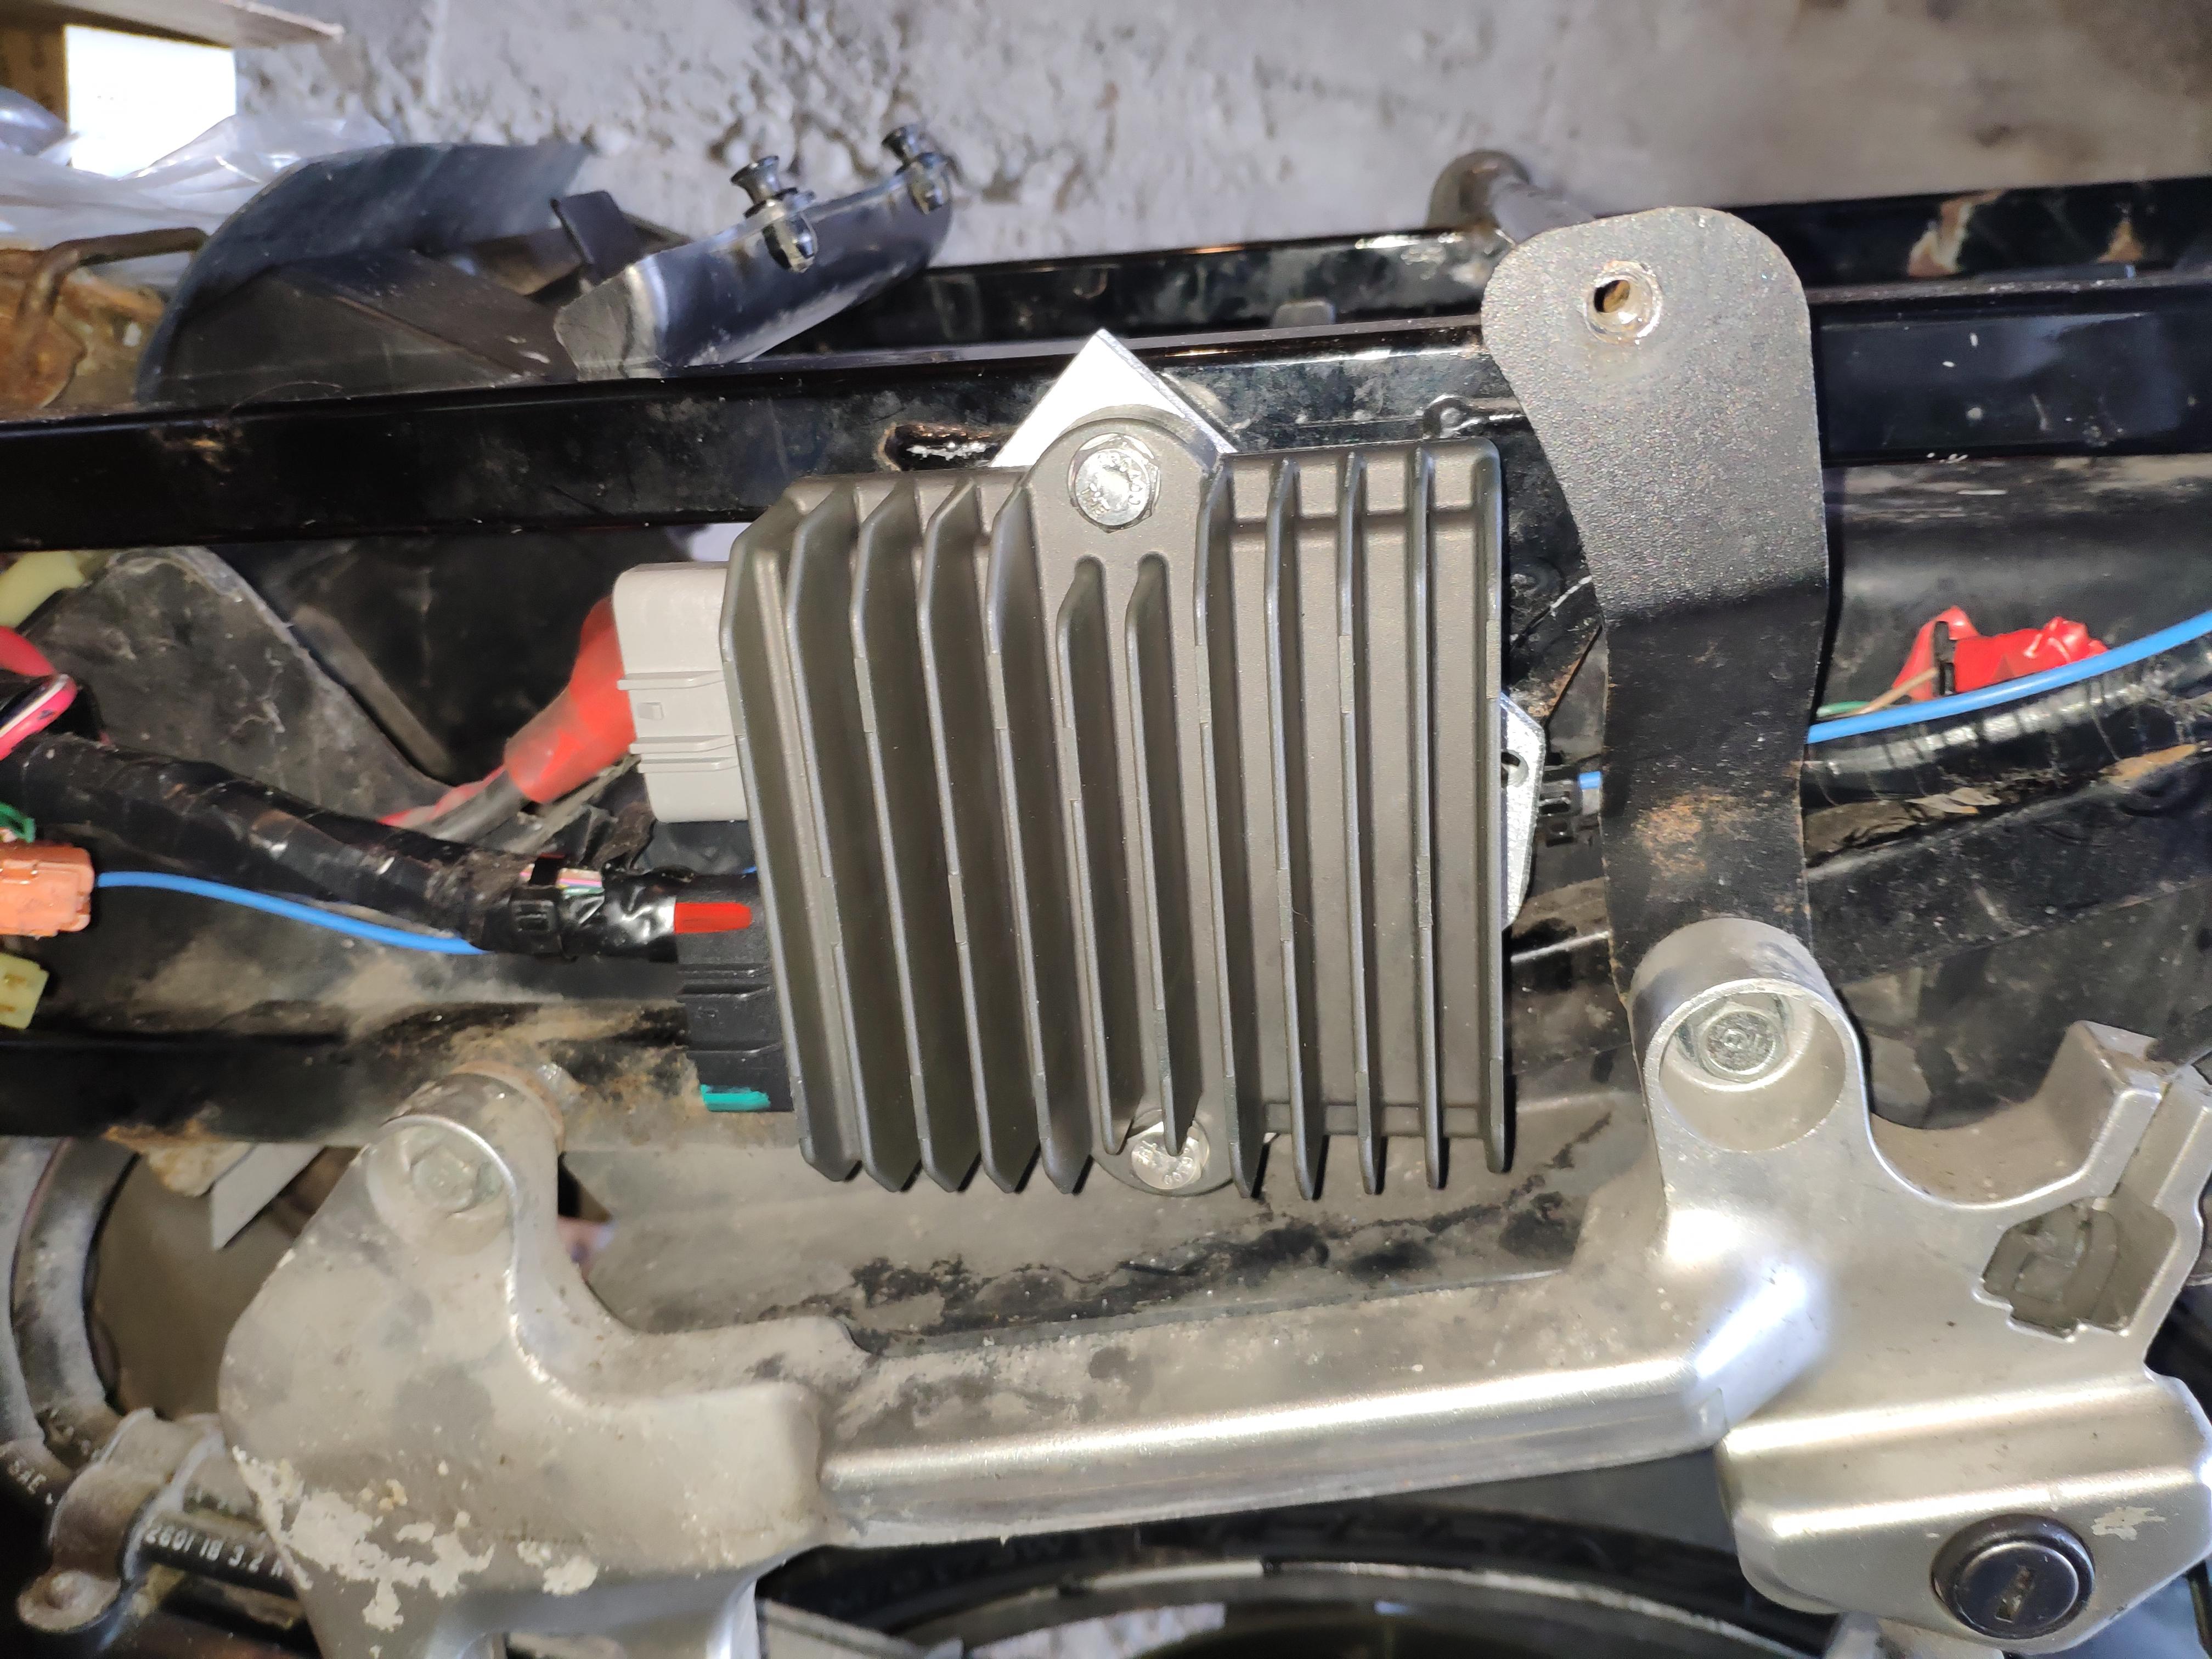
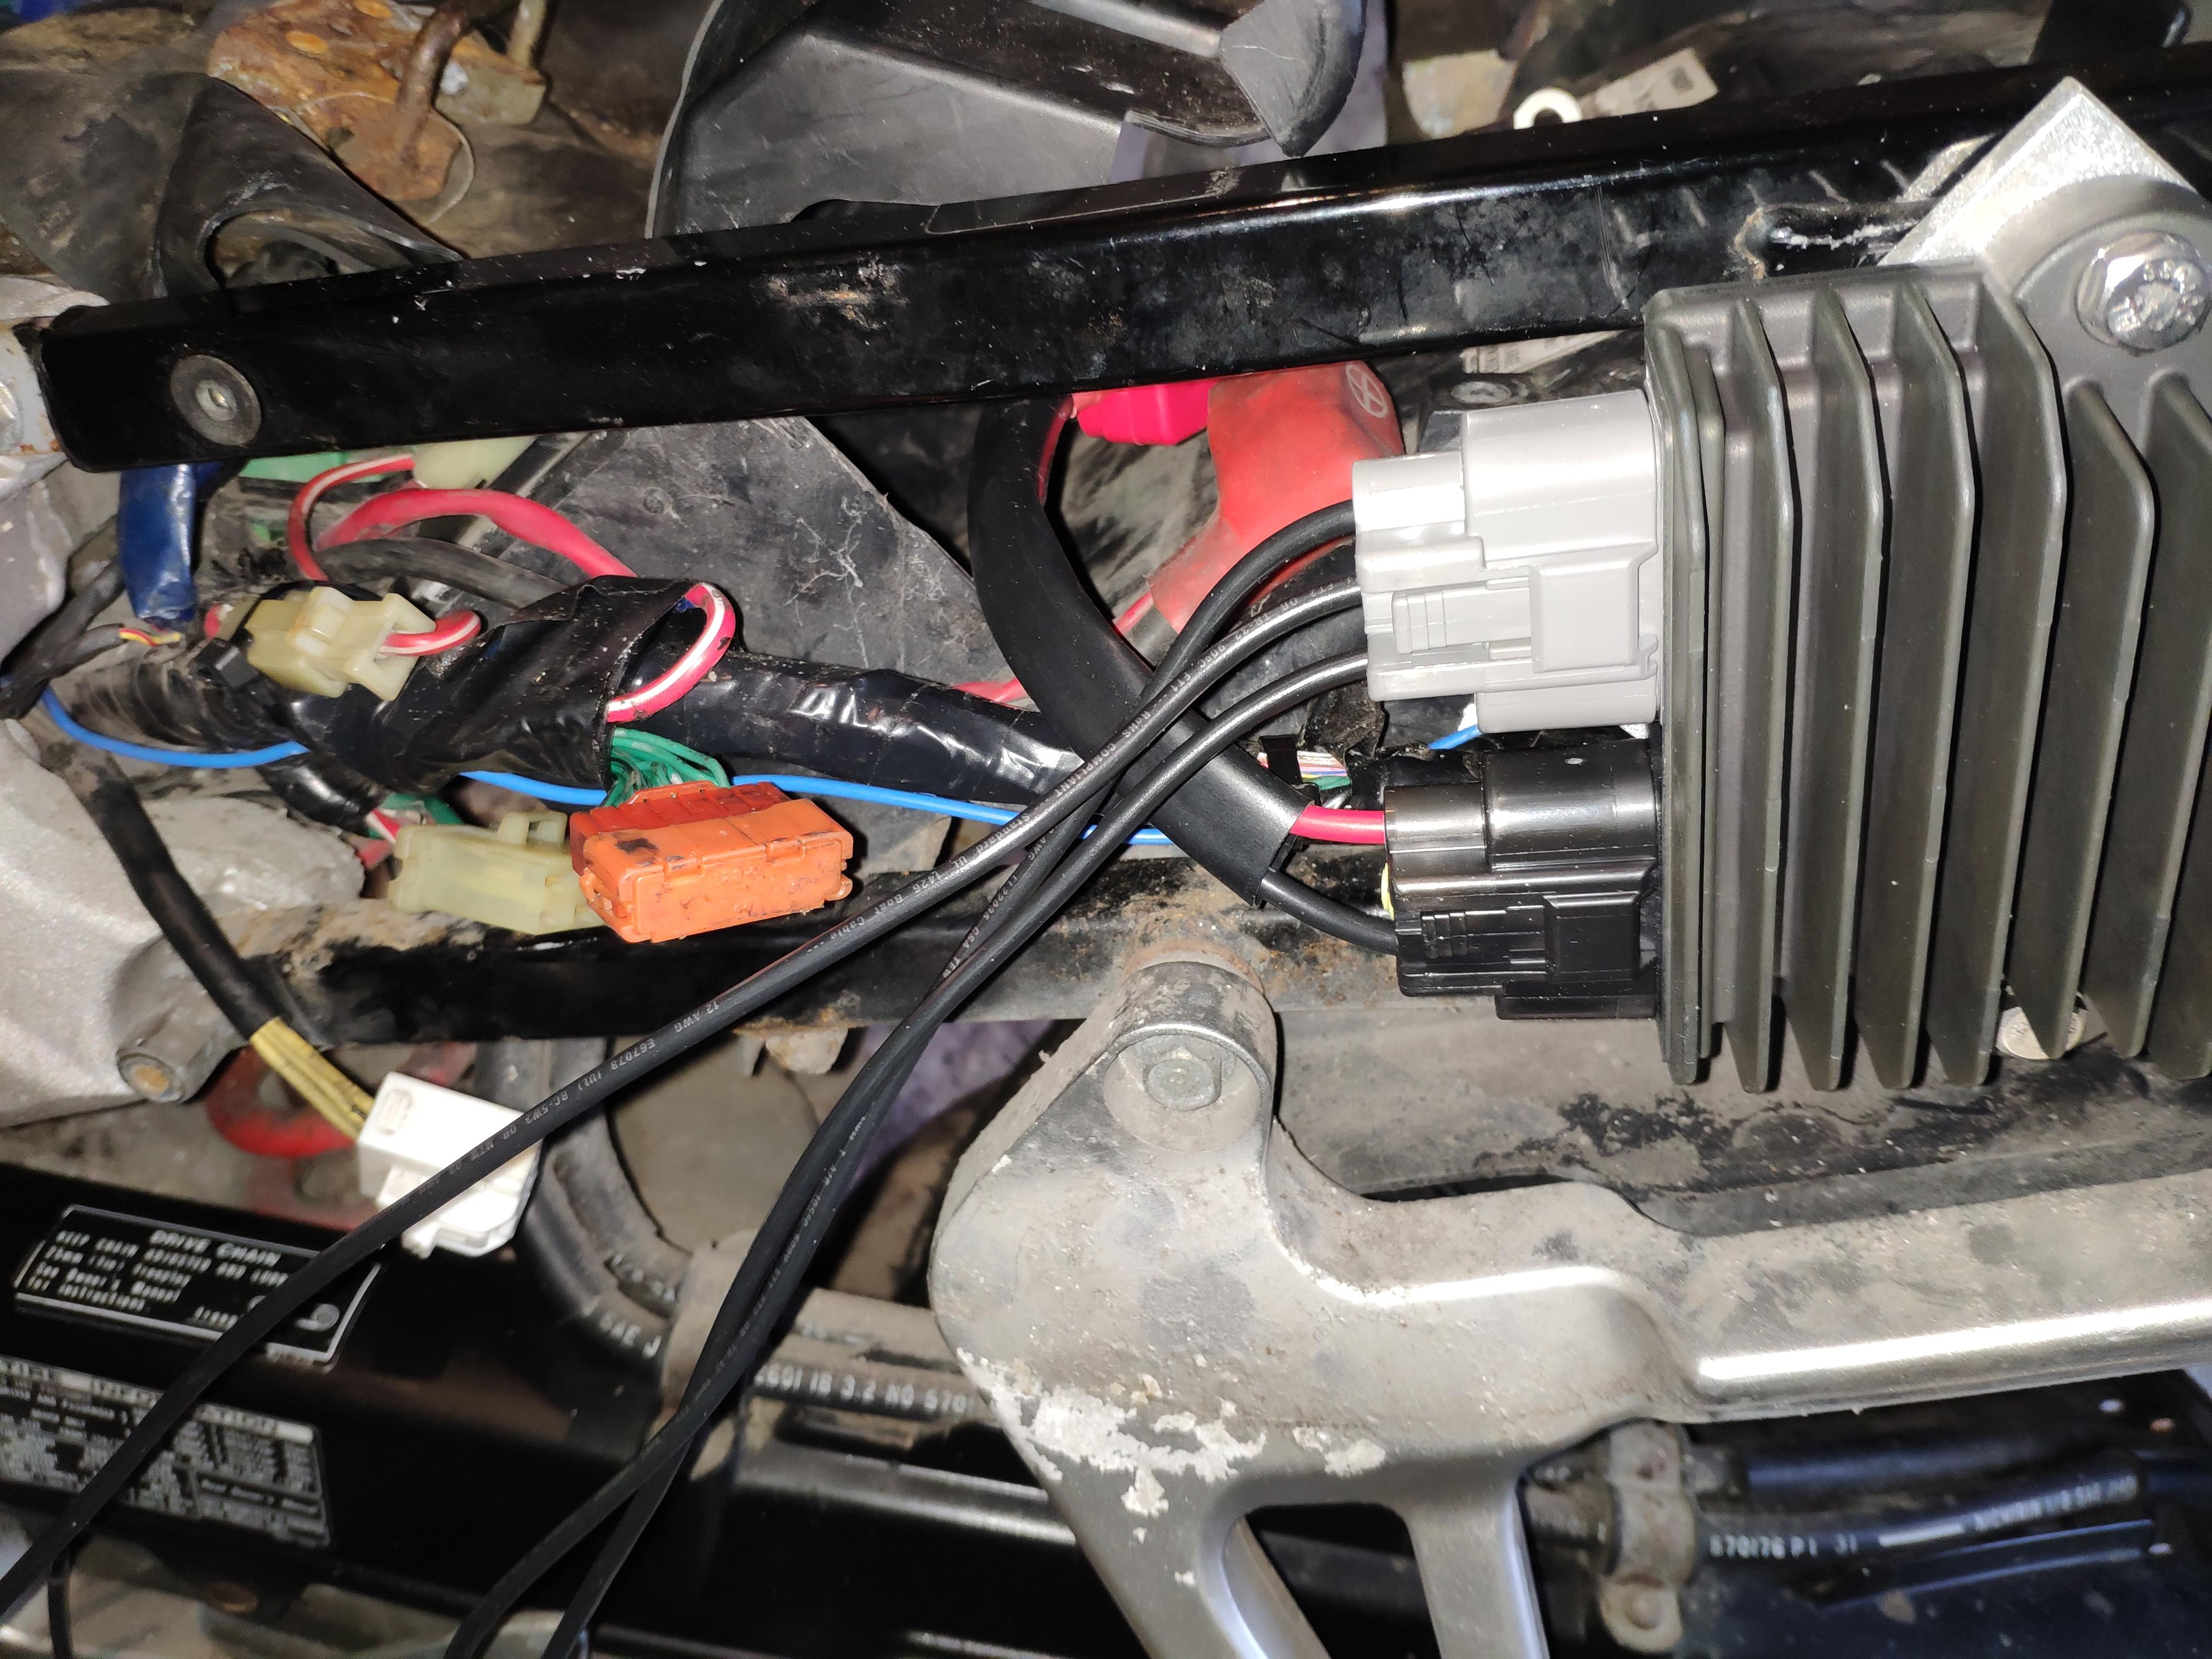
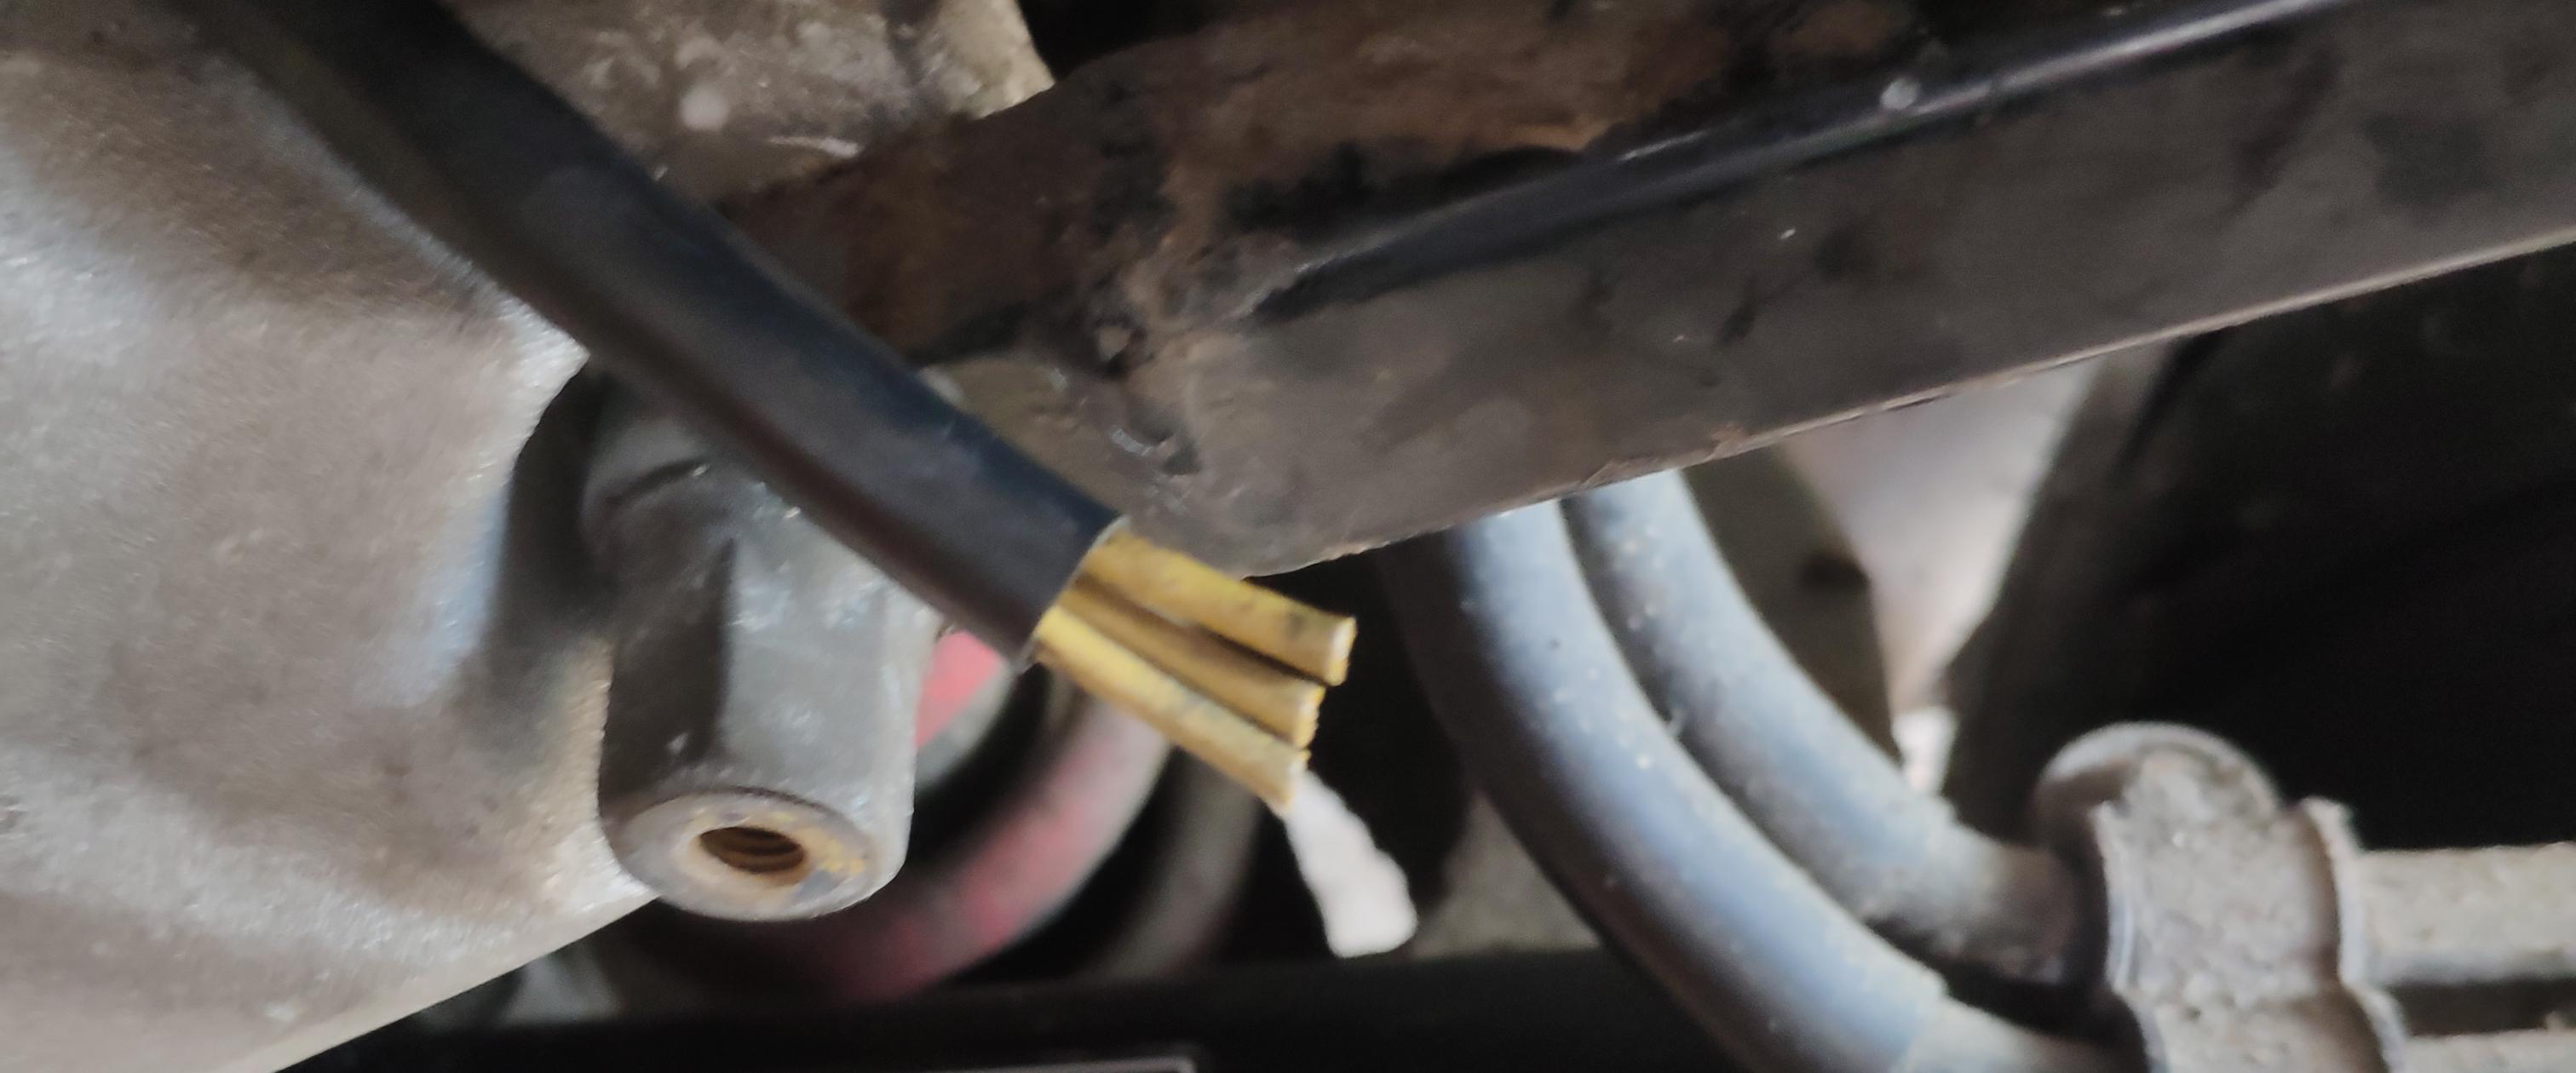
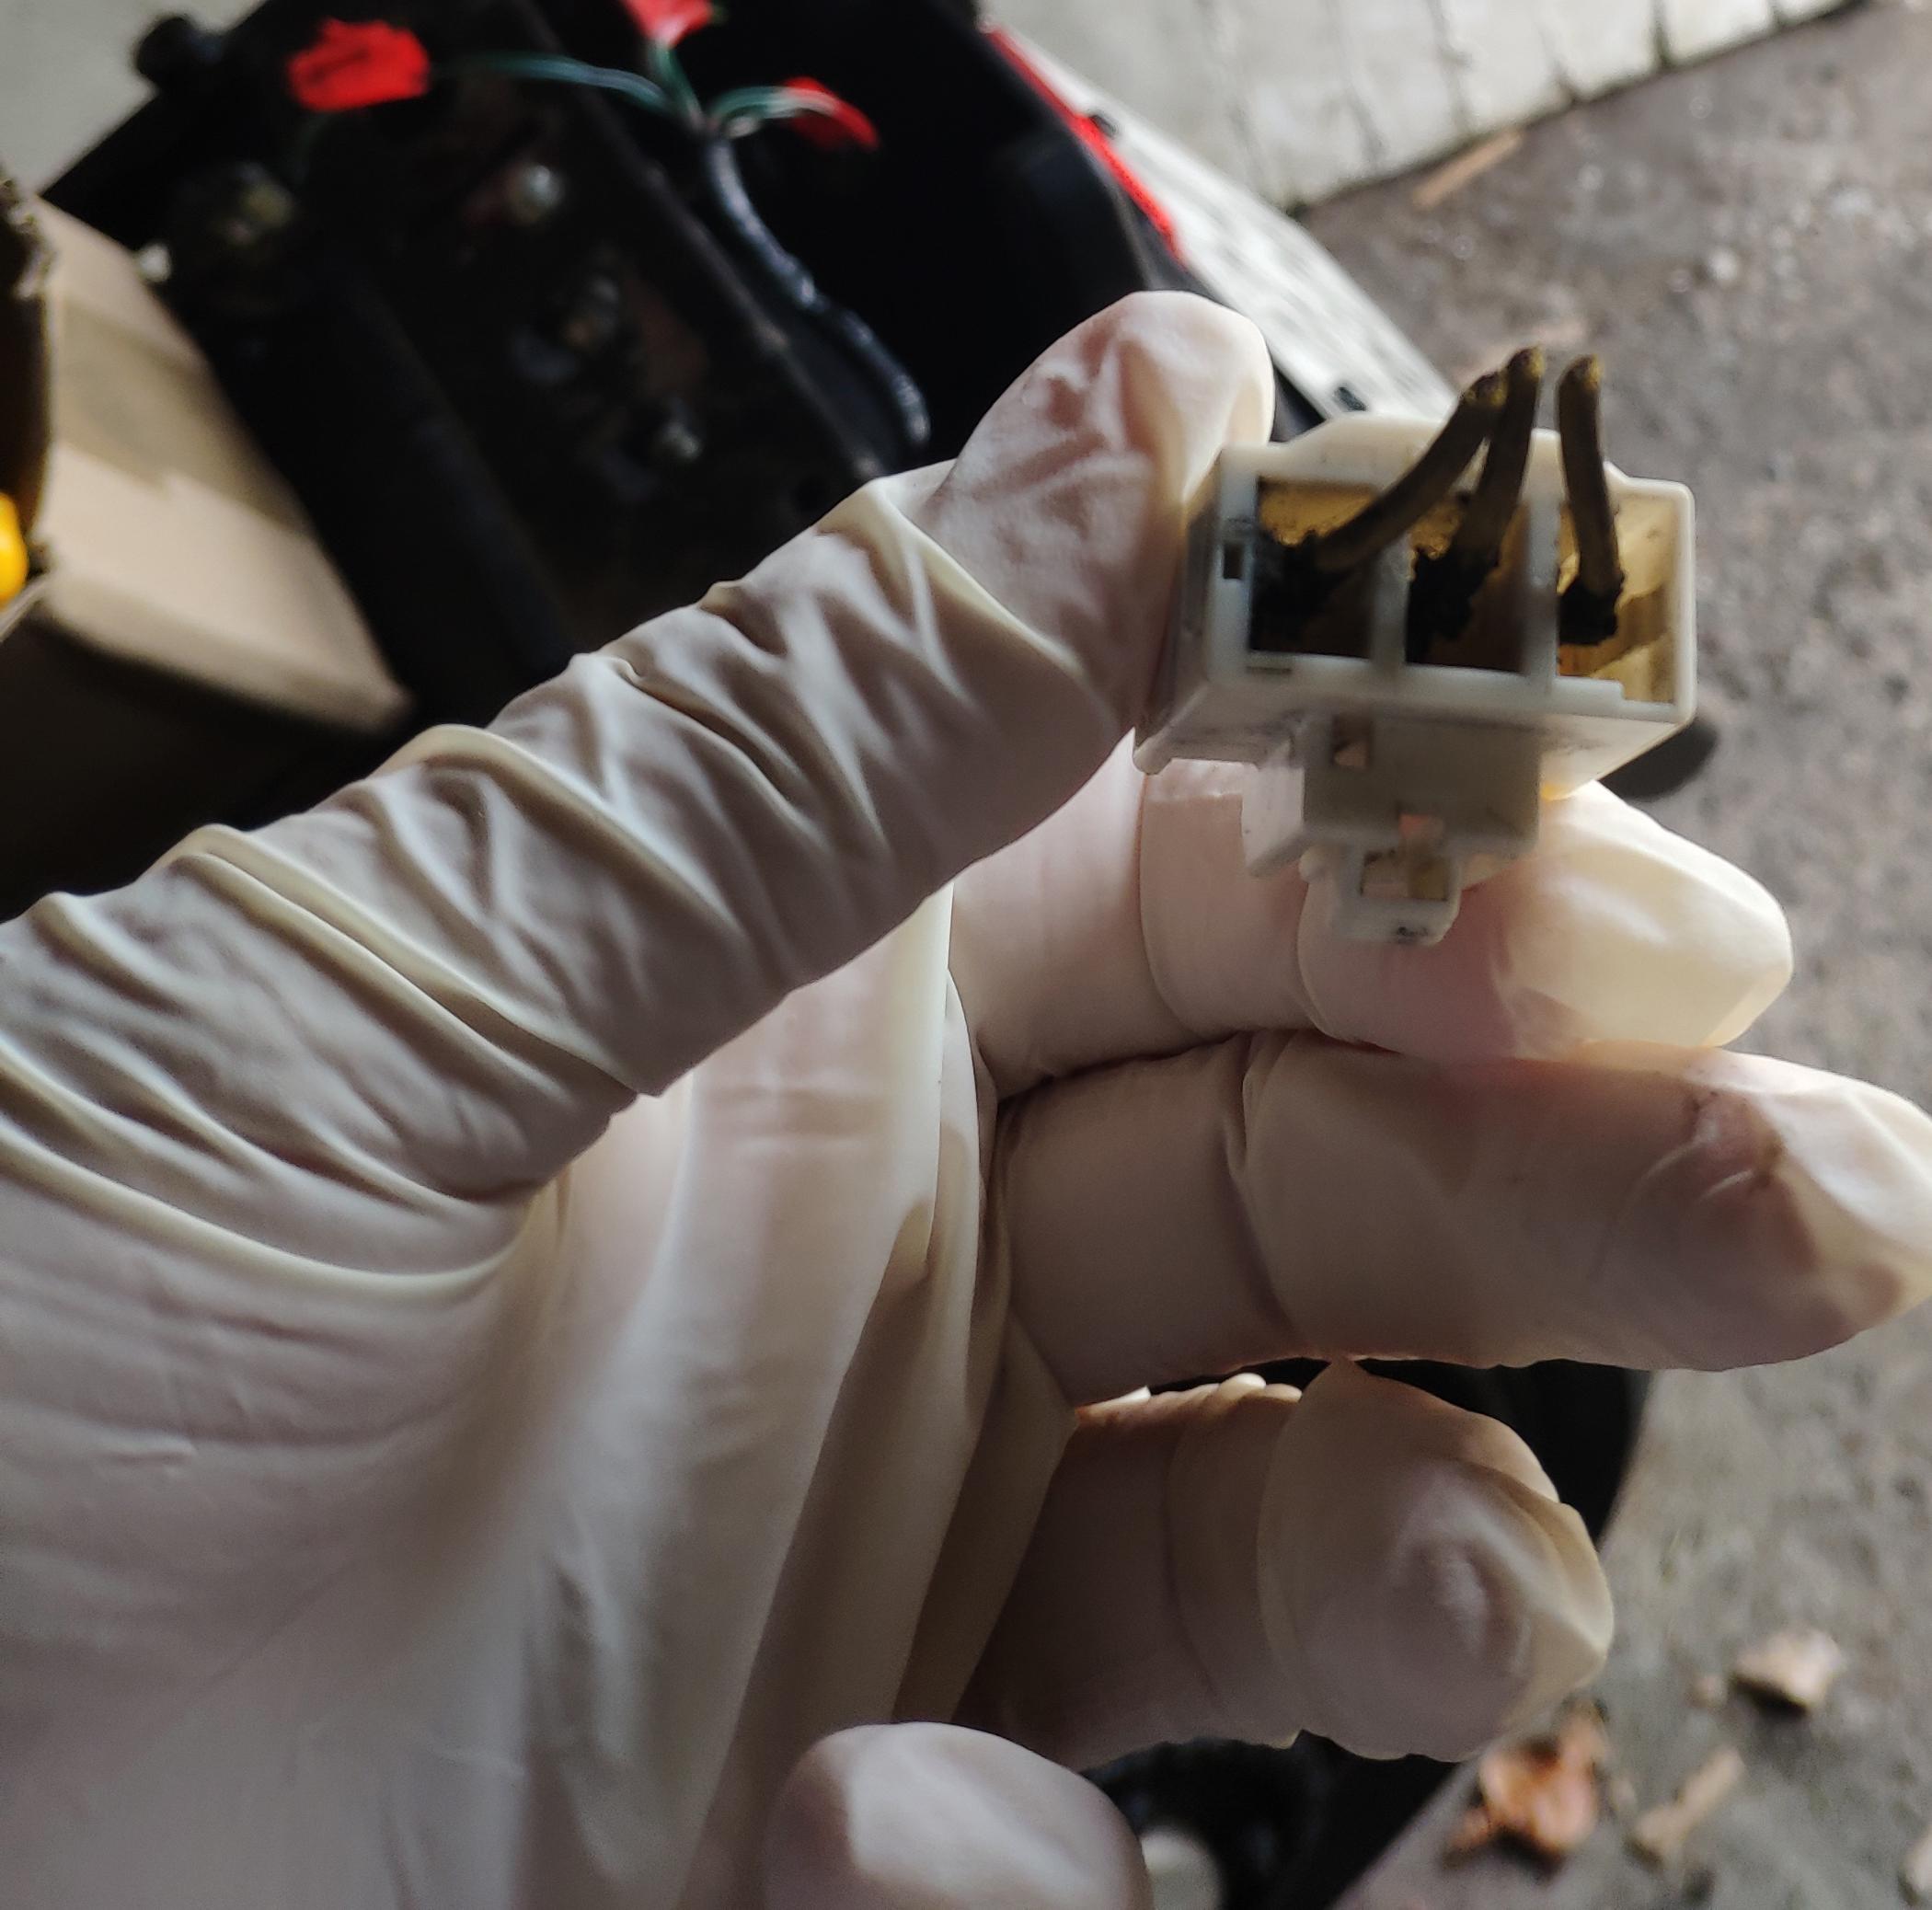
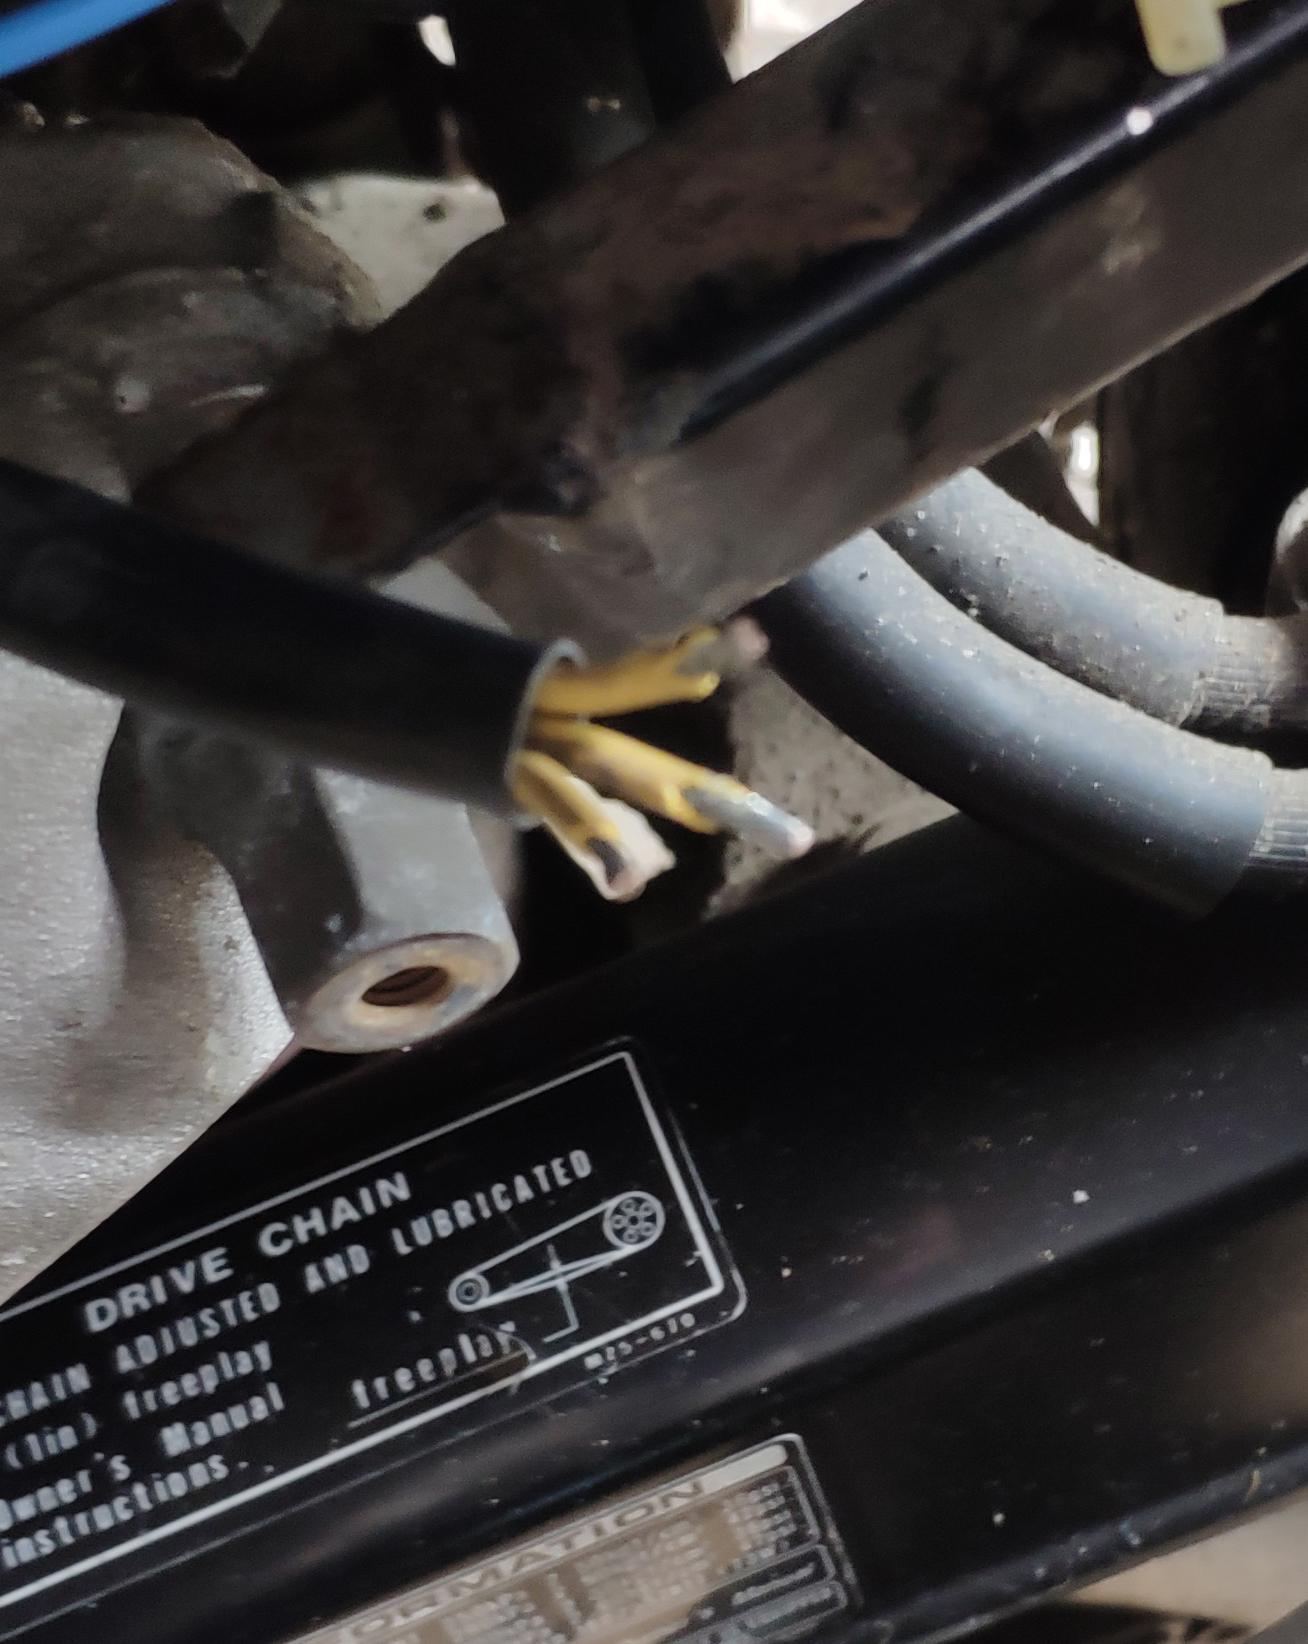
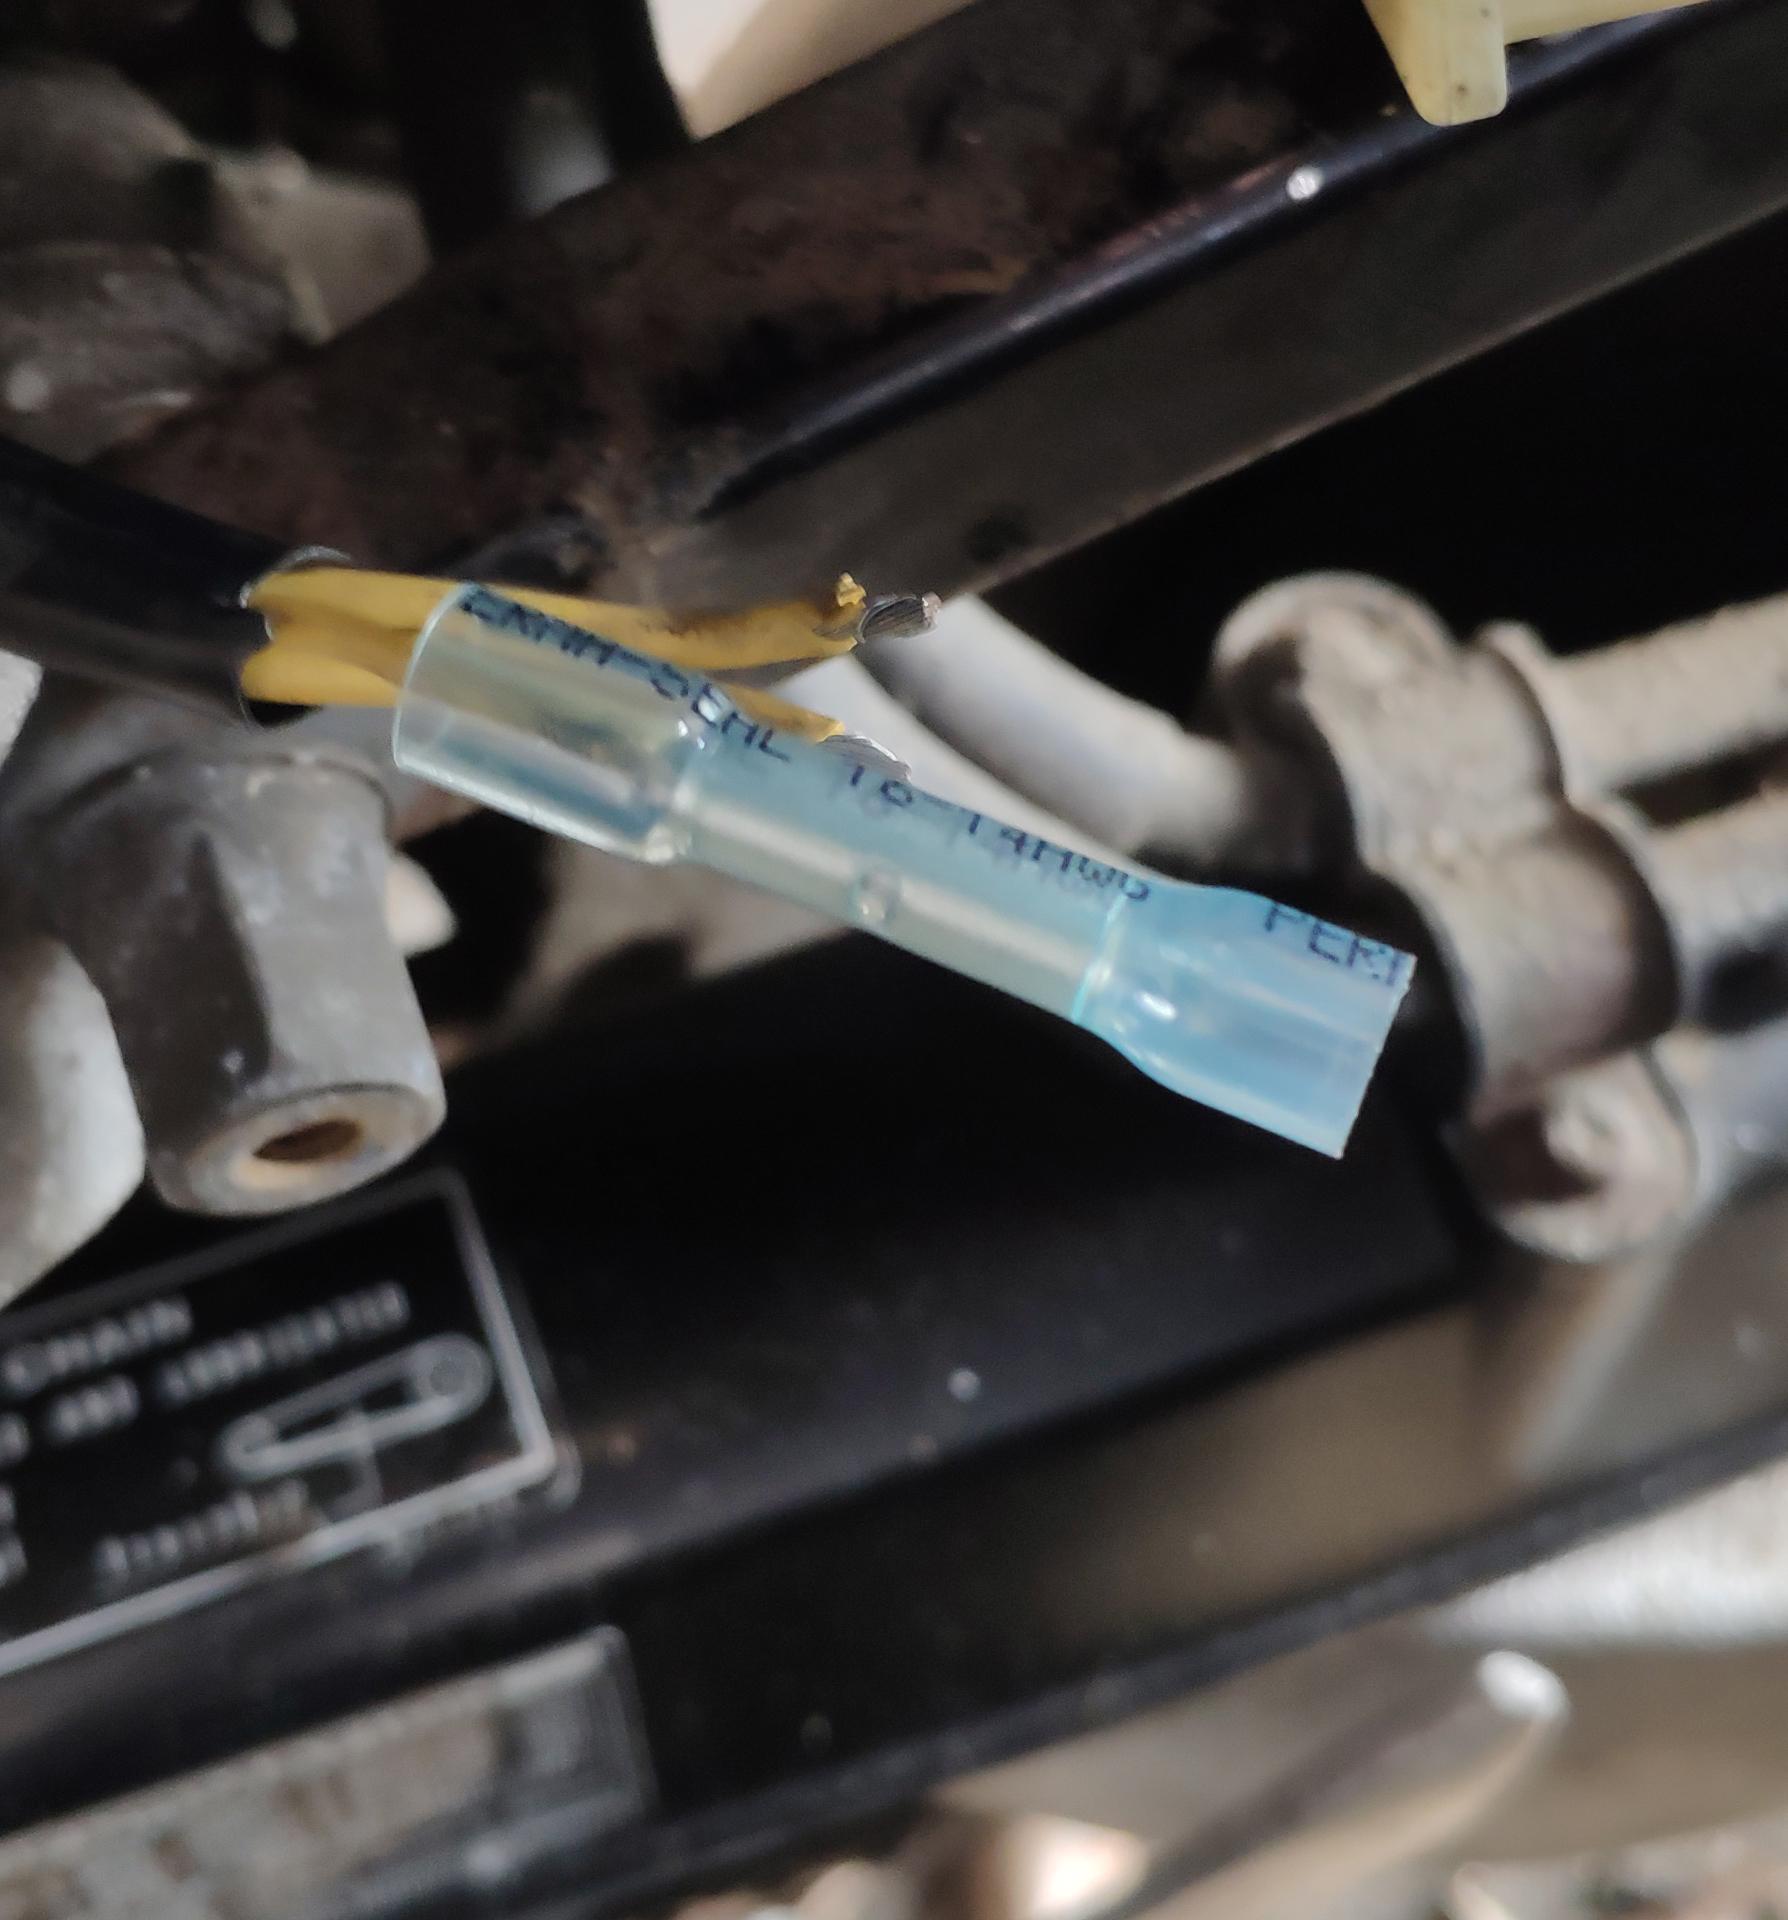
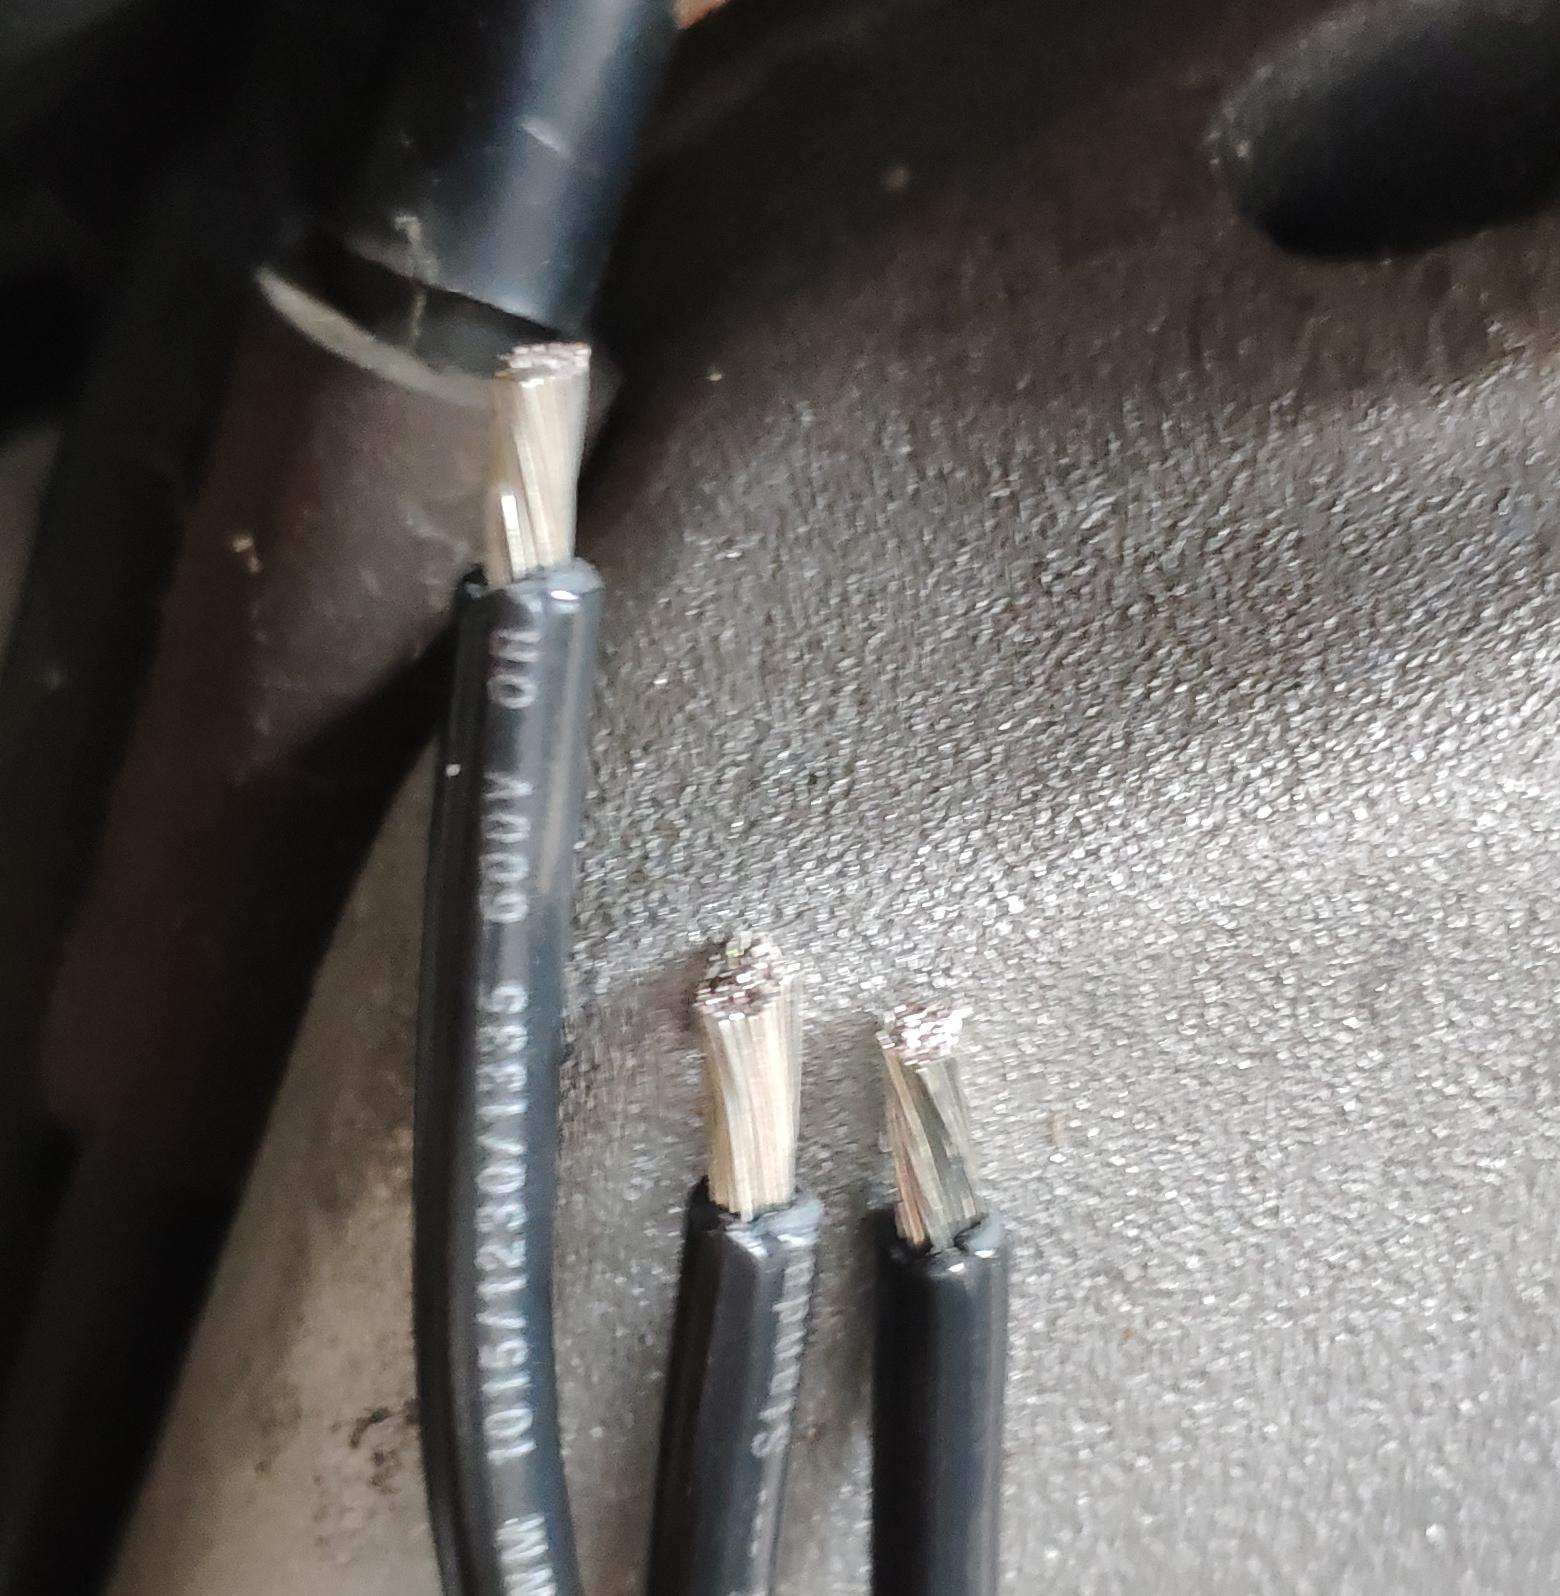
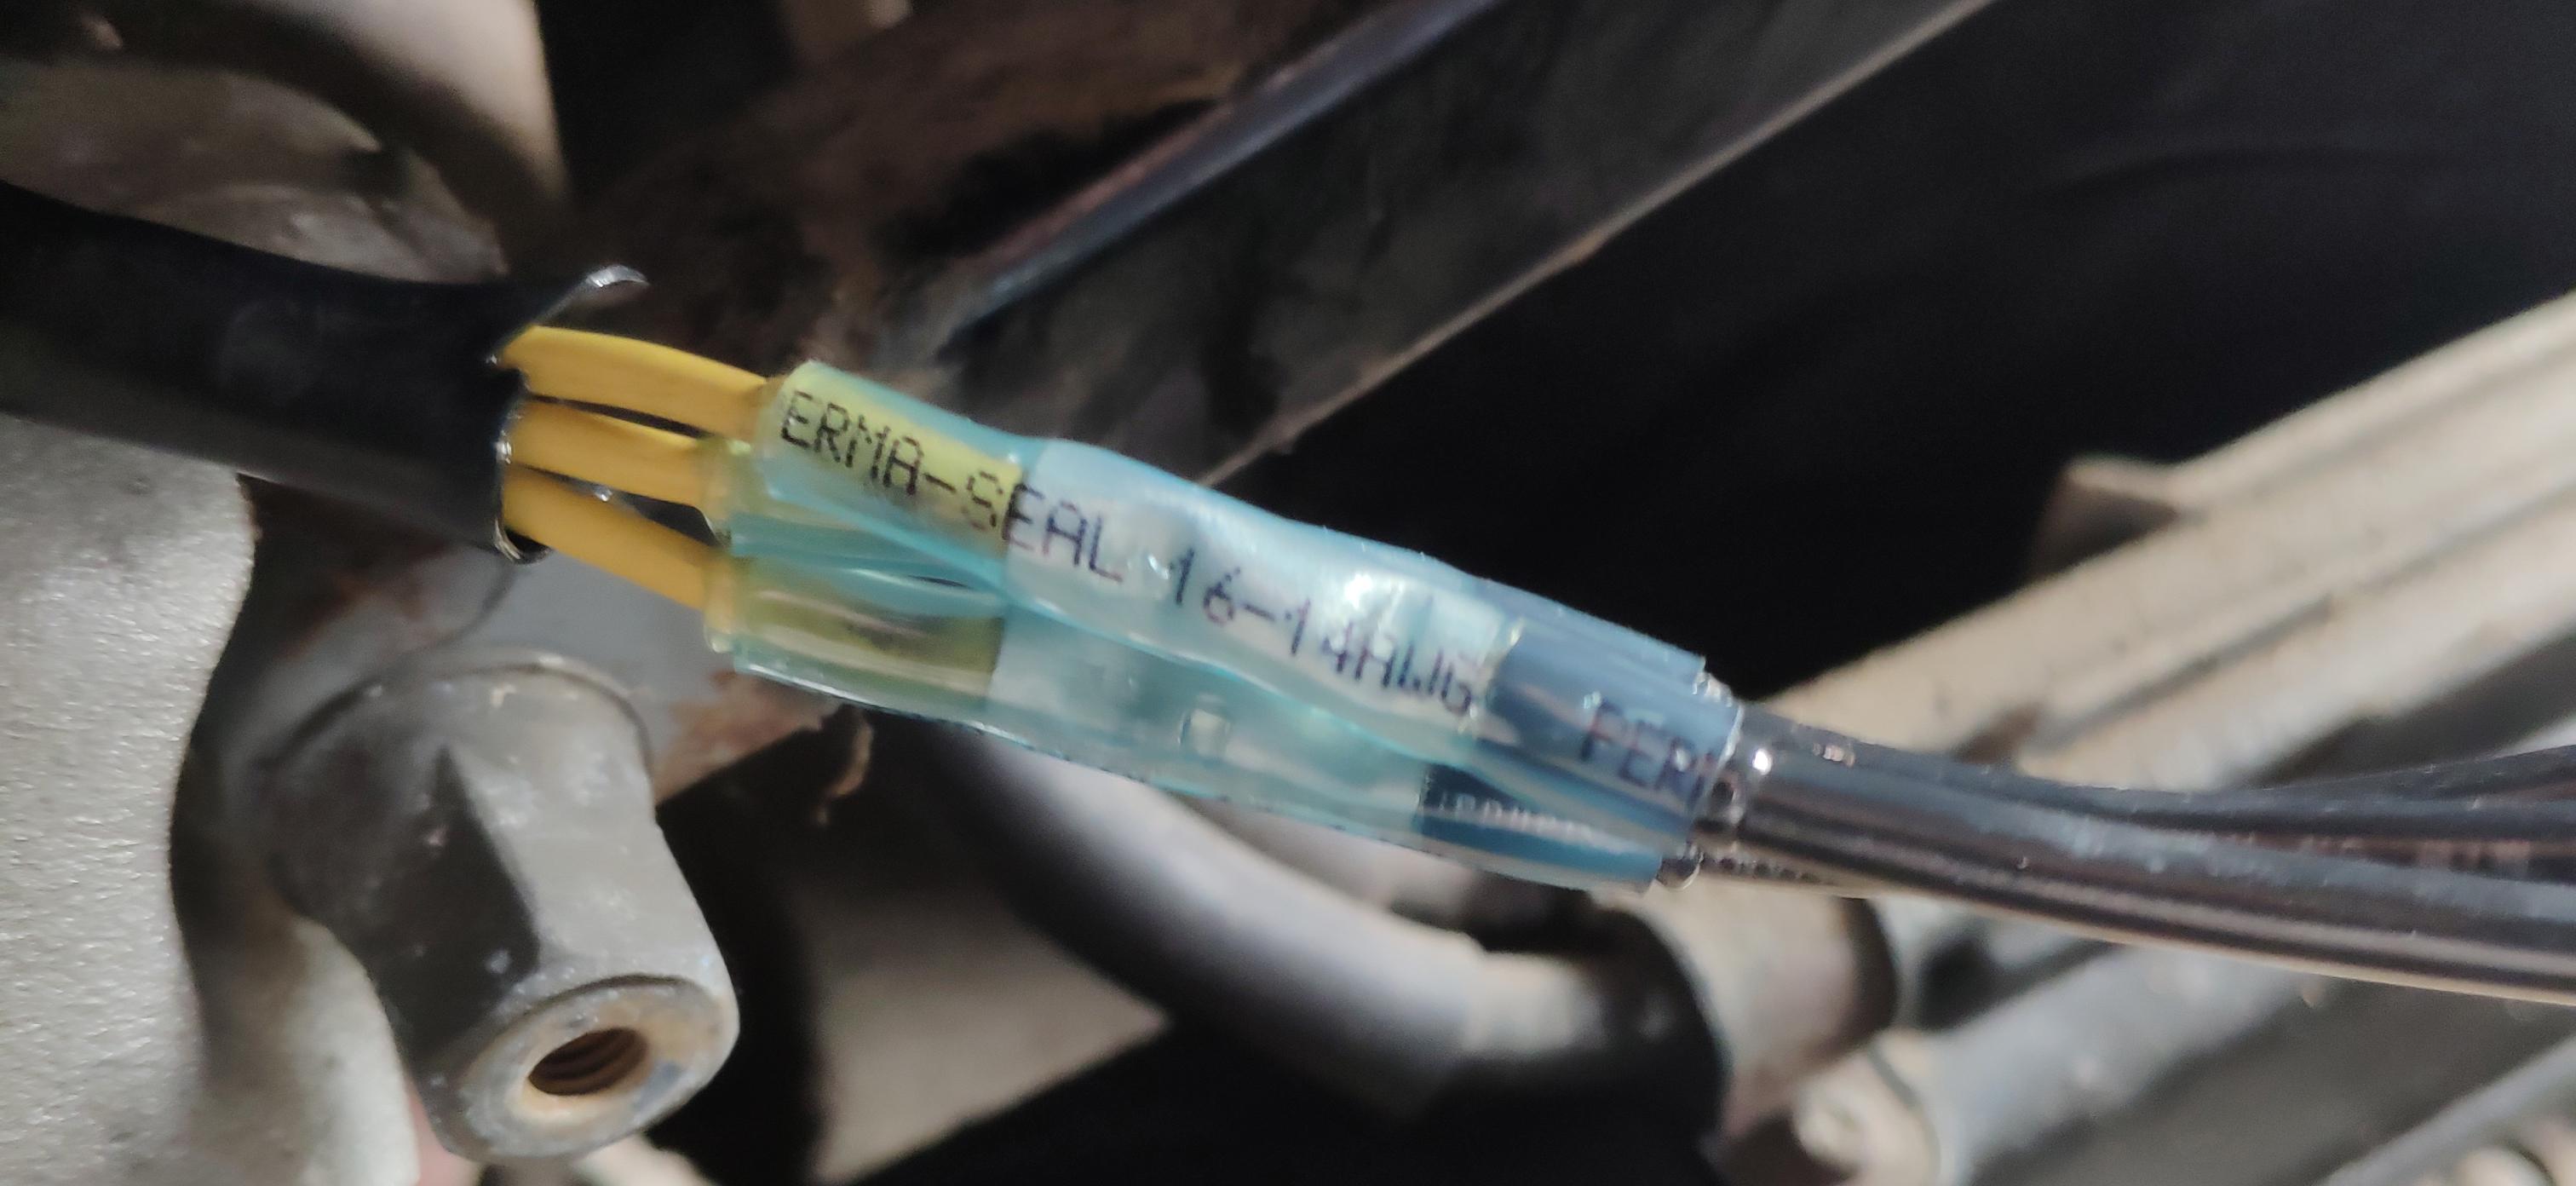
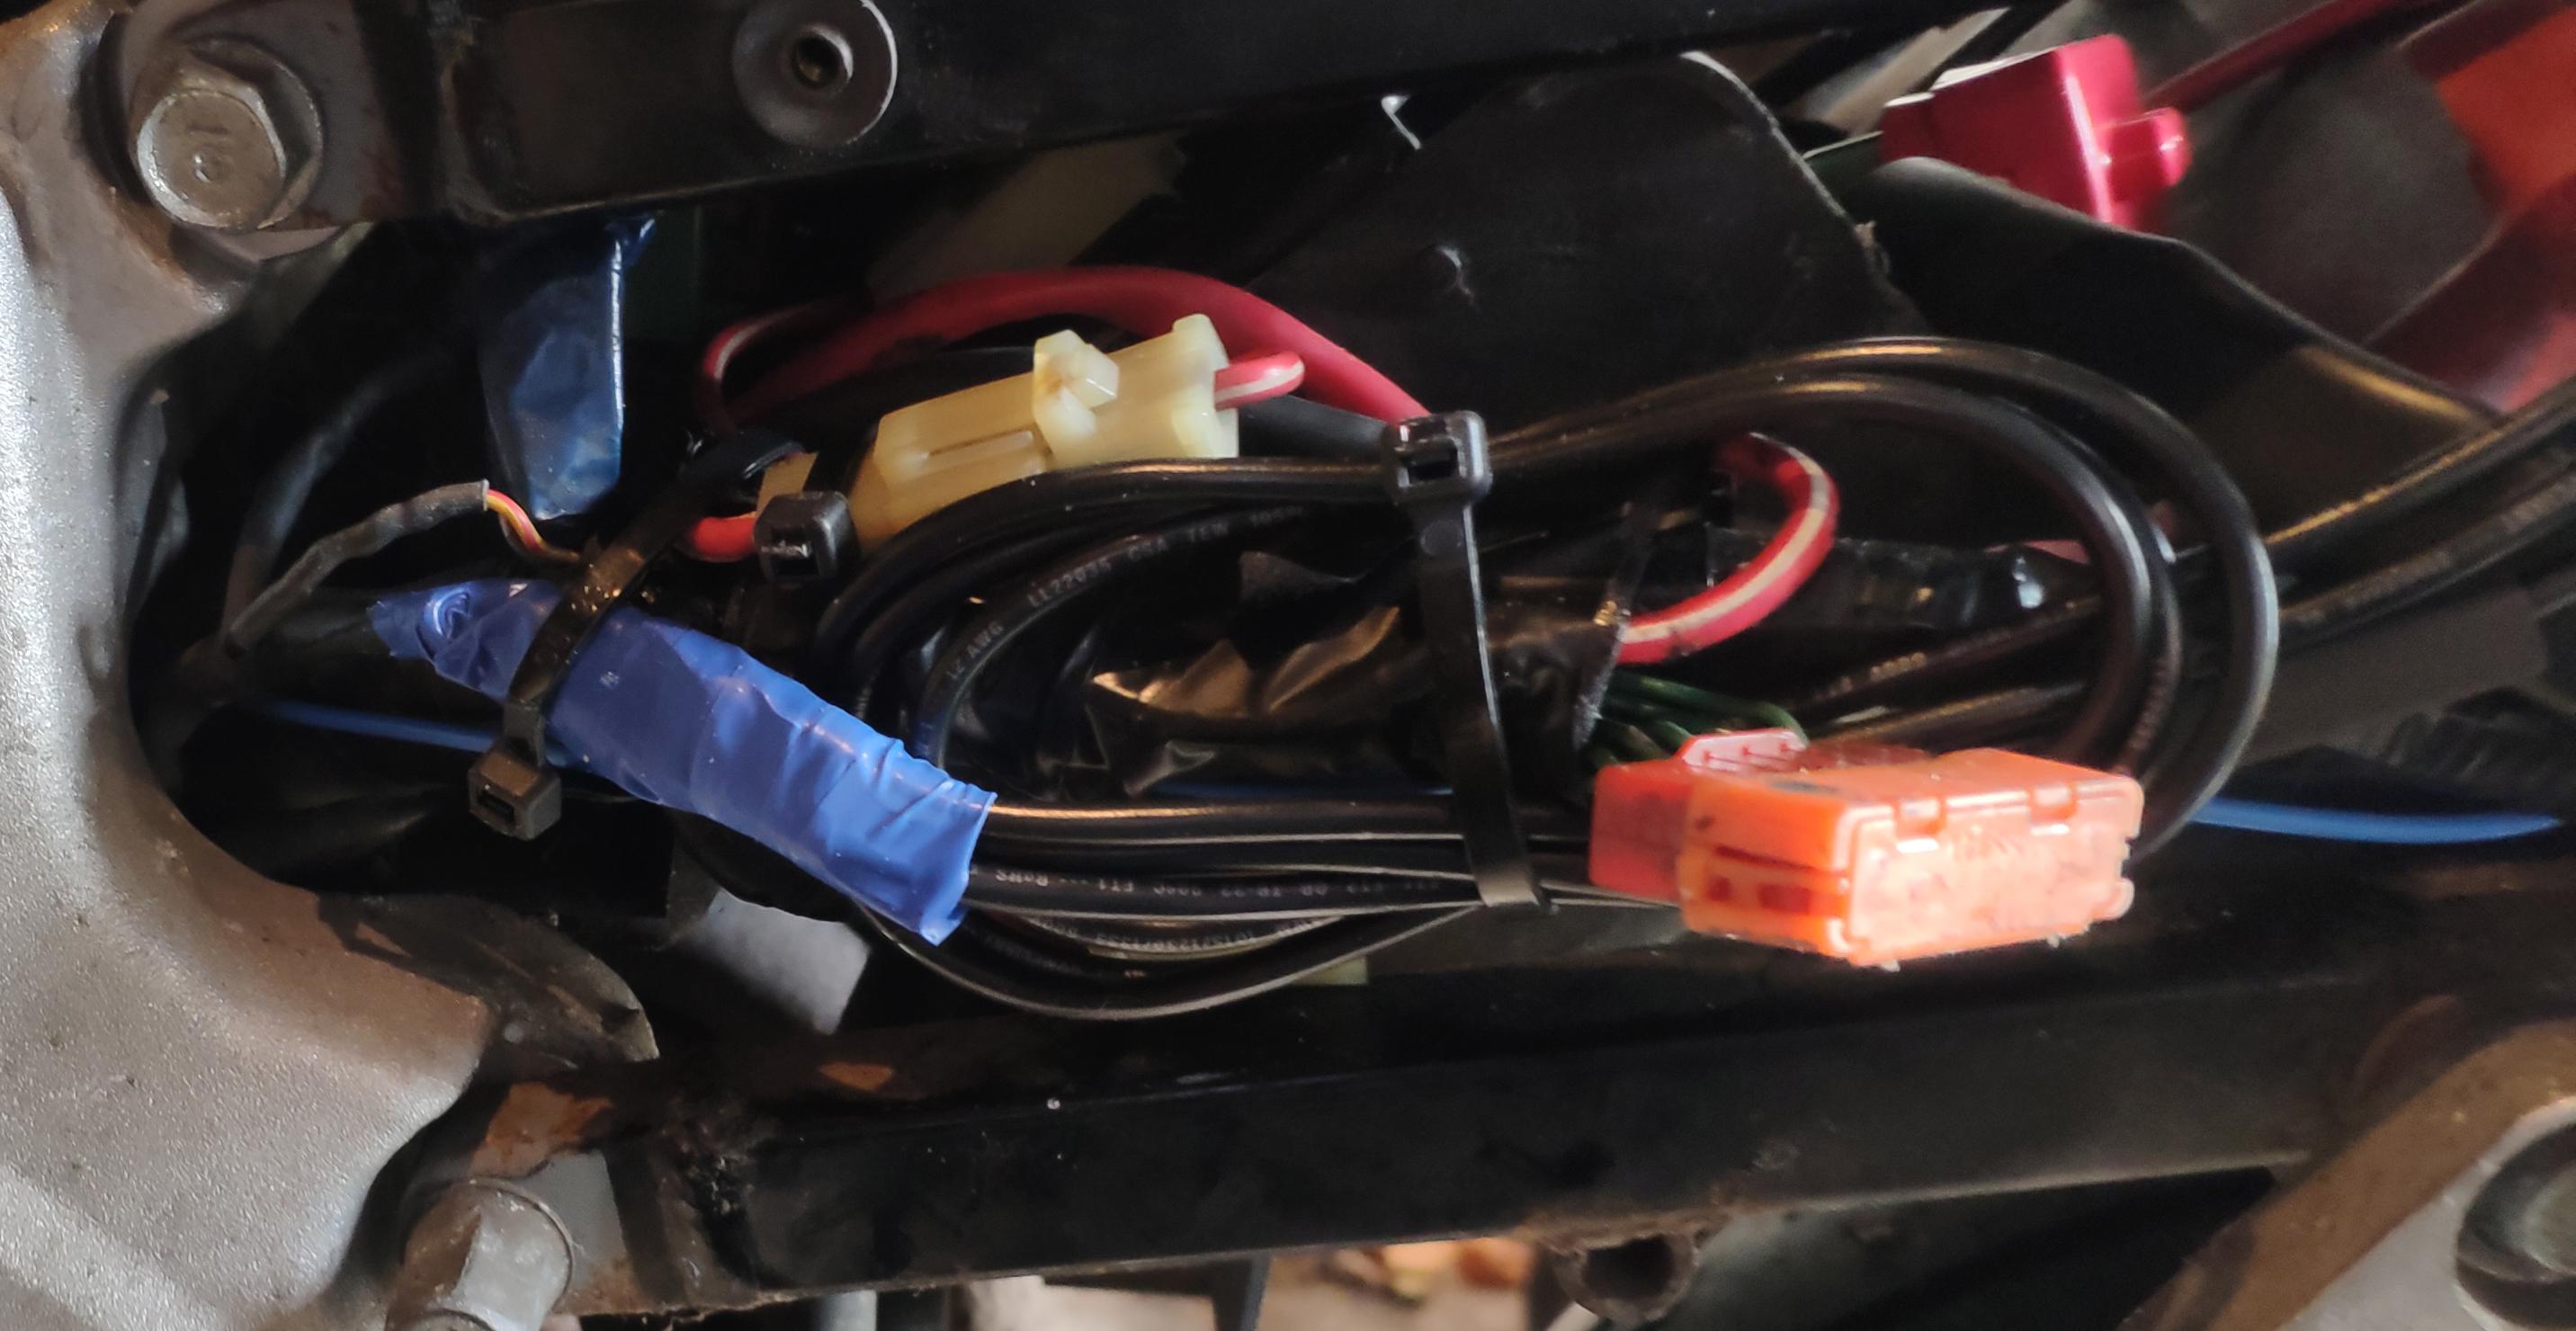
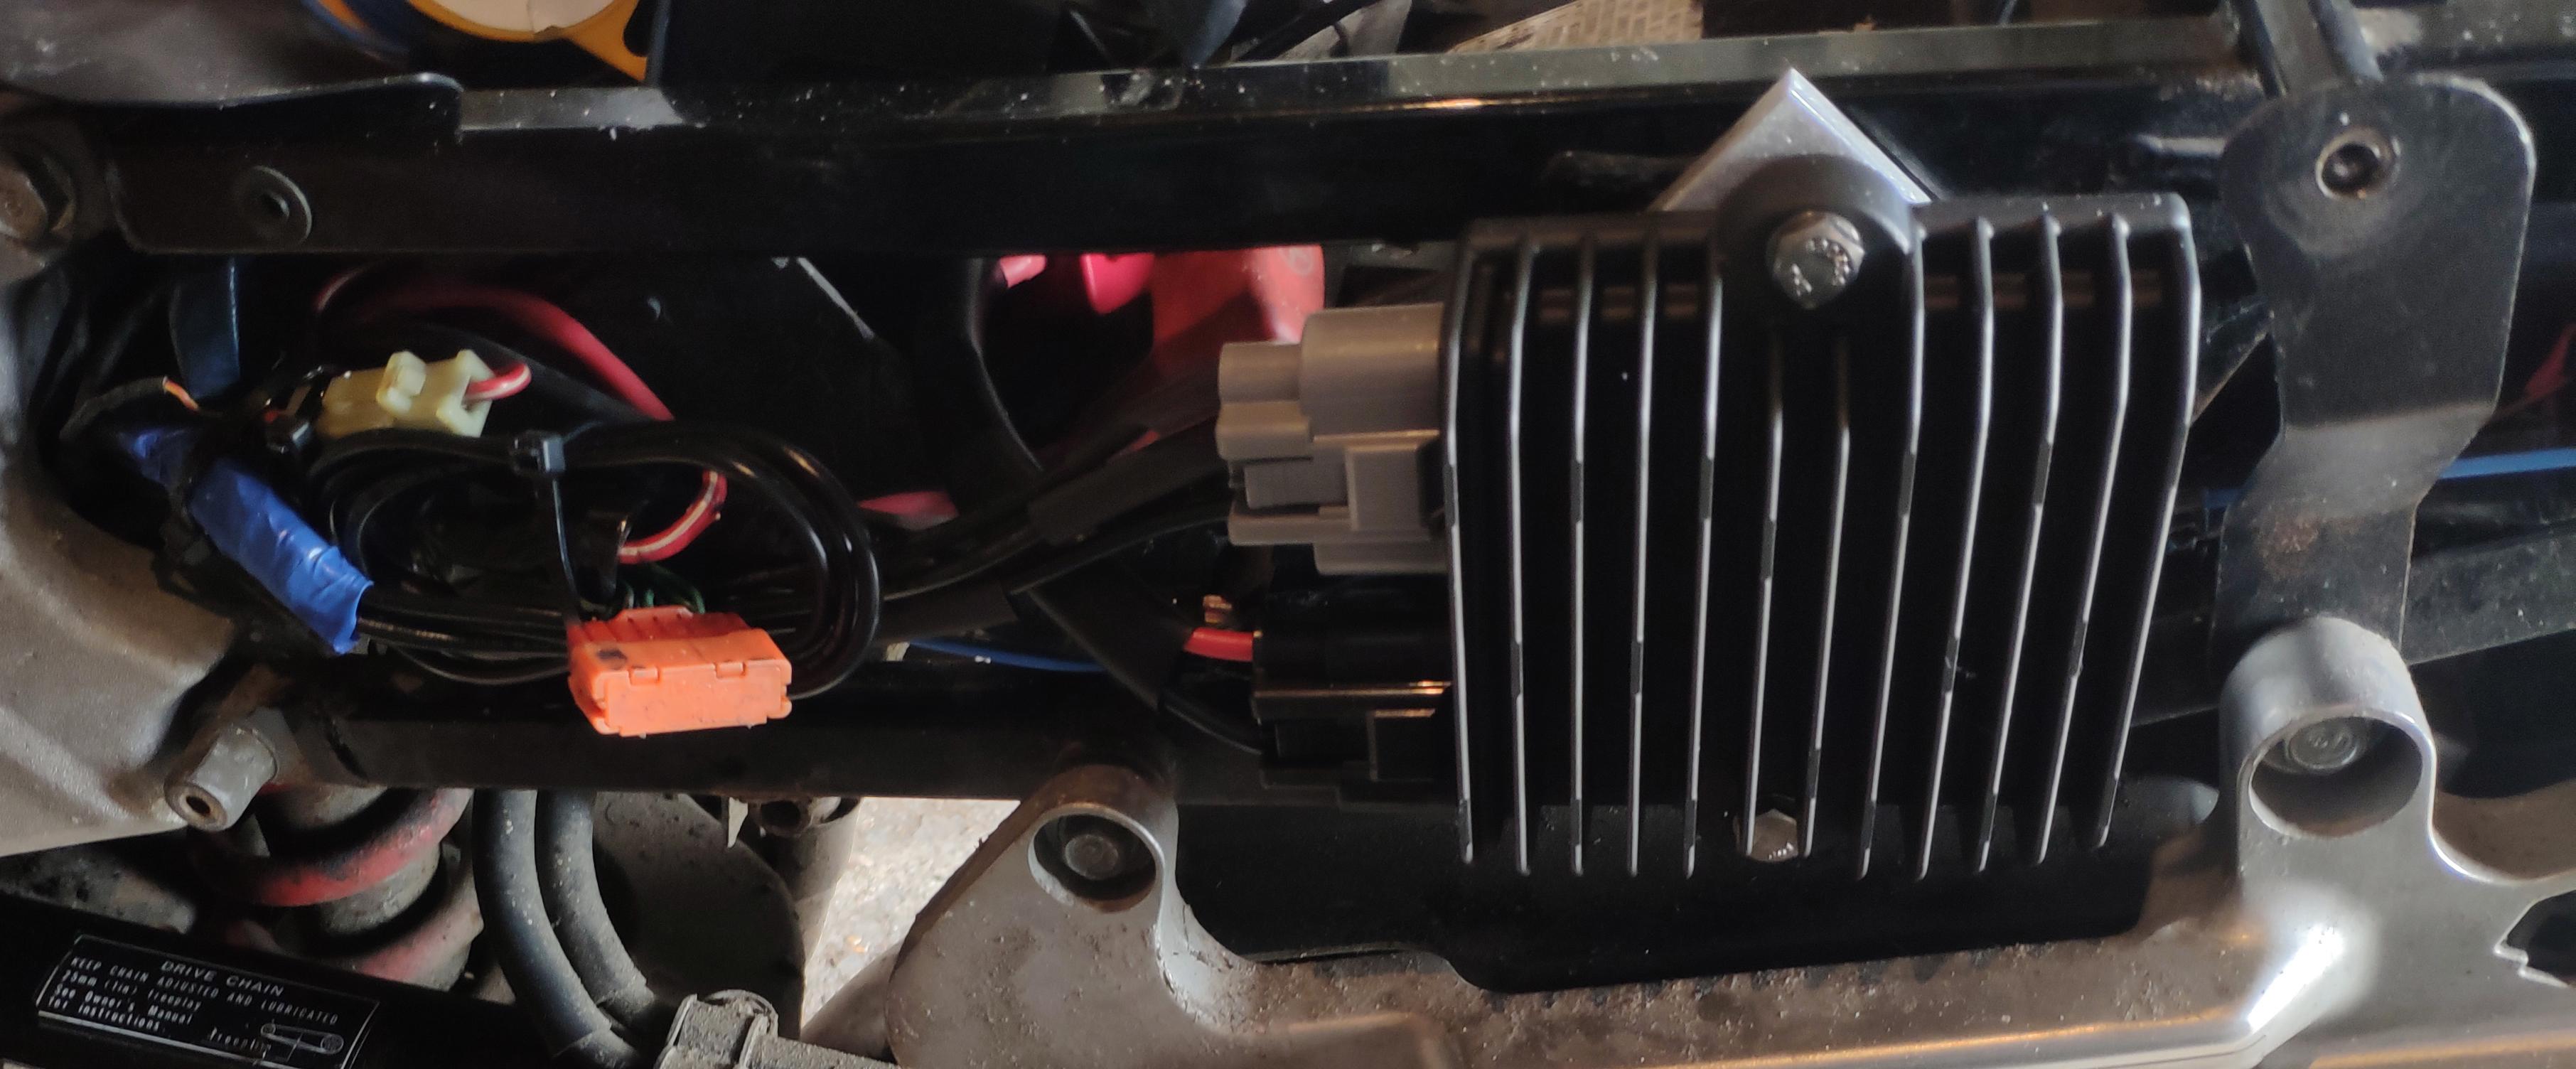
The Problem: The 5th gen VFR’s are known for having questionable Regulator Rectifiers (RR) that can suffer from overheating (other gen VFR's also suffer from the same issue). One preventative step that can be taken is to replace the RR with a mosfet (FH020AA) or series (SH847) RR. I went with the SH847 option as I want to run LED’s and I think this would be the best option for that. Not all bikes suffer from overheating, however I decided to do it as a preventative step on my 5th gen. Parts/Tools Required: Parts List: · Shindengen SH847 RR Kit from roadstercycle.com. It comes with crimp and solder type connections. Mine only came with the crimp style connectors, so I used them. For 5th Gen VFR’s you need 12” battery cables and the default stator cables are 24” and need to be cut to length. · 4 Way Mounting bracket from roadstercycle.com (Optional) Tools: · Crimping tool with insulated crimping capability like: Soldering iron (if you decide to use the solder connections) Hex tool for mounting the bracket (I can’t remember the exact size) Screwdriver + Spanner (10mm) + Socket. Heat gun or hairdryer Electrical Tape & Cable Ties (Optional) Tools required for removal of Rear Cowl Steps: 1. Remove the Seat. 2. Remove the rear Grips 3. Disconnect rear turn signals and brake lights. Turn them counter clockwise to loosen. It can be tricky to get a good grip, so take your time. 4. Remove the rear Cowl. 5. Label the lights as they are left dangling (Optional). Remember to remove when reinstalling 6. You can now see the old regulator Rectifier. Remove this by removing the 2 bolts. On my bike, 1 could be removed by the front bolt, the other had a nut that needs securing as you remove the bolt. Access is great though so you should have no problem. Tape up the old power connector, you wont need this. You will be left with the following: 7. I used the 4 way mounting bracket to mount in the stock location. You will be required to cut off one of the corners and file it smooth, like so: 8. Mount the bracket using the supplied hex screws. I had to use a bolt on the rear of one of them. 9. Mount the new RR onto the mounting bracket. The cooling fins do not have to be parallel to the airflow for this type of RR. 10. At this point you should check clearances by loosely reattaching the upper cowl. If it does not fit, move the mounting bracket as required, or relocate to a different location. 11. Plug in the new cables. 12. Cut the old stator plug. 13. Strip a small length off each stator cable 14. Slide the crimp connector onto one of the cables, if using the crimp style connectors. Otherwise use the solder type connectors. 15. Crimp between the midpoint and the end point. 16. Strip a small length off the new stator wires. They will need to be cut to length first. I left a little spare, just in case. 17. Slide this into the other end of the crimp connector and crimp between the midpoint and end point. 18. Do this for all 3 stator cables 19. Test by starting the bike and checking voltages, it should be 13V’s at idle and over 14V @ 5k rpm. If all is ok, continue. 20. Use the heat gun or hairdryer to heat the heat shrink around the crimp connectors. Use tape around them (Optional). 21. Cable tie the cables out of the way (optional) 22. Reinstall the upper Cowl in reverse order.

- 26 replies
-
- 4
-

-
- regulator rectifier
- sh847
- (and 1 more)