


Cdn Arctic
-
Posts
125 -
Joined
-
Last visited
Content Type
Forums
Profiles
Gallery
Blogs
Downloads
Events
Posts posted by Cdn Arctic
-
-
Well done!! I'd love to see how you did the coolant bottle - any tricks or tips to share?
How were the nerves while cutting the fairings?
Hey Ken,
There was a wee bit of trepidation when I started up the drill and ran it through the very, very expensive bits of my bike. :rolleyes: But, if you think about it, the holes have to be in the right place. You are running both drill bits through the same jigs and just eyeballing the location where the hole saw will bite into the fairing shows the alignment of the hole has to be centred. Radar did do his homework!! :thumbsup:
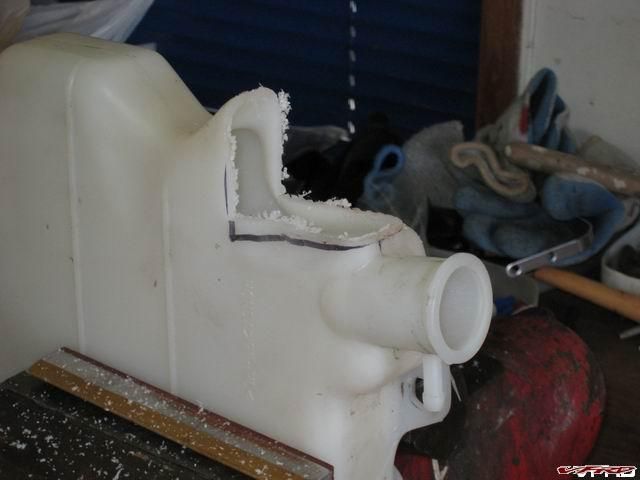
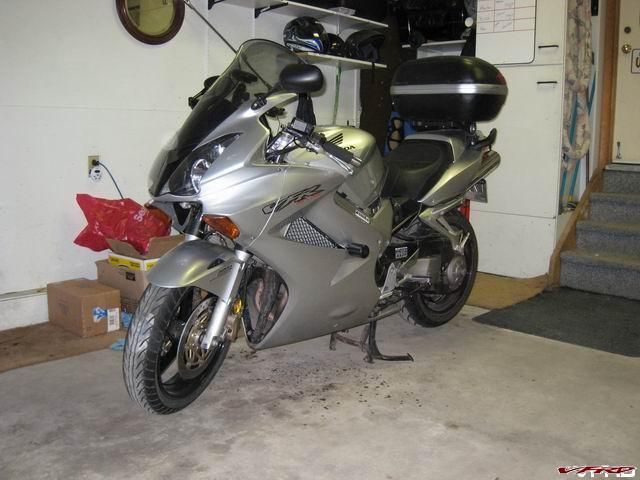
The coolant bottle was a snap. Follow the bouncing ball:
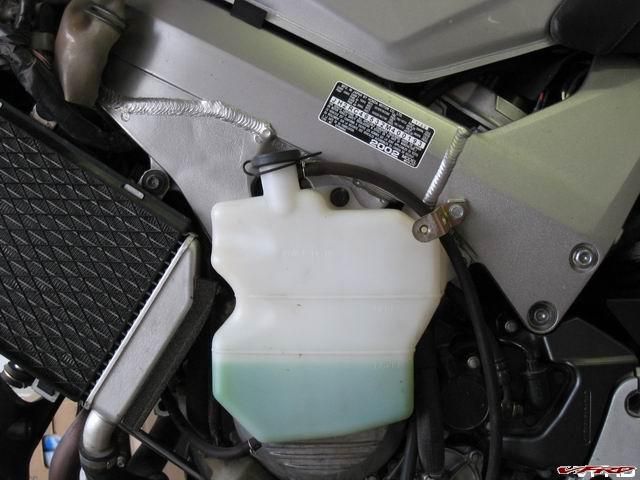
Resize of IMG_0126.JPG
The coolant bottle before any hacking.
Resize of IMG_0128.JPG
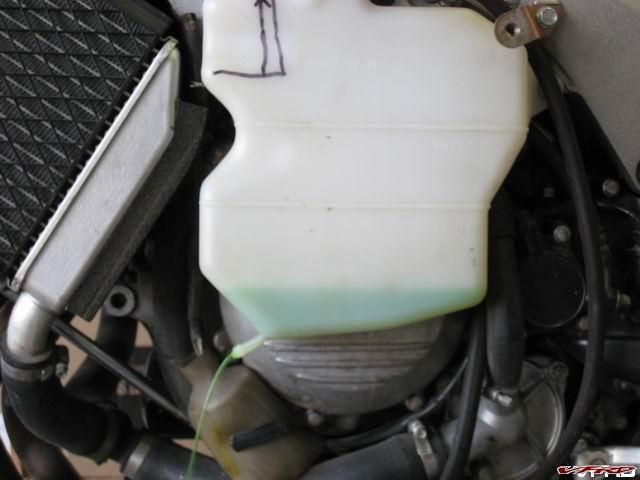
Measure the clearance required to free up the engine mounting hole for use. See, I measured twice,
and drained the bottle.
Resize of IMG_0129.JPG
Getting ready to cut.
Resize of IMG_0137.JPG
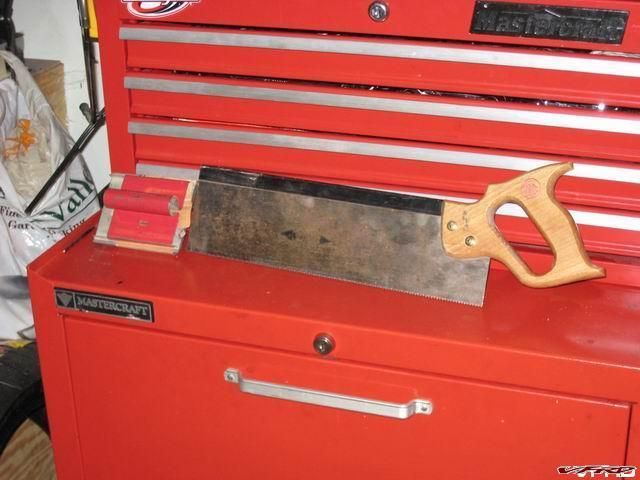
The tools:
I used a back saw to cut out the portion of the bottle required to clear the mounting hole. Using the saw made sure each cut was at least parallel, even if the cuts weren't a perfect 90 degrees. The "caps" I fashioned would touch both cut surfaces. The sanding block was used to smooth the cut edges.
Resize of IMG_0130.JPG
The saw cuts were rough. I used a utility knife to trim off the majority of the kerf and then used the sanding block to smooth everything prior to gluing.

Resize of IMG_0131.JPG
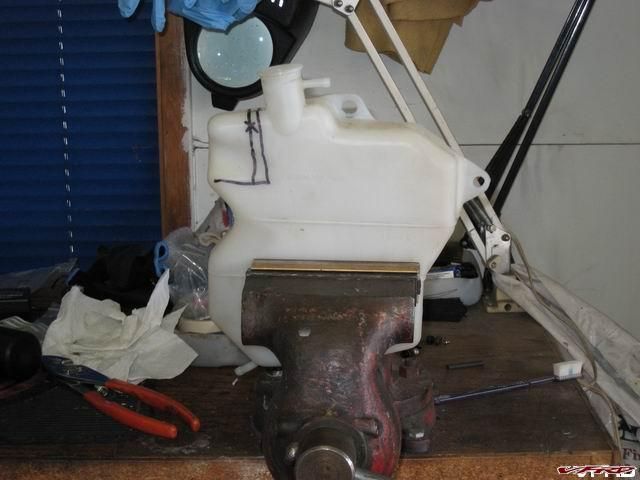
This is the bit I cut out. I used it as the material for the bottom portion of the rebuild. Just fashioned it to fit and shaped it to look somewhat reasonable. The vertical "patch" was fashioned out of a piece of plastic cut from a windshield washer bottle I hand hanging around. Same material as the VFR coolant bottle.
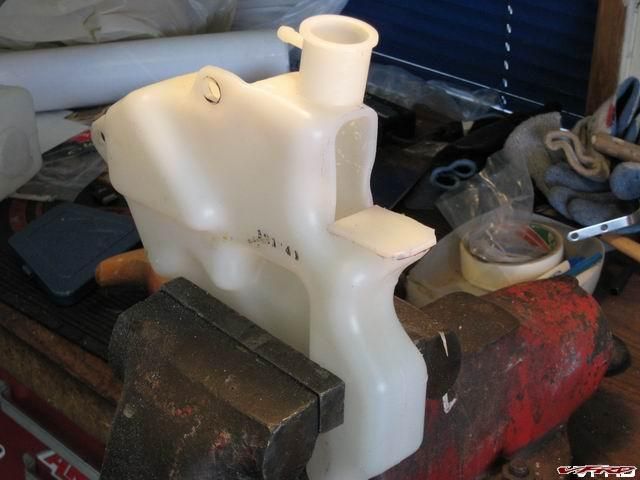
Resize of IMG_0132.JPG
Fitment of horizontal patch
Resize of IMG_0133.JPG
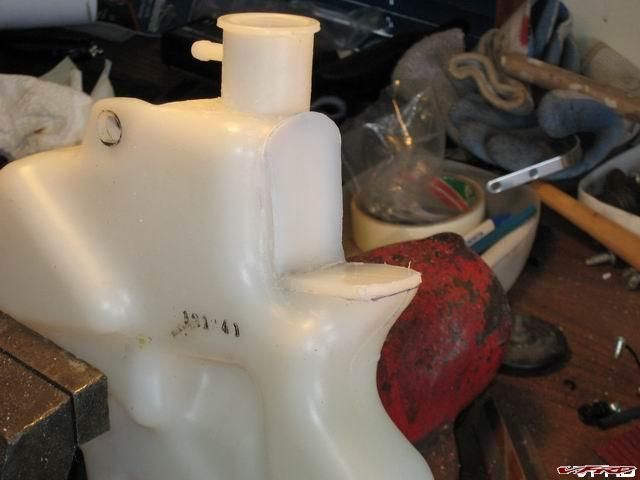
Vertical Patch installed. I used your recommendation of the Loctite "All Plastic" adhesive. It worked like advertised. :thumbsup:
Resize of IMG_0134.JPG
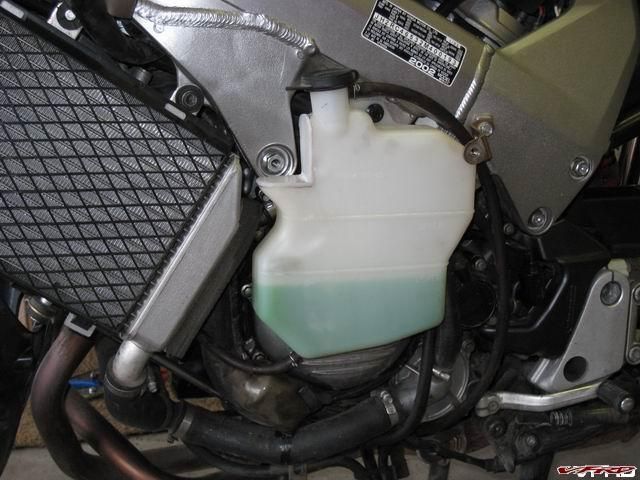
Reinstall the bottle, connect the hoses, pour in the antifreeze drained and Bob's your uncle, you are DONE!!
Nothing magic here. Just measure, cut, make the patches, glue 'em down. As note somewhere else in the thread these patches don't have to be perfectly air tight. This is not a pressured portion of the cooling system and noting the high / low fluid marks on the bottle, antifreeze won't be spilling unless you are using the sliders for their intended purpose and if that happens a little leaking isn't going to be my prime concern. :D
Rich
-
The sliders arrived.
The sliders are installed.
The Customer (me) is happy.
If there is anyone in the Calgary area planning to do an install of Radar's most fine Sliders, I sure can lend a 18" drill. an 1-1/8" hole saw (used only twice) and a honking long piece of drill rod. PM me.
:D :D
Slider1
Slider2
PS
I also have pictures of the coolant bottle rework if anyone would like to see 'em
-
If there is enough interest in acquiring brackets, I can ask my machine shop to provide a quote to build some more for me. The last batch of 5 went for $65/pair plus shipping. I don?t know if he will hold the price on another run, but I could ask. Please PM me if you would be interested in a set. I will need 5 commitments before I place an order.
They will have slots cut to accommodate the grab handle mounts, but not for mounting the top plate. This allows for finally adjustment and positioning the plate on each installation. The brackets are made out of 1/8? plate and will need paint.
Or, I can provide a drawing (Ken's orginal doctored with the measurements) for those who might like to get a quote from a local metal masher or have the ability to make their own brackets.
There would be a time factor here too. I'm scheduled to have a bit o'surgery in October or November so if there isn't at least 5 souls on board in the next week or so I won't be able to play until spring.
-
Anyone Interested?
In the process of installing my GIVI V46 Top Box over my passenger seat, I ended up with an extra set of brackets. Sold them and then another request came to me for 2 sets of brackets. Same thing happened, I ended up with a spare set of brackets after I shipped the two out today. Is anyone interested in them?
Price is $65 plus $10 shipping.
They are drilled to fit a GIVI M5 mounting plate.
Here is a picture of the brackets.
 border='0' alt='user posted image' />
Brackets.JPG
Send me a PM if your interested.
My fabricator tells me he is losing his ass on supplying these to me and will only accpet orders for 4 sets at a time in the future, so these may be the last ones I have to sell. I would sure make the templates available if anyone wants to have a go at getting them fabricated or building their own set from scratch. Again, PM me and I'll get a copy of the plans to you.
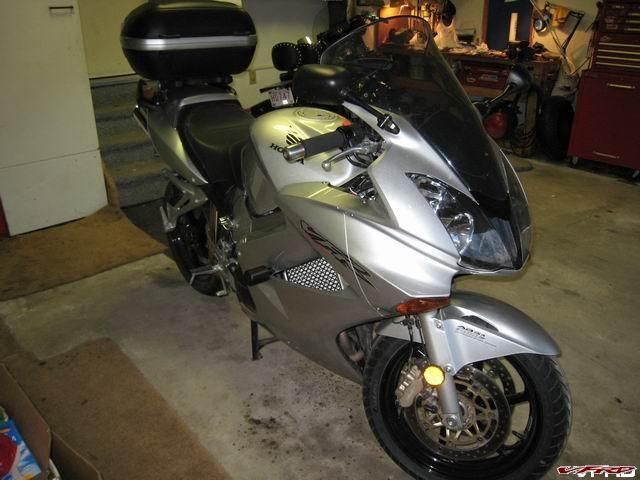
Here is a picture of the top box mounted:
http://i72.photobucket.com/albums/i190/cdn...ic/IMGP1703.jpg
-
FRE,
Looks like I'm going to be ordering a couple sets of brackets for another member and could add a 3rd set for you. Send me a PM if you are interested.
As far as helmet locks go, I added a Harley Lock that works like a dream. See below:
 border='0' alt='user posted image' />
Lock.JPG
-
Well Done..............Where were you 15 years ago when I paid the Corbin Masked Bandits :pissed: $400 for a pair o'backrests! Great product but 2 backrests shouldn't equal the price of a seat!!!!!!!!!!!!!!
-
They are from a Harley dealer see......lots of chrome on those spacers. :D
But that's $7 Canadian, less in $US dollars. I'm sure there are other solutions for spacers, but I want a fix that was fool proof and didn't require chasing around to find alternatives. They were there and I bought 'em.
-
Taking Ken's template I had a set of brackets made. I had two problems when mounting the brackets and then the top box. First, when the GIVI plate is attached to the brackets lining up the bolts to fit in the frame was a bit of a problem. And once I had fiddled about and got them mounted I had the same problem as Ken, couldn't get at the rear bolt with an Allan Key to tighten them. So I took everything apart and proceeded to change the hole that mates with the Grab Handles into slots.
On the second installation there was no problem lining up the bolts with the frame and there was enough movement to position the back bolts so they could be tightened on both sides with ease. Because it is easy to remove the bolts, it makes the issue of removing the brackets to get the seat off less of an issue.
Also, I used 1" spacers to raise the bracket off the Garb Handles. Now the brackets don't touch the grab handles and scuffing is eliminated.
 border='0' alt='user posted image' />
IMGP1652.JPG
 border='0' alt='user posted image' />
IMGP1653.JPG
 border='0' alt='user posted image' />
2 Spacers.JPG
 border='0' alt='user posted image' />
3 Handles-Spacers.JPG
 border='0' alt='user posted image' />
7 Side View.JPG
-
Here is a listing of Top Box Plates for GIVI product. My 2002 using the 3rd one in top row for a V46 Top Box, Model # M-5. If you have more than one bike and want to move a Top Box between them, you may need another style. Prices are in $CDN.
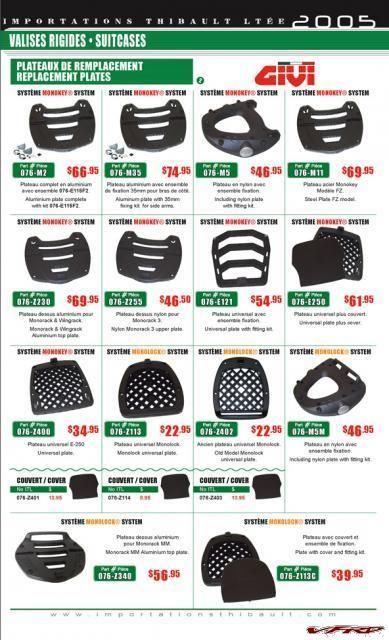 border='0' alt='user posted image' />
GIVI Base Plates.jpg
-
Need to figure out part numbers for GIVI Base Plates? Here is a page from a Canadian Supplier that should help. The one for my VFR is an M-5. First row #3, $46.95CDN.
border='0' alt='user posted image' />GIVI Base Plates.jpg
Web Page
http://www.importationsthibault.com/2006/c...e&page=318&ac=1
I'm mounting a V46 Top Box using the bracket design from Ken. Fitted the brackets base plate and box last night. Nice.....Ken, you are my favourite. I made a modification to Ken's design that helps the "back bolt" problems (can't get a Allen key into the bolt) and makes fitting the brackets a snap. I cut slots in the bracket where it attaches to the Grab Handles. This allows some movement to align the bolts with the frame and establish a position that allows access to the back bolt with an Allen key. I also used spacers to raise the brackets up an inch above the Grab Handles. This removes the problem of the bracket sitting directly on the uneven profile of the Grab Handle.
The brackets are currently being painted and I'll have the whole istallation ready for a test ride this weekend. :D :D
-
Johne - you bring up a good point. The main reason I needed to better position the weight of the topbox was for those RARE occasions when precious cargo must be transported safely. Sleemans is one of Canada's finest beers, and it rightly deserves to be protected, and cared for with the highest respect. Not to mention it costs a small fortune to buy......
I can get at least 24 beer, with ice, packed into this fine cooler, er I mean topbox. Its there for the end of the day AFTER the riding (I don't drink and ride - at ALL.)
BOx is watertight - so as long as it doesn't melt too much - it shouldn't slosh around. We'll find out this summer though - won't we......
Ken, I seem to be following your lead here so when you design and install the insulation package for the cooler / ice box (I'm old and can remember ice boxes) can you please take pictures and save me more time in following you along. Maybe your design could incorporate a drainage system to accommodate the melt factor... :D
-
TBZEP - I just took some photos - photobucket site is under maintenance right now - so can't load them up. BUT - - to answer your question in the meantime, no - there is no way to drill into the top plate to get the allen key in the head.
I'll see if I can remember how to upload to VFRD......
Ken,
How about changing to a Hex Head instead of a Allen? You should be able to slip an open ended wrench in the space without any problem. Change all 4 and the look is identical and you will be the only one that ever notices. You could also consider cutting an Allen wrench down and that might work too. I don't like the idea of vise grips either.
Rich
-
Ken,
Very nice job. I get my brackets from the metal munchers this Saturday and hope my results are close to what you have achieved. Again, thanks for the templates. I'll send you a photo of the spacers I'm going to use to raise the brackets too avoid chaffing the grab handles, assuming the job comes off half decently. Maybe they will resolves the seat removal problem, too.
Rich
A "real" Helmet Lock
in Modifications
Posted
Not having the talents of many, I solved the helmet lock dilemma by purchasing an add on lock from my local HD dealer. Cost was about $25-30 and install was simple. Just had to remove a little plastic from the panel directly behind the lock and installed using the safety screws. Total time to install was about 10 minutes. The HD lock was the only lock I could find that would compress to fit the frame tubing of my Gen6.
Not as cool as one off's but within my scope and machining prowess. :D
Helmet Lock