


megatronousprime
-
Posts
13 -
Joined
-
Last visited
Content Type
Forums
Profiles
Gallery
Blogs
Downloads
Events
Posts posted by megatronousprime
-
-
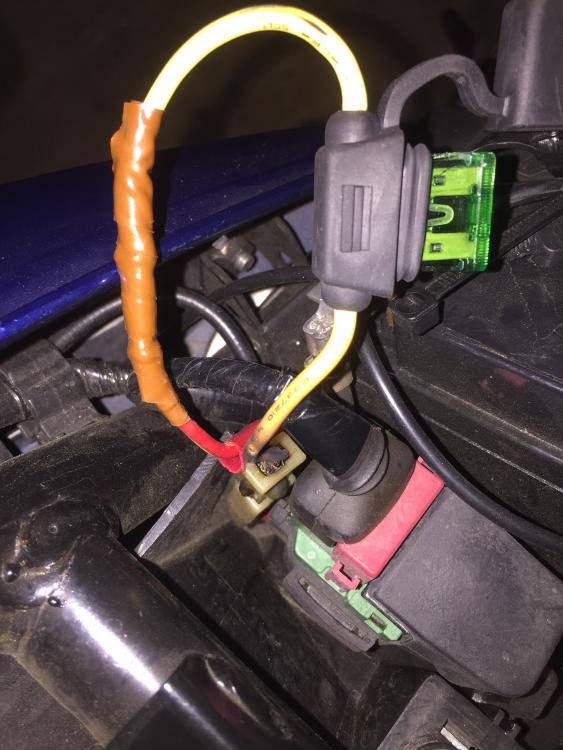
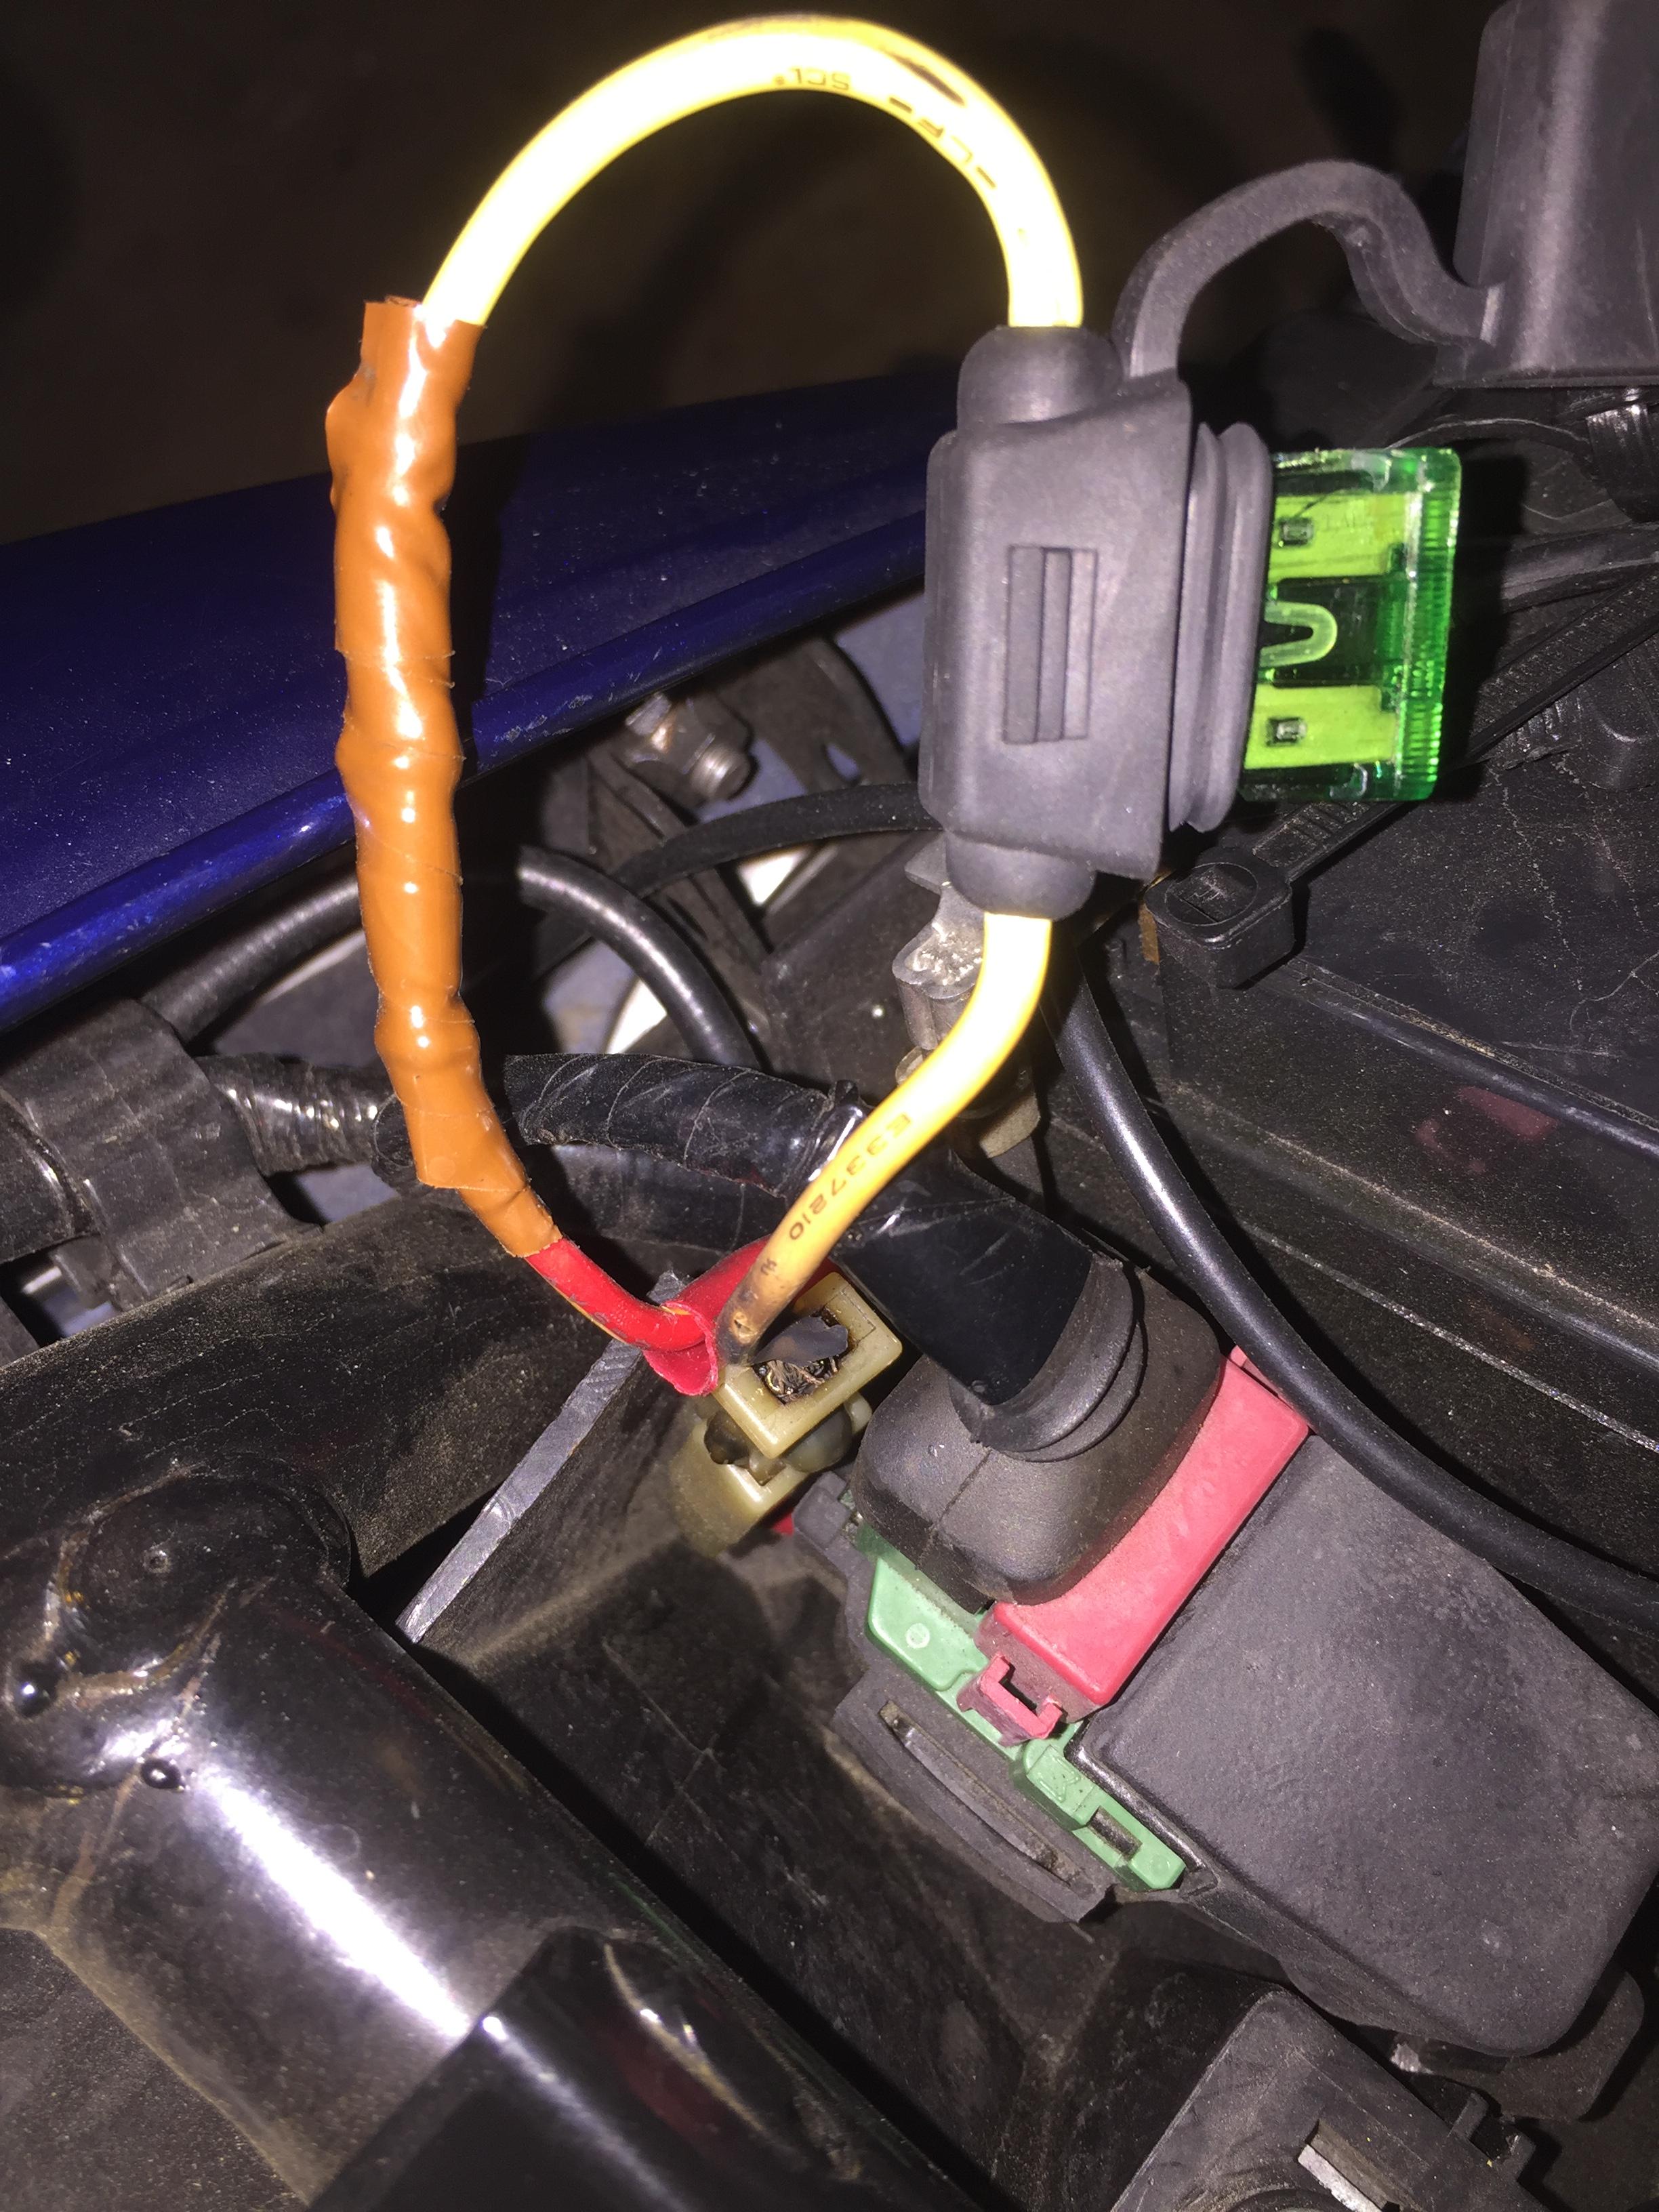
Hello Everyone --I just ran into the same problem again since I changed out the fuse holder last season on my 2007 RWB--melted 30 amp fuse holder and burnt 14 gauge wire from small connector that was melting also --I plan on installing the new marine grade fuse holder with 12 gauge wire and cut out the other little connector thats melting too and replace that 14guage wire with 12 gauge, same as the fuse holder then install the new fuse holder inline--what do you guys think about that? BTW, my RWB only has 16k miles on it.
Any advice is appreciated!
-
Thank You all!!
-
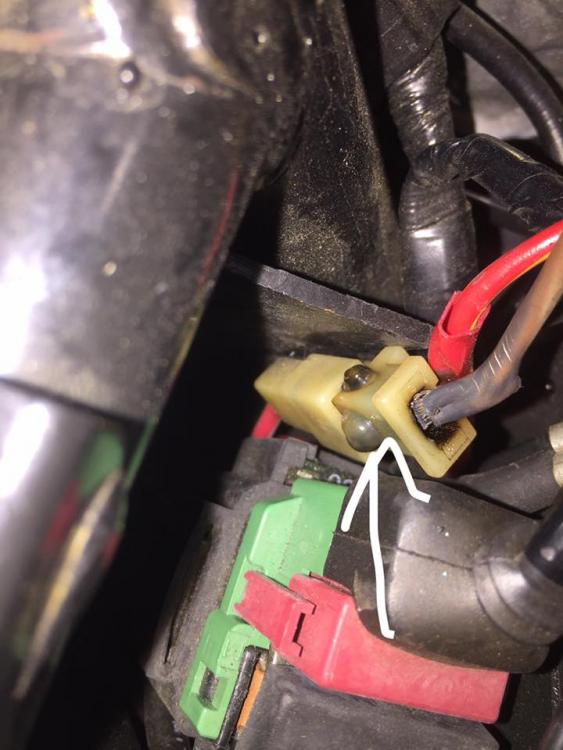
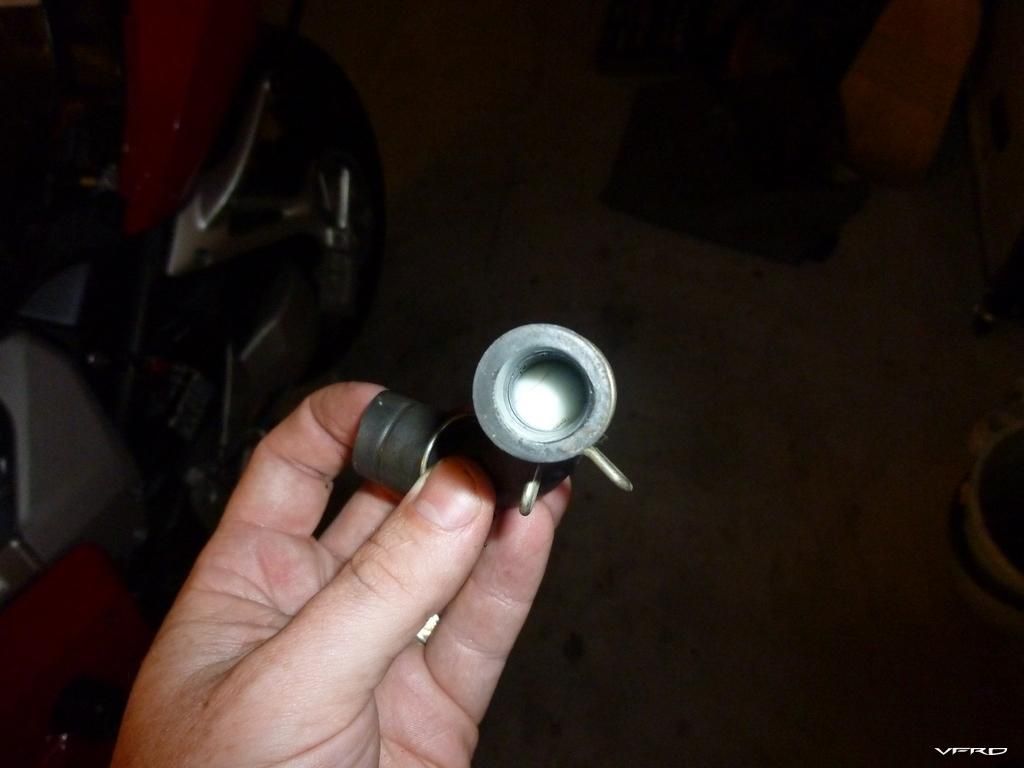
So I already changed the main fuse holder to a good marine grade holder....but I didn't do anything to the smaller connector on the bottom.
My bike would not start yesterday after a short ride --I looked under the seat and found that the smeller connector that's connected to the 30AMP Main Fuse holder is melted...I killed the battery trying to crank the bike over...
Can anyone help? How can I get the bike to crank over? do I cut out this connector and sodder wire to wire? please help.
-
On 3/14/2010 at 5:34 AM, kaldek said:
This shows the simple and easily reversible "marble method" for disabling your PAIR valves. Please note that disabling your PAIR valves is not a performance modification, but is a good change to make when you have a Powercommander (and particularly an Autotune module) to get the best fuel mixture dialled in.
At this point, I will try and sell you Toro's PAIR block-off plates which I also have on order. These are a much better permanent solution and any money to Toro is a good thing because the bloke deserves it!
Anyway without any further ado, let's get started.
First, you need to get your seat off. I don't need to explain how to do that, but note that the tank cannot be lifted if the seat has not been removed.
Next, lift up the tank:
Remove the two 8mm bolts which secure the tank.
Once the tank bolts have been removed, lift up the tank and replace one of the bolts, like so:
Screw the bolt down a bit, then spin the washer so it seats against the frame.
We're going to use this bolt which is nicely sticking out of the frame as a means of securely holding up the tank. I have used some socket wrench extenders, with the hollow end sitting over the bolt head, and the solid end pushing up under the tank, like so:
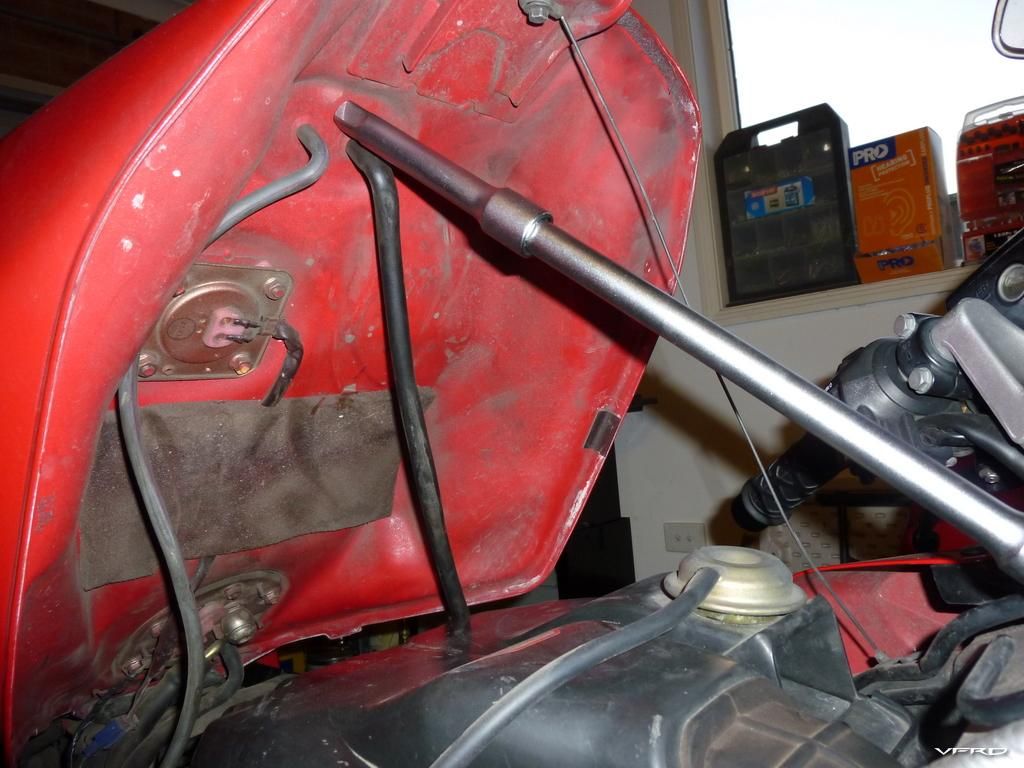
Nice and secure!
Now we need to remove the UPPER air hose (it's the short one) from the rear-left of the airbox. This hose connects directly to the airbox and to the PAIR solenoid.
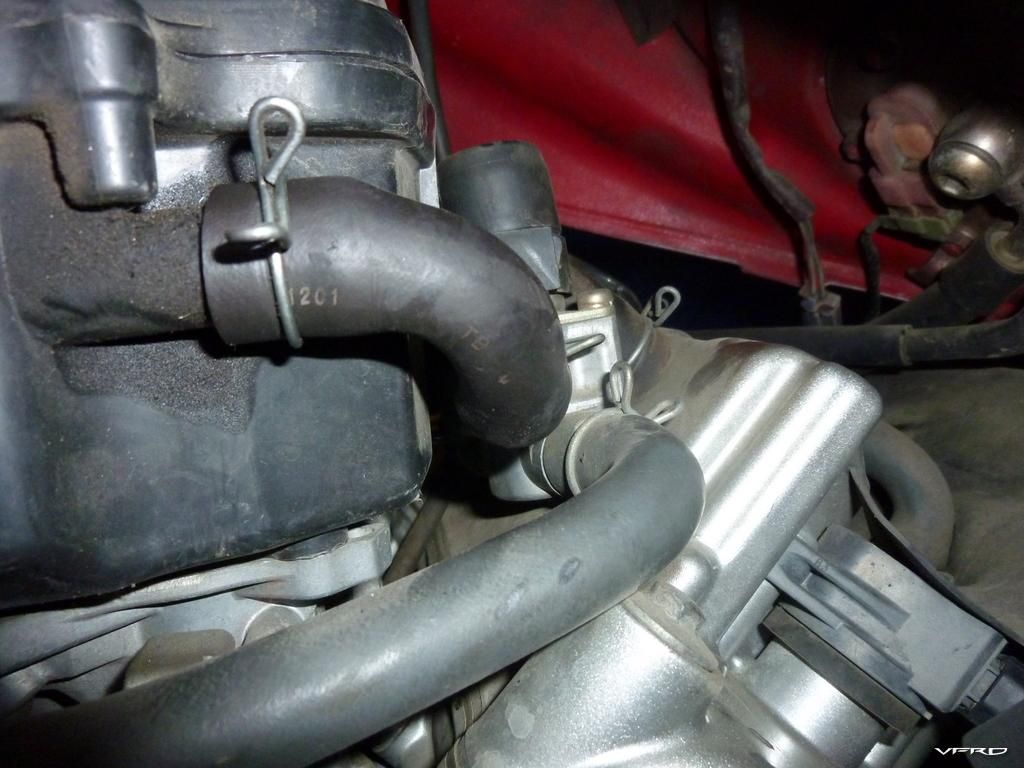
Remove the UPPER hose by loosening the clamps with your fingers and moving them down the hose. Use a small flat-blade screwdriver to wiggle the hose a bit to get it off.
Once it's been removed, your airbox should look like this:
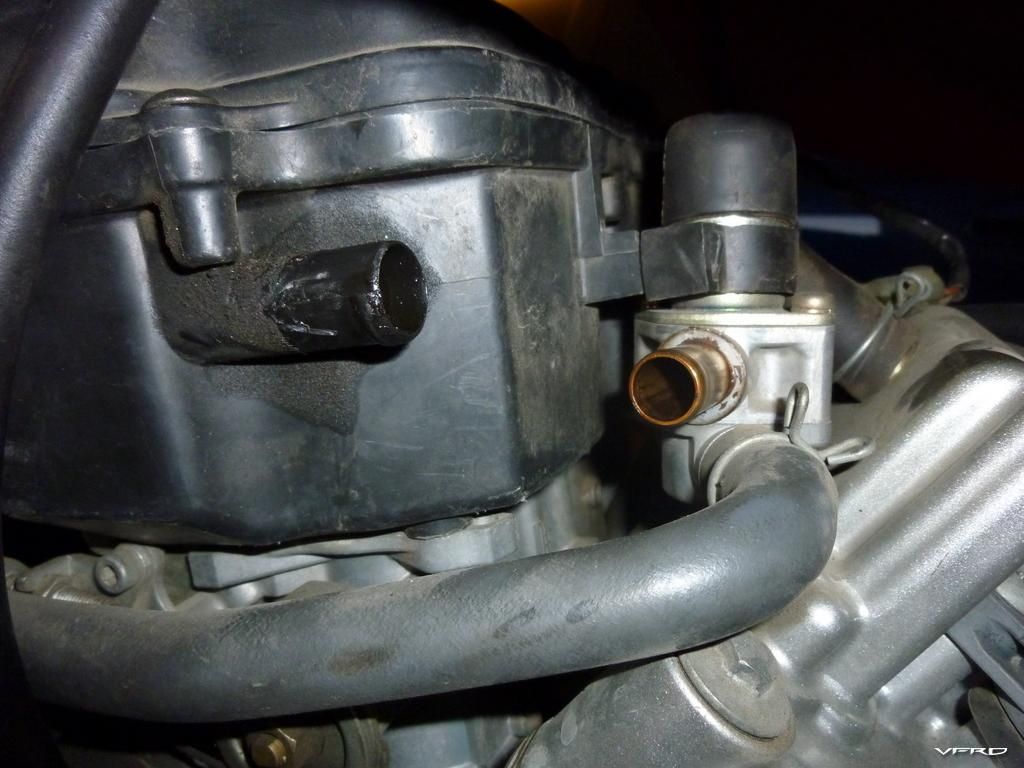
Airbox without PAIR hose.
The next thing we need, is a bag of these:
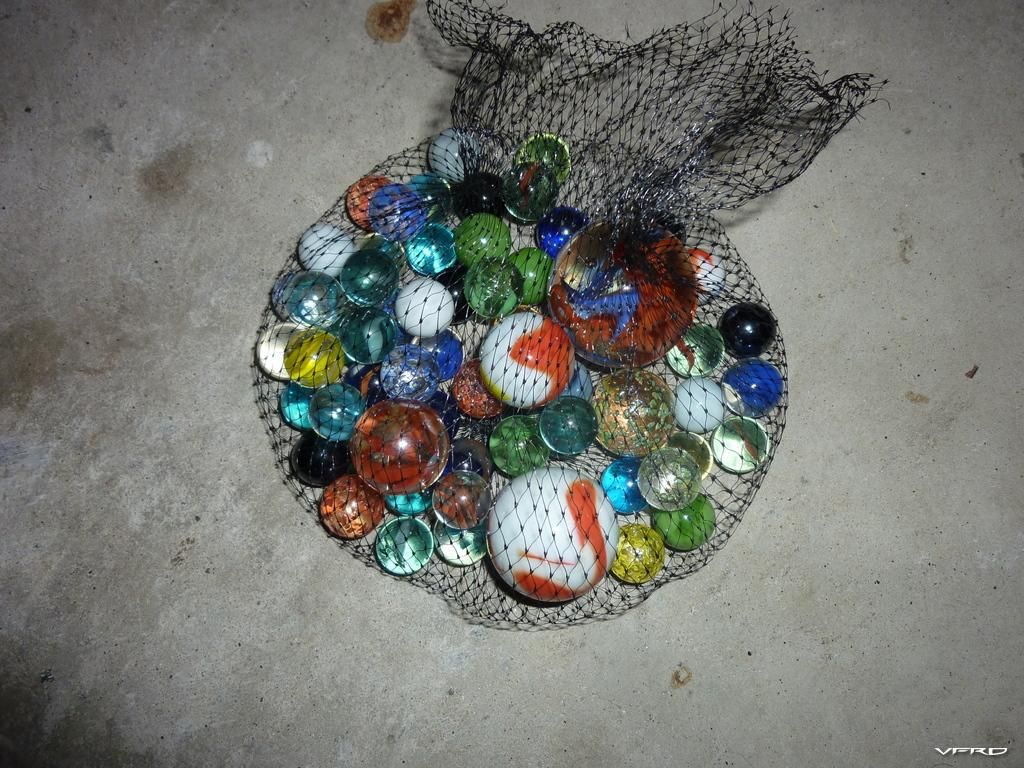
Three dollar bag of assorted marbles!
Find a marble which is a nice tight fit in the hose but can be pushed with some effort. Note that it doesn't need to be the world's tightest fit - these are not vacuum hoses, just low pressure fresh-air hoses to draw air from the airbox into the exhaust. Don't be concerned about the marble being sucked into your engine! Firstly, there is very little if any air pressure going through these hoses, and secondly the marble will head towards the solenoid rather than the airbox, if at all!
SPECIAL NOTE: Feel free to test the marble by sucking on the hose. If you can successfully suck the marble out of the hose, put your tools down and go for a job interview in the porn industry.

Push the marble into the hose, past where the clamps and hose connectors would reach to.
It's best to push your marble into the end of the hose which is straightest, so you're not trying to shove the marble round corners.

Marble goes in straightest end.
After this, you can just slip the hose back on, put the clamps back in their original positions, and secure the tank again. However we now need to adjust the idle speed, as the ECU holds the PAIR valves open during idling, which affects the airflow through the airbox and exhaust. Disabling the PAIR system causes the fuel mixture at idle to change and therefore the idle speed will drop, so we need to bring it back up.
Start the bike and let the engine warm up. If it won't hold an idle already, skip right ahead and perform the following step with the engine cold and also once it's hot.
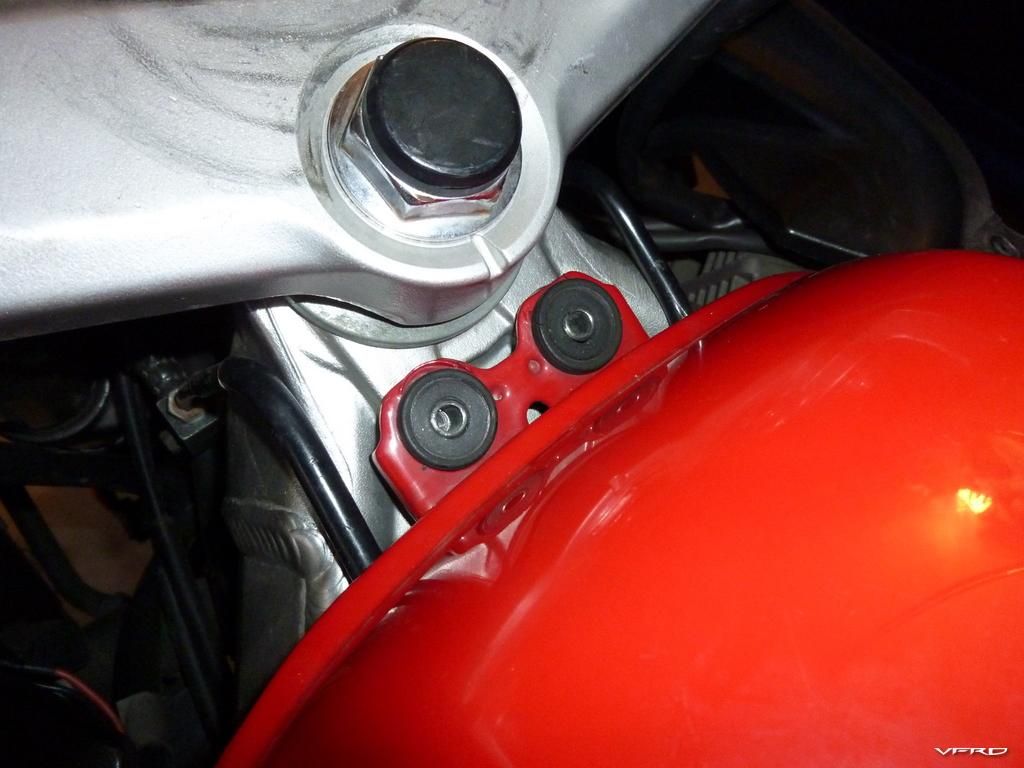
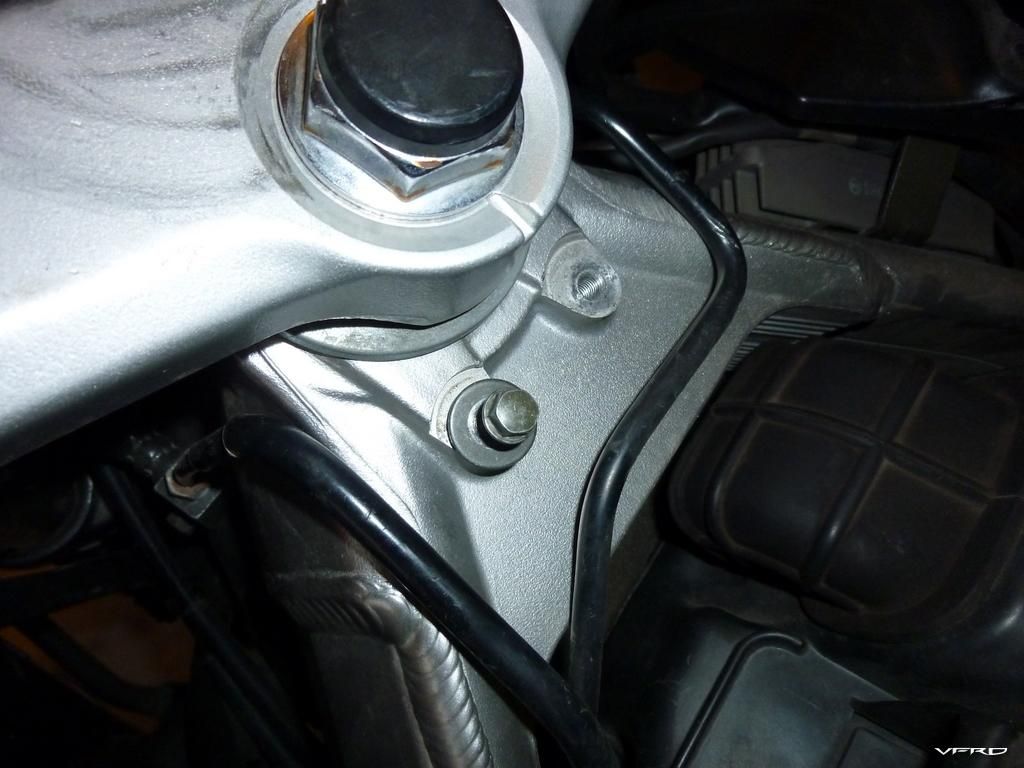
We're now going to adjust the idle speed. Here's where the idle adjuster is on the right-hand side of the bike just behind the fairing.
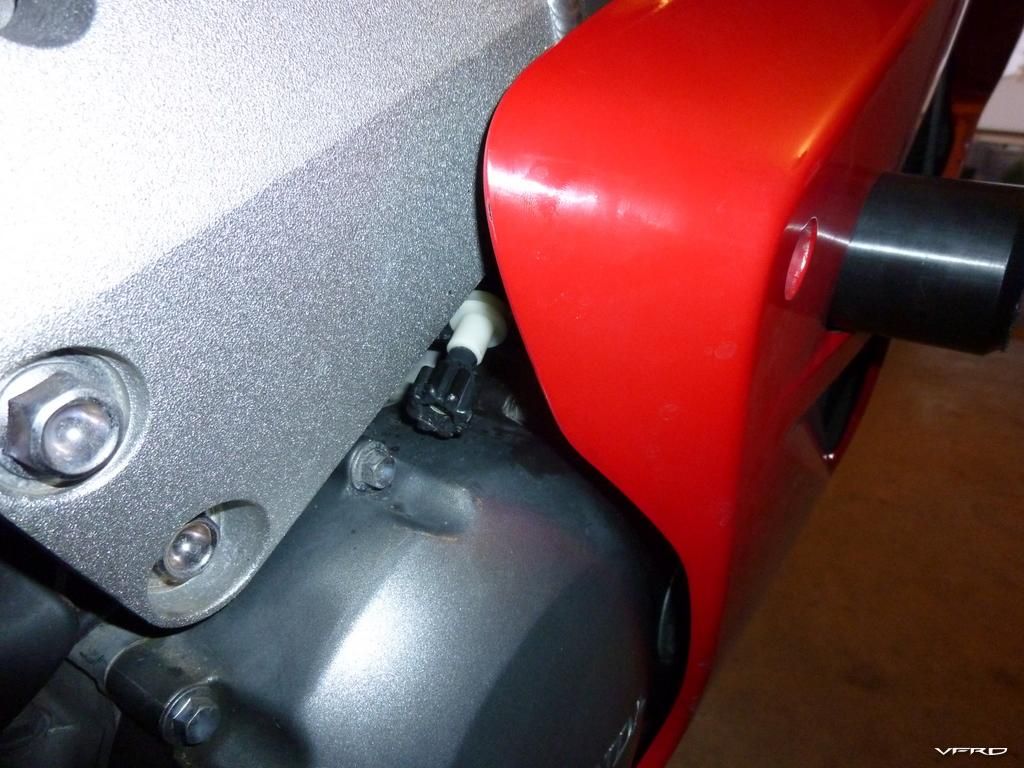
Well hidden idle adjuster!
Turn the idle adjuster clockwise to increase the idle speed. Most likely it will be really hard to turn with your fingers, so use some needle-nose pliers if you like:
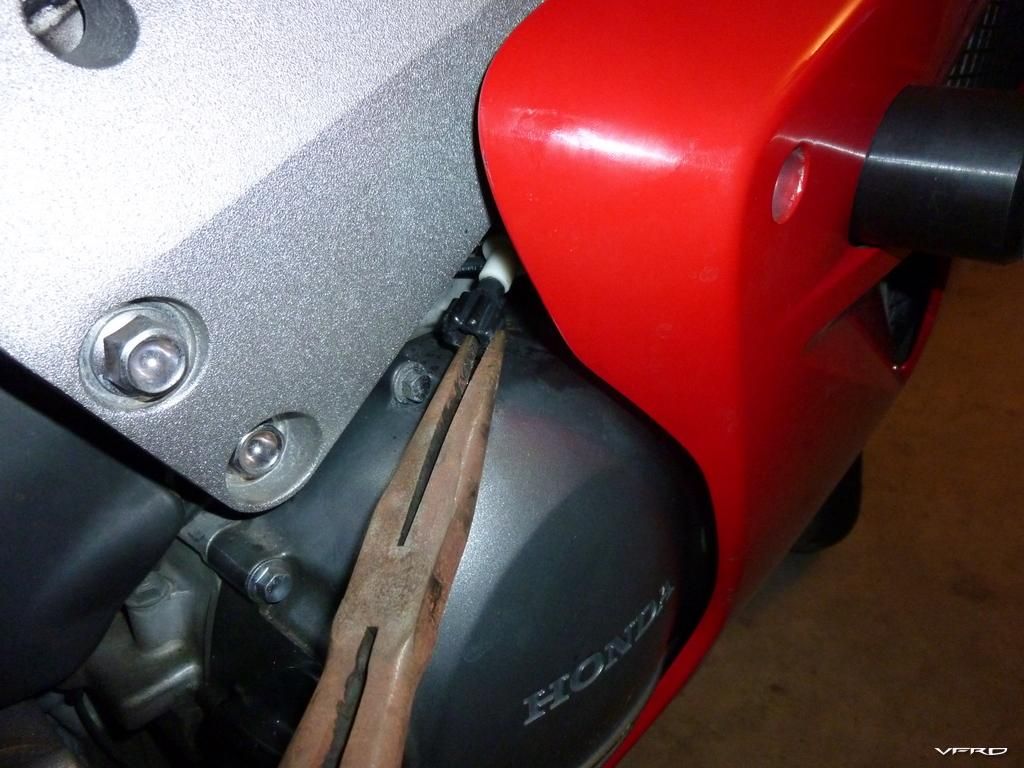
Be gentle and make small adjustments! A quarter turn can be a hundred rpm!
Once your engine is hot, and your idle has been set to approximately 1,200 rpm, you're ready to roll!
Hello! I Know this is an old post but hopefully you still see it and could help me out... I have 1 question--I do not have a power commander. I ride an 07 vfr and at low RPMs the front end kind of vibrates. It feels sort of like the wheels need to be balanced or something but I know its not the wheels that is the problem because once the bike goes up in Speed its fine. Could this PAIR Modification smooth out this issue on my bike?
-
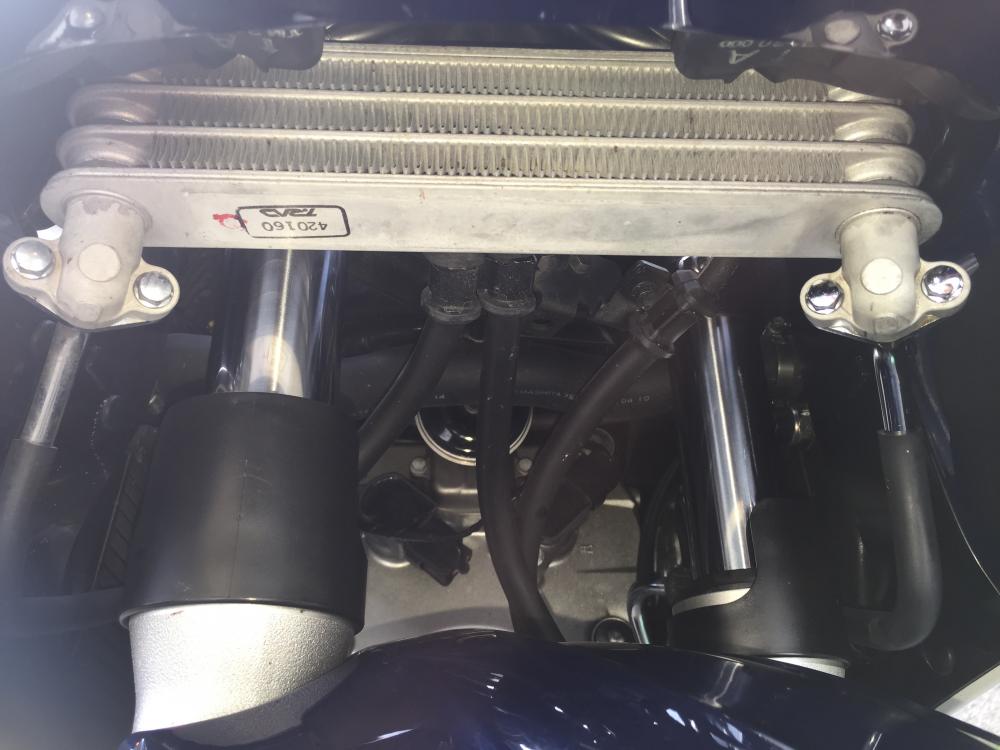
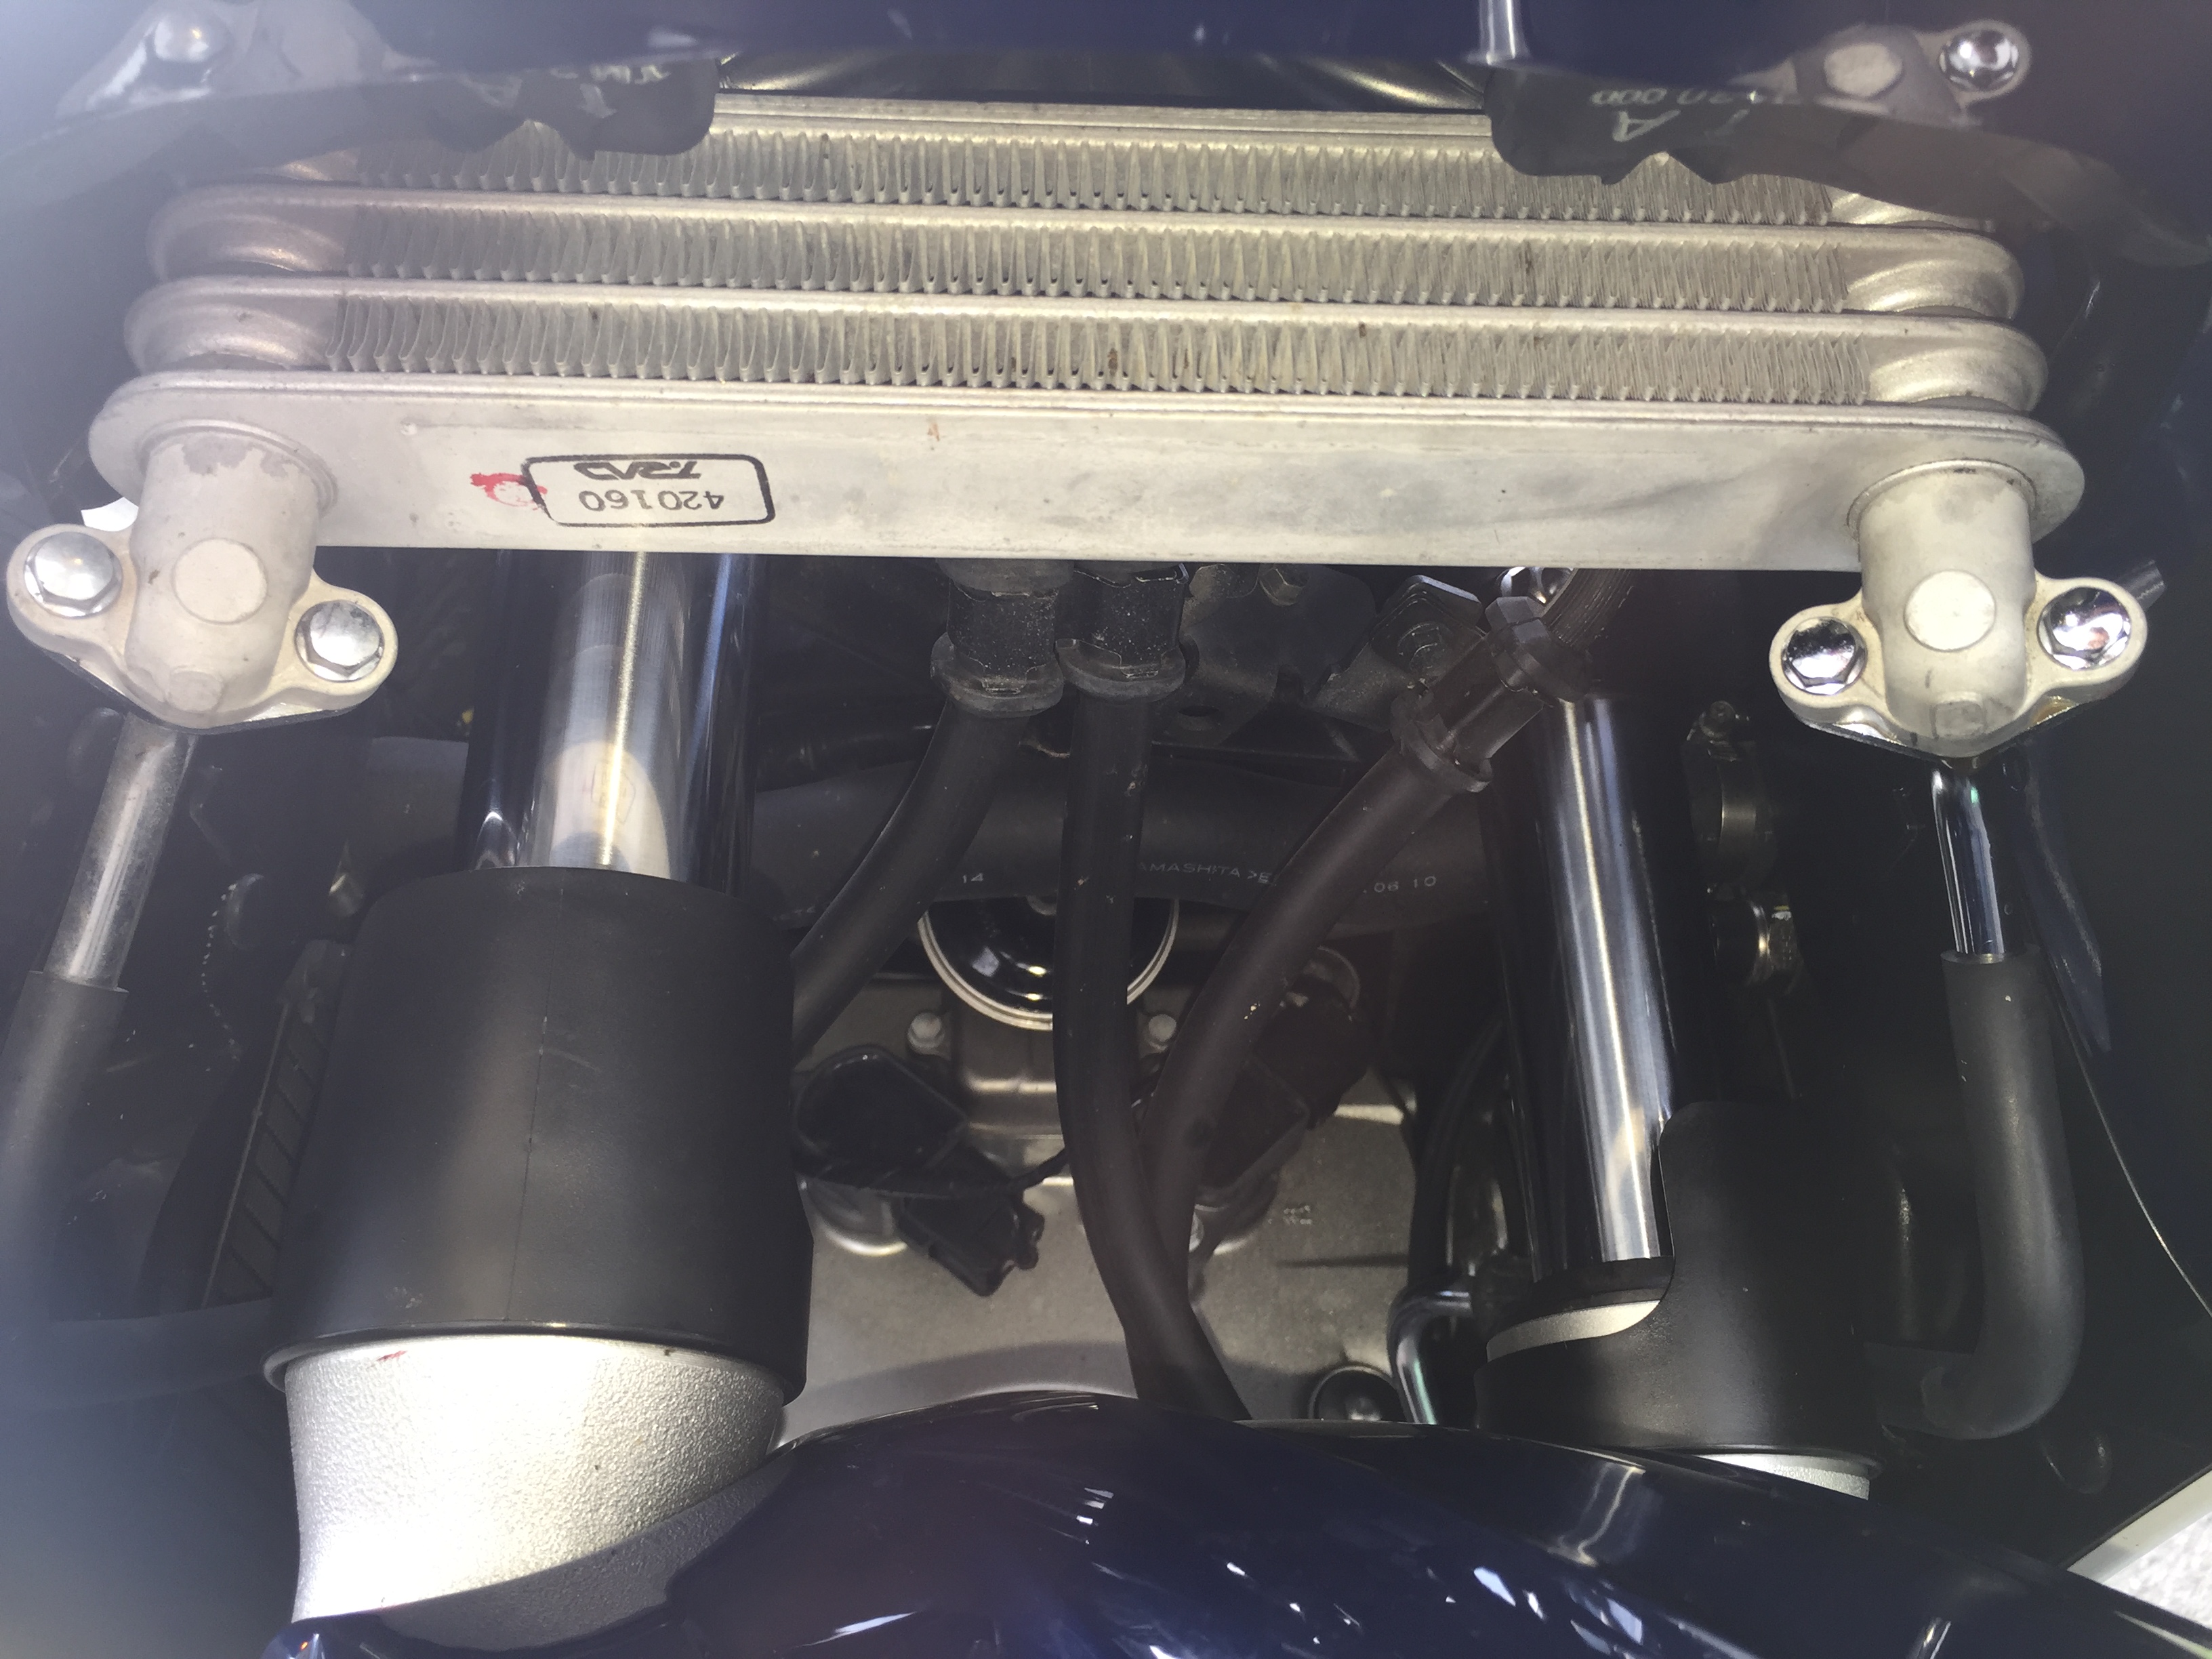
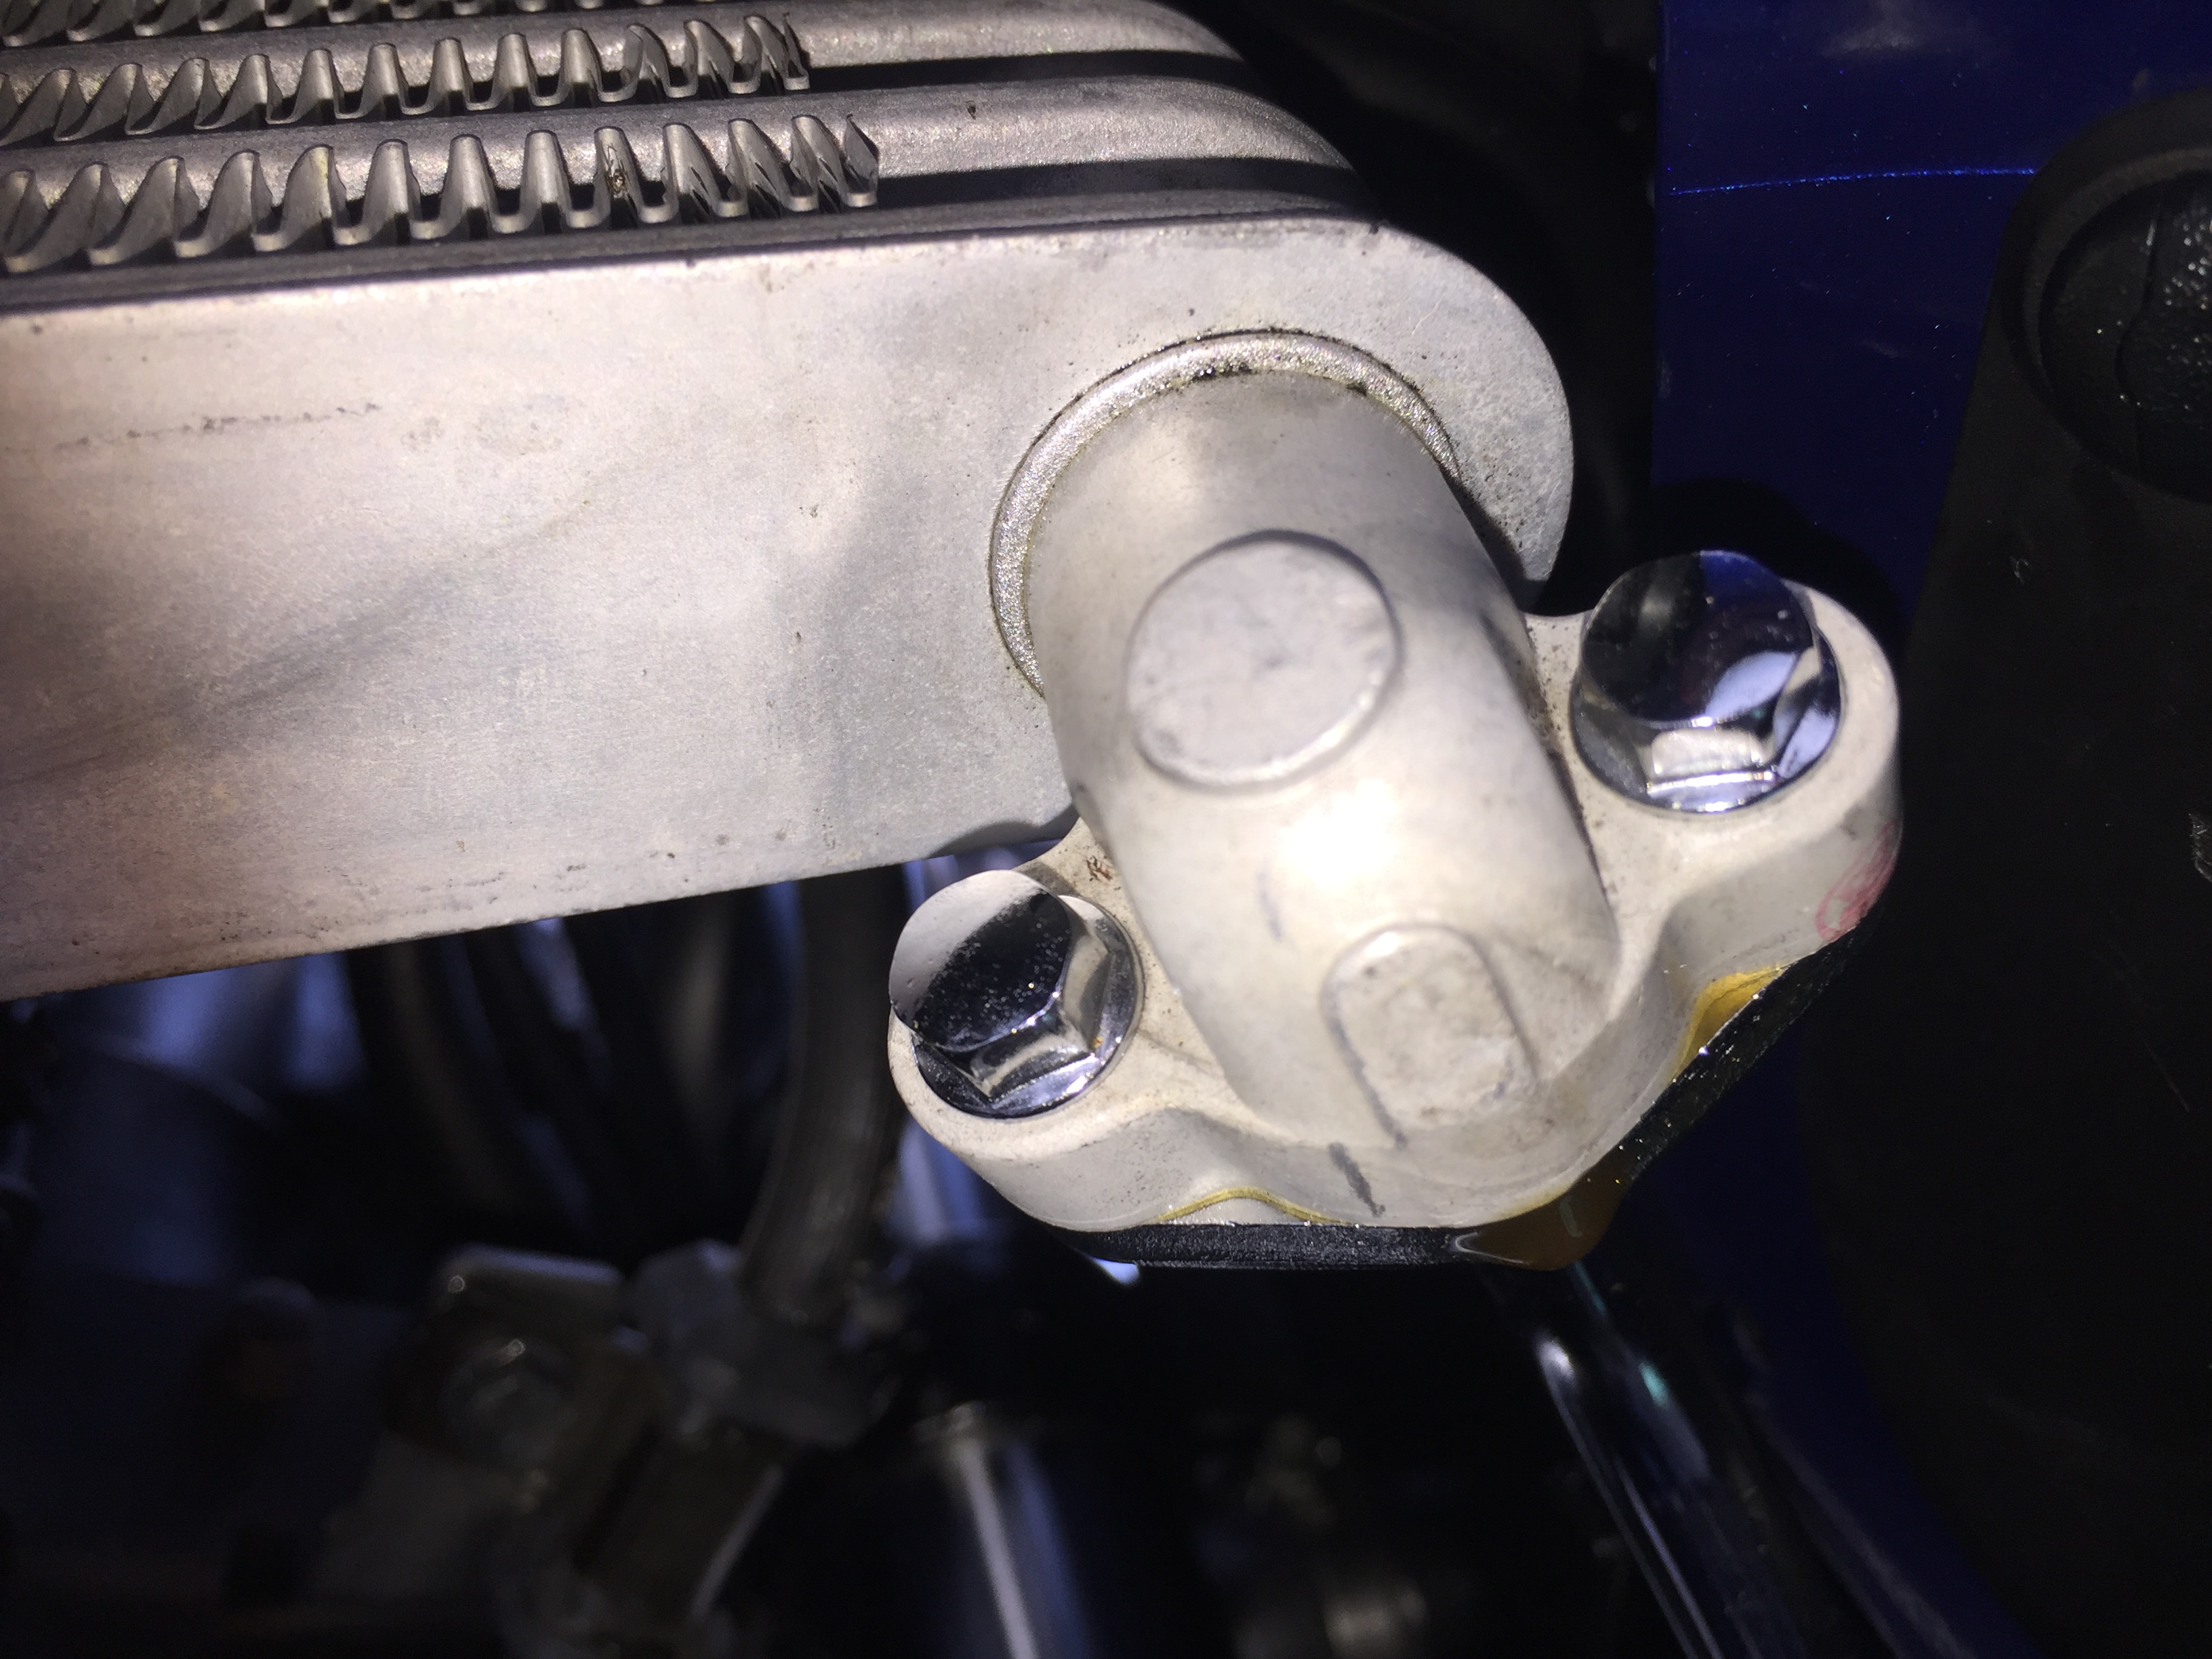
Thank you all for the warm welcome! Now I need some help!Whats up everyone. So I have an oil leak coming from the right side flange on the oil cooler line. I thought maybe it was a bad O-ring so I replaced it but the oil is still leaking...Has anyone of you ever experience this? What might it be if its not the O-ring? Could there be a Hairline crack in the oil cooler? How can find out? Cuz I don't see oil comimg from anywhere but the flange ..I've attaché dpics..any help will be highly appreciated. Thank you in advance!

-
Whats up everyone. So I have an oil leak coming from the right side flange on the oil cooler line. I thought maybe it was a bad O-ring so I replaced it but the oil is still leaking...Has anyone of you ever experience this? What might it be if its not the O-ring? Could there be a Hairline crack in the oil cooler? How can find out? Cuz I don't see oil comimg from anywhere but the flange ..I've attaché dpics..any help will be highly appreciated. Thank you in advance!


-
Thank you
11 hours ago, LEGEND said:Excellent find, welcome to vfr ownership.
Thanks !
-
13 hours ago, GatorVFR said:
Welcome from the great state of Texas and another '07 rider!
 Thank you!!!!
Thank you
-
23 hours ago, Dutchy said:
Welcome to VFRD from across the pond!
Thank you!
 11 hours ago, Duc2V4 said:
Welcome Aboard! Looks like you find a nice ride, congrats.
11 hours ago, Duc2V4 said:Welcome Aboard! Looks like you find a nice ride, congrats.
-
I just purchased My first VFR--its a 2007 Red whit and blue 25th anniversary edition with 2500 miles and I only paid $4000 U.S. Dollars!
-
Hello everyone !How's it going out here in the VFR discussion world? Thanks for welcoming me into this forum! I'm Numan and im from Clifton, NJ--I just got my 1st VFR and its the 07 RWB Anniversary Edition with ONLY 2500 miles--practically brand new!!


Connector gets hot!
in Sixth Generation VFR's
Posted
Im trying to understand what you're saying.
Youre telling us to use a 40 amp fuse?