


meddle1999
-
Posts
129 -
Joined
-
Last visited
Content Type
Forums
Profiles
Gallery
Blogs
Downloads
Events
Posts posted by meddle1999
-
-
Cool.. really cool. Nice tribute. I'm sure He's smilin up there. ( and riding kick ass roads forever)
-
I convertet my KTM to wave rotors and noticed a substantial difference in stopping power... (although were talking in the dirt here!) didn't notice any increase in wear on the pads either.... They definately run cooler as well. when the rotors on the Viffer are sacked thats where ill go as well.....
-
And you guys call yourselves motorcyclists!!! It's clearly a thingamajig for the whatchamacallit.. you know it bolts to the doo hickey. It will look alot better with a nice coat of Plad spray paint though.
-
Hey Seb... use an abrasive wheel (suitable for carbide) and sharpen the cutting edges of a masonry bit... high rpm,light pressure and a little oil and you should be able to work you way through the extractor. Ive done this many times and with a little practice it works quite well...
-
heres another..... Garage door opener.... works sweet...... cost me 3 bucks at radio shack.... the remote was a spare....

-
Iva got a couple... first.. my El-cheapo helmet lock....... 'cause hondas version is a disgrace!!! cost me less than 10 bucks....
-
I have access to a laser cutting CNC production shop , I'm looking into possibly having a short run done if the price is right. I will drill for mounting on the bike and E-coat black. Up to the buyer to get a lock and mill footrest assy. I will get back with a ballpark price If I have enough intrest.
-
I have seen a Bar End with a barrel lock on the end too. Don't recall the name of the product, but it looked pretty slick.
You are *so* going to kick yourself... LINK!
:beer:
Unfortunately what they don't tell you is that you also have to employ an adapter plate to slip through the D ring on your helmet to attach it to the bar end lock. It doesn't look like it would be too comfortable in your pocket.
-
That looks great meddle!
I've been wanting to do something like that for a while!
It was really quite simple to do. I think I've only got about $15 in the whole setup.
-
Damn nice. Up to producing these?
I've thought about it some but I don't think I could charge a fair price and still turn a decent profit. I'm still looking into it though.
-
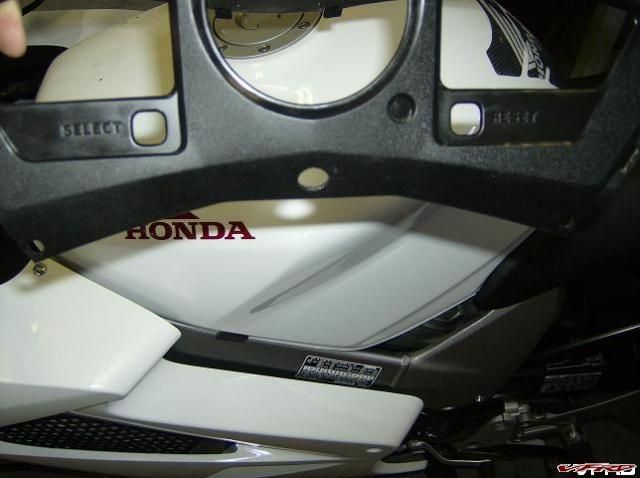
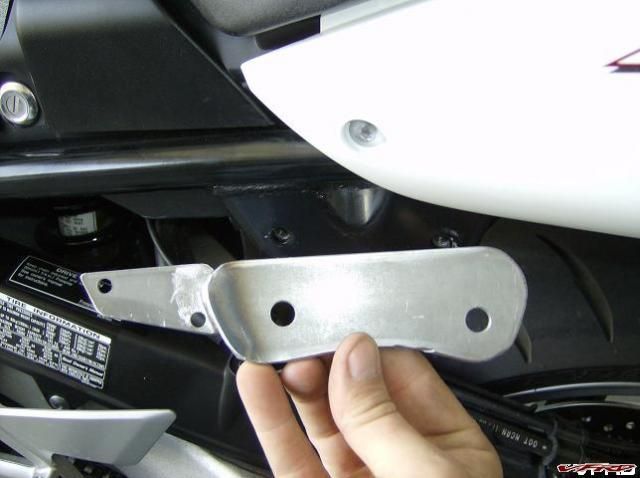
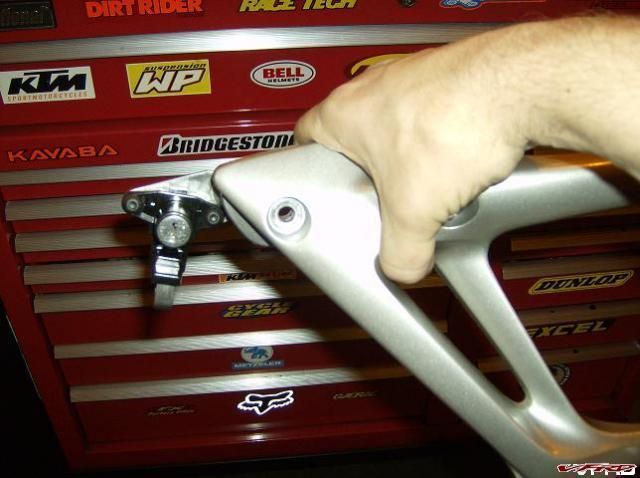
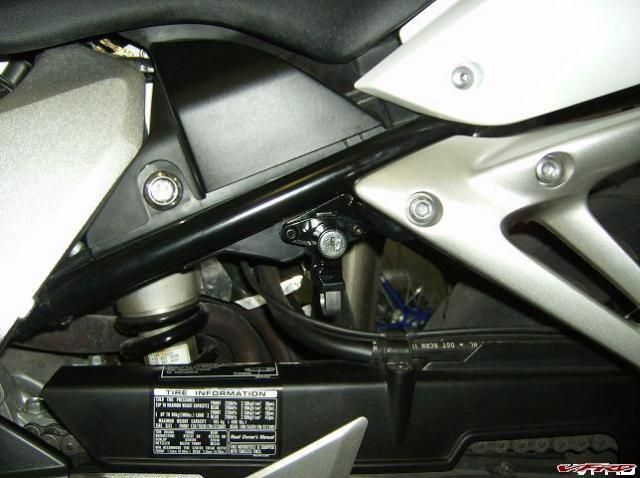
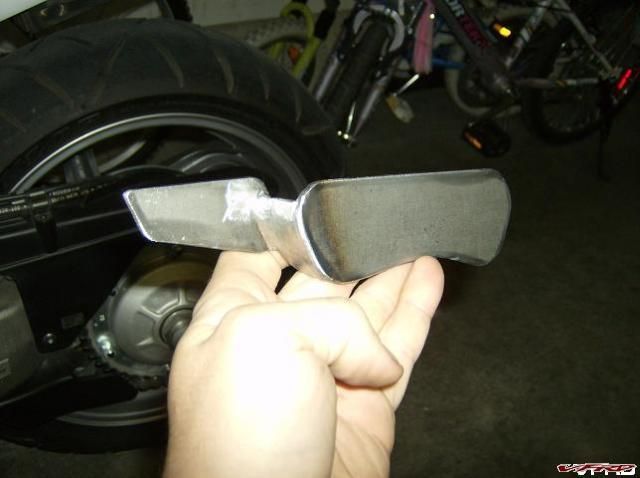
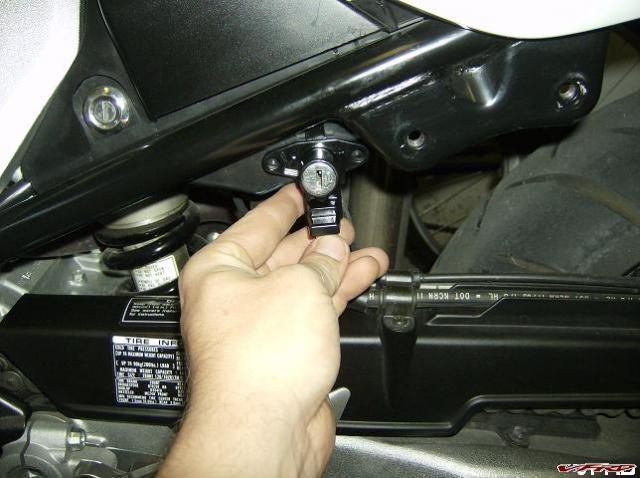
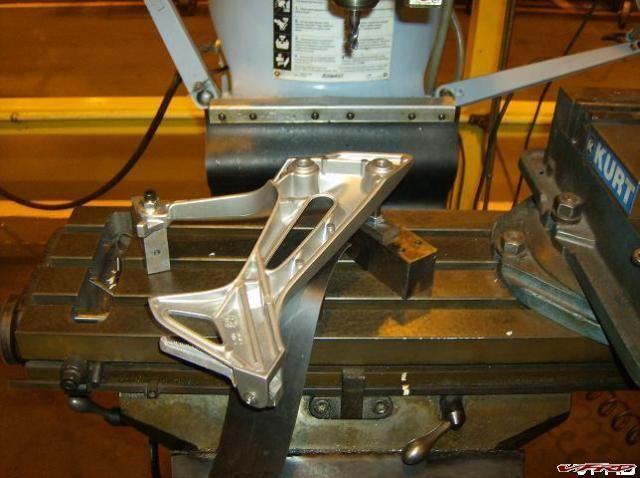
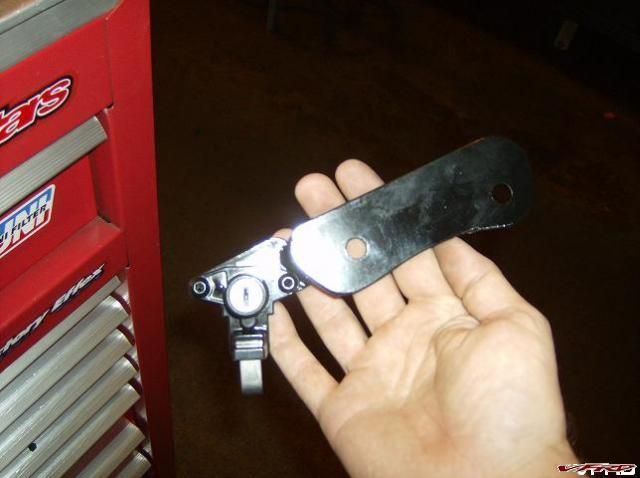
I got sick of Honda's sad excuse for a helmet lock and decided to take matters into my own hands. I have posted this on "another" vfr site but wanted to share it here as well. It started off with a helmet lock an 80's CB??. I fabricated a mount for it to mount under the left side passenger footrest assy. I also removed the thickness of the bracket from the footrest assy. to keep things even. All in all it works very well and I dont miss removing the seat all the time.
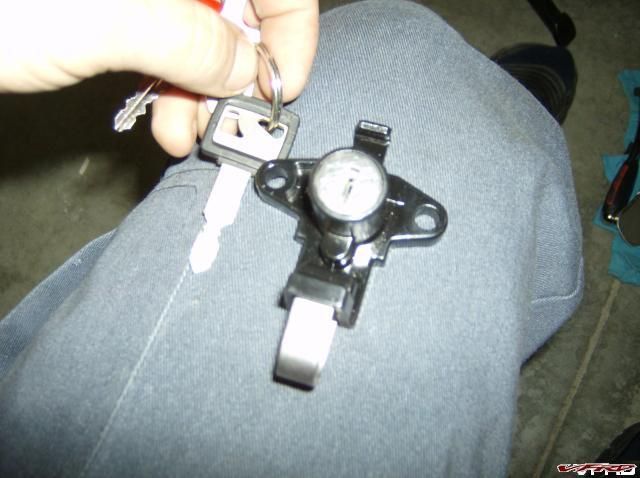
HPIM0142.jpg
HPIM0145.jpg
HPIM0150.jpg
HPIM0147.jpg
HPIM0154.jpg
HPIM0164.jpg
-
My ex-wife simply used my 1961 H-D Panhead to open it...right through the fiberglass while I was at work............... <_< ....shoulda' been grounds at the time............. :unsure:
I did the same thing myself with a brand new John Deer mower... DOHHH!!!!!
-
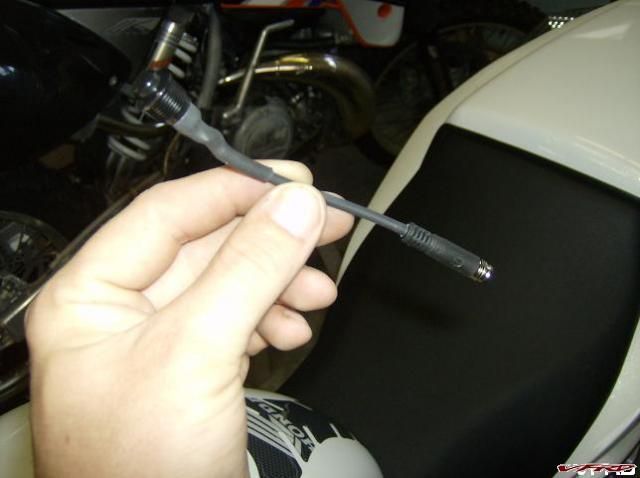
I had an extra remote and some time on my hands... total investment was around 3 bucks for push button....
HPIM0170.jpg
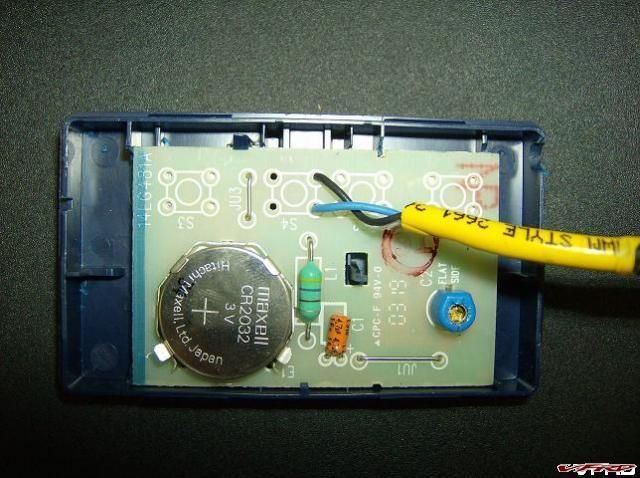
I opened up the remote and desoldered the stock button. I then soldered a new wire onto the board. (I had a brad harrison connector lying around but any connector will work.
HPIM0165.jpg
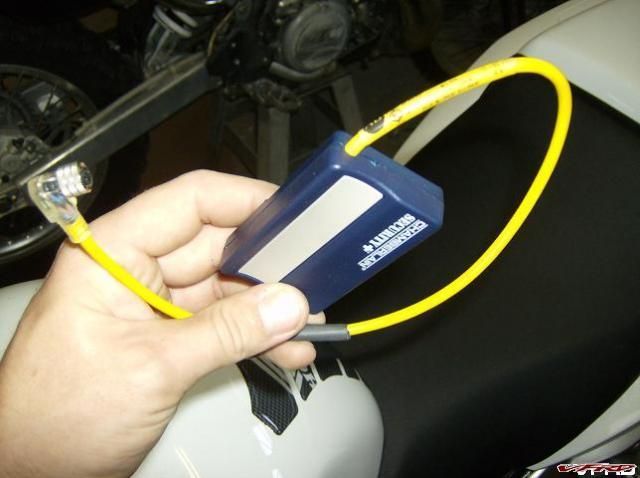
here is the other end of connector mounted to small momentary button (radio shack)
HPIM0167.jpg
here is mating end attached to opener case.
HPIM0173.jpg
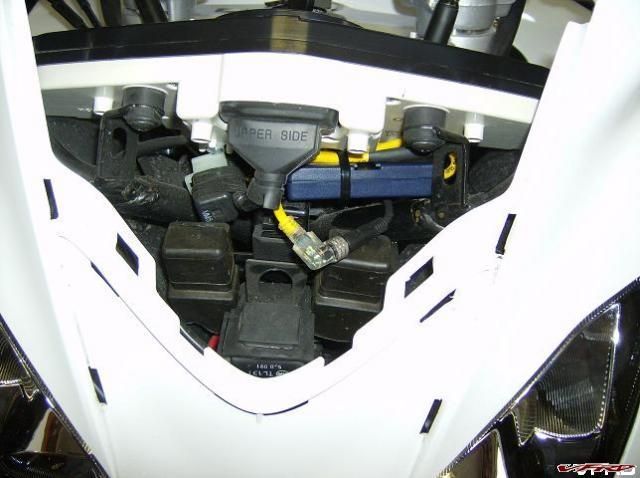
Here is unit mounted behind instrument cluster
HPIM0171.jpg
Small hole drilled in dash cover to accept button.
HPIM0174.jpg
Finished!!
This mod was cheap easy and works awesome!!! hope i inspired some fellow gearheads.
Helmet Locks for the 6th Gen VFR
in Modifications
Posted
Her is another option.... I found it was tucked in a little better and looks a little more "factory"
helmet lock mod