

mello dude
-
Posts
2,413 -
Joined
-
Last visited
-
Days Won
27
Content Type
Forums
Profiles
Gallery
Blogs
Downloads
Events
Everything posted by mello dude
-
Want to give a shout out for Pro Bolt on their excellent fasteners. (And a little fun while I’m at it.) Kinda pic crazy... I have a tendency to strip my ride at any little annoyance, and from that I have worn the paint off the front fender. Ok, no mas... So I wanted to go to something that doesn’t rotate against the paint every disassembly like the stock OEMs. – A trip to Lowes and I found these nylon washers, and had on hand some Honda collars that could stay fixed when the fastener comes off. I was searching around for a dome head fastener that could work, and I remember something Mohawk mentioned ProBolt, so I checked ‘em out. Well, there’s nothing more dangerous than a Saturday nite beer buzz and a credit card, and I found ProBolt had titanium 6mm Dome heads that looked perfect. ---Jeez, you know, sometimes a guy has just has to have gold titanium fender fasteners – right?😁 Ordered a few stainless too for other purposes. Got the parts in and they deserve a “wow.” These things are jewels of a fastener. Its not too often you get something thats way better than you expect. And they give you other useful nylon washers that will come in handy. -- Definitely on the go to list, when the need is there. Cheers Pics
-
Hi - Why screw with marbles n stuff, just yank the damn thing outta there! As a btw - I miss Kaldek and all his incredible detailed work he did on his bikes. Was great reading!
-

So I might have done a thing......
mello dude replied to Veefer800Canuck's topic in OTHER Motorcycle Talk (non vfr)
WOW! Holy bike lust! -
Pair valve removal "how to" from my 5th gen.. pics pics pics....
mello dude replied to mello dude's topic in Modifications
Gottta give Moose a kudos for catching this - the reed screw hitting the plate if you dont take out the reed assembly.. -
Pair valve removal "how to" from my 5th gen.. pics pics pics....
mello dude replied to mello dude's topic in Modifications
Bumping this up for guys who recently got the pair valve kits.- 41 replies
-
- 2
-

-

-
- pair valve plates install
- pair plate kits
- (and 2 more)
-
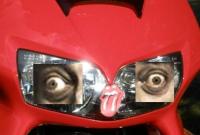
 Nice photo! - Gotta ride one of those...
 -
So I might have done a thing......
mello dude replied to Veefer800Canuck's topic in OTHER Motorcycle Talk (non vfr)
^^^^^ Congrats! Cool! -- You gotta post pics when it shows up.. -
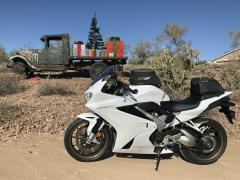
 Wow, that's beautiful! Love that double exhaust!
 -
 Hello - What bag is that on the tail? Thxz!
 -
Thanks for the tip
-
Not one to leave much to chance - the seat would get hot so- a what the hey.. .did the seat too.... Used ThermoTec material... A convenient chess board turned out to be great template material.... Template First pieces fitted... Progressing.... The whole deal completed..... So -- I can say that all the fuss did the job and worked out fine. Got in longer rides at end of season.... - Maybe in the spring I wont take it apart again and get some solid trips going! Sources... https://www.heatshieldproducts.com/automotive/auto-heat-shield-guide http://www.designengineering.com/ https://www.thermotec.com/products/heat-shields-and-protection Cheers
-
Working on a few brews.. I find it ironic its 3*F outside... Brr - And I'm writing about heat shields... --- Anyhoo this fall one of my "to dos" was to beef up heat shielding on the 5th gen. For some reason, the last few seasons, it would cook my ass to hamburger and limited time I could handle on it to a couple hours a shot with out a break.... I used several products on the market --- DEI Engineering / Heatshield Products flex transmission covering and ThermoTec - all have great stuff.... Photos photos photos -- also an excuse to get more practice with this SmugMug photo site.. Need to figure out to reduce photos before posting, but I'll get there later.... Starting out - I pulled the back end of the tank loose and pulled the stocker rubber shield parts. Used Heatshield Products formable transmission cover with adhesive and cut that to shape on the front rubber shield...Being stiff aluminum and foam, it was very tricky to get it shaped and stuck down. There is a perimeter tape that ensures it stays put. -- the battery cover is from DEI - a more flexible material. That one was fairly simple. Backside look...... After 3 or 4 - cut fit, cut fit, cut fit, --- got it installed to a good fitting..... fits good, looks good too. Right side.... Battery cover -- no brainer - ez
-
Pair valve removal "how to" from my 5th gen.. pics pics pics....
mello dude replied to mello dude's topic in Modifications
-
Pair valve removal "how to" from my 5th gen.. pics pics pics....
mello dude replied to mello dude's topic in Modifications
@RC51 Nick, and @RobF -- hey thanks guys...- 41 replies
-
- 2
-
-
- pair valve plates install
- pair plate kits
- (and 2 more)
-
Pair valve removal "how to" from my 5th gen.. pics pics pics....
mello dude replied to mello dude's topic in Modifications
Now go button it up and go try it out.... No more Pop! Pop! Pop! Heh heh... I assume on a 6th gen or possible 8th, the job wouldnt be that much different.... Cheers all... For real, I sell the cover plates at $29.95 plus $7.00 shipping (US) --I make these... Perfect laser cut, deburred and hand finished by yours truly.. ..Stainless Steel socket bolts included.- 41 replies
-
- 5
-
-
- pair valve plates install
- pair plate kits
- (and 2 more)
-
Pair valve removal "how to" from my 5th gen.. pics pics pics....
mello dude replied to mello dude's topic in Modifications
And the victim... -
Pair valve removal "how to" from my 5th gen.. pics pics pics....
mello dude replied to mello dude's topic in Modifications
Tape up the connector and next you can pull that sucker outta there.... -
Pair valve removal "how to" from my 5th gen.. pics pics pics....
mello dude replied to mello dude's topic in Modifications
Clip any zip ties on the long hose going to the rear on the pump .. typically it has one or two clipped to the harness.... Also next step is to get the frickn connector loose from the pump to the harness. On the 5th gen, its on the left front side... Its a royal sumbitch to get apart!! -
Pair valve removal "how to" from my 5th gen.. pics pics pics....
mello dude replied to mello dude's topic in Modifications
You will need to plug up the port..... Cool box of goodies... got at Autozone...- 41 replies
-
- 1
-
-
- pair valve plates install
- pair plate kits
- (and 2 more)
-
Pair valve removal "how to" from my 5th gen.. pics pics pics....
mello dude replied to mello dude's topic in Modifications
Pull the hose loose from the front air cleaner box port... -
Pair valve removal "how to" from my 5th gen.. pics pics pics....
mello dude replied to mello dude's topic in Modifications
There is a pump hanger mounted to left front of airbox, unscrew that... I had the aircleaner out.. .dont drop the screw into the venturis!- 41 replies
-
- 1
-
-
- pair valve plates install
- pair plate kits
- (and 2 more)
-
Pair valve removal "how to" from my 5th gen.. pics pics pics....
mello dude replied to mello dude's topic in Modifications
Now work on pulling out the Pair Valve pump.... -
Pair valve removal "how to" from my 5th gen.. pics pics pics....
mello dude replied to mello dude's topic in Modifications
Bolted down... Looking good! Front Rear -
Pair valve removal "how to" from my 5th gen.. pics pics pics....
mello dude replied to mello dude's topic in Modifications
Assembling the covers .....--- Clean the covers good before installing. Alcohol, brake cleaner etc... ------Torque 9 ft-lbs -
Pair valve removal "how to" from my 5th gen.. pics pics pics....
mello dude replied to mello dude's topic in Modifications
Now your gonna need new pair valve covers...... Hey mello dude, where did you get the cool pair valve covers?- 41 replies
-
- 3
-
-
- pair valve plates install
- pair plate kits
- (and 2 more)