

ZenMoto
-
Posts
105 -
Joined
-
Last visited
-
Days Won
4
Content Type
Forums
Profiles
Gallery
Blogs
Downloads
Events
Everything posted by ZenMoto
-
 Love the location! :)
 -
 Thanks! Had the silver Arai for a while now. But I'm thinking my next lid will be the new Schuberth flip-up. I'm not usually a flip-up guy, and never liked the old Schuberth helmets, but the new one fits like a glove and feel really solid! :) It's just $$$ :fing02: lol
 -
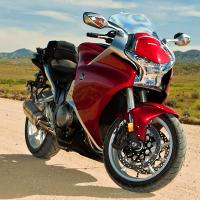
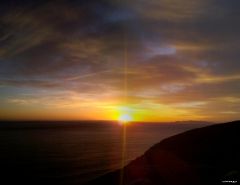
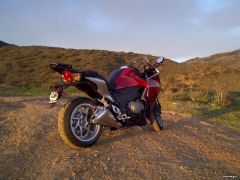
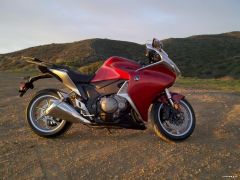
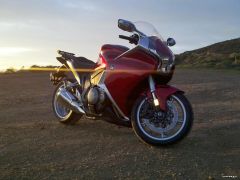
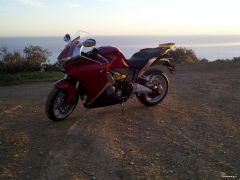
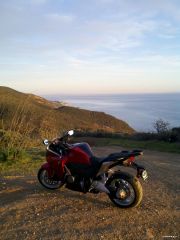
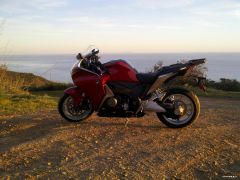
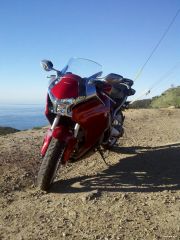
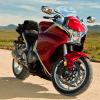
My first real (half) day on the new VFR1200F.
-
-
From the album: VFR1200F "Glinda"
-
From the album: VFR1200F "Glinda"
-
From the album: VFR1200F "Glinda"
-
From the album: VFR1200F "Glinda"
-
From the album: VFR1200F "Glinda"
-
From the album: VFR1200F "Glinda"
-

From the album: VFR1200F "Glinda"
-
From the album: VFR1200F "Glinda"
-
From the album: VFR1200F "Glinda"
-
From the album: VFR1200F "Glinda"
-
From the album: VFR1200F "Glinda"
-
Cleaning Up The Old (new To Me) Girl; 1999 Vfr800 Fi. Part 3
ZenMoto commented on ZenMoto's blog entry in ZenMoto's Web Log
It hasn't given me any problems since the fix. I ended up using JB weld to hold it in place, and with that in mind, I machined out a fer gaps in the portion of the rod sliding into the subframe (just narrow sections where I let the lathe dig in deeper than the surrounding material. My thinking was that this area would fill with JB Weld increasing the shear-strength of the bond. ...probably overkill, but it can't hurt! :) Good luck on your repair! Dale -
Cleaning Up The Old (new To Me) Girl; 1999 Vfr800 Fi. Part 2
ZenMoto posted a blog entry in ZenMoto's Web Log
Time for another update! Granted, I haven't gotten much done since I last posted, or at least not a lot done on the bike. lol When last we left, I was waiting for my buddy, and all around VFR guru, Tony to come by to help me with a valve check. I'm confident enough to do the valves, but have never dug into this generation VFR and I know Tony knows all the shortcuts. ...waiting for him proved to be well worth it. Though I had remounted the forks to facilitate removing the rear, there was still plenty of room to move around with the radiators moved out of the way. First though, you have to remove the two bolts that hold the oil cooler in place and allow it to drop out of the way. It will seem to still be an obstacle because the rigid oil-lines are resting on the coolant hose that crosses in front of the engine. Once the radiators are lowered, the oil cooler will also fall out of the way. A trick Tony showed me, which requires removing the inner radiator brackets (which bolt to the engine just above the front exhaust ports). By removing these braces and the bolts which hold the rads to the sides of the frame, you can wiggle them free and drop them nearly to the ground. You need to disconnect the vent line from the right rad (as you sit on the bike), and be sure to cap it, but that's the only hitch. With all this done, access to the front cylinder head is pretty much wide open, as seen here: In the pic above you can also see the "cheater" bar I have with a 14mm socket (I think) on the crank. I don't necessarily go by the marks on the crank for checking valves, just ensure that the cam lobe is pointing straight up (away from the bucket) when checking clearance. For some reason the "T" marks make checking valves seem much more intimidating than it really needs to be. If I needed to pull the cams to make an adjustment, a bottle of pink nail polish is sufficient to mark the gears to make sure everything goes in exactly as it came out. :smile: There was a little surface rust on the cam-gears, but nothing too bad, probably from time spent sitting on the right coast in cold weather. :frown: And here's Tony enjoying the fact that all the front valves were well within factory spec (not a surprise with just under 40k on the clock, but always good to check). The rears are even easier, though a bit more wiggling is required to get the valve cover out. By removing the ignition coils from the back of the air box, there is just enough room to wiggle and manipulate the rear valve cover free. The ignition coils don't need to be unplugged, just set aside and out of the way (they will only really fit back into place in one way, so don't worry about it too much). Here is the rear exposed with the air box still in place (this saves a LOT of time from following the manual). The rear (cylinders 1 & 3) were all in spec as well, so it was a quick process and time to button her back up. A quick note about the reusable valve cover gaskets used on many modern motorcycles ...and this goes out to whoever did work on this particular bike prior to me). You do not need to use liquid gasket on these gaskets. And you should NEVER wet them with oil prior to installation. If you look at these gaskets they have 3 "wipers" let's call them, that comprise the sealing action. When they are clean, and DRY, you simply make sure they are aligned properly, and tighten the valve covers; these "wipers" make positive contact, and provide a triple layer of barriers that the engine oil is not going to penetrate. ...if you wet them with oil, they cannot compress into the open channels between them, hence, they don't form a tight barrier and will leak. When you go to put your VFR back together, inspect these gaskets, and take time to thoroughly clean and dry them before installation. If you do this, you will never have a leaky valve cover and you shouldn't ever have to replace the gaskets! ...ok, of my soapbox, but I was frustrated after spending an hour picking bits of hardened sealant off my gaskets! :rolleyes: So since that didn't take very long (it wasn't even lunch time) Tony helped me check out the electrical system and showed me the 3 points that must be kept clean and secure. These are the 3 main grounds for the bike's electrical and charging systems. 1. Right side of frame, general accessory ground. 2. "Main" fuse and ground, this is the ground for everything relating to the charging system (mine was in great shape) 3. Battery & main frame ground; this is where the battery grounds to the frame and it is tricky to get to, but very important! ...this is viewing it from the right side of the frame (the battery box is just to the left): ...and looking at it from under the tail, near the left side of the swingarm pivot, looking up: For all of these I make sure the connections are freshly cleaned and free of any corrosion, then I use a smearing of dielectric grease to prevent anything getting in there (FYI, I'm told you can also use Vaseline). So with the valves checked, and the electrical cleaned and sorted, it was lunch time, and I had other things to do besides work on the bike this weekend. Lastly, there was a bulb out on the dash and since I haven't put anything back together, now was the perfect time to pull it and go shopping for a replacement! ...with the bike in this state of disassembly, it's pretty easy to get at these: I still have to rewire the marine fuse box under the seat through a relay, and rewire my heated grips and Datel volt meter, but that will happen this weekend. :biggrin: As for the rest, well. ...my exhaust should be back from Jet-Hot next week sometime, along with my new (heavier) spring for the Penske. ...and there's all of this still to find a home for on the bike somewhere: ...ah the joys of 10 year old bikes! :fing02: -
Cleaning Up The Old (new To Me) Girl; 1999 Vfr800 Fi. Part 1
ZenMoto posted a blog entry in ZenMoto's Web Log
For those of you who saw my blog of going to pick up the '99 in West Orange, NJ you might recognize the old girl. ...she looks pretty good doesn't she? Well, pictures lie my friends! ...they lie, and they'll break your heart if you let them! Not one to let a perfectly good bike die a horrible death, I felt it was my duty to rescue her from the clutches of the east coast, salt-air weather, and bring her back to life as she started, in sunny SoCal. So, once I had her back here, it was time to start tearing her apart and finding out what all she really needed in terms of parts & service. ...and so it begins: I knew before leaving New Jersey that there was already a crack in the sub-frame's crossbar, where the right side of the rear cowl attaches (frankenbolt position), but half way across the country it let go (luckily the broken off piece stayed wedged in the rear fairing). Now that the bike was safely home, I could really look at that, and any other damage: No big deal, I'll be able to turn a steel rod down to the right ID and slip it in there before getting it welded back together; it should end up stronger than original. :biggrin: One other concern was just how rusty the OEM exhaust headers had gotten during her years on the right coast. A brass wheel on my cordless DeWalt drill (one of my favorite shop tools) told me that they were very much salvageable, so once I can remove them, they will be sent out for a good sandblasting and coating. ...but first I had to get them off the bike. This would be easier said than done, and required quite a bit of dis assembly. Not the end of the world, since there isn't a square inch of this bike that isn't covered with 10 years of road debris, dirt, tar, and/or corrosion that I would want to clean up as best I could. Before I could pull the rear end apart though, I wanted to take care of the forks since I can't have both wheels off the bike at the same time. :tongue: Hmm, not pretty! Pulling the front fender, I noticed that it is cracked at the upper mounting point on both sides. ...yay! With the forks off, I can see more clearly just how filthy and corroded the rest of the bike is. And the brakes, though they have new pads, haven't been cleaned in years! So I clean up the brakes, and start cleaning up the forks as best I can. I'd really like to replace the sliders and have the lower legs powder-coated, but that will have to wait for another time, when I have more $$$. The sliders clean up ok, but the pitting is pretty bad. Left: Right: ...luckily, it's all above the seal line with the forks compressed. I guess it's time to flush the old syrup out and replace it with some good old Mobil 1 Synthetic ATF. I'm also going to be installing RaceTech's .95kg springs for my weight, instead of the OEM progressive boingers. I need to cut some spacers for the new springs, so I start with an overall "same as stock" length, and I'll adjust as needed once the bike is back together. Flushing the forks is pretty straight forward. I bought some cheap Penzoil ATF for the job. The key is to stroke the tube (slider) and the damping rod many, many times both when emptying the oil, and when flushing with new. To make this easier, and it does get tiring, I secure a 10mm wrench under the locking nut to use as a handle when drawing the damper rod back up (it falls easily). ...this also prevents the rod from dropping into the fork tube, requiring you to fish it out with needle-nose pliers. :fing02: After flushing, and draining, the forks 3 full cycles, it's time for the real stuff, the Mobil 1, which has the equivalent weight of 6-7 in fork oil ...which is hard to find! After filling the forks, it's back to the wrench for a good 30 strokes of both the tube and the damper rod, once again, to ensure that the cartridge is fully immersed in oil with no air pockets. Then using my handy Motion Pro fork oil tool (basically a graduated depth rod and a syringe), I can remove the excess oil until I have the right level. Since the RaceTech springs are a bit heavier than stock, I go with 145mm instead of the OEM level of 130mm from the top of the compressed fork tube (with springs removed). With the forks done, and the brakes cleaned, it's time to put the front back together (mostly) so I can finally dig into the rear. Removing the heat shield on the right side of the bike (by removing the swingarm pivot nut and right foot peg bracket) gave me access to the exhaust. IF you don't own a pivoting socket head, go get one; they come in really handy when you have to remove the rear headers! What was I saying about the rusty exhaust? ...oh yeah, it was rusty! And the rust would mean not only more work than necessary, but more parts ordered, and more $$$ spent. They say nothing holds like a cross thread, but I think rust comes in a close second! The clamps were both shot, and this one refused to let go of the bolt, regardless of what I allowed it to soak in, so eventually I just broke the bastard in half! So with the exhaust out I now had much better access to the rear of the engine case and swingarm pivot area ...which needed some attention: Come to think of it, the swingarm itself is a mess, so I should probably just pull it as well. Now with the entire rear of the bike removed, I can really access back of the engine as well as the front sprocket area. ...FYI, this is after I've already removed about 4lbs. of crap from the general area: Soaking in degreaser before another round of scrubbing ensues: Here you can easily see the difference between scrubbed down, and only wiped off with a wet rag! With the swingarm relatively clean, it was time to pull all the bushings, and re grease all the bearings. ...much better! Ready for reassembly: Now, back the rear of the engine. First I need to stuff up the open exhaust ports. I'm not likely to get anything in there, but why risk it. Looking at this picutre, I'm not too keen on how black the #1 exhaust looks, so it'll be interesting getting into the valves this weekend to see what's going on there: ...but that's for later. Now, back to cleaning up the engine and driveline: Ahh, much better! Since my first shipment of parts came from Service Honda, I can now try to drill out the one, rusted in place, screw on the clutch reservoir. It wasn't too hard, but it's actually the first time I've ever had to drill out a screw, so I'm glad it went well. A little WD40 and vice-grips got the stud out, and I can now flush the clutch and get back in business: I don't have a picture, but I also found a bolt missing through the clutch slave housing into the engine block (one of the two long bolts) so fluid has been seeping out and has bubbled the finish of the paint below the clutch slave on the housing and sprocket cover to which it bolts. :mad: Also, after pulling the shock (a nice new Penske is going in) and greasing all the associated bearings down there, I noticed that the dogbone has been sitting askew (I have the same issue with my XR650R ...maybe it's a Honda thing, like bad RRs?). ...I'm still not sure what to do about this. Any thoughts??? :confused: The exhaust (minus new clamps which are back ordered through Honda) went out to Jet-Hot for a thorough cleaning, and a ceramic coating in flat black. I also sent the discolored heat shield along with instructions to coat it with their semi-gloss black; I can't wait to see them when they get back in a couple-few weeks. This weekend A buddy is coming over (VFR guru) and we'll take a look at the valves, and try to figure out why there's so much carbon in the #1 exhaust port. After that it will be electrical cleaning and rewiring of many little things (accessory fuse box, Datel volt meter, etc.) and I'll finally swap the somewhat unclean air filter with the new K&N. ...here's a reason to leave the snorkel in I suppose: Yes those are leaves and twigs on the filter, and yes, they were there when I removed the lid, they didn't just fall in there! So that's part one. It's also about 2 weeks of working in the garage whenever I get a chance. Stay tuned for part 2 ...whenever that happens! lol D PS, this shot I took while the forks were off has me seriously considering a Sumo setup for the XR! :biggrin: -
Cleaning Up The Old (new To Me) Girl; 1999 Vfr800 Fi. Part 3
ZenMoto posted a blog entry in ZenMoto's Web Log
So when last I left you, I had just finished up the valves (with the help of my buddy Tony) and needed to get some additional wiring taken care or while waiting for my exhaust to get back from Jet-Hot. ...well, Father's Day weekend was as good a time as any to wrap up my project! :fing02: It started Friday with a call from my girlfriend that I had "missed" a delivery from FedEx. "Crap! ...that's my exhaust!" After a couple calls to FedEx (the first being a very rude lady telling me I would have to wait until Monday for their next delivery attempt) I found I could drive the 30 miles to the Ventura, CA sort facility and pick up my package as long as I made it before 8pm! ...that's more like it! So while, chronologically I saw the exhaust before I did any new wiring on the VFR, you're going to get things in the order work was done, so let's flash to the bike. It needed some new wiring for both the heated grips as well as the Datel voltmeter in the dash. I decided to just run 2 pairs of 14g wire from the fuse box forward. With both pairs run and labeled I wrapped the whole mess in wiring tape and ran it along the main wiring loom to the back of the bike; overall it gives it a cleaner look, protects the wires, and makes future repairs a bit easier (since you can reuse the wiring tape). Here is the wiring where the two pairs split up; the toggle is for the heated grips, the other pair goes further forward to where the previous owner mounted the volt meter in the dash (a location I hate as it's unreadable, but I'm not ready to buy a new dash panel yet). The next issue involves the fuse box itself. It's a quality, marine grade, fuse box, but it was wired directly to the battery (bad if you leave your heated grips on over night in the middle of South Dakota, for instance). :mad: I don't have pics of my relay install (so sue me) but I wired in a relay at the rear of the bike, operated off the license plate light as a switch. ...hardly a critical light should something go wonky with the relay etc.. Knowing that I finally had the exhaust, I took a moment to work over the back of the engine case with my Dremel and a small brass wheel; with my DMV inspection coming, I wanted to be sure the engine serial number was clearly visible. ...it's a far cry from the corroded and caked in pounds of dirt, oil, grease and tar that it was a few weeks ago! ...so just to annoy you, I'm going to flash backwards slightly to the work week prior to getting the exhaust. There were a couple things I needed to take care of, and luckily, we have an old lathe at work. If you remember the beginning of this thread, there is a broken cross bar on my subframe, so I wanted to turn a steel bar that would fit in there vs. trying to weld the broken bit back into place. Also, I was missing one of the steel bushings in my left passenger grab-handle. Rather than spend $80 buying a new handle from Mother Honda, I decided to spend a whopping $5 at the Do It Center on a 3' length of "weldable steel" rod; this would be PLENTY for both projects. Here's my newly turned bushing (left) next to the OEM one from the right handle. And pressed into the grab handle. ...fits like a glove!!! Next would be the insert for the cross bar. I needed to tap it (kinda useless if I can't bolt into it). ...that should do it. It fit's just a little snug into the existing cross bar. And the length looks good. ...a little JB Weld and she'll be good to go!!! :cool: Ok, fine. Back to the exhaust. You remember this mess: ...well, how do you like me now? Thank you Jet-Hot! ...I even had them coat the heat shield since it was all marred up. I also got my 1300# Hyperco spring in the mail from HRP World. :smile: Installation went pretty good until I actually had to connect the main header pipe to the pair of connector pipes from the #1 & #3 cylinders. I just didn't have enough muscle to compress them down over the new gaskets. ...luckily, I DO have ratcheting tie down straps in the garage! :thumbsup: Yeah, that's what I'm talking about! They look pretty damned good to me! NOTE: If you're doing your exhaust, don't forget to slip the clamps over the pipe and up out of the way before compressing them down onto the gasket! ...no I didn't forget, but forgetting would suck, so I bring it up as a little reminder! :wink: Then I cleaned up all the shock linkage, and flipped the dog bone so if it continued to rub, it would at least rub on a a new spot giving me a little more life from the current dog bone. ...I have no doubt I'll have to replace this piece some day. Penske is installed, along with a new chain slider. ...time to stake the new chain! Chain Staking Slip the new chain around the drive sprocket and rest both halves on the rear sprocket with the bike in gear to prevent anything from moving. ...this makes life a lot easier! Here are the two halves with the master link in place and the "X-Rings" on and packed in the supplied grease (I love DID). I also love my Motion Pro chain staking kit (it's also really handy to have a 14mm deep well socket and largish socket wrench). Place the master link cover plate where it belongs (the grease should hold it in place just fine). Line up the chain tool so it lines up with both posts and slowly add pressure using your wrench until you feel it start to really press into place. The key to staking a chain is to go slow, and recheck your alignment with the chain tool over and over. As you add a lot of pressure (it takes quite a bit to force the plate over the posts) it will often slip slightly out of alignment. Once it finally seats over the posts it will suddenly feel much easier to press; be careful not to over press the plate, you only want it flush with the surrounding plates, you don't want to crush the O (or X) rings. To stake the chain, you need to change out to a pin and anvil in your tool (you stake one pin at a time). You don't need to destroy the pin, just slightly deform the ends. Remember how hard it was to press the plate on? There are no heavy forces acting on the plates to push them out, so the slightest deformation in the pin will keep the plate in place forever. Here's the completed master link. At this point, all that remains is to button up the bike. I have a box full of new hardware to replace all the either rusty / corroded, broken, missing, or just plain wrong hardware that was on the bike. I got lazy on pics at this point because I just wanted to get her put together. So here she is, done at last! ...ok, bike porn time, here's the VFR with her garage mates: So with her all together it was time for a little test run before cleaning up the garage and putting all the girls back to bed for the night. :cool: A romp into the Santa Monica Mountains (my back yard) gives me a good chance to shake her down. ...first note, the suspension is bOuNcY BoUnCy, especially in the rear. I brought some basic tools along to help make any needed adjusttments, and after dialing in a little preload into the front, it settles down a lot. I added some preload to the rear, and it helps, but I really need to reduce the compression damping a little and add some rebound damping. A run down Mulholland to PCH and back up gets the rear more in line, but still not quite enough rebound damping. I suspect a day of tweaking the suspension while running the same sections of mountain over and over and over will be in order. ...damn, that's tough work!!! :biggrin: Here's the old girl parked in front of the Rock Store in Malibu while I cool off in the shade after a hard days work! I hope this little thread helps someone out down the road! Cheers, Dale -
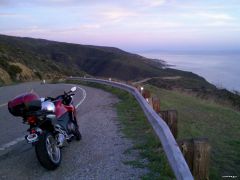
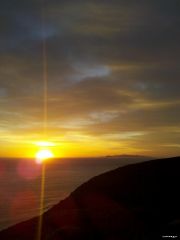
Days 6 – 7 Where was I? ...oh yes, Spearfish, SD. After visiting the local brew house for a burger, fries and a much needed beer, I walked back to the hotel and began going over my route through Wyoming. There seemed to be no way around it, even if I stopped only briefly at Devil's Tower, I was still looking at a 12 hour day to get across that big-ass state! Lol So I ditched my originally planned northern route to the tower, which would have been up 85 to 34 just before Belle Fourche, then West into Wyoming. 34 turns into 24 at the WY border and takes you through scenic little towns like Aladdin and Alva before turning south toward the tower. ...but like I said, I decided to skip this route to cut the extra hour out of my schedule. Instead, I stuck to I 90 across the border. It was wet, and cold again (so I was back in the rain suit), but before too long I was exiting onto 14 and making my way toward the Tower. Before long I was cresting small, rolling hills and getting my first glimpse of something I'd only ever seen in pictures, starting with Close Encounters as a young kid. It was still wet, but the drizzle had stopped and the clouds were moving swiftly east. I was hopeful that the day would turn blue like the day before had. To maintain some reasonable schedule, I tried not to stop too often, but it's pretty hard when you have this looming at you around every turn! I liked this one so much, it's now my wallpaper at work. There was a turnout a few miles before the park entrance with an information board, so I snapped a picture. ...this was a theme on my trip, I'd see an information board, or historical marker, and due to my time restrictions, I'd either pass it altogether, or stop only long enough to snap a photo, so I could read it later! Lol You might be sick of the tower already, but I just think it's cool! Like I said, I *usually* don't stop long enough to read, but the kiosk at the park dew my attention long enough for a proper read through. It really is an impressive place in person. Much more so in my opinion, than Rushmore or Crazy Horse, mainly because it's nature just showing off. Finally, after hiking around a bit, and killing nearly an hour, I decided I had best be on my way. I'd barely crossed the border into WY and it is a HUGE state! lol On the way out, I noticed the "Please don't feed the prairie dogs" sign before I actually noticed the prairie dogs! Here's one little guy who wasn't too shy. Back on 24 south, back the way I'd come, I instead hung a right onto 14 for a little more back country before rejoining I 90 west at Moorcroft. Cresting a hill on I 90 gave me my first view of the Bighorn Mts., so of course, I had to stop and take a couple pics. I didn't stop again until, at Buffalo, WY, when I grabbed a late breakfast, and rechecked the road closures over/through the Bighorn Mountains. I'd really wanted to head north to take 14 over, but it was closed due to snow. Instead I was relegated to 16 up and over Powder River Pass. It's still a beautiful ride, but not as scenic as 14 (and not nearly as closed). There were some beautiful views to be had during the climb up 16. ...and the higher I climbed, the colder it got. I was glad I'd left my rain suit on at this point. By the time I reached the summit, it was a cool 32 degrees. But these travelers were undaunted, and were on their way to climb to the peak for a better photo op. ...of course, they had a nice warm truck to climb into when they were done! On the way down the mountain, the temperatures rose to a balmy 45 and continued to a downright tropical 55. All the while, the road was straightening, and the hills were rolling. I was left with mile after mile of rolling hills on a road that was straight as an arrow out in the middle of nowhere. So I decided to make a new friend! Having unburdened me of $79 (for 78 / 65) the nice officer let me go after suggesting that I could come back for court in June, and "enjoy the parks while they're open!" ...he was a very funny guy!!! I carried on through Ten Sleep, Worland, and didn't even stop in Thermopolis to take pictures of the amazing geothermal mineral deposits the hot springs continue to make in the area. My neck was acting up again after only a 4-5 hours in the saddle, and I really wanted to make some time. I made my way into Wind River Canyon and had to stop for a pic or two. I made my way down the canon, past the Boysen Reservoir, to Hwy 26 to Riverton. In Riverton I continued straight onto 789 past Arapaho (nice to get close to some of my ancestry, being part Arapaho and part Cherokee). 789 took me into Lander and onto Dickinson Ave., which I took south to Red Canyon. ...the camera is absolutely level in these photos! I continued on through South Pass and the Continental Divide. ...this goes on for a loooooong time!!! And the wind on these high plains was taking an even greater toll on my neck. To add to the fun, despite adjusting the chain the day before (when the new tire was mounted) it was already stretched and making a terrible racket pulling away from stops. I was reminded of this when I hit Farson (all I could think was "The Good Man" from the Dark Tower by Stephen King), here I crossed 191 and continued on 28 S. Coming to the end of 28 at La Barge Rd / 372., I turned left toward I 80 and my relief at Green River! Unfortunately, turning into Green River, and looking at the Days Inn, I saw that all the hotels back into 15 tracks of rail switches, and I knew I wouldn't get any rest here. My neck was killing me, and I was beginning to feel carpal tunnel in my right hand and wrist (should have bought a throttle rocker, lol). Checking the GPS showed that the nearest town across the border in Utah was Vernal, and they had several hotels to choose from. It was 70 miles of freeway into Vernal, but that skirted around Flaming Gorge National Recreation Area ...and I wanted to go through it. I'm a sucker for punishment (and my neck still hurts as I sit here typing this), so I took the road less traveled and headed into the park; it would be 110 miles more before I could rest. At first I was disappointed in the park, it was very uninspiring, and with far away bluffs and brief glimpses of water just out of sight down some steep slope. The light was quickly fading and so was I; I needed something to keep me focused! I was rewarded almost instantly after crossing the border into Utah. Not only did I achieve my original goal of covering Wyoming in a day (would have been impossible if Yellowstone and/or the Tetons parks had been open), but the scenery suddenly came alive, with steep red cliff walls, and rock formations jutting out of thick forests. ...this would help keep my mind off the pain!!! Since there was no way I would make it very far before dark, I decided to stop and rest a bit and watch the sun set. ...it didn't take too long! These photos were all taken in the same minute! Feeling as rested as I was likely to get standing on the side of the road in 45 degree temps, I got back on the bike one last time for the day, and headed south once more. The deer through this area began to remind me of cockroaches; everywhere you shined a light, there they were, and then they would scatter! It made the last hour or so even more exhausting scanning the dark constantly for any dark shape that might be moving near the side of the road. You can call me paranoid, but I stopped counting deer at 100 and that was barely more than 20 minutes into that final hour! Almost as disconcerting where all the pickups, perhaps loaded with deer hunters, heading the other way. ...let's just say lane discipline isn't real high up on their priority list! I staggered into Vernal around 9:30pm and had been on 9and off) the bike since about 8am ...that's a long day, I don't care who you are! Lol All the restaurants were closed, so I was relegated to delivery from Pizza Hut, which didn't exactly hit he spot, but I was too tired to care. If you ever find yourself in Vernal, UT, the Best Western is very, very nice!!! $80 for the night, but the rooms were very newly remodeled and the bed and pillows kicked ass!!! By far the best night's sleep I had since leaving my parent's house in Illinois (and possibly better than that). :biggrin: On the downside, when I woke up, I found my neck and wrist were still not feeling much better. My plan had been to bomb across Utah, past Salt Lake and into Nevada. Following the Humboldt Range south, then across to Lake Tahoe. The final day of riding was to take me down the east side of the Sierras on highway 395 and then home to LA. ...That would have been 2 very long days ...or at least one very long day followed by a reasonably long day, and frankly, I just didn't feel up to it. Still, I was in the NE corner of Utah, another big state, with a lot of ground to cover before I could consider myself anywhere near home. I decided to head west and figure things out as I went. :cool: Leaving Vernal, I kept to highway 40 past Duchesne and on past the Strawberry Reservoir until I hit Heber, UT, and 189 into Provo. I totally missed Alpine Loop Rd., and looking at it on Google Earth makes me want to cry that I did! ...I must go back!!! The views on 189 are fantastic though, and not to be missed if you're in the area. ...actually, from what little I saw of Utah, I'd guess you'd have a difficult time finding any corner of that state that isn't majestic and beautiful!!! Once in Provo, I stopped for lunch, and to assess my situation. My neck was killing me, my wrist and forearm felt like they were on fire, it was already noon and I was still a good hour or so from the Salt Flats and the NV border if I chose that route, my chain was shot (I had adjusted it again that morning, and it there was just nothing left to do for it except replace it), and what weighed most on my decision, was that I was only a day away from this place if I wanted to come back and do some exploring (which I most certainly do). With all this in mind, and knowing my girlfriend wasn't expecting me until Sunday, I thought "what the hell" and hopped on the 15 S toward Las Vegas and, eventually, home. Here's what I didn't expect. ...15 through Utah is actually not too bad! There's just so much beautiful scenery in Utah, that you can't go wrong, even on a slab! So for the next several hours I just bombed away down the 15, occasionally stopping for gas and water, but making progress all the same. I was shocked when I crossed the border into Arizona, because for the first 2/3 of the time you're in that state you're just dropping down a deep, breathtaking canyon. Then it was across the border into NV and on towards Vegas. ...Vegas sucked a little bit. I knew I could stop there for the night, but that meant leaving Vegas on a Sunday morning ...which is always a bad idea. To make things more fun though, the temps had climbed to 104 and there was construction which meant stop and go for an hour, cooking in the Vegas sun while watching the temp gauge on the VFR climb past 230! :angry: Once clear though, it was on to Primm for gas and (much needed) water, then home. I should mention that by Baker the temperature had risen to a soothing 108 and stayed there until well past Barstow, not cooling off until almost Victorville, as the sun was setting. All told, I made it home to Newbury Park, CA at 10pm on the nose. I had left Vernal, UT at 8:30am (7:30am Pacific time) for a day total of 14.5 hours and who knows how many miles! The bike ran like a champ, I only ate up one rear tire (and a chain), I avoided the worst of the weather for the entire width of the country, and got to see some out of the way places that I've always wanted to visit. I got to surprise my girlfriend by getting home a day earlier than planned, and had all day Sunday to relax and clean up the VFR. Here's the old girl after a few hours and some elbow grease! :happy: Of course, now that she's home, I'll have to start tearing into her to find out what 10 years, and right-coast life, has done to the old girl. :ohmy: D
-
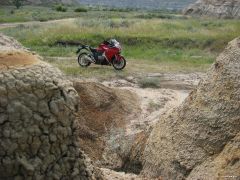
Days 4 – 5 Day 4 started off like any other, except that it was windy, and rainy, and the forecast was for severe thunderstorms with hail and tornadoes across the Midwestern region. ...oh joy!!! Undaunted and equipped with my new FroggToggs rain suit: frogg toggs® - Choose Product …and a belly full of homemade biscuits & gravy, I hit the road around 10am (hey, I'm on vacation). A short run up the Rock River towards Rockford found me on US 20 heading west. It was gloomy and had the occasional drizzle, but no real rain to speak of, so I was just enjoying the green countryside; a real novelty since living in Southern California. In short time, I found myself winding my way into the hills surrounding Galena, Illinois. There is some history to this town, especially if you're a fan of President Grant: As you can see from this picture, I still have a looong way to go! Lol US 20 is as good a road as you will find across Illinois, Iowa and into Nebraska; frankly, there's just not that much to see in those states, and by sticking to their northern edge you get the benefit of some rolling hills and lush countryside. I was skirting along the northern edge of the storm front too, and despite the few showers I rode though, my hands (in regular, Held riding gloves) never got wet. It was chilly though, and having the rain suit on over my Alpinestars suit really helped keep me warm. In fact, I wore the suit during the trip more for warmth than for weather protection. I crossed the Mississippi River at East Dubuque, Illinois at the Julien Dubuque Bridge; it sounds fancy, but it was a non-event. About halfway across Iowa the storm front broke and left me staring at clear blue skies, and warmer temperatures (in the low-mid 50s). ...there's a whole lot of nothing out there!!! Continuing on US 20 got me to the Nebraska border where I jumped on Highway 12, also known as the Lewis and Clark Trail. ...if you've always wondered the difference between Nebraska and Iowa, here you go: ...shocking, isn't it? Actually Northern Nebraska is quite pretty, and if you stay on secondary roads, like 12, you get to see all kinds of historical markers. I wish I'd had time to stop and at least take pictures of them for future reading, but I would never get anywhere if I did. As you can tell from the last pic, it was getting towards dusk and I had a ways to go yet. ...actually, I had no idea how far I had to go, because there's nothing in Nebraska ...or South Dakota. I was getting tired, and asked my handy little GPS to find me a place to stay. The first 5 hits all wanted me to back track 60 miles or so, but I'm not going backwards on this trip, nosiree. So the little bastard GPS told me to cross into SD at the next available turn. My plan had been to cross into SD at Spencer, Nebraska, but I didn't have Nebraska loaded into my GPS (my original route idea took me into Wisconsin, Minnesota, and SD) so the GPS had no idea that the Indian hotel and casino it was leading me to was just across the border from Spencer (like 3 miles) and neither did I. ...so like a sucker, I crossed into SD and up onto the high plains, and away from the scenic, hilly, protection of highway 12. ...you best not be rustlin' boy! My long shadow looking back towards NE. Dusk over the Missouri River. Who's that guy? The bridge leading away from the scenic rolling hills of NE, and into the wastelands that are southern SD. ...the next hour sucked! 40-60 mph cross winds across SD in the barren plains was making my already tired body really hurt, especially my neck. Fighting the wind was kicking my ass, and I was very glad to find myself at the hotel. It was shabby, and I certainly didn't find myself wanting to spend any time in their "casino" but the burger was pretty good, and they had hot showers and HBO. At least there was a pretty sunset to view behind the casino. I got good night’s sleep and woke up ready to tackle SD and get to the Black Hills. ...now is probably as good a time as any to mention certain things about the VFR. It has one of those fancy marine grade fuse boxes under the seat, which is what I wired my GPS and heated grips into. The problem is, the fuse box isn't installed off a relay, but directly off the battery (this will change now that I'm home). ...well, remember me saying how tired I was getting? ...I forgot to switch off the heated grips. This makes for a very dead and very un-bump startable bike! Lol So, after 20 minutes of huffing and puffing trying to get the old girl to fire up, I decided to go in and see if they had any jumper cables. ...turns out they had one of those fancy rechargeable jump starters. So I signed a little waiver, popped off the shiny new Sargent seat, and ...found out that the plastic protectors around the teeth of the clips make it damned near impossible to grab the small lugs on a motorcycle battery! Lol So after half pulling the battery out of the bike, and peeling back the insulation on the power leads from the bike, I'm able to get them clipped into place (as long as I don't let go of anything) and get the bike to fire. I had to let it run with the box attached for about 5 minutes before the bike had enough juice to run on her own power. ...I wasn't worried about getting enough charge though, it would be a long day in the saddle, and thanks to Marc, the battery was brand new. ...did I mention that I'm glad I filled up across the street before calling it a night? Lol Immediately after leaving the hotel on highway 18 west, I crossed the Fort Randall Dam. Which was the last scenic thing I saw until turning north on Big Foot Trail toward Wounded Knee. I did stop in Winner, SD for lunch. I ordered the Reuben from the local cafe, and got many strange looks from the locals ...probably my one-piece riding suit, or perhaps it was my full set of teeth and firm grasp of the English language ...who knows (just kidding, the people were actually very nice). I'll say this for the sandwich, it was the best food I've ever eaten in Winner, SD, and let's leave it at that! Next stop was Wounded Knee, off Big Foot Trail. To say they don't keep the "monument" up very well is an understatement: ...and one with me: I really wonder what it said before massacre. ...battle? ...slaughter? We may never know. Anyway, from what I could gather, out in this field, just beyond the crappy wooden structure, is the campsite that was the location of the last battle between the Apache & the US Army ...the Apache didn't win. The next stop along my route was after I entered the Badlands Natl. Park, very pretty and I'm sure the photos won't do it any justice. While stopped here I noticed that yet another bolt had gone AWOL from the right side of the Givi rack. With no M8 bolts handy, I used a half dozen cable-ties the secure the frame pieces together. From here, it was a straight shot (well, curved actually) into Rapid City, SD where a new tire and fresh oil was waiting for me at Rice Honda, Victory, and SeaDoo. Apparently though, 77 in a 65 isn't a great idea when you're getting close to an "urban center" ...I use that term loosely in context of South Dakota. Actually, the cop was cool, and we chatted a bit about the ride, etc.. He ended up giving me a written warning for speed and no insurance card specific to the vehicle (I had insurance, just didn't have a card with the VFR listed on it yet). No worries then and he didn't seem to mind the cell-phone pic I snapped while he was running my license. I got to take a breather in Rapid City while they spooned a new Dunlop sport touring donut onto the back of the VFR, and while it was there I asked them to dump the oil and put some fresh blood in her. Then it was off to the local Ace hardware for a replacement M8 bolt for the one that had jumped ship. With the crossbar on the sub frame broken, it was the only remaining support on the right side except the main mount where the grab handles would be! All done, it was still only 4:30 or 5pm so I figured I had plenty of time to get up to Mt. Rushmore and grab some pics, and Google Earth had convinced me there would be some twisty roads up there, perfect for scrubbing in the new shoe. ...well the trip up wasn't too twisty as it turned out, but that's fine because there's a 25 mph speed limit all the way to the monument! lol The one thing the Black Hills has though, is wildlife. I saw a wild turkey and TONS of deer. In fact, these two were just below the monument (with a half dozen others) crossing the road. Once I had let them by (the Solstice was stopped also), it was time to pay my $10 and finally see the monument in person. After parking, and on my way to the visitor's center, I saw this tagged and collared great, hornified mountainous goat wandering through the center: A ranger told me that they are completely wild, and are not fed and certainly not petted, but they have become (mostly) used to people, and really like the fresh grass that grows inside the center. With this in mind, I was able to get decent shots of another, untagged, goat in his natural habitat ...complete with manhole cover and stone walled restroom! Lol ...but I was here for the dead presidents! ...yep, the same shot a million other people have taken, but as usual with photos, it's much more impressive in person. I wasn't about to go hiking in all my gear, and time was a wastin' anyway, so it was back to the bike, and back onto Hwy 244 (Needles Highway) headed north. The good roads, from my research on Google Earth, were behind the monument, so that's where I was headed ...I still had a shiny, nubbly new tire to wear in after all. Once out of the official park, the views just got better and better. They say the president's heads are roughly 60' tall from chin to the top of their heads. ...that's pretty big! I had to stop for a pic of Horse Thief Lake as I went past. My next stop would have me circle south on highway 385 to the Crazy Horse monument. The head on Crazy Horse is 80' tall ...they just really wanted to outdo Mt. Rushmore. ...but this monument has been in progress since 1939, so it's not going to be done anytime soon. Lol Here are some more shots from the visitor's center, which is all made of wood harvested on the ranch where the monument is being built. A 1/34 scale model of the finished monument. And the wider view of the area from inside the visitor's center. From here I continued south to enter Custer State Park from the south, to head back north on 87, this is also known as the Needles Byway. The views were fantastic, but the light was failing, and having seen the deer population during the day, I wanted to make as much ground towards Spearfish (my stopping point for the day) before night fall. The sun was setting, and I just had to stop for a shot at Pactola Reservoir. Then it was on to Deadwood, see if you can guess where the old western town got its name? But the downtown was beautifully restored, and it was tempting to stay here for the night. ...then I realized there was a slot machine crammed into every nook and cranny in the town, and couldn't imagine getting a good night sleep with all that clanging going on! ...so I soldiered on into the darkness until I got to Spearfish, just off the I 90 Fwy / State Hwy 14. Tomorrow was Wyoming, and I was going to need my rest!
-
Days 1 - 3 I doubt everyone wants the gory details, but here's my (not so) brief account of my cross county adventure. I should preface this report by stating that this whole thing came together in about 2 weeks time, and with much help from my awesome girlfriend, Karisha. On little more than a whim, I agreed to purchase my buddy Marc's VFR, and purchased a ticket to Newark airport, arriving Friday May 8th. Of course, I threw my back out the Wednesday prior to leaving, and as of the day before, it wasn't much better; I was barely able to stand up straight, let alone walk very well. ...but what the hell, I had a ticket, so it was one-last-shot at the chiropractor Friday on the way to LAX (ahhh, that felt good). Amazingly, the flight did nothing to further aggravate my back. Friday night, after a full day of traveling and layovers, I arrived, and was whisked away by Marc in the family-mobile. A short stop for a bar burger and a couple tasty beers, and I was done for the night. ...off to Marc's for a shower and a good night's sleep. In the am, after a quick breakfast, it was out to the bike. Tearing off the seat and side panel, I began to wire in the heated grips I had brought along. ...ignore the goofy face. I also installed a new power lead for my GPS, and gave the bike a quick once-over. Then it was time to get cleaned up, and go for a shakedown run into the city for some pizza and to see the new Star Trek movie. I can't tell you what great hosts the Sirys are, but not only did Marc treat me to a great night out on the town,, but his wife, despite being due at any minute (ok, a couple weeks) let him go. The pizza was very good (not comparable to Chicago pizza, too different, but delicious all the same), then off to the movie. Afterwords we made a quick stop at Times Square so Marc could snap an i Phone pic of me to kick off my trip: Then back to Casa Siry for another shower and some sleep. In the morning, I got a bit of a late start getting packed up, but Marc offered me up some delicious French toast, and then we set off for a bimble around the local area. Marc saddled up the VFR for one last time, and gave me the keys to his 148 mile old Triumph. He showed me around the beautiful areas near his house (I wish we would have stopped, at one particular overlook, for photos). Then he led me to my launching point for the big ride, complete with handwritten directions on how to get to, and follow, the Delaware River. I stopped before getting to the river to make some Mother's Day calls, including one to my Mom telling her to keep an eye out for a delivery I had sent. Since it was a Sunday, I said, it would most likely arrive Monday. Then it was up to the river on State Route 97, which was a beautiful route. I just had to stop for a few photos of Roebling's Bridge and Aqueduct. Along the way, there was a stunning waterfall, about 80' high, which flowed under the road, and into the Delaware. New York, as it turns out, is full of picturesque scenery, and I found I just had to stop again just north of Amish country for a scenic photo: After picking my way north through the countryside, I found myself at the 90 freeway and jumping on to make some time to Niagara Falls. I arrived after dark, but the park was still open (it closed while I was there). I tried getting a few photos, but the lower observation platform was closed, and the falls face away from the US. ...not to mention it was in the 30s, and very wet with spray from the falls. ...does it look cold? ...it was!!! From Niagara I got back on the freeway (after riding around the, now closed, gate) and made my way into Pennsylvania. By the time I stopped for the night, it was already 1am, and I was spent. Luckily, to keep me on schedule, the hotel put me in a room where there would be construction at 7am, so after a whopping 5 hours of sleep, I awoke to the sound of pounding on the walls of my room from the outside. ...lovely! I gave the front desk a piece of my mind I was back on the bike, and back on the freeway. ...I've seen Ohio, Indiana, and Chicago ...there's not much of a scenic route until you get into the city, and Chicago at 4pm (which is when I crossed the Skyway) is no time for sightseeing. I was stuck in traffic for about an hour before I hit clear freeway out to Rockford, IL; then south to Byron where my folks live. I rode around the block so as not to get the dogs barking (they always bark at vehicles turning up the street) and killed the bike, rolling in quietly. I took off my helmet, got out my camera, and called my Mom. When she answered I asked if she'd had a delivery. She says "Nope, nothing came today." so I replies that I had just gotten a delivery confirmation, and she should go check ...I'd wait on the phone. After looking on the front porch, and not noticing my standing in the driveway, she tells me she'll go check out by the garage. So I'm standing there with a camera to my face, and my phone on my shoulder when I hear her say "Now who the hell is standing in our driv... OH!" ...priceless!!! My Dad was out fishing with his buddy, Ron, so I got to surprise him separately when they showed up about an hour later. The look on his face will put a smile on my face for years to come. Once my folks and Ron had a chance to get cleaned up, I took them all out for a dinner of BBQ and drinks. A spendy night, but totally worth it. Day 3 was spent visiting with my folks, and seeing my Brother, Dan, and his 3yo son Aaron, and 5 month old Jake: We enjoyed some Giordano's pizza and caught up while watching the Cubs destroy San Diego, before I said goodbye, and headed back to the folks for my last night at home.
