


HispanicSlammer
-
Posts
6,954 -
Joined
-
Last visited
-
Days Won
61
Content Type
Forums
Profiles
Gallery
Blogs
Downloads
Events
Posts posted by HispanicSlammer
-
-
Well I am still getting 15-20 emails from people replying to simple pm notifications, I feel obligated to pass the info back so they dont think they have completed a conversation when all they really did was annoy me! So I took the pm text out of the notification like it used to be - sorry but it is just not working!
-
I read most of this thread once but remind me again why you want these? Not criticizing, genuinely curious.
Hotter spark! Coils with wires that lead to the spark plug lose voltage for each inch of high voltage wire, so voltage loss = power loss. Coil on plug effectively puts the voltage step up as close to the spark plug as possible with minimal voltage loss.
-
I was at the local dealer yesterday and there was a custom chopper with a Honda xr400 motor in it, maybe an xl600 motor, it was a dirtbike motor in any case. The guy had a coil on plug sticking off the spark plug about 8 inches, it looked stupid as hell but works!
-
I ordered one - most of my surging and lagging issues were solved when I took the oem muffler off and replaced it with the leo vince but there is still a bit of lag in 2nd gear. I looked hard at the dutchgixxer mod but well Iike the gear indicator to work correctly - I am a bit anal about that. I just had a few issues when I started to pass a car in the mountains from a slow start 25 mph in 2nd gear and then I twisted the throttle and it lagged on me for bit - dont want that to happen anymore, nothing worse then pulling out into the other lane to go around a car and you get a little power lag! Of course it spooled up but it wasn't instant like it needs to be. The old girl 1998 never once did that to me!
It just seemed the fueling went into some kind of saver mode and had to be coaxed out of it to get the power on. It was worse with the flapper valve in the oem exhaust hated that - it did not help low rpm torque at all it just smothered it. It usually does not happen cause I tend to not let the bike rev so low or I am already spooled up before I try a pass. Honestly it has more passing power in 4th then 2nd sometimes.
Do you realise Miguel that the Z Bomb also gives incorrect gear display in 1st and 2nd?
Mine arrived today and I'll fit it once the bike is through the initial service.
Peter
NO - Damnit, I looked for a description! Well I dont have to cut more wires on the girl.
-
I ordered one - most of my surging and lagging issues were solved when I took the oem muffler off and replaced it with the leo vince but there is still a bit of lag in 2nd gear. I looked hard at the dutchgixxer mod but well Iike the gear indicator to work correctly - I am a bit anal about that. I just had a few issues when I started to pass a car in the mountains from a slow start 25 mph in 2nd gear and then I twisted the throttle and it lagged on me for bit - dont want that to happen anymore, nothing worse then pulling out into the other lane to go around a car and you get a little power lag! Of course it spooled up but it wasn't instant like it needs to be. The old girl 1998 never once did that to me!
It just seemed the fueling went into some kind of saver mode and had to be coaxed out of it to get the power on. It was worse with the flapper valve in the oem exhaust hated that - it did not help low rpm torque at all it just smothered it. It usually does not happen cause I tend to not let the bike rev so low or I am already spooled up before I try a pass. Honestly it has more passing power in 4th then 2nd sometimes.
-
New topics will require an input of at least one tag now, one word that best describes the topic, you can use more then one, as long as you separate each new tag with a comma and not one long string of words as one tag. Sometimes a tag will require a string of words just use common sense please! Tagging is the way the forum software is now going forward in the future makes sense to use it wisely, makes searching topics so much easier.
(I.E. the redslut tag our friend in Holland uses for his topics - that's the name of his bike not about a person!)
-
If you reply to a PM notification email - it comes to ME AND NOT the person intended. Its just a notification sent out by the forum software from my email address! Says this at the bottom,
PLEASE DO NOT REPLY DIRECTLY TO THIS EMAIL!
I had to remove the preview text on the last version of the board, please don't make me remove it again.
Second if you have an automated message handler please remove that, or use an email address for vfrd that does not use an automated message reply!
-
 1
1
-
-
PCIII is a fine tool, and at that price! Ha - I doubt you are going to get any significant performance out of a V vs III There are some nice maps for your set up already in the files section. If your dead set on the auto tune sure, go for it.
-
A member scanned one it is in the files section.
-
fixed very very very old post the pics were from the old delphi forum we had back in 2002cant see any of the images
-
I saw this a few months ago from a computer at work, and had to get back to work and then plumb forgot about it, now its back and on the homepage, very cool bike.
-
I see the comment regarding different oils providing "smooth" or "smoother shifting". I noticed the same thing only once, long ago using Motul on a 91 VX800 but have not seen the phenomena since. Does anyone have know why different oils could cause smoother shifting? I does not seem viscosity related but it seems to be brand specific.
After 25 years dealing with customers I think its not a question of
oil so much as a question of technique and clutch...
RC30 and RC45 owners will ask for the same slick shifting oil that
made their friend's RC30 and RC45 shift so smoothly after it left the
Busy Little Shop... I hate to break it to them but it wasn't the oil
that made the difference it was rider technique and the elimination of
clutch drag... so before I will dump one slick shifting oil for the
next slick shifting oil I work with them on their technique and their
clutch... then and only then will they understand that they were
fooled into thinking it was the oil when in fact it was technique and
clutch...
I think we are after the same thing... smooth shift without upsetting
the suspension... the secret is moving the foot quicker than clutch or
throttle... go easy with the clutch and throttle but move your foot
quicker... but worry there is no such thing as too quick... its the
first step of seemless shifting in MotoGp...
Here are the steps how to check your clutch for drag... your gears
can't shift smoothly if your clutch is part way engaged...
1 Place your bike on the center stand...
2 Start engine and establish a steady idle...
3 Squeeze in the clutch and hold... shift into first gear...
4 Now look at the rear wheel... if it's spinning step on the rear brake...
does this action drag down the engine rpms???
If you bike is equipped with an cable then adjust the clutch lever
knob clock wise (out) 1/4 turn and check again check for clutch
drag... if you bike is equipped with hydraulics bleed system and check
for bubbles...
Ultimately you want the rear wheel to stop spinning when the engine is
idling and first gear selected with the clutch lever is squeezed in...
Nice debunker there! My veefalo does that, I have yet to change the clutch fluid - bled the brakes last summer but did not bleed the clutch fluid. I will try this technique out, the veefalo shifts very nicely though really. I have been using the rotella stuff myself 10w 30 - rated JA but for cars, its almost twice the price for the MA stuff and well I am with 2thdr on the cost issues - I change it twice as often as the manual recommends and I have a scott resuable filter that I really like - graded for same size particles as the paper filters and better flow. I have had it for 5 years now and it cleans up every time, I run water though it in the opposite direction to force out stuck particles and clean with degreaser on the stainless filter, wipe off the smuged up iron/steel paste on the magnet. I change the oil more often then most, and before every big cross country trip.
-
Make sure to hit the return key after each tag so that it registers it singlely, or it will lop them all together as one tag. you will see a blue box form around the tag each time it registers.
-
Its all a part of search engine optimization seo tagging
-
You old tymers may have noticed that when starting a new topic the "topic description" line no longer exists, replaced with "topic tags" this is not the same, its been adopted from popular blogging software to aide in searching. Topic tags are simple one or two word descriptions of the content you are adding, not a line paragraph or sentence to describe the topic anymore. The tags all get shown together or can be searched to create a list of similar topics pertaing to that tag.
Some of you have already adopted this approach some are still adding sentences as a topic description to the topic. I would still like to make topic tags open, but as an admin I can just post up a list of tags for you to choose from and well I am not that creative so the tags would be limited to my feeble list of tags. So please I hope I have explained what tags are - and on the homepage you will see a new block, and on the forum index page there is also a block with popular tags - click on the tag that interest you and see a list of topics tagged that way.
for example I tagged this topic with "topics" "tags" "description" and "search" you can add up to 10 tags to a topic, and you can go back and edit them if you want to later on the topics you created.
-
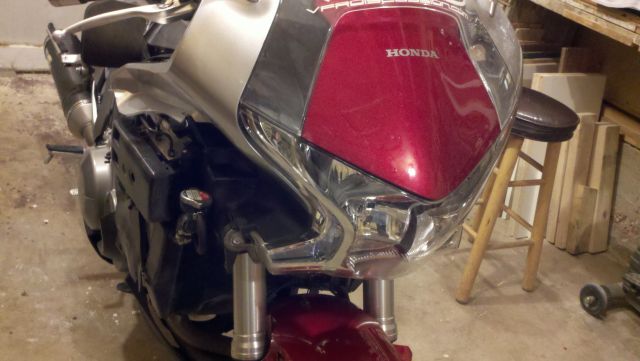
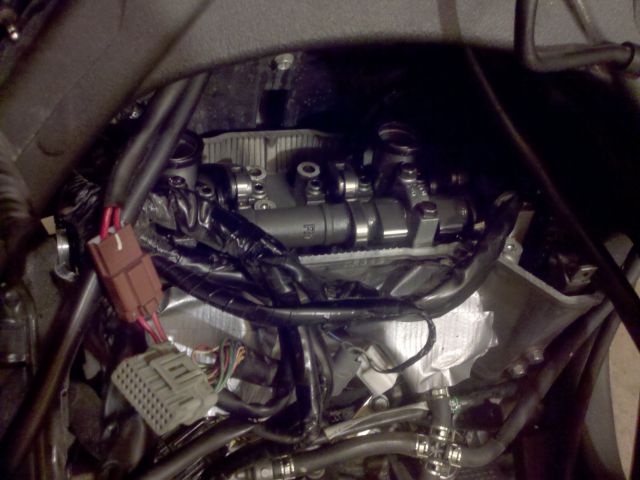
I began with a strip down of the basic plastic removal around 3am in the morning, I work nights anyway and well it is a quiet time for me with no interruptions from nosy family members! That took no time at all I am getting pretty good at removing the plastic.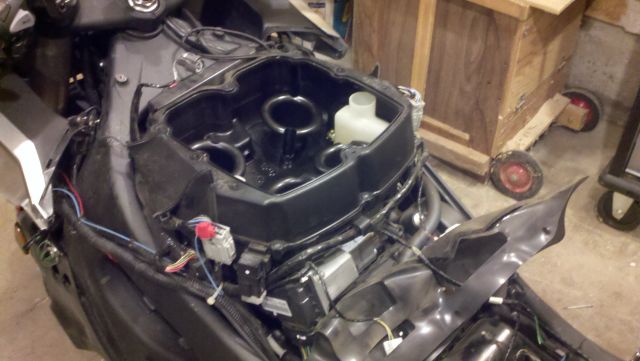
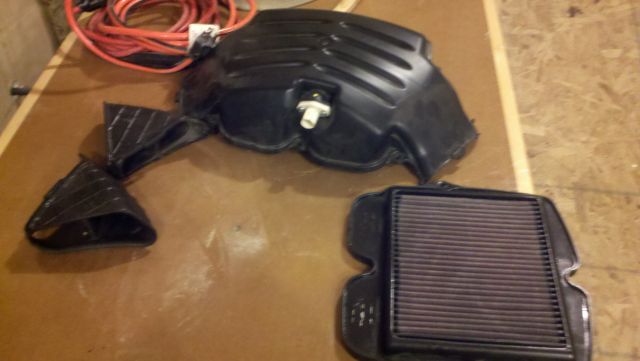
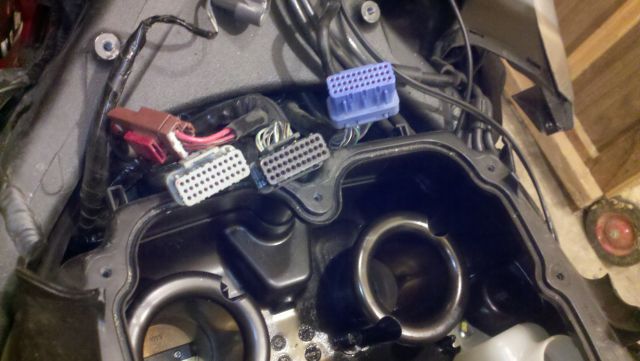
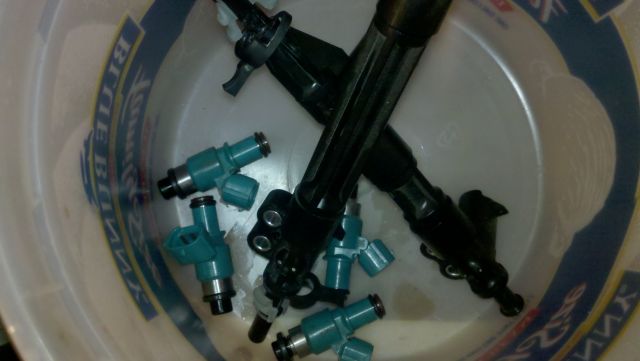
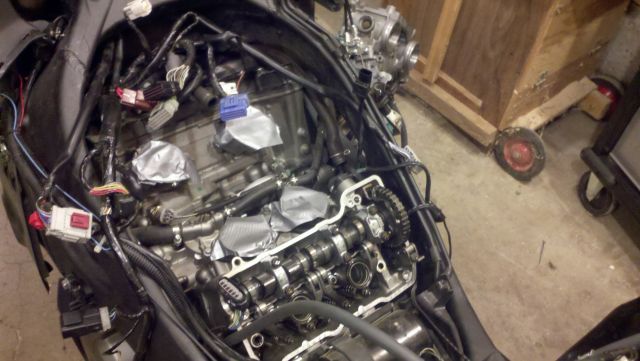
Yes you have to remove all that just to get to the front spark plugs, lucky they use high mileage iridium spark plugs with a 30k lifetime so you are going to have to inspect the valves before hand before you have to replace them - I did that and they all looked fine. I had all of my exhaust valves just out of spec those are the rocker roller set, and one of the bucket under shim intakes was loose but still in spec. Just as I figured the roller rocker design would be more apt to be out of spec then the bucket under shims would be, just like the CRX dirt bikes! Its a simple elegant design, less rolling mass with only one cam shaft and the cam chain does not need a huge bend in it for a powerful cam chain tensioner this design uses a spring loaded bow tensioner instead of a massive punch design like the vtecs use.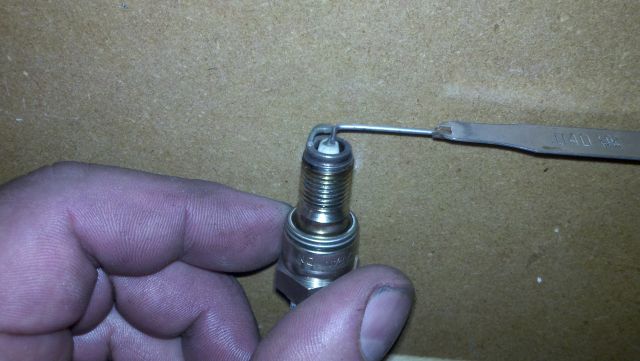
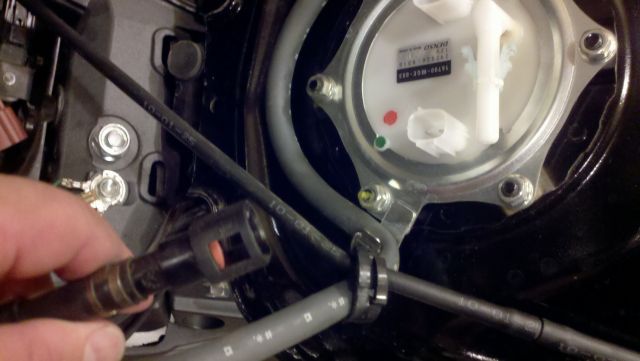
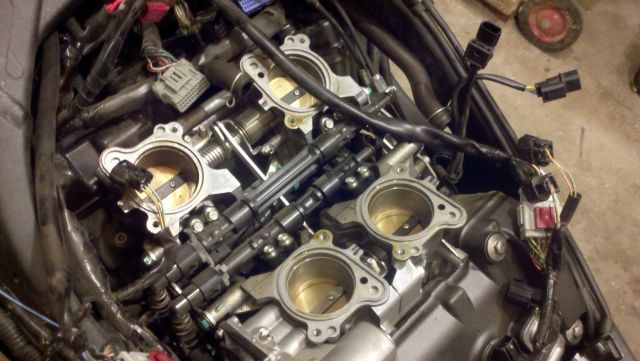
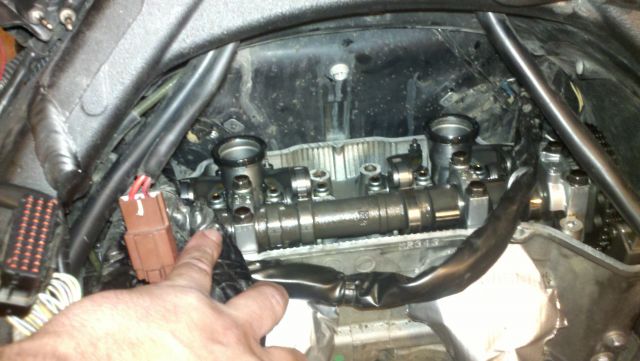
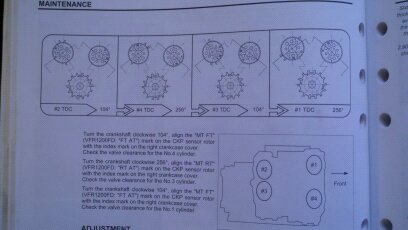
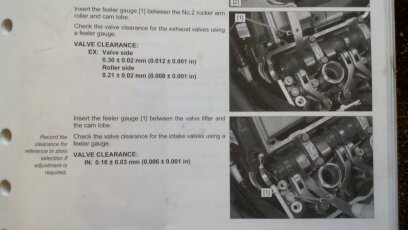
There are two marks on the timing cover I suppose its easier then the 4 I had on the old girl, you watch the cam shaft on the rear set for direction ques as you turn it to make sure the engine is in top dead center for the cylinder your inspecting all marked out in the manual but the manual has very small pictures for the cam shaft positions so its hard to read. I managed it though. They have 3 measurements for the Valve Clearance
Exhaust Valves have a roller rocker design with a roller on one end and a screw driver and lock nut on the other with a square head for the driver. They were all out of spec all of them!
The manual has two sets of measurements for the exhaust side
Valve side with the lock nut 0.03 + or - 0,02 mm or (0.012 + or - 0.001 inches)
Roller side 0.21 + or - 0.02 mm or (0.008 + or - 0.001 inches) my gap strips were in listed in both but came stepped up in inch sizes so I use the inch listings
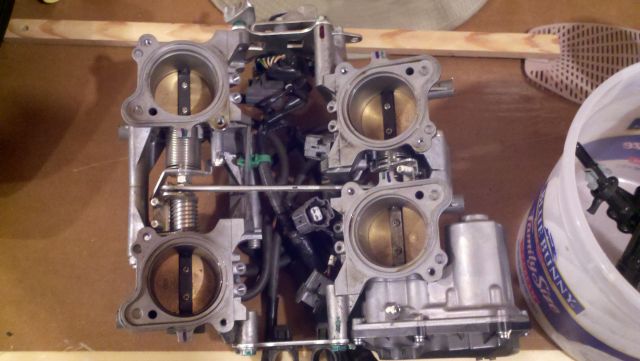
Intake side is the shim under bucket design
0.16 + or - 0.003 or (0.006 + or - 0.001 inches) on one was loose at .007 but still in tolerance and most likely to go tight as it wears.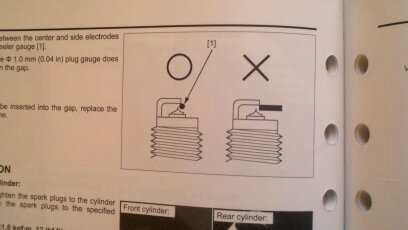
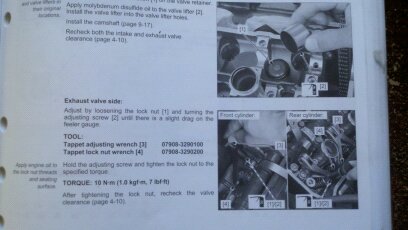
Edited some of the photos with additional info that I neglected to mention first draft. I started at 3am and had it done and back together with the bike running at 6am. Including a half an hour bathroom veg out break, take your time, be diliberate, read the manual for instructions, read all the back pages for what to do and dont take any short cuts be careful removing connectors and fasteners they can get dropped easy - calm slow and methodical is best. If you dont have much time to do it then just let a pro do it or wait till you can dedicate all your attention to it and not hurry the job. Break it up into sections/tasks and it wont seem so difficult. Each task one at a time then reverse it to button it all back up. -

beats me its in the gallery I think at the we dont give a hoot meet
-
-
-
Shoot dude I am still getting emails "why was my account deleted"? what is it now? ~ almost a month and a half since the "incident" with the deleteing everybody thing happened? I doubt they will find and read this any time soon, well the ones who do it anyway *cough* wrestler *cough*
I found a hook though that will convert quoted photos to links instead of displaying the photos over and over again in a web of nested quotes in quotes - full 30k character posts with 40 or so images quoted will be somewhat shortened with links instead of 1200 pixle wide photos shown over and over again.
-
520 chains can handle 100 hp motorcycles, so they use them in race machines to save a bit of unsprung wieght but then replace them after a few races as a highly consumable item. Street uses I dont know about perhaps your pocket book can handle it and you have the time to replace chains as often as tires? At least go with a DID over an RK I never had much luck with RK chains they just dont last as long for me.
-
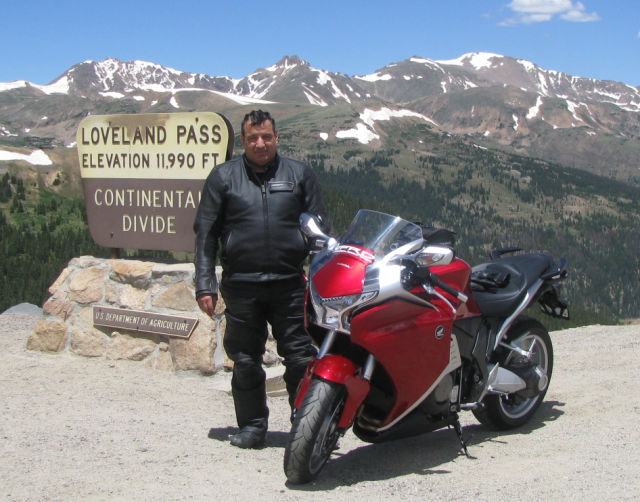
Hopefully this isn't another one of my dumb questions, but why does HS refer to his bike as "veefalo"? A combination of VFR & Colorado?
When the bike came out, a couple of euro magazines like Motociclismo of Spain/Italy said it looked like a pissed off buffalo and referred to the bike as La búfala (spanish feminine word for Buffalo). Vee (for V4)+ falo (shortened buffalo)=veefalo. Just search for the word buffalo on this site for more details.
Yea a Buffalo some say is what the vfr1200 looks like, came out of some magazines and it does look a bit like a buffalo but I did not name it veefalo that came from my buddy dutchinterceptor
Can I remove the side tank cover panels without removing the actual side fairing panels first? Can you confirm how many fixing points there are and where they are located. I think your post mentions 5 but I can only find 4. Thanks for your help.
No you cannot the tank cover is bolted in underneith the side fairings so you have to remove them first - I suppose you can remove the back fasteners and just pull it out of the way but that might crack the plastic? Fixing points on the fairing or the tank covers? Edit added some service manual pics to the original post
-
Get it to your door
-
Can make coil springs heavier rate by using larger wire or more coils.......progressive rates (heavier the more they're compressed) are achieved by tighter wound coils on one end....................... :thumbsup:
Progressive rate springs use the same wire, wound tighter at one end. This design is to intentionally bind up the tighter windings and increase the spring rate by reducing the effective number of coils availible to compress. The tighter wind does not impart any strength or weakness to the spring just less space before they bind up - its the effective number of windings that cause your spring rate to increase. Once a spring binds up on the tighter portion there the less tighter wound coils are still able to compress but less of them so the spring rate goes up, if the tighter wound springs are all of the same spacing then the looser wound coils then its a two rate spring, if the tighter wound springs gradually get tighter then its a true progressive rate spring, up to the point where they bind up and cant move.
Brake Pads Front
in Maintenance Guides
Posted
The entire caliper set should probably be rebuilt every 5 years or more often with more mileage, I rebuilt mine at 120k - the slider pin was completely dry on both fronts and the rear was worse, I cleaned and polished the cylinders replaced all the o-rings (that's a biotch) - removed the slider pin, and replaced the torn boots over them, and then greased up the slider pin with high temp grease. The slider pin is important since it lets the caliper float with the floating disc. One of the pistons was etched by salts, I ended up replacing it since I did not want the thing to leak. Then I got ran over in Tennesse and the bike got totalled 1 month after all that darned work on it!
I used EBC HH+ pads on the fronts and OEM on the back, the one time I used ebc on the rear they where way way too grabby, the rear brake should not be grabby! I tried non sintered pads but they just do not perform very well on the 5th gen.