

jay-d
-
Posts
42 -
Joined
-
Last visited
-
Days Won
1
Content Type
Forums
Profiles
Gallery
Blogs
Downloads
Events
Posts posted by jay-d
-
-
I haven't been here for a while, but I'm glad everyone is making good use of this guide!
For those that are not pumping the SMC manually, that's completely ok, but just remember that the fluid between the SMC and the rear proportional control valve still has old fluid in it! If you're ok with that, then by all means skip that step :D
-
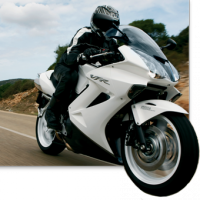
My God, how is your bike so absolutely, postively, spotlessly clean???
Are we looking at the same bike?! haha.. my bike isn't clean!!
I'm sure it's cleaner than most, I bought it with 5,500km on it so it was always stored, hardly ridden!
It's got almost 20,000km on it now but it needs a good taking apart and clean next spring for sure!

-
Jay, the photo in "G. Left Front Caliper, Inner/Centre Bleed Screw" shows actuating the SMC, but I think this line is done with the rear brake pedal - please confirm.
Hey, the picture looks like it's actuating the SMC but it's really not. This is the same line that fills the SMC so you can bleed the LPCV and the rear caliper centre bleed screw via the SMC.
Hope that clears that up

-
I wish I took pictures of where I mounted mine. VERY easy if you separate them.
All I required additionally was a small L bracket. I'll be taking the front end apart, I might take off the fairings and take some pictures.
Essentially, I mounted the compressor where Boneman mounted his horn, perfectly upright.
I mounted the horn in the stock location using the stock bracket, I just had to use some heavy duty wire to mount the original bracket to the horn.
-
Nice writeup, sure to be usefull as the procedure is rather involved and a pain in the rear compared to bleeding "regular" brakes. I would like to point out, however, that the FSM usually reccomends bolt replacement for a good reason. In this case it's probably not because there is anything wrong with the bolts, just that the new ones probably have some sort of threadlocker allready coating the threads. I personally like to put a dab of medium strength threadlocker on nearly all the fasteners on the bike, cause they vibrate and things come loose without warning. Might wanna add that to the re-assembly instructions, might not, just my opinion.
You're right! I actually did use medium strength lock tite when i assembled everything so i will update the original post when i get to my computer!
-
- Popular Post
- Popular Post
This guide was created because I couldn't seem to find one that was very thorough and included pictures of all procedures. This guide requires the use of Speed Bleeders as it makes life so much easier! You can follow this guide using the old school method as well, but it will require more time and patience.
Readers Notes:
Left and ride side are determined as if you were sitting on the motorcycle.
Images come after descriptions.
Initialisms:
LBS: Linked Braking System
LPCV: Left-side (Servo) Proportional Control Valve (Battery side)
RPCV: Right-side (Rear) Proportional Control valve (Opposite battery side)
LMC: Lever Master Cylinder (Front)
RMC: Rear Master Cylinder (Pedal)
SMC: Secondary Master Cylinder (Left-Front Caliper)
FSM: Factory Service Manual
Parts Required:
One man bleeder kit (optional)
Speed Bleeders Part Numbers:
Front right caliper SB8125
Front left caliper outer bleeder SB8125
Front left caliper inner/centre bleeder SB8125
Rear caliper outer bleeder SB8125
Rear caliper inner/centre bleeder SB8125L
Clutch bleeder SB8125L
LPCV SB8125LL
RPCV SB8125
Part 1: Theory
Part 2: Diassembly And Prep
Part 3: Procedure
Part 4: Assembly
Part 5: Clutch
Part 1: Theory
The LBS is confusing for some when it comes to understanding how it works. The function of the sytem changed from 5th generation LBS to 6th generation LBS. I'm not too sure what the changes were, but I do know they operate differently. The way the 6th generation LBS works is; when the front lever is applied, only five out of the six (three pistons in each left/right caliper) caliper pistons actuate as well as the centre piston in the rear caliper leaving the left caliper centre piston untouched.
When the rear pedal lever is applied; only two out of the three rear caliper pistons actuate as well as the left front caliper centre piston. The LBS only works when the motorcycle is moving however, you can test this by propping your bike on the centre stand, rotating the rear wheel and applying the front brake; the rear wheel will not stop spinning.
The way it works is by force. The SMC is mounted above the left caliper that's attached to the fork and with the motorcycle moving, the rider will apply the front brake which squeezes the pads on the rotor and that drag pivots the left front caliper up which actuates the SMC and brake fluid gets pushed through to the LPCV and then to the rear caliper centre piston. The rear doesn't work in the same way because there's actually a brake line that goes all the way to the front left caliper that actuates that one centre piston by it's lonesome with the application of the rear pedal.


Thanks to BartmanEH for the above picture!
Part 2: Disassembly And Preparation
You want your bike to be on a level ground and prop the bike up on it's centre stand for this whole procedure. Rotate the handle bar all the way to the left so the LMC is level. Remove both screws and remove all the old fluid inside the LMC. You can use a turkey baster or rags, whatever you wish. Once the old fluid is out, fill it up with fresh new fluid. Make sure you squeeze the front lever a few times just incase you got any air bubbles when removing the old fluid.

Using an allen wrench, loosen, but do not remove the left front caliper bolts.

Remove the seat and do the same procedure you did for the LMC to the RMC. Don't forget to press the pedal lever a few times to remove any air bubbles.
Remove the rear wheel.
Remove the two bolts that hold the rear caliper together. The inside one is tricky and I needed to use a long 12mm socket to reach it. Once the rear caliper is removed, mount it at the 10 o'clock position on the rotor. The reason for this is so the inner/centre bleed screw is facing up, not parallel to the ground.


Part 3: Procedure
The procedure and order we're going to follow is the same one listed in the FSM, but with more pictures and explanations. Sections C. and D. are the most difficult. You will need a helper as well.
USING FRONT MASTER CYLINDER LEVER FOR A. AND B.
A. Left Front Caliper, Upper/Outer Bleed Screw

This is basic bleed. Open very slightly, usually about a 1/4 turn and pump the front lever until new fluid comes out. Even though I use speed bleeders, I still pressurize it old school method just to be on the safe side. The old school method is; with the bleeder screw closed, have your helper pump the front lever five times and hold. While holding, gently unscrew the bleeder screw until fluid comes out and before the lever reaches it's maximum travel, tighten the bleed screw. Top up the fluid level.

B. Right Front Caliper, Single Bleed Screw
This procedure is the same as above. Make sure you keep an eye on the fluid level as it drains.
USING REAR MASTER CYLINDER PEDAL FOR C. TO G.
C. Leftside PCV (Battery side), Single Bleed Screw Actuated via SMC

This step is the most confusing and difficult one as it requires good timing between yourself and your helper. The SMC is not attached at all to the front lever in anyway. You can unscrew the LPCV bleeder screw and pump the front lever all day long and no fluid will get pushed through. You could manually actuate the SMC by hand and only a little bit of fluid will come out and then stop. The correct method to do this; from what I've gathered on how the system operates and without using a vacuum bleed tool is as follows.
Remove the two bolts that hold the left front caliper on. I used an aluminum L-bracket I had lying around to wedge between the pads so they don't close.

Tilt the caliper 15° from the ground so the inner/centre bleed screw is facing up.

Your helper will be on the RMC side pressing the pedal and you will be at the left front caliper in charge of manually actuating the SMC and loosening/tighten the LPCV bleed screw. The way this system works is; there's a brake line that goes from the RMC to the SMC and from the SMC to the LPCV. Because there's no reservoir at the SMC, there's no way for new fluid to replenish to continue being pushed through the lines and out the LPCV bleeder screw, however, this is where the RMC comes in.
When your helper presses the RMC pedal down, the SMC piston will get pushed out filling it with fresh fluid. Once your helper releases the pedal, you will manually actuate the SMC by pressing it in to the caliper with your hand and fluid will get pushed through to the LPCV bleeder screw.


Push the SMC in with your hand.

Do not release from this point. Tell your helper to press the pedal again which will forcefully push the SMC out and then once your helper releases the pedal, you will manually push the SMC in again watching for new fluid. Once fresh fluid is coming out, I performed a final pressure bleed by tightening the LPCV bleeder, asking my helper to pump the rear pedal five times and release, then I loosened the LPCV bleeder screw and manually actuated the SMC gently half way and then tightened the bleed screw.

Note: Even with speed bleeders installed, I did not manually operate the SMC more than once for safe measure. To further elaborate on this; continuously pushing in the SMC numerous times will not bleed the SMC to LPCV brake line because there is no reservoir at the SMC. You will push whatever fluid is in the line and it will become empty with air. One manual push of the SMC followed by one rear pedal actuation by your helper.
D. Rear Caliper, Inner/Centre Bleed Screw Actuated via SMC

This procedure is the exact same as the above. The only difference is, you're bypassing the LPCV and going all the way to the rear caliper inner/centre bleed screw. Pressurize the sytem the same way as above too.

E. Rightside PCV (Opposite Battery), Single Bleed Screw

This is the easiest step. Follow the procedure as in Section A. but using the RMC pedal.

F. Rear Caliper, Upper/Outer Bleed Screw

Another easy step, follow above procedure.

G. Left Front Caliper, Inner/Centre Bleed Screw

The last procedure, again very easy, same as above.

Part 4: Assembly
Top up both fluids if they are low and fasten all caps and lids back on the reservoir.
Attach the front left caliper and torque the pivot and joint bolts to 23ft-lbs. The FSM says always use new bolts, but I cleaned up the old loctite residue, re-applied some new medium strength loctite and re-used them.
Attach the rear caliper and torque the joint bolts to 23ft-lbs. The FSM says replace also but I did the same as the front caliper bolts.
Reinstall the rear wheel and torque bolts to 80ft-lbs.
Now would be a good time to prime (pump a few times) your front lever and rear pedal lever. Once primed, they should not travel a lot of distance; they should feel stiff. If for any reason the levers travel a larger than normal distance, then there's probably air in the line somewhere or you might have forgot to tighten a bleed screw.
Note: The FSM says to use new bolts, not because there is something wrong with the bolts, but because there is probably some sort of loctite already applied to the threads. Thank you Metallican525 for that insight.
Part 5: Clutch
I don't have to go in to any detail about this because if you just did your whole brake system, might as well do the clutch as it's very simple and same procedure at Part 3, Section A. Remember to turn the handle bars to the right though.
At the end, I took my bike for a ride and I had no idea that this bike has this much braking power! Mind you, my fluid was 6 years old which was probably the cause of that but this method works flawlessly.
I hope this DIY was very thorough and gave you a good understanding on how to tackle this easy but tiresome procedure!
-
 15
15
-
Found this video from a local site describing how important it is to setup the ergonomics of your bike to fit you!
Riding season is approaching for some and I thought this would be a great refresh for some new rides and old alike! I now remember that my clutch and brake levers definitely required me to lift my wrist up to wrap my fingers around the lever.. will definitely take some time to make all my adjustments!
Bleeding/fluid Replacement On Linked Brakes W/abs On 6Th Generation (The Ultimate Guide)
in Maintenance Guides
Posted
No. This is incorrect, the SMC does not have a reservoir, so therefore it cannot push new fluid through. It also does not operate from the force of the rear brake pedal, it works with the movement of the front tire and friction of the brakes which causes the SMC to operate. You must do it the way I've listed to bleed it correctly. I've stated this on the front page.
The caliper does not have to be high up, the bleed screw has to be facing up. That's all that's required, just like in the main tutorial picture.