

jroberts427
-
Posts
82 -
Joined
-
Last visited
-
Days Won
11
Content Type
Forums
Profiles
Gallery
Blogs
Downloads
Events
Posts posted by jroberts427
-
-
Good chance the SMC (secondary master cylinder) at the front wheel is also blocked. Need to go through the whole system to make sure everything is clear. Great opportunity to ditch the linked braking system all together.
Justin
-
 1
1
-
-
Thanks guys, and I appreciate the tips along the way. Now to get it registered and insured so I can do a real shakedown run. The weather is warming up and it's time to go riding, and look for the next project! (There is a CBR954RR for sale locally that looks interesting.)
Take care,
Justin
-
1
-
-
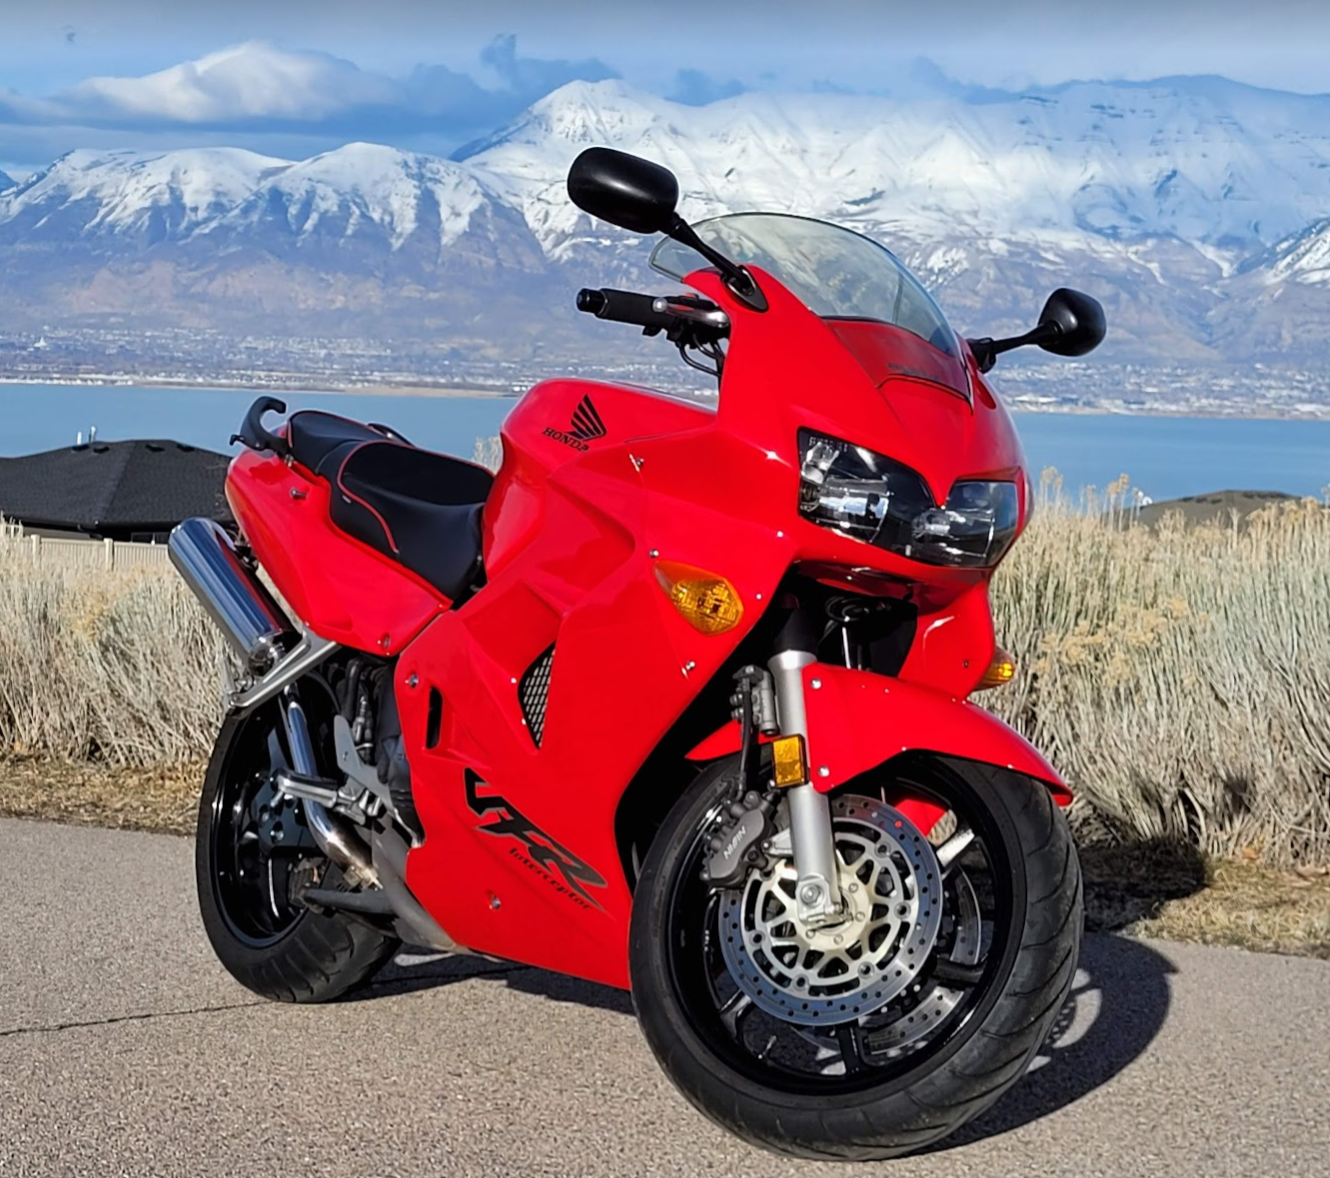
Gentlemen, I give you VIN# 00089. Looking nearly as good as the day I brought her home from the dealer back in May 2001. She's not perfect, but I'd say the time spent in the garage has paid off nicely.

Cheers,
Justin
-
7
-
 1
1
-
-
51 minutes ago, doubled said:
Jason you mentioned taking apart the turn signal, cleaning and lubing. I have the same issue. What solvents did you use?
Also, what polish did you use on the turn signal lenses?
Thanks!
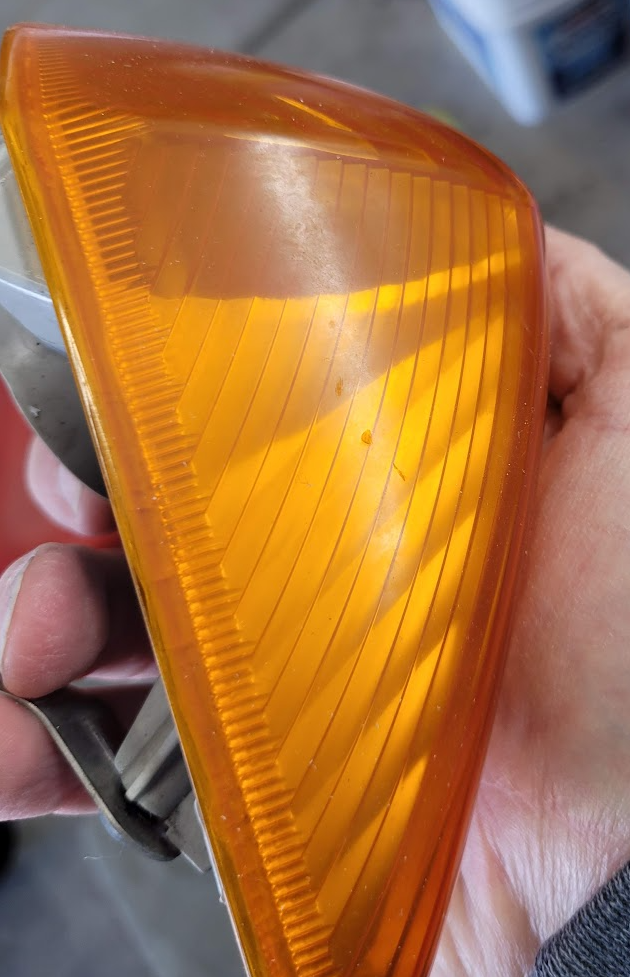
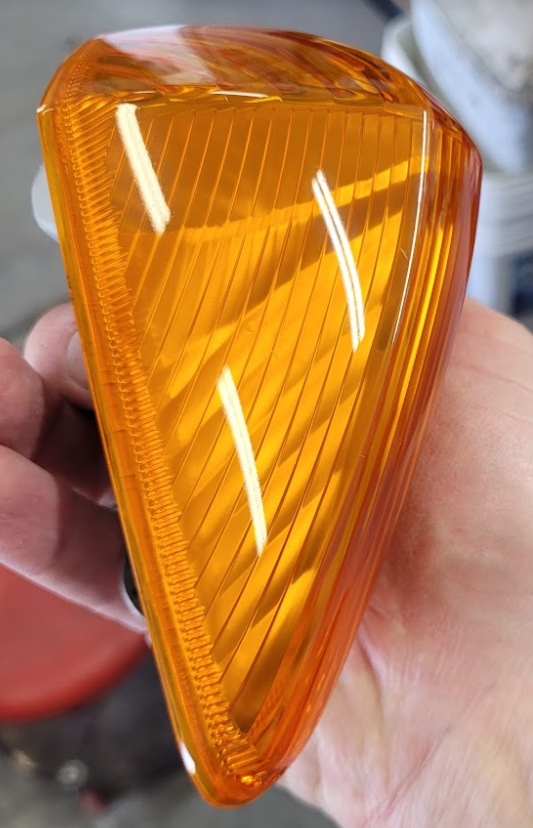
I used a little MAF cleaner that I had on the shelf. Didn't take much. I suspect carb cleaner would have worked as well. Just a few light, quick sprays to remove the old lube that was on the contacts. I then added a little brake lube that was out since I did the rear brakes. Worked great.
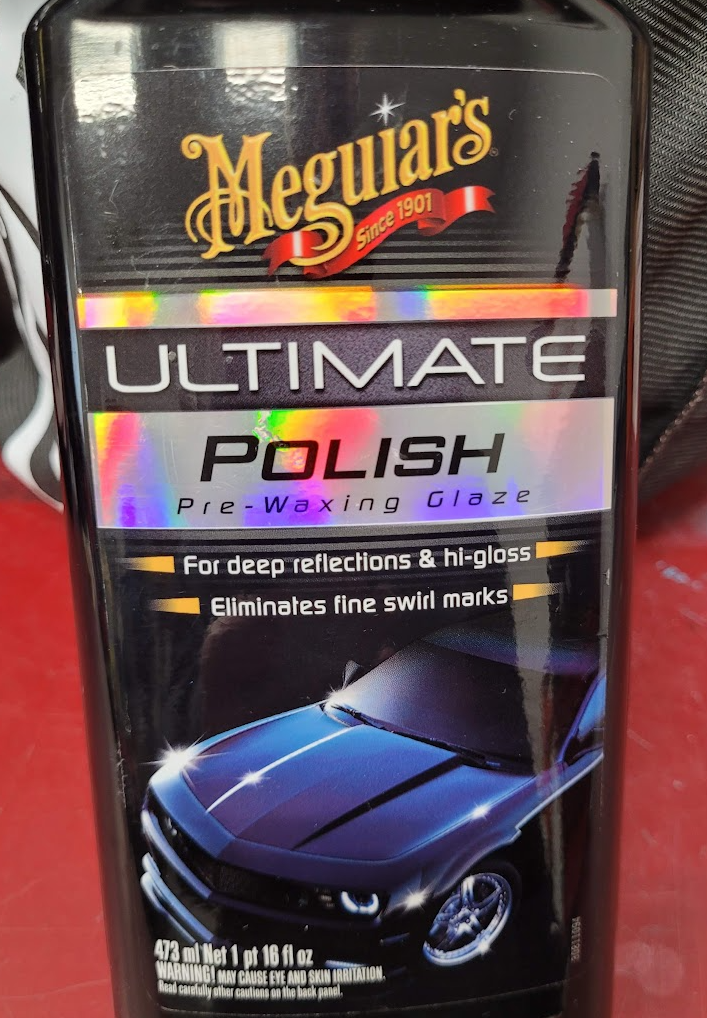
On the turn signals (and all of the plastics) I used Meguiar's Ultimate polish on a white foam pad with my dual action polisher. For small pieces like the turn signals it can be done by hand if you don't have a DA. Just clean the part, add a bit of polish to a clean microfiber, use circular motion with light pressure for maybe a minute. Wipe off when done to reveal the shine, repeat as needed.
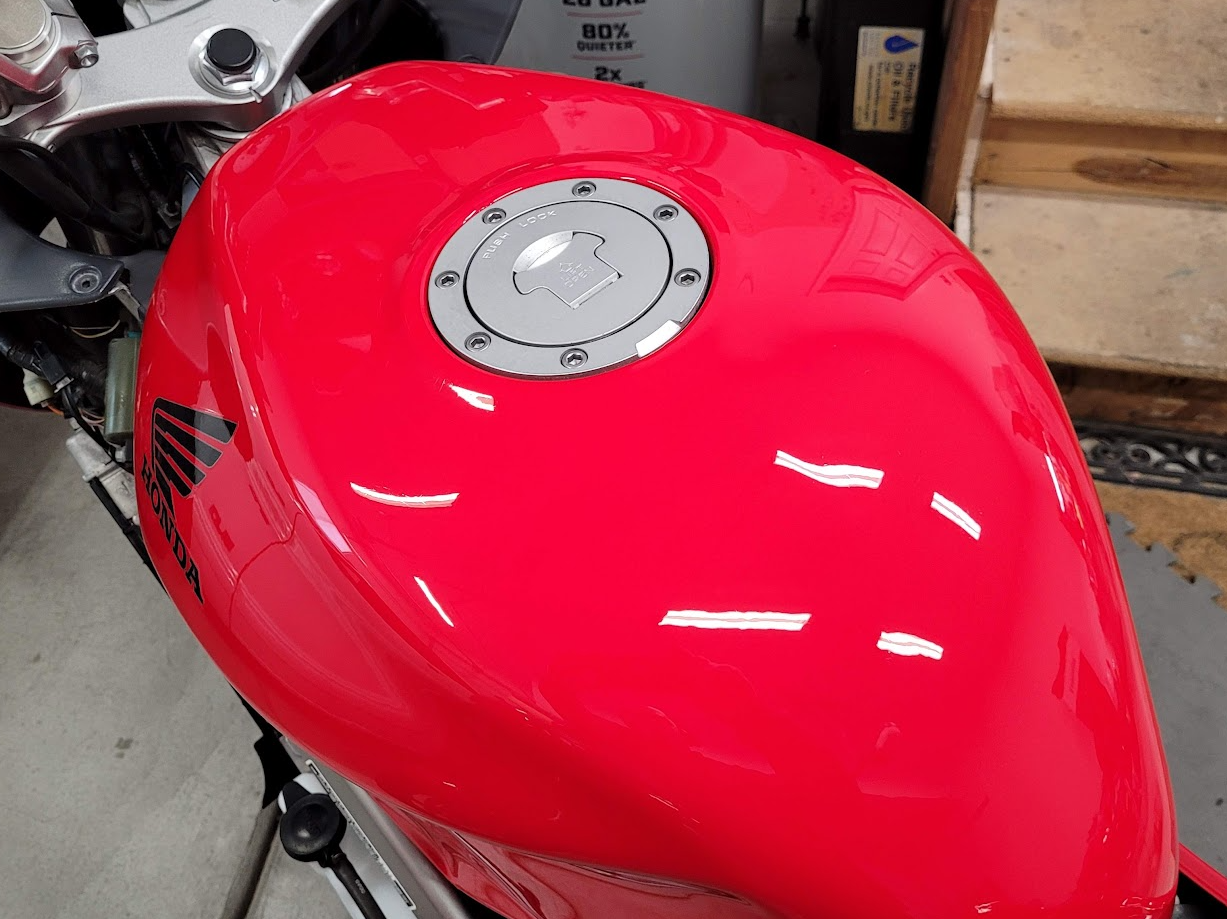
If you want to polish the tank and fairings, a machine polisher is the way to go. I was a bit surprised to find that the plastics on the bike are single stage paint (got some red paint transfer on the pad) and only the tank has clear coat. They did polish up nicely though.
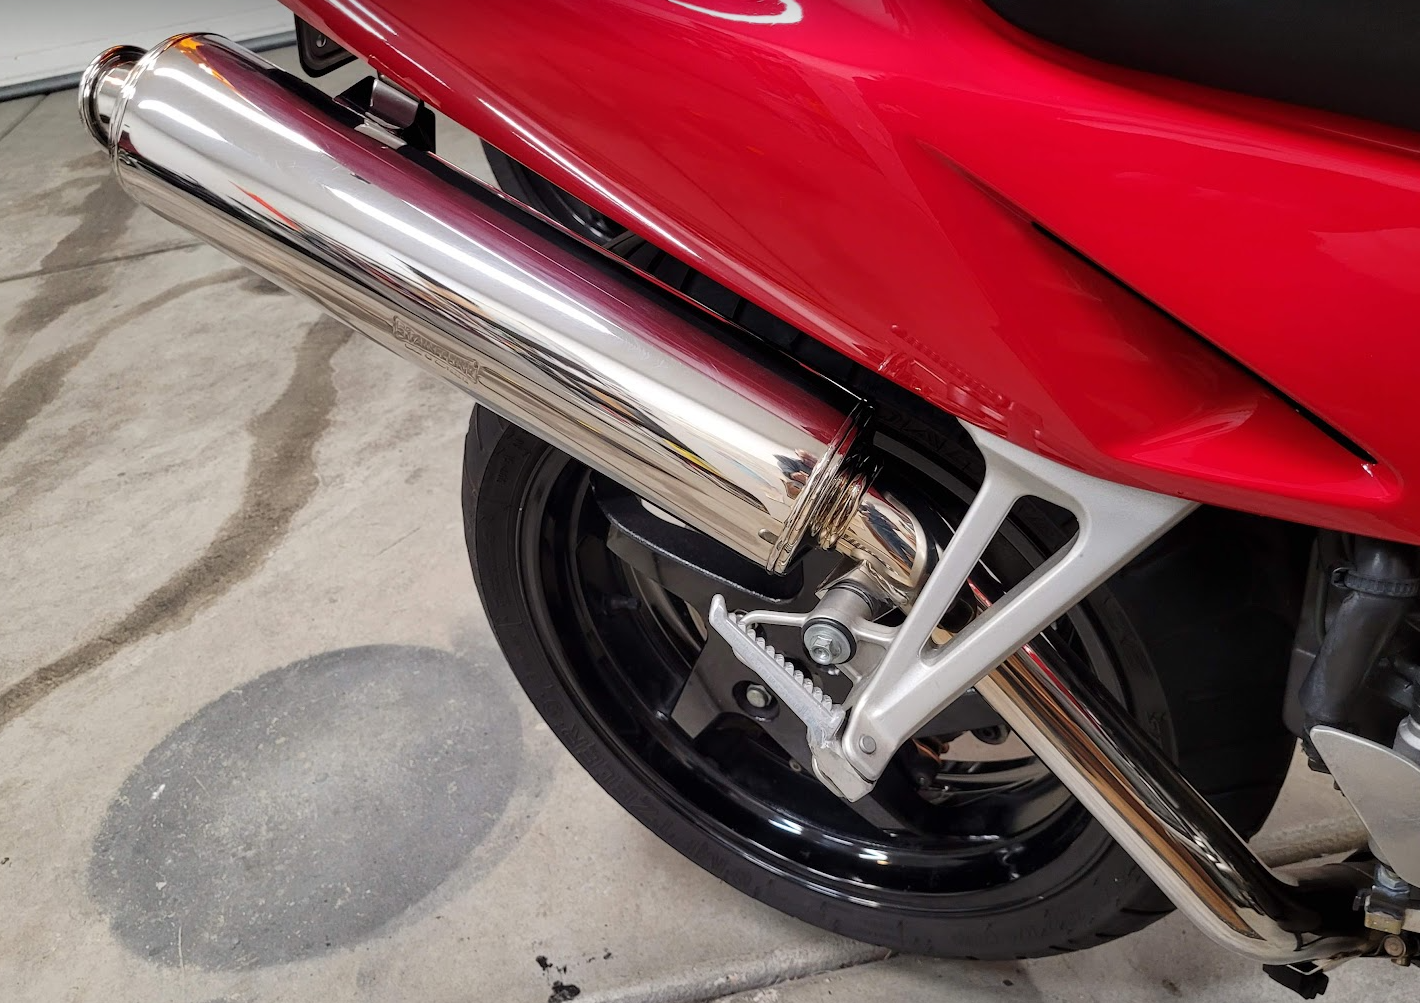
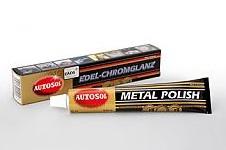
@Grum I tried some Autosol metal polish on the pipe and it worked very well. Thanks for the tip!
The bike is basically put back together at this point. Just waiting for some clear weather for a shake down run and some outside pics.
Cheers,
Justin
-
5
-
-
That yellow and white looks great.
-
1
-
-
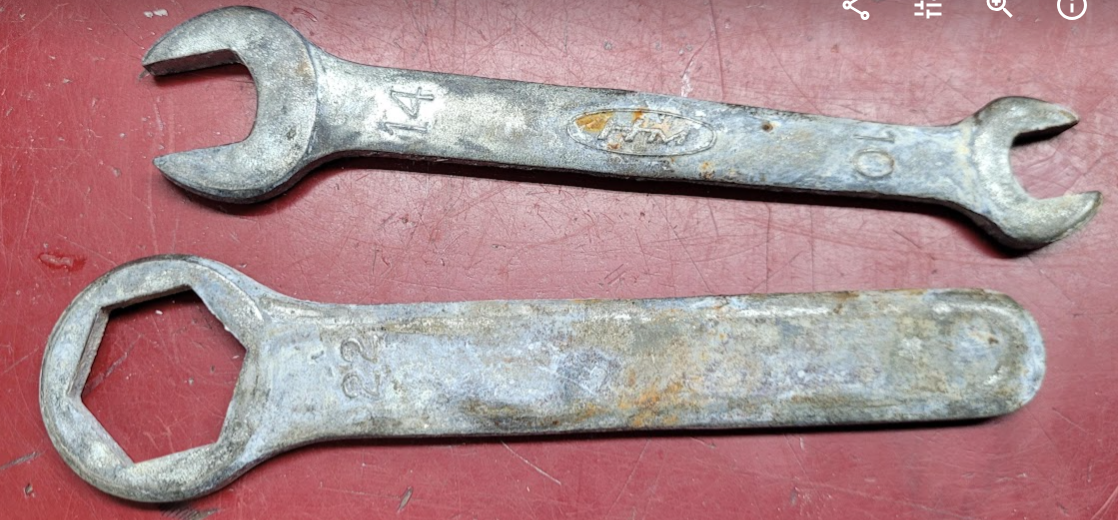
8 minutes ago, Grum said:
Whatever coating they have it appears to be pretty thin, the coating seems to suffer as the tools bounce around against each other while in the kit when riding.
Some rubbing with steel wool and a little metal polish will help.
BUT is it really worth worrying too much over some surface corrosion on a set of spanners you most likely may never use?
As long as they are usable and there as a backup is probably all that really matters.
As always YMMV.
Yeah I'm not too worried about these, as you state, they may never be used. More of a curiosity while I'm in the groove of polishing things.👍
-
So, are the tools galvanized or plated? Wondering if there is a way to clean up the corrosion on the tool kit or if re-plating would be required.
-
8 hours ago, Duc2V4 said:
I have 2 VFRs, a 5 Gen (01) and a 6 Gen (09), both currently run cat-less and with the O2 sensors still installed. Prior to putting on the “WyLD” headers (on both bikes), I ran 98-99 model headers on both for a short spell. I had O2 bungs installed so that I could use the auto tune feature of the Rapid Bike tuning module, which requires the sensors to be installed. Although the 98-99 headers are slightly different, in a couple of ways, one, the primaries are lager, the other is that the front primaries do not cross over, like the later models. Not sure how this affects exhaust flow but I had not noticed any issues running them on either bike when I had them installed. Alternatively, you can use O2 bypass devices, essentially resistors on the O2 leads and that go back to the wiring harness and that should keep any FI errors from showing up. These would be used with headers that do not have the O2 bungs on them. You can get them from Dyno-Jet still, if you want to go that route, or make your own. I’m sure there’s a video or link to a video on this forum on how to do that.
All that said, I might actually still have the 98-99 headers that I had on my 5 Gen still laying around the garage. If you’re interested in those, send me a PM and I’ll go look and see if I still have them.
Thanks. PM sent.
-
12 minutes ago, Grum said:
I've used this stuff on the lower exhaust on my 8gen. Keeps it nice and shiny.
Picture - Lower exhaust after 90,000k's.
That looks fantastic, I'll look into that.
Will it cause any type of running issue with the bike to run catless?
-
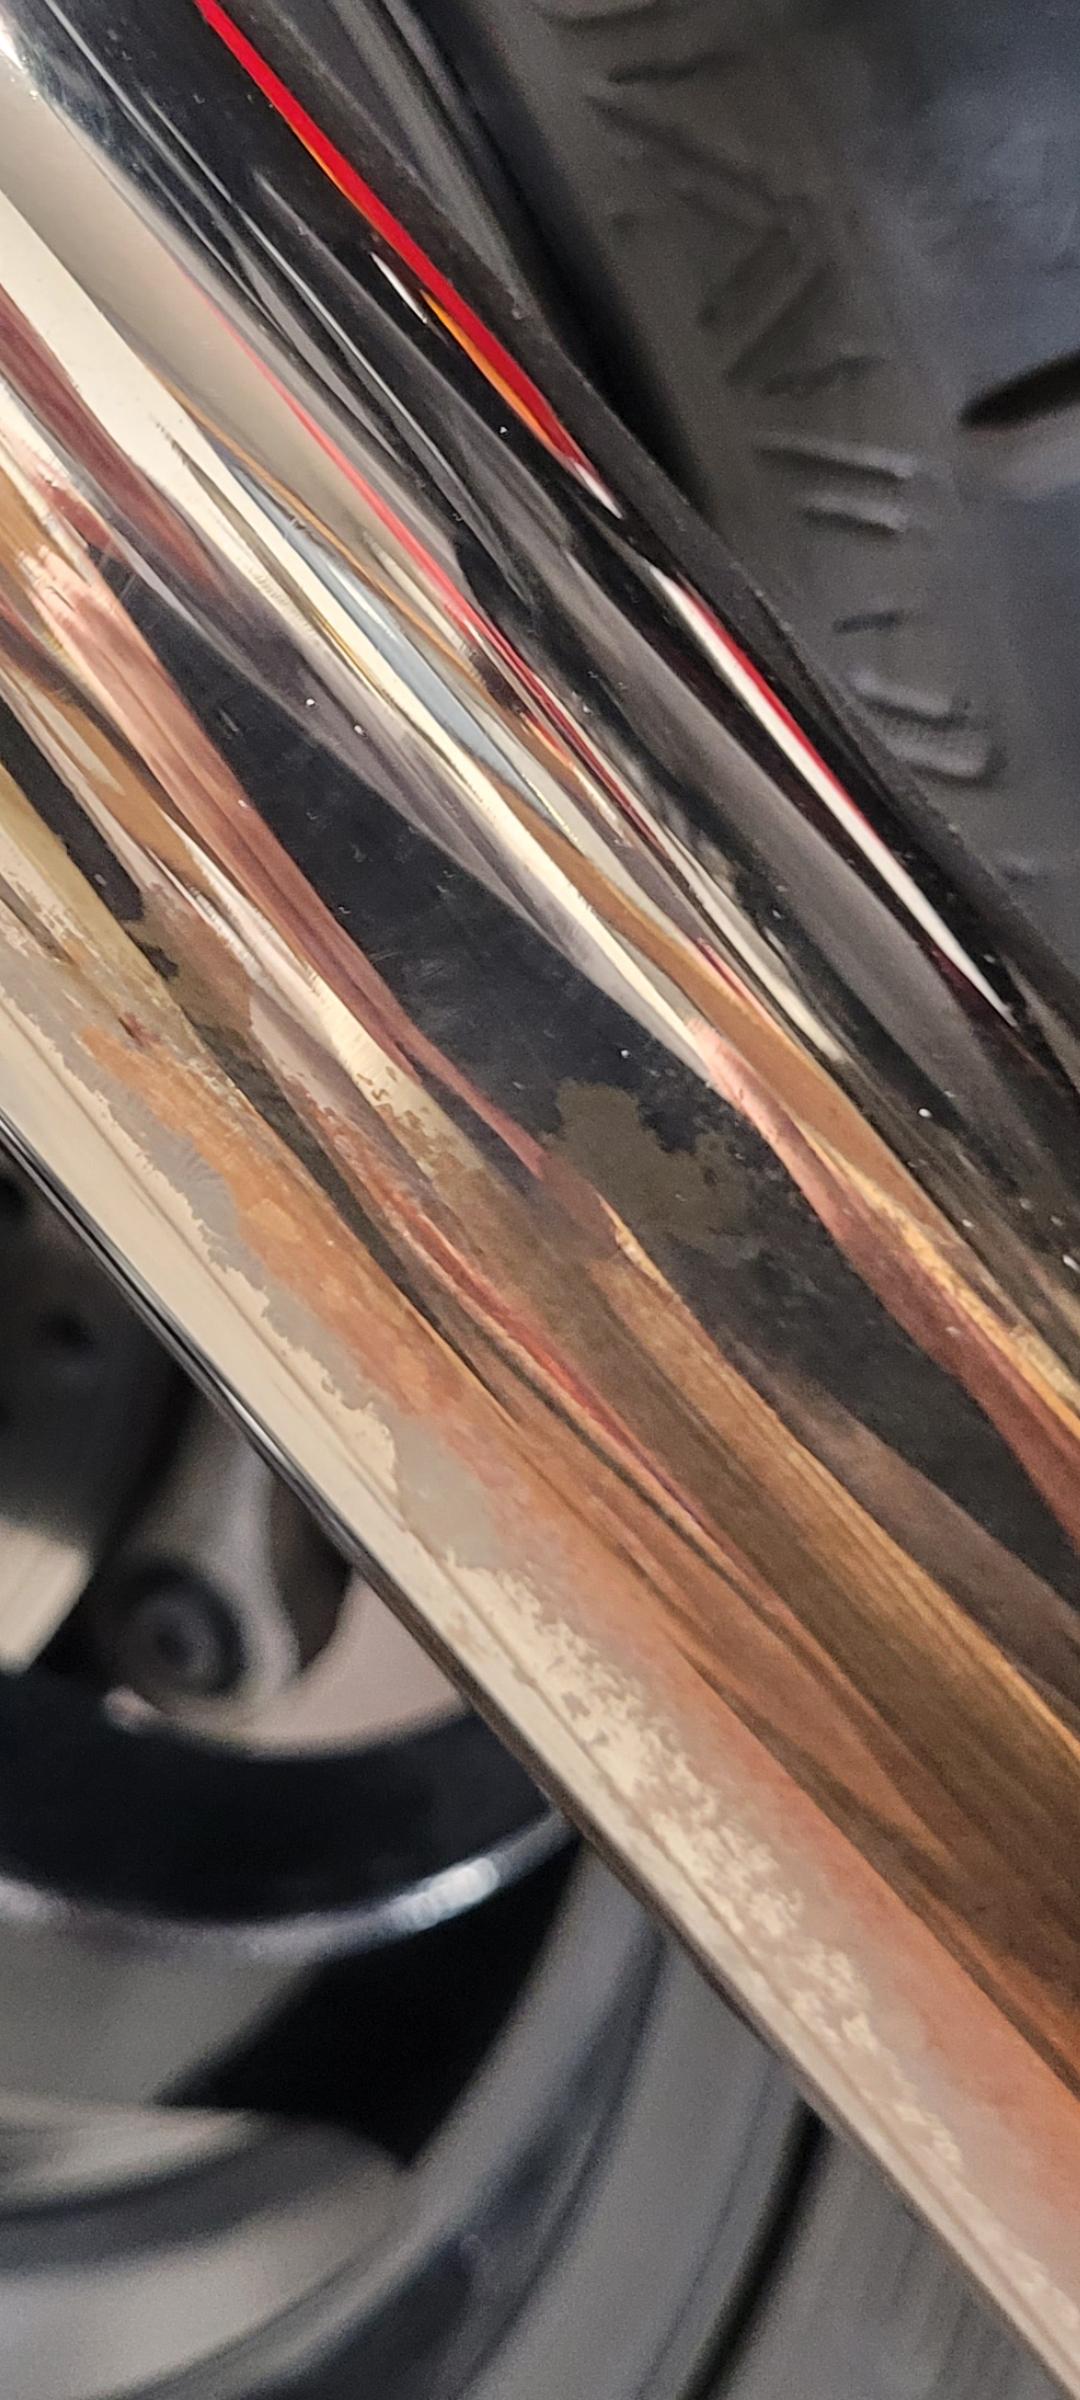
Thanks guys. Any thoughts on how to best polish out the discoloration on the lower area of the exhaust pipe? Also I may one day ditch the stock catted headers for catless headers. Any issue with that on a 2001? I noticed that the O2 sensors are in front of the cats and would be retained on a catless header setup.

-
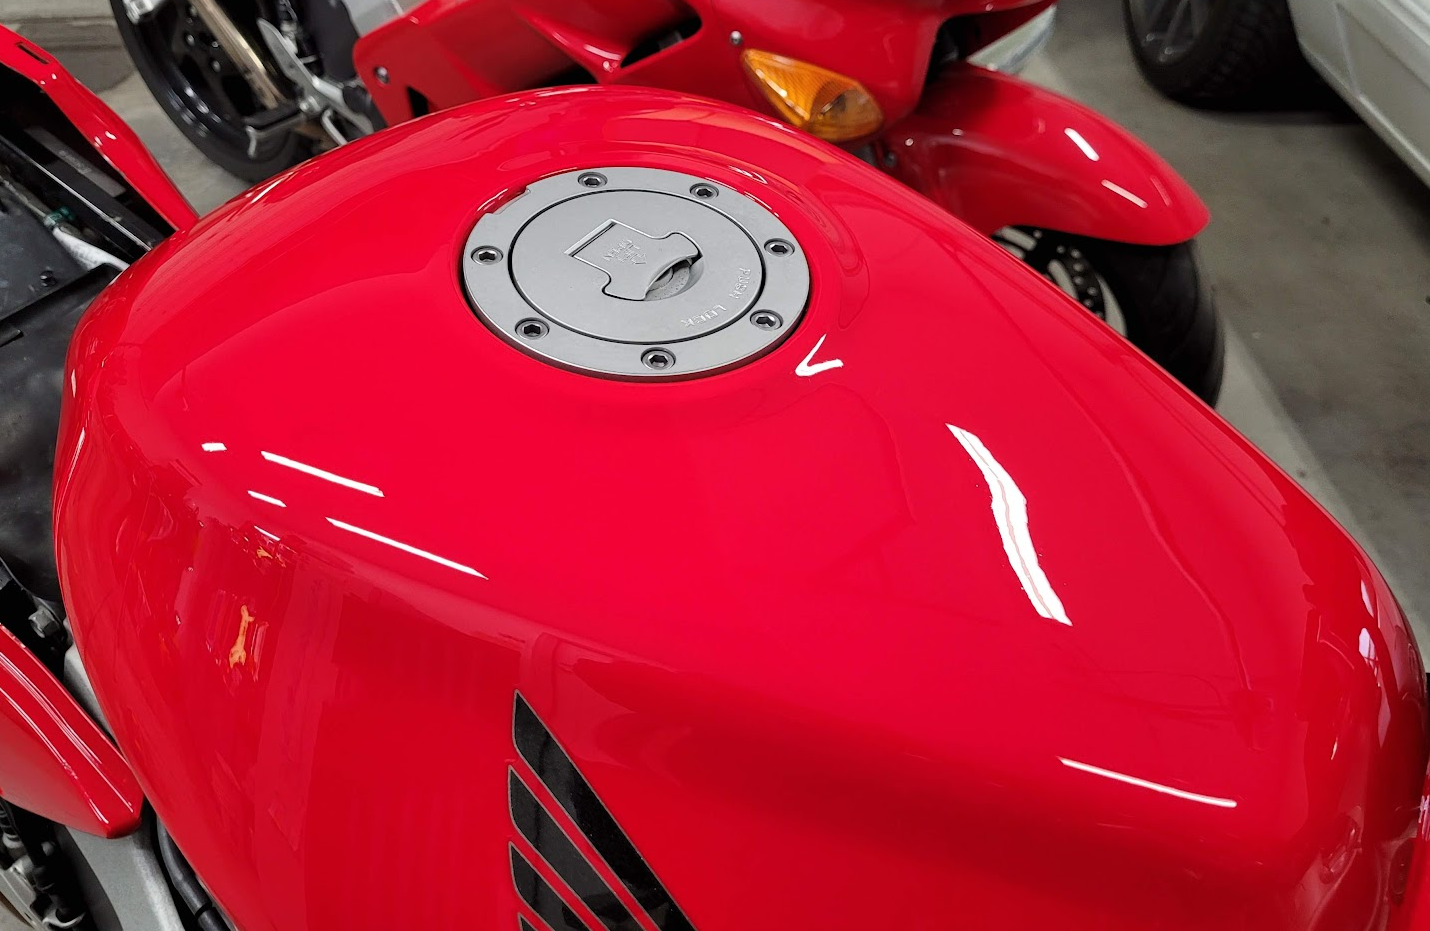
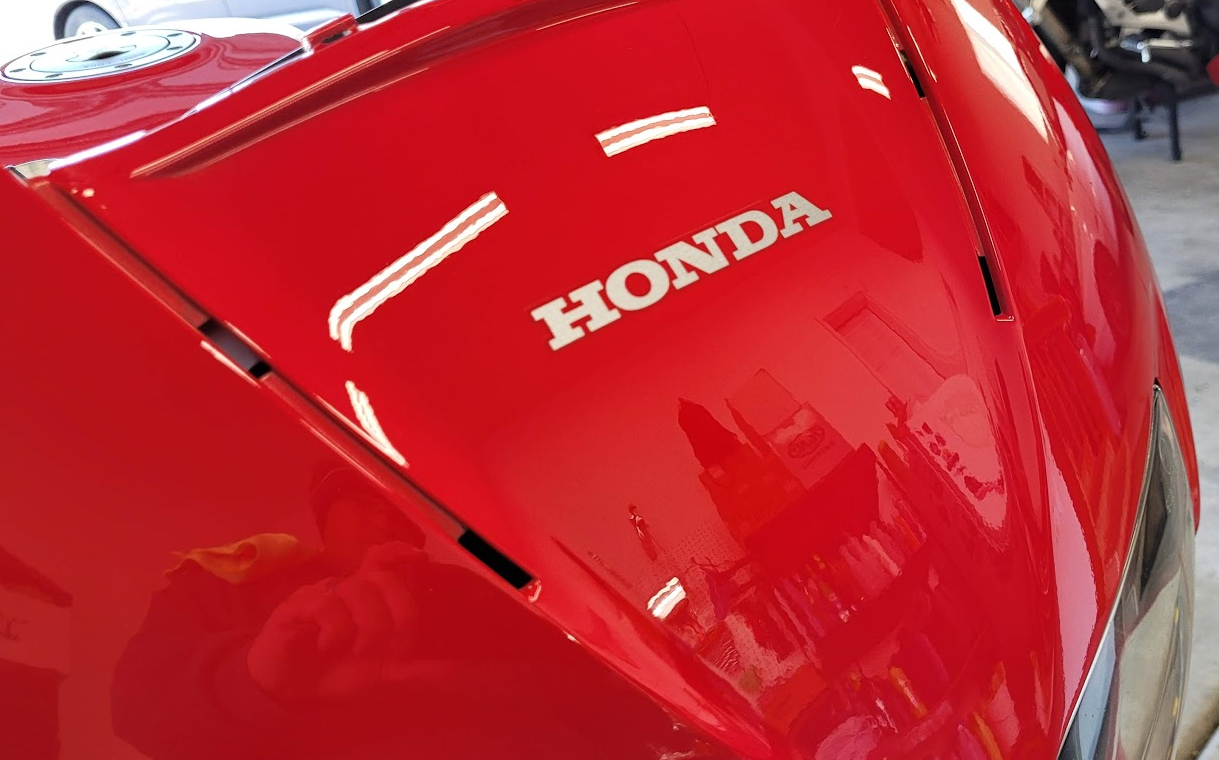
The bike spent some time in a carport and the right side showed some fading from exposure to the elements. A light polish makes a difference in no time.
That Italian Red pops nicely.
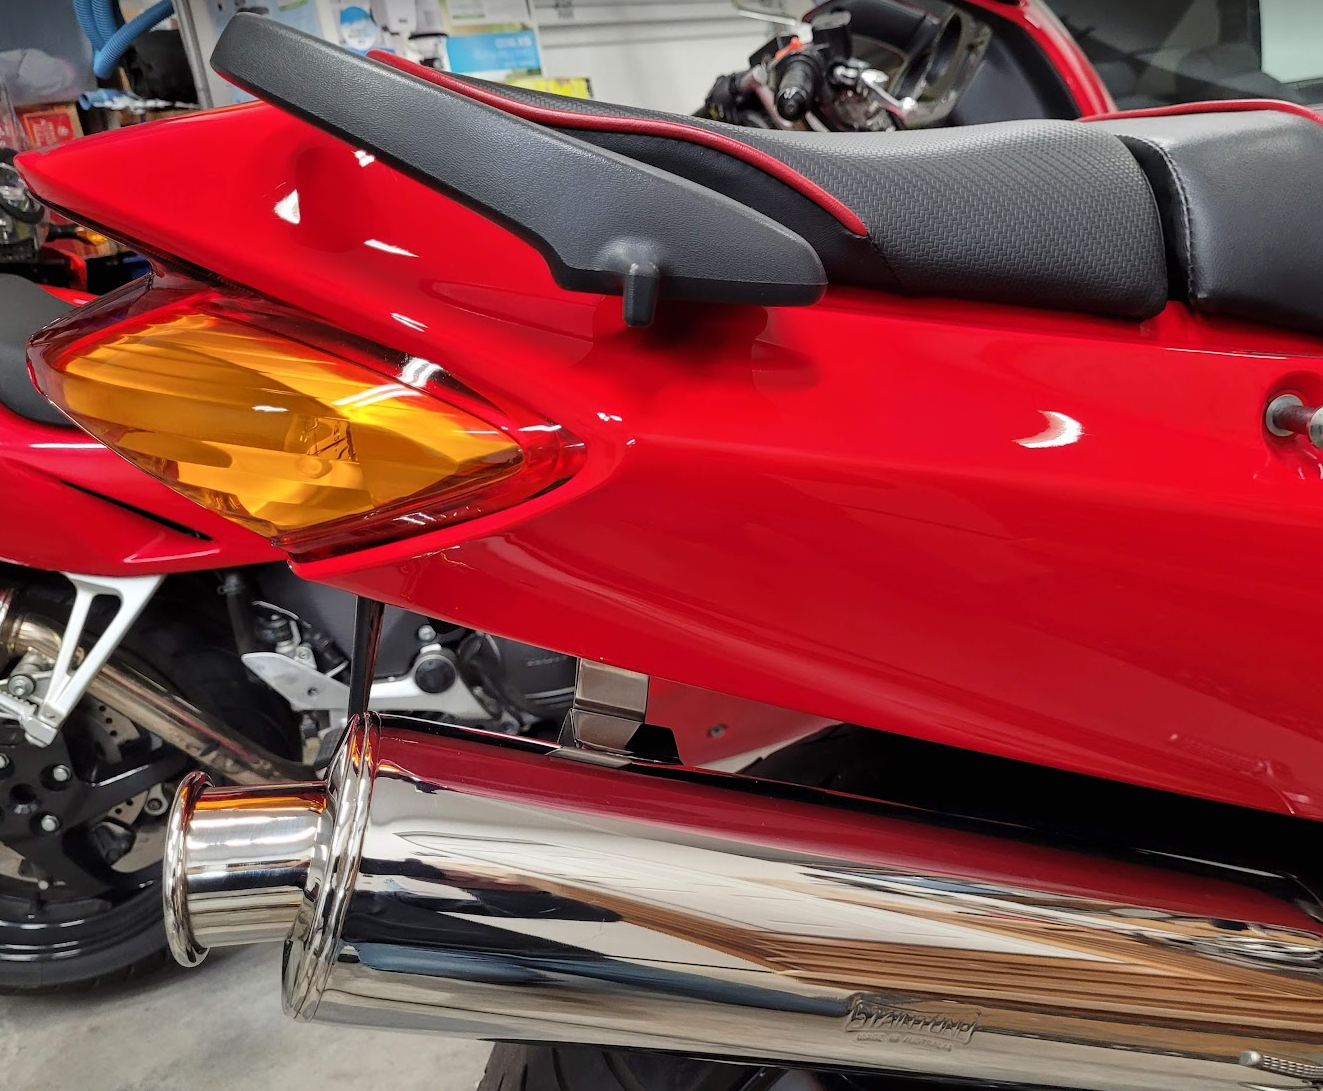
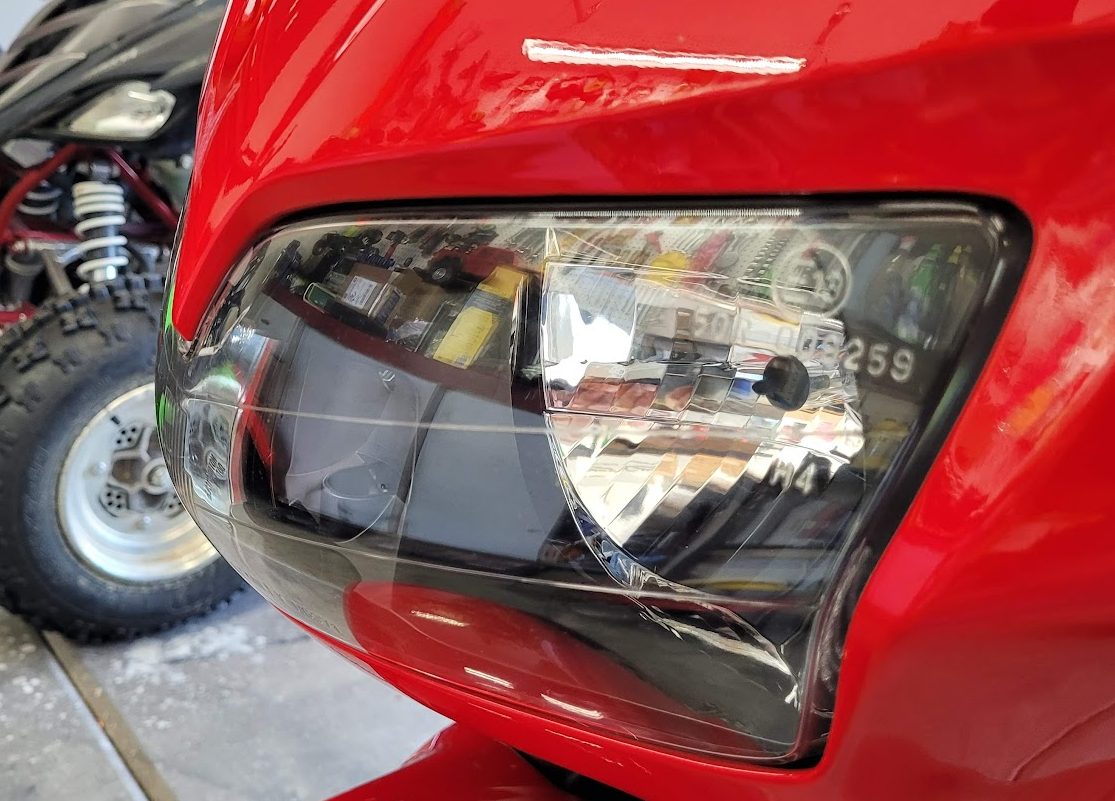
Even with 39,000 miles the headlight cover cleaned up great.
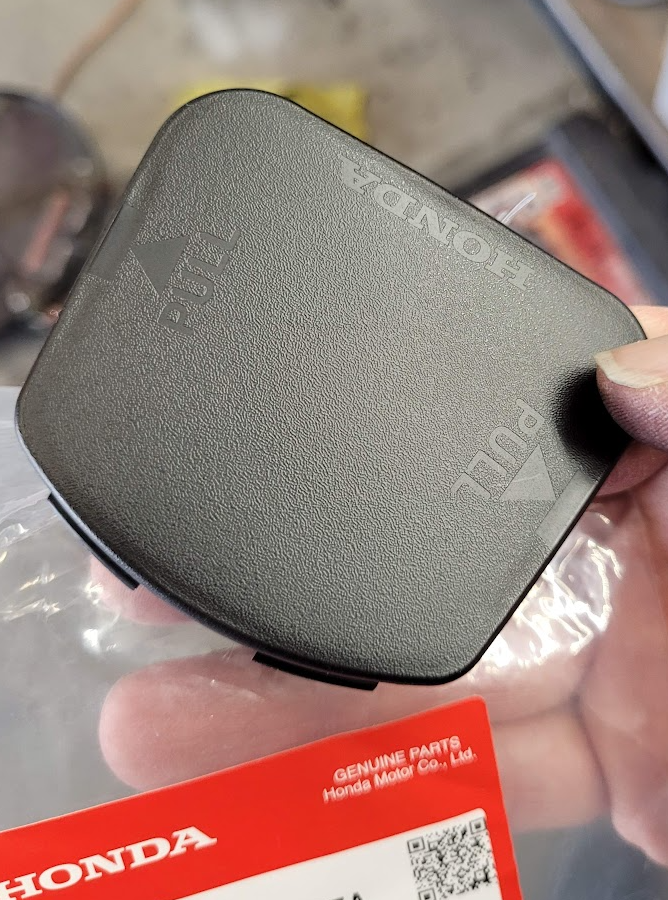
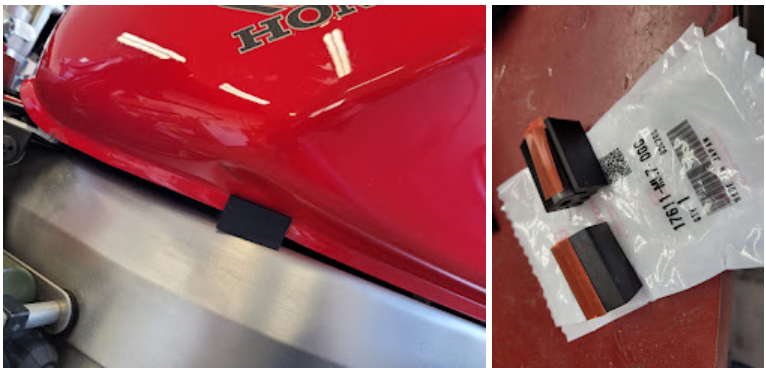
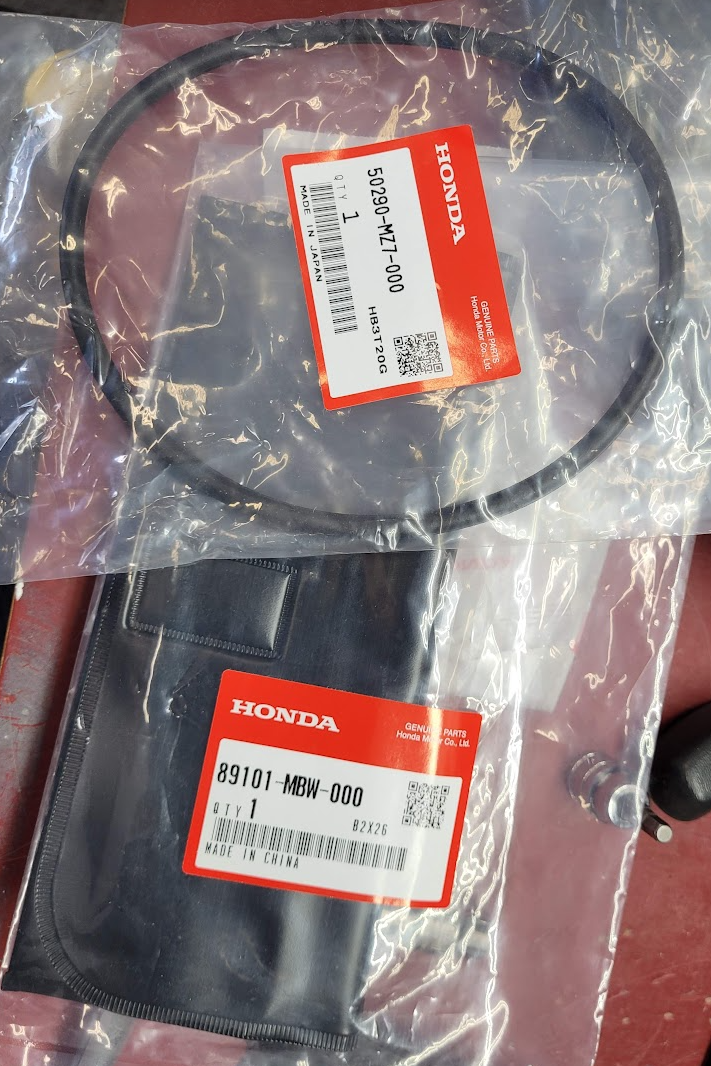
This piece was missing when I got the bike back. It's a bulb cover under the headlight assembly. No bulb on the US bikes but I wanted the cover in place regardless.
Fuel tank cushions were also missing, now installed.
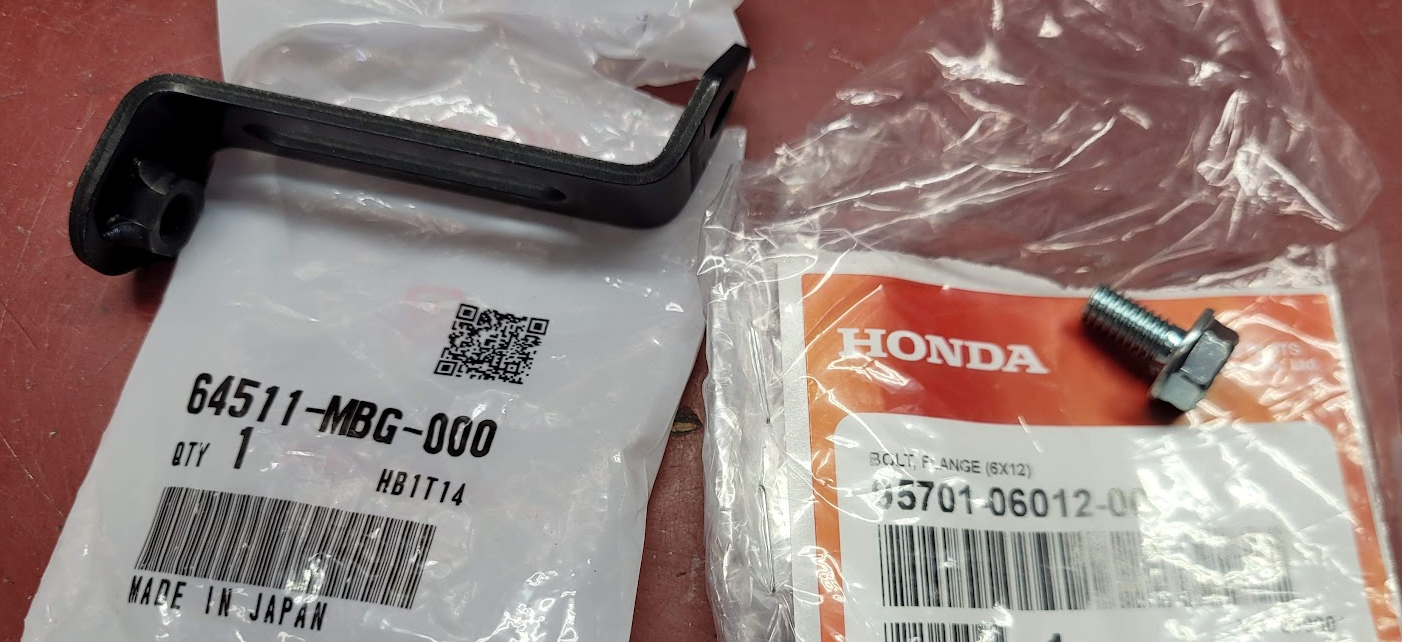
Fairing bracket missing from the left side, now installed.
Even got a new tool bag and rubber band.
I noticed that the turn signal switch was sticky. Took it apart, cleaned and lubed inside. Now it moves freely as it should. All that remains now is to polish the windscreen, tail and side fairings, install and final wax. I ordered a taller windscreen that will be here soon, we'll see how well it works. I'm hoping it will direct the wind blast a bit higher.
Also need to figure out how to polish some discoloration near the bottom of the Staintune pipe. I have a few metal polishes to try out.
Getting closer to a real shakedown run.
Cheers,
Justin
-
6
-
-
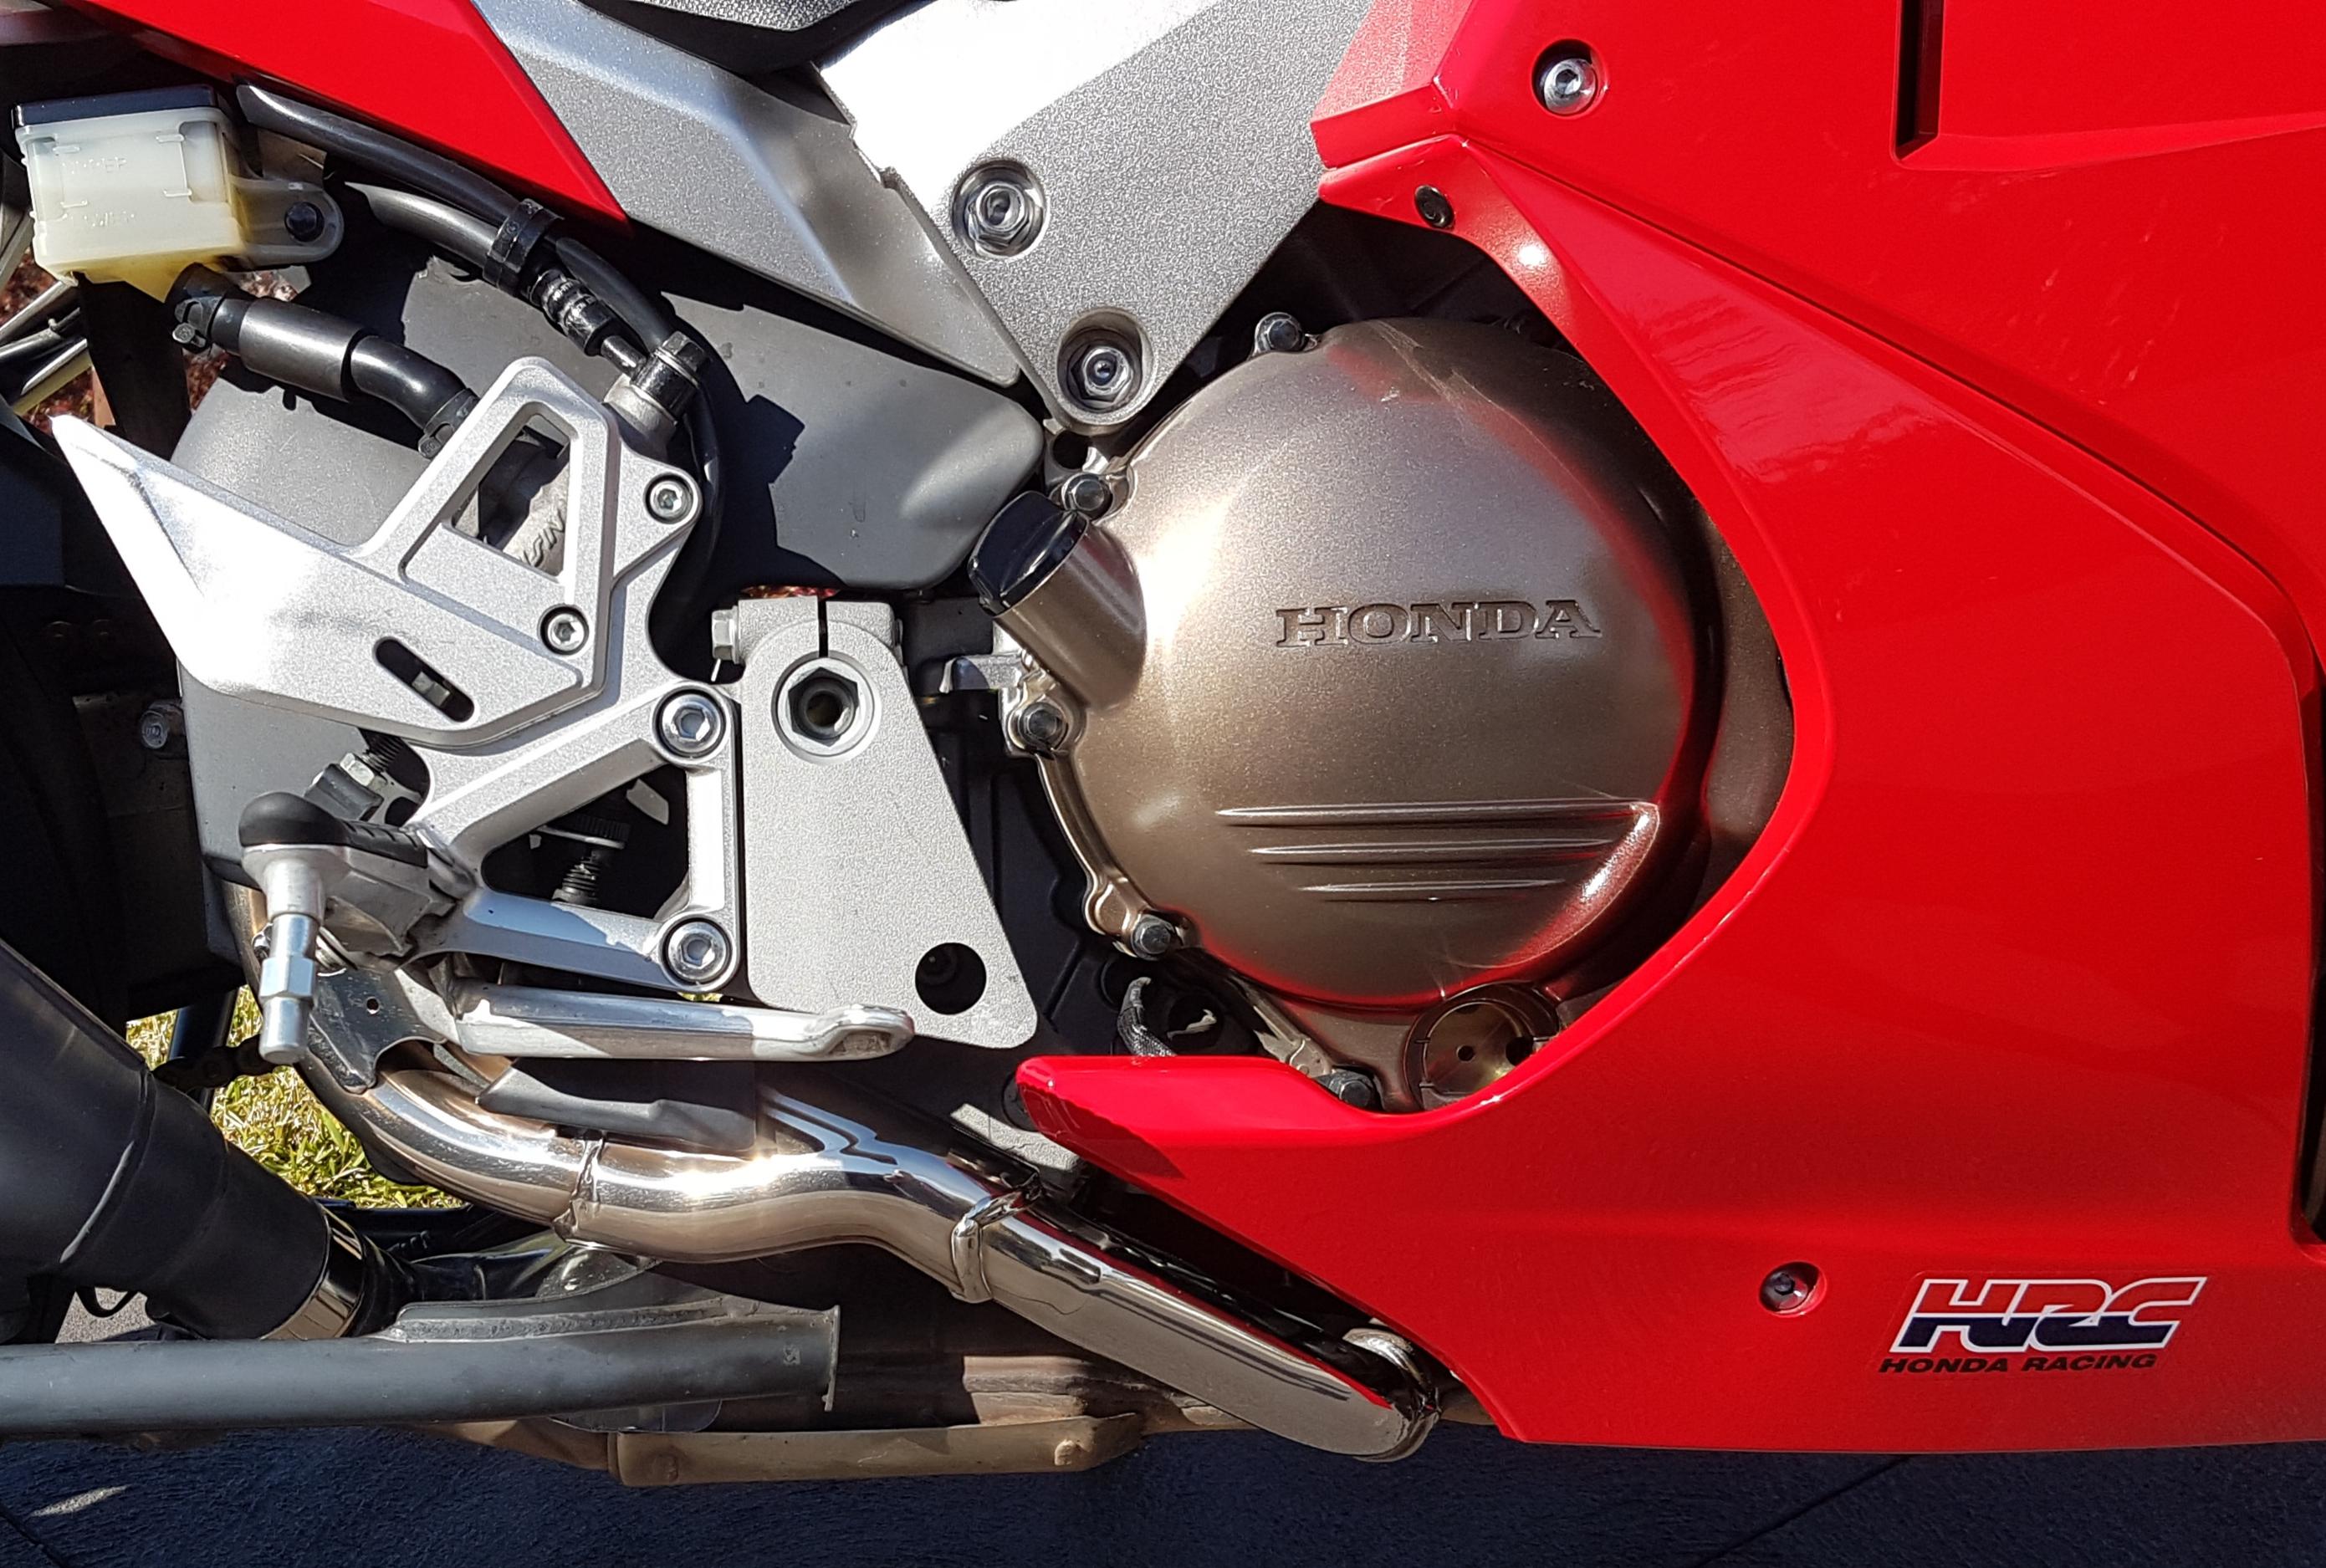
Slowly making progress as parts come in.
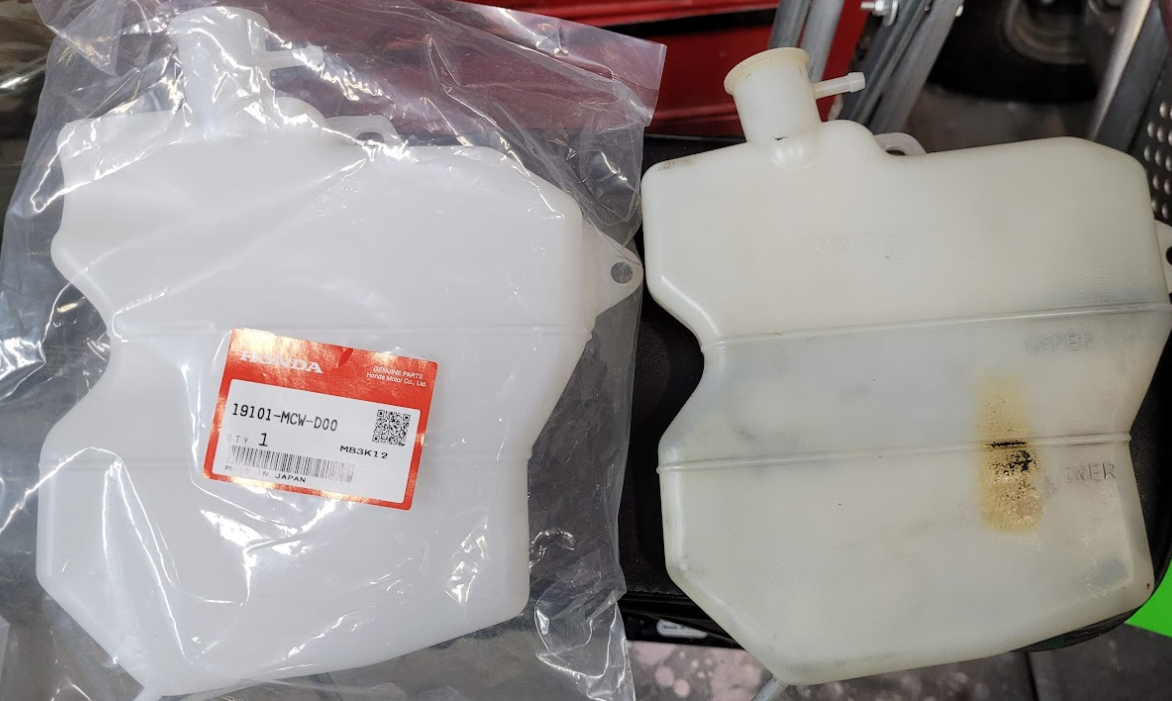
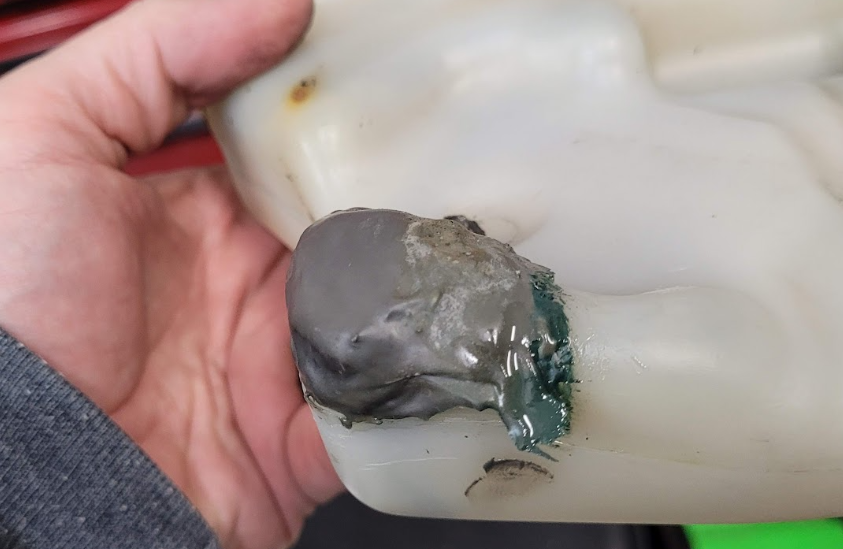
New hotness vs old and busted. Nice to be able to get an OEM part to replace the original with the failed epoxy repair.
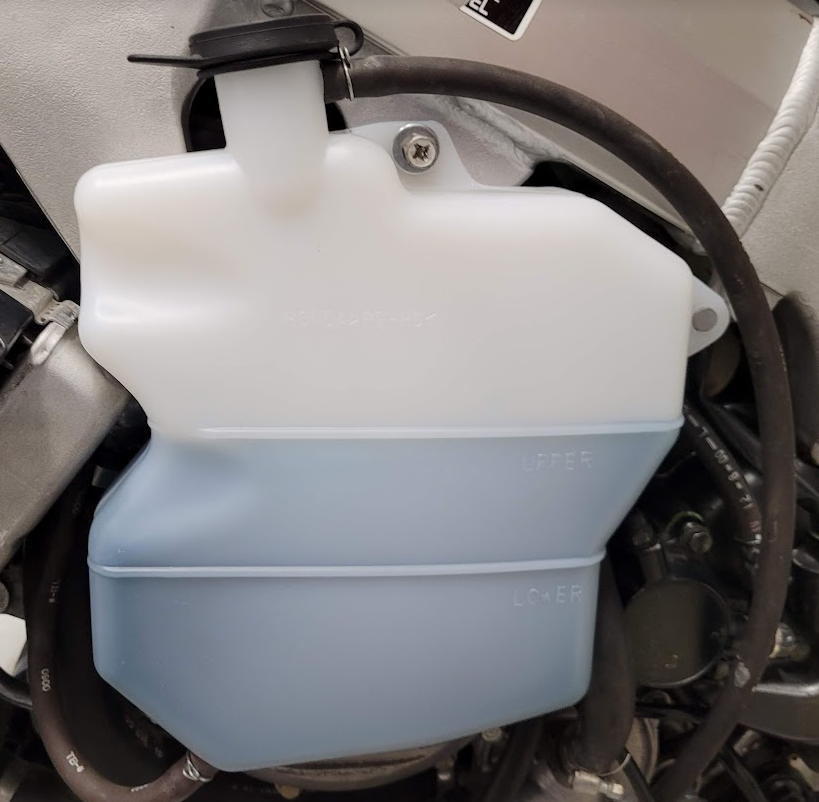
Now with Honda blue coolant, sorted!
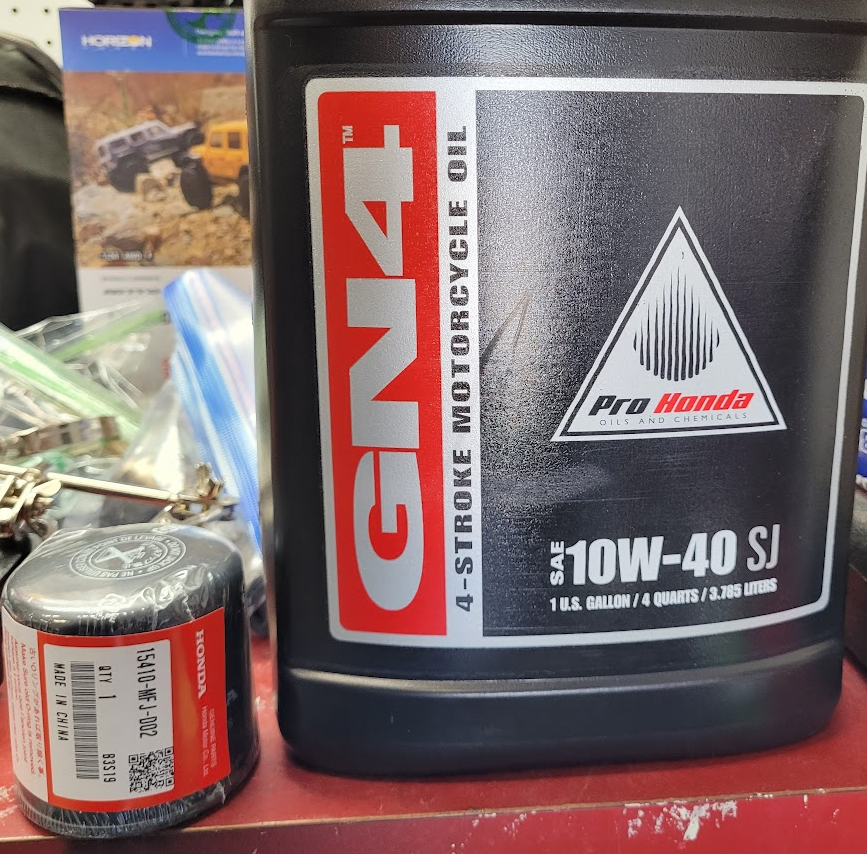
Honda oil and filter up next...
Looking good.
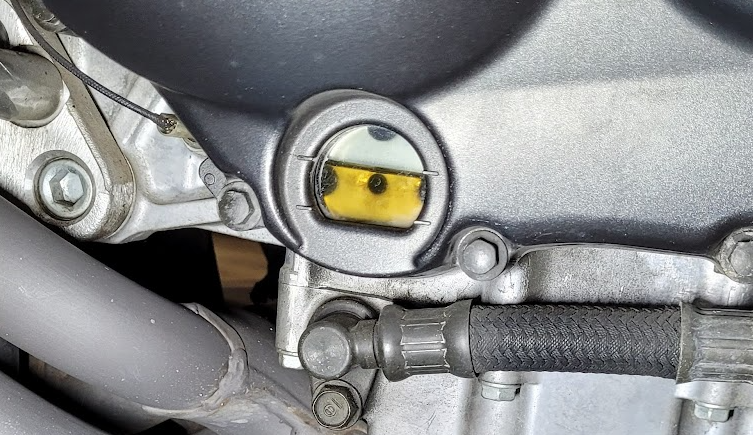
With new oil and coolant I started the bike and let it warm up, checking for leaks and luckily none were found. I also wanted to confirm that the cooling fan functioned correctly. I let the bike get up to 230* F and the fan did not kick on. After the bike cooled down I put it on the side stand and topped off the coolant level, then went to the manual. Per the manual the fan should kick on from 208*-216* F. So, following the manual I tested the fan motor by running a jumper from the fan motor switch connector to a ground with the key on. Fan motor works. Then I tested voltage, looks good. I thought I might need a new fan switch but decided to do a continuity test first. I put the switch in a vise and attached the leads from a multimeter. I then heated up the switch base with a propane torch. After a few seconds of heat, the multimeter confirmed continuity. I did this 3 times just to be sure. On the last one I listened to the switch as it cooled down, and heard the click. Reinstalled the switch and let the bike warm up again. This time the fan kicked on right at 219* F and off again at 206*F. I let that cycle 3 times before calling it good.
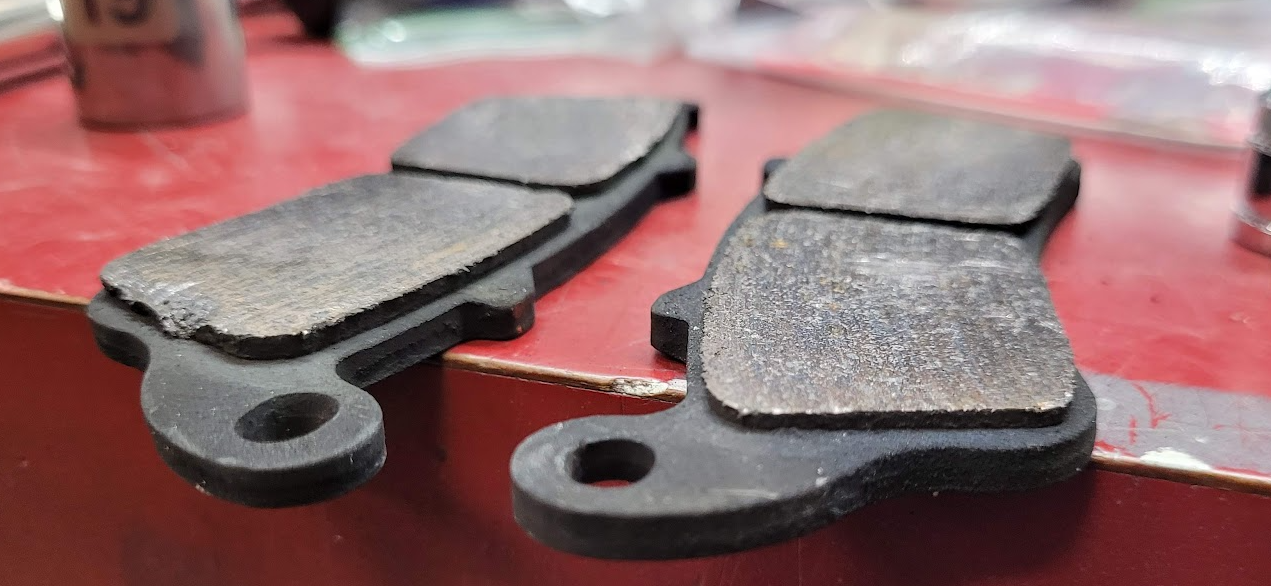
Next up, rear brake pads. The fronts are fine but rears were getting low. There is a very good chance these are the rear pads I installed many years ago. (The damage on the left pad is from me using a flat screwdriver against the old pads to compress the pistons)
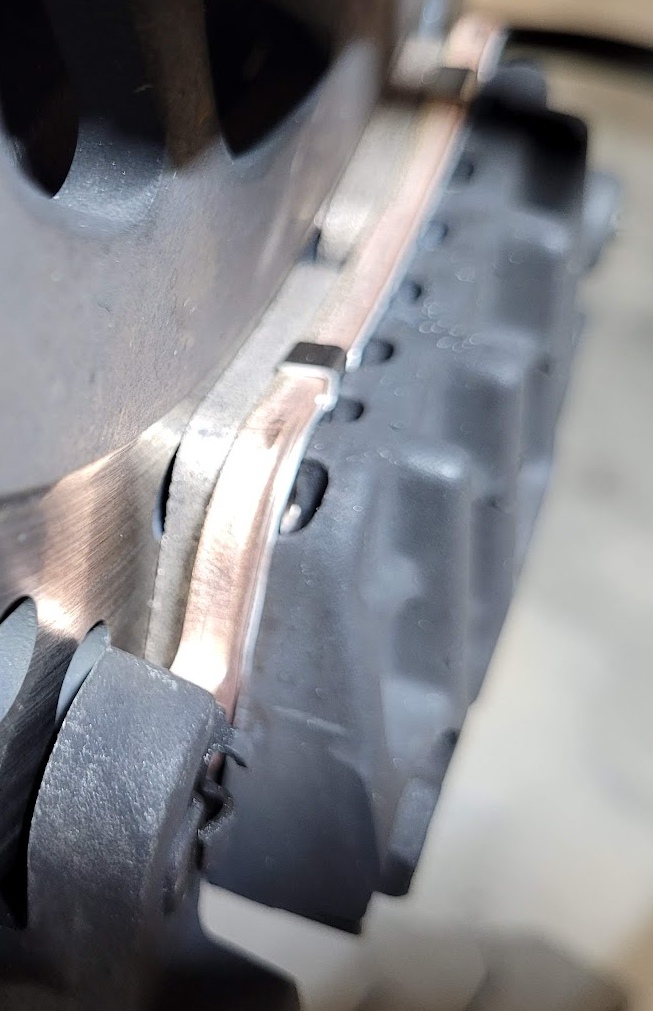
Caliper cleaned, pins lubed, new pads installed and everything torqued to spec.
Torqued the front calipers, axle bolt and fork pinch bolts. Found two caliper bolts that were slightly loose. Good to have peace of mind on these things. Next up, more polishing and more OEM parts to install. Added bonus, the weather is starting to warm up nicely!
Cheers,
Justin
-
5
-
-
You can order online from several sites in a similar format to the link below that use the Honda parts diagram. Would have to confirm shipping to Canada or find a place in country.
https://www.hondaparts-direct.com/oempartfinder?aribrand=HOM&arian=motorcycle
Item #15 here (part number stated by Bronco):
-
1
-
-
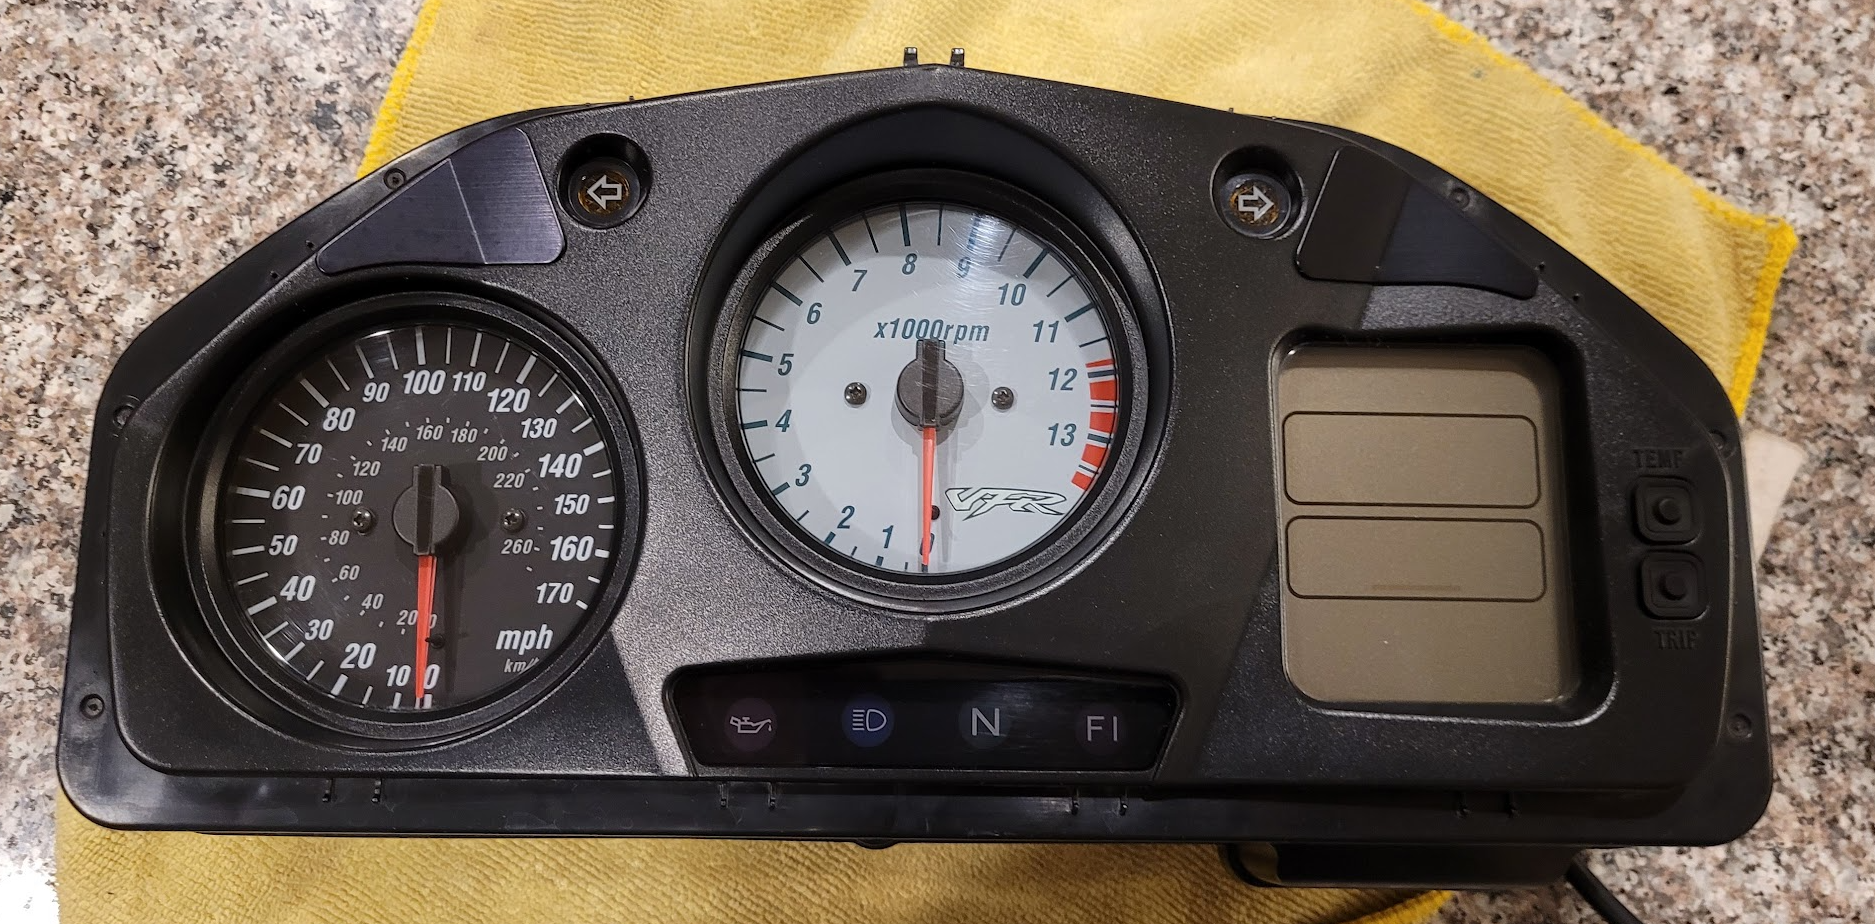
LEDs are such a cheap, easy and effective mod. Highly recommended. You only need 5 for the backlights in the cluster.
https://www.amazon.com/gp/product/B08229N2Y5/ref=ppx_yo_dt_b_search_asin_title?ie=UTF8&psc=1
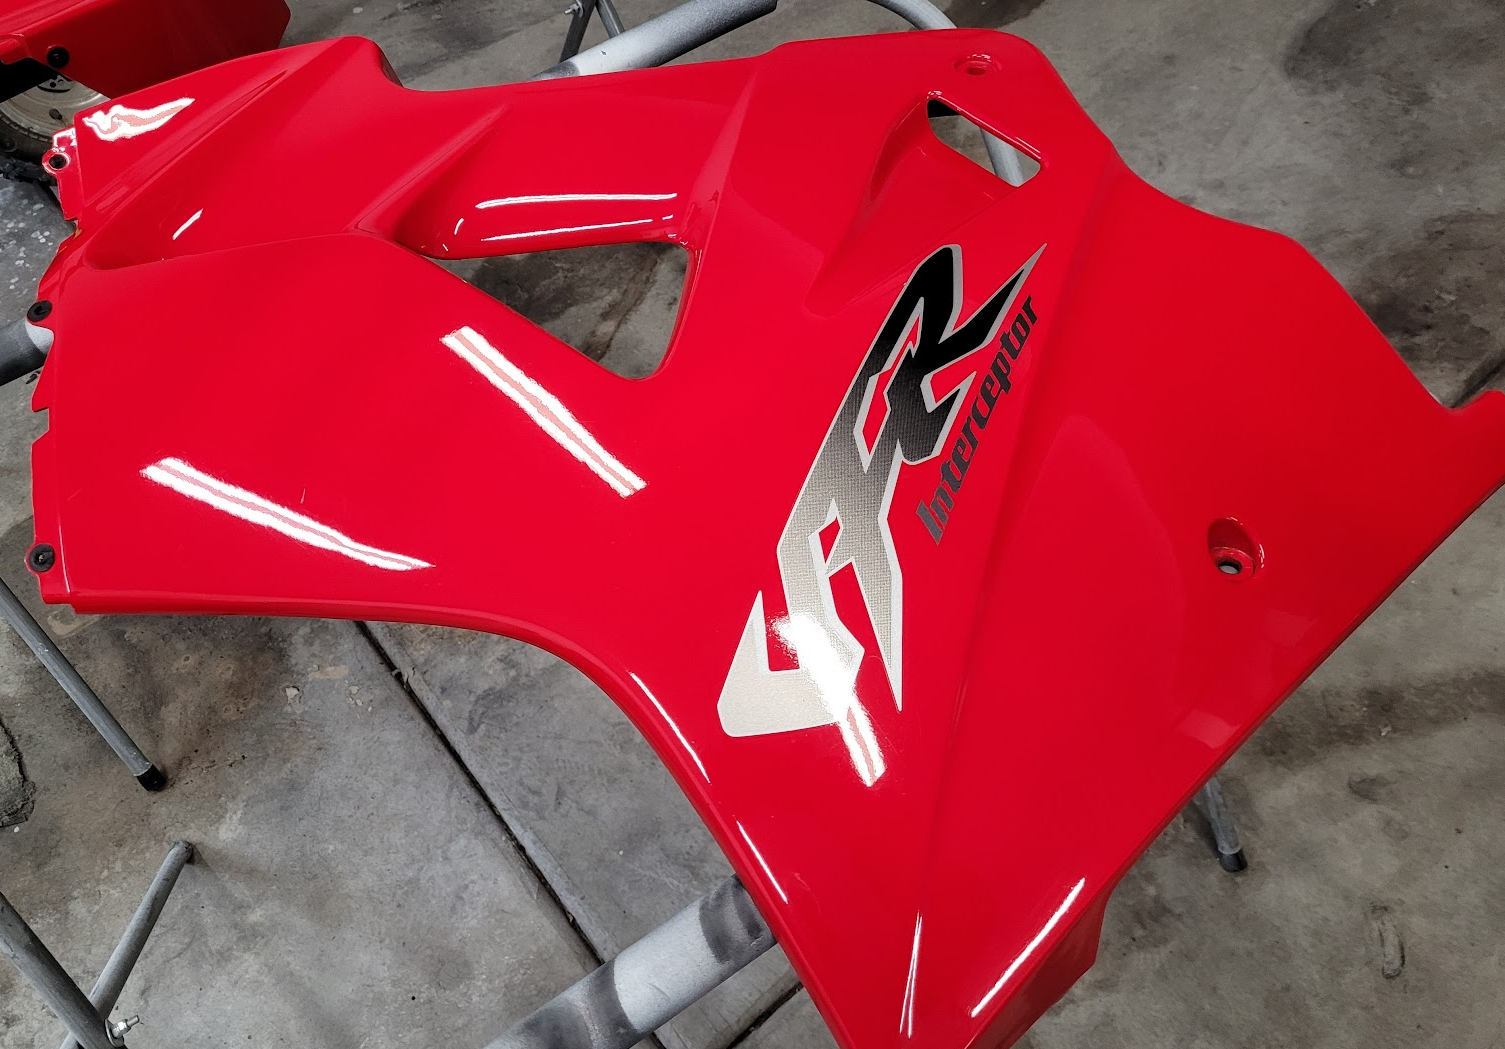
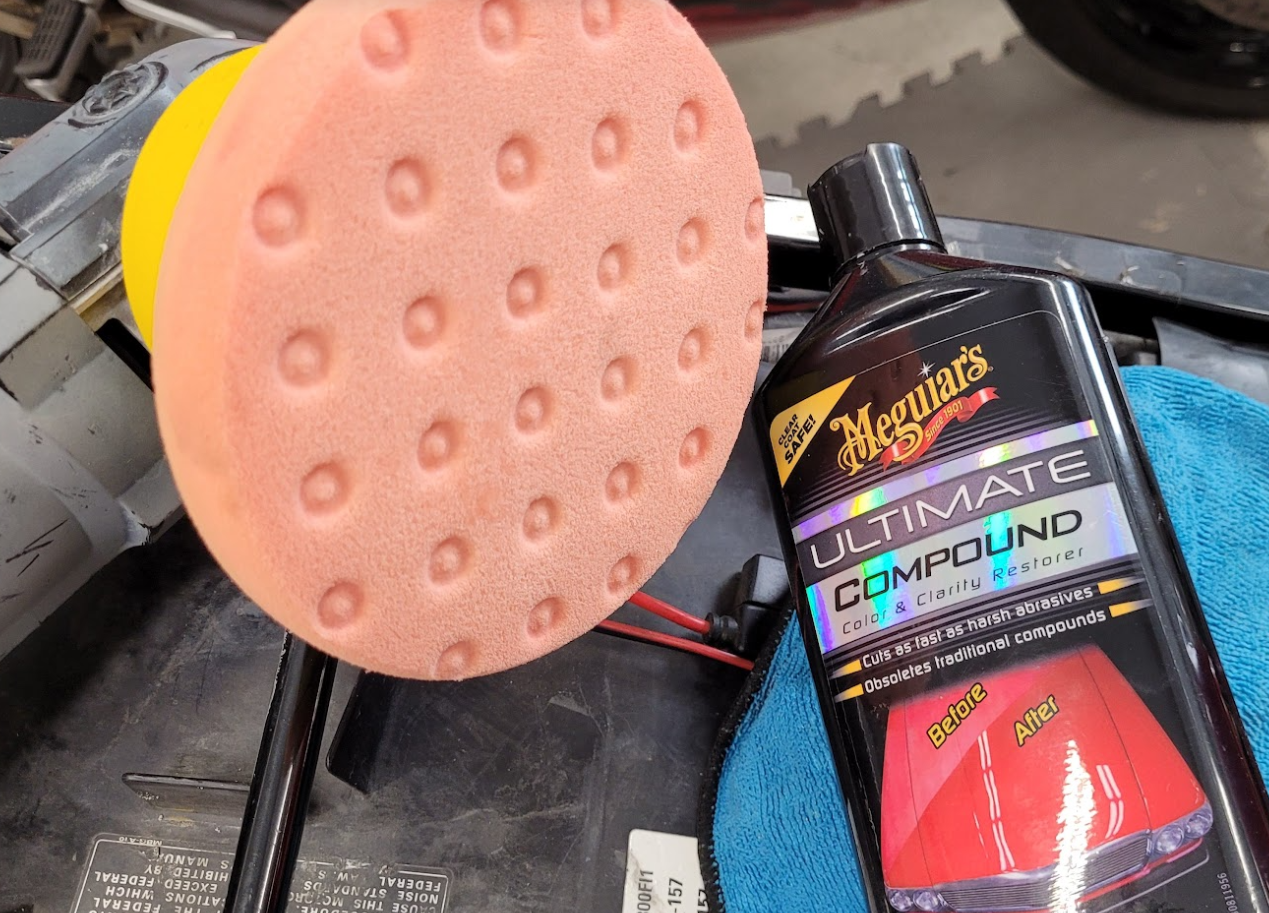
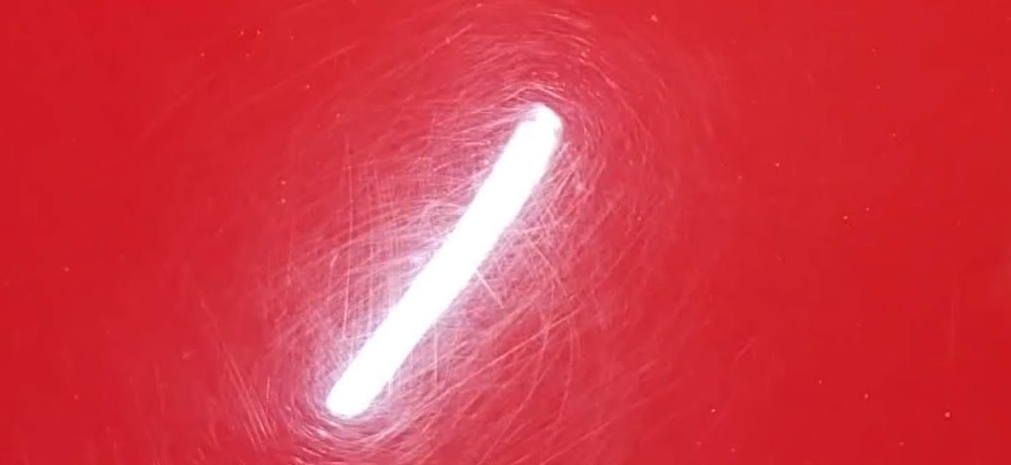
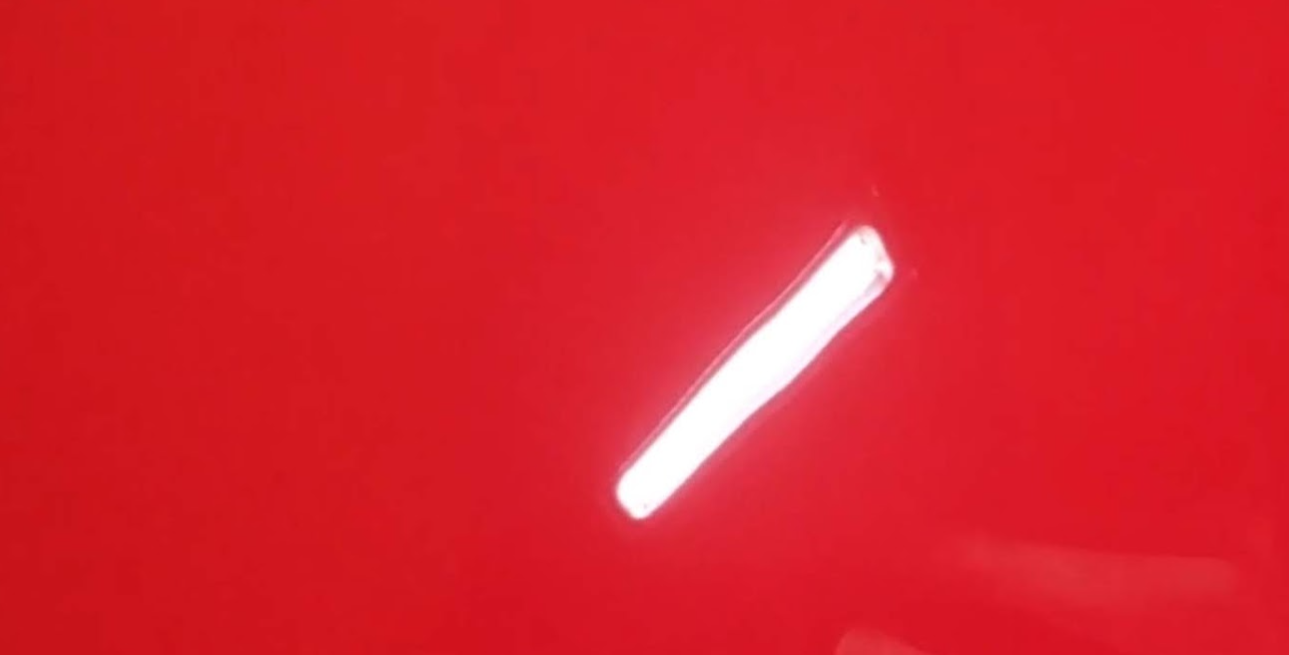
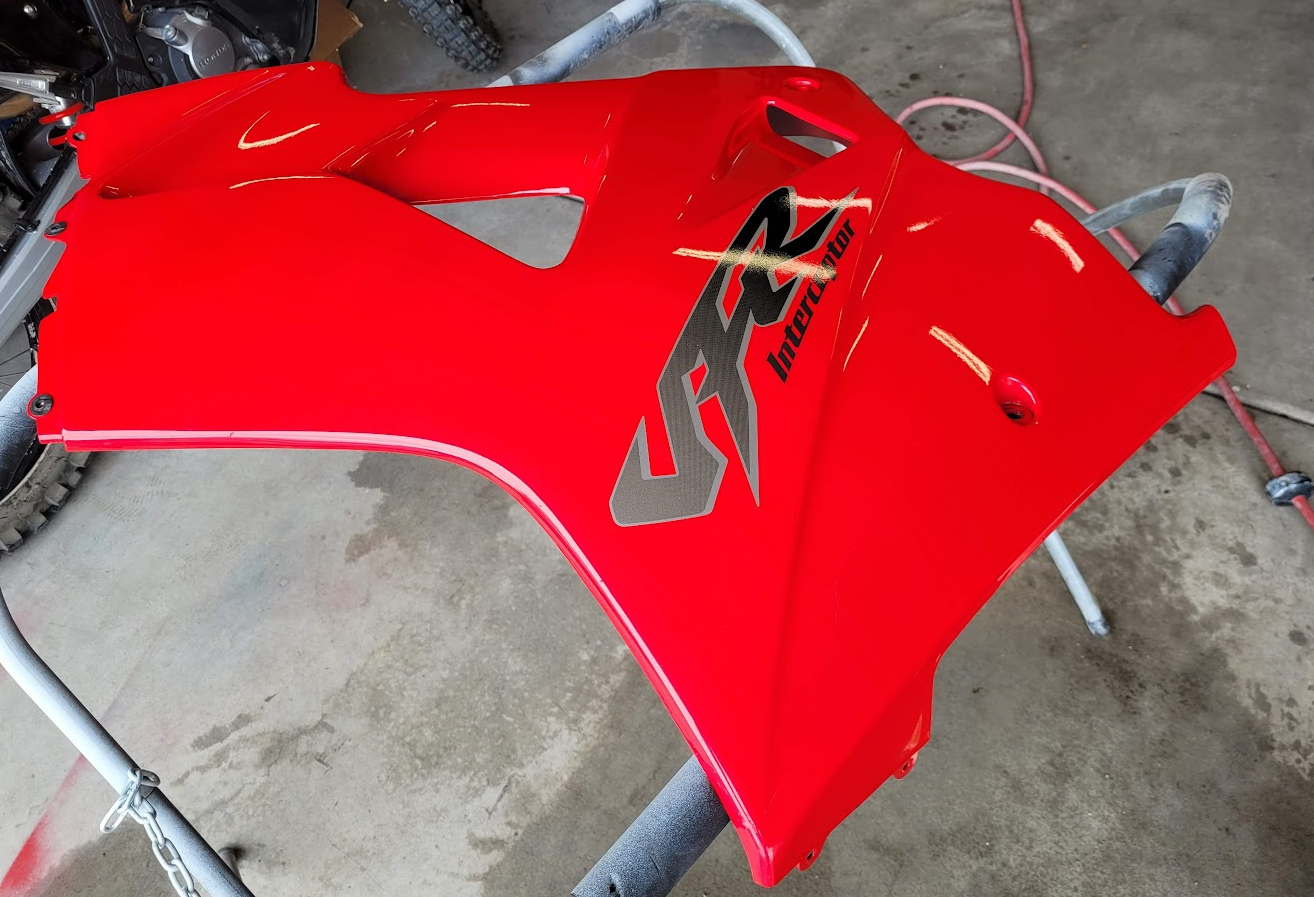
Did a test spot with the polisher. I first used a rubber wheel on a drill to remove this old decal, then lightly hit the area with 2000 grit wet sand, followed by an initial pass of Ultimate Compound on an orange pad. Turned out nice.
Before polishing:
After:
-
6
-
-
8 hours ago, bmart said:
I can tell you this...I leave many of my zip ties long these days if no one sees them. The short ones cut up your hands when you're working in tight spaces!
Fair enough. 👍
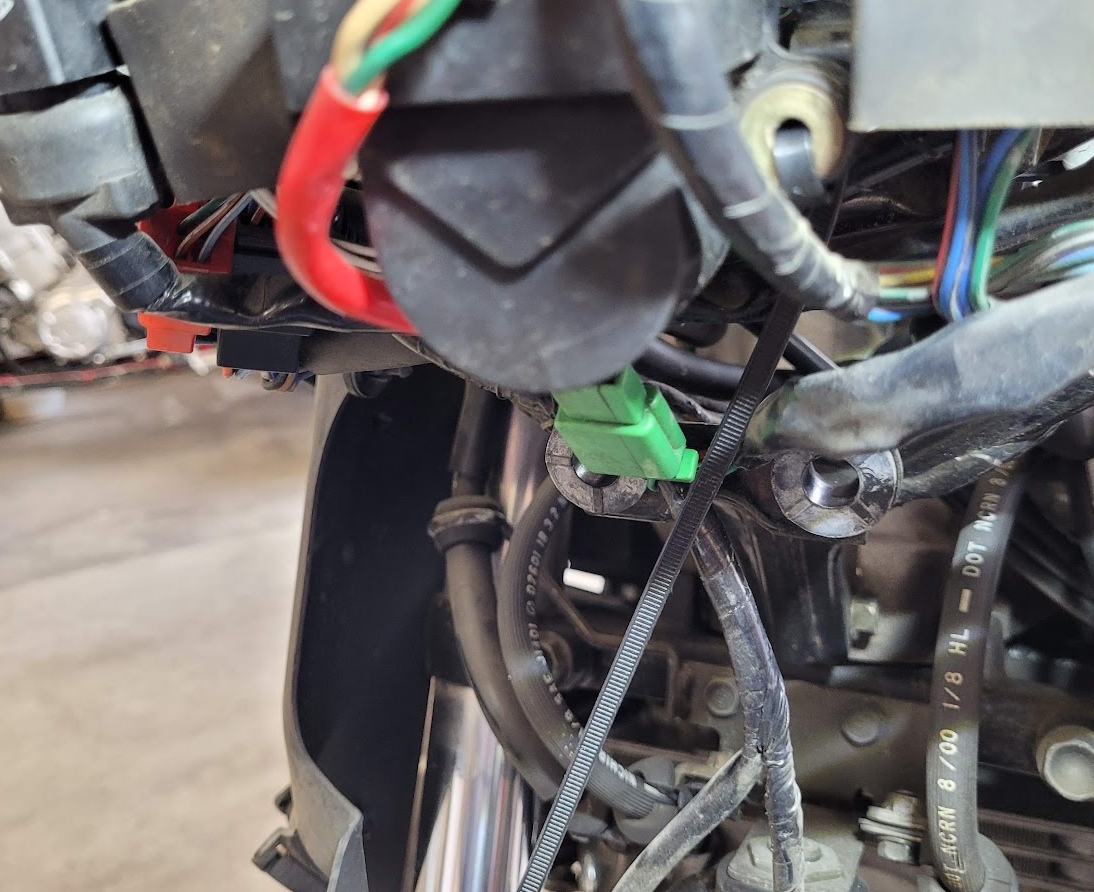
I think the main point is the bike seems to have been reassembled in a rush. All major bits will be reviewed and torqued to factory spec before attempting a real ride. The swingarm pinch bolt was not fully tightened for example. So, sprockets, brakes, forks, wheels, etc. It will all be gone through for peace of mind.
-
Thanks Grum. It is a fun and somewhat mysterious project so far.
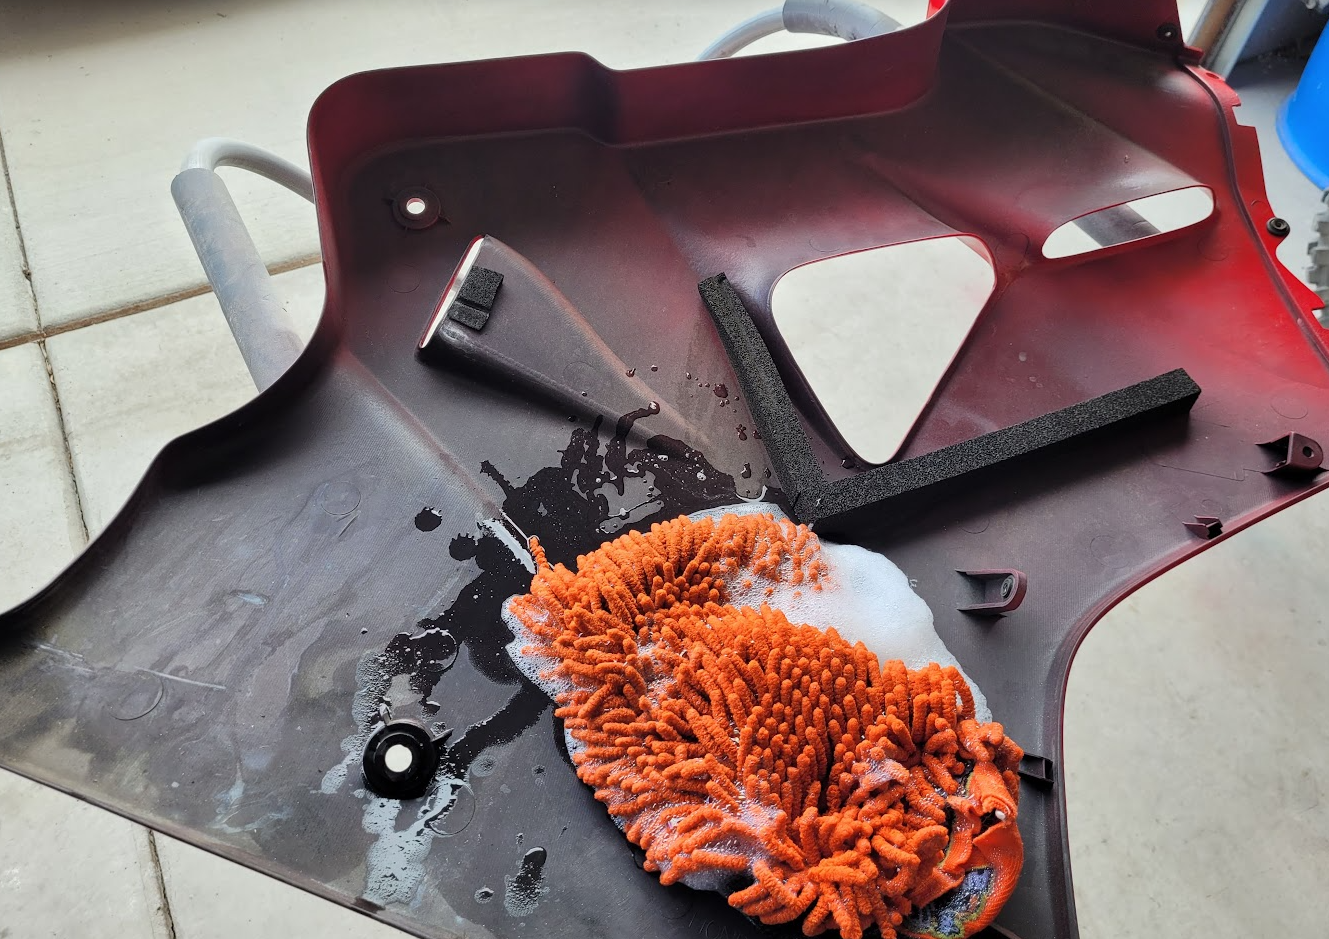
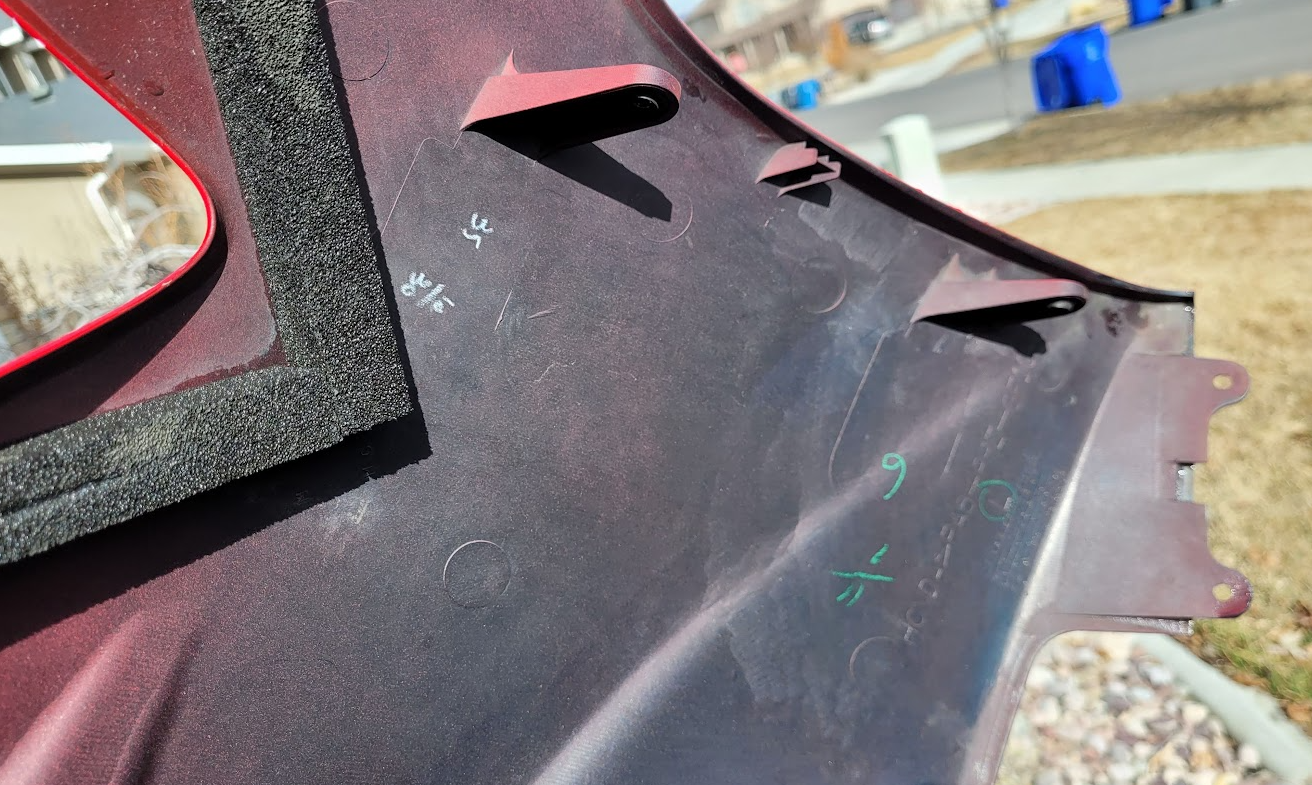
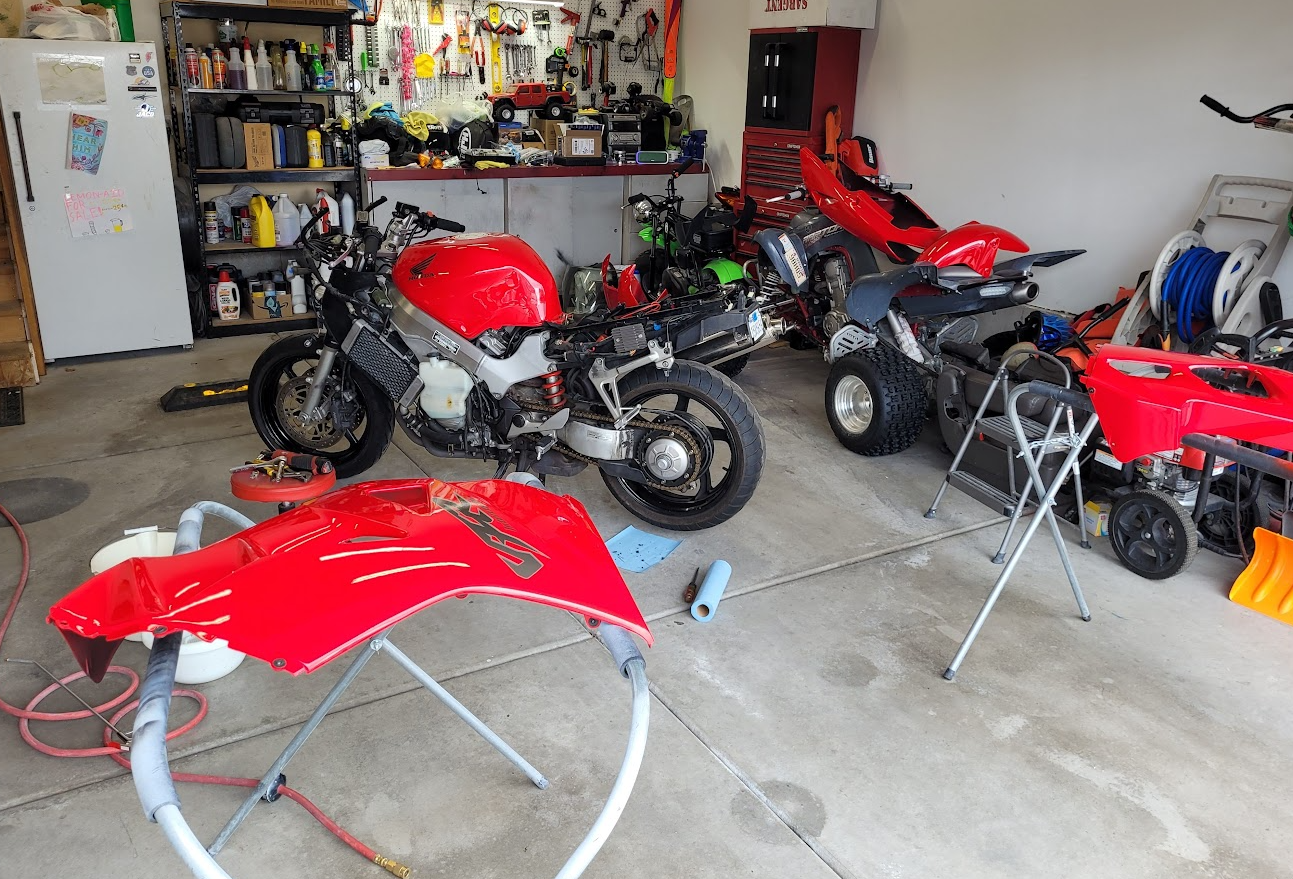
Today I began cleaning things up. Took the rest of the body work off to inspect and wash inside and out. The fairings came out nice. I will machine polish all of the plastics before they go back on. Always interesting to see factory markings on the inside of things.
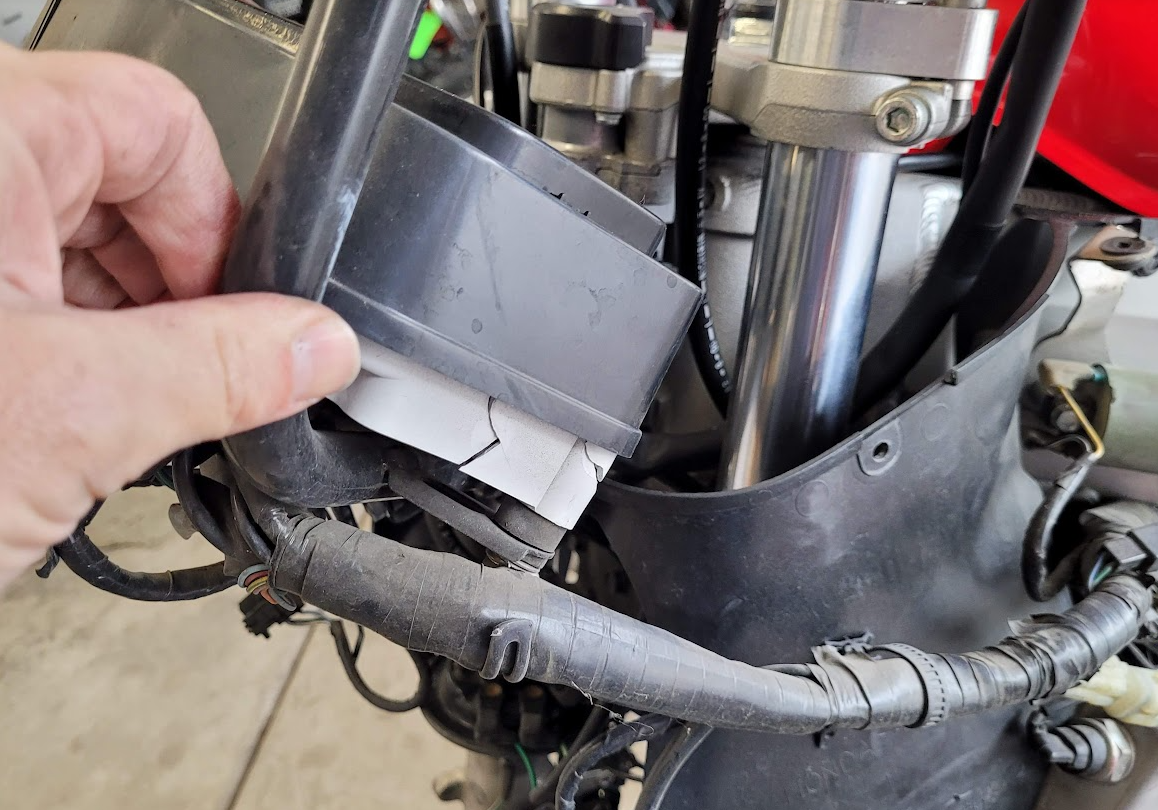
Found more evidence of the left side drop, the gauge cluster is cracked on the lower left mount. I just took it out and super glued it back together. Luckily just the housing was cracked that I can see. Everything else looks ok. Took the opportunity to put LEDs in the backlighting slots as done on my other bike.
That needle indicated 155 mph exactly once with me at the helm, in Death Valley around 2002. Actual speed would have been somewhere in the 140s but it was all she had. Still faster than my buddies Ducati 900SS at the time. We were headed to Las Vegas for Ducati Revs America. Ironically, after doing some top speed runs out in the desert we both got pulled over just outside of Vegas for doing 20 over.
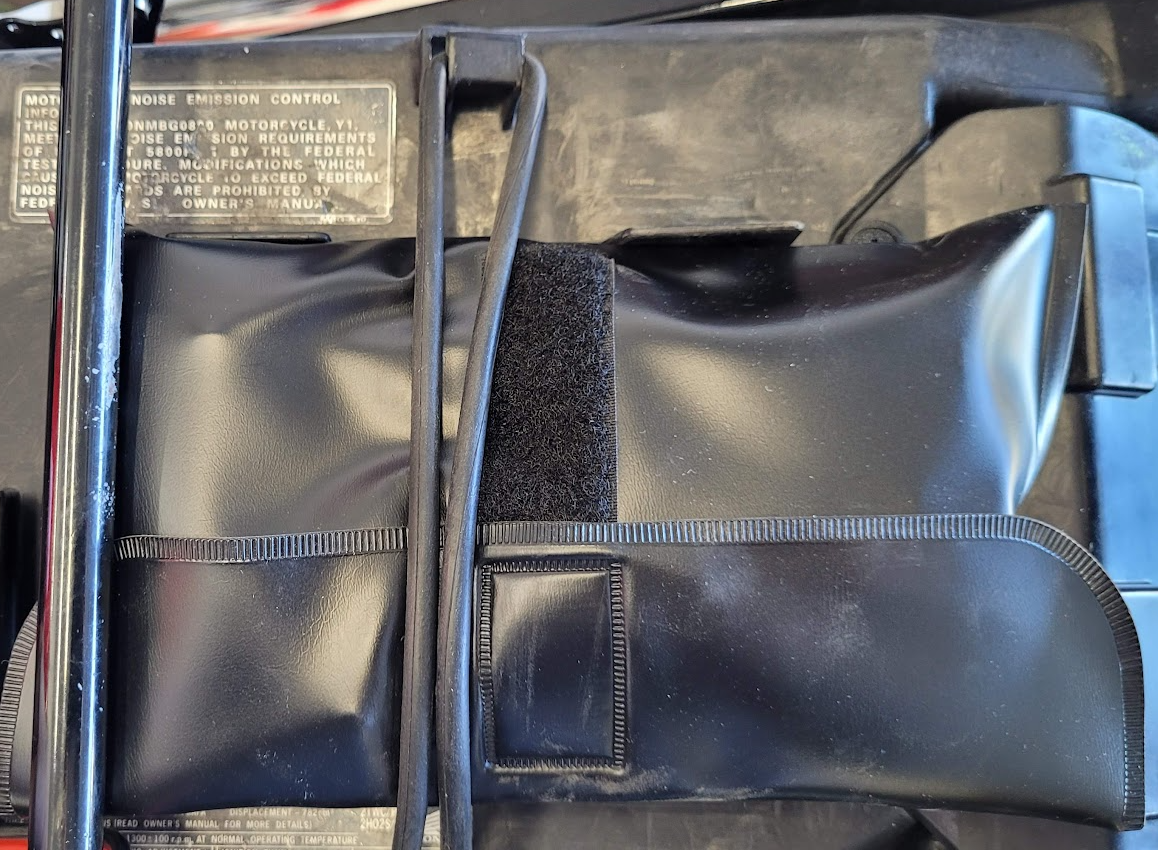
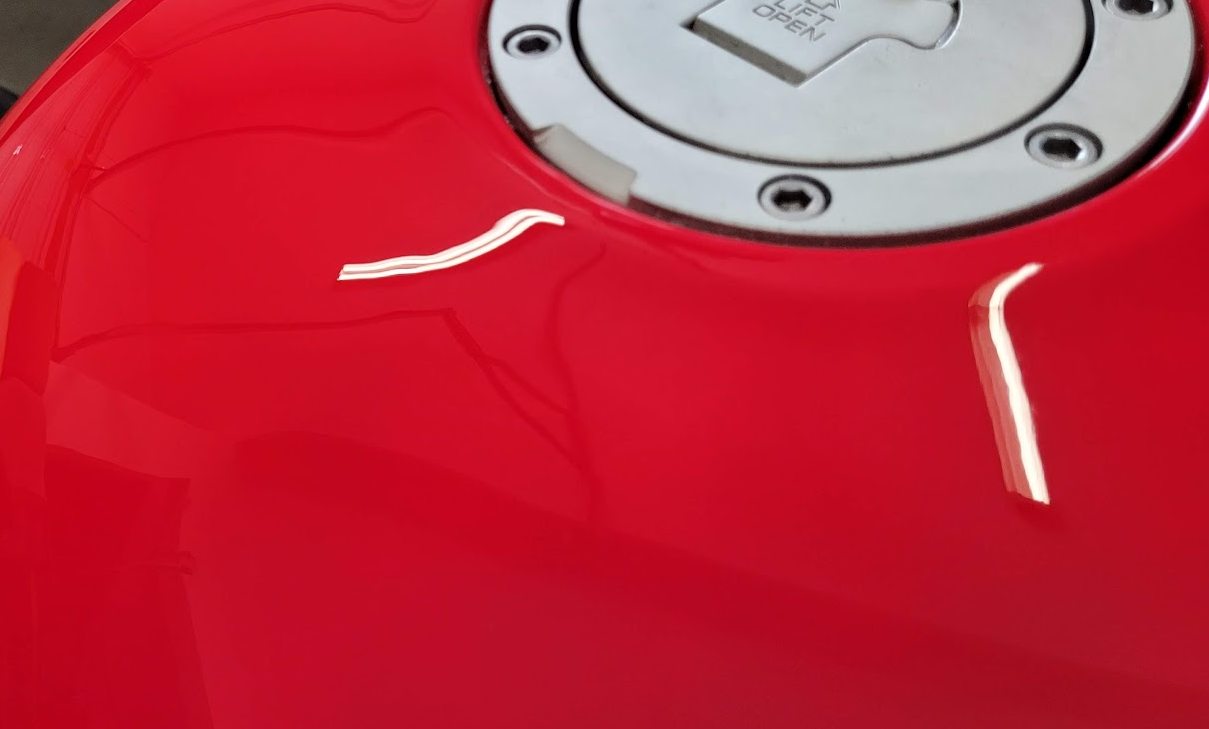
Found two more missing fasteners, and a lonely zip tie in place of one. The excess wasn't even snipped off. What kind of neanderthal put this bike back together? lol
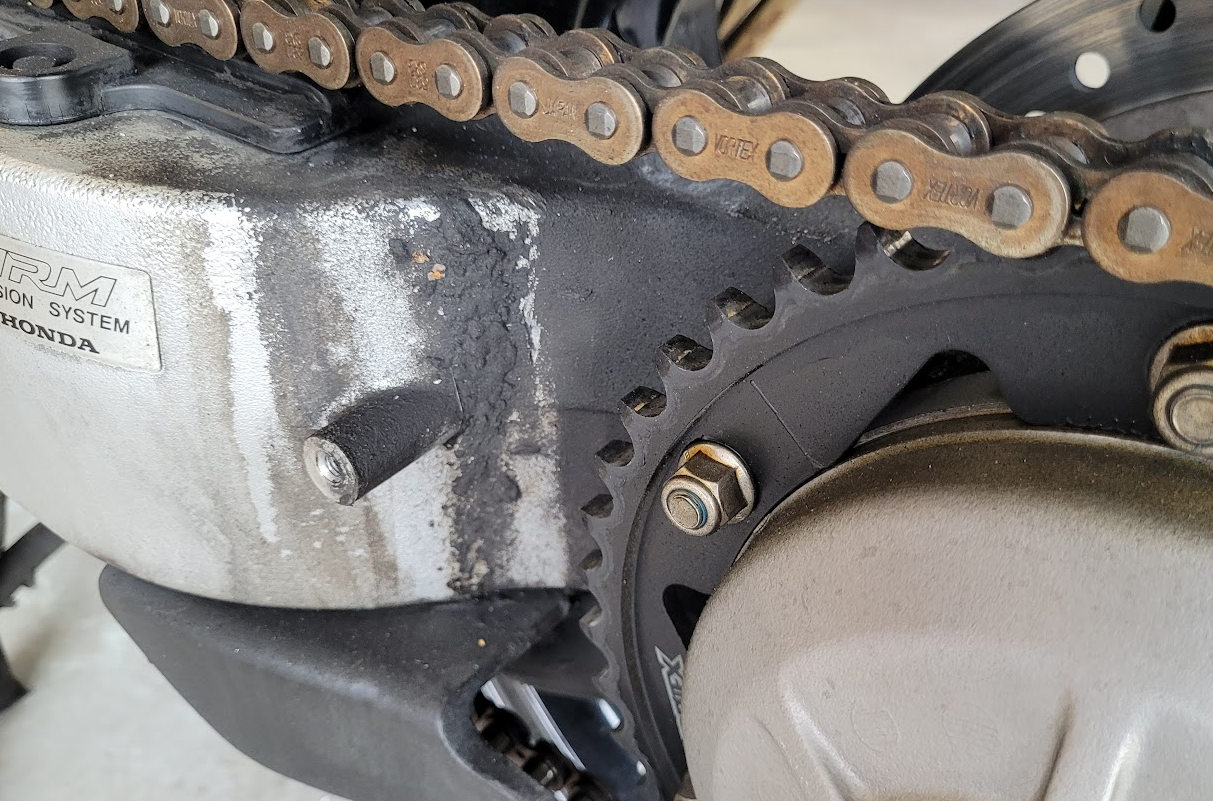
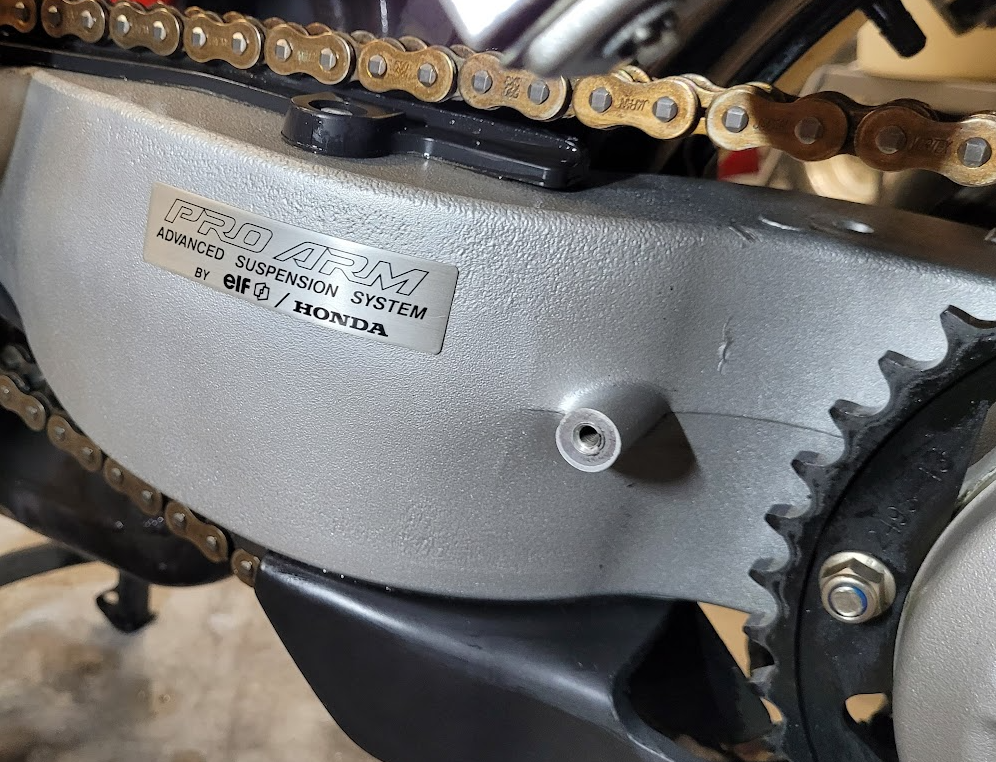
Just taking my time, trying to make a difference... Chain and sprockets are recent so they can stay.
Little by little.
Cheers,
Justin
-
5
-
-
- Popular Post
- Popular Post
Hello again fellow Vifferini!
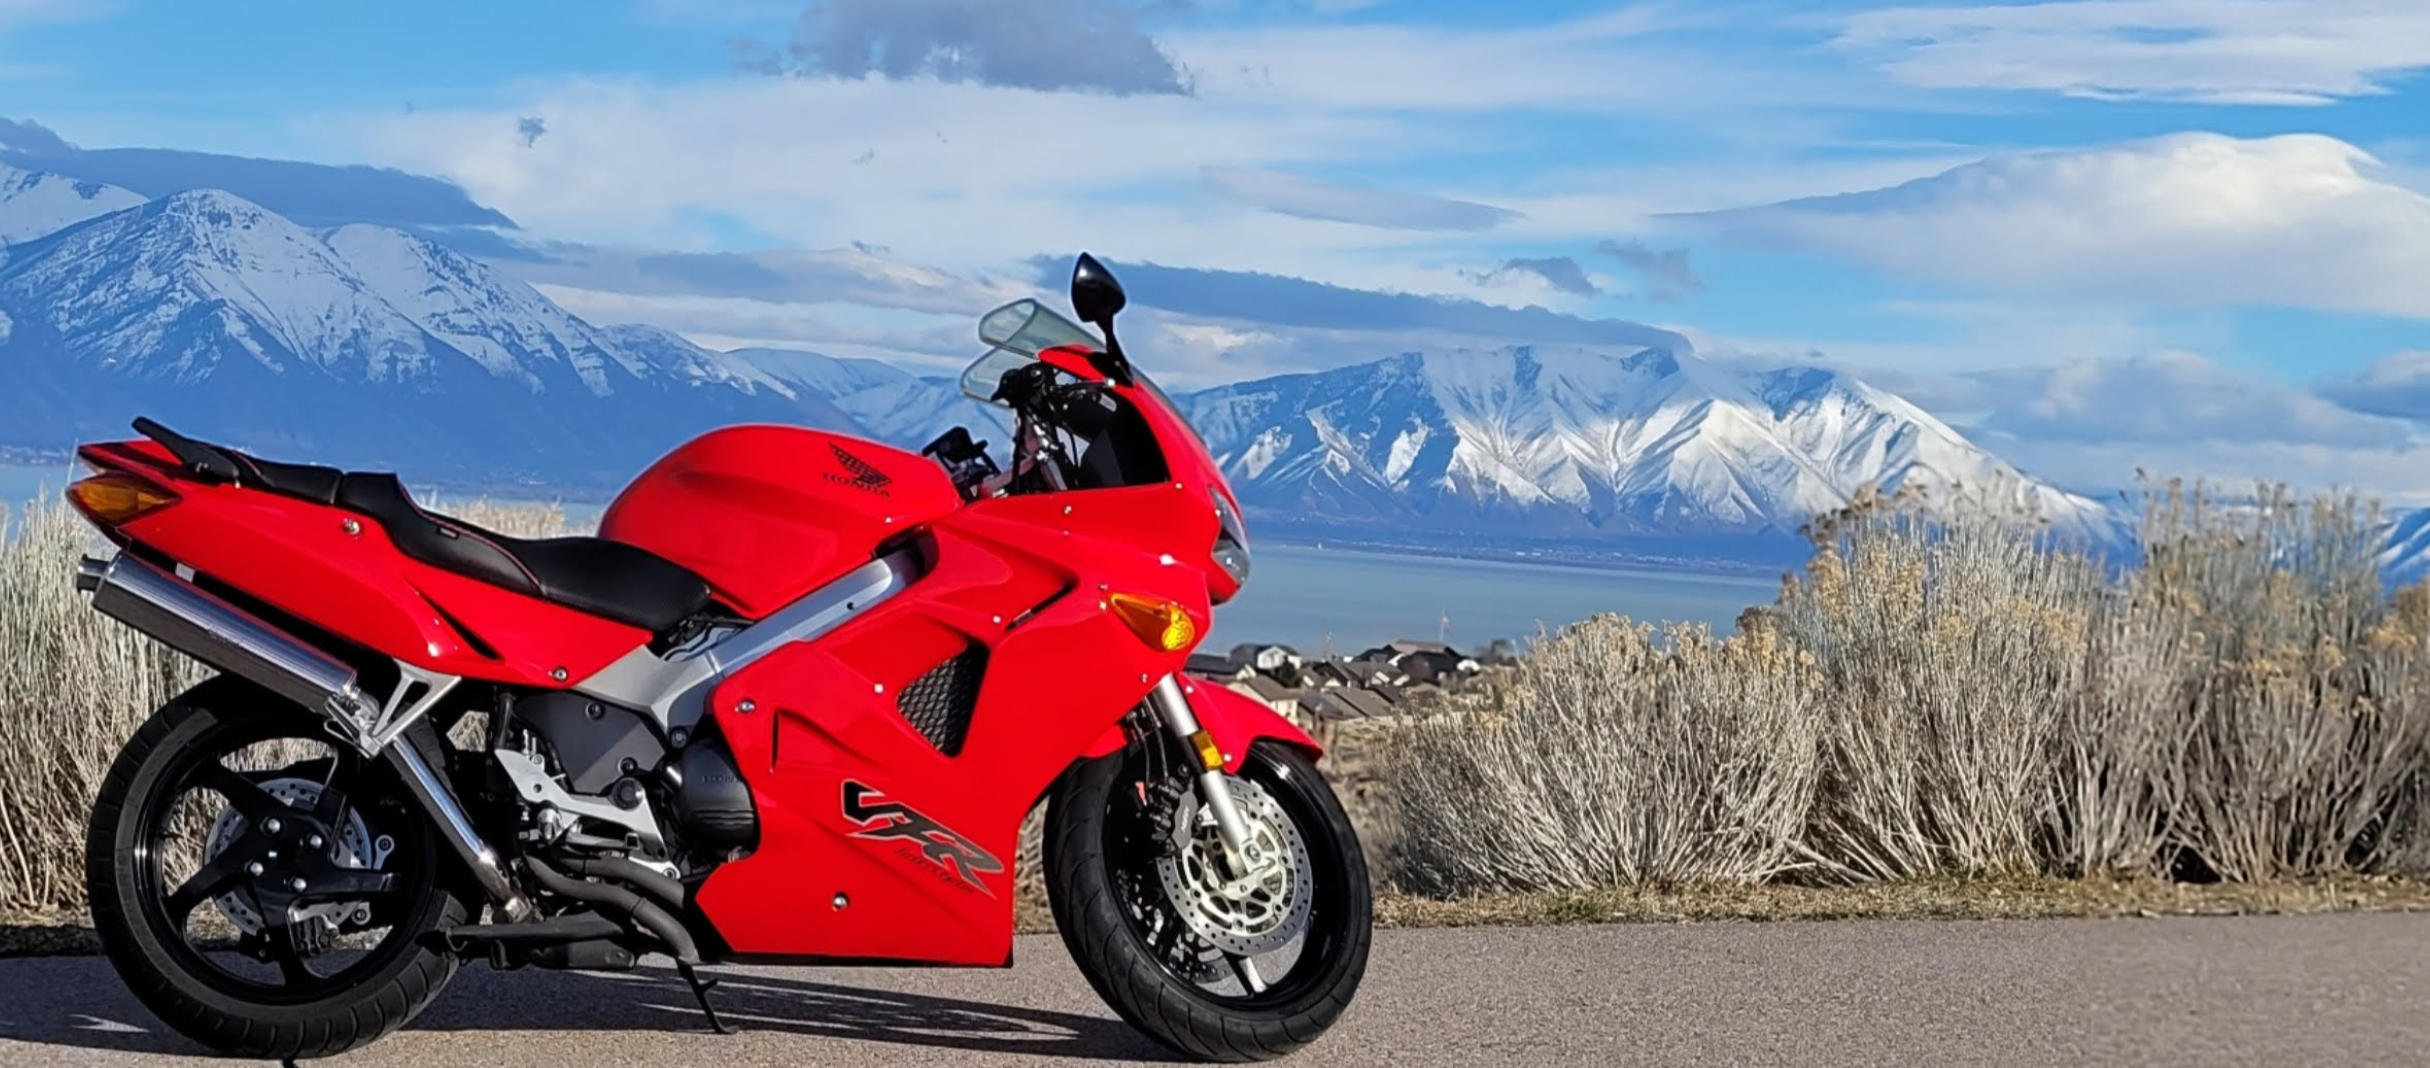
Some of you may have read my long winded story here of getting back on a VFR after a 15 year absence from riding. I then posted the clean up thread here about that bike. Since purchase I have put about 10,000 miles on it having an absolute blast riding around the fine state of Utah, USA. The warm weather season is short but we do have a handful of excellent roads with endless scenery. The bike is set up just like my first VFR and it runs perfect. I couldn't be happier with it.
Well, the plot thickens...which is to say I tracked down and bought back my original VFR. The one that I bought new in Northern California back in 2001. Yes, my actual exact bike, VIN #00089. Turns out the internet can be an interesting and effective tool. I actually got in touch with the owner a couple years ago but he wasn't ready to sell at that time. Finally, in recent weeks he let me know that he had upgraded and would sell it back to me, and at a very reasonable price. I was more than pleased, and my teenage son and I made plans to pick it up two states away in California.
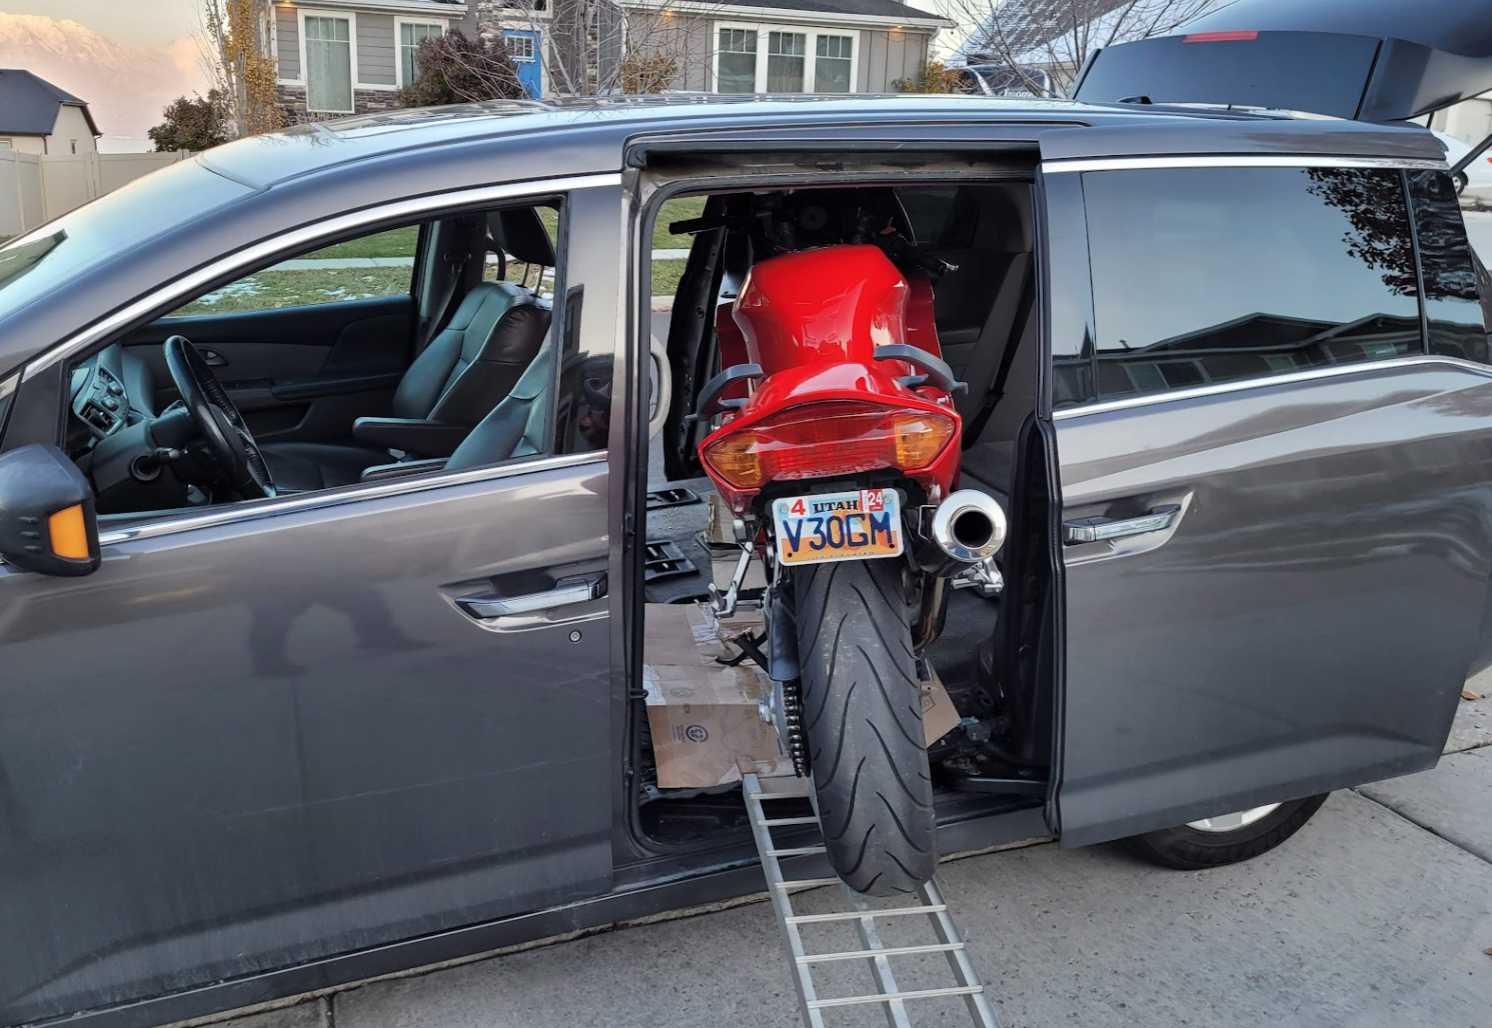
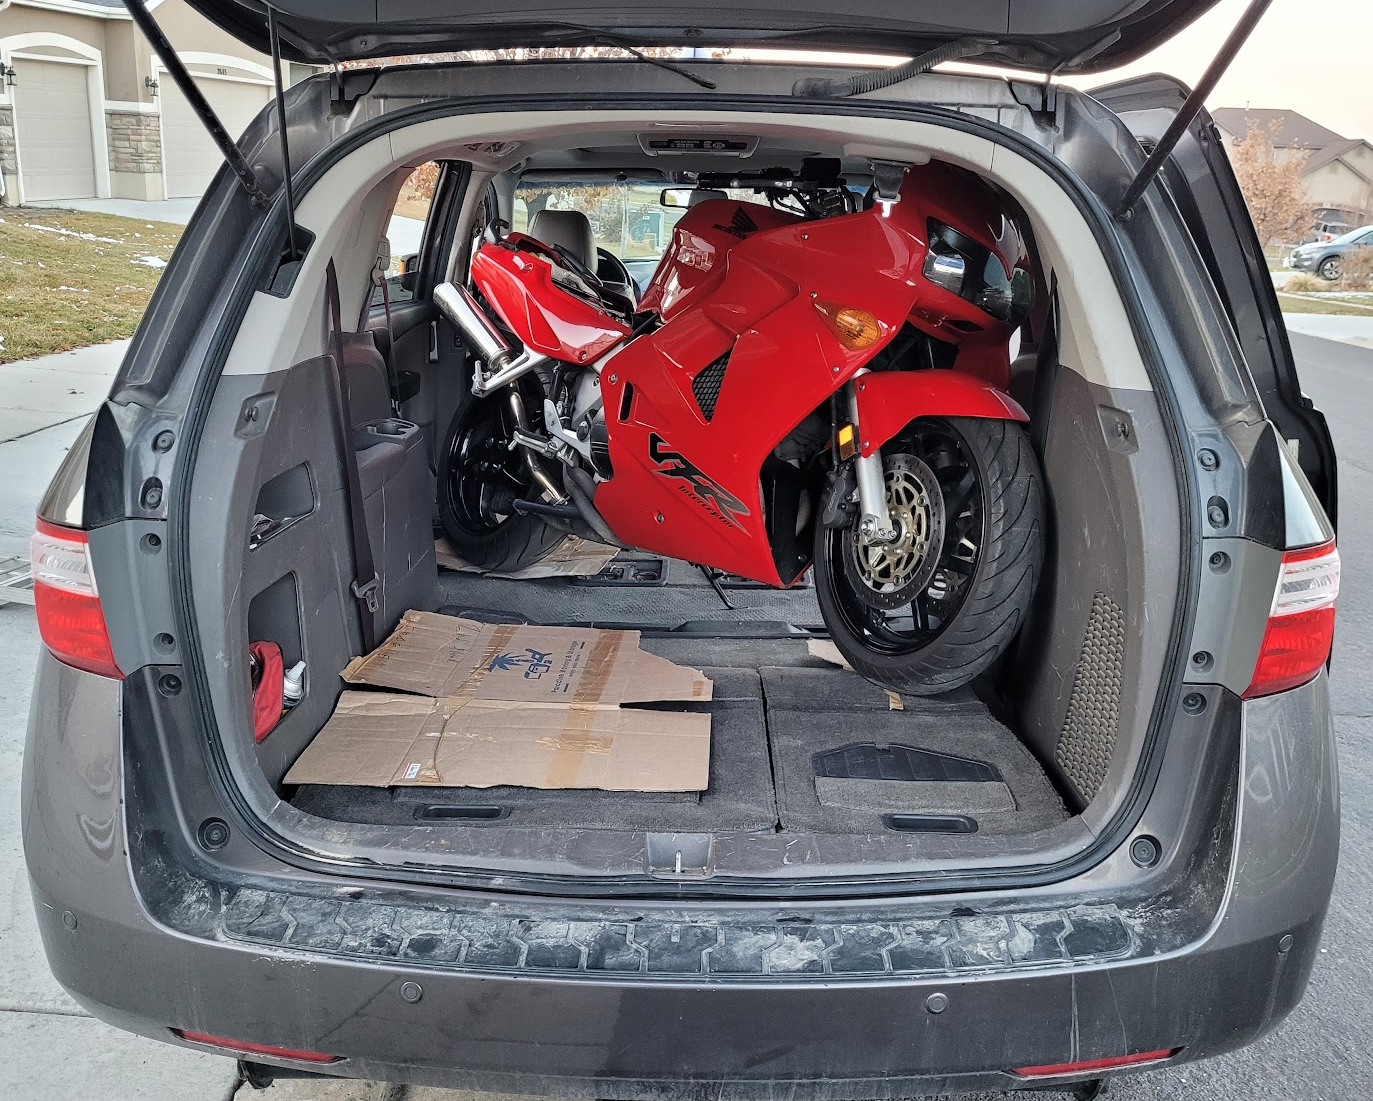
Not wanting to drag my small open trailer 1800 miles there and back, I wondered if a motorcycle would fit inside the wife's minivan. The Google machine quickly confirmed that I was not the first to consider this, as I found multiple pictures of various bikes shoehorned into spaces more commonly filled with soccer moms and soccer kids. That said, we had to test before the drive just to be sure. After some general measuring I figured that if we removed the windscreen and mirrors from my current VFR, we might be able to load it through the side door, which is exactly what we did.
"Easy does it. Left a bit! Watch the ramp!"
Success! Even got the doors to close with room to spare. Took it right back out and put it in the garage, neighbors shaking their heads, unsurprised at my usual shenanigans.
So with that confirmed we made our way out to CA to pick up the original machine. Let me say this, one-on-one time with your kids is absolute gold. While going to get my old bike was cool, 20 plus hours in the car with my son was the real highlight of the trip. He's a fantastic kid and we had great time making new memories doing something that wouldn't make sense to most people. We arrived just after dark at the seller's home after a full day's drive. It was great to meet the gentleman and trade a few stories. I pointed out the small scratches on the clutch cover. "Yeah, that was me, trying to put it up on the center stand one day wearing flip flops and it slowly went over on it's side on the driveway. Not my first bonehead move." It was so cool to see that it still had every mod that I had installed more than 20 years prior, save the Sargent seat, but I'll just use the one from my other bike now. Looking over the bike further I noticed that he had the db killer installed on the Staintune, something I never used in my ownership. "Have you heard it without the db killer?" I asked, reaching for my set of Allen keys. "I didn't know you could remove it." he said. A few seconds later I had it out and fired up the bike inside his carport. Let it warm up for a bit and then gave it a few mild revs. "Whoa you can't have it now!!" he said jokingly, "I should have removed that a long time ago!" We both got a laugh. Every VFR guy has their favorite pipe, an uncorked Staintune is mine, though a period Micron is a close second. The Staintune look and sound just can't be matched. I removed the windscreen and mirrors, having done this exercise once before, and we loaded up the bike in the minivan. I strapped it down securely using the factory seat anchors and several ratchet straps. It was almost as if the van was made for this type of thing. We journeyed back home and put the bike in the garage, with some new memories and a new chapter to start.
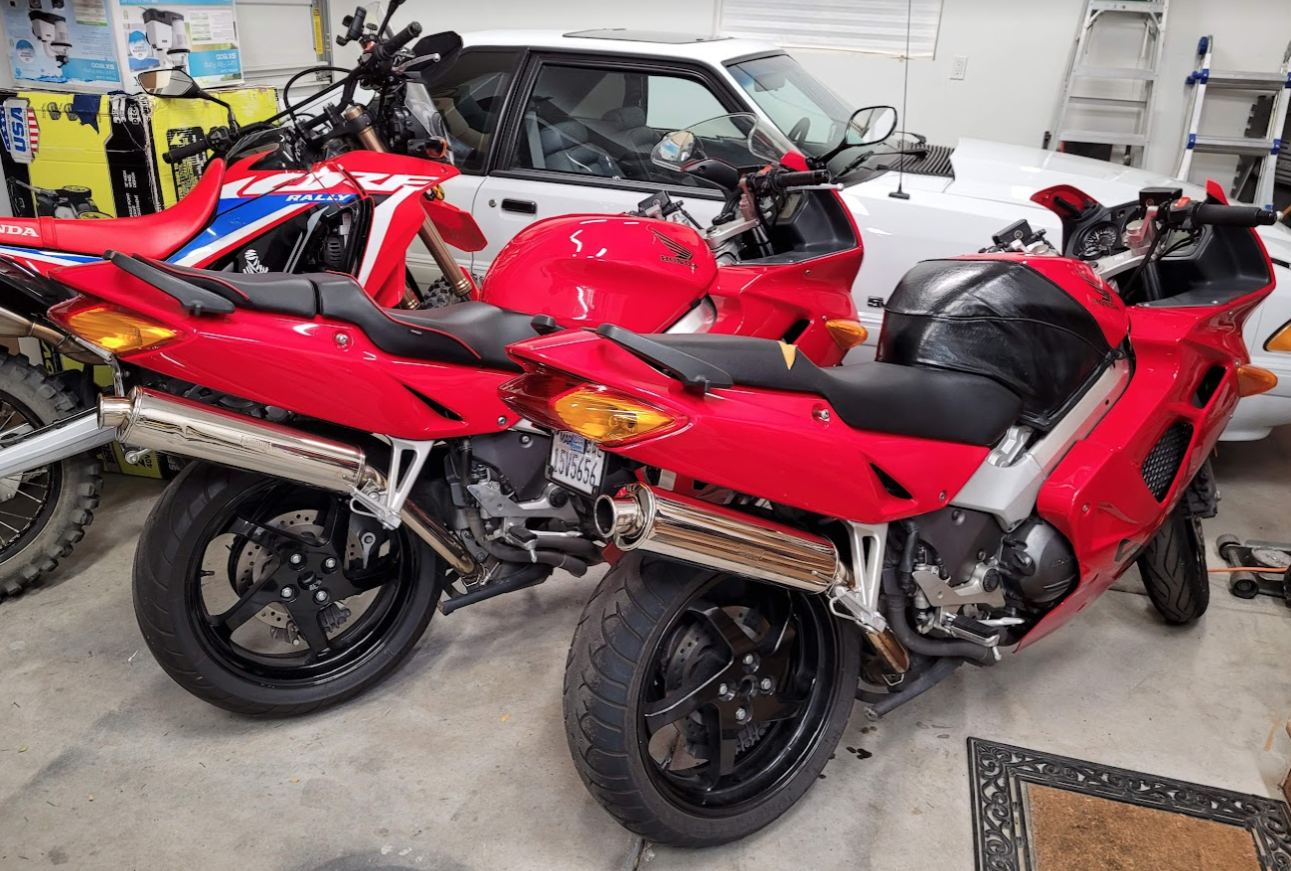
Seeing double, this looks familiar. The more recent left, modded to resemble the original, right. It even has my original plate on the back as plates stay with the vehicle in California.
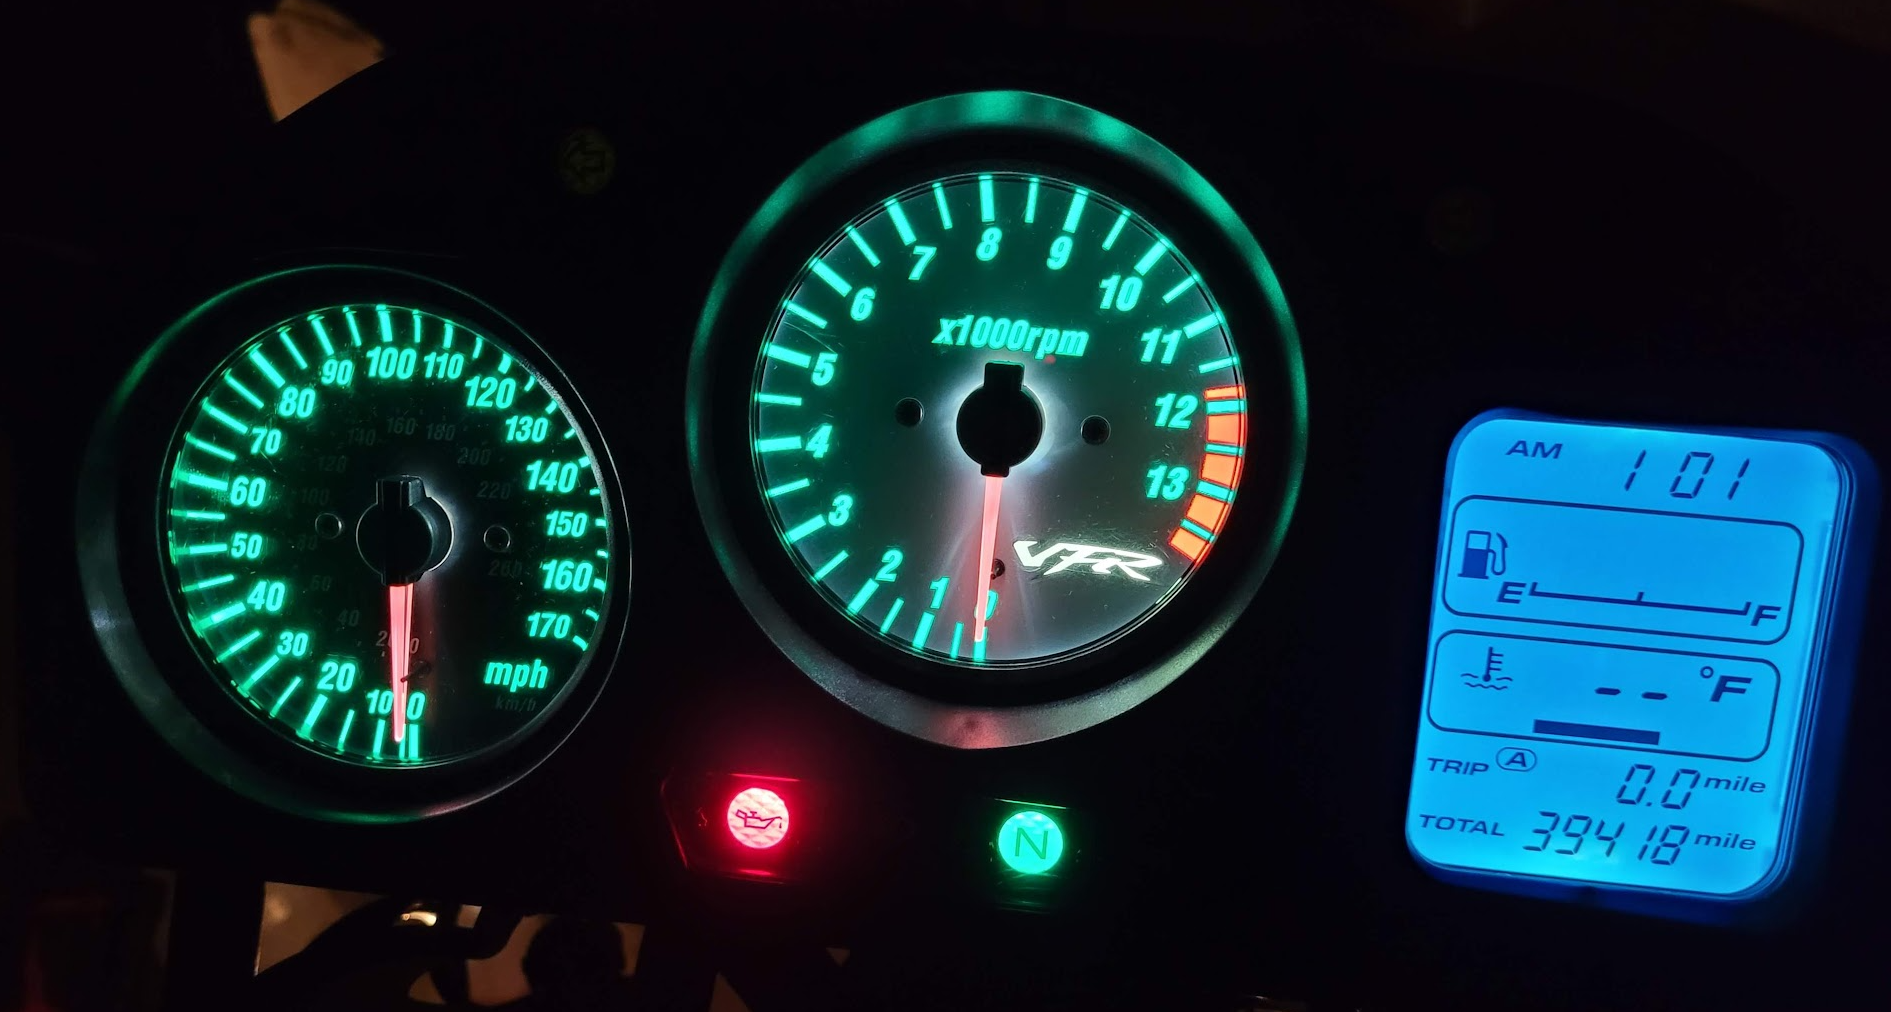
So what now? Get organized, make the punch list. Gotta go over everything to see that it is clean and up to spec. Fluids, charging system, brakes, etc, a nice winter project. The seller provided me with some receipts of maintenance he'd had done recently at a shop near his home. New plugs, valves checked (all in spec), new coolant and brake fluids. Mentioned an issue of stumbling in lower revs that the shop couldn't rectify. Also mentioned a slight coolant leak on the left side and a dent in the left radiator. Interesting but no worries, I have time to look over everything and make it right. When I sold the bike in 2006 it had 26,000 miles on it. Now it shows just 39,000 miles. I can live with that. In general it looks to be in decent shape still, just needing to be gone through a bit.
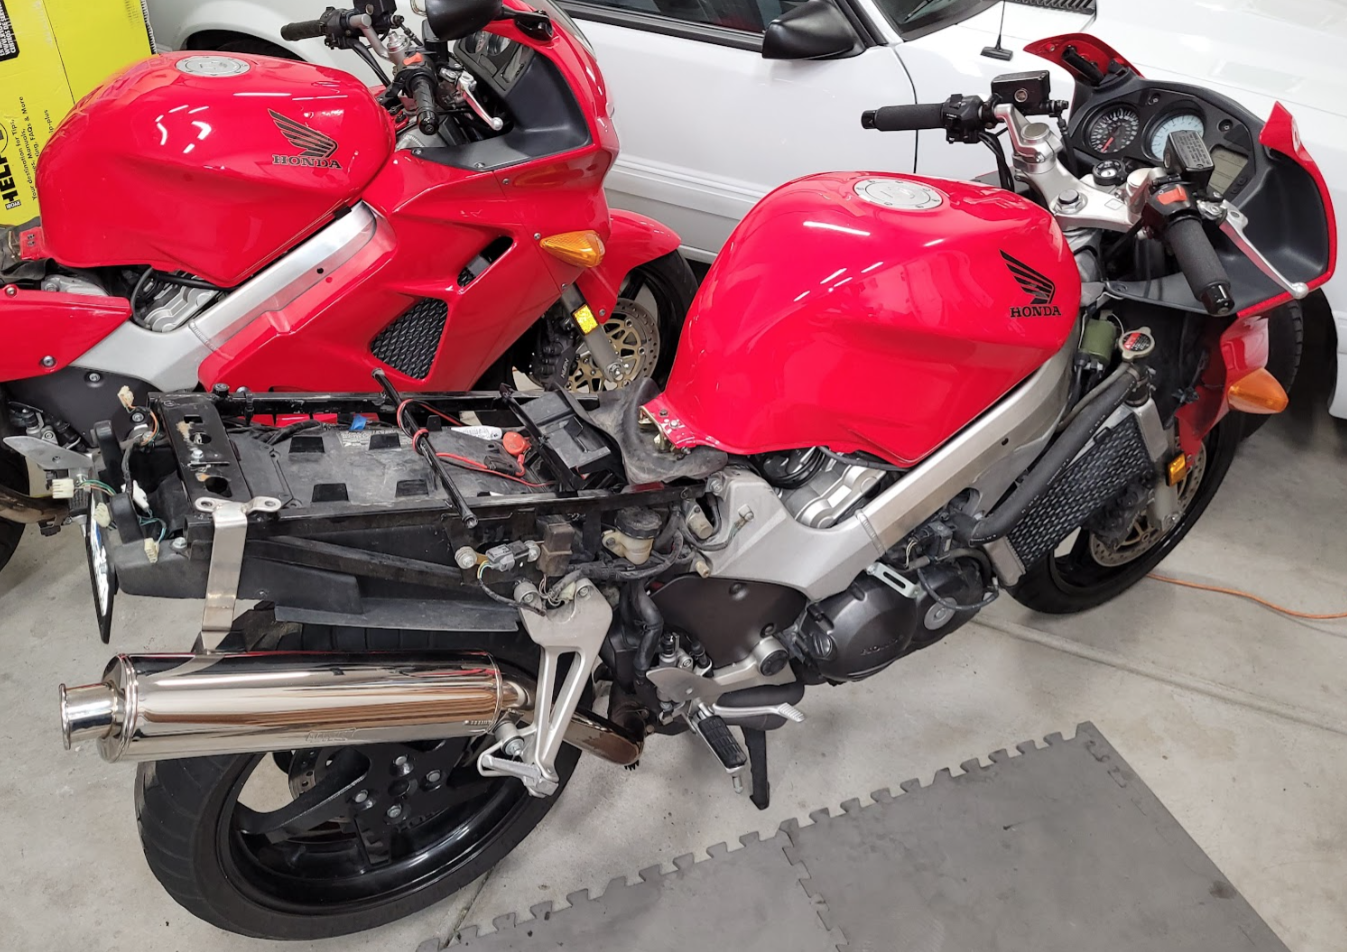
I first removed the side fairings to have a look at things underneath. Hmmm...of the 18 or so fasteners I removed, only 3 were correct and all were finger tight or less. Luckily you can still order the correct ones from Honda. It's clearly been down on the left side at some point. The coolant leak is from an epoxy repair attempt at the bottom of the reservoir. Actually glad to see it's not from the engine casing as the reservoir is easy to replace. Odd repair though. The left rad is indeed dented on the bottom and the bracket bent slightly, though it is not leaking. It will work until I can get another one. When I removed the tail fairing some of the tool kit fell out of the left side, clanging onto the garage floor, and there is a small crack on the left of the tail fairing at the franken bolt insert. Yeah, it's definitely been down. But....(and it's a big but), whomever dropped it did put on an OEM side fairing so that's a win, and everything else I can deal with quite easily. I also took a chance to check voltage and saw 13.70ish at idle and a solid 14.44v at 4,000 rpm, right where it should be as far as I understand. I'll keep an eye on things once I start riding it later.
I made a list and ordered a bunch of fasteners and a new coolant reservoir, OEM oil filters and fluids. Just going to take my time and enjoy it.
More to come.
Cheers,
Justin
-
10
-
2
-
 1
1
-
Looking for a left radiator for 98-01 VFR800.
Thanks in advance,
Justin


5th gen pricing oddities...
in Fifth Generation VFR's
Posted
Here's a 2001 with 17k miles listed locally for $6k. It's high but the seller is probably not in a rush and can lower the price as needed. https://classifieds.ksl.com/listing/75107544
I say list yours at 5-6 and see what happens. You can always lower it.
That said, I offer the following for reference:
I bought a 2001 in 2021 with 20k miles for $3,000. Pretty clean overall just needed some refreshing. I considered this one a pretty good deal.
I bought another 2001 6 months ago with 39k miles for $2500. Not as clean, needed more refreshing. This one was more of an ok/fair deal for what it was.
Last year there was a 2001 on cycletrader with only 1200 miles listed at $6500. Very sensible price given the miles. It was super clean too. It would be rare to find another one with miles that low or lower.
Things that help get top dollar:
-bike should be detailed, waxed and exceptionally clean. If we're claiming near showroom it should look like it.
-new(er) tires, recent fluids, etc, especially brake fluid for anyone that knows the annoyance of properly bleeding linked brakes.
-any and all documented service history available, receipts if you have any in a folder. Both keys if you have them.
-all mods documented in the ad, stock parts included if you have them still.
-should include OEM grab handles, rear upper cowl (that covers the seat), OEM windscreen, owner's manual and tool kit
-any issues or defects documented/photographed. Pointing out a few small scratches is a good thing if that's literally all there is to point out. It emphasizes that the rest of the bike is in great shape and no surprises for potential buyers.
-Several GOOD pictures in sunlight (It's amazing how many sellers don't take the time to clean up a vehicle or take good pics.)
-a short but well written for sale ad, bullet points not paragraphs
-priced reasonably given current market. These bikes live between $2k and about $6k with most falling in the $3500-$4500 range. Several factors determine what it will ultimately sell for. There's a price that will have it sold in minutes, another that will have it sold in a day, and another that will take weeks, and another where it won't sell at all. Decide what you would be happy with, add a little wiggle room and see how it goes.
I have sold many vehicles to the first person who came to look at them by having them clean, sorted, well presented and fairly priced. Most of my vehicles have sold quickly. Some too quickly. Some took longer, some I had to lower the price a little more until the right buyer appeared. Just gotta get the right combination of factors to get it done.
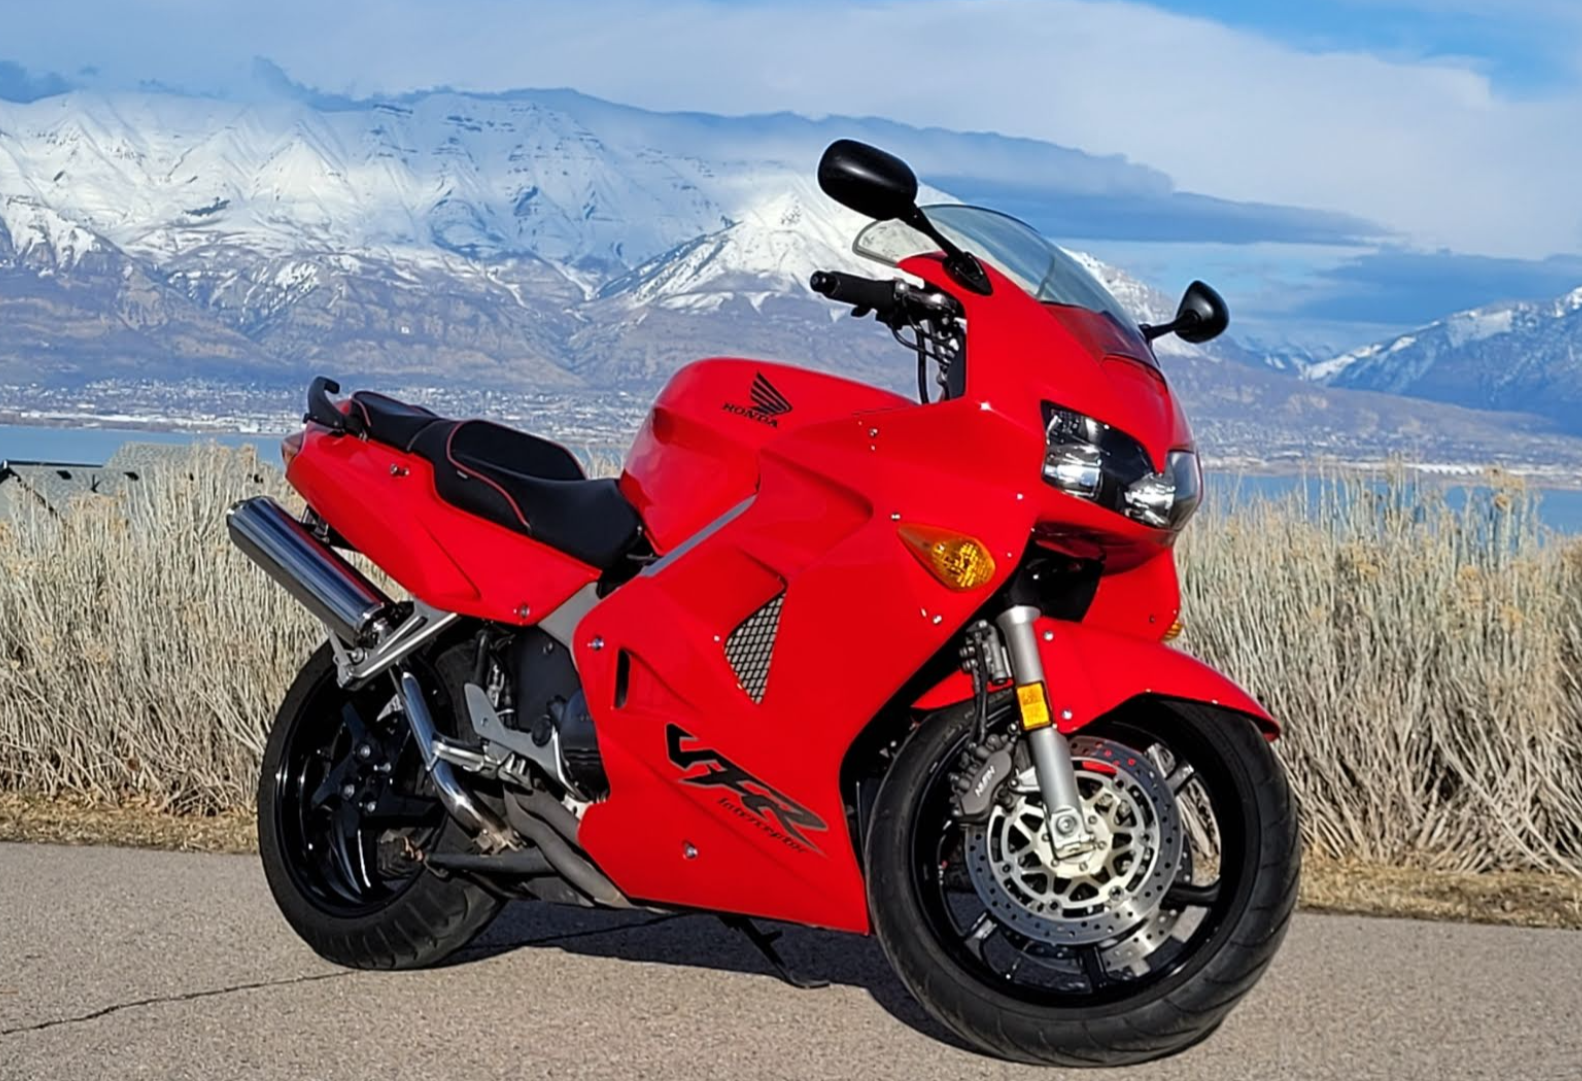
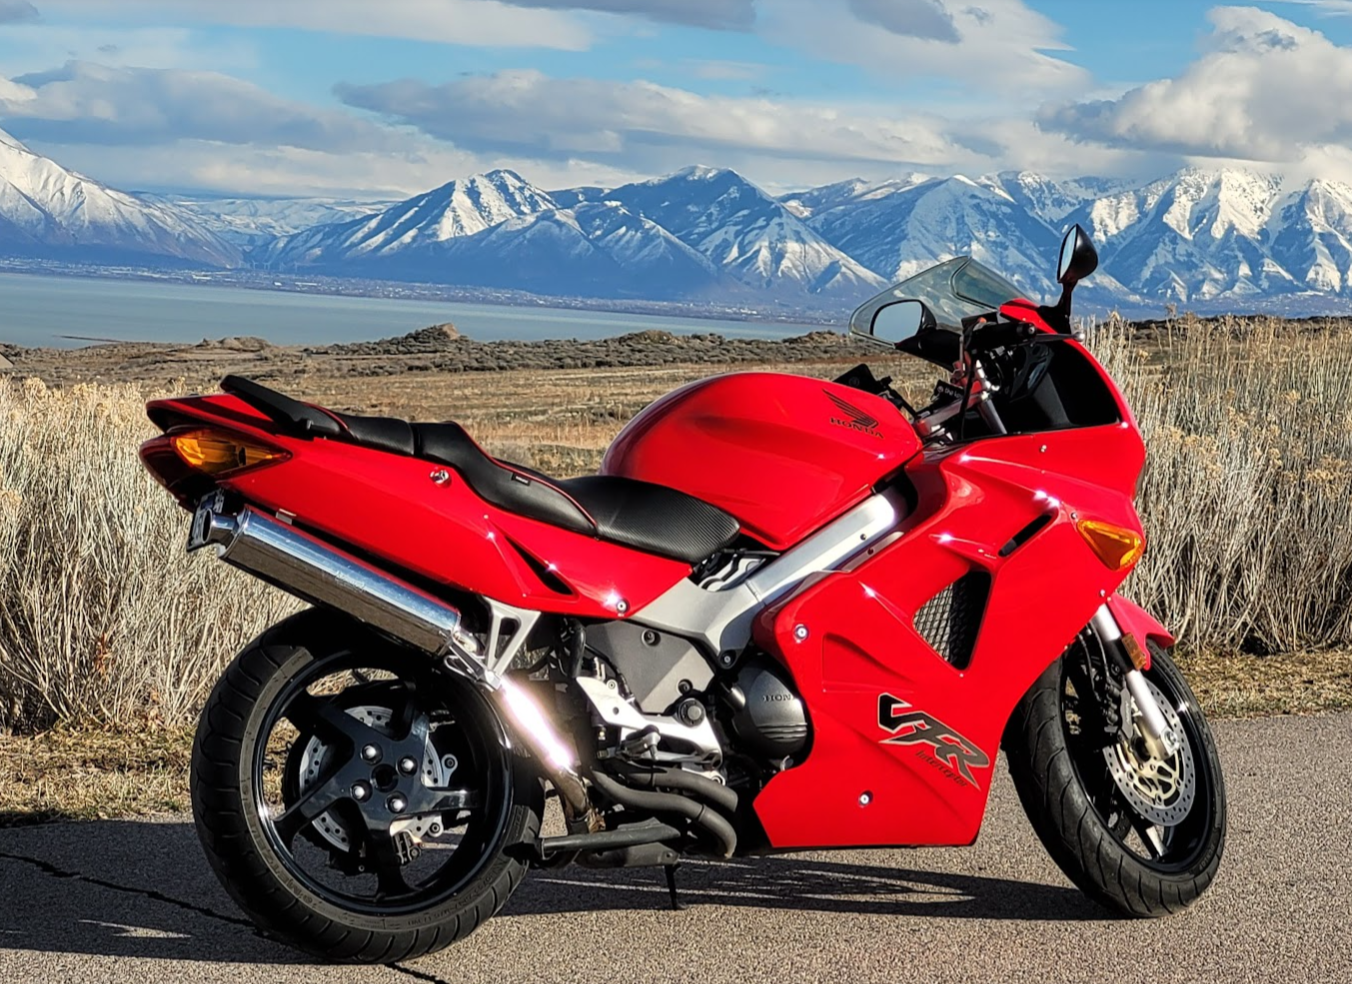
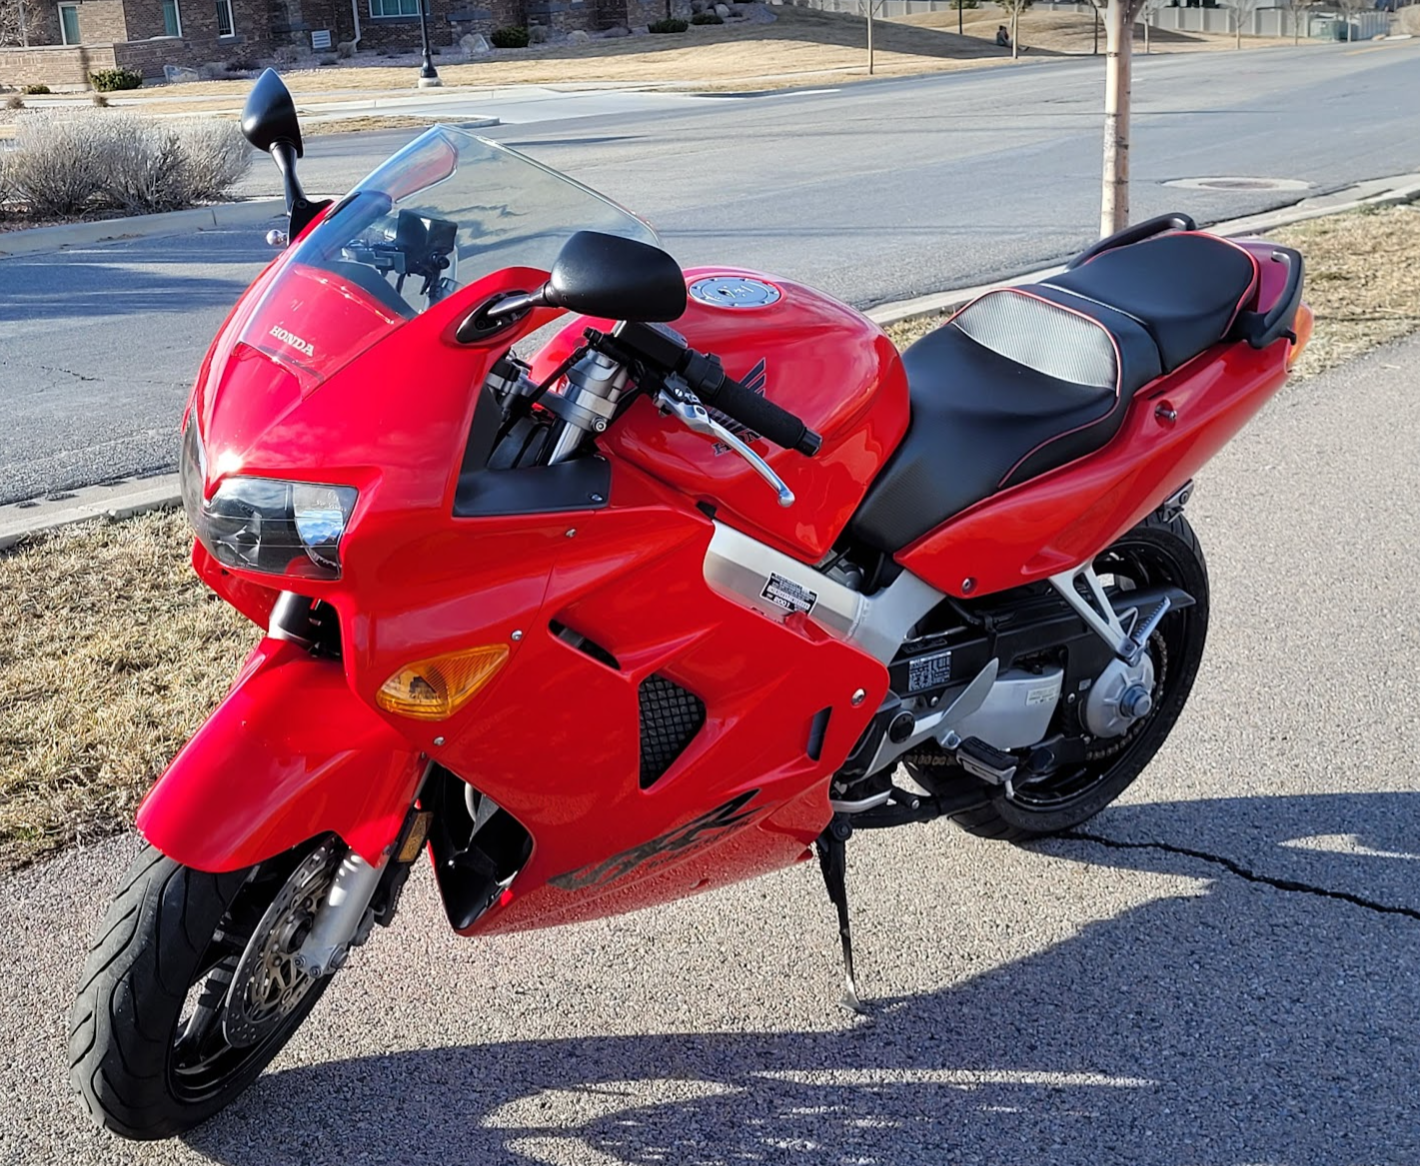
This is one that I recently spent some time refreshing and cleaning up over the winter. It's not worth $6k, but would probably sell quickly at a reasonable ask. Not for sale though. 😉
Cheers,
Justin
(click for better resolution)