

Darth Bling
-
Posts
641 -
Joined
-
Last visited
Content Type
Forums
Profiles
Gallery
Blogs
Downloads
Events
Everything posted by Darth Bling
-
From another post that I posted yesterday: Apparently the ECU isn't fooled by the O2-eliminator mod and when it enters closed loop mode, it tries to adjust the air/fuel ratio. Unfortunately, any adjustments the ECU makes won’t register because the O2-eliminators are sending a constant signal to the computer. So the ECU continues to adjusts the air/fuel mixture in a vain attempt to reach the stoichiometric ratio and it eventually leans out the air/fuel mixture so much that the engine loses a ton of power. When you twist the throttle a bit, the ECU leaves closed loop mode and goes back to the default map. The engine suddenly makes power again and the bike lurches violently forward. Ironically, the O2-eliminators are suppose to make the ECU think everything as just fine when it enters closed loop mode, but it instead has cause some bikes to surge severely. The trick around this is to prevent the bike from entering closed loop mode. This can be achieved by starting the bike before the ECU has a chance to complete its boot up cycle. Now, when you turn the ignition on, you see the digital gauges flash on once and then display normally. I believe this is caused by the ECU going though a boot up cycle. If you start the bike before the ECU finishes its boot up cycle, then it won’t go into closed loop later. My guess is that by starting the bike before the ECU boots up causes an error in the ECU. To protect the bike, the ECU loads the default map and sticks with it. So, once you turn the ignition on, start your bike immediately and you shouldn’t have any more surging issues. (Likewise, there’s no reason this wouldn’t work for bikes without O2-eliminators either). This is my start up procedure (which seems to work very well to avoid this surging problem): 1) Turn ignition on. 2) Put the bike into neutral. 3) Wait for the fuel pump to prime the fuel system. 4) Once FI system is primed, then in quick secession: turn ignition off, push the starter button, turn ignition on, release starter once bike starts.
-
Holy crap! They want AUD $633 for a 6th gen kit. :huh: I remember a couple of years ago the kit were only $300. <_< Still, I've heard nothing but good things about these guys. I know a guy who got one for his Valkyrie and he loves it.
-
Nope, I'm still around. I keep finding other things to do instead of working on these mirrors. I do have the design done, I just need to get it into a suitable format for the CNC shop and then they can give me a quote.
-
I put a couple of new mods on my bike last week. Just finally got around to taking some pictures of them tonight. The first new mod is my Küryakyn Voltmeter. I mounted it underneath the speedometer display. It displays red, yellow, and green LED based on the health of your charging system. Obviously, green means everything is good. And here's my new "Back Off" Brand LED license plate frame. I've got it wired up so it works as a running light and brake light. The yellow LEDs on the ends also work as turn signals. The frame originally came in chrome, but I took care of that with some spray paint. :D
-
Just sent JoeW a message (now that he's back in business!) :thumbsup: Thanks for the offer! I have a spare black front wheel that I am going to put up for sale very soon... That wouldn't be my old front wheel, would it? :P :goofy: on the frame comments. It really needs to be black too. B)
-
Yup, those are the wrong mounts. Sorry, guys, I've been out of town for while. Just got home not too long ago and I haven't had a chance to check up on VFRD in a while. The Thurn mounts that I used work fine, but I have a design that I think is much better. I just need to find a CNC shop that's local to me to get a quote on machining these things. They'll also need to be anodized black too. As soon as I have more info, I'll post the details. (Trust me, I don't want to drag this out to BLS's lower peg block porportions)
-
I would go with the 929 shock if I were you. You'll get compression damping and you can easily add spacers to make it the right height. The F4i shock would work too, but then you would have to get a new spring for it. The CBR-XX shock is also shorter than the 5th gen stock, but it's rated for about 100 lbs more than the VFR spring. So, if you're on the heavy side or do a lot of two-up riding, it might be the way to go. Of course, you can just get a heavier spring for the F4i or 929 shock too. :blink:
-
Well, it's taken me awhile, but I finally got some pictures taken of my new front end. Gave the bike a wash for the first time since last August (I think) and removed the saddlebag mounts and grab handles to give it a clean look for the photos. I'll be putting the saddlebag and top-box mounts back on later for a trip I have planned next week. I'll be going to Montana with my parents for the national Goldwing rally. :thumbsup: After getting the bike washed, a friend and I rode up to the Vista House which is located on the old historic Columbia highway about 25 miles east of Portland. It was a really nice day and the view from the outlook was great. We parked our bikes up on the sidewalk where there wasn't a railing and snap some pictures. The park ranger walked up and we though we were in trouble, but it turned out she was just tired of talking to tourists and wanted to see if we was up to something more interesting. I tried to get her to hop on the bike for a picture, but she declined. She was really cute, especially in her Oregon state park ranger uniform. Too bad she's a hippie vegetarian from Iowa though. :rolleyes: Anyway, here are some pictures: :beer: Beside the RC51 front end, I also have a set of Leo Vince Titanium pipes plus some 98/99 catless headers that have been ceramically coated by Jet-hot. Radar's frame sliders have also been installed too! :P The parts list for the RC51 front end include: 2000 RC51 SP1 Forks 2000 RC51 SP1 Lower Triple and Steering Stem 2004 RC51 SP2 Front Wheel with Rotors 2000 CBR929 Upper Triple 2004 Front Brake Calipers 2004 CBR600RR Rear Brake M/C 2005 CBR600F4i Front Brake M/C RC51 Front Fender Convertibars for RC51 Galfer SS Brakeline Kit for 2007 Yamaha R1 Galfer Front Brake Pads for RC51 All Balls RC51 Tapered Bearings
-
I say crack them open and found out how thick the walls are in the forks. If shaving 1 mm off around the circumference is more than 25% of the total wall thickness, I say don't do it. (I don't know why 25%, sounds like a good number). Conversely, what about enlarging the bottom triple clamps to 56 mm? There's a lot more material there to shave off than on the forks.
-
 All you need to do now is get the fork legs and levers done in gold. It would be so sweet! :salesman: Looks good! :thumbsup:
 -
I believe the diameter of the fork tubes are 50mm at the top triple clamp and 54mm at the bottom clamp.
-
Looks nice! I like it. :thumbsup:
-
The police... Seriously, downsides could include: loss of mis-range, loss of fuel economy, looks fugly (IMHO), and getting hassled by the police. :goofy:
-
Reno-Fernley Track - June 2nd, 2007 Pictures Summary I recently completed a track day at Reno-Fernley Raceway on Saturday, June 2nd. I was down in Reno for the second annual Reno VFRD meet. We had members from all over the west coast at the meet (San Bernardino, San Francisco, Newport, and Portland). On Friday, we all went for a ride to hit the local twisties and then we had a BBQ. Saturday we split into two groups: some of us went to the track and others went for a ride around Lake Tahoe. Afterwards, we regrouped for dinner and refreshments. Track day was an fantastic experience. This was my very first track day, so I had those first-day-of-school butterflies as I pulled into the pit area. After registering, I got in line for tech inspection and then we had a quick riders meeting. I was in the B- group, so our first session consisted of three sighting laps to learn the course and get comfortable. Each lap was about 3 miles long and comprised of over 20 turns. There were a few bumps out on the track and I noticed my suspension wasn’t taking them very well. As soon as I got back into the pit, I went on over to the Lindemann Engineering trailer and had my suspension set up properly by (I believe) Mr. Lindemann himself. I was able to get two laps in before my second session expired and I was very impressed with how the suspension was working now with the RC51 front-end and CBR-XX rear shock I had put on it. The bike handled extremely well and soaked up bumps 1000% better than before. Now that my suspension was set up, I was ready to hit the track. But by the end of my third session, I had another problem. I had a set of regular sport tires (Pirelli Diablos), on my bike and I was pushing the tires past their limits. My rear end kicked out on me a few times during the session, but nothing too bad. During the last lap of my session, I learned just how bad my tires were actually performing. I was banked over in a tight left-hander when both tires gave up on me. For about half a second, the only thing keeping the bike upright was my knee, my left peg and foot, and the gear shift lever (which got grounded down pretty good). Luckily, I was able to push the bike back up and save it. Right after that, I entered a long right-hand sweeper and that’s when I definitely knew something was wrong. I was trying to keep my line nice and tight, but the bike was drifting off line. Once I got out of the sweeper, I had drifted about 20-feet off my line (almost ended up in the dirt actually). I immediately found the Dunlop dealer after my third session and bought some D208 GP-compound track tires to replace my Diablos. I was inspecting my old tires and notice that the edges were shiny. That told me the tires were getting way too hot and that’s why I was sliding around the track. Once the Dunlops got spooned on, I hopped back out on the track. What an unbelievable transformation those tires made! It was like going from snow-packed roads to fresh, clean asphalt. Those tires stuck like glue in every corner and at every lean angle. Lunch was served and there was three more afternoon sessions left in the day. The temperature had reached a high of 93°F, which made wearing a full leather one-piece suit a bit uncomfortable. I spent my last three sessions working on form and technique. By the end of the day, I felt much more comfortable and quicker on the track. I still have a lot work to do. My upperbody position is a little bit off, plus I need to work on my brake/throttle transitions. But, the goal now is to apply everything that I’ve learned on the track to the road. With a better arsenal of techniques and skills, I can navigate the roads safer and smarter than before. :thumbsup:
-
4th Gen. Vfr/cbr F4i Body Conversion
Darth Bling replied to Hobie1dog's topic in Third and Fourth Generation VFR's
No worky for me, is your account set for public viewing? :joystick: Account options ---> Album Settings---> (edit my album settings)---> Change Album Settings---> My album is: Public/Private Here's the direct link for the movie: http://s11.photobucket.com/albums/a180/hob...og/P1010560.flv You'll also need a flv player though to watch it. -
Sorry I didn't get back to you sooner... Yes, I ran the wire through the little hole besides the hollow rivet. I enlarged the hole a bit and smoothed out the rough edges with a Dermal grounding bit. I also enlarged the hole on the Thurn mirror mounts, cut the black cover off from the wires to give the wires a bit more room, and I stuck a couple of washers in between the mirror mounts and the GSXR stocks. The mirrors can actually rotate 45° each direction without binding the wires. :thumbsup: I've been thinking about it some, and I know there's a better way to mount the mirrors. I've got a few designs in my head that would work, but I need to get in touch with a CNC shop to find out how much it'll cost to make some custom mounts (unless vanion2 beats me too it and his friends makes some mounts). I really don't think I'll get anything done this month since I've got a lot of work to do on my bike in anticipation for my first track day in June, but there's a good chance I could get something fabbed up for wholesale by the end of the summer. :blink:
-
Visibility to the rear is similar to stock; the mirrors stick out about as far. Wiring wasn’t too bad. Just tapped into the wires from the lower lights. I wired the mirrors so they act as running lights, but when I hit the turn signal, they turn off and on in time with the regular turn signals. All you need to do is just ground the lights with the turn signal wires. Yeah, turning the lower lights into ram air vents has crossed my mind. :beer:
-
Quite a while back, I bought some Kisan vecrtoLights from a member here at VFRD. They were nifty little lights that attached to the bottom of your mirrors. They acted as a second pair of running lights, as well as brakes lights and turn signals. They worked really well and I got a lot of comments on them. Kisan V-10 vectroLights Then sometime last fall, my right mirror got snapped off. It was at this point I decide to try out a set of aftermarket mirrors made by Thurn Motorsports. I've seen the mirrors on ebay a few times and decided the quality looked fairly decent. Huge mistake. I have to say that these mirrors are absolute crap! Thurn Mirrors The problem with the Thurn mirrors was the ball-and-socket joint was way too loose. Only after a few minutes of riding on the freeway, the mirrors would fold inward from the force of the wind. Even large bumps would knock the mirrors down. Even though the looks of the mirror eventually grew on me, I hated them. I tried tightening the socket joint up, but I ended up breaking the plastic on both sides. <_< Don't mind the dead bugs One good thing did come out of my purchase of the Thurn mirrors, and that would be the mirror mounts. As you can see in the picture above, the mounts provide a nice flat mounting area. And that's when it hit me... GSXR mirrors!! :goofy: GSXR mirrors! As you can see, the GSXR mirrors require a flatter surface to mount to than does our VFR. So, I figure I could remove the mounts from the GSXR mirrors and then bolt the mirror stocks directly to the Thurn mounts. The GSXR mounts After taken the little caps off the GSXR mirrors, I notice the mirrors used a hollow rivet to secure them to the mounting bolts. A few moments later, I'm using my power drill to drill out the rivets. It's also worth to note that the Thurn mounts don't use a standard or metric thread pitch. The bolt guru at my local hardware store said that it's some kind of special pitch only found on motorcycles and that I would have to special order the bolts. Hmm...no thanks; I've been dying to try out my new tap and die set. :P I ended up drilling the Thurn mounts out with a 3/8" bit and then tapping it to 7/16". I end up running the wires from the mirrors through a tiny notch in the mirror stock down on the end. The notch is where those little caps snap into. I figured that once I get everything torque down, I can secure the caps down with a sealant instead of snapping them back into place. I also had the grind down the head of the 7/16" bolt I used to mount the mirrors. The caps don't offer much room underneath them. I end up sticking the bolt into my drill and then spinning it on a metal file. Compare to the Thurn mirrors, the new GSXR mirrors are sharp!! And I thought I'd reinstall the stock mirror just to see a comparison. Comparison And of course, the new mirrors in all their glory!!!! :D Bling!
-
Very interesting. I know when I stuck 330 ohm resistors in my O2 sensor wires, the surging was absolutely horrible. Almost to the point of dangerous when traveling around town in 1st and 2nd gear. The only work around was to get the bike to start in default mode, which involved turning the bike on and off quickly a few times before starting it. After putting on quite a few miles with the resistors in place, the surging has gotten better. I can still tell it's there, but it's no where near as bad as before. I always figured the ECU just "relearned" everything and fixed it for me. I'll have to give this velocity stack swap a try and see if it eliminates the surging for good. :thumbsup:
-
'04 Vfr Dynotuned Results: 109.3hp / 59.2tq
Darth Bling replied to tinyminds's topic in Modifications
Nice!! I'm so excited now. I can't wait to put my cat-less headers on now. :D -
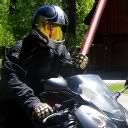
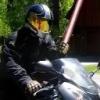
Yup, it's official. I've spent way too much time on here. I'm now up to 2000 posts! Well, in my "1000 Posts" blog entry, I talked about some "grand" milestones I've had. I don't remember any of them right now, but they were pretty cool. B) Now, how about some 2000 milestones. Hmmm..... ...yeah, I've got nothing. :P Well, here's picture of me in my new favorite shirt. And what about a showing of all my avators that I've ever had: :beer: Hmm, yeah, I'm out of ideas now.
-
Tommy I got your number and will call you for the dyno day. Lonny plans to get his done too Dyno day??? I need to hit the dyno too. Well, not right now, but around mid-May I will. George, the new paint job looks sweet!! :thumbsup:
-
untilhttp://www.vfrdiscussion.com/forum/index.php?showtopic=28198
-
People are pissed that you added a cape to the flaf?? WTF? :blink: I thought you're idea was incredibly creative and unique. It certainly solved the real estate problem, and I wholeheartedly believe the cape retains the spirit of the flaf. You can't really say that "this" or "that" is the flaf. The flaf is constantly changing, with each signature and each place that it visits it becomes something more and different. Even it's name reflects it's history perfectly. Originally, it was to be called a flag, but it was misspelled and has since morphed into flaf. Why not then morph a sweatshirt into a super-sweatshirt? It gives the flaf some unique character that not only reflects the uniqueness of VFRD, but the uniqueness of the VFR. :)
-
My Top 5 Most Embarassing Motorcycle Moments
Darth Bling commented on Stéphane's blog entry in Stéphane's Blog
Bwa-haa-haa-ha! That's some good stuff. :thumbsup: Reminds me of a few moments I've had on the bike. :rolleyes:
