

Das Bone
-
Posts
237 -
Joined
-
Last visited
Content Type
Forums
Profiles
Gallery
Blogs
Downloads
Events
Posts posted by Das Bone
-
-
Anyone else notice a funk between 3-5k rpms running this map?
I just put it in, running Staintunes, Dynojet O2 elims, and stock filter(probably dirty at 16k mi).
On startup, got some afterfire with no throttle application(popping right off the bat, little smoke), smoothed out after a couple small tugs on the grip. Noticed the extra noise too, seems a couple db louder??(not that there's anything wrong w/ that!) Out on the road (50 deg F), seems to pull better, pulls straight through VTEC @ 7k(never had a problem w/ it before, but I could feel the dip, seems to be gone now), HOWEVER - my bike was always real smooth at any rpm, roll the gas to any number, hold it, rpms stay put, no surging/on-off power feel. Now, I bring it to 3.5/4.5/5k(cruising rpm), and I have surging. Feels like sh-t. Almost feels like a really loose chain, but my chain is fine...
Maybe the map is tuned for this surging that I never had, and now I get the opposite effect??
I'll ride it to work tomorrow, then I'm going to try the baseline map off Dynojet's site and try that.
Just curious to know if someone else had that happen. I love the PC in my F4i, my favorite part is that the on/off feel from 0 throttle position is gone(map from their site for F4i/K&N/Hindle slip-on), and smooth, direct throttle response throughout the rpm range. That's all I was hoping for on the VFR, I don't mind the VTEC transition. Surging sucks!!
Back a couple of years ago, it turned out that the PC I had(which had been custom mapped) malfunctioned. DJ replaced it under warranty :fing02:
Anyway, during this process Eric and I talked and exchanged maps. I uploaded his map and really didn't feel that it was much different from my VFR without a PC. He tried my custom map and flet that it was rich in some areas if I remember correctly, but he did use some of the settings from my map in certain areas that he felt were better. So I reinstalled my "custom" map with the new PC and all was good again. Big, noticeable difference from Eric's map in my bike.
The point I'm trying to get to is that there are factors which will affect how well a particular map will work in your particular bike. Probably the most important is where you live and ride, i.e. elevation etc.
For example, we all know that DJ has loads of maps to service their customers. When I was first exploring and trying to educate myself about the PC prior to purchase I noticed that the people that were happiest with their PC's were the one's that had custom maps made. The people that went with one of DJ's maps seemed to be only marginally happy in general.
I'm currently having a map done for my '07 600RR and got to sit in and watch some of it being done. The PC came loaded with DJ's map for my bike/pipe combo etc. and their map was much richer in areas than what was being done on my map at my sea level elevation. The reason for this was due to DJ being at approx 2500' in elevation and a couple of other minor details......hence the richer map being created in and for that particular environment.
So, it's something to consider when trying to find the best map for your bike and where you ride.
-
Simply amazing Doug! Well done :fing02:
-
Well, maybe I am confused then. I called the dealer and spoke to another service advisor who claimed he was very familiar with the recall. He said that at a minimum the front and rear sub harnesses are replaced under the recall. Only the left main harness (and any other affected parts) are replaced if additional damage is found. So, once mine is done I will check the battery harness to see if it was replaced.
Yes, both harness' are part of the recall so should both be replaced.
Mine's been there over two weeks now and has had the main harness replaced as well due to the burned connector (Jeremy said it's a ground block)I posted a pic of back a bit. So, yeah.......if anyone uses their bike as a daily commuter, you may want to make sure the dealer has or atleast can get the main harness very quickly in case a problem arises as it did with mine.
In my case, interesting that all was good with my VFR up til I took it in for the recall.........coincidence or ? :beer: <_<
-
Took mine in last Wed. for the recall. Running just fine as usual. Picked the bike up later that afternoon......bike ran like crap.
Frustrated <_< but had to leave bike at the dealership. Two days later the service manager called and explained that they found a burned connector that's part of the main wire harness(not part of the two being replaced under the recall) and that he had contacted Honda's techline and sent pics etc. to them.
At this point, I'm told that a new main wire harness should be sent out for my bike hopefully this week.
Here's the burned connector...left side just forward of the the battery compartment

Burned connector after recall
-
Hey NVR2L8,
Glad that you've seemed to "fix" your issues.
FWIW, I went to a PCIII a few years ago and before I did, I did a fair bit of research on who seemed to be most happy with their PC's. It was pretty apparent at the time that the people that were having the best results with their PC's were those that had custom maps made. I went that route and the improvement was very worthwhile...........i.e. well made custom map is the way to go IMHO. I have a friend with an '04 and he was having the same frustrating hesitation/surging issues that many of us have experienced...got a PC and tried DJ's maps and a map from a member here with no consistent improvement in general with any of these maps. Finally got him to try my map(he was concerned that since his bike was setup different than mine it wouldn't work well) and he's a happy camper now.........issues virtually gone.
PM me if you need more info,
Craig
-
OK, so I went and got some parts(thanks Jeff/Last Chance)........10 gauge wire, shrink wrap and a new fuse holder. I didn't notice til I got home but the wires coming out of the new fuse holder are 12 gauge....will this be OK?
So, I guess what I'll be doing, again thanks to Jeff's help, is unhooking and removing the battery......cutting the large red wire leading to the OEM fuse holder at the OEM fuse holder, as well as cutting the red/white wire below the small connector(i.e. at the end farthest away from the OEM fuse holder)............splice/solder one side of the new fuse holder's wire to the large red OEM wire..........and the other wire from the new fuse holder will be spliced/soldered to the red/white wire minus the connector/smaller gauge OEM red/white wire.
So, I'm essentially getting rid of the OEM fuse holder and the OEM small connector/small gauge red/white wire(the one that seems to be causing all the problems).
So, does this sound right and am I OK with the new fuse holder's wire's being 12 gauge?
Thanks guys,
Craig
-
My turn now. I just checked my 30A and it's getting worse looking as is the short section of red/white wire.
Obvious I need to make the change now, but with all the missing pics and data and what appears to my "un-educated electrical" brain, there seems to be differing ways of doing the fix so now I'm totally confused :goofy:
Ken's ex. on pg 1, Jeremy's explanation on pg 6 and Tinyminds on pg 7 I realize are all achieving the same fix but seem somewhat different in their methods??????
What I get is that we are essentially replacing the red wire coming from battery +, the 30 fuse holder, and here's the part that I'm unclear on....the red/white wire that has a connector in line. Are we replacing the entire red/white wire connector and all(and if not...why not) or just a section of it?
If BR or any one can help out with some pics that show exactly what's kept and what is removed, or some very simple verbage that my non-electrical brain can follow it would be much appreciated. Specific part #'s etc. would be great if anyone still has that info.
Much thanks,
Craig
-
Looks great :thumbsup:
Your post was hilarious too :rolleyes:
Two other thoughts for you......black out the radiators, and black out the lower headers. I've done this to my '03 and definitely made a difference.
Great job with your mods
-
Ok here's a couple of pics of what I think is this "ground connector". You need to have the tank up and possibly the left fairing off(mine's off now so not sure how visible this area is with fairing on) to be able to see it. It's directly below the "lower throttle body adjuster" which you can kind of see in the pics(tough to get an angle)....you guys probably know what it is anyway but for ease it's the round wheel in that area that the throttle cables run through.
General shot for location purposes:

100_0161.JPG Mysterious Ground Connector....general location
And close up....If this is that grey grounding connector that's actually pictured in the other thread, I think his pics were with the black tape around this connector removed and that's why it looks different. So it's the "boxy" looking black tape covered part that you can see some of in this pic:

100_0162.JPG Mysterious Ground Connector: close up....essentially directly below lower throttle body adjuster...completely wrapped in black tape
Hope that helps enough.
Now to my situation:
I followed and did all the tests with the multi meter that you guys(mucho thanks again) suggested and found no unwanted voltage running through the tank...key off and key/run on. I tested both fuel pump and fuel level sensor plugs and continuity was fine. The only test I did not do was the resistance test, but followed both MQ's and Riemski's posts to the letter otherwise.
So, I don't appear to be getting any current running amok through my tank so hopefully I wll not explode :beer: :P ......so I suppose I should still do the extra ground wire fix anyway.............any other thoughts or comments?
-
OK, check this out :blink:
Checked all the connections talked about here and everything looked fine...clean connectors, no burned wires, etc. Everything looked normal.
So, in messing around with all this I tried putting the tank back down and lifting it up as I mentioned before. This time, in both the raised and lowered position all was fine when I turned the key on, i.e. normal boot up, normal sounds, no FI lights/codes.
Then, with the tank in the lowered postion and athe key on, I started moving it slightly from side to side and as I pushed it towards the left, relays started clicking and the dash went wacko. Pushed the tank back to centered and all went back to normal.
So I lifted the tank and while viewing from the right side of the bike, I noticed that the forward tank mount bracket on the tank had a little burned looking area.

Tank mounting point grounded out on oil hose This is where my tank had rubbed through the oil hose and grounded out
Looked down to the contact point when the tank is lowered and noticed that the little metal tube(now know it's the oil hose) that's covered with a plastic insulation sleeve(for obvious reasons now) was worn through the plastic sleeve and was down to the metal oil hose.

Oil hose that tank had rubbed through The rubber insulation got rubbed through by the tank creating big problem
So, I taped up the exposed oil hose with some electricians tape, put the tank back down, turned the key on and pushed the tank all over the place and lo and behold.......no problems.
Now all seems to be fine with the tank lowered and the key on as well as with the tank raised and the key on.
Does this make sense to the brain trust here as the cause of my problems? Would this have done it...Im thinking yeah even with my limited knowledge in this area.
I'm so excited I can hardly stand it :P
-
DB - Sorry to hear about the problems. Give a little history of your bike. Have you ever had any of the above mentioned electrical problems? Have you added any additional grounds? Have you inspected the blue connector and ECU connectors? Have you added any electrical accessories? So for so many questions, just need to know what we are up against.
Thanks.
The bike's an '03 with about 18,5K miles....no problems up to this point other than an apparent PCIII failure a month or so ago.
I haven't had any of the mentioned electrical problems. No electrical accessories added other than the PC but that has been out of the bike now for a few weeks. I had ridden the bike post PC removal for approx 400 miles with no problems.
I have not added any grounds or anything...bike is stock in that respect.
I have not yet looked at this "blue" connector....but this smoke which was a "translucent white" color was coming up from that general area.
Also, what I'm getting FI code wise is this:
Flaaaaaash Flaaaaaash Flash Flash Flash.........followed by
Flaaaaaash Flaaaaaash Flash Flash Flash Flash.........from the shop manual 's description what I got was a 23/24 code which are 23=Faulty no. 1 o2 sensor heater....24= faulty no. 2 o2 sensor heater.
Wierd as I mentioned becuase I still have my 02 elims installed?
OK here's another wierd thing.
I just lifted the tank. I turned the key to the on position and as I mentioned earlier the dash goes through it's start up procedure but the lights(low beams) are extremely dim and there's a buzzing under the dash and I didn't hear any "whine" from the typical under tank(fuel pump I think) at all.
So, I put the tank back down and turned on the key and everything goes back to normal, ie no FI codes, boot up procedure is normal, etc....................what the heck does this mean?
BTW, I am in no way shape or form an electrical or mechanical genius :lol: ....just thought I'd better make sure that is understood :D
-
Ahhhhhh!

Now I've got a problem that I hope some of you smart guys can help with.
Short version: A week or so ago, on a ride after lunch I started the bike up on the side stand and got FI codes. Rode home and the bike ran fine. Looked the codes up in the shop manual and from my best guess I was getting a 23/24 code which says it an 02 sensor prob. Now I've got the 02 elims so I thought that was wierd. Also, when turning the key to the "on" position the dash would go through it's normal "boot" up procedure but I was hearing the whine from under the tank(fuel pump?) that normally stops.... keep going and not stop?
Was going to pull the fairing and remove 02 elims and re hook up 02 sensors but first I propped the tank up to look at stuff and while the tank was up I did turn on the key and heard all sorts of wired relay type noises under the dash and the headlights were really dim etc.
Checked hoses, wires under the tank and all looked OK but moved a few around thinking that maybe something got pinched. Put the tank back down and turned the key on and all seemed OK......no codes, normal boot up etc.
Today I went riding and all was fine. Stopped for dinner. Started the bike to leave and the same FI codes appeared and saw some smoke coming out on the left side just in front of the tank area :blink: ...the area where that wiring harness and blue connector is you guys were talking about.
Got home with no problems thankfully and am stil getting the FI codes when the side stand is down(while riding the FI light is on constantly).....When turning the key back on I'm still getting that whine from underneath the tank that I described earlier that normally stops when the bike is booting up....but it doesn't stop......hearing some relay clicking sounds also....turning the key on and off gives the same results with the exception that the "whine" did stop like normal one time but didn't all the other times.
I checked the 30amp fuse holder back by the battery and it looks OK.
Does this make any sense to anyone..................help
-
As long as I don't show up for my first ride, slide a bit in the first corner and get blacklisted, everything is going to be ok. :D
Exactly

-
I finally read this.? It actually fits my riding style very well.?
But, I have to have one qualm.
No hanging off?? Err cog manipulation.? Is this not a tried and tested technique used on a motorcycle to reduce lean angle?? Why would this not be acceptable on the street?? It seems to me like relying entirely on lean angle would make road hazards more of a problem...... thoughts?
I understand you're qualm as I had the same question. The main reason Nick suggests not "hanging off" as much on the street in the Pace is because it can give the appearance that one is racing/speeding to the law enforcement community.
I asked Nick about this(not hanging off on the street) and he kind of smiled and said "well.................." You get the point :P
Yes it is a technique that definitely reduces the bikes lean angle which is a very good thing for obvious saftey reasons. That's one of the first things they explain in their classes as it allows you to have a much greater safety margin for negotiating road hazards etc. as you quite rightly mentioned B)
-
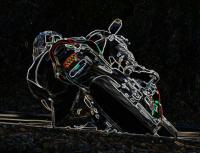
Man, that's scary looking
on that you're O.K. -
I just recently ordered my VFR800 and expect to get it in about 1.5 weeks; it'll be my second bike. The dealer will be installing the frame sliders.
What I am wondering is this: Since so many owners want and install frame sliders, a fact of which Honda (and other manufacturers) must be well aware, why aren't they a factory option? That would seem to make more sense.
Sliders designed by the bike manufacturer could be superior to after market sliders and probably cost less besides.
Ahhh grasshopper..........one can not expect to understand the corporate mind of the Motorcycle manufacturer :P
Sh*t, we can't even seem to understand what "American" Honda is thinking most of the time :beer:
-
Been there, done that. Not me, but one of the other mods. Take a look see. :wheel:
Guess I missed that one huh(really need that "doh" emoticon again) :lol:
-
We sometimes have the lead rider pass the rolling road blocks, slow down until all can pass, than wick it on again. It doesn't make the cages very happy sometimes, but hey, they started it! :P
We really try to avoid using that one as I know of a couple of horror stories that have happened because a cager got very pissed off. :wheel:
I'm a litttle surprised(pleasantly) to hear that others do use the same "slow the group down to gap the cars" or the "pull off and wait to gap the cars" techniques as it seems like everyone that I've tried to explain the rationale behind it to out here seemed to think I was speaking Swahili or something :goofy:
What do you Mods think...should we do some sort of sticky with this stuff to make it available to everyone?
-
Like minds my friend ! I've been using all three for years myself ! :thumbsup:
"Like minds"......or is that "Simple minds"? :wheel:
Maybe we should do a sticky of the "Pace" and the "Corner/Traffic Strategies" to help spread the ideas around.
Kind of a "Street Strategies for the Sport Rider" sticky. Might be a cool thing to have in the "Riding Techniques" forum for everyone to refer to.
I think I might need to do a better job on the write up though :joystick:
I could take what I had begun before and redo some of what I did today and combine?????
Just a thought............
-
As I mentioned in the other thread that Bailey was refering to, we've got some addtional little tricks that we've added to our rides in terms of getting the most out of sport riding(corners) and using a bit of strategy to allow us to run the majority of corners at speed while avoiding traffic.
Had to get to work so I didn't get to finish.
I've been working on an actual write up about this but haven't finished yet but here's the basic gist. Works well for us so maybe it will for others.
For reference, I'm all about corners(big surprise).....For me this is what I love most about riding.......by far.
So, this means that I want to take advantage of just about any curve in the road :P ........cars can and do create problems in this area <_< . If you get stuck behind a car or series of cars in the twisties chances are they will slow you down immensely thereby ruining your cornering fun.....which is just not acceptable :P
We use 3 different techniques to avoid getting stuck behind cars in the twisties.
#1 We all know and use this one......pass over the double yellow or use the passing lane to get around said car(s).
This works great much of the time, and we use it quite often.
Sometimes though this technique may not be all that practical for numerous reasons, i.e. no "safe" way to pass due to blind corners, road conditions, oncoming traffic, etc. as well as too many cars bunched up to be able to get around or not enough space for anyone other than the leader to get by and on and on.....oh, and that it's a nasty ticket if you get nailed in terms of passing over the double yellow.
So, assuming that Option #1 is not going to work at this point, here's the other two little strategies.
Here's the scenario: Some great corners are coming up but there are cars in front of you that you're not going to be able to get around(refer to previous paragraph)for one reason or another.
#2 The leader checks to make sure that there's no traffic approaching from the rear of the group, and basically just slows the group WAY down to allow the traffic up ahead to get even further up ahead as to create a gap. Once the traffic up ahead has been given enough time clear atleast some of the area, the leader can then pick up the pace and the group can rail through the corners.
This technique can be repeated as often as necessary(traffic from the rear permitting) to allow a sporting pace in the corners where the fun really is. Essentially the group is sacrificing the straights for the corners.
#3 is really just an extreme version of #2.
If the situation is such that there's either: 1) just too many cars up ahead and are going so slowly that regardless of how much the leader slows the group down, you're still not going to get to enjoy most of the corners...or 2) if there's just too much traffic behind for the leader to be able to slow the group down without causing problems for other motorists behind the group............. The leader just pulls the group off the road onto the shoulder and waits until the road ahead clears out enough to be able to run through the twisties at speed. Sometimes we wait for a very short period of time, sometimes for a minute or two, i.e whatever's required to give the group a "gap".
We use these little "tricks" all the time as needed in conjunction with our "Pace" style ride and find that, if done right our group is able to enjoy quick cornering speeds in almost all the corners on our route for that day.
I apologize for being a bit wordy but hope that it makes some sense.
-
Lets make sure we don't violate any copyright issues before posting it. I hope is says, feel free to distribute.
Good point, but I do know of atleast three or four forums that it's posted as a sticky on. Not proof that it's O.K. but one could assume that if it wasn't they would have been told to remove it by now?
I might be able to find out if it would be O.K. for sure if needed?
-
Speaking of krazy glue.... you might try this... have to go to a hobby store we now carry a rubberized super glue that is fantastic does not set up hard it fills in gaps and gives a little bit, which may help with the high frequency vibrations that motorcycles exhibit.... just something to try for the radiator overflow bottle.
Sounds interesting...do you know specifically what it's called?
On my second go around of resealing my bottle I used "Devcon Multi Purpose Silicone Adhesive S-12-/12045" that I got from Home Depot....so far so good...fingers crossed of course
-
Ienatsch compiled a number of articles from his writing and editorial stints at Motorcyclist, Sport Rider, Sportbike, and Cycle World magazines in a 2003 book titled Sport Riding Techniques - How to Develop Real World Skills for Speed, Safety and Confidence On The Street and Track. The Pace is the last chapter. The book is a good read and I highly recommend it.
:beer: it's my favorite technique etc. book.
The last chapter you mention where he does talk about the Pace is different than the original Pace article....it's almost like an addendum B)
Everyone should have that book too!
-
Wow, I didn't realize that so many people were unaware of the Pace.
Bailey, maybe we should put a sticky/link or something for it on VFRD :goofy:
When I first read the Pace, I thought that it seemed like the smartest approach to riding sport bikes on the street.
The main group that I rode with was kind of attempting to do something along the Pace lines without actully knowing it, so when I discoverd the Pace it was like the Holy Grail :P There it was...already written out etc.
I had ridden the balls out as fast as you can into the corner style and actually was finding, as well as the rest of our group, that at the end of the day, riding the Pace style was more fun and lees stressful that what we had been doing.
Do we ever get on it and deviate from the Pace...sure(the last run up Mulholland from PCH I made didn't adhere to the Pace) but the majority of the time we use the Pace as a general guideline for our group rides.
Lewis, when we did the VFRD group ride back a few months ago the Pace that I led us at especially on the way up with the large group was definitely on the slow side of our normal Pace. On the way home we picked it up more and that would have been like a "medium" Pace version. Our quick Pace is faster than that. We tend to fluctuate depending on how big the group is and or how experienced everyone is etc. as well as if any of the group has ridden together(especially with a Pace style ride) and adjust accordingly B)
As I mentioned in the other thread that Bailey was refering to, we've got some addtional little tricks that we've added to our rides in terms of getting the most out of sport riding(corners) and using a bit of strategy to allow us to run the majority of corners at speed while avoiding traffic.
Nick Ienatsch 's The Pace
in Rider Safety
Posted
Really :laugh: :fing02: :laugh: