So I decided to upgrade the stock main beams to LED, mainly to just reduce the power draw when I had all the accessories running and needed to put main beam on. I suspect a lot may have done this already, as I found a few threads on similar mods, but nothing detailing everything I went through exactly, so thought it might be of help to someone if I made one myself.
Bike's an '02/6th gen, UK model, which had 4xH7's (2 for low, 2 for high). I'm not sure if this differs to models sold in other countries, as I've seen talk of H4's rather than H7's, any how...
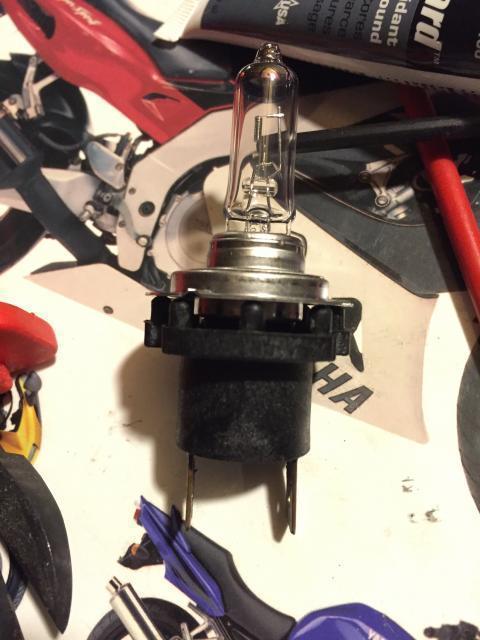
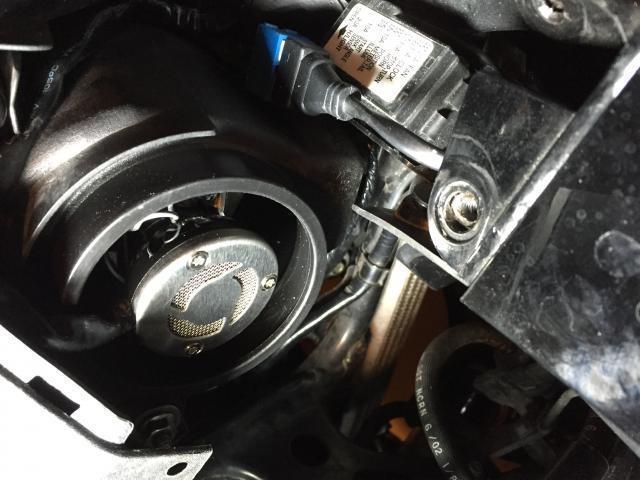
Stock bulbs are H7's, but they are fitted into a converter:
The converter increases the distance between the two spades to the same width as H4's. Pic below is of the H7 in the converter compared to a H7 without:
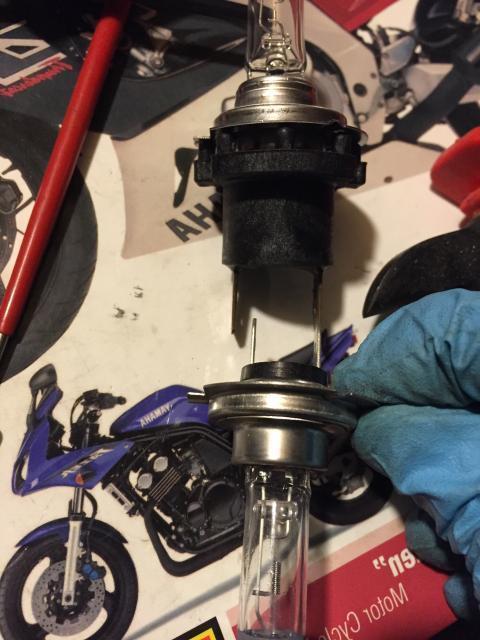
H4 and H7 spades are also different widths, the H4's are slightly wider.
I found out the hard way that the rim on bulbs for H4's and H7's are different (my own fault for just not bothering to look). H4's have 3 'tabs' on the rim of the bulb, spaced in a triangle shape and the H7's only have 2, directly opposite each other. So basically the stock wiring is geared up to take H4's, but the headlight housing designed to take H7's.
I figured it would be easier to change the spade connectors to fit H7's rather than the headlight unit fitting to take H4's, so went down the route of replacing with H7's.
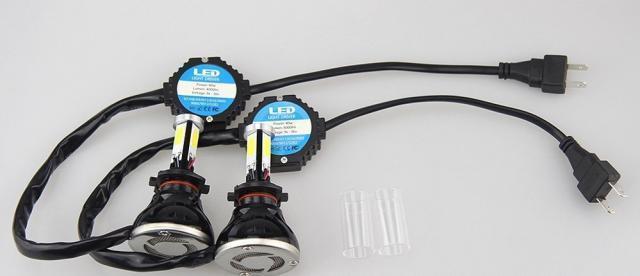
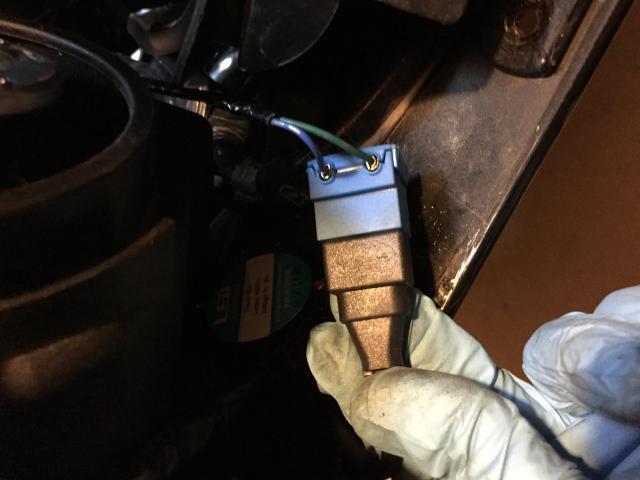
I bought 2x40w LEDs (6k white light, 4k lumen) from amazon.co.uk for <£40, from what I could tell they looked similar (identical?) to the ones Lifetime LEDs were selling, but cheaper due to delivery fees:
Turns out H7 spades are the same size as the 6.3mm ones used elsewhere on the bike, picked up a set of them off ebay for a few £'s. Below pic of the 6.3mm 'H7 spades' compared to the stock 'H4 spade' which I cut off (see below). Ignore the Fazer, that's my daily commute :):
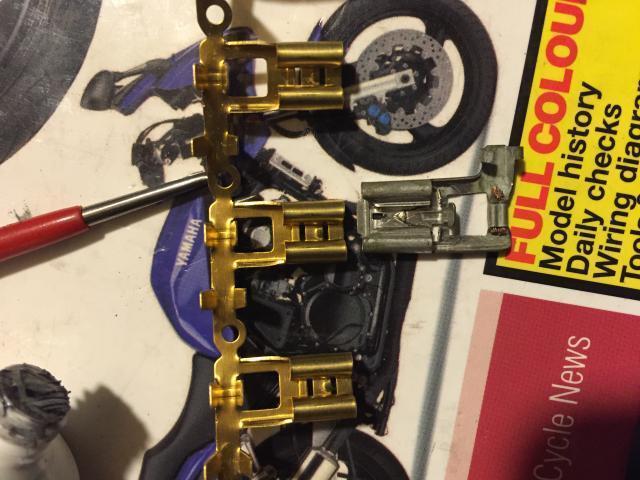
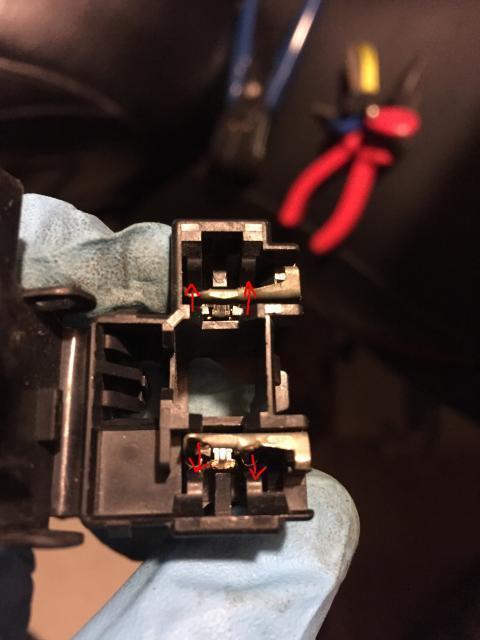
It isn't rocket science, but to get the stock spades out of the connector, you just apply pressure to the clips annotated below. A bit fiddly but if you pull the spade out at the same time as pressing on the clip, you wedge the clip in the release position whilst you do the other side. No need to press both simultaneously.
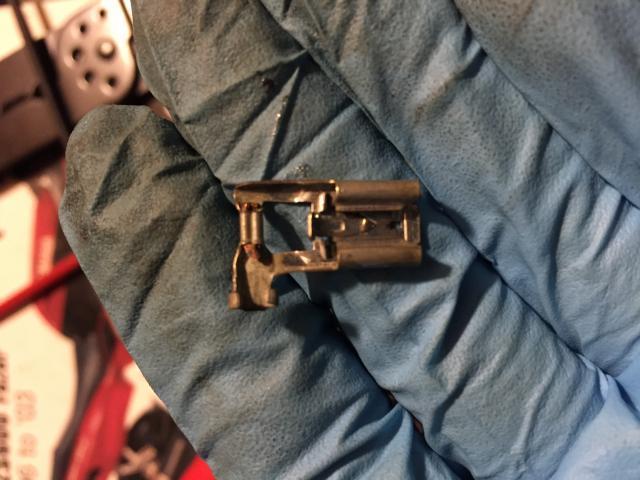
I really wanted to try and remove the spades without cutting the wires, but couldn't release the exposed copper. I managed to pry the tabs up that wrapped round the insulation, so only lost a few mm's of the exposed copper. There was still a decent amount of slack in the wires even after removing this (ignoring the fact they plug into cables for the LEDs, not prong on the back of the bulb). If I ever needed to go change the spades again, say to go back to H4s, there should still be enough length left on the wires. Removed spade:
I didn't take photos of it, but because the new female spades are right angled I couldn't use ratchet crimps. Instead I did manually, using small needle nose pliers to curve the tabs round the shaft of a thin jewelers screwdriver to get the shape roughly right, slid the wire in and used a pair of cheap non-ratchet crimps to press the tabs down onto the wire. Doesn't look as neat as the stock wiring, but seemed sturdy enough.
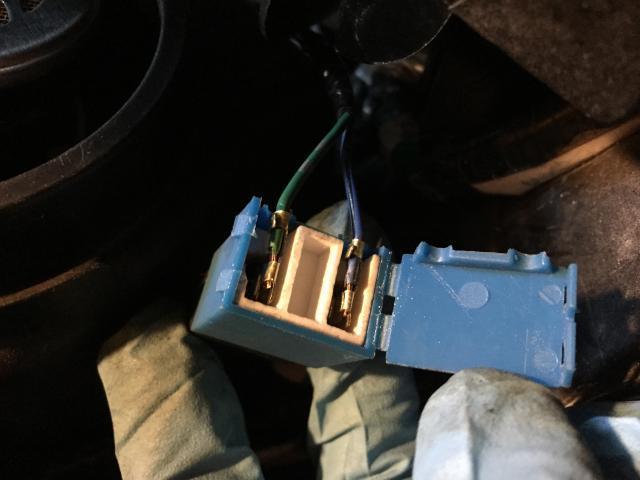
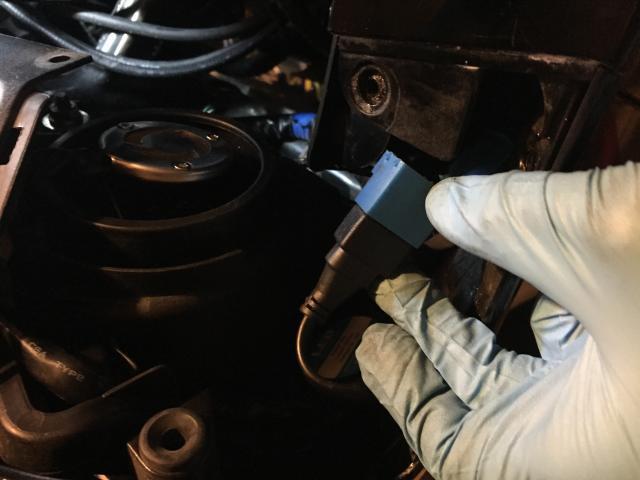
The H7 spades didn't fit into the stock plastic spade connector, so I bought a pair of ceramic "H7 spade connectors" off ebay, again only a few £. Depending on the type of female spades and the plastic connectors you get, the spades might not 'lock' into place with a retention mechanism. Mine didn't, but the plastic flap/door on the back of the connector helped keep them in place, I also held a screwdriver against the back of the female spade connector, whilst pushing in the male spade connector from the LED bulb to make sure the fit was secure. It was fairly snug so I'd be very surprised if it worked its way loose.
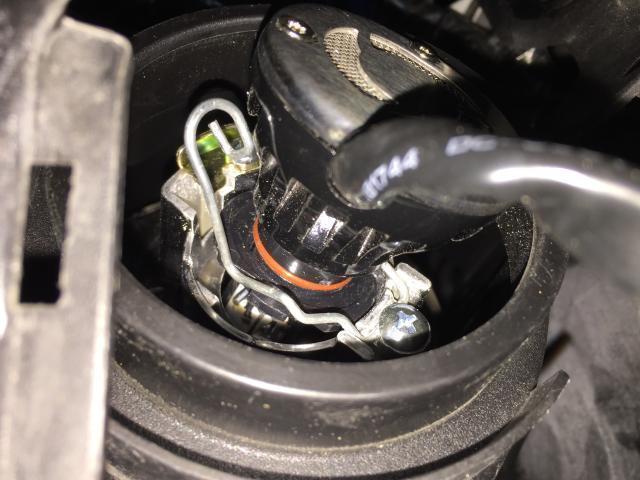
For the actual bulbs, I had to remove the rubber cover (as you can see from the earlier pics, bulbs actually have fans on the back of the enclosure). The bulb/fan units are supposed to be waterproof (although I didn't try dunking them in water to test, as some youtube videos have), so I'm going to leave the cover off entirely rather than cutting a chunk out the middle. Given these are the high beams, they're housed pretty high up in the front fairing so I'd imagine there's a low risk of much water getting up that high. Finally, the actual male to female spade connections are no longer on the back of the bulbs (see below), so it should be safe enough. I hope. There was a bit of bending required with the retaining bracket, I had to position it in between the front him and rear bulge of the bulb before fitting the bulb into the housing, even then it took a bit of pressure.
Final task was to just connect the male spade from the bulb into female spade in the connector. Again the fit was snug so I can't imagine them working lose:
The LEDs come with driver units, but there's enough space in both the side trims to house these, even with the fuse box in the right one (see above). I imagine the side trims are well protected from the elements, so I didn't bother putting insulating tape around them, might do next time I go in there just to be safe.
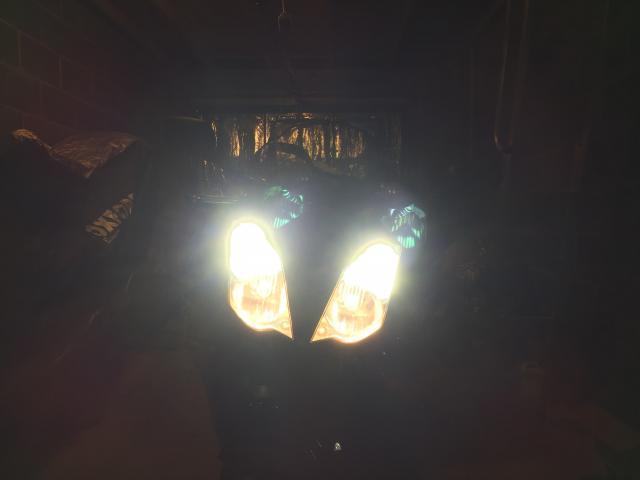
It only occurred to me as an afterthought to take photos and document this, so unfortunately I don't have comprehensive before/after comparisons. But here's one of stock main beam from a few weeks back:
After the mod, but with the non-LED low beams:
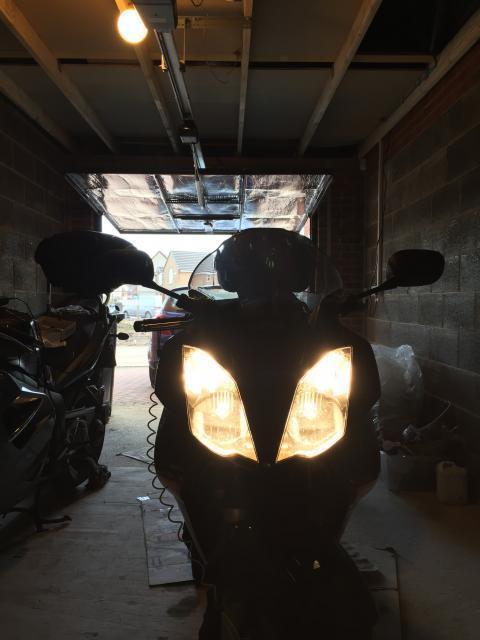
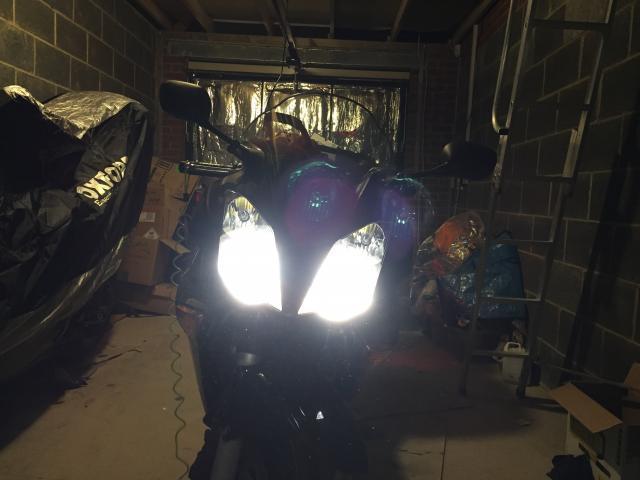
And after the mod with the LED high beams:
It's noticeably brighter with the LEDs on high beam but the above shots don't do it justice, think I needed to wait a bit longer for the camera to adjust to the change in light conditions or something :/ I haven't had chance to take it for a ride yet, but if anyone wants better photo's I'll try and take some of the light spread etc...
The only thing I'm not 100% convinced about is how the rim on the H7's fits into the headlight housing. They aren't going to come out, but I noticed there was a bit of play, the bulb could slightly 'wobble' if I shook the back of the fan or cable. I'm not sure this could happen from just riding the bike, I wouldn't say it was loose, but if it proves to be a problem I might use some neoprene foam I've got lying around that I could cut to shape to create an improvised washer/grommet just to give it a bit more support and apply more pressure on the retention bracket. There's probably better stuff than foam, but it was lying on the shelf next to the bike and was the first thing to come to mind!
As mentioned, I've only done this for the high beam lights, mostly to reduce power draw. I've no intention of doing the low beams right now, VFR seems to be brighter than most bikes at just stock. But if I were to do them, I'd follow the same steps as above, although I'd want to make sure there is no wobble with the bulbs in the housing. I guess if there's a wobble with high beam it shouldn't cause too much of an issue (by definition nothing should be close in front of you if you're using highs), but I certainly wouldn't want low beams wobbling and blinding oncoming traffic!