

alexandervf
-
Posts
13 -
Joined
-
Last visited
Content Type
Forums
Profiles
Gallery
Blogs
Downloads
Events
Everything posted by alexandervf
-
The Rebirth Of An Rvf400 Wire Harness....
alexandervf replied to alexandervf's topic in Modifications
I bought all the connectors from eastern beaver. You will be needing : Most of the connectors are under this category, see the link below. (all these connectors are sealed type and are expensive. You can choose non sealed if you want to go cheaper at the .090 inch pin size http://www.easternbeaver.com/Main/Elec__Products/Connectors/Sealed/sealed.html 1x 4 pin male and female (.090 inch) 2x 9 pin male and female (.090 inch) 1x 2 pin female 2p250L (.250 inch) 1x 6 pin 6p250cna for your R/R (.250 inch) 1x 2 pin male and female (.090 inch) 1x 8 pin male and female (.090 inch) 2x 3 pin male and female (.090 inch) 2x 3 pin male and female 3p250-cna (.250 inch) Fuse box terminals as many as you want H4 socket 2 or more (.312/.305 inch) It is best for you in order to avoid double orders to buy one of each plug more as a spare ...just in case. Also you will be needing : B-48's and B-49's as many as you can buy 30 or more of each. They are VERY useful because you will have to join cables like your original harness is. If you decide to use the SH series of REG/REC you will be needing the 6p250-cna plug. If you decide to use the FH series of REG/REC you will be needing the Furukawa QLW .250” Connectors. That's most of it. -
The Rebirth Of An Rvf400 Wire Harness....
alexandervf replied to alexandervf's topic in Modifications
Good luck with your project on november Rcdekker. If you like this kind of job, you will have a good time and you will also have an outstanding outcome. Thanks -
The Rebirth Of An Rvf400 Wire Harness....
alexandervf replied to alexandervf's topic in Modifications
I for one couldn't agree more....it's a pain in the a$$ but can you imagine the size and weight of the harness if every device on the bike had it's own wiring ??? !!! I do not find it to be all that wrong, it's just that the fabrication methods of the early 90's are poor to our 2013 eyes. Indeed, if you were to start this project.... it would be MASSIVE as it is very expensive, but , you will also gain A LOT. -
The Rebirth Of An Rvf400 Wire Harness....
alexandervf replied to alexandervf's topic in Modifications
Currently...he .... ....is responsible for the bike..... ...BUT don't be fooled by his innocent look, it can be deceiving,.....he has good and reliable friends.... -
AXL 4881 resize zps7209a09e
alexandervf commented on Veefer800Canuck's gallery image in Member's Gallery
 Well i use rear view mirrors...they were not on this photo shoot...
 -
The Rebirth Of An Rvf400 Wire Harness....
alexandervf replied to alexandervf's topic in Modifications
-
The Rebirth Of An Rvf400 Wire Harness....
alexandervf replied to alexandervf's topic in Modifications
All pictures are there....i can see them....if anyone else can't see them please confirm. Don't know if there was a temporary problem with photobucket... -
The Rebirth Of An Rvf400 Wire Harness....
alexandervf replied to alexandervf's topic in Modifications
Thanks Veefer!!! -
The Rebirth Of An Rvf400 Wire Harness....
alexandervf replied to alexandervf's topic in Modifications
Due to the fact that i had plenty of time waiting for the spools to arrive, i said, why don't i give a good clean treatment to my carbs....what do i have to lose??? Yes right.....Take a look what i found .....The "No brain left" "Neanderthal" mechanic that i trusted him with my bike had a "faster" way in his mind of removing the carbs from the bike, obviously, he hit them from underneath.....The result a good size crack.... So ..... this part of the carbs had to be replaced. Bought a used set of carbs and replaced it. Given the opportunity i also cleaned thoroughly the carbs inside-out . Replaced also every o-ring, they where past their best and did not want to go through this again. Carbs broken appart.... The result.....after putting them back together (and after replacing the broken part, of course)..... I have done A LOT more on the bike such as cleaning the starter motor and replacing the brush as well as the o-rings and oil seals, i just did not take photos of these....which i have regretted. -
The Rebirth Of An Rvf400 Wire Harness....
alexandervf replied to alexandervf's topic in Modifications
Thanks everyone for your kind words!! -
The Rebirth Of An Rvf400 Wire Harness....
alexandervf replied to alexandervf's topic in Modifications
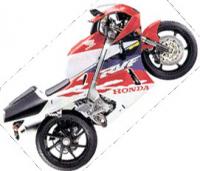
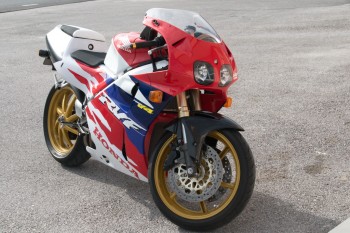
Here are a few shots of how my bike looks today..... I have also done the carbs.... pics will follow....soon.... -
Hi to everyone once more......... As the title states, i decided about a year ago, after facing a few (Critical) electrical problems to build ,reconstruct,revive ... you choose the word that suits best, the whole wiring harness. The wire used for the job was a high grade teflon coated wire with silver plated strands bought from the US. The connectors are new type, splash proof, sumitomo's and furukawa's from Japan. I have also rewound my stator, made new spark plug wires installed the (rare to us here) ER9EH IX spark plugs and replaced almost every incandescent bulb with leds. A volt meter has been installed as well. There were a few more jobs done as well which i will show you ..... So.... These are spools that were used (there are more, they were on pending orders).... Here you can see the spark plug wires..... I had to... lets say... "modify" some older spark plug wires in order to "extract" the part that i needed... In the following photos, you will see the connectors used for the harness.... The following photos show the beginning of the harness build.... Smaller clocks loom...(did not mess with the T10 rubber bases, could not find them anywhere on the internet as a oem part).... Side stand switch..... Main keyswitch / ignition.... Tail light loom.... Left hand side switchgear...... The Left hand side switchgear was later replaced by a cbr900 left hand side switchgear such as this one..... The right hand switchgear..... ....Which was later replaced by a CBR600 right hand switchgear such as this one..... As i said above.....leds almost everywhere.... The clocks.... .....And the tail light unit.... .....Testing of the tail light... The stator.....a painful job...but very rewarding if done right. Here is what it looked like before i messed with it...... The core...cleaned... Preparations for the rewiring of the core.... The stator....FINALY....ready to be submerged in the special resin... Submerging the stator in the resin... The stator...ready for installation... The volt meter ....... Thermo-switch / sensor, so that it triggers the cooling fan when the R/R reaches 46 degrees Celsius ..... Other mods.... Hand made R/R stainless steel base... Relocating the R/R under the pillion seat .... Hand made stainless steel V-piece mesh.... Top radiator hand made stainless steel mesh (front and rear of the rad)..... TIP: Some of you may already know it , some of you may not. If you are about to mess with teflon coated wires they do not strip the usual way.....You will need a special tool for striping teflon wire insulation. If you do not have the money for such a tool (I did not) you can make it like i did....you will have to brake down one of these.... and make something like this.... This was a job that took almost a year to complete. It was a painful job (especially the stator) but i very much enjoyed it because i LEARNED A LOT. Thanks for reading.