Leaderboard


Popular Content
Showing content with the highest reputation since 04/13/2024 in all areas
-
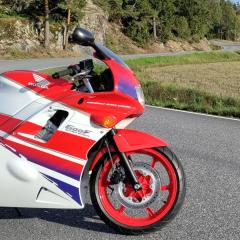
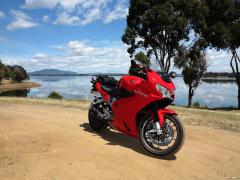
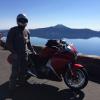
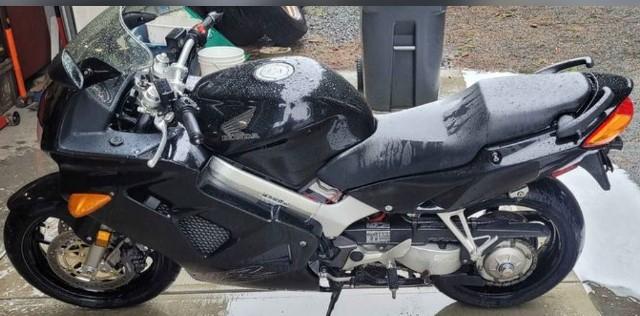
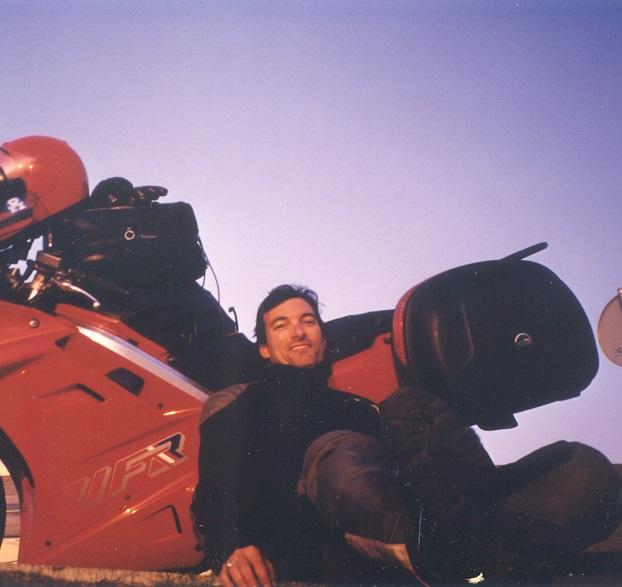
May '93: Cherry blossoms at Beacon Hill park made a good backdrop for this shot of the new-to me '91 VFR750.
 5 points
 -
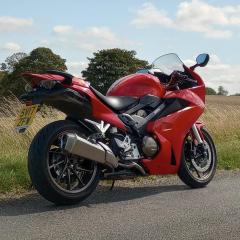
Never been an issue with all 4 VFR800's I've owned with after market exhausts fitted, 1200 shouldn't be any different. O2 sensors means ECU runs in closed loop, so air to fuel ratio is continuously optimized. Think you're worrying about nothing. I'd probably go back to the OEM type airfilter if it was mine! Good Luck with the bike, take it for a good test ride. Check it's maintenance history. Coolant change, brake and clutch fluid replacement - should have had a few of those! Oil and filter, etc. P.s. I'm sure there was a rear wheel drive unit issue recall for the early 1200's. Make sure this has been done.4 points
-
Hi Mello. Thanks for the info. Saw his name on the member list. I don't want to join the ST-owners forum, but if you're on it? Can you send him a PM, tell him to get back to the real forum! VFRD misses him. Cheers3 points
-
If there is decent airflow through the radiator then the bike should sit at/near the thermostat opening point of 78-80C or 176F irrespective of the ambient temperature. When you get stuck in traffic (no air passing through the radiator) the temperature will rise to around 100 (212) and should cycle up/down as the fans switch on off. To get higher than that would suggest maybe the fans don't work or the thermostat is stuck. Let's assume the cooling system is full and the reservoir has a decent volume as well (you checked that, right?). If the radiator stays cold when the engine starts and then suddenly gets too hot to touch around 176, the thermostat probably works. If the radiator gently warms up as soon as the engine starts, the thermostat is probably jammed half-open. If the radiator never gets hot, the thermostat is probably jammed shut. Check the fan switches itself on around 212F and off a few degrees below that. Some have altered the fan wiring to put a manual bypass switch in place, so if you are going to get mired in traffic you can start the fan earlier.3 points
-
Not sure if this has been posted on VFRD but long time VFR specialty product company Tyga Performance is now selling full RC30 conversion kits to suit 4th Gen VFR750. All bodywork, subframes, infill panels, exhaust system... the works. Even a replacement fuel tank. They look incredible and are literally plug and play. Bodywork Set 1, GRP, Painted RC30, RC36-2 RC30 Style, Street | TYGA-Performance The interest in this kit on the Facebook "RC/RVF Replica Group" is immense and a lot of bikes are going to be converted, so now's the time to grab a 4th Gen. Especially a cosmetically challenged one.3 points
-
I wish the video had a skinny guy try to use it...3 points
-
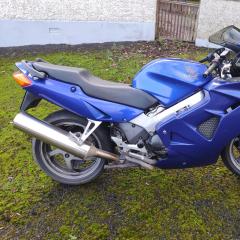
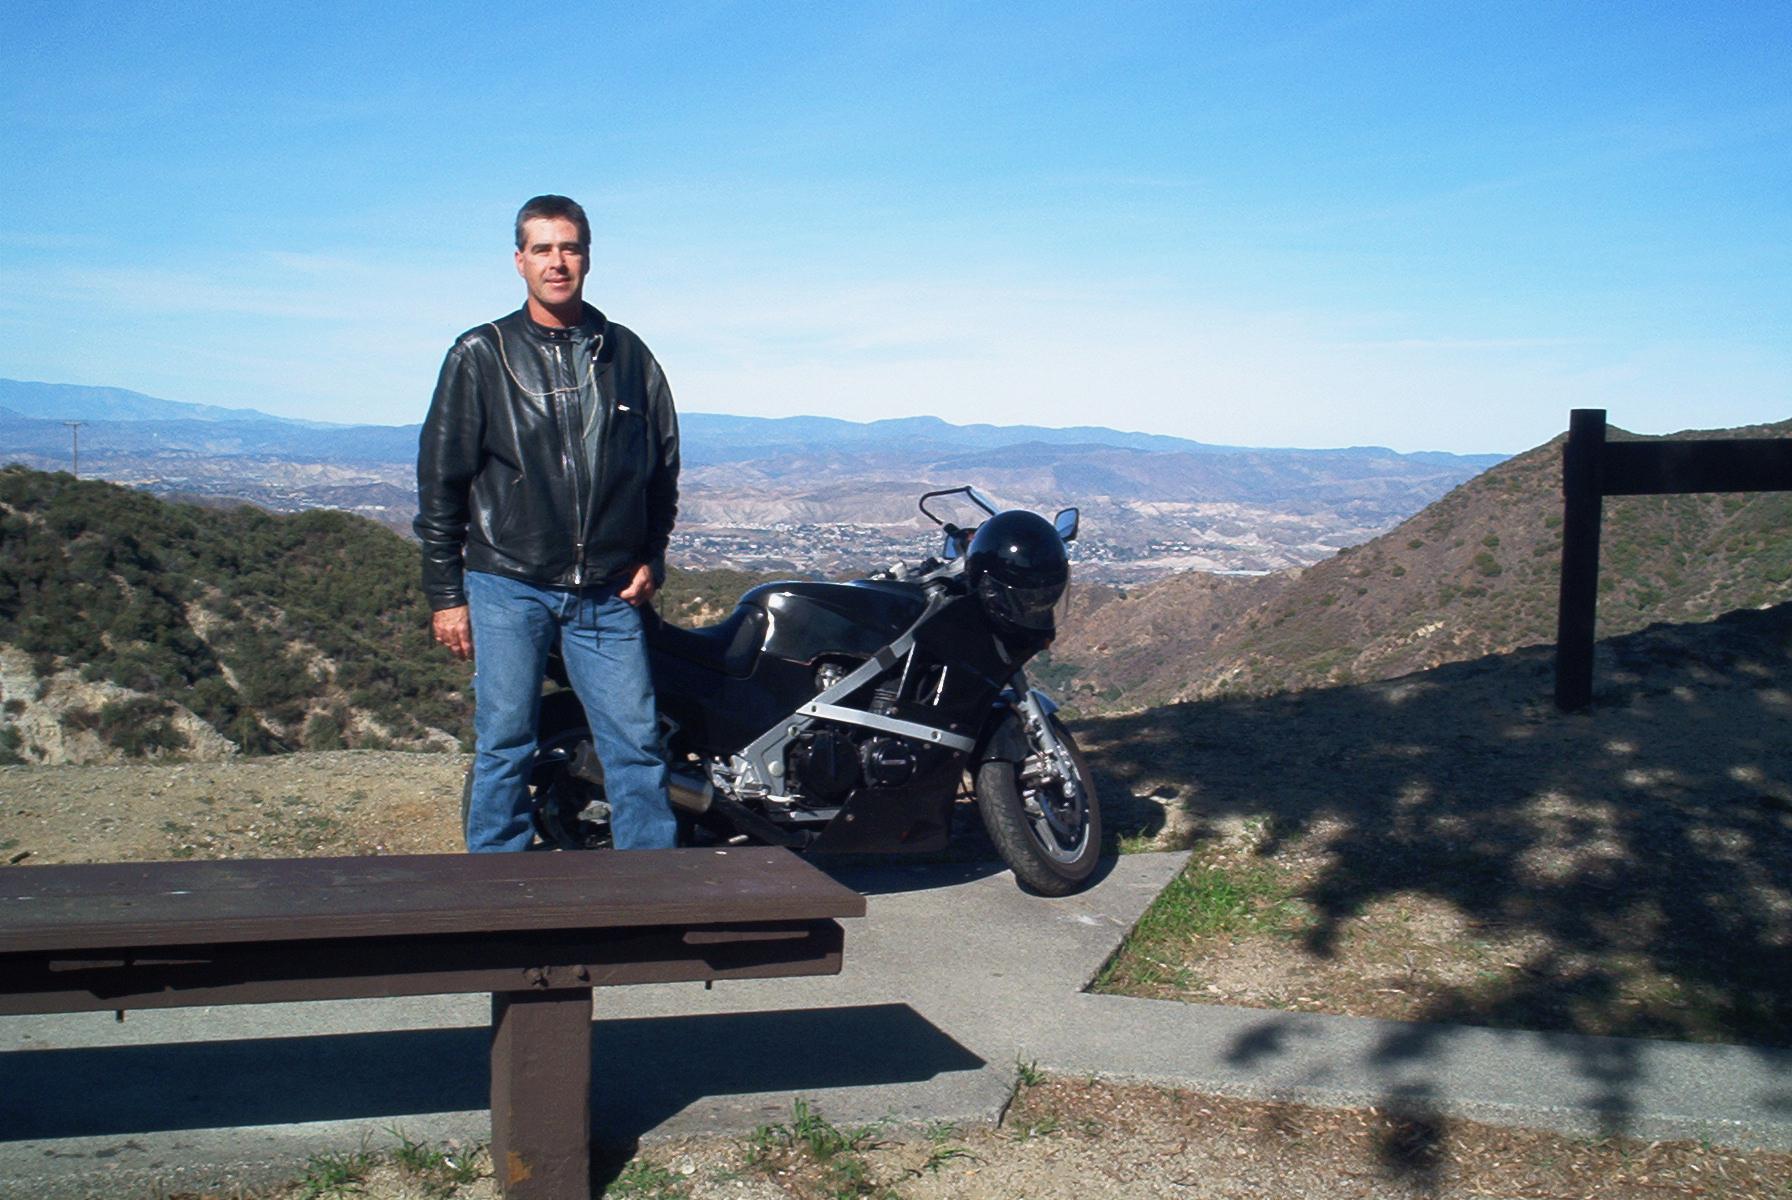
...I bought this lightly used 2 year old VFR750, and haven't been without a Honda since then; several VFRs and a handful of VTR1000F. I'd bought the bike late that afternoon, and being early March it was a dark, damp first ride to visit my folks. I'd love to have it back, and in that condition.2 points
-
Errrrr......thanks. Everyone is entitled to their opinion and I'm not going to challenge yours 😆2 points
-
The RC46 crank case & major assemblies are taken directly from the RC45 which in final race trim was putting out 195rwhp @ 14K/rpm. The only major parts difference was the pistons & Ti conrods & the crank+cams being timed differently. The big bang RC45 crank is timed at 0 degrees, such that it acts like a pair of V-twins joined together. And the 2mm shorter stroke allowed for the higher race RPM. That setup creates huge loads, the VFR's 180 degree crank is much kinder to the cases & bearings. Due to the total lack of RC45 crank case spares, race teams use 5th gen crank cases with the swingarm pivot ground off. They then bolt straight in to RC45 frame and all RC45 innards just drop in.2 points
-
Rode a few bikes as a youngster, but didn't really start riding until '98. Oldest pic I have of me & the '87 ZX600 is from '05. First VFR was '09.
2 points
-
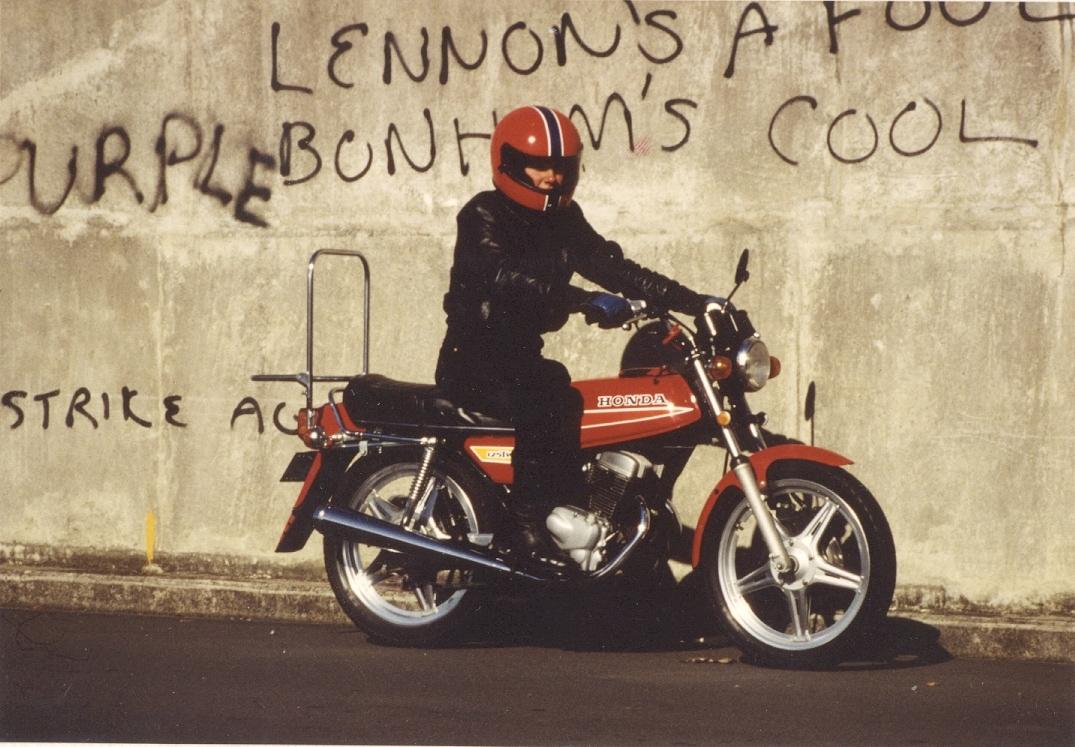
I can't quite match the vintage, but here we are in 1982, me and my mighty CB125T; two tiny pistons frantically going nowhere! 12000rpm redline! The T did not stand for torque however. This was my first motorcycle and started my love afair with Honda.
2 points
-
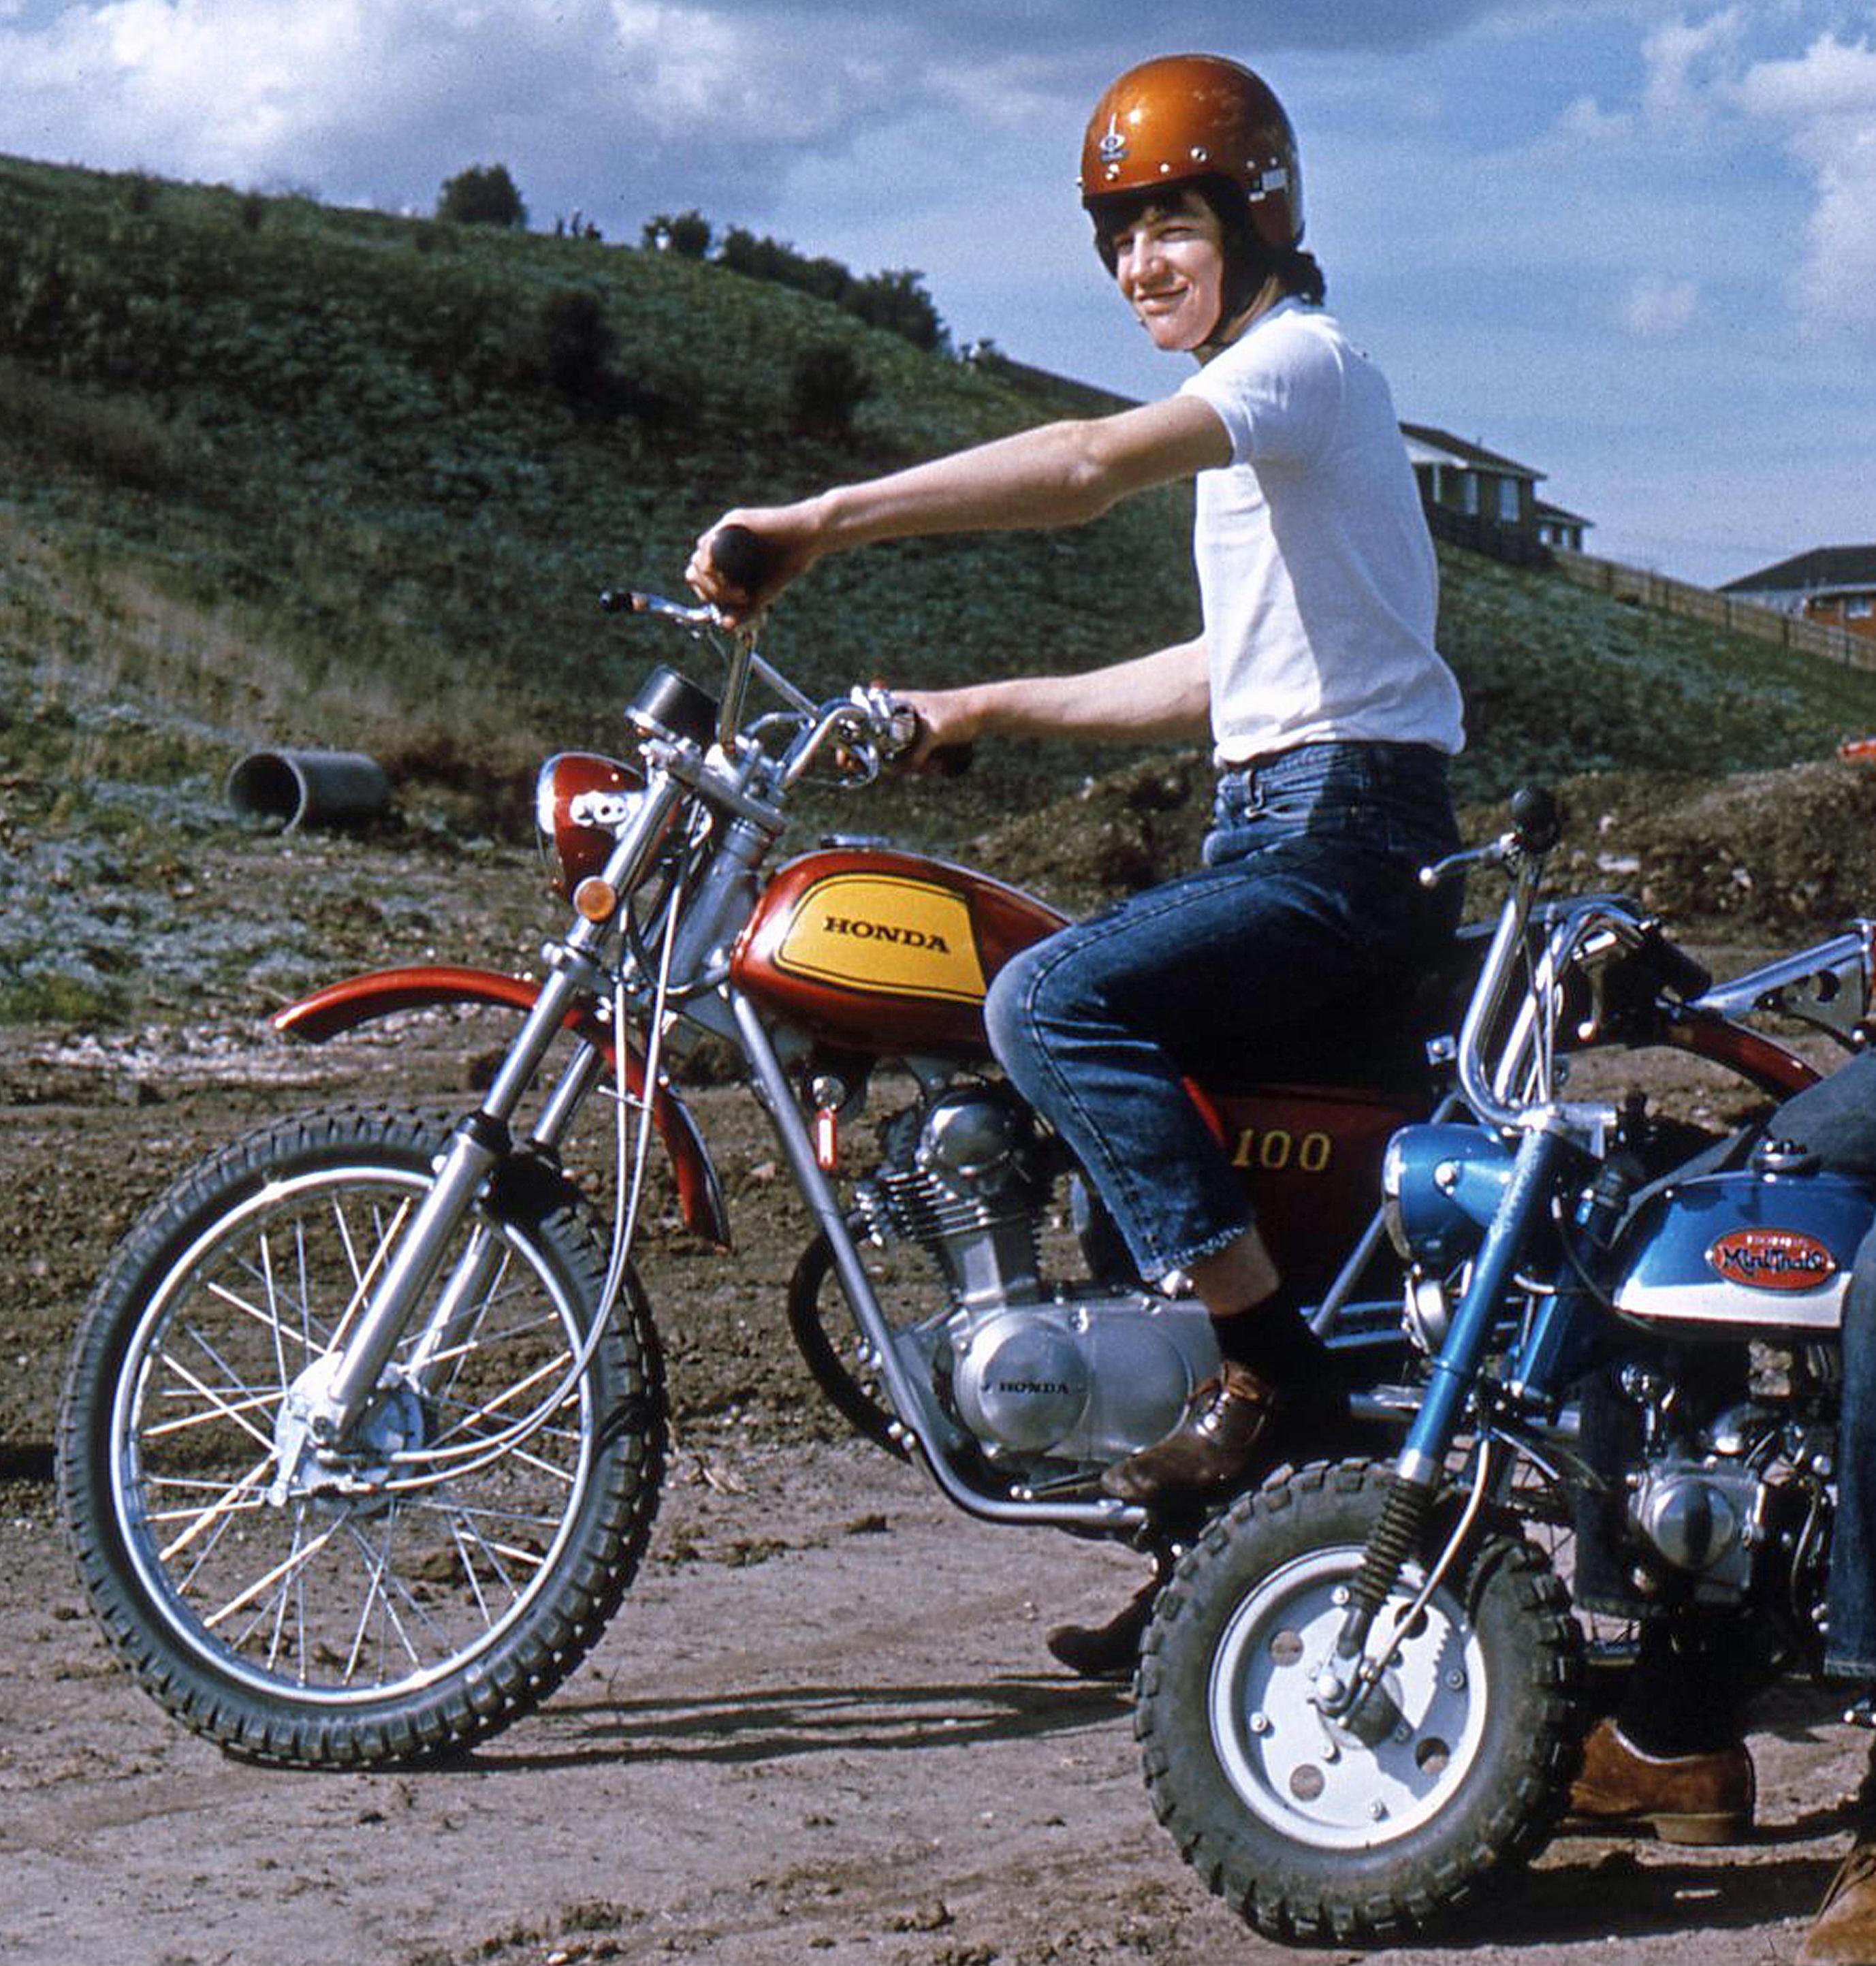
Just for a laugh!..... 1972 - Yikes, 52 years ago!! My beloved Honda SL100, absolutely had a hoot with this bike. Worked three paper delivery rounds per week to save up for it. I'd really give this bike a work out and never had a fault with it. That bike won me over forever with Honda's build quality, reliability and durability. My buddies little Honda Mini Trail was also bulletproof. ATGATT...only partially back then. Cheers
2 points
-
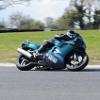
OK Lorne. I didn't go back far enough (the end of my digital photos is ~ a little over 20 yrs ago). However, here's an action photo of me about to drag my knee, wearing, obviously, ATGATT. I challenge all here at VFRD to name vehicle brand as well as engine. Cheers!
2 points
-
Oh greeze, man, id prefer to crash on a motorcycle........😏2 points
-
I did it again, now I have a low km 1998 to keep the 2000 company. That's two in the garage now but is my 4th in total.
2 points
-
I know it made the rounds on the FB group. Like you, I figure it will be tough to find a 4th gen starting about now. May be a good idea to hang on to an unmolested one even.2 points
-
I am the muttonhead in this (what should be) finale in the VFR saga. Looking at shock length and not bike ride height caused me many hours of headaches. Even I can't believe it. The next time that each shock is out I will measure to compare. For now, they both stay bolted in and as they are. Yellow VFR00 hot sag numbers came in perfect after some adjusting. Front is 24/34 and rear is 10/30. This is after a few changes to get rear ride height very close to VFR98, which I love. The yellow bike front forks are a touch (1.5mm) higher in the triples (front of bike is lower) and the rear is a touch higher (w/in 1.5mm) measured up from the axle...but close enough for a lackey. Simply everything feels better with the geometry changed. Braking. Seating. Pressure on arms. Mid corner direction changes. Everything. Patience paid off. I was ready to light it on fire...like I am with the ABS FJ1200 wheels/brakes that cost the earth. I rode both VFRs back to back today to verify/set hot sag. While they feel different because the components are different, they are both pretty excellent. Absolutely adequate for any kind of riding. I planned to be zippy in the mountains tomorrow, but all 7 buddies bailed, so I'll likely just roll around the lakes here, which is a 4-5 hour ride.2 points
-
Well well. A Green/Blue wire! The wiring diagrams Are Correct. And you wonder why you've made me a "Grumpy Grum"......Should be as obvious as the correct Green/Blue wire I'm seeing for Temperature Input Not a "blue with gray dashes" and that it took three requests for you check it. As for those gray dashes you mention I have no idea what they are for. And why only now, you're admitting to having ordered a replacement ECT sometime back, after you stated on the other post (2000 VFR800 fuel pump no power) that you did the Service Manual tests and suspected it was faulty back then? 30.1 Ohms is Miles out of tolerance. You could have saved us all a hell of a lot of time wasting, sounds like another wild goose chase per the ECM saga, I'm convinced you knew about the blown ECM all along. And this - "BLUE 10P wire is blue with gray dashes good continuity." Question asked, continuity to What? You were looking at the Lb wire Light Blue - For the R/H Turn Indicator Light! And this - "item 8 You are incorrect the wire is not green/blue it is blue with gray dashes" Sorry not so! But correct if chasing a Turn Light fault. Seriously, trying to sort out your problems via a keybord 14,000km away is near impossible (well for me anyway) when your feedback has been confusing, with very little clear info, jumping off track, or not answering questions, it just makes the whole interaction messy, difficult to follow, and time wasting. As for the insult - "Grumpy Grum says he truly is the expert." I've never said that in my 67 years existence, I don't hold back or hide info from people and enjoy passing whatever helpful info I may have to help others, even You! I've worked with people who kept important, helpful info from others, a job security issue perhaps, that ain't me. But frankly I couldn't care less mate! Enough said, good luck with it all, guess you don't believe this, but I hope you get that bike up and running ASAP. This time I'm definitely done. Cheers2 points
-
Electrical fault finding can be very frustrating particularly if ( like me) one is not that experienced at it. That's why many of us use the experts on this site. However, it is really important to follow the steps of advice exactly and report back findings on those steps as requested. That's also the better way to learn because the approach has logical structure. Missing out bits, giving half answers or introducing new stuff makes having the conversation frustrating or downright infuriating. We're all human and everyone offering help on here is genuinely interested in getting a fellow biker back on the road. But being frustrated by half answers will test anyone's patience eventually. I do hope you get this sorted. Cheers!2 points
-
You can indeed just change the fronts and leave the rear with the original rubber lines. In fact getting at the connectors under the seat area for the rear brake lines on the 8 Gen is a royal pain in the arse. I did post about changing the fronts a little while back. I will try to find it for you.2 points
-
I am no expert when it comes to electrical stuff but going back to first principles and from what I understand from Grum's detailed and patient advice: 1. There is one relevant wire that goes from the ECT to the instrument panel. It's shown as G/Bu in the diagrams. But the colour may have altered with heat/age. 2. A broken circuit in this wire or a faulty relevant track in the instrument panel will show up as a permanently flashing 270 temp reading. 3. Use of a non OEM or faulty ECT sensor could also cause the permanent 270 flashing reading. Based on the understanding in 1-3 above my approach would be: 4. Confirm which wire runs from the ECT through to the instrument panel relevant pin and check continuity throughout the run including cleaning any relevant intermediate connections. If colours have faded or changed this will need patient methodical checking and I'd recommend a written note of what you find at each connection. If continuity in this wire is good the problem will either be a faulty sensor or a corroded or dirty track in the instrument panel. 5. There is a fault finding test in the manual for the ECT - run that to confirm or eliminate a problem with the sensor 6. If it's not the sensor you will need to check the tracks inside the instrument panel - there are posts on this site of how to do that I hope I've understood this right. As a disclaimer, I have no experience of a 5th Gen and I have not read the 5 Gen manual- this is taken from the advice you've been offered. Good luck.2 points
-
Hi Skids. That's a real bummer m8. I feel your pain! Yep that horrible point of no return, trying desperately to recover it or at least lay it down gracefully. I remember years ago doing damage to my leg femoral nerve by saving a topple over, the bike back upright without hitting the deck, but bloody hell, the resulting nerve damage was painful for weeks. You're definitely No "Muppet" m8, shit happens!. Given my weight at the moment I feel a little bit Miss Piggy ish! Hope you and the bike are mended ASAP. Take Care. Cheers.2 points
-
No shop anywhere near me would mount tires not bought from them, so they turned customers into DIY's. About 18 years ago I bought a Black Widow paddock tire changer and a HF balancer. The convenience factor became apparent immediately. I averaged 4-6 tires a year for myself and 6-12 for guys in the same position as me. I don't charge for it as motorcycles are my hobby, not a business. Also, it turned our to be a good way to meet the few sport/sport touring guys here in Mid Coast Maine.2 points
-
"one" what? Is this bike coming out of Winter storage for Spring by any chance? Sounds like you need the carbs cleaned/rebuilt.1 point
-
My dad would always tell me my car was worth whatever one person was willing pay on any given day. As to your low mileage example, the mileage will be a big plus but if the services all need to be performed, it's considerable these days and will bring that value down. There's a '00 5th gen in my area that is listed for $6500. My '07 with every farkle you can put on one is listed for $5700. I listed it here on VFRD for almost a year at a lower price and got zero replies. VFR guys are cheap sob's. I can say that because I'm one of you. I will gladly lower the price when someone shows some real interest. Unmolested 5th gens are harder and harder to find so you should get some interest. Start high and just be patient. Could I interest you in a 6th gen?😆1 point
-
Yes, and... After changing the oil, you need to RIDE for a good 45 minutes at full operating temperature to remove any moisture from the crankcases (provided you do not have any issues). Running a bike in the driveway, even until the fans come on, typically introduces moisture. That's why short trips on vehicles is so bad for them and their exhaust systems.1 point
-
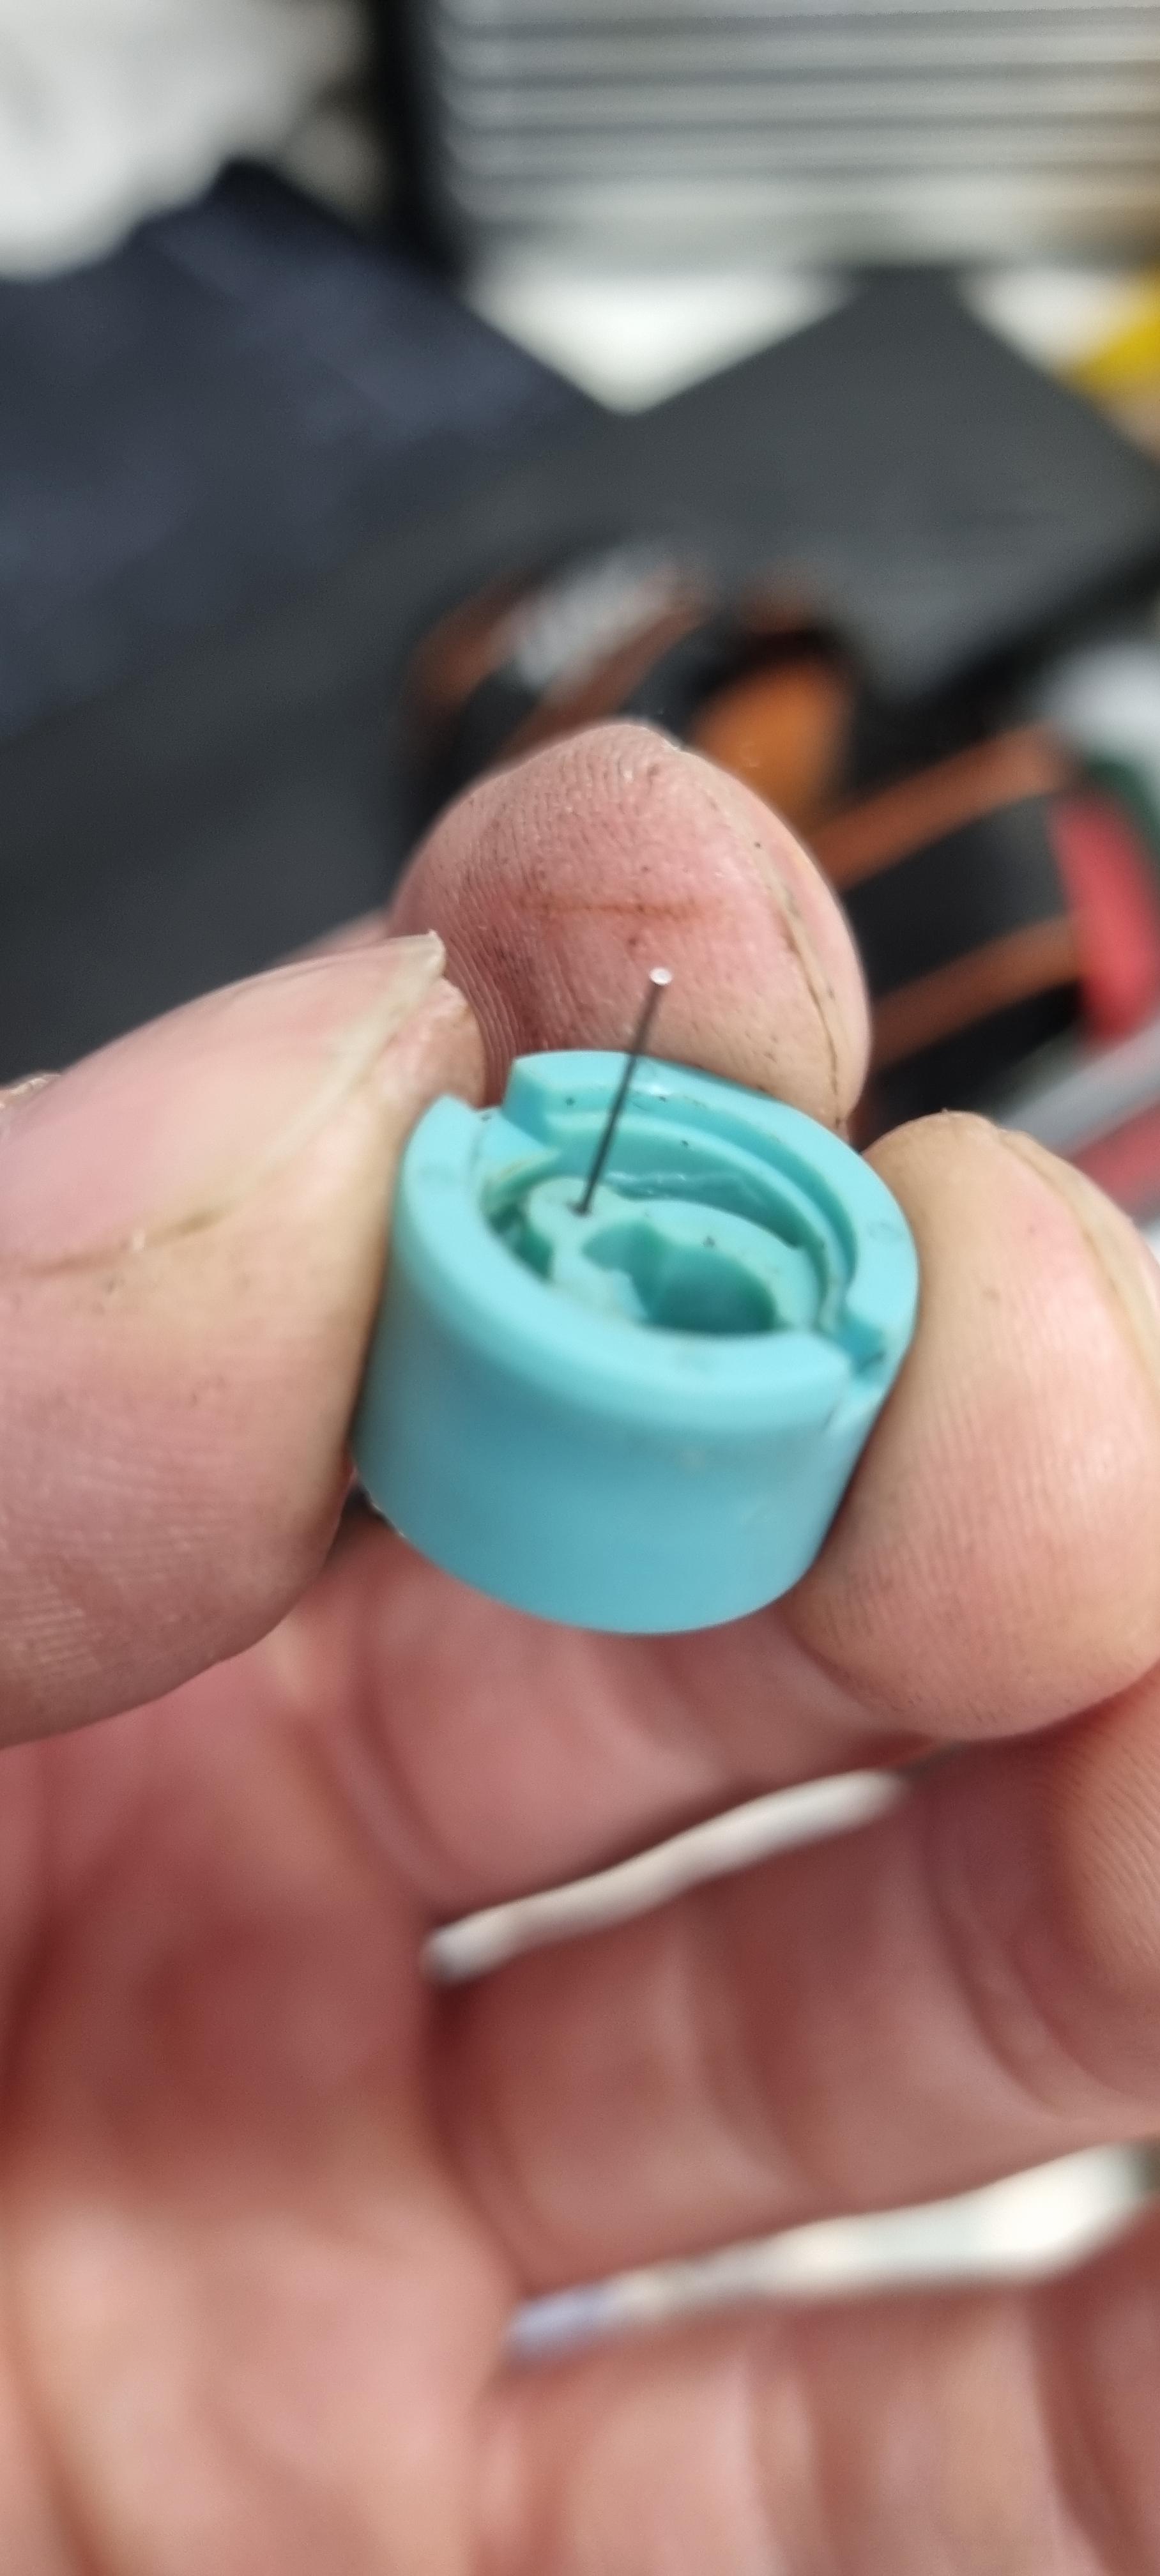
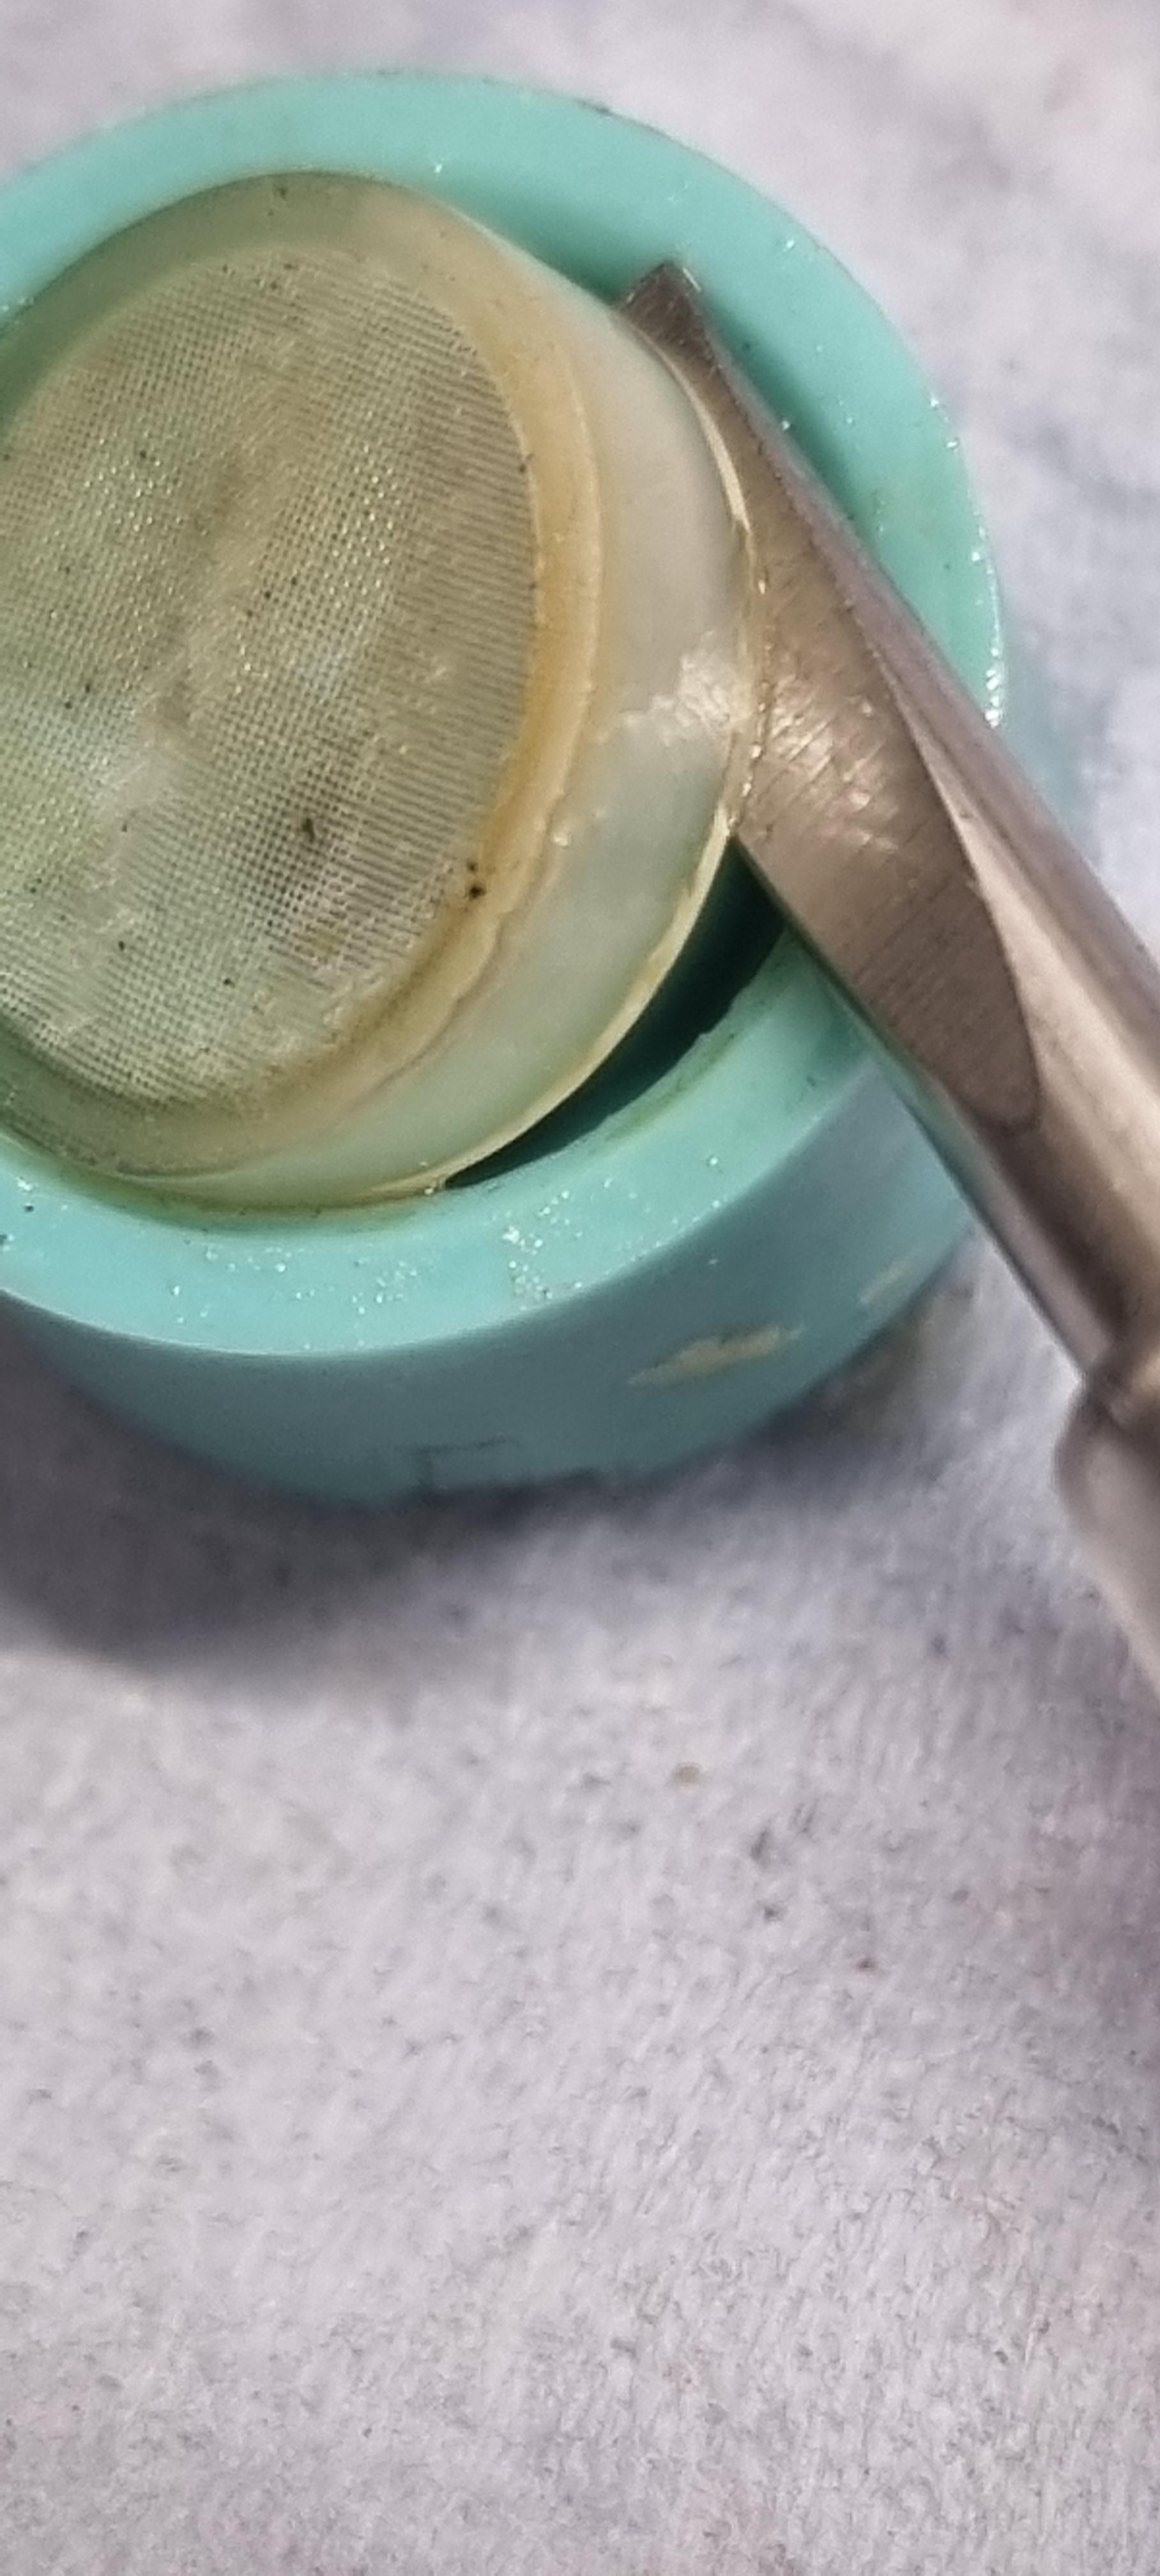
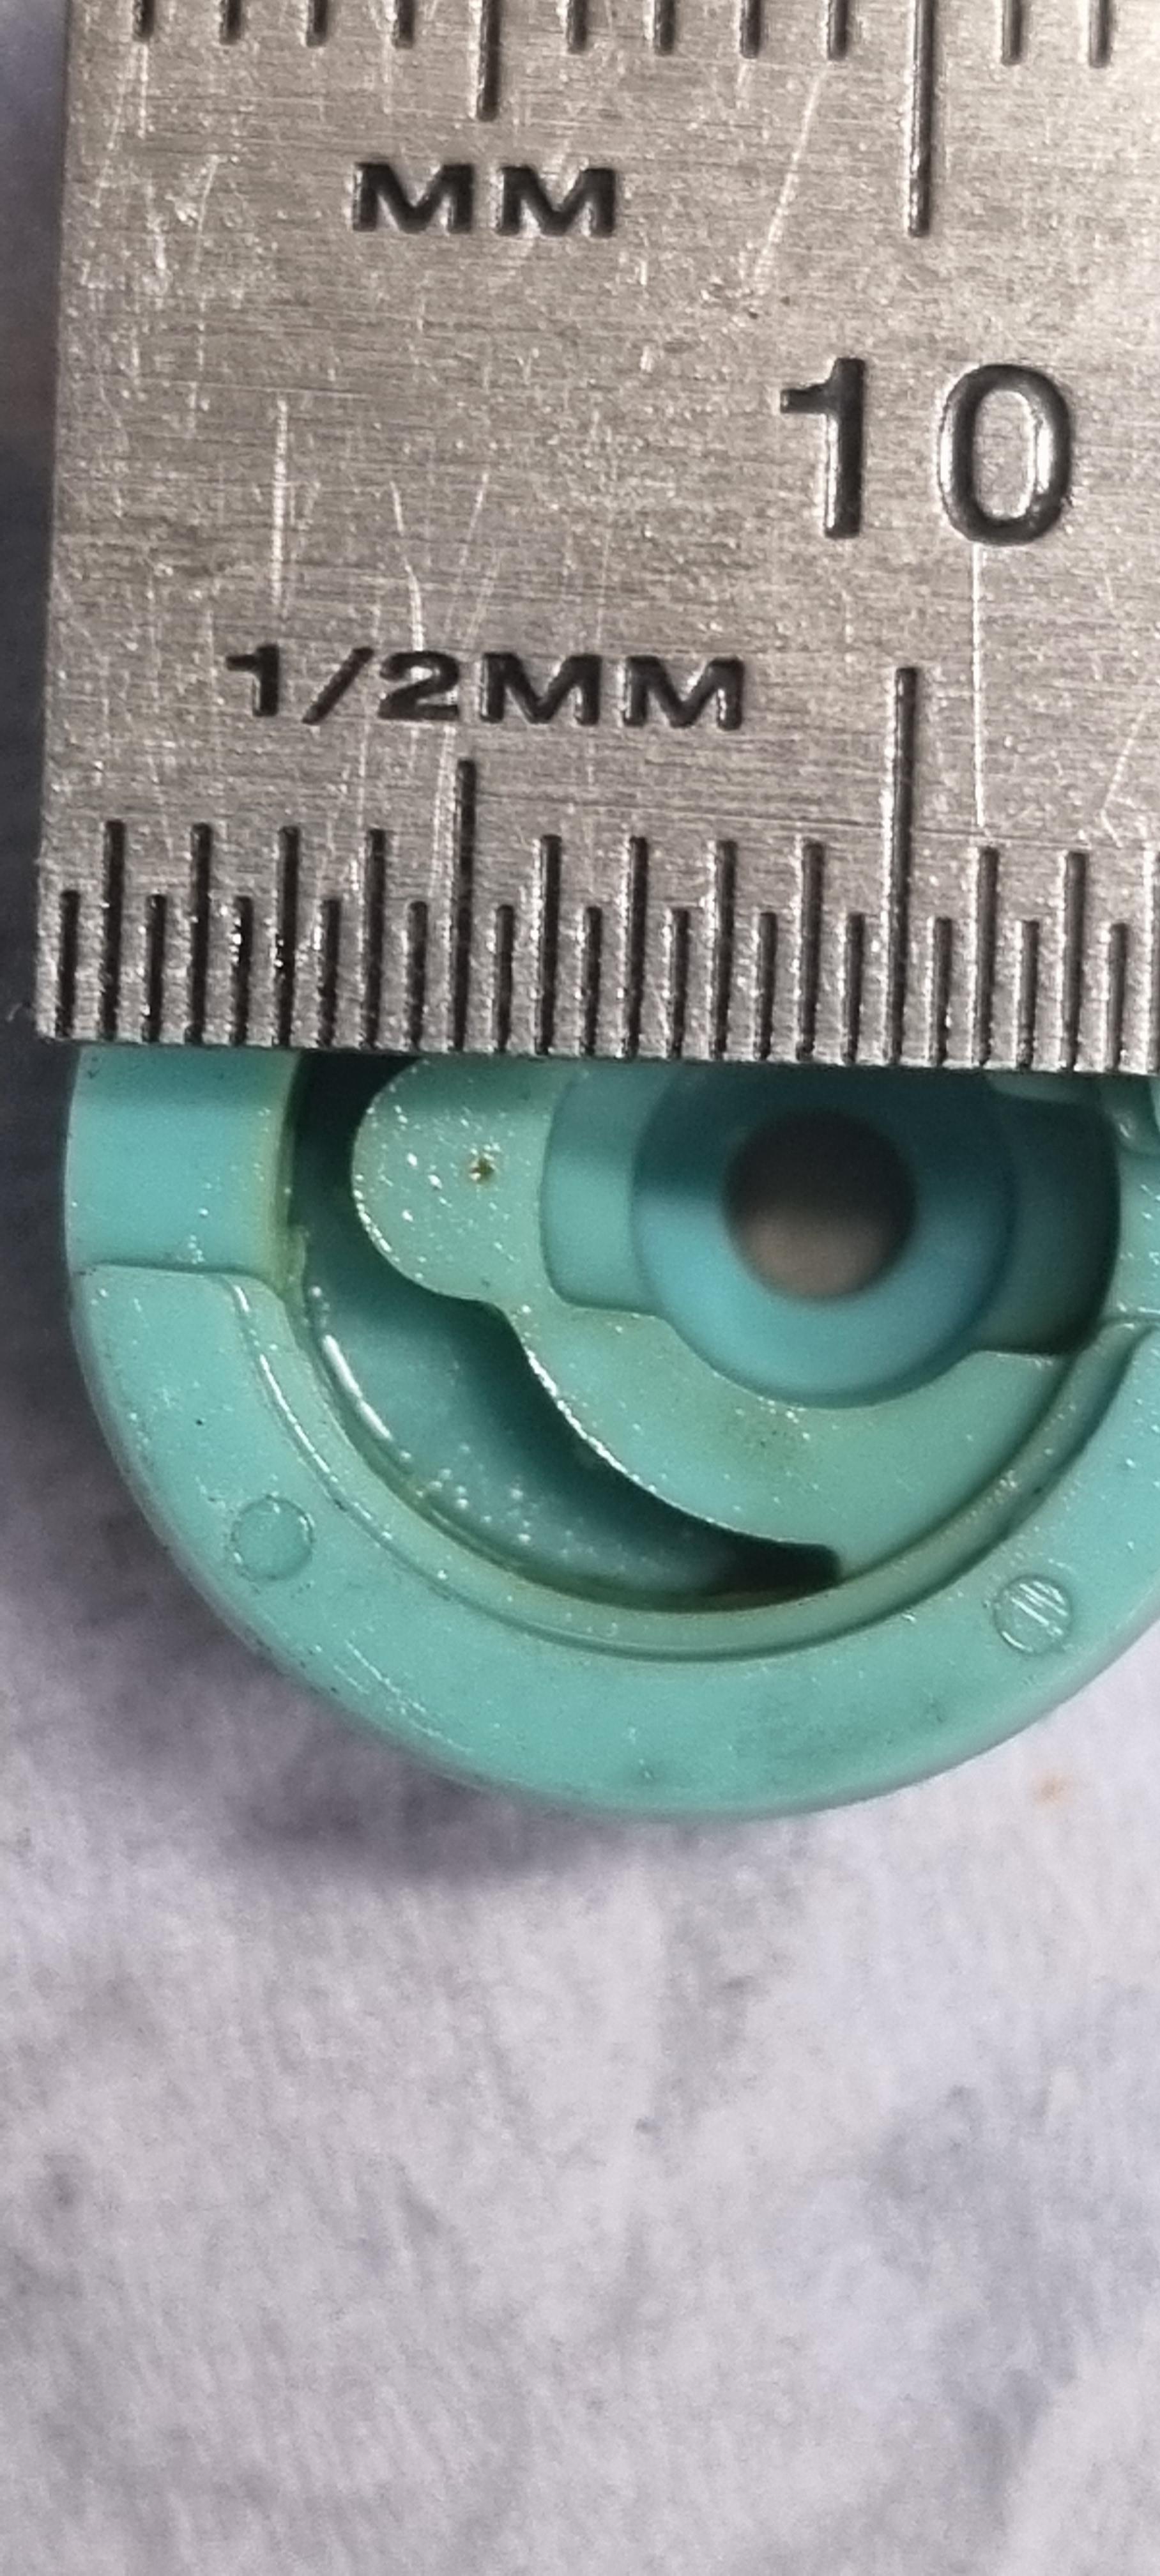
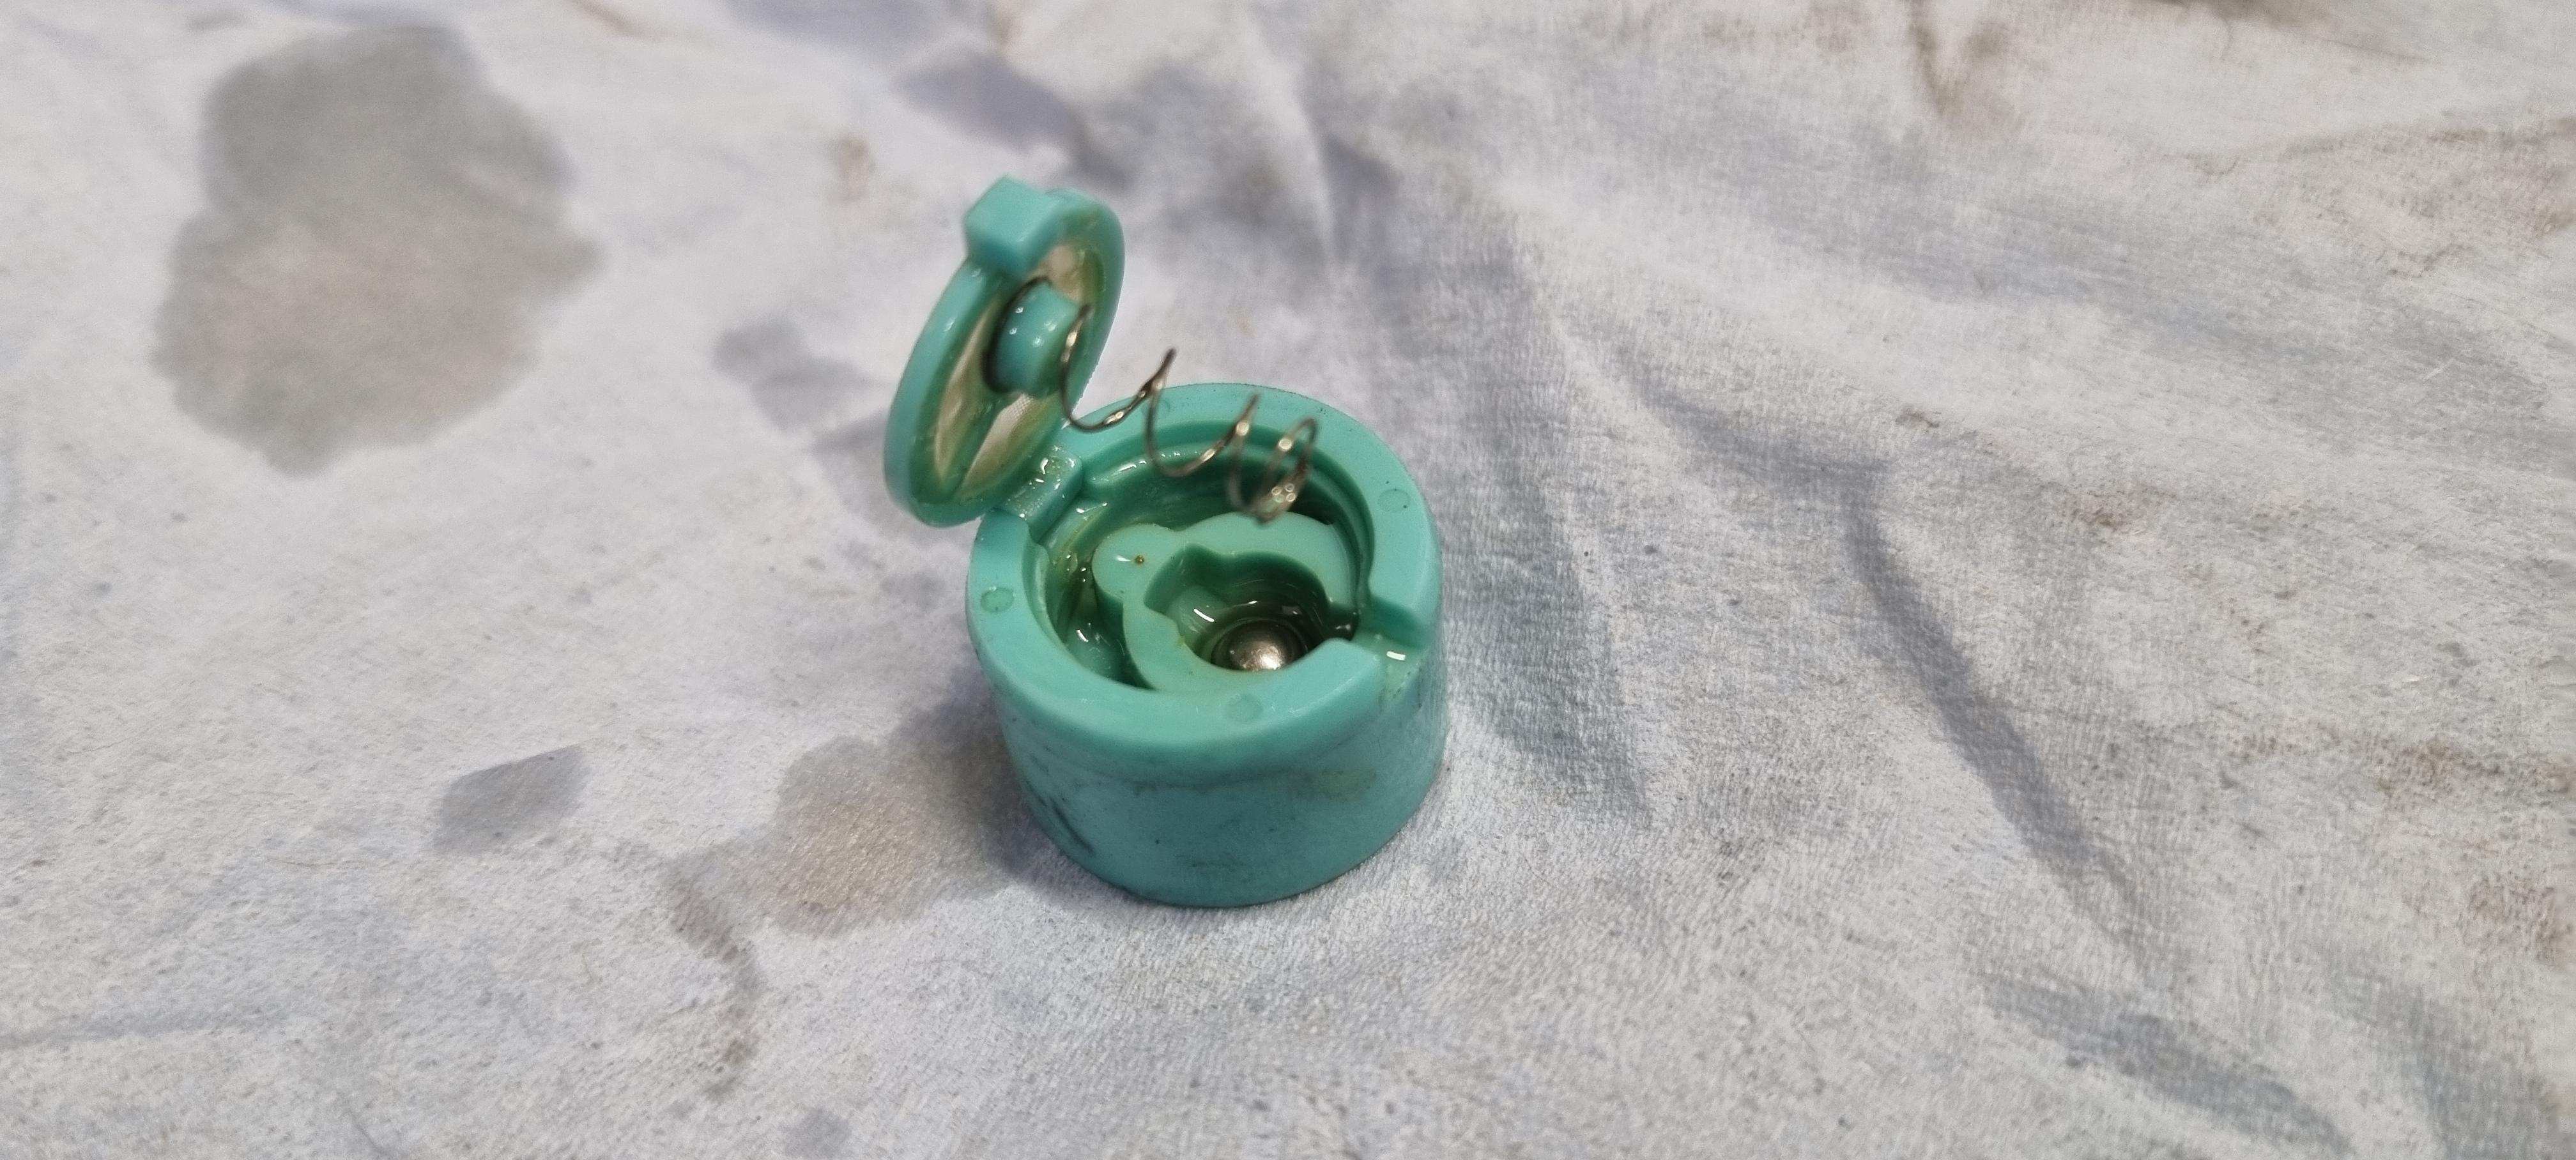
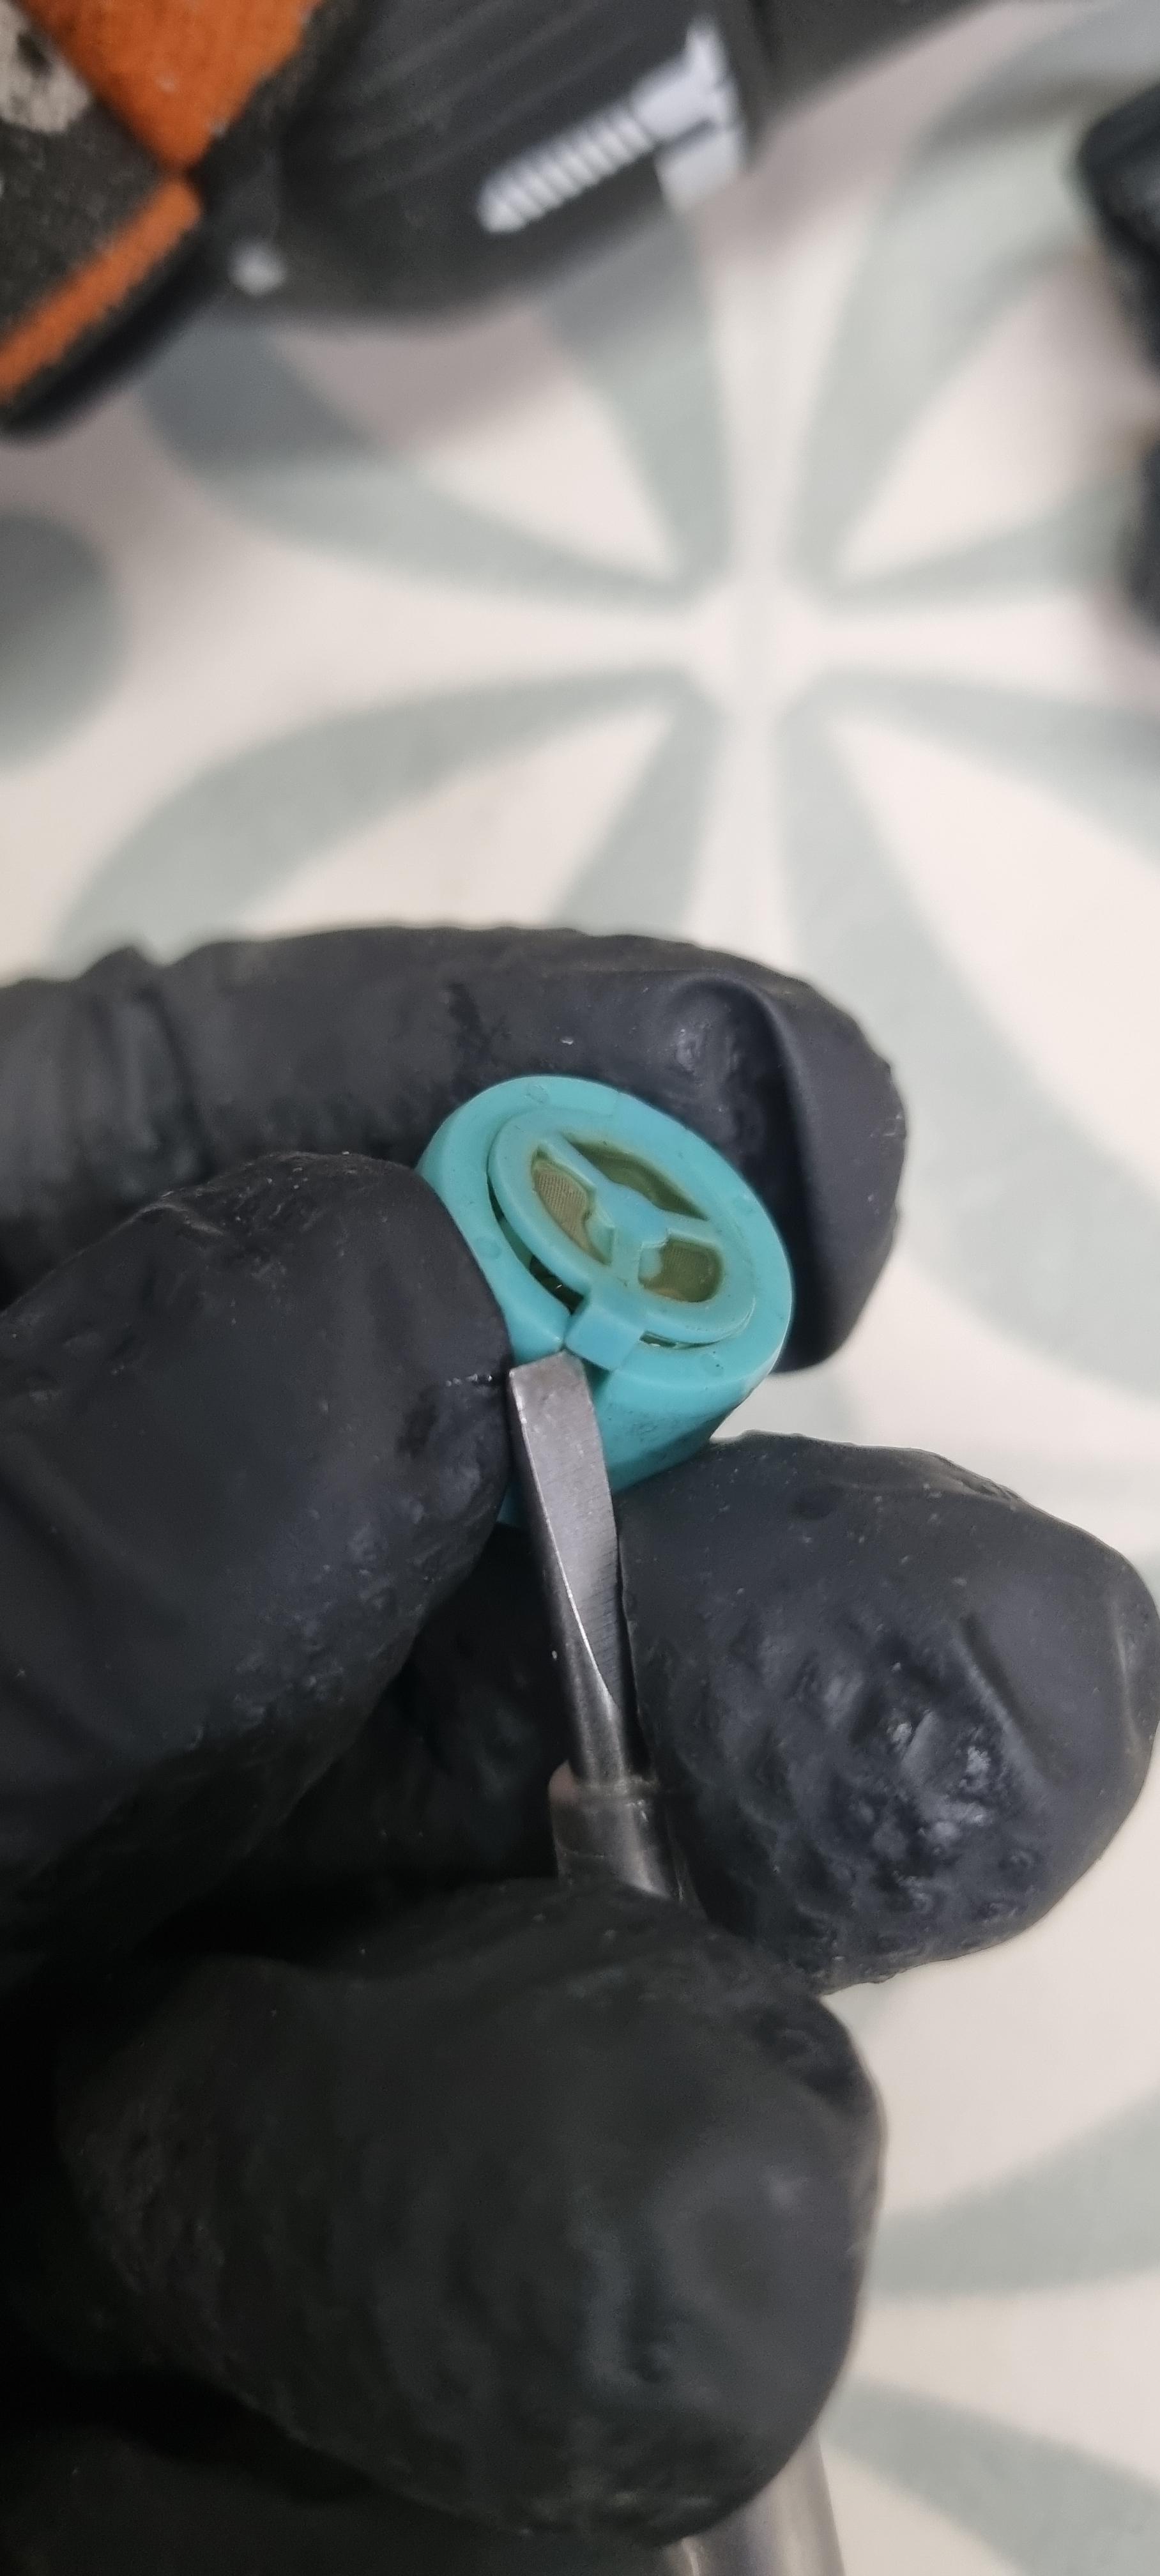
I was reading through the very useful thread below, but couldn't add to it, so I guess the best I can do is put it here, shame to split things up, but never mind! https://www.vfrdiscussion.com/index.php?/forums/topic/83194-rear-brake-locking-after-pressing-pedal/ Some more photos of the mystery green valve. This is a relieving check valve. The mesh is critical because the relief orifice is 0.2mm or less and I think people might miss it, so I'm documenting it here, The photos show me removing it, note the orientation, balls up please.... 😉 Red silicone pipe in the outlet of the master cylinder and it hovers out with ease (bearing in mind my 25 year old bike is almost as new condition.... yours might not be so free!) Mesh on both sides, the unseen side has 2 tabs of different sizes to prevent it being put together wrong, as it's eccentric. The spring and ball can be seen. The other side sort of resembles a bottle cap and it pushes into a face groove and snaps down, I used a 0.5mm drill to lift a corner and got a small flat bladed under it as shown, it was still a bit tricky/delicate even with the flat driver to assist. Now shown around the 5.5mm mark on the metric ruler, you can just make out a tiny orifice, this is the relief port. It's so small I can measure it, but I think it is around 0.2mm maybe less. The smallest drill I have, is 0.35 so I can't clear it with a drill, in the end after searching though my wire brush drawer, one had bristles small enough, that were stiff enough not to break, if you break one in there, it's never coming out, be warned, be gentle, if the wire kinks, dont straighten it, remove it, throw it away, start again. I wouldn't advise drill bits or brass wire brushes for this reason, they are too easily snapped the hole is very deep, no doubt to add to it's restrictiveness. The bike is a barn find, very low mileage, very very good condition, its all very clean, but I pushed a slug a waxy looking something from that hole, hopefully this will resolve my issue as pressure was building up in the centre piston and was immediately released when I cracked the hose. The pressure went all the way back to here, then stopped across this plastic relieving check valve. Hopefully the photos and videos here will be immortalised forever, but if not, get in touch, or I keep them here: https://www.dropbox.com/scl/fo/tfbghuds6mhf49210s78o/AME1iORZF4UJXQm3jKPyTjY?rlkey=kdw4ehnjmi1nuoimdw0ra4ifj&dl=0 20240417_223535.mp4 20240417_223419.mp4
1 point
-
Previous owner left everything to dealers, I showed him some faults he was not aware of when viewing the bike so not much there Will remove the fairings this weekend and start measuring and tracing and checking for cables that aren't part of the loom. Will make some notes as I go as this will be my first time chasing a electrical issue and that wiring map is already making my eyes hurt1 point
-
I've got a simple "Sealey" manual tyre changer in the UK (probably the same as many others coming out of the same factory in China!) and it works absolutely okay. However, I bought a separate, nylon enhanced tyre bar off eBay which works better than the original all-metal one the Sealey came with. What made the unit work best for me was to bolt it to the driveway, using stainless steel button head bolts (slathered in anti-seize) threaded into Rawlbolts sunk into the drive. When I'm done I unbolt it and put the bolts back into the holes. So far, so good! Ciao, JZH1 point
-
Also not from waaayyyy back, but still pretty far back. I was both exhausted and satisfied after completing a SaddleSore 1000 ride just outside Boulogne, France, in around 1998. I think the photo was originally a 35mm slide (which I was still using--and explains why I have several boxes full of slides and few digital photos from the early days!) The FL was my original 1990, bought new in California. Retired it after 60,000 mi or so, but it could have gone on and on (if I had replaced the cam shaft I broke whilst improperly tightening the cap bolts...). Ciao, JZH
1 point
-
I'm kind of flabbergasted to hear multiple stories about the transmission issues here. Im sure theese are Na bikes yes? I have absolutely abused my bike for 30k km with 100% power increase in mind just making Shure of proper shifts before wot. Absolutely no hickups before and now that I'm building a map slowly I have transmission parts in my sump. Can't wait to see this with my own eyes!1 point
-
That's one good thing, the Kill Switch when activated does inhibit Cranking. "When kill switch is in the Off position the engine does not crank" - Sorry to be pedantic assume you Did have Ignition to ON when checking this? - Very Important for diagnosis, Please Check exactly this - Ignition ON, Kill Switch OFF, Press Starter Switch - Does the engine Crank ? Absolutely completely wrong that either Kill OR Ignition Switch doesn't stop the engine. HISS cannot cause the condition you have. Crazy to think a dealership would say such a thing! Questions.. - With the Engine Running. Then turn Off only the Ignition Switch (assume the engine continues to run). Do the Headlights go Off and the Instrument Panel go blank? - And with engine running, Sidestand Down, Clutch In shift to in Gear. Does the Engine immediately Stop as it should? - Can you identify any strange non OEM looking wiring anywhere on the bike, you'll need to remove a lot of plastic to check this? As possibly only a part of the fault. I'd be checking to see if the Bank Angle Sensor has been bypassed. Meaning its unplugged and the Red/Yellow wire is jumpered to the Green wire. Or the Red/Yellow wire simply Grounded. I think the bottom line here (at this stage!) is that the ESR is possibly staying energised when it obviously shouldn't. Hopefully!! a few voltage checks might find out Why.1 point
-
Hi Grum Thank you for the reply Private sale, so no dealership. When kill switch is in the Off position the engine does not crank. It seems I need to start with Fuse C and the Engine Stop Relay. I will give feedback once I had the time to check this. Apparently the dealership that serviced the bike told the previous owner there is nothing wrong and that it is part off the HISS system. Yet another reason I don't trust dealerships anymore.1 point
-
I thought my experience in obtaining OEM hard luggage might be informative/useful for others, because things have apparently changed over the years since the bags were in production. When I bought my '07 Anniversary Interceptor a little over a month ago, I knew I wanted hard bags. I was unsuccessful in locating an Anniversary RWB bike with OEM Honda bags, so once I got it home, I started researching. I pretty quickly decided that I wanted the OEM Honda bags... even though they are basically Givi bags, the mounting brackets tuck them in better, and shape integrates better with the bike. Option #1 was to look for used bags (eBay, etc), but I couldn't find anything, so I started researching part numbers. I was able to find the part numbers for the brackets and bags pretty easily, and discovered that there were originally two separate part numbers for the brackets (side mounts and center brace) and additional part numbers for the bags. I was able to track down the center brace on eBay, and found what I believe to be the last set of side brackets in the US at a dealership in Ohio. I was also able to order the bags new from Honda, and was told at the time I got one of seven sets of blue bags left in the US. Side brackets: 08L41-MCW-1000W Center brace: 08L41-MCW-800B (number no longer in Honda's system) Blue bags: 08L41-MCW-1E0 To my great surprise, the bags purchased under the part number above included all the mounting brackets! None of my research had indicated that would be the case, but then again, almost all the threads I found on the subject were at least 10 years old... All in, it's not a bad deal, and only about $200 more than buying the current production bags and brackets from GIVI (not including my extra brackets... LOL). TLDR: there are still some OEM bags out there, and the blue ones, at least, come with the mounting brackets. On to the rest of the story... When I started installing the mounting brackets it was immediately apparent that they were not going to fit with my Delkevic exhaust. The mounting arm that bolts to the center bracket behind the license plate is angled to match the triangular OEM muffler and wouldn't clear the oval aftermarket muffler. I am fortunate enough to have the ability and tools to do some fabrication, so I cut off the offending mounting arm, and modified the center brace so the stay would be horizontal instead of angled, and thus clear the muffler. Then I welded everything back together. The rest of the mounting procedure was easy bolt-up, per the instructions.1 point
-
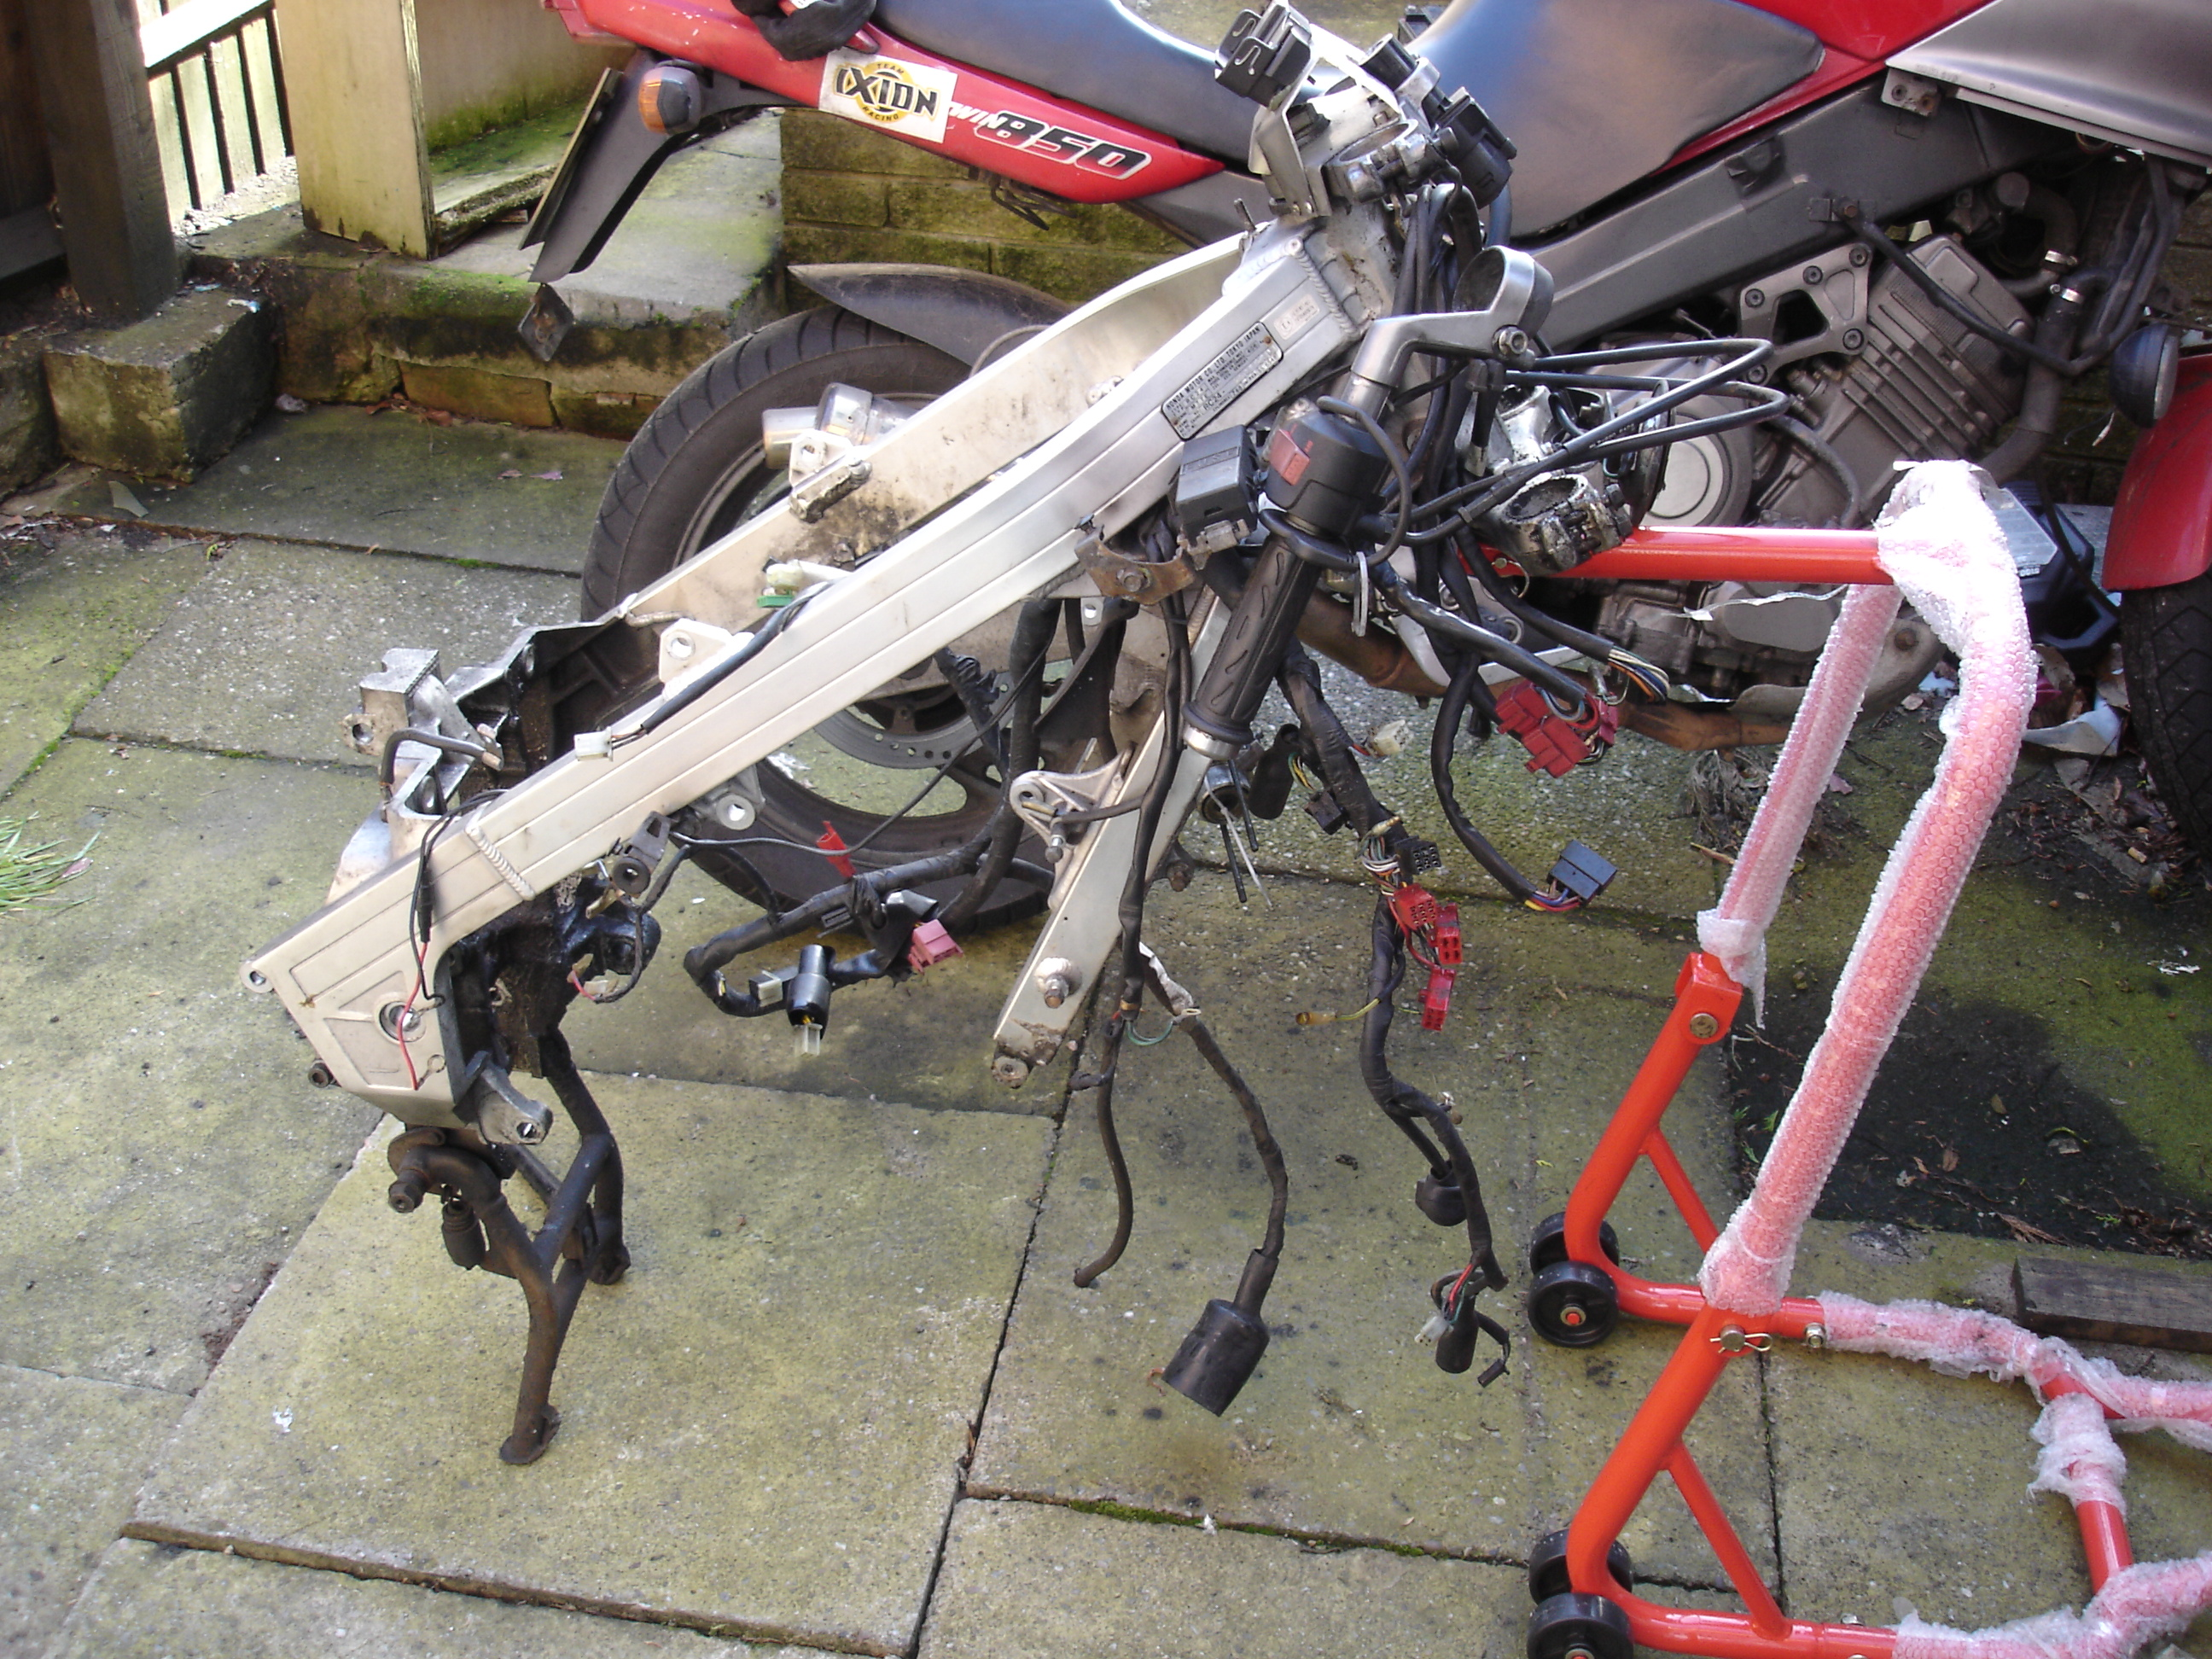
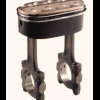
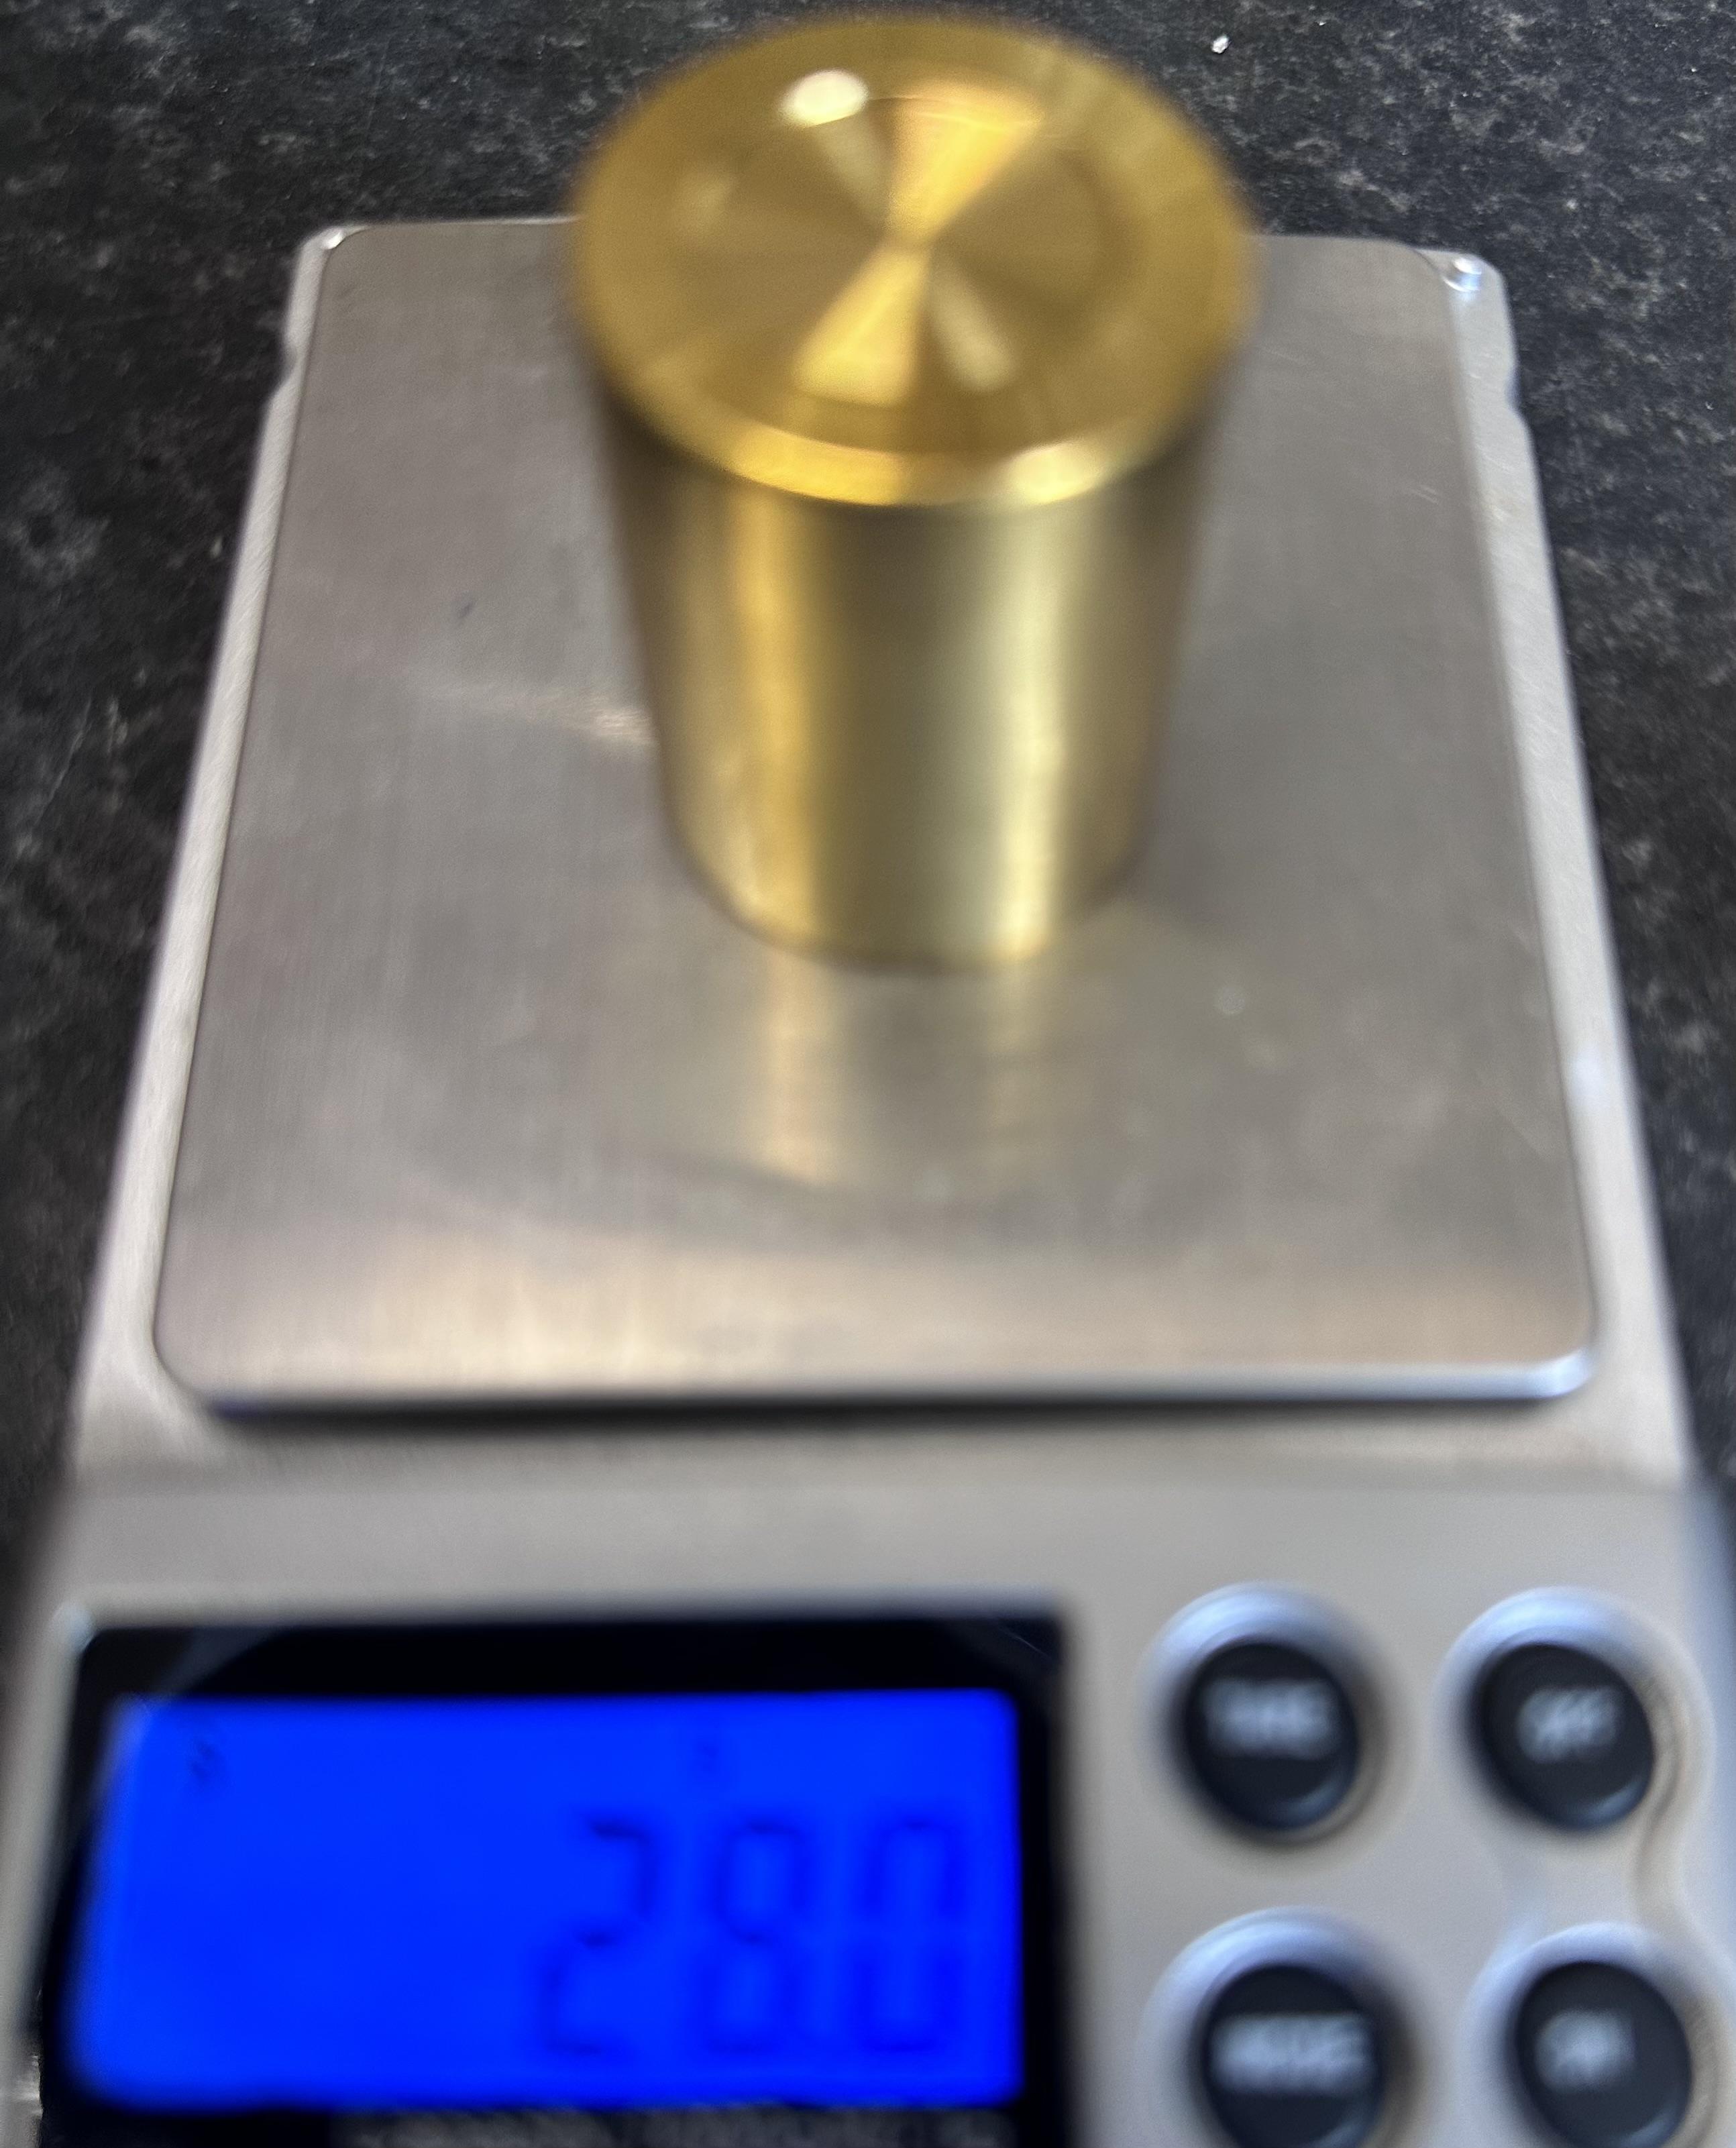
To fix my lack of rear wheel a little research shows the disc mount for the 400 & 800 are common. So I have a stock 800 axle off with a local engineering firm to reduce its length & add a new threaded section to allow me to fit my refurbed custom cush drive & bought a stock wheel to use until my carbon one is repaired. Pics when I get it back.
1 point
-
"Wheel weight to be used later."1 point
-
We're not done just yet. 1 - Ok. So I get from what you're saying. You still do not hear the Fuel Pump prime at switch on? 2 - Can you elaborate as to what isn't plugged in? Apart from the obvious light's. "the fuel pump runs continuously with the plug bridged. (didn’t hook up fuel line since it was just a test for the pump. could be why it’s running continuously. not sure.)" That's exactly what should happen when bypassing the FCR! Fuel Pump runs continuously. 3 - Verify good continuity of the Brown/Black wire(FCR control wire) from the FCR to A21 (or possibly B18?) at the ECM. Here's a test for the ECM and Fi Light. Refer to chapter 5 in the Service Manual pages 5-7 to 5-8. 4 - Add a shorting link to the the ECM Service Check Connector as if you wanted to retrieve any historical Fault Codes. With Sidestand down and kill switch to RUN. Switch On Ignition. Does the Fi Light come On or flash a code? It should do one or the other. 5 - Looking at your photo again and seeing the ECM exposed as it is. Do a close inspection for any impact damage, are there any physical signs of cracks, on the ECM or its connectors? 6 - Check the wiring of the Ignition Switch. Does it have a pink wire and a diode mounted on the underneath of the switch like the photo attached? This diode and wire performs an ECM enabled and security function. 7 - And one Final Test, the end is near! Voltages measurement, Red meter lead to Battery Positive. Black lead to the Brown/Black wire for the FCR. Everything plugged in. Kill Switch to RUN, with Ignition to On, DO YOU MEASURE 12V FOR APPROXIMATELY 2 TO 3 SECONDS AT SWITCH ON? Let's know how you get on with the above questions and tests. All 7 of them Please! This should determine if you do have a dud ECM.
1 point
-
Non-mountain ride was excellent. Just under 200 miles and raced a hawk. VFR00 actually a joy to ride...and loving the sound of this Delkevic.1 point
-
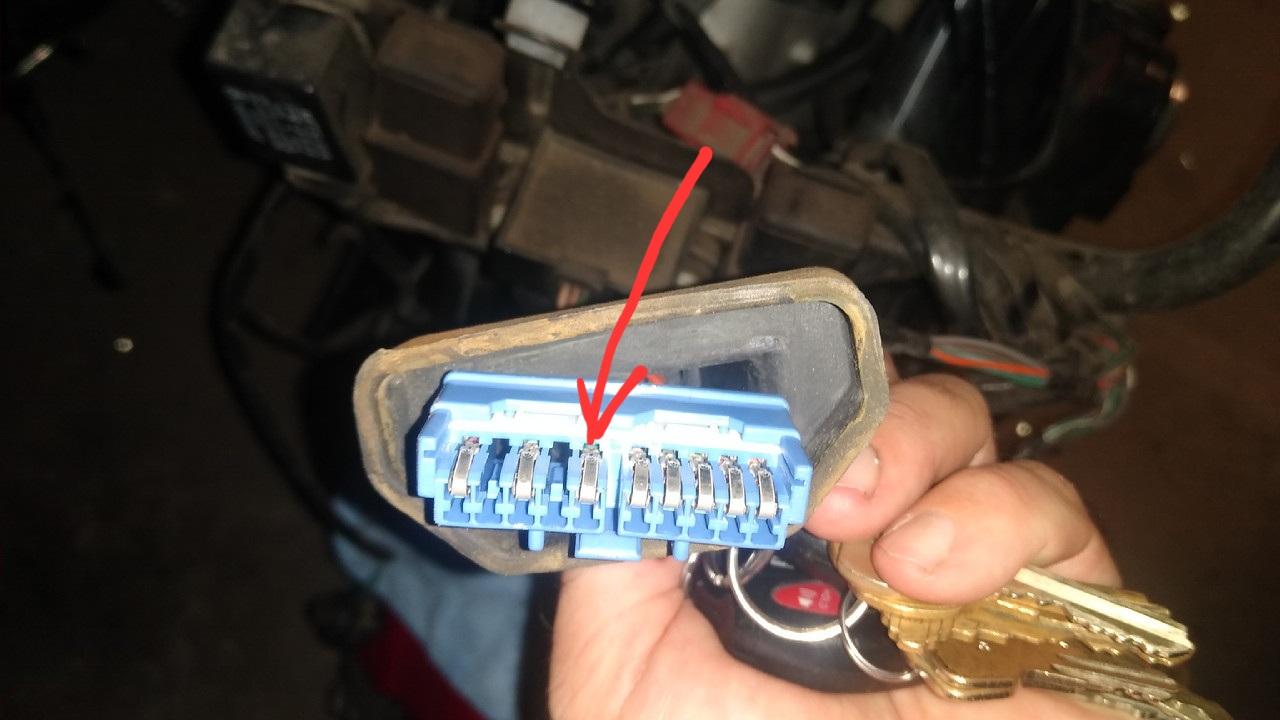
What is the colour of the wire at the back of this pin (Red arrow) of the 10P Blue Instrument Panel Plug? This is the Temperature input from the ECT sensor. But wait there's more! Incase you need to check further........... Mapped out the PCB tracks and connection point for LCD Temperature Display. Just follow the Yellow Brick Road highlighting, (ignore red arrows and comments lower part of picture.)
1 point
-
I hope you got your off out of the way now and glad that it was minor.1 point
-
i agree the amount of rust in that tank is concerning. If that gets past the filter you're gonna have all kinds of FI issues. Not to mention the sealing surface for the sender O ring doesn't look very smooth. A couple different ways to approach that rust: electrolysis, and Evaporust/vinegar. I did my old Ninja tank with Evaporust, and a handful of drywall screws.1 point
-
No local places will mount spoked wheels anymore. I ordered tires for my Sled from CycleGear 30 miles away with the plan of having them mount them. Two weeks for them to come in. I take the wheels off and show up to "the tire machine is down until at least next week." The kid gives me a card for a place another thirty minutes up the road. I call and then head that way thinking that I'll just get this over with. When I go to pick them up, I ask How much?. The kid looks at his partner who stumbles and then says $110. I pay them and head home. After fighting to get the rear on, I go to check the pressure and discover it is flat. I'm dropping the money for a Rabaconda. It's not just the money to be saved, it's also the hassle of people.1 point
-
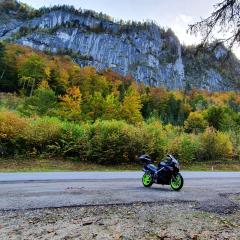
Today season opened The Bandit was a positive surprise, ok the aftermarket can a bit louder to my taste but that's easy to fix. Rides good, engine more flexible than I had believe, no sky rocket but still fun. Well it's still ice on local lakes And you had to take it easy as roads partly covered whit light gravel from winter that has not been taken from the road yet Also a add to garage today, 2 wheels as electric engine that assist as you pedal A Yamaha moro07 30th anniversary model.1 point
-
I had the same problem and it also happened to 2 other nuts on the fuel pump housing. I got a professional welder to fix it. he did a great job for €50. He welded new bolt heads in, its been fine since with a new gasket & o-ring used on install. Its not something you want leaking.1 point
-
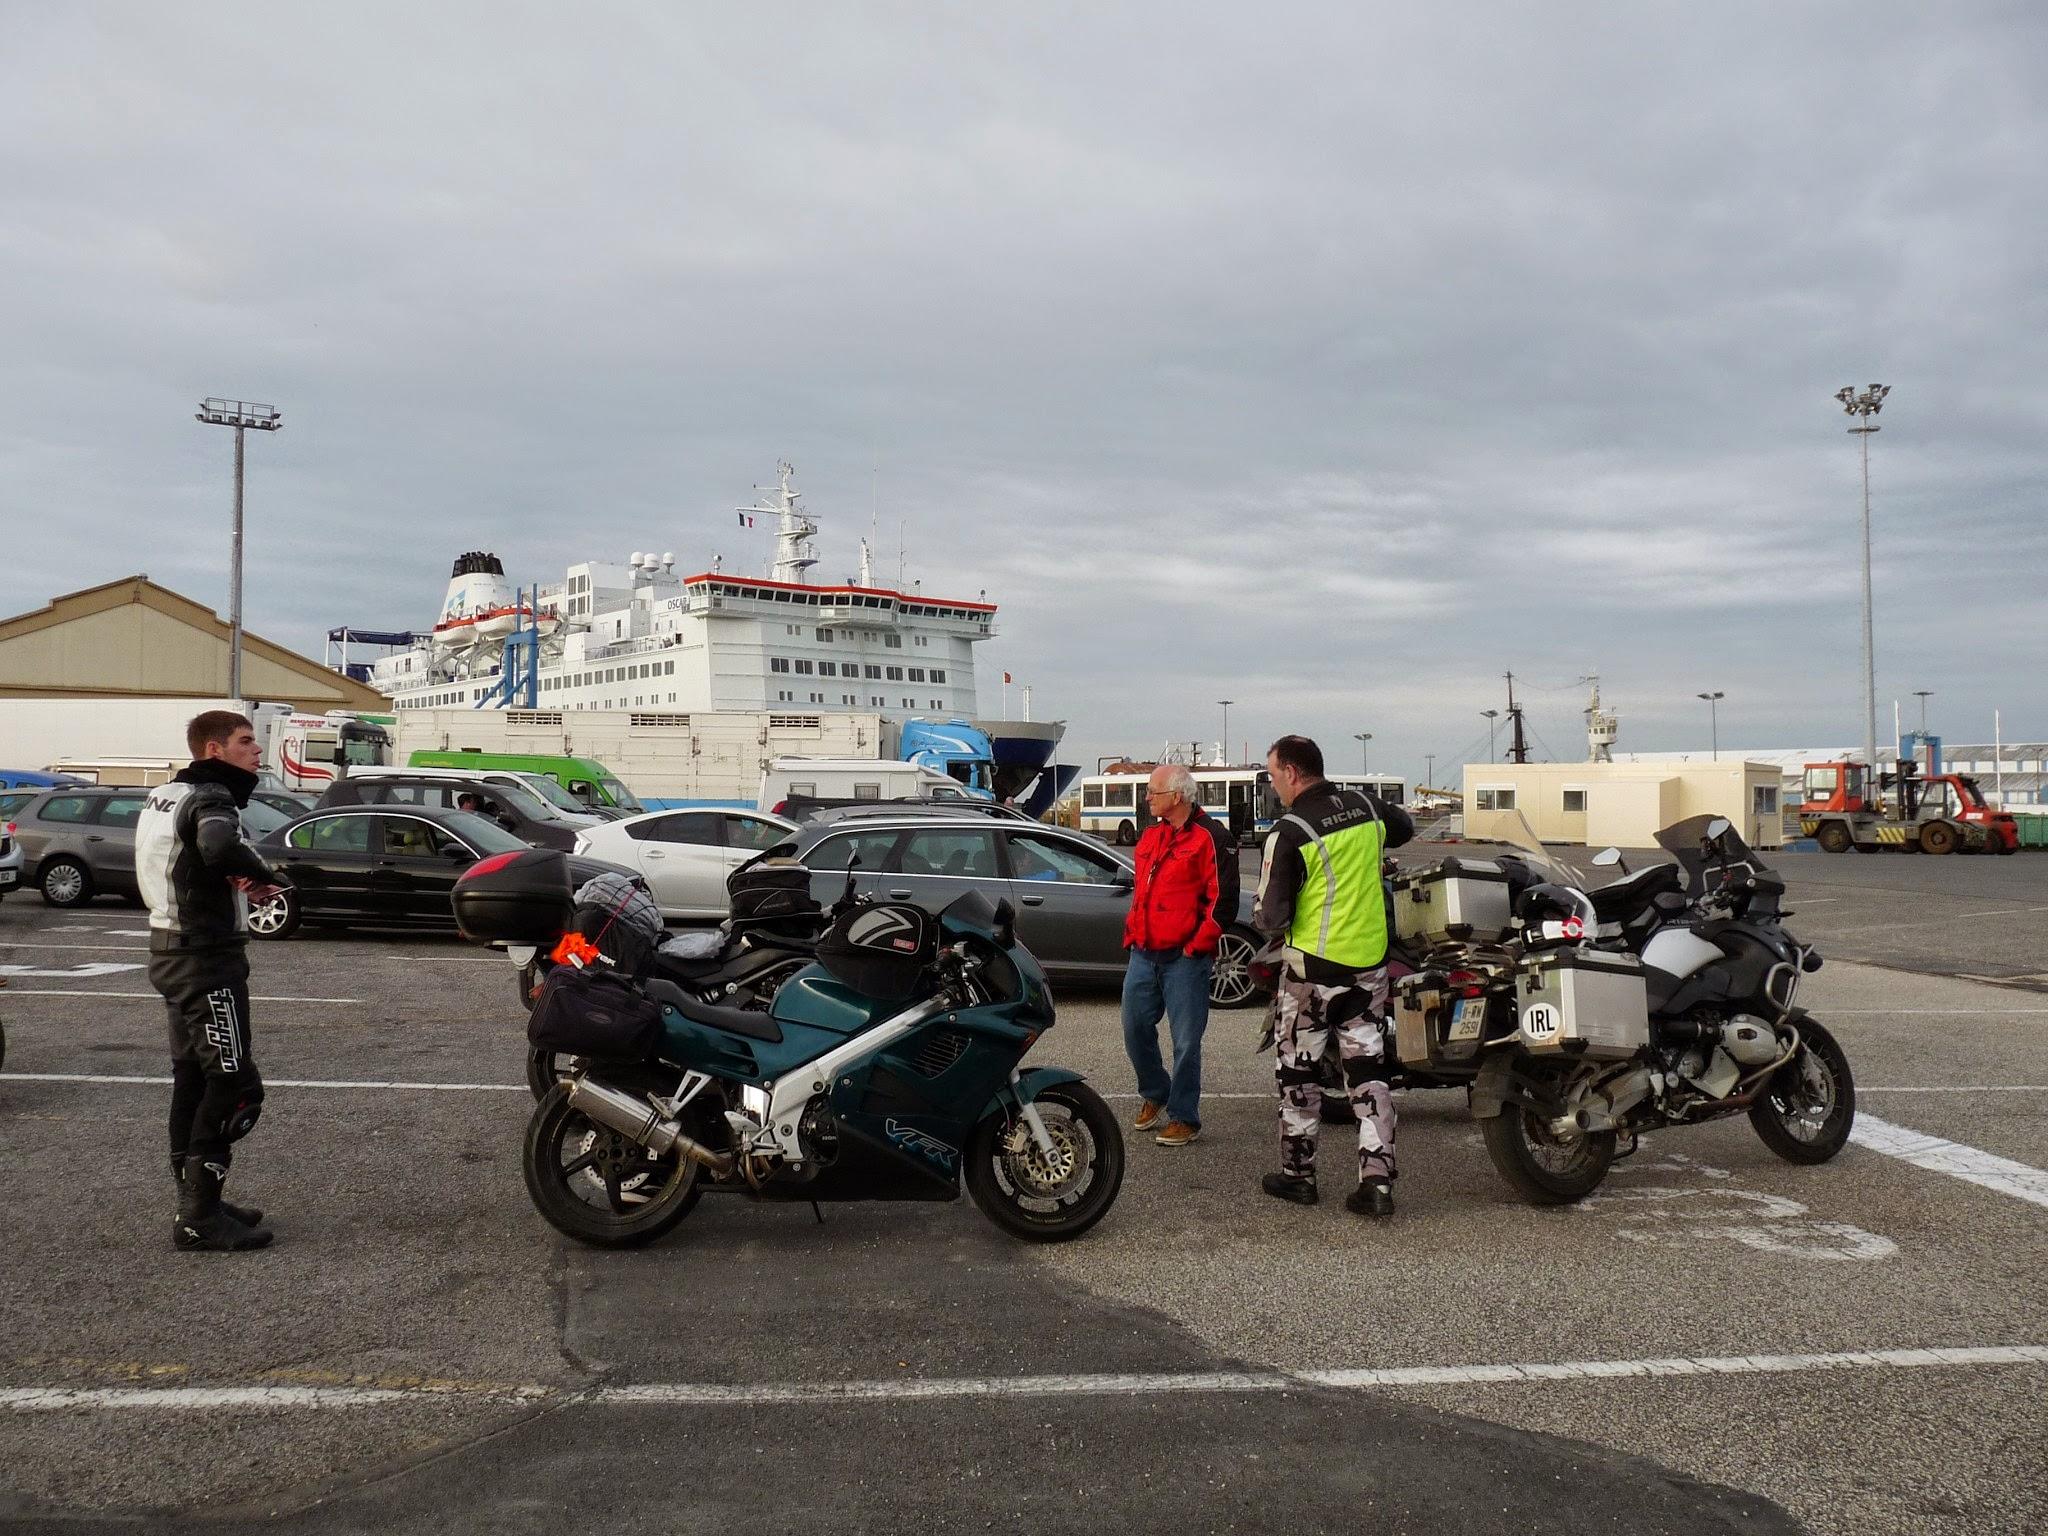
Beautiful memories. There's something about how bikes can link us back to memories of places we've been and trips taken. Ten years ago I was stranded on the dock at Cherbourg, France, because the ferry I was catching home to Ireland (an 18 hour overnighter) had a radar problem. Eventually we were allowed to board but I had to leave my VFR quayside. They were basically only allowing us on to give us all a place to sleep for the night. They attempted to empty us out the following morning with promises of other ferries but a few of us hung on and explained that we were entitled to do so under EU law. There was no guarantee that an "alternative sailing" would actually take us and once you've left the boat you're on your own. Eventually made friends with many of the staff, got a tour of the ship, saw the bridge, got the VFR onboard and got home a day late. The poor French lad I'd helped out through this, on a nice Kawasaki ER6, had a day robbed from his tour of Ireland because of it but I managed to get him a cabin so he was comfy (until he got to Ireland where it pissed rain..poor guy). Photo below of the VFR fully-loaded dockside. The two Beemer guys disappeared the morning the ferry was emptied, think they chanced the "alternative sailings" thing. Actually the Larry David lookalike there was riding a Honda Silverwing maxiscoot! One more edit - I'm sitting here now with my baby daughter asleep in my arms and am married to the woman who I was traveling back and forth to France for. We've our own little home, a lovely little dog, and a shed where I can work on/admire my two VFRs. If you'd told me that was gonna happen 10 years ago when that picture was taken I'd have been astounded. Life moves fast.
1 point
-
I would tap that stud and get a nut on it. Looks like the tank needs to be cleaned also lots of rust. Good luck you can do it!1 point
-
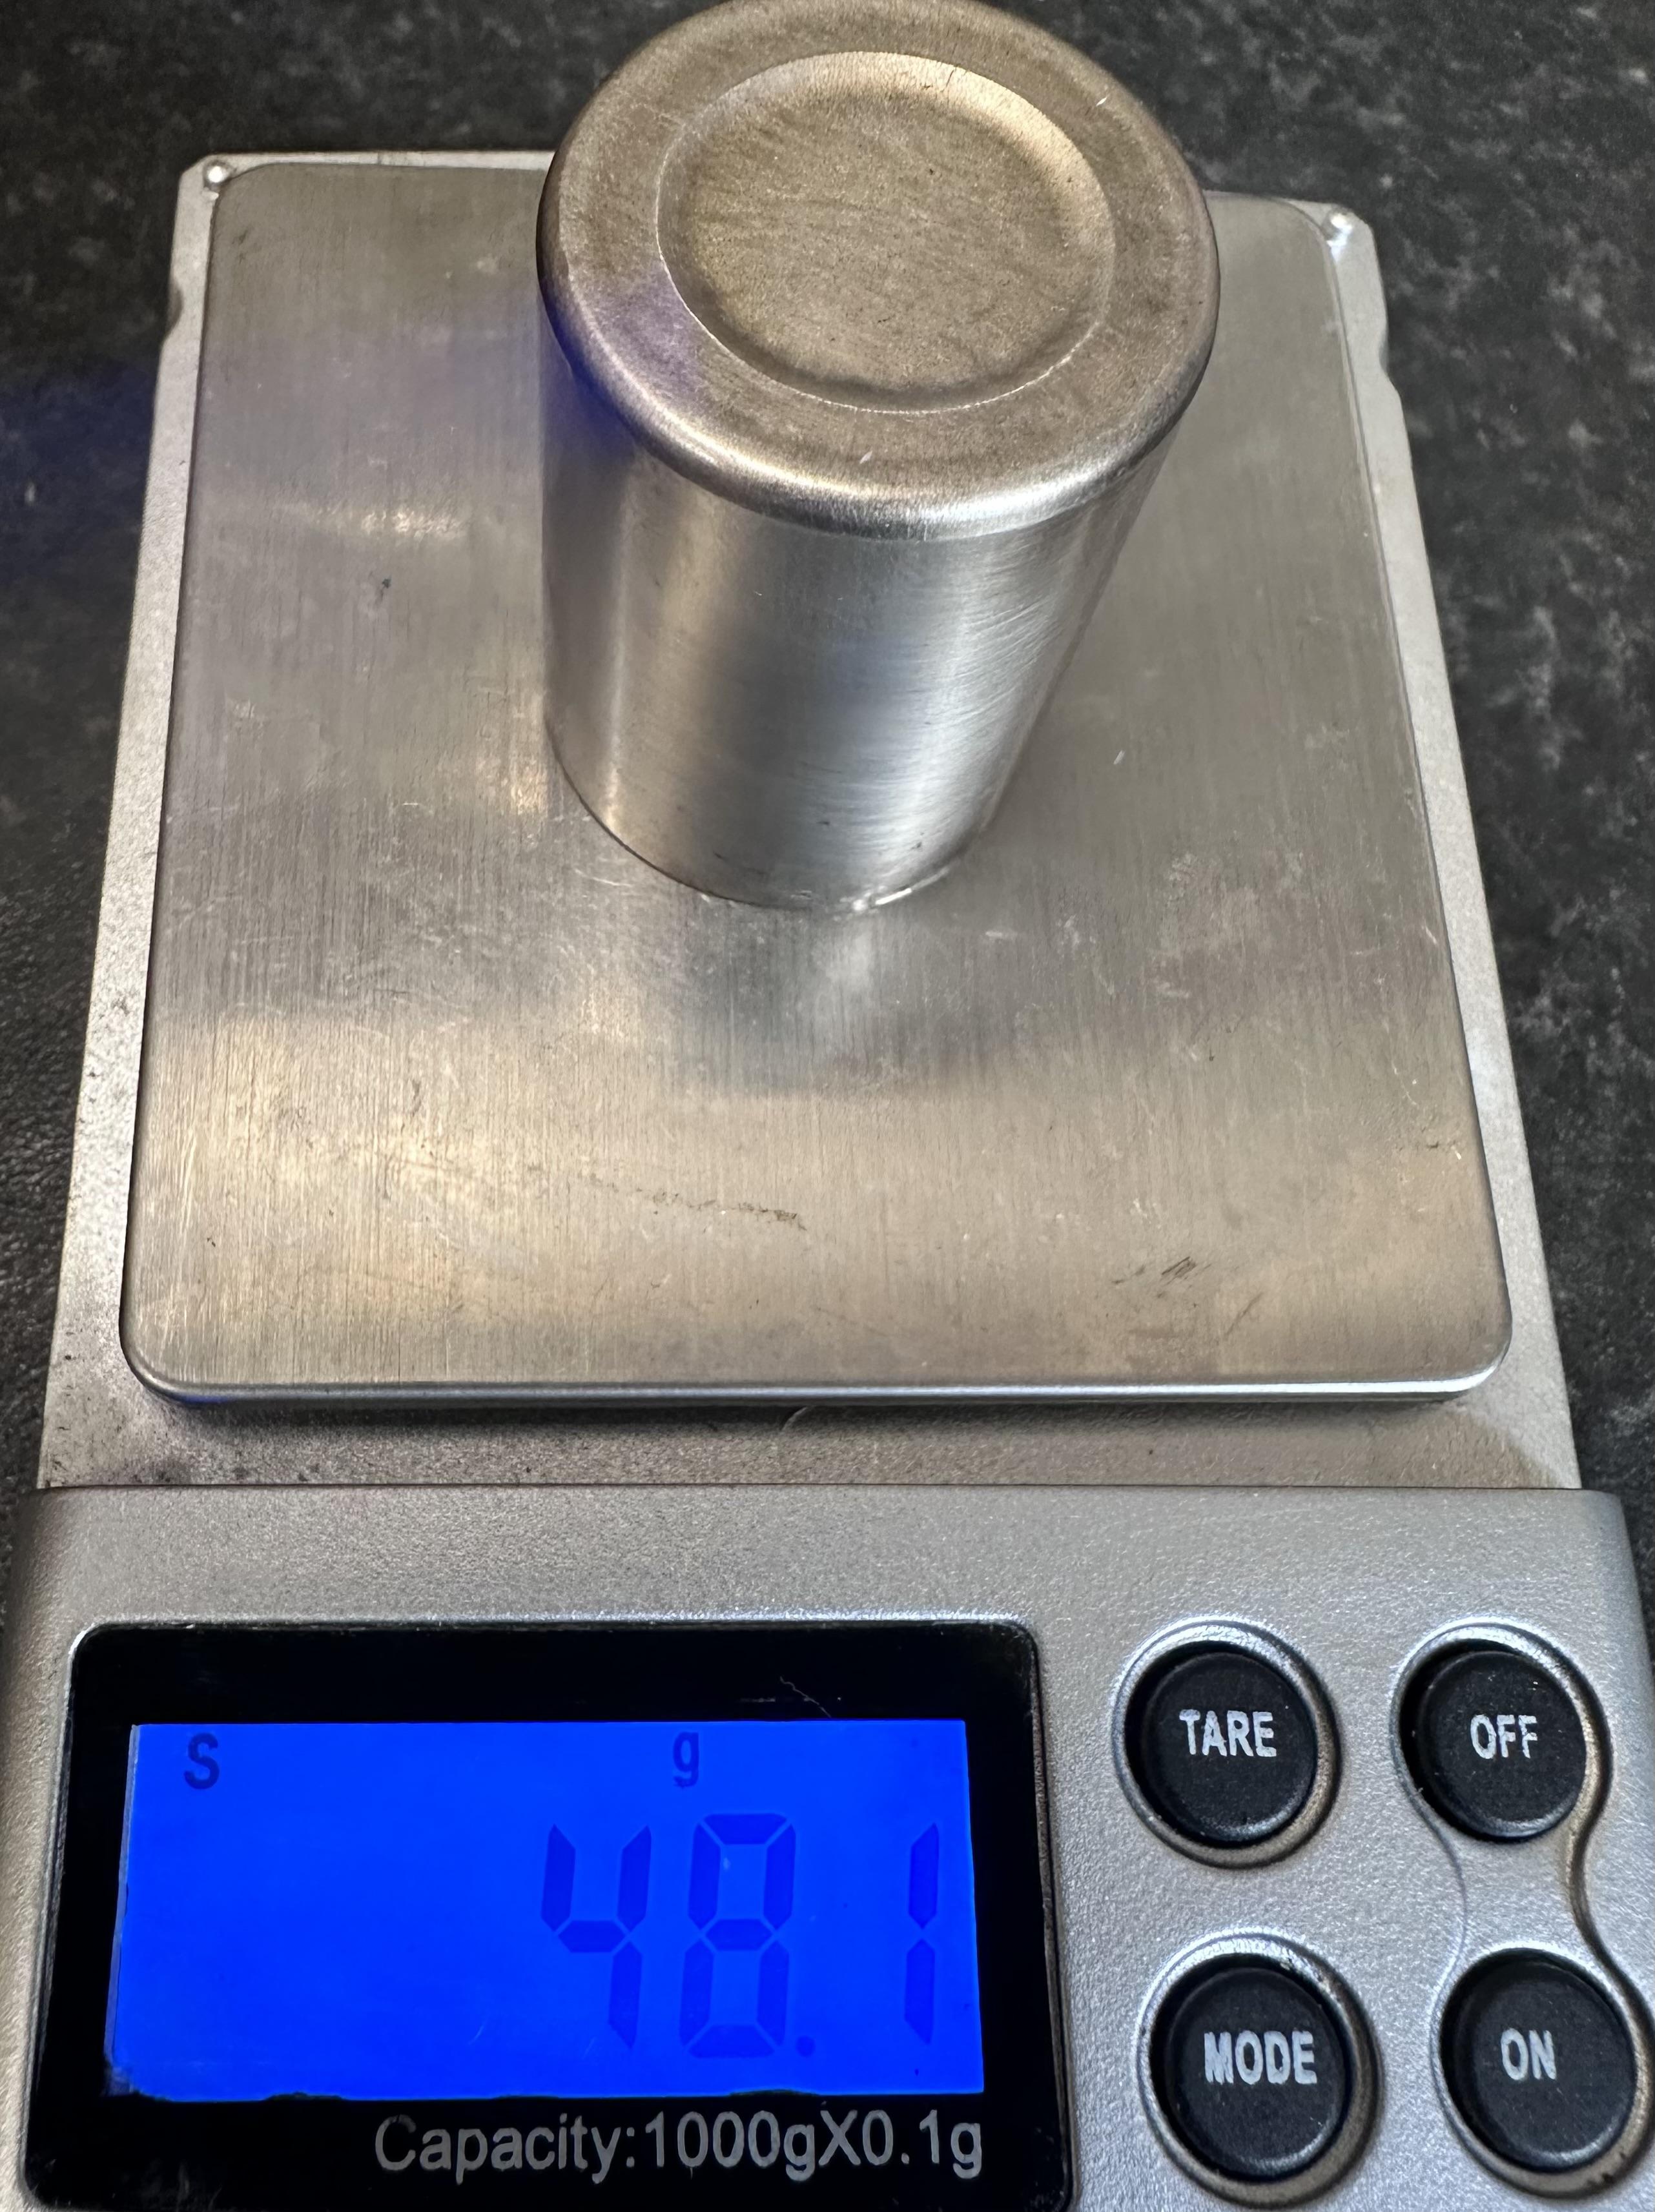
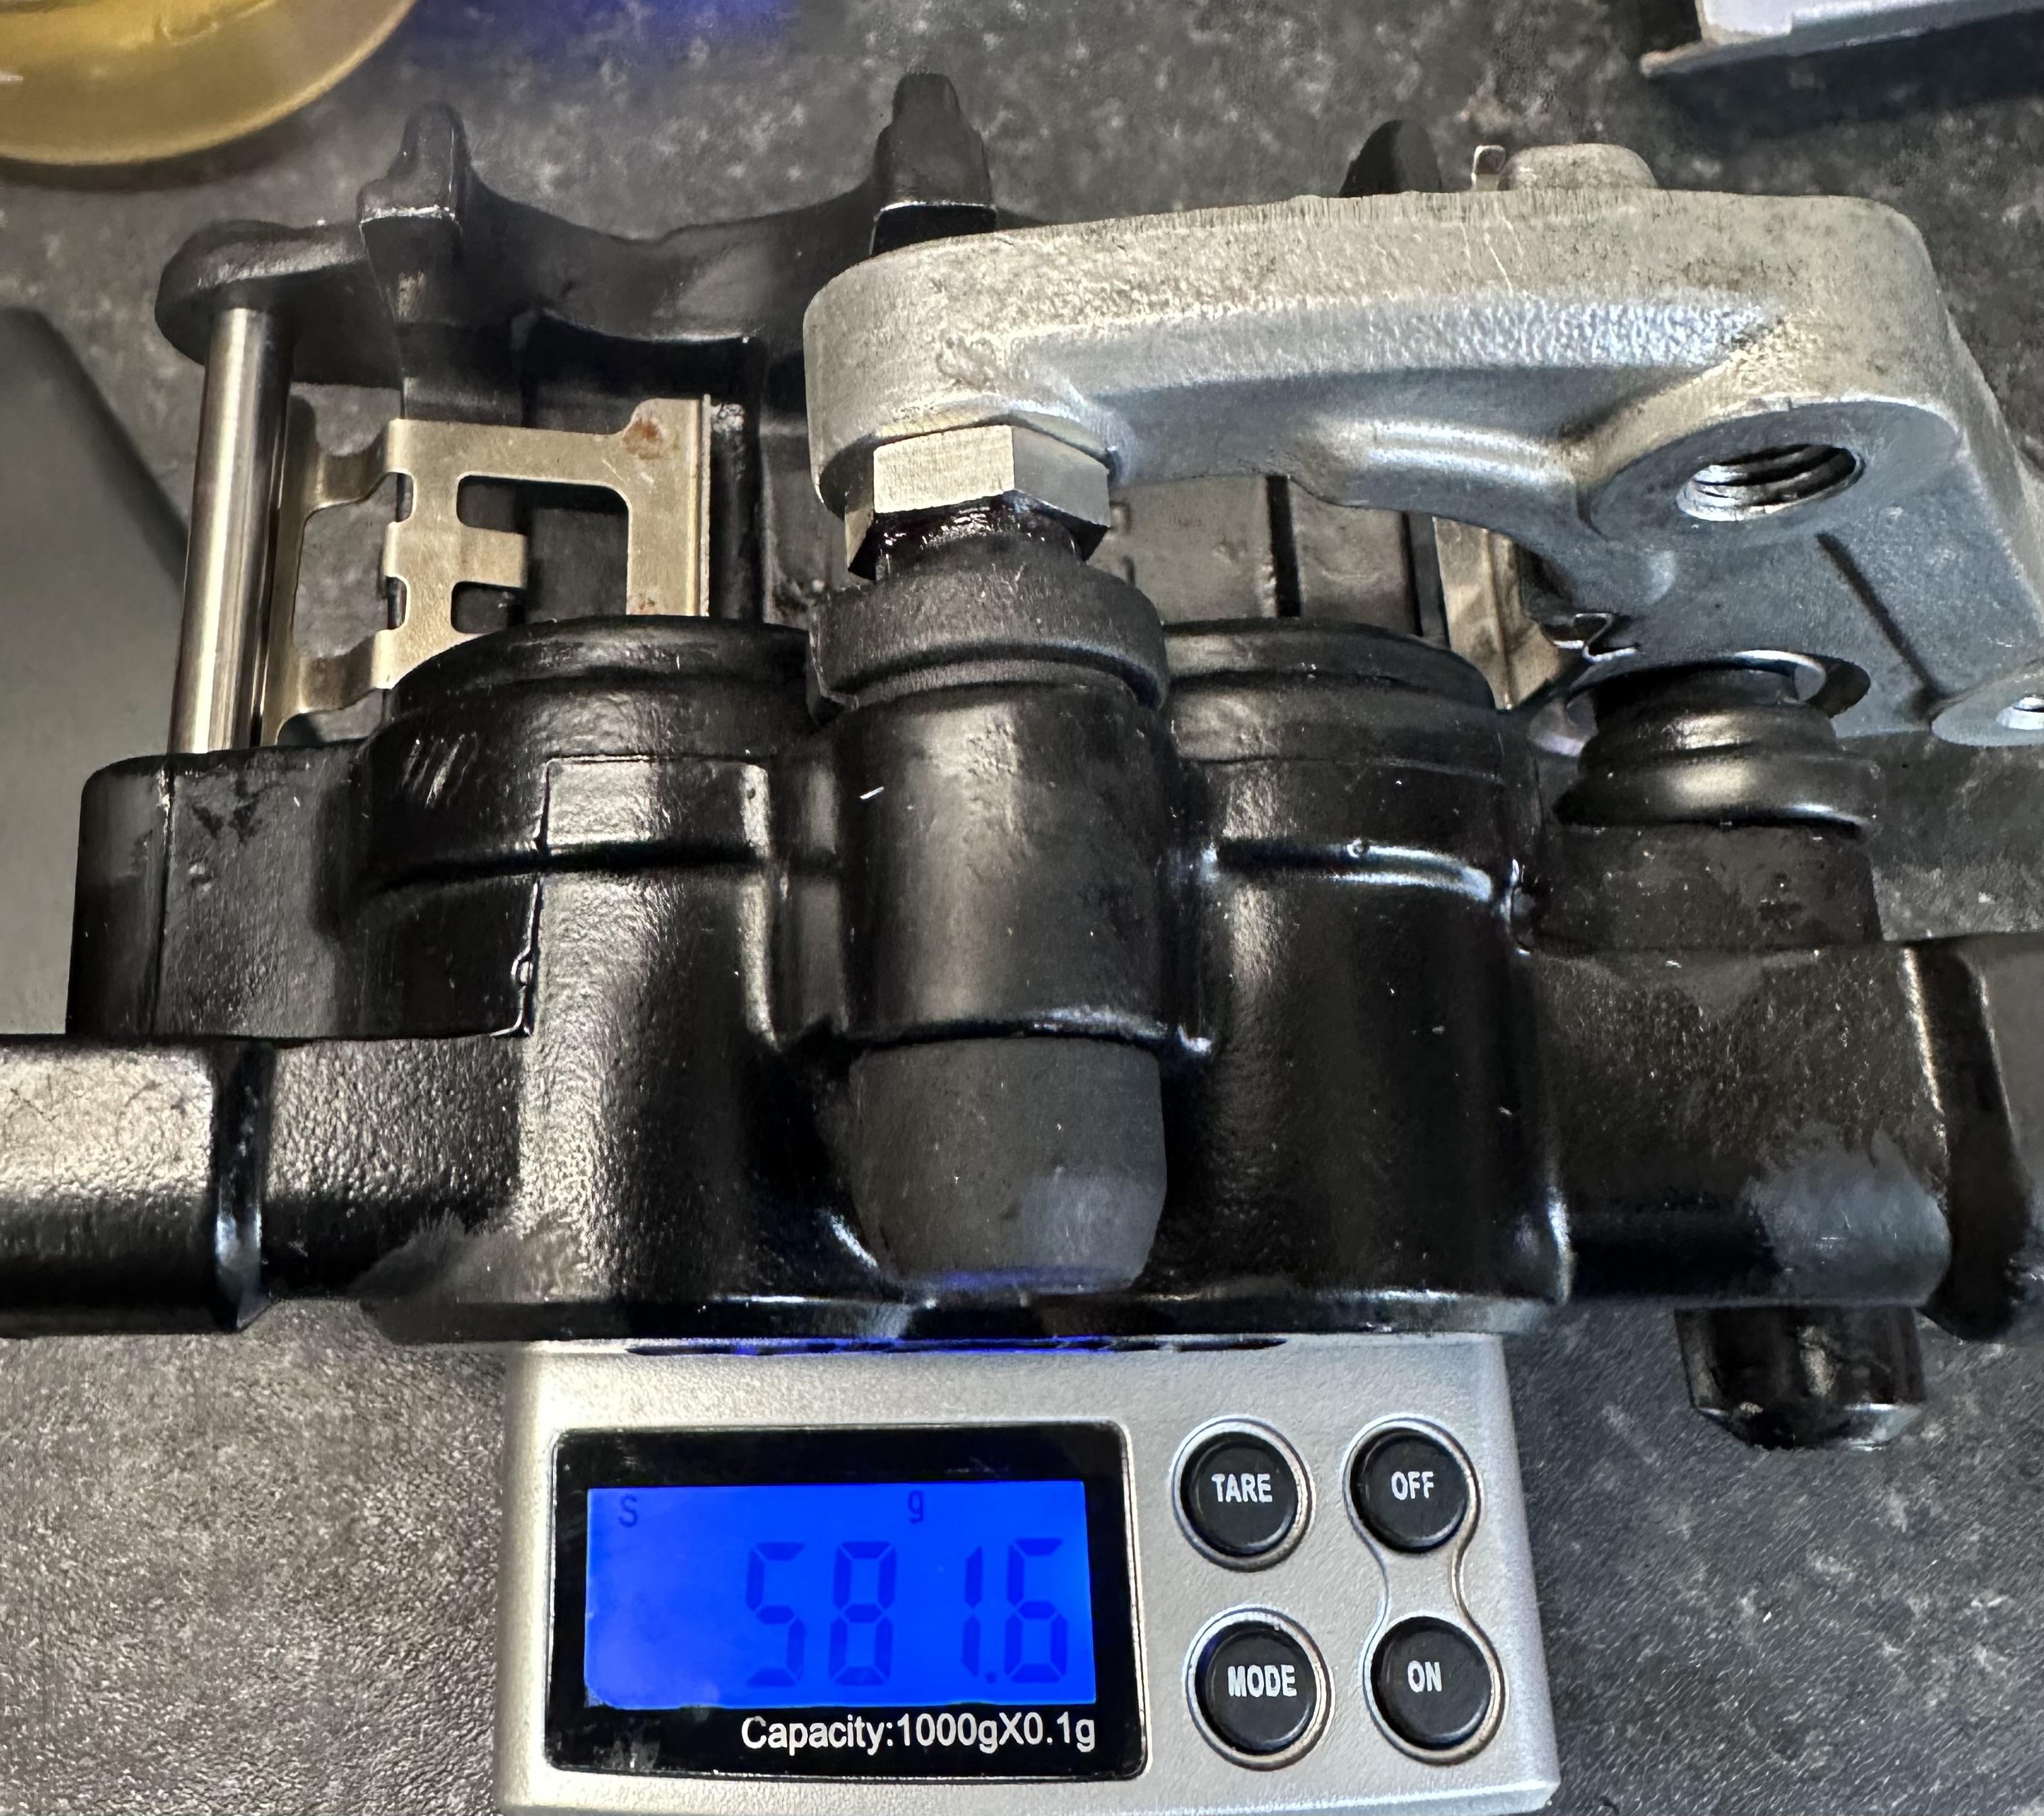
I'm coming buddy! If your bike is a low mileage garage queen that has never seen the rain this may be easier for you. So, first off ignore the HBoL where it says you need to remove the engine. You don't and with the age of these it's a risk. Particularly the rear lower bolt which has a far too small hex in it and runs through a U in the bottom of the engine so corrodes in place. I've had to cut two off in the past but you could get replacement bolts then! Next up, be utterly prepared to deal with snapping exhaust studs. They're piddly little M6 ones. If you plan on doing it this winter then start spraying them with penetrating now! 🤣 Ignoring the parts that are NLA, my personal minimum shopping list for this would be 18291-MN5-650 (exhaust gasket) x4 90304-438-000 (front nuts) x4 Unfortunately when I did mine I believed the HBoL so took the engine out...🤣 After the event I realised this wasn't needed. It's still a massive pig of a job though even without taking the engine out. So, here is how I would do it if I was to do it over again. -1) Get the bike properly hot and then spray all the exhaust bolts/nuts with proper penetrating fluid (ie not WD40) at least a week before. Keep spraying them every day until you're ready. The exhaust studs particularly the fronts where they get sprayed by water from the front wheel will snap for fun so everything you can do to prevent that helps. 0) Put the bike on the main stand on a 2x4 or similar (and the same under the front wheel) to give some extra height. 1) Remove seat, tank, side fairing panels, belly pan and all rear plastics (inc tail light), unbolt and remove the silencers and the collector. Undo the front to rear header clamps. 2) Remove battery, disconnect wiring from ECU, reg/rec, pickups, starter solenoid, fuel pump relay and rear coils (note which way they're connected)...but if you forgot then bottom connector on bottom coil is black/white, next one is red/blue, bottom connector on top coil is black/white then top is blue/black. Remove the rear coils. Remove the pipe to the rad from the coolant tank. Disconnect the hose from the carbs to the fuel pump. 3) Remove the loom from the subframe up until where it meets the frame, remove the top bolt for the rear brake master cylinder, remove the rearsets and remove the subframe. 4) Remove the rear wheel. 5) Unbolt the top shock mount, the remote adjuster, the linkage bolt (the one to the frame) and the two special bolts either side of the swingarm and remove the swingarm with the shock, move the chain over it so you don't need to remove that. 6) Remove the remains of the shock heat shield (it's inevitably a rusty hole by now). 7) Loosen (don't remove) the rear engine bolts (the ones that go into the back of the rear head) and then remove the heatshield plate they hold on. Spray all the exhaust nuts again with penetrating fluid. At this point it's time to actually tackle removing the exhausts. Now personally I would be very tempted to go straight for cutting the front nuts off. two slits either side with a Dremel or similar then split them. It massively de-risks the chances of snapping a stud. If you decide not to then I would go *straight* for lots of heat on them, get them hot and hope they either unscrew from the head or unscrew. If they don't and snap....well you're now going to have to drill out and re-tap the remains. Once you've got the fronts out then you can remove the front downpipes from the rears. Next up is the rears, you should be able to get an 10mm socket on to the end of the nuts using a massively long extension going through the back of the frame. Once they're undone you should be able to wiggle the rear exhausts out, it can be done but it can take some wiggling and having extra ground clearance helps (hence why starting off with the bike raised). Remove the exhaust gaskets (they're particularly hard to see in the rear ports), stick the new ones in the ports with a blob of grease to hold them in place, wrangle the newer ones in, fit the front downpipes and then tighten the nuts on them. Make sure you don't get the left and right front downpipes mixed up (DAMHIK!) In classic HBoL fashion, assembly is the reverse of disassembly... 1) Refit the heatshield plate between frame and engine, tighten the rear engine bolts (the ones that go into the back of the rear head) to sec. 2) Refit the heatshield plate between exhausts and shock. You may want to consider making a new one as it's nothing special but rusts away and does protect the shock from heat. 3) Refit the swing arm, don't forget to loop the chain through first! Bolt the linkage and shock in. 4) Refit the rear wheel 5) Refit the subframe (and rearsets) and fit the loom to it. 6) Refit the rear coils, connect everything you disconnected back up again. Refit the battery. 7) Refit the tank, connect up the fuel pump to the tank and to the carbs. 8 ) Refit the collector. 9) Refit the exhausts. 10) Refit bellypan, side fairings, seat plastics/tail light and seat. Start her up.
1 point
-
I would view the below as mileage items: Brake pads Chain and sprockets (keep lubed to ward off surface rust) Valve check - changes due to heat cycles and movement Time related: Oil Coolant Brake fluid Fork oil - 5 years? Clean electrical connectors - corrosion can still happen over time even without riding. Petrol tank - keep full to ward off rust and use fuel stabiliser. Injectors - can't hurt to use an injector cleaner to help keep them clean when riding. Tyres - after using 7 year old tyres I wouldn't again. Fit something sporty that will wear out before 5 years is reached. Get your moneys worth! Keep on stands to avoid flat spots. Battery - tender or swap in a battery from one of the others when you want to drive it, saves buying a battery that sits on a tender for most of its life. Mice protection - may not affect you, plug exhaust and airbox. Bodywork - keep covered with a soft cover even garaged. Detail and polish as the urge grabs you. ACF on metal fittings and fixings. Hoses - over time will get old and hard. Buy replacements now and hoard for later. Rear hub - may be prudent to strip and regrease and then move periodically to stop it seizing, grease gumming up (?) That's all I can think of right now but good advance thinking 👍1 point
-
It's a basic USB/serial to TTL converter cable. Can build your own with instructions here: https://github.com/AlexKovalevich/HondaECU Heck once you've reached that site, you might as well download all the software to edit maps and flash them to ECU yourself. He's got stock and modified .BIN files for download with 1st/2nd gear restrictions removed.1 point
-
1 point


.JPG.e854512fe5c890a30f6f19befeb1f2b4.JPG)