Leaderboard


Popular Content
Showing content with the highest reputation since 04/13/2024 in all areas
-
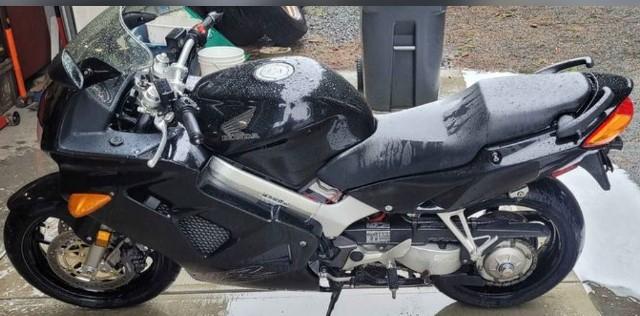
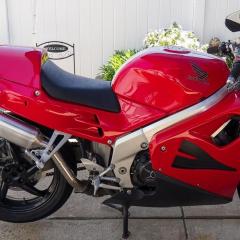
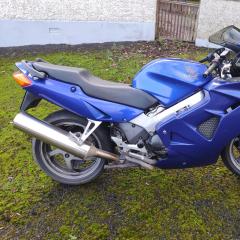
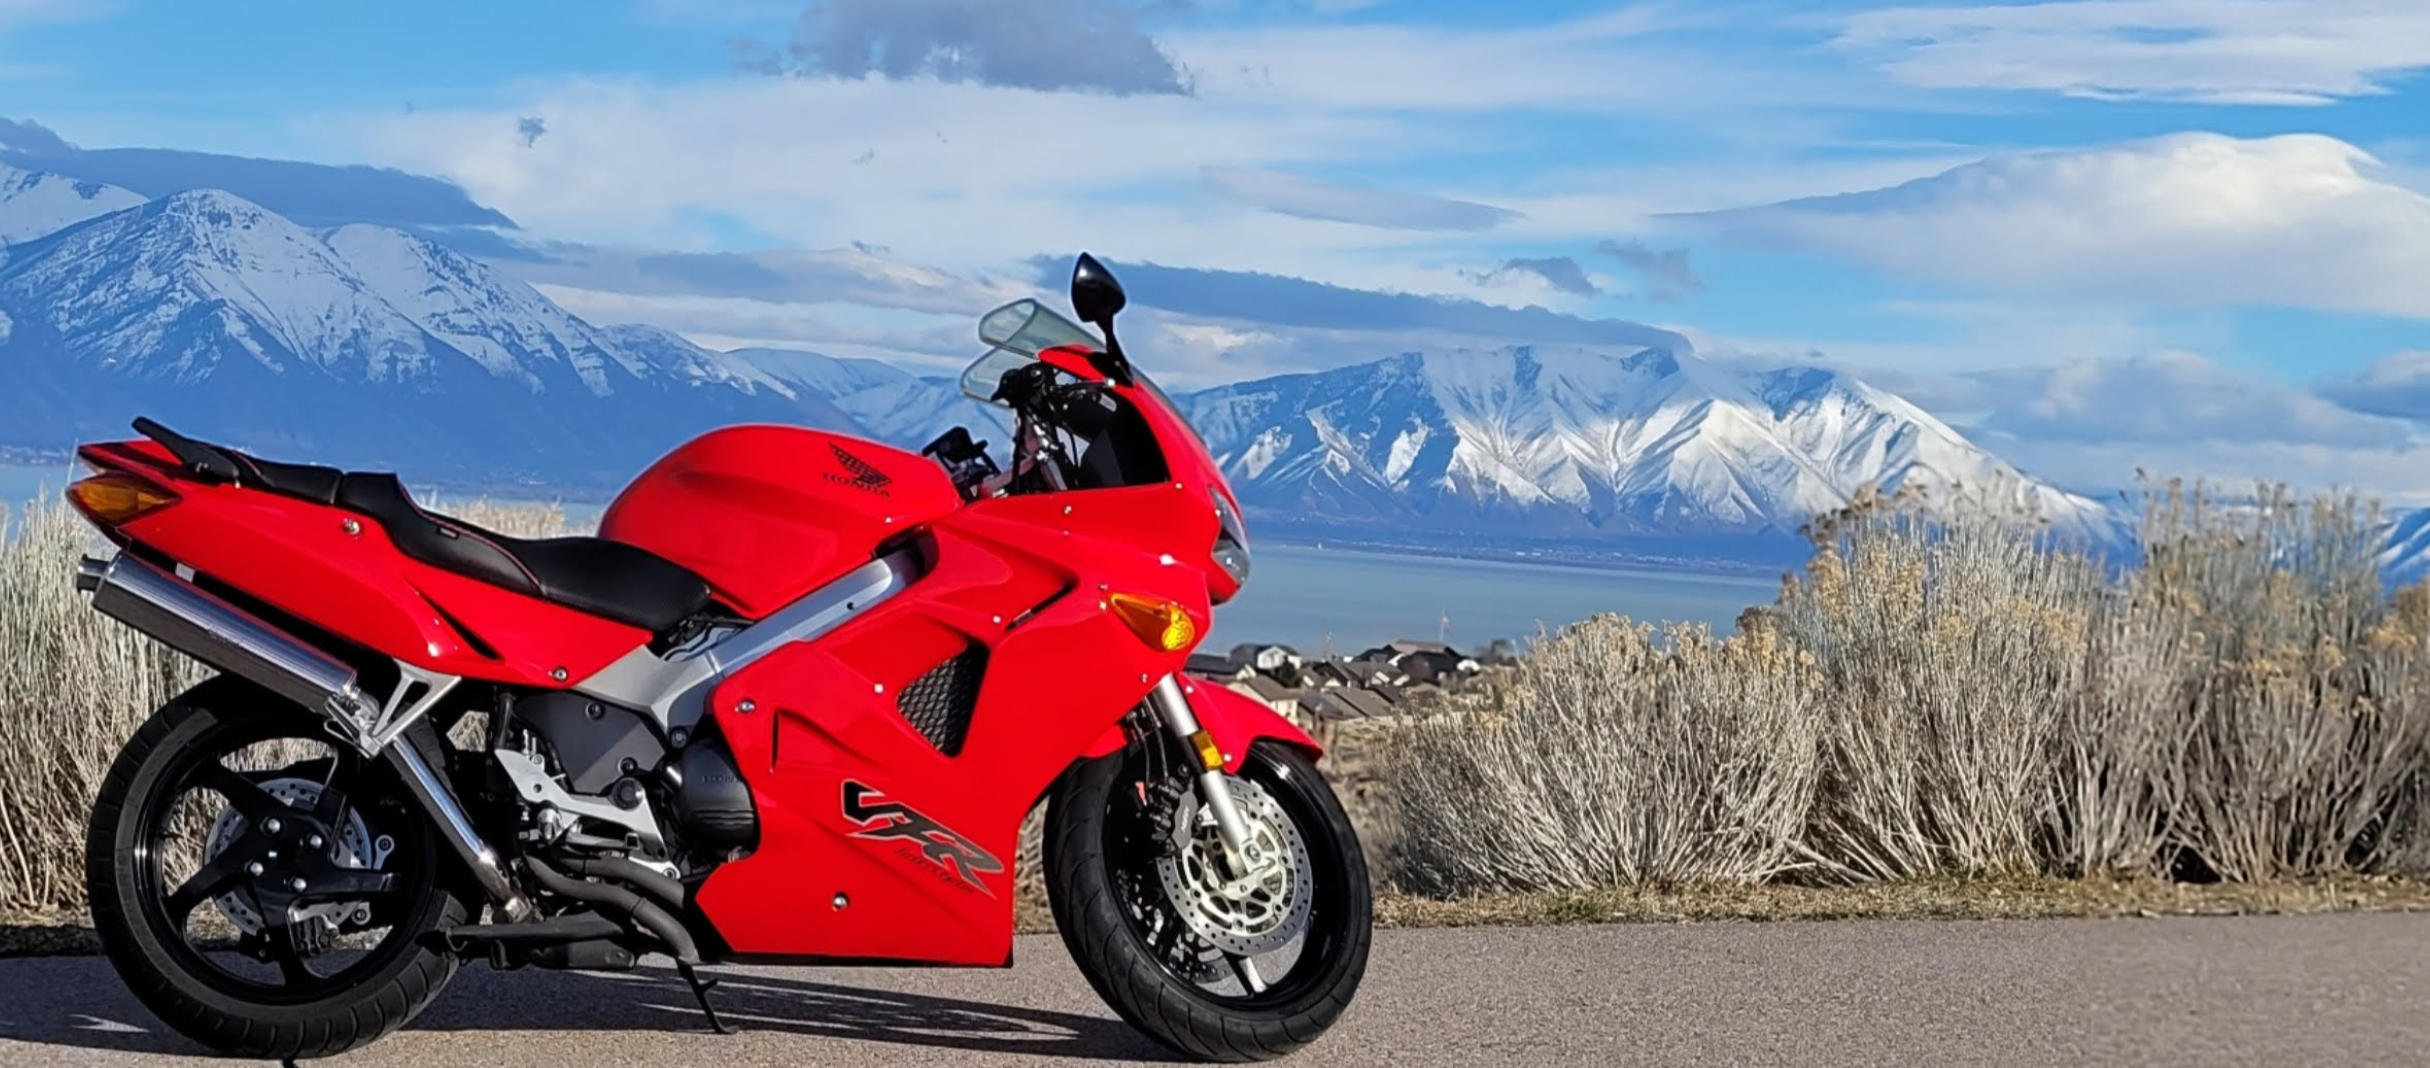
May '93: Cherry blossoms at Beacon Hill park made a good backdrop for this shot of the new-to me '91 VFR750.
 5 points
 -
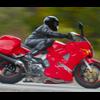
Never been an issue with all 4 VFR800's I've owned with after market exhausts fitted, 1200 shouldn't be any different. O2 sensors means ECU runs in closed loop, so air to fuel ratio is continuously optimized. Think you're worrying about nothing. I'd probably go back to the OEM type airfilter if it was mine! Good Luck with the bike, take it for a good test ride. Check it's maintenance history. Coolant change, brake and clutch fluid replacement - should have had a few of those! Oil and filter, etc. P.s. I'm sure there was a rear wheel drive unit issue recall for the early 1200's. Make sure this has been done.4 points
-
Hi Mello. Thanks for the info. Saw his name on the member list. I don't want to join the ST-owners forum, but if you're on it? Can you send him a PM, tell him to get back to the real forum! VFRD misses him. Cheers3 points
-
If there is decent airflow through the radiator then the bike should sit at/near the thermostat opening point of 78-80C or 176F irrespective of the ambient temperature. When you get stuck in traffic (no air passing through the radiator) the temperature will rise to around 100 (212) and should cycle up/down as the fans switch on off. To get higher than that would suggest maybe the fans don't work or the thermostat is stuck. Let's assume the cooling system is full and the reservoir has a decent volume as well (you checked that, right?). If the radiator stays cold when the engine starts and then suddenly gets too hot to touch around 176, the thermostat probably works. If the radiator gently warms up as soon as the engine starts, the thermostat is probably jammed half-open. If the radiator never gets hot, the thermostat is probably jammed shut. Check the fan switches itself on around 212F and off a few degrees below that. Some have altered the fan wiring to put a manual bypass switch in place, so if you are going to get mired in traffic you can start the fan earlier.3 points
-
Not sure if this has been posted on VFRD but long time VFR specialty product company Tyga Performance is now selling full RC30 conversion kits to suit 4th Gen VFR750. All bodywork, subframes, infill panels, exhaust system... the works. Even a replacement fuel tank. They look incredible and are literally plug and play. Bodywork Set 1, GRP, Painted RC30, RC36-2 RC30 Style, Street | TYGA-Performance The interest in this kit on the Facebook "RC/RVF Replica Group" is immense and a lot of bikes are going to be converted, so now's the time to grab a 4th Gen. Especially a cosmetically challenged one.3 points
-
I wish the video had a skinny guy try to use it...3 points
-
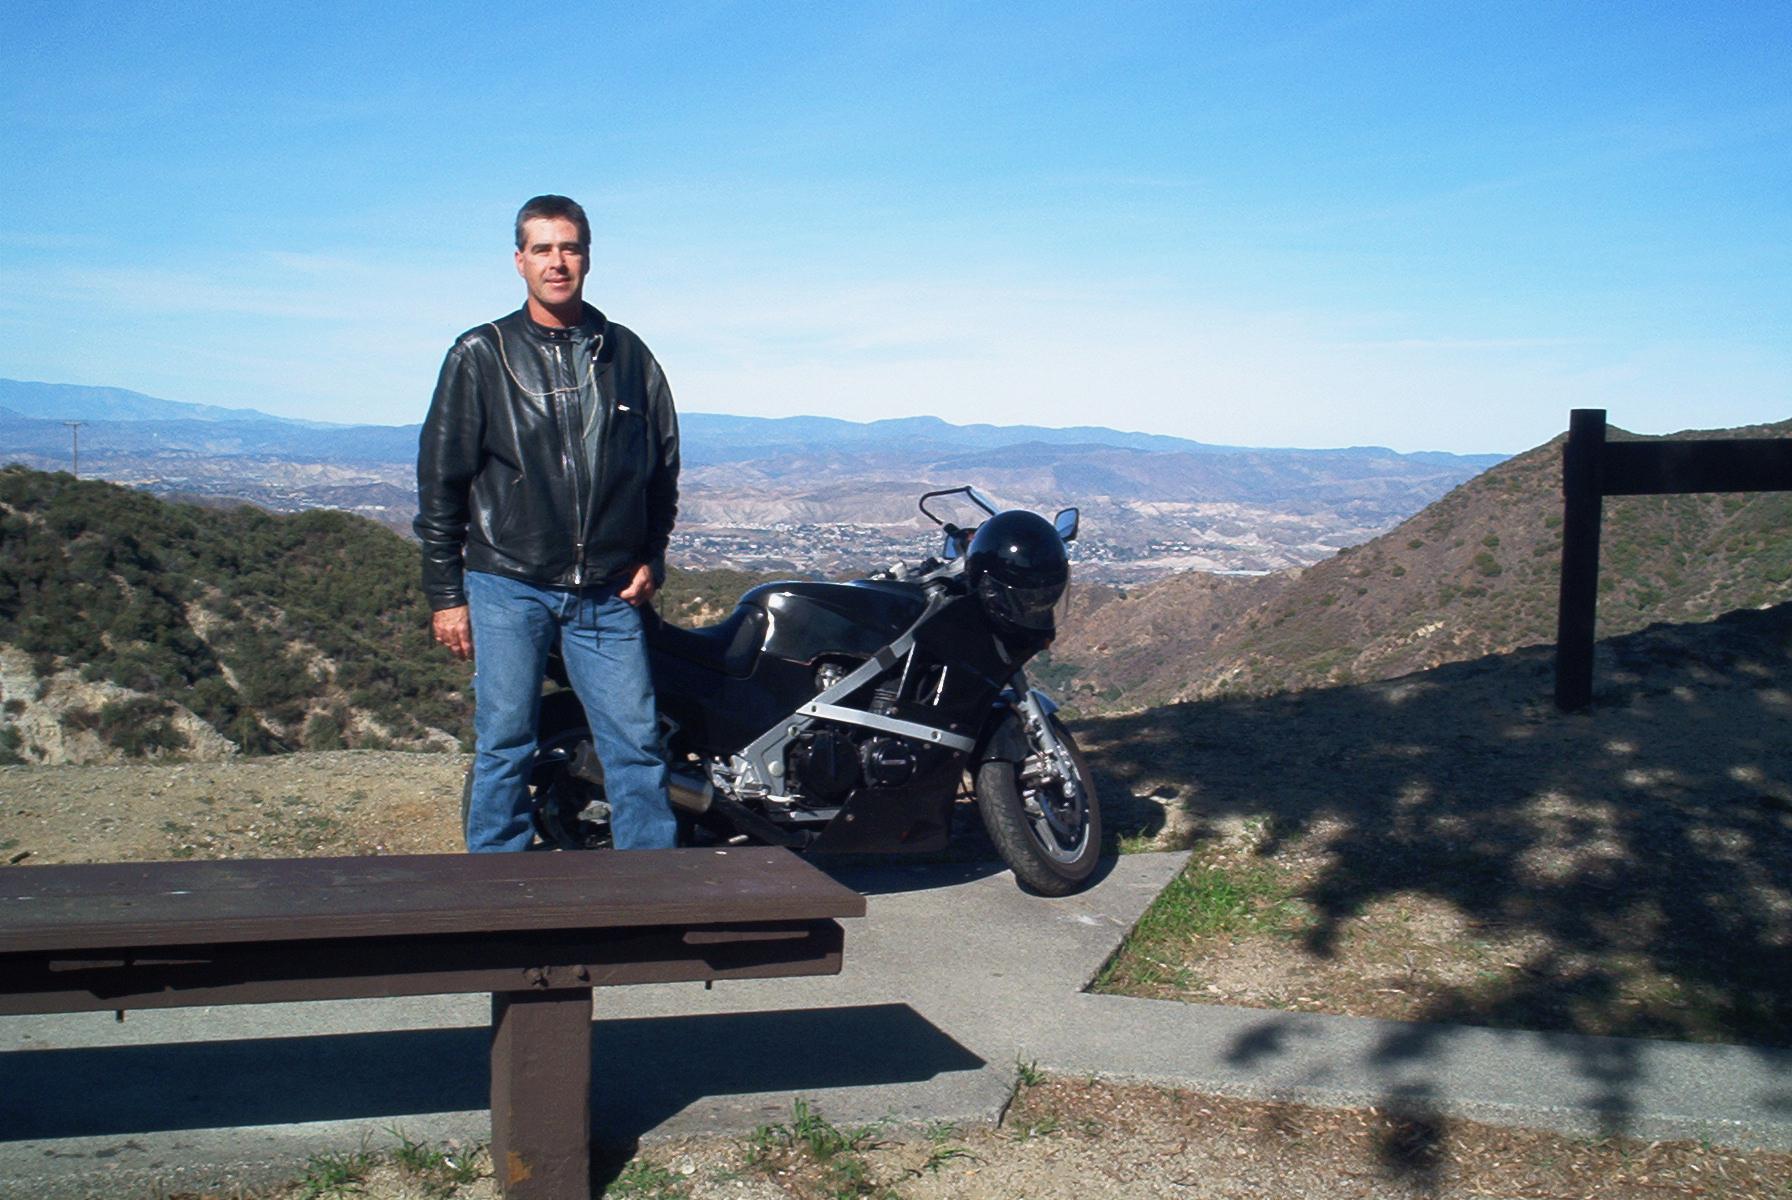
...I bought this lightly used 2 year old VFR750, and haven't been without a Honda since then; several VFRs and a handful of VTR1000F. I'd bought the bike late that afternoon, and being early March it was a dark, damp first ride to visit my folks. I'd love to have it back, and in that condition.2 points
-
The issue of the centre piston on the rear caliper not relieving is now resolved. This would only happen when actuating from the rear brake (that cylinder feeds the rears outer two pistons directly, and feeds centre piston via the front second master cylinder, though the green check and relief valve you see above. I think what was happening is fluid was entering the system through the ball check valve, but could not escape though the tiny relief hole which had blocked after been stood 12 years. The brake initially stuck after cleaning it out as above, it wasn't jammed on, but it wasnt right which was very worrying, I again began the process of confirming and chasing the pressure lock from the caliper back towards the front second master cylinder, but after confirming the pressure released at the rear middle piston banjo, subsequently releasing the rear wheel, I moved on to the PCV under the back right of the fuel tank, only to find I couldn't get it to lock again!? Maybe I just had an air bubble right at the back of the system and I let it out? I did a quick manual bleed over all the points, pumping the front second cylinder by hand, no vacuum/power or check valve hoses, just an 8/10mm spanner and a bit of pipe on all the points, my favourite method to be honest! - The levers are nice and firm now, and after a good blast out, the front brakes are really keen even with light pressure, the back when actuated from the rear still drags for 1/2 second or so but its getting quicker and smoother at releasing, I dont notice it when pulling up at lights any more, the bike free wheels forward back when rocked. Happy, just been out for an hour, great bike, good find.2 points
-
Errrrr......thanks. Everyone is entitled to their opinion and I'm not going to challenge yours 😆2 points
-
The RC46 crank case & major assemblies are taken directly from the RC45 which in final race trim was putting out 195rwhp @ 14K/rpm. The only major parts difference was the pistons & Ti conrods & the crank+cams being timed differently. The big bang RC45 crank is timed at 0 degrees, such that it acts like a pair of V-twins joined together. And the 2mm shorter stroke allowed for the higher race RPM. That setup creates huge loads, the VFR's 180 degree crank is much kinder to the cases & bearings. Due to the total lack of RC45 crank case spares, race teams use 5th gen crank cases with the swingarm pivot ground off. They then bolt straight in to RC45 frame and all RC45 innards just drop in.2 points
-
Rode a few bikes as a youngster, but didn't really start riding until '98. Oldest pic I have of me & the '87 ZX600 is from '05. First VFR was '09.
2 points
-
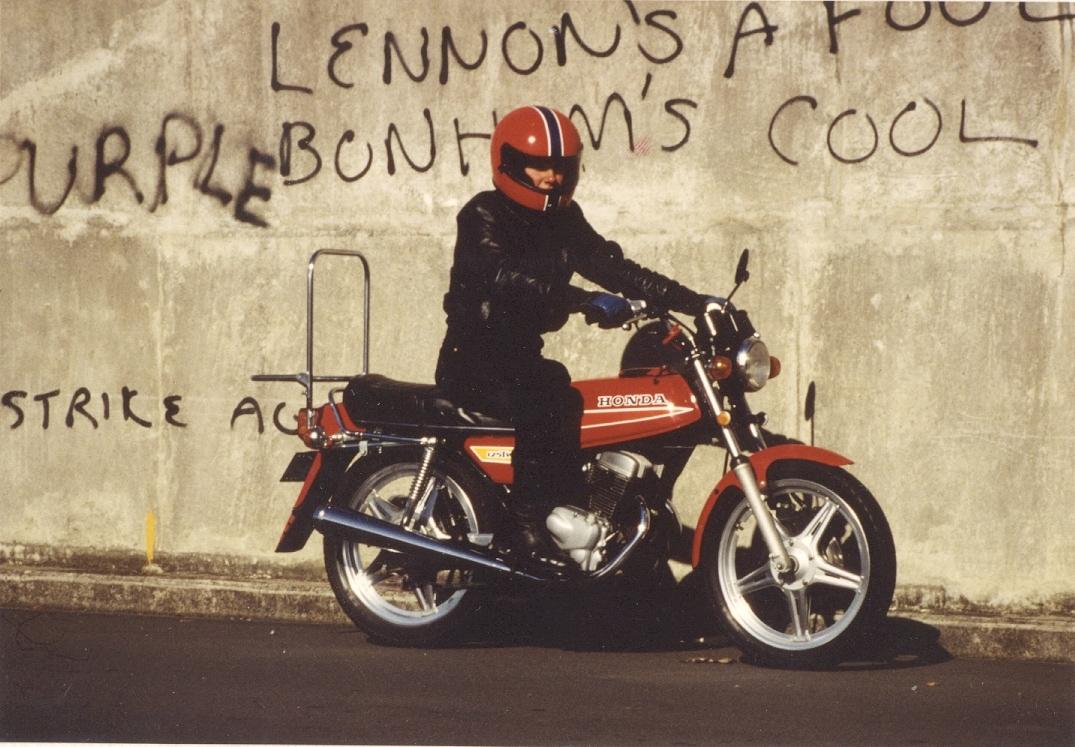
I can't quite match the vintage, but here we are in 1982, me and my mighty CB125T; two tiny pistons frantically going nowhere! 12000rpm redline! The T did not stand for torque however. This was my first motorcycle and started my love afair with Honda.
2 points
-
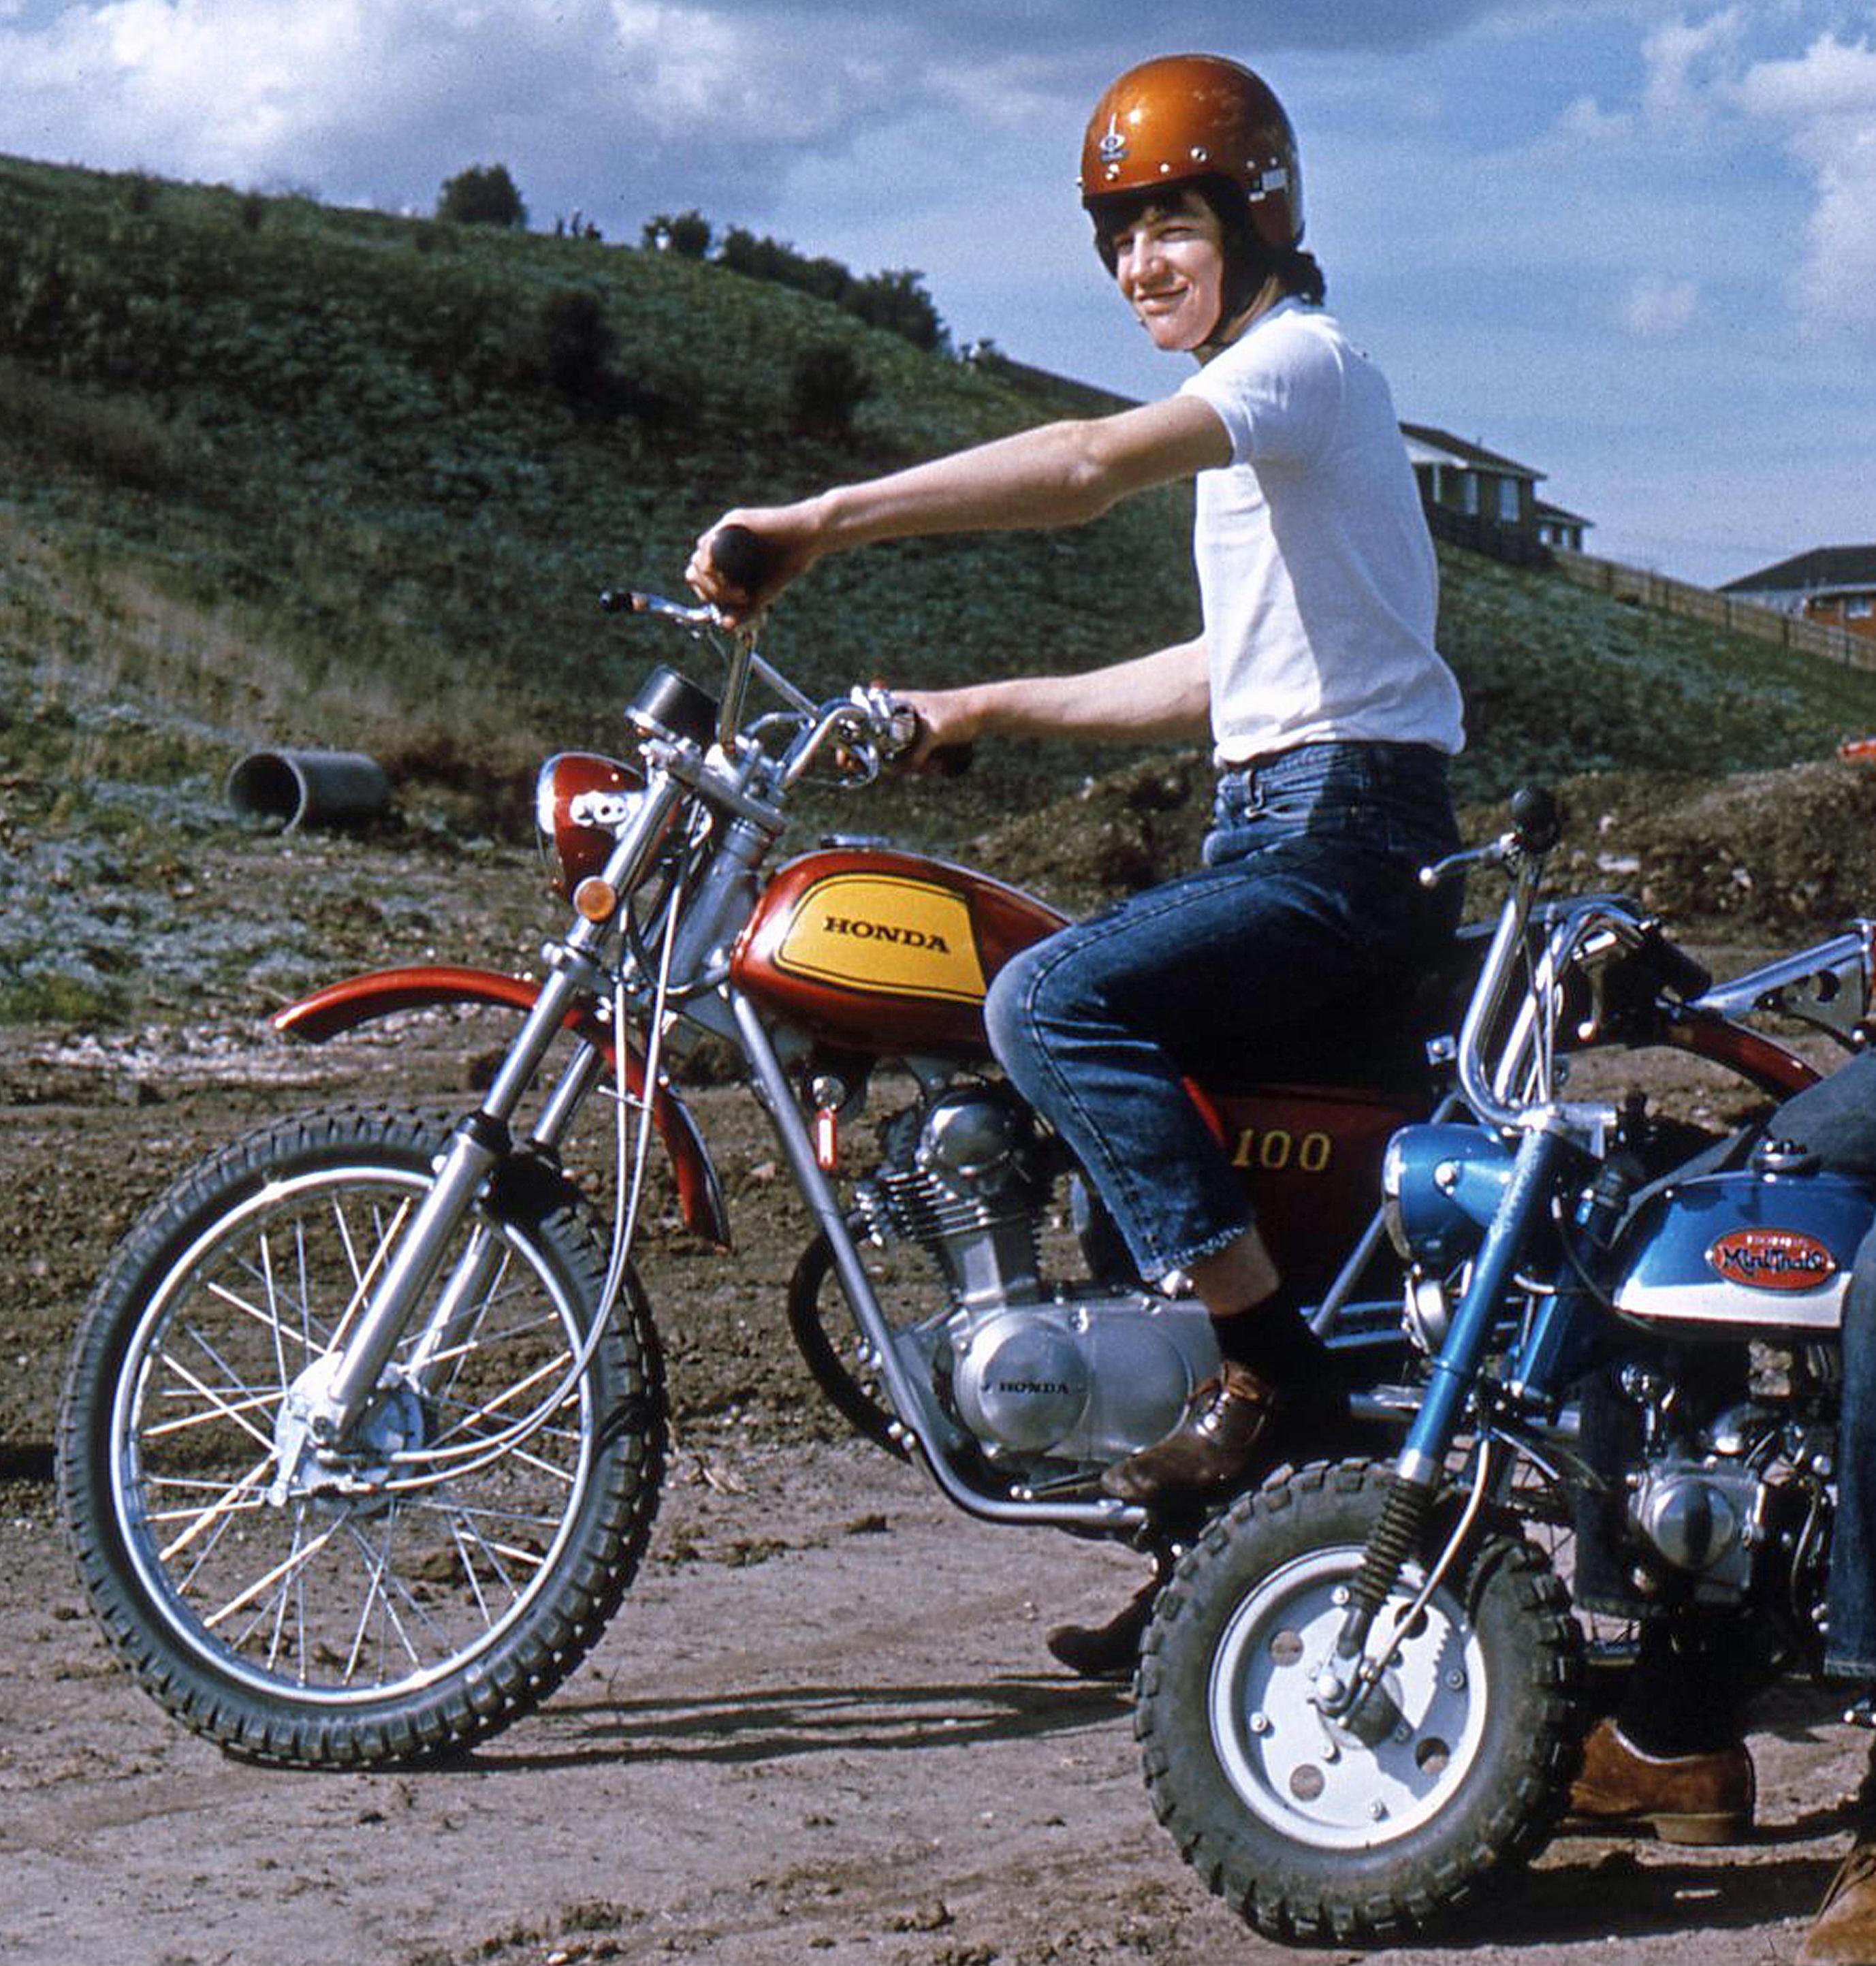
Just for a laugh!..... 1972 - Yikes, 52 years ago!! My beloved Honda SL100, absolutely had a hoot with this bike. Worked three paper delivery rounds per week to save up for it. I'd really give this bike a work out and never had a fault with it. That bike won me over forever with Honda's build quality, reliability and durability. My buddies little Honda Mini Trail was also bulletproof. ATGATT...only partially back then. Cheers
2 points
-
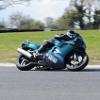
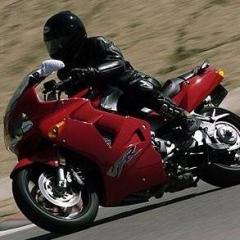
OK Lorne. I didn't go back far enough (the end of my digital photos is ~ a little over 20 yrs ago). However, here's an action photo of me about to drag my knee, wearing, obviously, ATGATT. I challenge all here at VFRD to name vehicle brand as well as engine. Cheers!
2 points
-
Oh greeze, man, id prefer to crash on a motorcycle........😏2 points
-
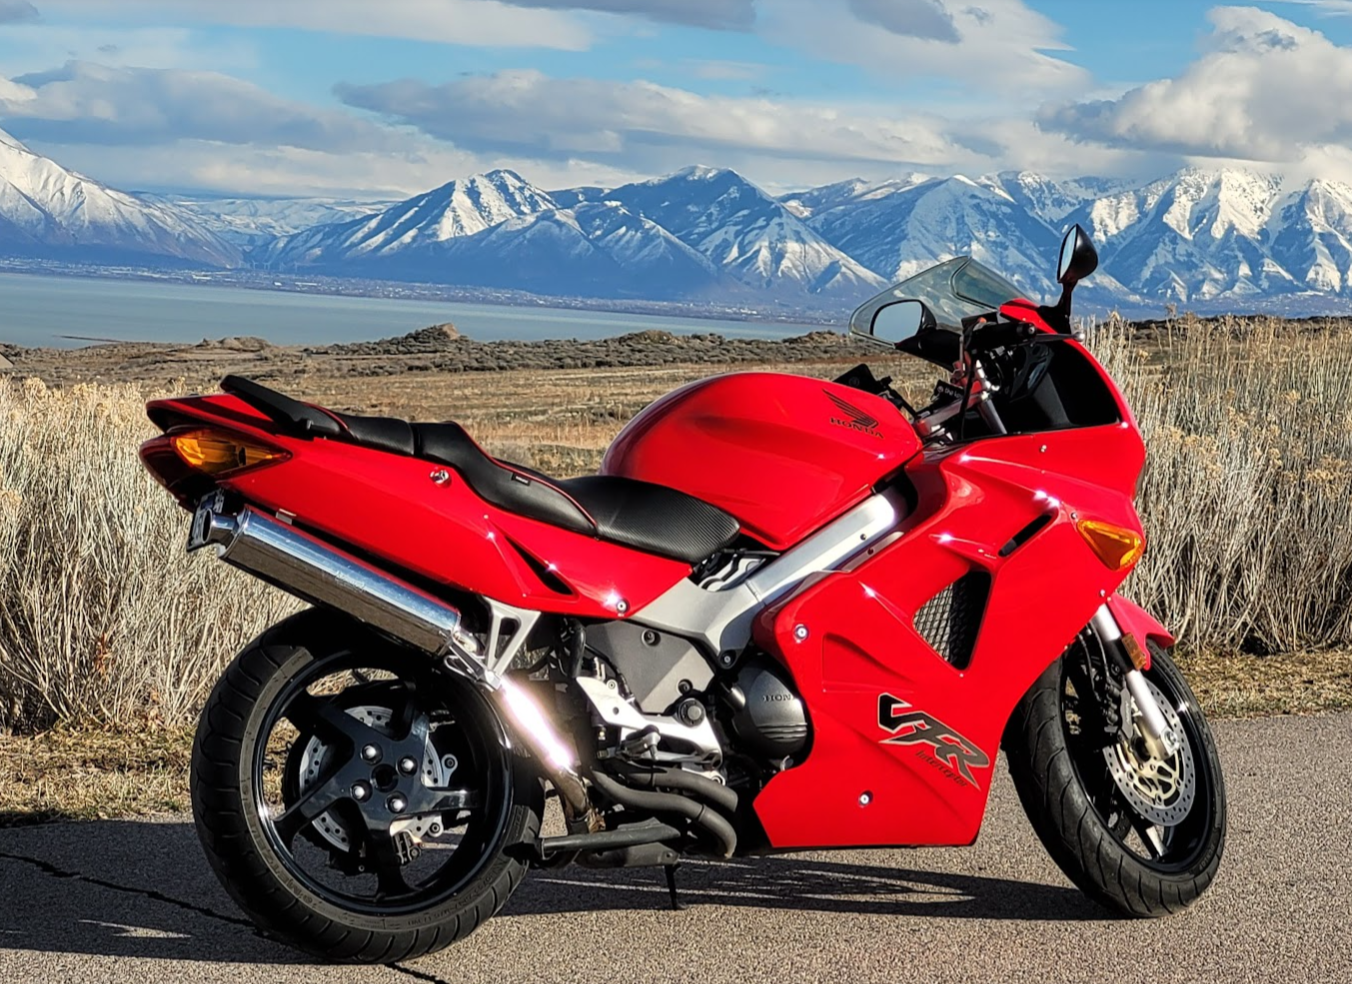
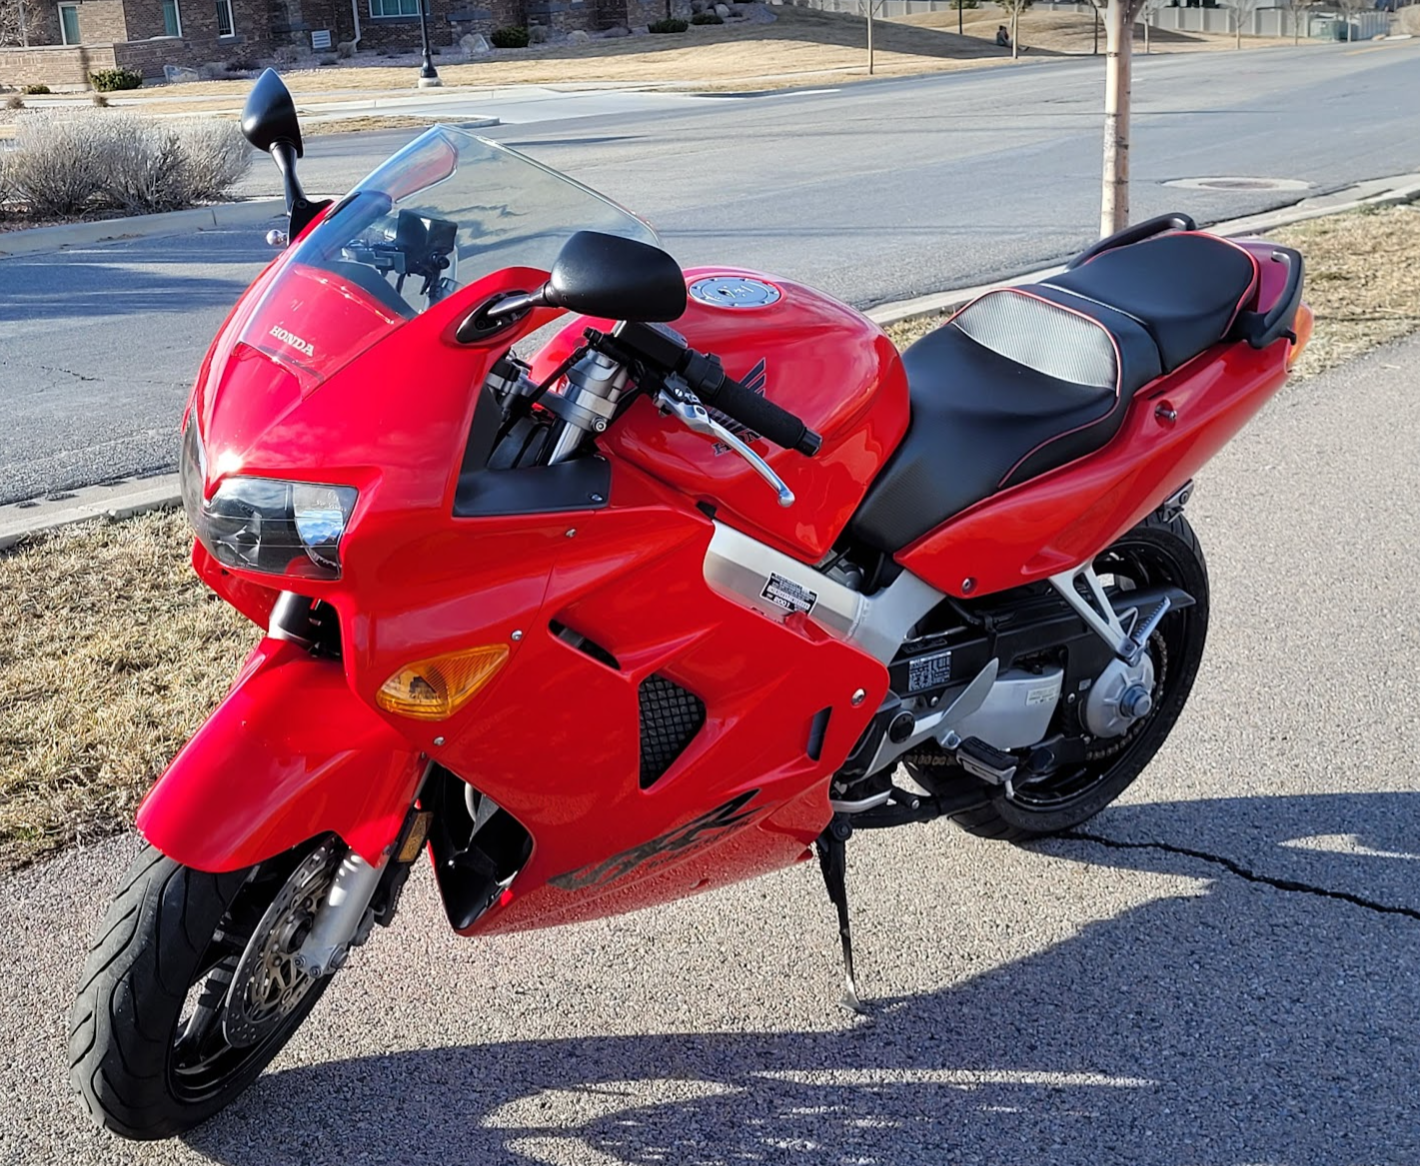
I did it again, now I have a low km 1998 to keep the 2000 company. That's two in the garage now but is my 4th in total.
2 points
-
I know it made the rounds on the FB group. Like you, I figure it will be tough to find a 4th gen starting about now. May be a good idea to hang on to an unmolested one even.2 points
-
I am the muttonhead in this (what should be) finale in the VFR saga. Looking at shock length and not bike ride height caused me many hours of headaches. Even I can't believe it. The next time that each shock is out I will measure to compare. For now, they both stay bolted in and as they are. Yellow VFR00 hot sag numbers came in perfect after some adjusting. Front is 24/34 and rear is 10/30. This is after a few changes to get rear ride height very close to VFR98, which I love. The yellow bike front forks are a touch (1.5mm) higher in the triples (front of bike is lower) and the rear is a touch higher (w/in 1.5mm) measured up from the axle...but close enough for a lackey. Simply everything feels better with the geometry changed. Braking. Seating. Pressure on arms. Mid corner direction changes. Everything. Patience paid off. I was ready to light it on fire...like I am with the ABS FJ1200 wheels/brakes that cost the earth. I rode both VFRs back to back today to verify/set hot sag. While they feel different because the components are different, they are both pretty excellent. Absolutely adequate for any kind of riding. I planned to be zippy in the mountains tomorrow, but all 7 buddies bailed, so I'll likely just roll around the lakes here, which is a 4-5 hour ride.2 points
-
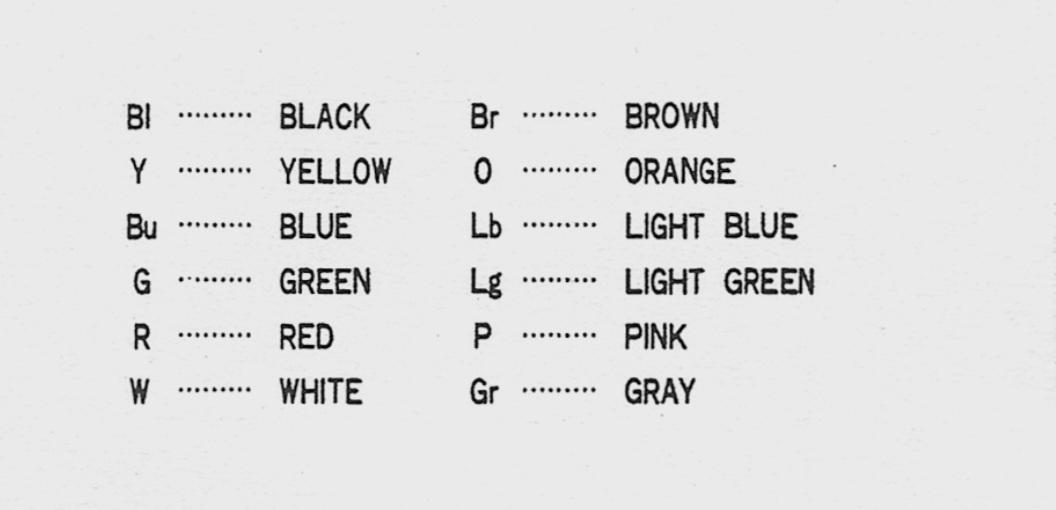
Well well. A Green/Blue wire! The wiring diagrams Are Correct. And you wonder why you've made me a "Grumpy Grum"......Should be as obvious as the correct Green/Blue wire I'm seeing for Temperature Input Not a "blue with gray dashes" and that it took three requests for you check it. As for those gray dashes you mention I have no idea what they are for. And why only now, you're admitting to having ordered a replacement ECT sometime back, after you stated on the other post (2000 VFR800 fuel pump no power) that you did the Service Manual tests and suspected it was faulty back then? 30.1 Ohms is Miles out of tolerance. You could have saved us all a hell of a lot of time wasting, sounds like another wild goose chase per the ECM saga, I'm convinced you knew about the blown ECM all along. And this - "BLUE 10P wire is blue with gray dashes good continuity." Question asked, continuity to What? You were looking at the Lb wire Light Blue - For the R/H Turn Indicator Light! And this - "item 8 You are incorrect the wire is not green/blue it is blue with gray dashes" Sorry not so! But correct if chasing a Turn Light fault. Seriously, trying to sort out your problems via a keybord 14,000km away is near impossible (well for me anyway) when your feedback has been confusing, with very little clear info, jumping off track, or not answering questions, it just makes the whole interaction messy, difficult to follow, and time wasting. As for the insult - "Grumpy Grum says he truly is the expert." I've never said that in my 67 years existence, I don't hold back or hide info from people and enjoy passing whatever helpful info I may have to help others, even You! I've worked with people who kept important, helpful info from others, a job security issue perhaps, that ain't me. But frankly I couldn't care less mate! Enough said, good luck with it all, guess you don't believe this, but I hope you get that bike up and running ASAP. This time I'm definitely done. Cheers2 points
-
Electrical fault finding can be very frustrating particularly if ( like me) one is not that experienced at it. That's why many of us use the experts on this site. However, it is really important to follow the steps of advice exactly and report back findings on those steps as requested. That's also the better way to learn because the approach has logical structure. Missing out bits, giving half answers or introducing new stuff makes having the conversation frustrating or downright infuriating. We're all human and everyone offering help on here is genuinely interested in getting a fellow biker back on the road. But being frustrated by half answers will test anyone's patience eventually. I do hope you get this sorted. Cheers!2 points
-
You can indeed just change the fronts and leave the rear with the original rubber lines. In fact getting at the connectors under the seat area for the rear brake lines on the 8 Gen is a royal pain in the arse. I did post about changing the fronts a little while back. I will try to find it for you.2 points
-
I am no expert when it comes to electrical stuff but going back to first principles and from what I understand from Grum's detailed and patient advice: 1. There is one relevant wire that goes from the ECT to the instrument panel. It's shown as G/Bu in the diagrams. But the colour may have altered with heat/age. 2. A broken circuit in this wire or a faulty relevant track in the instrument panel will show up as a permanently flashing 270 temp reading. 3. Use of a non OEM or faulty ECT sensor could also cause the permanent 270 flashing reading. Based on the understanding in 1-3 above my approach would be: 4. Confirm which wire runs from the ECT through to the instrument panel relevant pin and check continuity throughout the run including cleaning any relevant intermediate connections. If colours have faded or changed this will need patient methodical checking and I'd recommend a written note of what you find at each connection. If continuity in this wire is good the problem will either be a faulty sensor or a corroded or dirty track in the instrument panel. 5. There is a fault finding test in the manual for the ECT - run that to confirm or eliminate a problem with the sensor 6. If it's not the sensor you will need to check the tracks inside the instrument panel - there are posts on this site of how to do that I hope I've understood this right. As a disclaimer, I have no experience of a 5th Gen and I have not read the 5 Gen manual- this is taken from the advice you've been offered. Good luck.2 points
-
Hi Skids. That's a real bummer m8. I feel your pain! Yep that horrible point of no return, trying desperately to recover it or at least lay it down gracefully. I remember years ago doing damage to my leg femoral nerve by saving a topple over, the bike back upright without hitting the deck, but bloody hell, the resulting nerve damage was painful for weeks. You're definitely No "Muppet" m8, shit happens!. Given my weight at the moment I feel a little bit Miss Piggy ish! Hope you and the bike are mended ASAP. Take Care. Cheers.2 points
-
No shop anywhere near me would mount tires not bought from them, so they turned customers into DIY's. About 18 years ago I bought a Black Widow paddock tire changer and a HF balancer. The convenience factor became apparent immediately. I averaged 4-6 tires a year for myself and 6-12 for guys in the same position as me. I don't charge for it as motorcycles are my hobby, not a business. Also, it turned our to be a good way to meet the few sport/sport touring guys here in Mid Coast Maine.2 points
-
"one" what? Is this bike coming out of Winter storage for Spring by any chance? Sounds like you need the carbs cleaned/rebuilt.1 point
-
I treasure mine! Like many on the list, there's still nothing to replace it with that is better. Certainly not $10k better! 🙂1 point
-
Yes, and... After changing the oil, you need to RIDE for a good 45 minutes at full operating temperature to remove any moisture from the crankcases (provided you do not have any issues). Running a bike in the driveway, even until the fans come on, typically introduces moisture. That's why short trips on vehicles is so bad for them and their exhaust systems.1 point
-
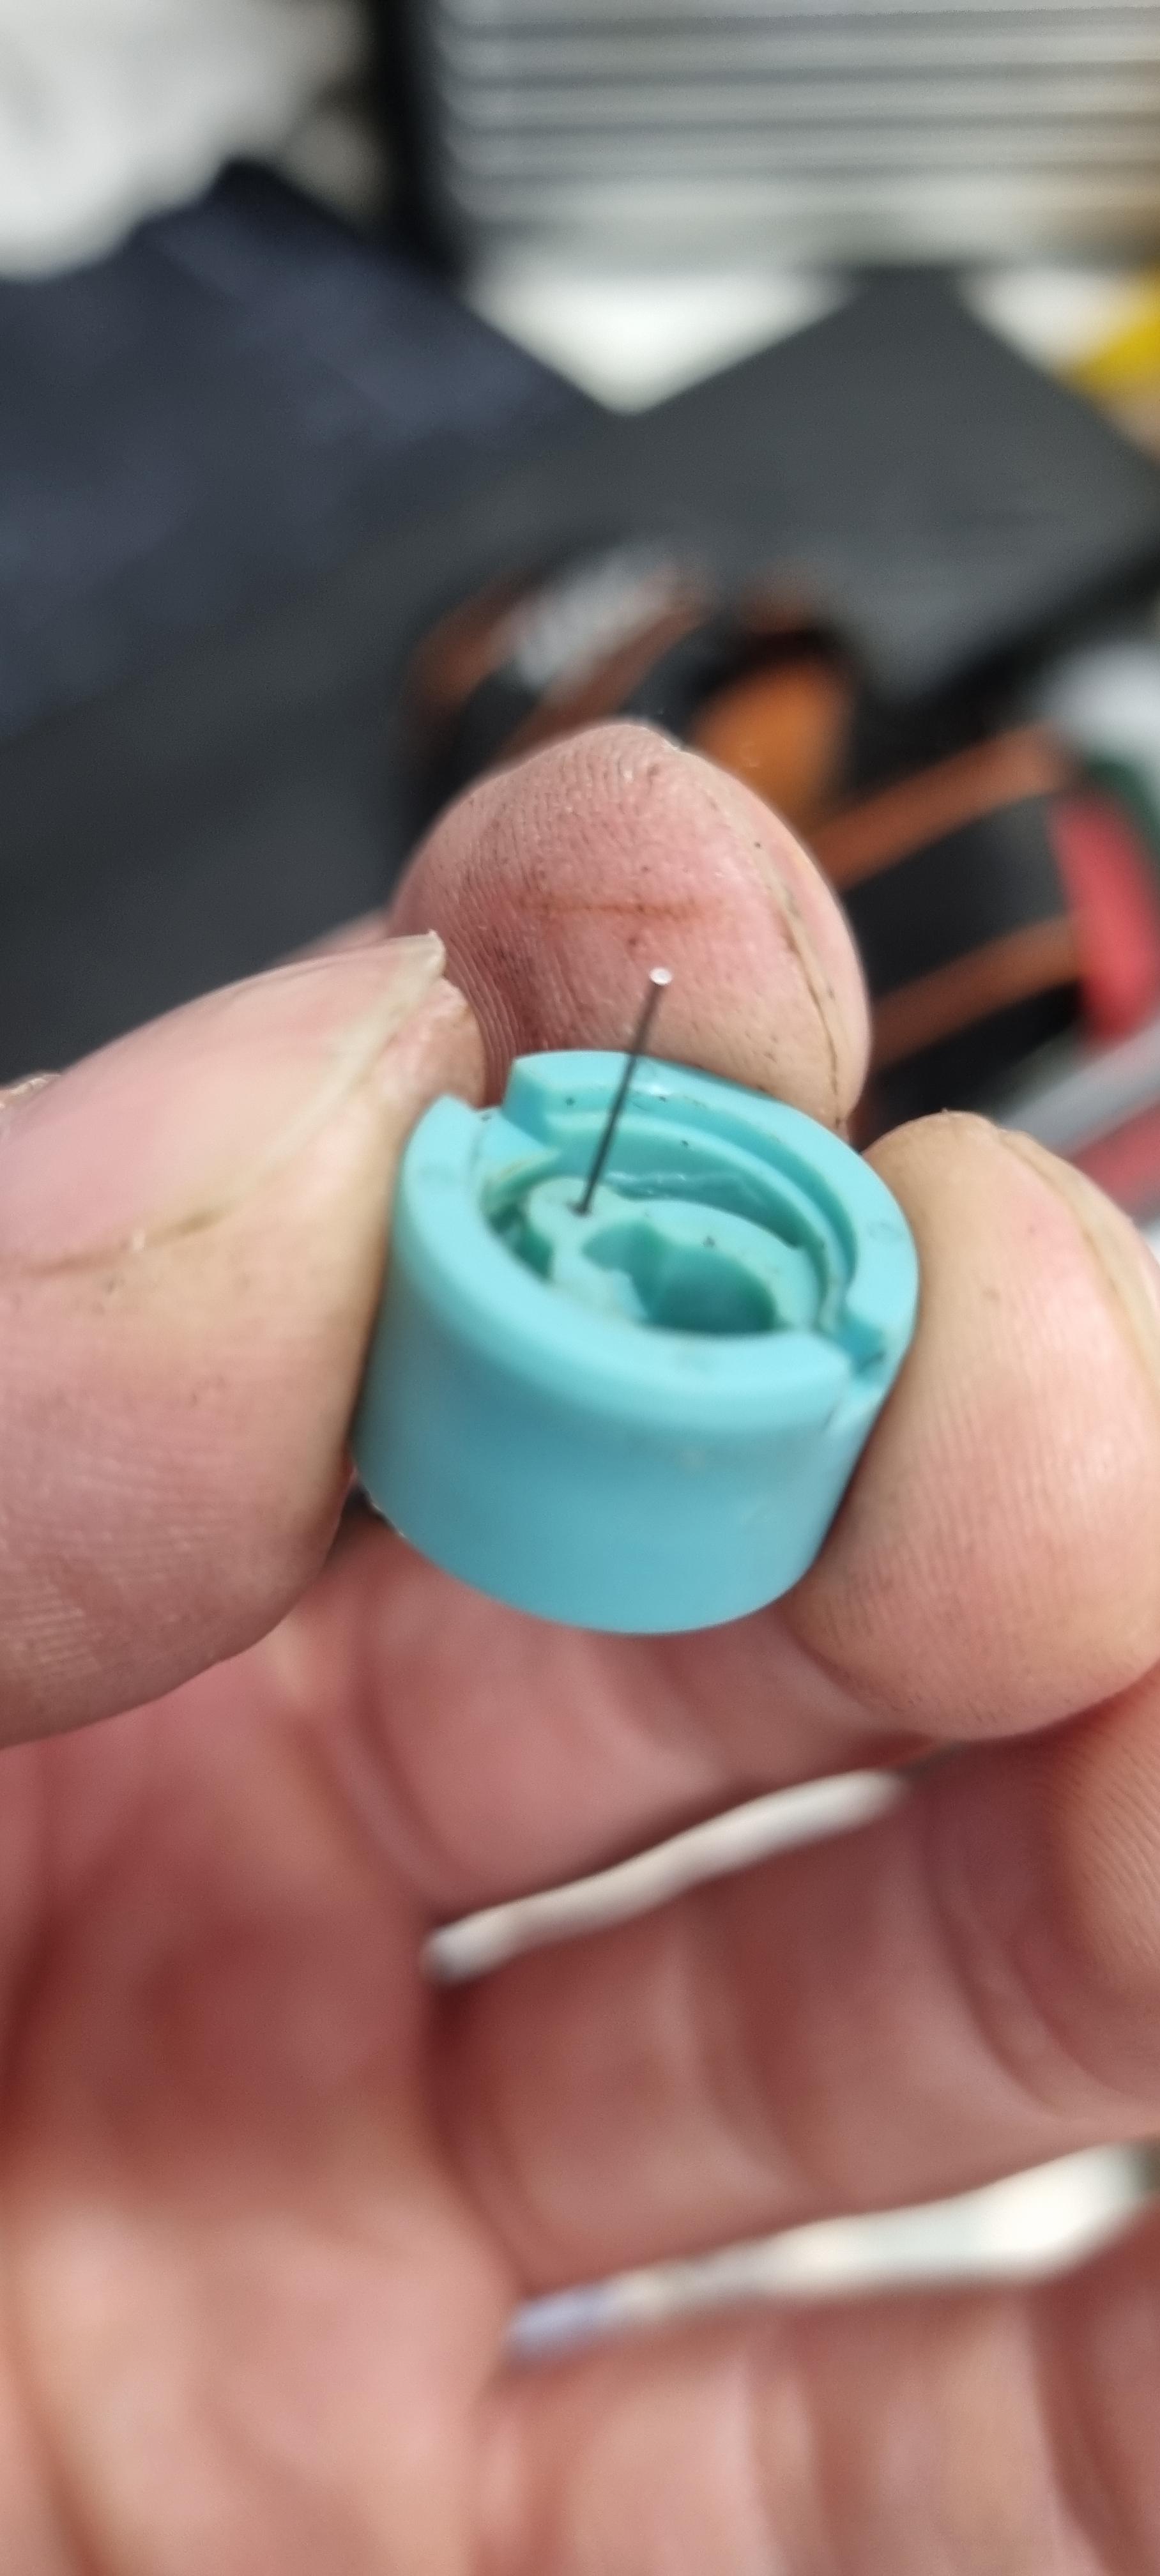
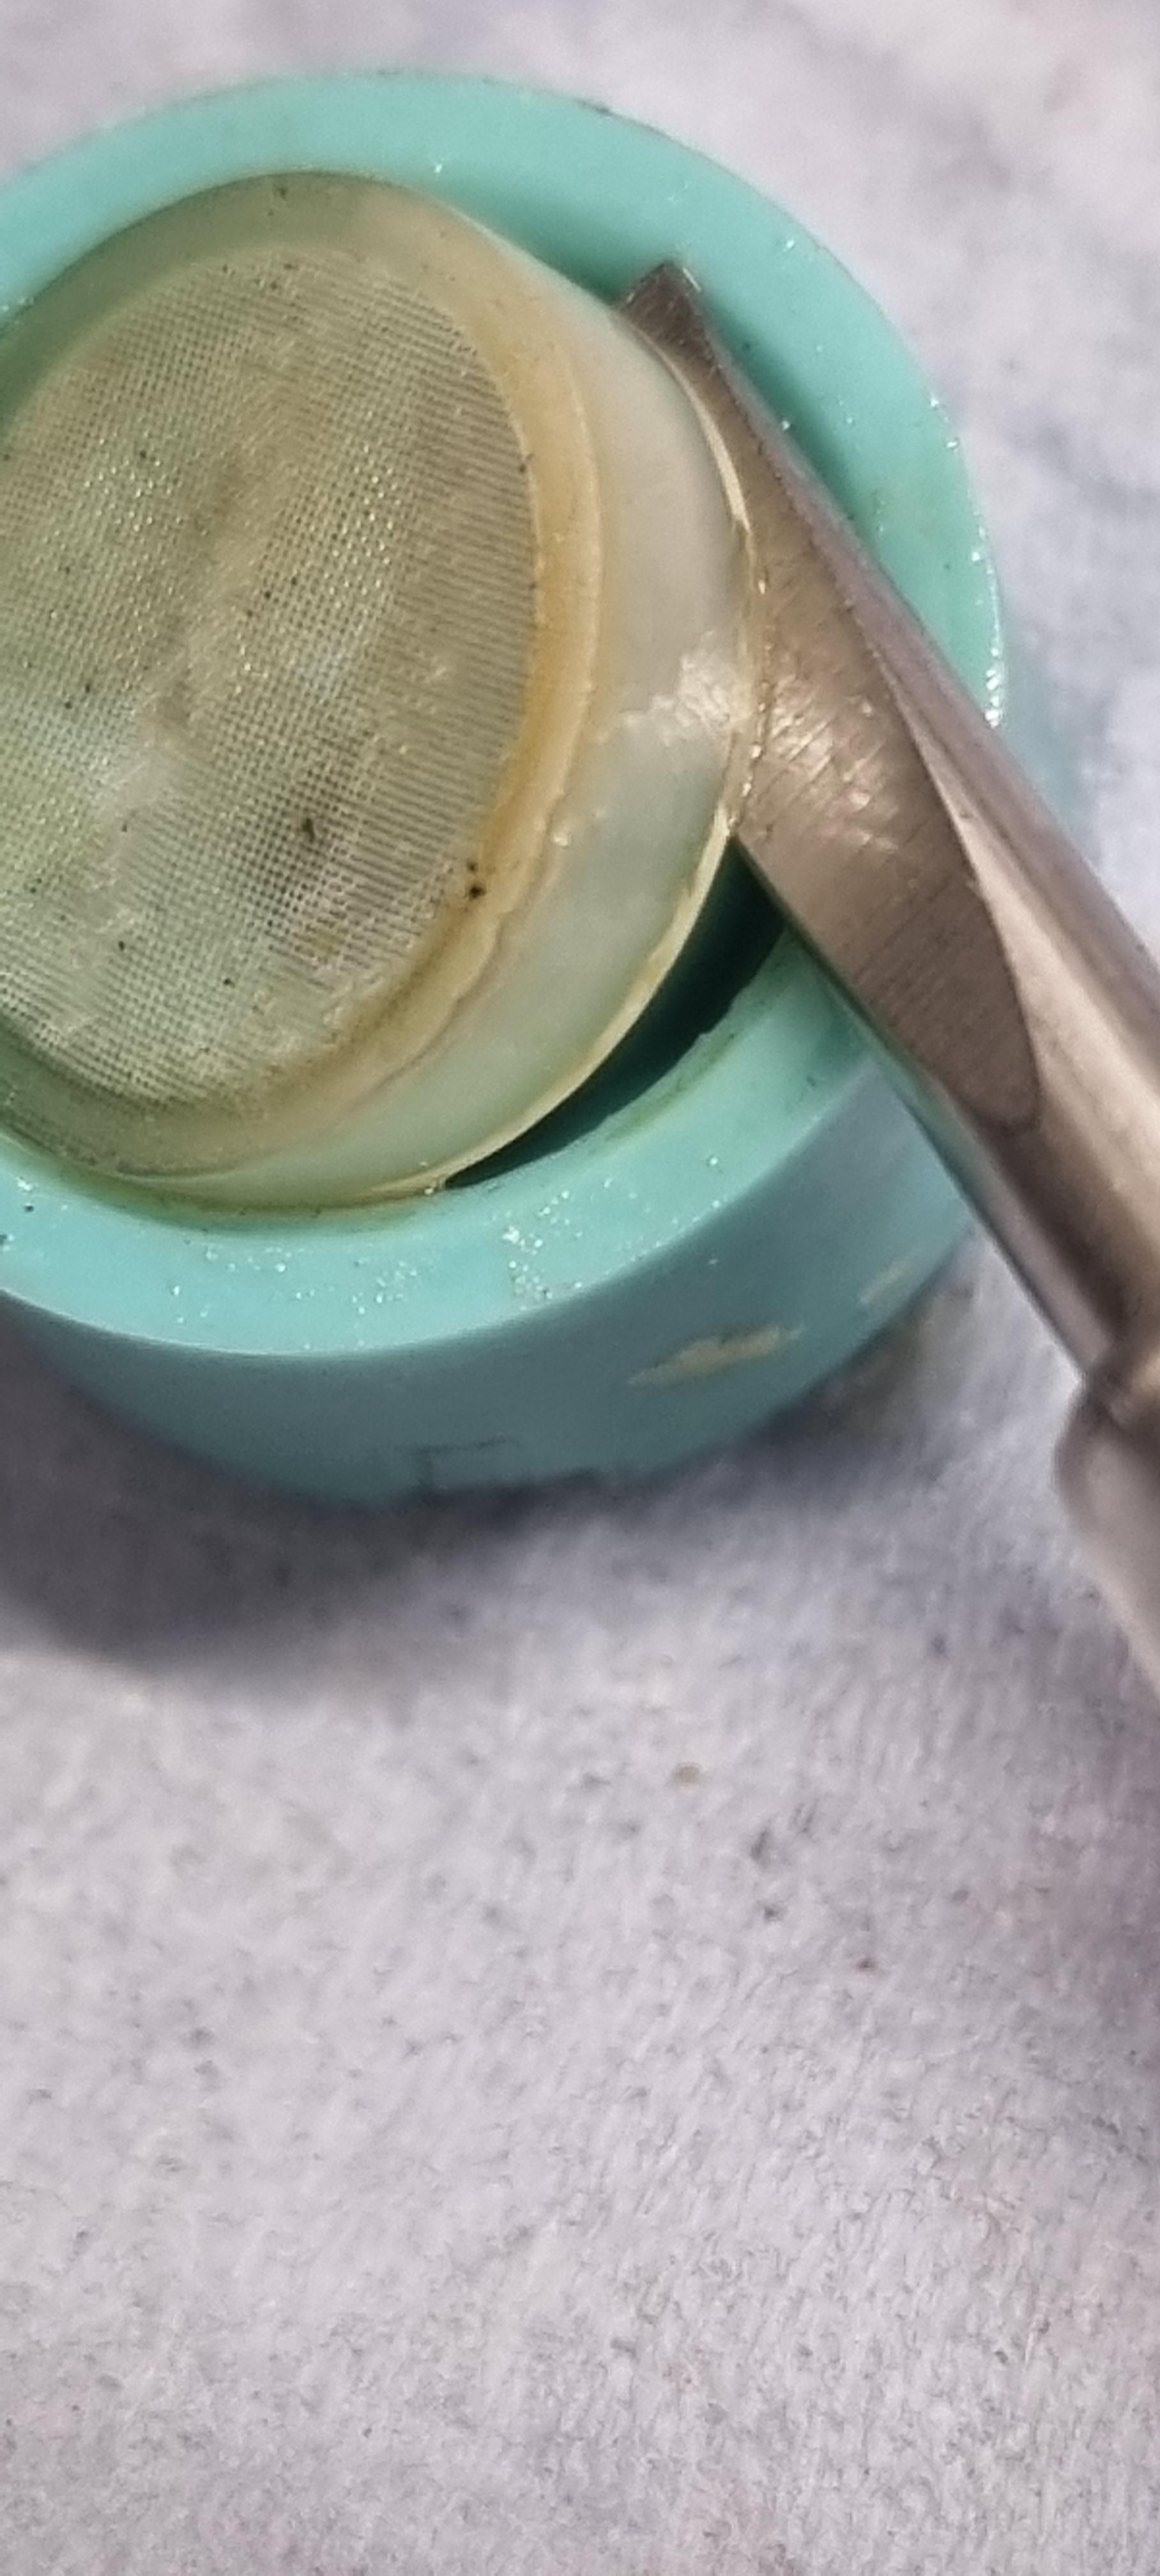
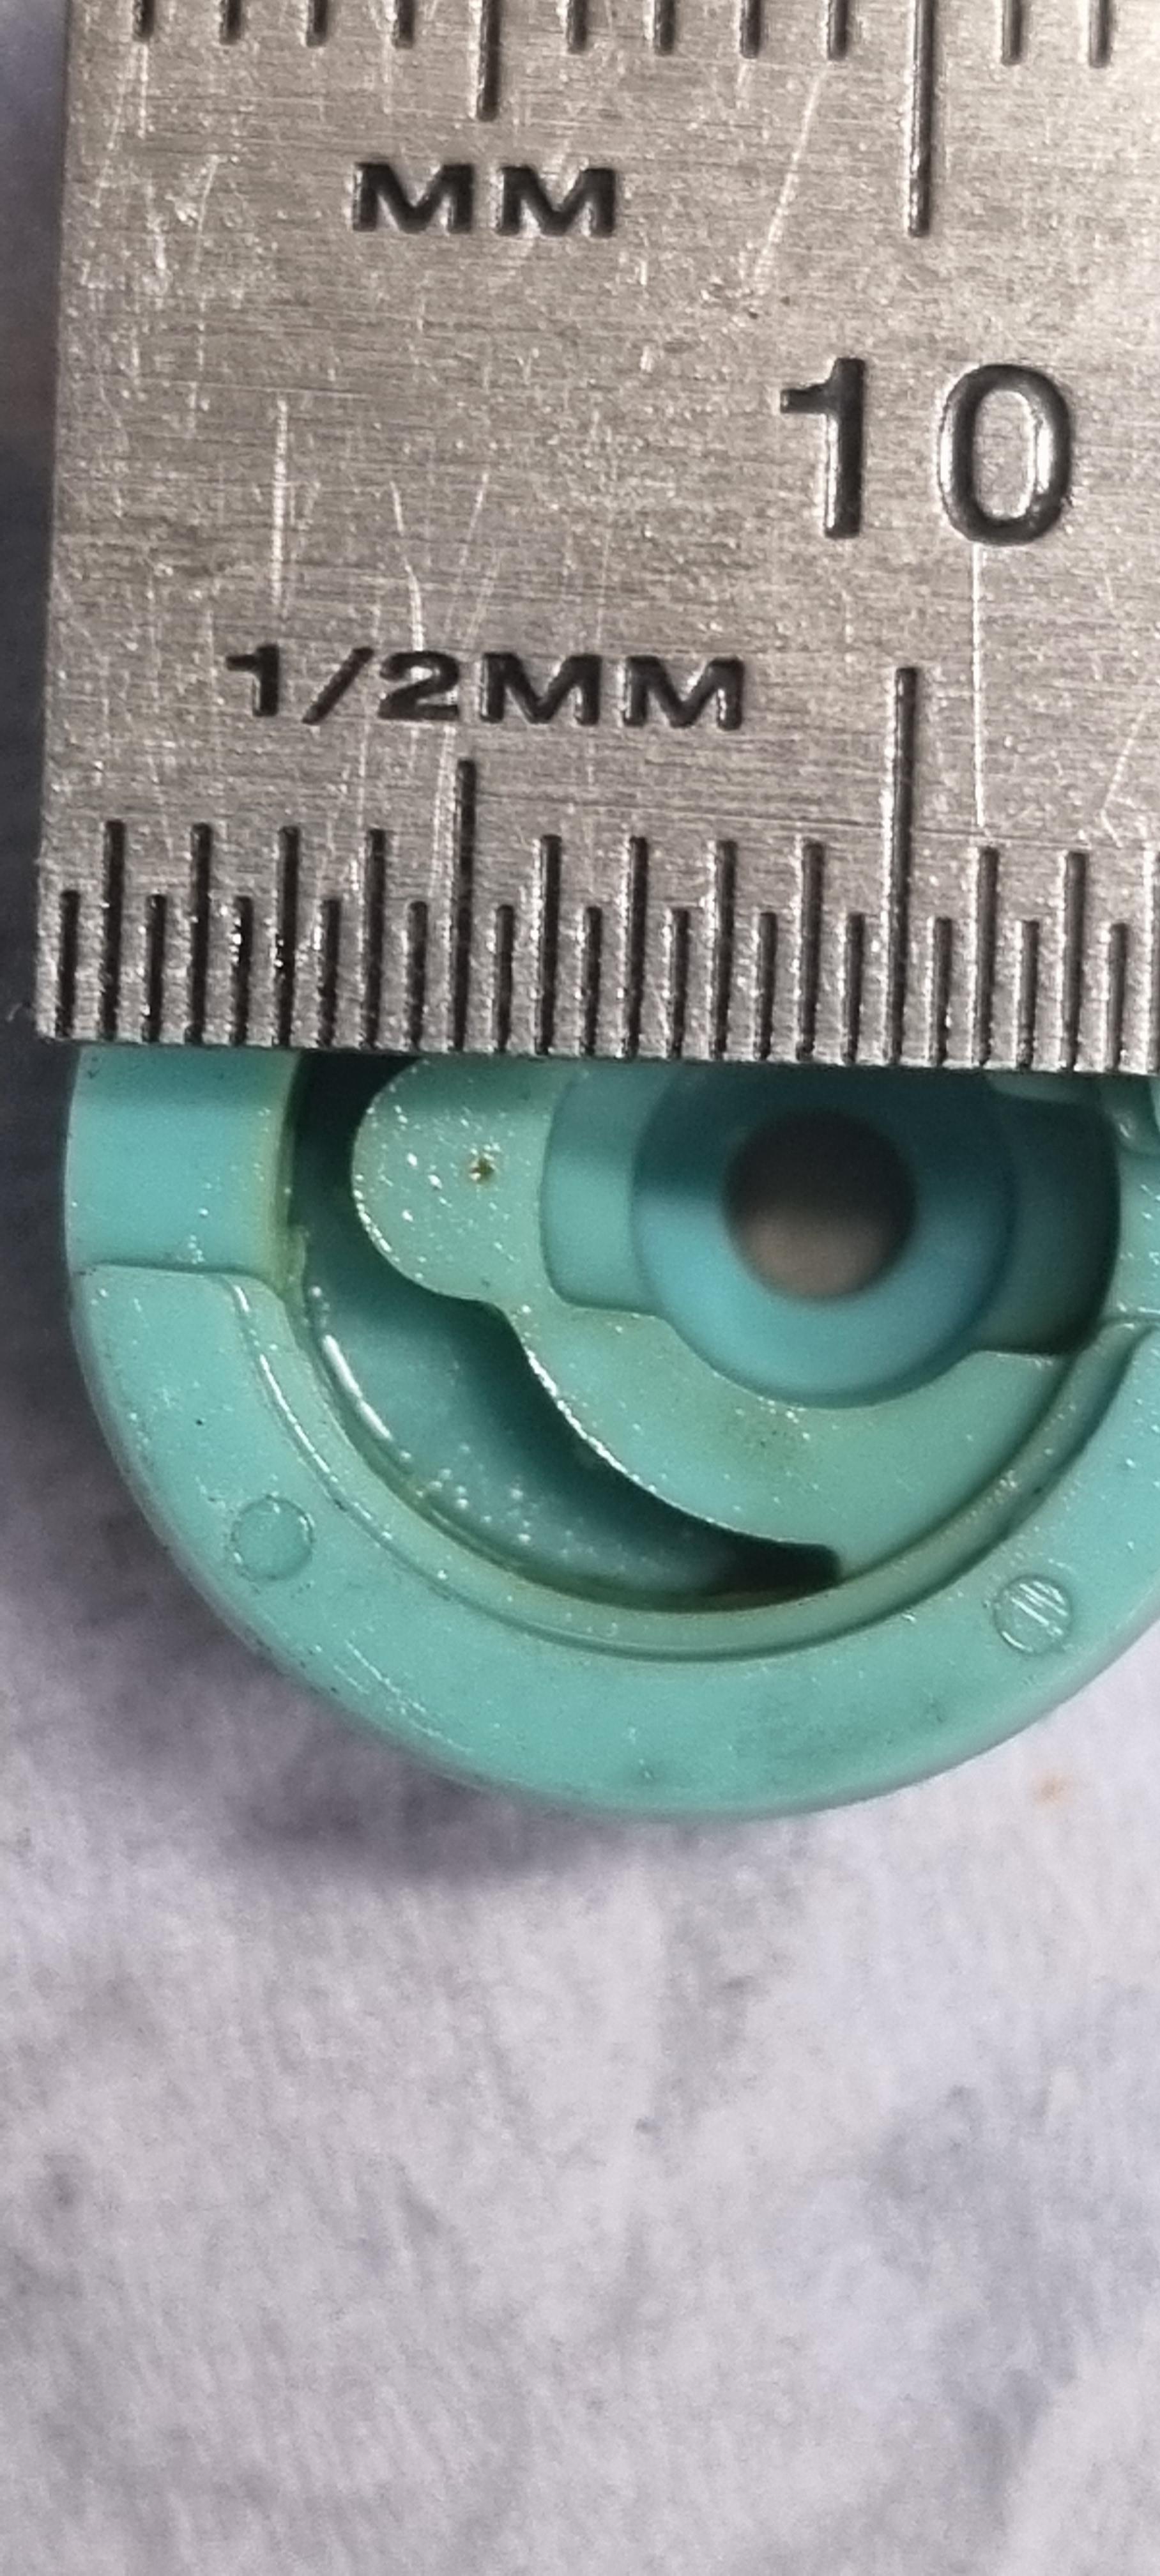
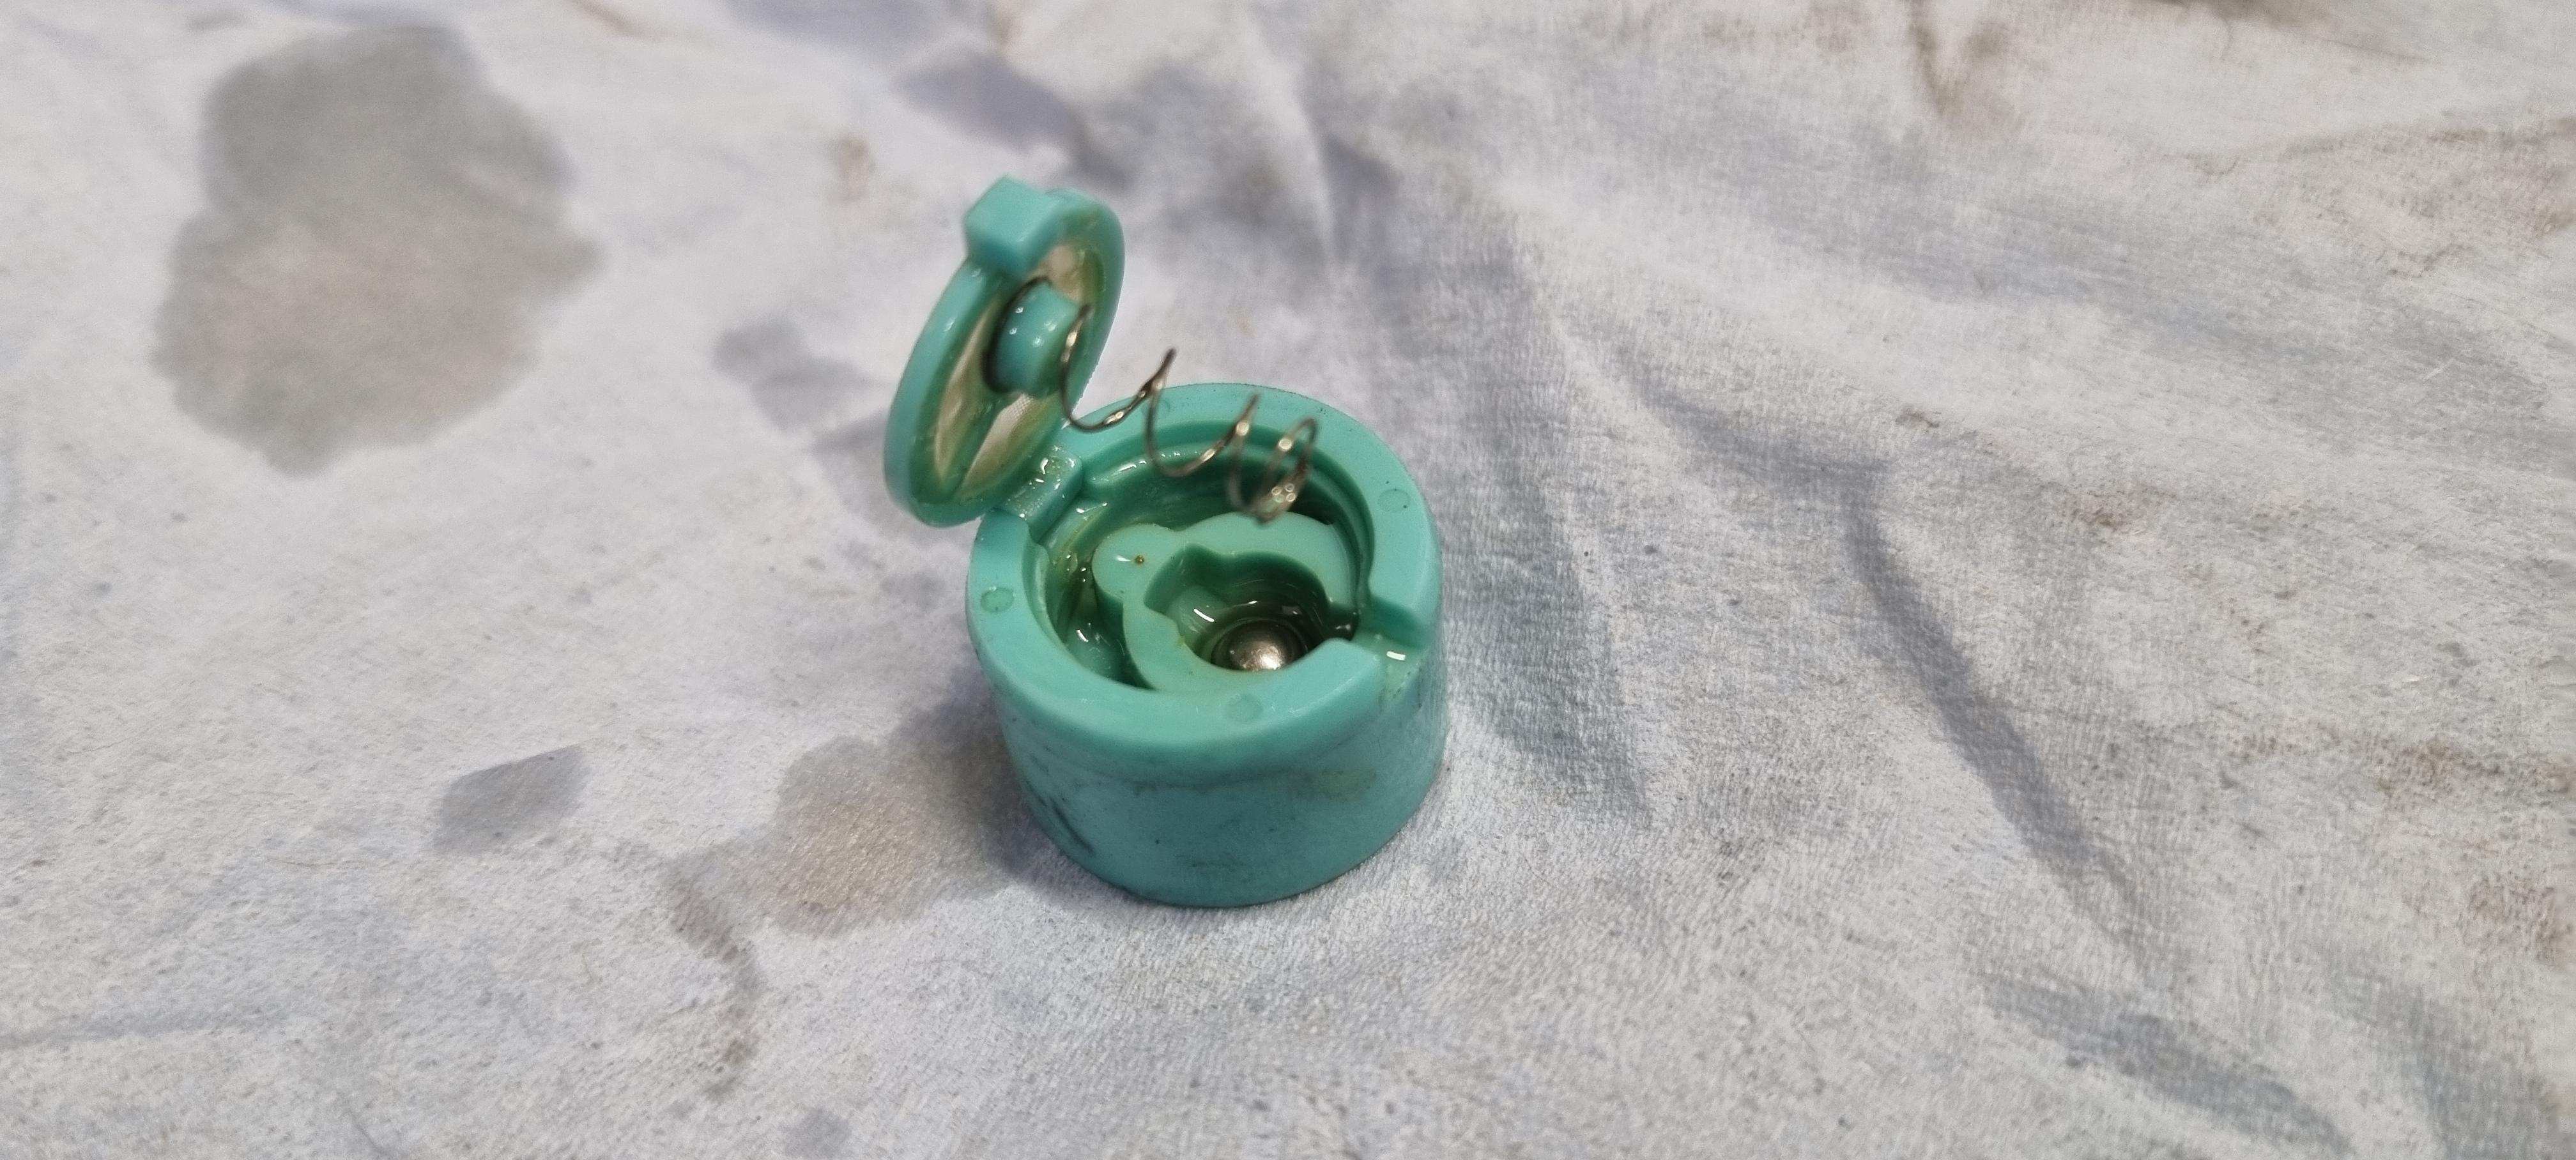
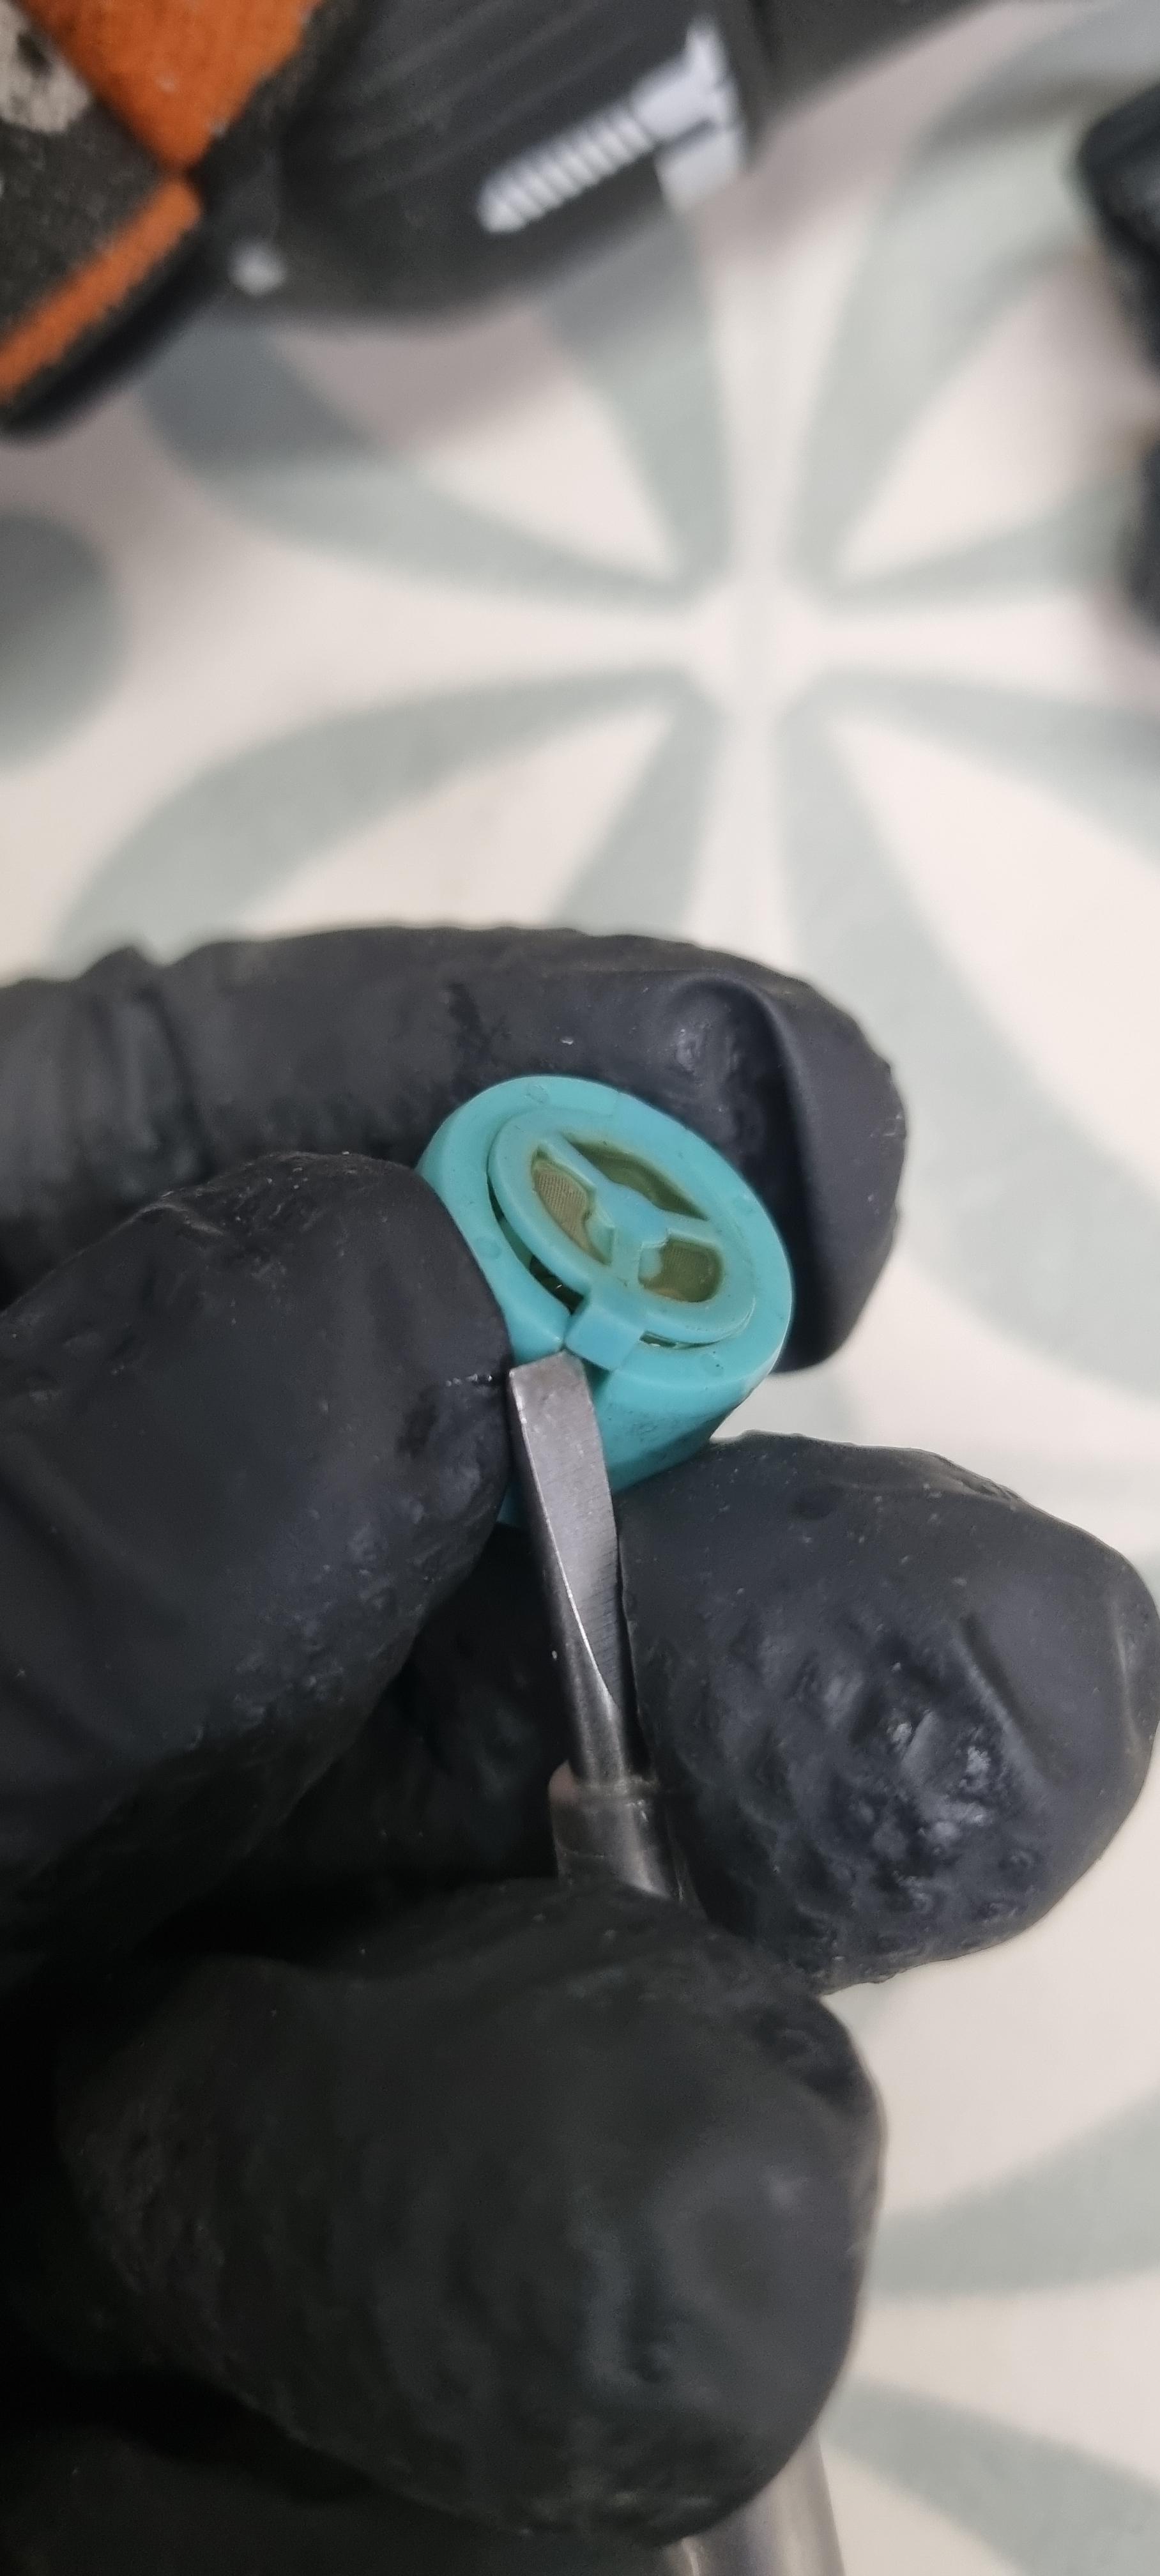
I was reading through the very useful thread below, but couldn't add to it, so I guess the best I can do is put it here, shame to split things up, but never mind! https://www.vfrdiscussion.com/index.php?/forums/topic/83194-rear-brake-locking-after-pressing-pedal/ Some more photos of the mystery green valve. This is a relieving check valve. The mesh is critical because the relief orifice is 0.2mm or less and I think people might miss it, so I'm documenting it here, The photos show me removing it, note the orientation, balls up please.... 😉 Red silicone pipe in the outlet of the master cylinder and it hovers out with ease (bearing in mind my 25 year old bike is almost as new condition.... yours might not be so free!) Mesh on both sides, the unseen side has 2 tabs of different sizes to prevent it being put together wrong, as it's eccentric. The spring and ball can be seen. The other side sort of resembles a bottle cap and it pushes into a face groove and snaps down, I used a 0.5mm drill to lift a corner and got a small flat bladed under it as shown, it was still a bit tricky/delicate even with the flat driver to assist. Now shown around the 5.5mm mark on the metric ruler, you can just make out a tiny orifice, this is the relief port. It's so small I can measure it, but I think it is around 0.2mm maybe less. The smallest drill I have, is 0.35 so I can't clear it with a drill, in the end after searching though my wire brush drawer, one had bristles small enough, that were stiff enough not to break, if you break one in there, it's never coming out, be warned, be gentle, if the wire kinks, dont straighten it, remove it, throw it away, start again. I wouldn't advise drill bits or brass wire brushes for this reason, they are too easily snapped the hole is very deep, no doubt to add to it's restrictiveness. The bike is a barn find, very low mileage, very very good condition, its all very clean, but I pushed a slug a waxy looking something from that hole, hopefully this will resolve my issue as pressure was building up in the centre piston and was immediately released when I cracked the hose. The pressure went all the way back to here, then stopped across this plastic relieving check valve. Hopefully the photos and videos here will be immortalised forever, but if not, get in touch, or I keep them here: https://www.dropbox.com/scl/fo/tfbghuds6mhf49210s78o/AME1iORZF4UJXQm3jKPyTjY?rlkey=kdw4ehnjmi1nuoimdw0ra4ifj&dl=0 20240417_223535.mp4 20240417_223419.mp4
1 point
-
Just so you know, the two posts above are from two of the more knowledgeable members of the forum. Welcome to VFRD.1 point
-
Previous owner left everything to dealers, I showed him some faults he was not aware of when viewing the bike so not much there Will remove the fairings this weekend and start measuring and tracing and checking for cables that aren't part of the loom. Will make some notes as I go as this will be my first time chasing a electrical issue and that wiring map is already making my eyes hurt1 point
-
Hi Grum Thank you for the reply Private sale, so no dealership. When kill switch is in the Off position the engine does not crank. It seems I need to start with Fuse C and the Engine Stop Relay. I will give feedback once I had the time to check this. Apparently the dealership that serviced the bike told the previous owner there is nothing wrong and that it is part off the HISS system. Yet another reason I don't trust dealerships anymore.1 point
-
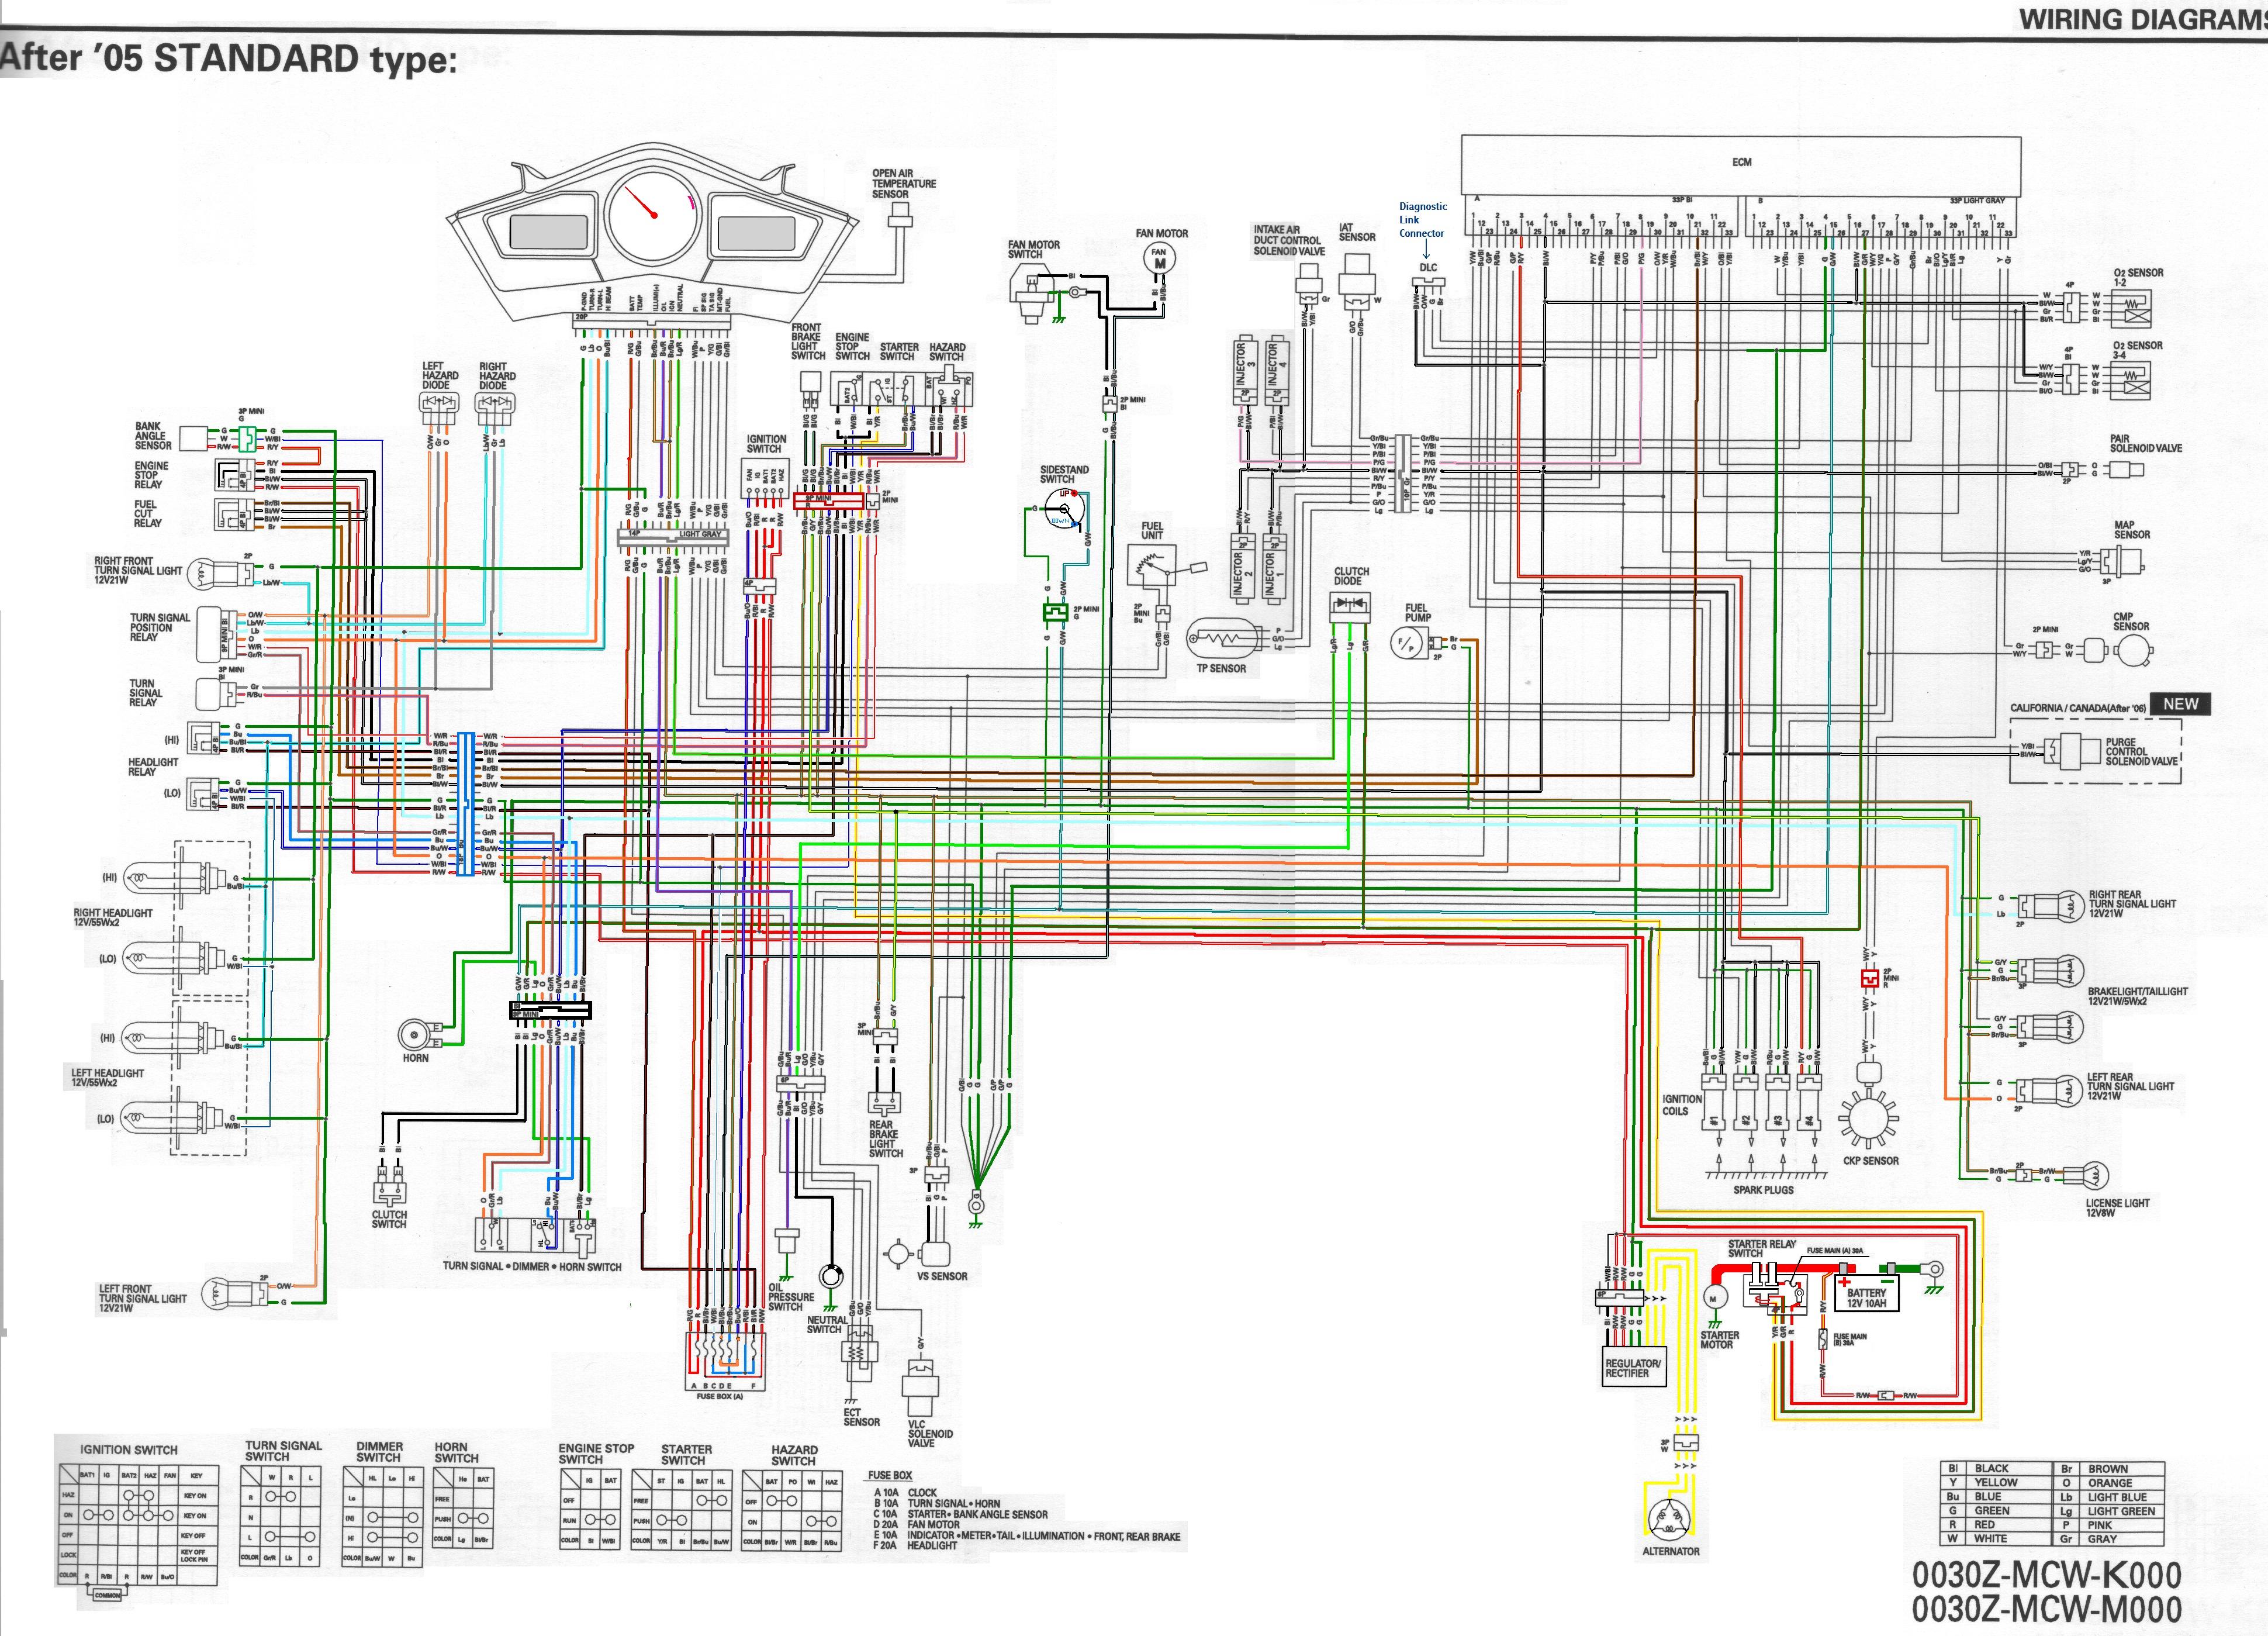
Wow very strange. Strong suspicion of modified wiring or possible wiring short 12v to 12v. Never heard of this one before. Has this anomaly been there since you picked it up 3 weeks ago or only just happened? This could potentially be a warranty issue if purchased from a dealership. You have a strong case here, you have an incorrect and potentially dangerous situation. Kill Switch has two functions when in the Kill position. 1. Engine Stop Relay coil 12v is removed Black wire = Dead Engine. 2. Removes 12v Starter Relay coil voltage on the Yellow/Red wire = Starter will not Crank over the engine. Question - Can you crank the Engine with the Kill Switch NOT in the RUN position, it shouldn't crank? Ignition Switch to Off Kills power to sub Fuses C, E and F refer the attached drawing ( 2005 model should be similar to yours). Loss of power to fuse C being the 12v power to the Kill Switch and the Bank Angle Sensor also knocks out the Engine Stop Relay to kill the Engine. Engine Stop Relay is not being controlled properly by the sound of things. Have you got the Service Manual? You can download it from this forum. Do you have a multimeter? If Yes then... Suggest you follow the Kill Switch power path...refer attached wiring diagram. 1. Measure Voltage at the Engine Stop Relay on the Black wire there should ONLY be 12v on this wire when Kill Switch is in RUN position with Ignition to On. Activate the Kill switch a few times while monitoring the voltage. It might be easier to monitor this voltage at the 18P Blue connector located just forward above the L/H radiator, remove the left side cowl. What do you measure every time you operate the Kill Switch?
1 point
-
I thought my experience in obtaining OEM hard luggage might be informative/useful for others, because things have apparently changed over the years since the bags were in production. When I bought my '07 Anniversary Interceptor a little over a month ago, I knew I wanted hard bags. I was unsuccessful in locating an Anniversary RWB bike with OEM Honda bags, so once I got it home, I started researching. I pretty quickly decided that I wanted the OEM Honda bags... even though they are basically Givi bags, the mounting brackets tuck them in better, and shape integrates better with the bike. Option #1 was to look for used bags (eBay, etc), but I couldn't find anything, so I started researching part numbers. I was able to find the part numbers for the brackets and bags pretty easily, and discovered that there were originally two separate part numbers for the brackets (side mounts and center brace) and additional part numbers for the bags. I was able to track down the center brace on eBay, and found what I believe to be the last set of side brackets in the US at a dealership in Ohio. I was also able to order the bags new from Honda, and was told at the time I got one of seven sets of blue bags left in the US. Side brackets: 08L41-MCW-1000W Center brace: 08L41-MCW-800B (number no longer in Honda's system) Blue bags: 08L41-MCW-1E0 To my great surprise, the bags purchased under the part number above included all the mounting brackets! None of my research had indicated that would be the case, but then again, almost all the threads I found on the subject were at least 10 years old... All in, it's not a bad deal, and only about $200 more than buying the current production bags and brackets from GIVI (not including my extra brackets... LOL). TLDR: there are still some OEM bags out there, and the blue ones, at least, come with the mounting brackets. On to the rest of the story... When I started installing the mounting brackets it was immediately apparent that they were not going to fit with my Delkevic exhaust. The mounting arm that bolts to the center bracket behind the license plate is angled to match the triangular OEM muffler and wouldn't clear the oval aftermarket muffler. I am fortunate enough to have the ability and tools to do some fabrication, so I cut off the offending mounting arm, and modified the center brace so the stay would be horizontal instead of angled, and thus clear the muffler. Then I welded everything back together. The rest of the mounting procedure was easy bolt-up, per the instructions.1 point
-
Where did you get alloy radiator?1 point
-
Seems hot headed to me. Could be many things. Have you looked at anything yet? Low coolant and air in system are high on the list. Thermostat... possessed...1 point
-
Saw Danno posted today on the ST-owners forum.... looks like he is busy working on getting a pilots license...1 point
-
Yeah mate. That does sound like the classic CCT symptom, with chain clatter up at the head covers, and from the R/H side. Listen closely and determine if its from the front or rear cylinders. Cheers1 point
-
I apologize for my rather confusing symptoms I described. I checked the battery voltage, checked to make sure the charging system was working as it should, I unplugged the starter relay than plugged it back in, I bypassed the clutch switch to see if it made any difference and it did not. The very last thing I did was I took apart the starter switch/button and found corrosion all over the contacts. I cleaned all the corrosion off and i’ve had no issues since. I believe that was the problem! The bike had been sitting in a gentleman's garage for the last two years before I bought it and started using it as my daily commuter. I appreciate all the help! Cheers!1 point
-
Man that RWB paint scheme is the bomb. Nice job on the brackets. When I have my VTEC out on the road I usually just use one pannier. I'd considered getting some Delkevic cans for it so thanks for the info on clearance with the pannier mount!1 point
-
Got some on order, will post when fitted.1 point
-
I have these on my 600 Hornet. I did not have to use them, but the previous owner did with no damage to the bike . I guess they passed the test.1 point
-
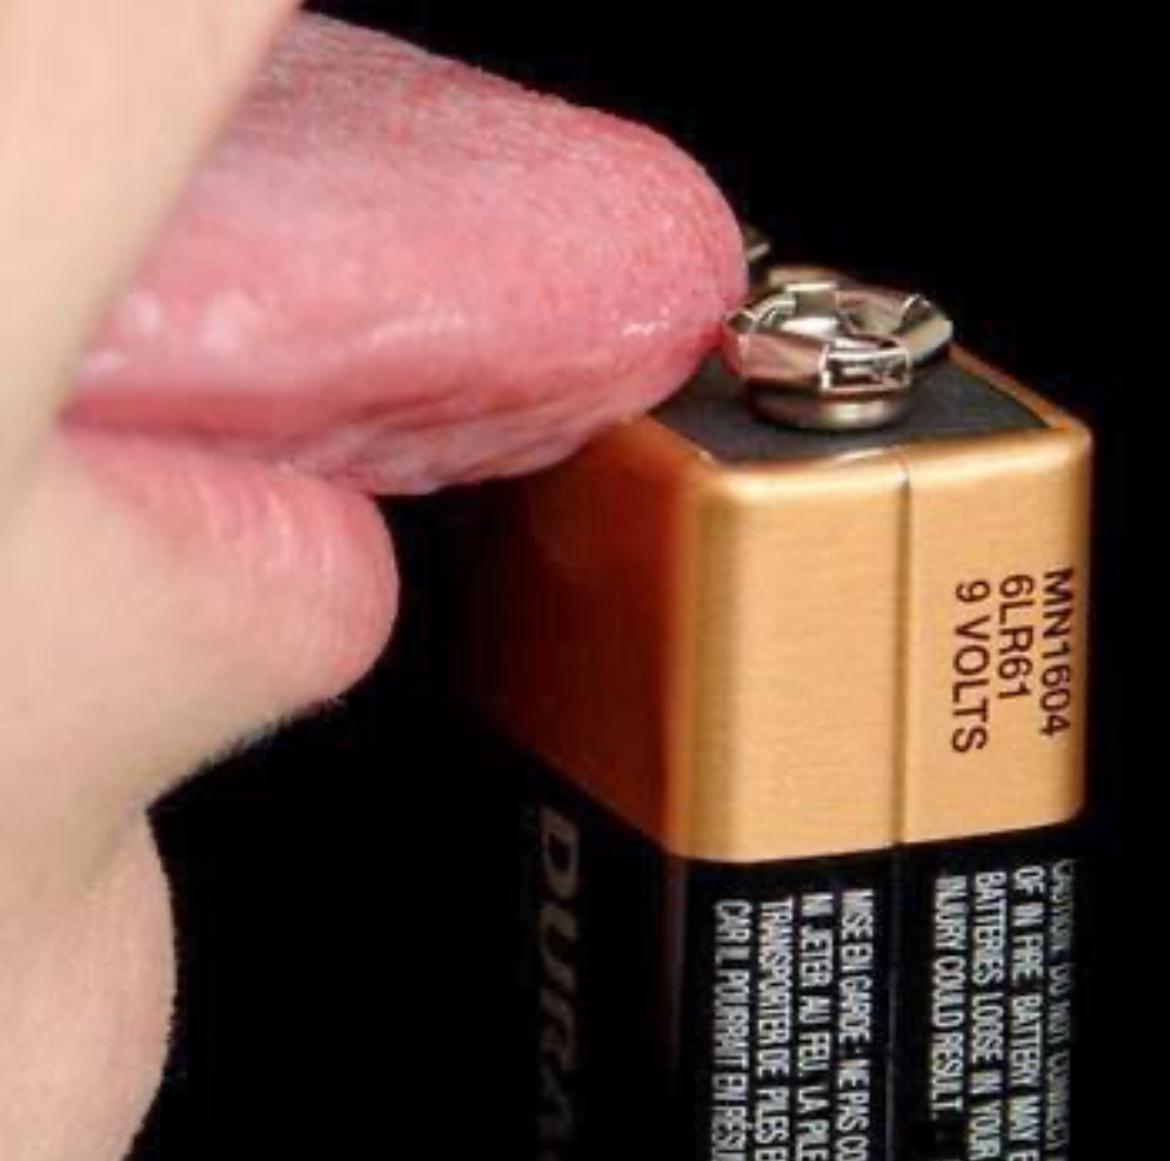
How I used to test a 9 volt battery
1 point
-
8. So you're saying the Green/Blue from the ECT somwhere changes to a Blue/Gray at the Instrument Panel? AND that doesn't appear on the Pre or Post 99 Drawiings! AND if you look closely, unfortunately the colored drawing shows a Gray/Blue wire........That is incorrectly colored and is actually a Gray/Black (Gr/Bl) wire and goes to the Fuel Sender. However, with BOTH drawings there is NO reference to a Blue/Gray (Bu/Gr) wire amongst the 17 Instrument Panel wires? The ONLY two Blue (main wire color) wires at the Instrument Panel are a Blue/Red = Oil Pressure Light, and, Blue/Black = Hi Beam indicator Light. I don't have a 5th gen, never have, so I can only go by relevant drawings be they Right or Wrong!! So it's impossible for me to verify this Blue/Gray wire you talk of. 9. Go back and check I added the number 9 to that paragraph this morning to draw attention to it. "you sound very condescending no reason for that". Short memory mate, and yes I do have reasons. And still no mention that you have replaced the ECT. I hope you fitted a genuine OEM and not some Chinese cheapy! However, you've got tons of info provided which should hopefully resolve your issue, you just need to use it, along with the Service Manual and wiring diagram. Info - Wire coding and drawings.. Eg A Bu/Gr - Blue is the Main wire colour, Gray is its stripe being the trace. No trace = a solid color wire. See attached wire table. AND - I do mean it, Good Luck and hope you have it resolved soon.
1 point
-
ECT has two sensors in one. The ECM has no intel of the coolant temp to Instrument Panel sensor, so No Fault Code for it. Do you have three wires at the ECT. And one of them Green/Blue? This wire should definitely be at the Blue 10P connector for the Instrument Panel. If its not, something is horribly wrong or strangely modified!1 point
-
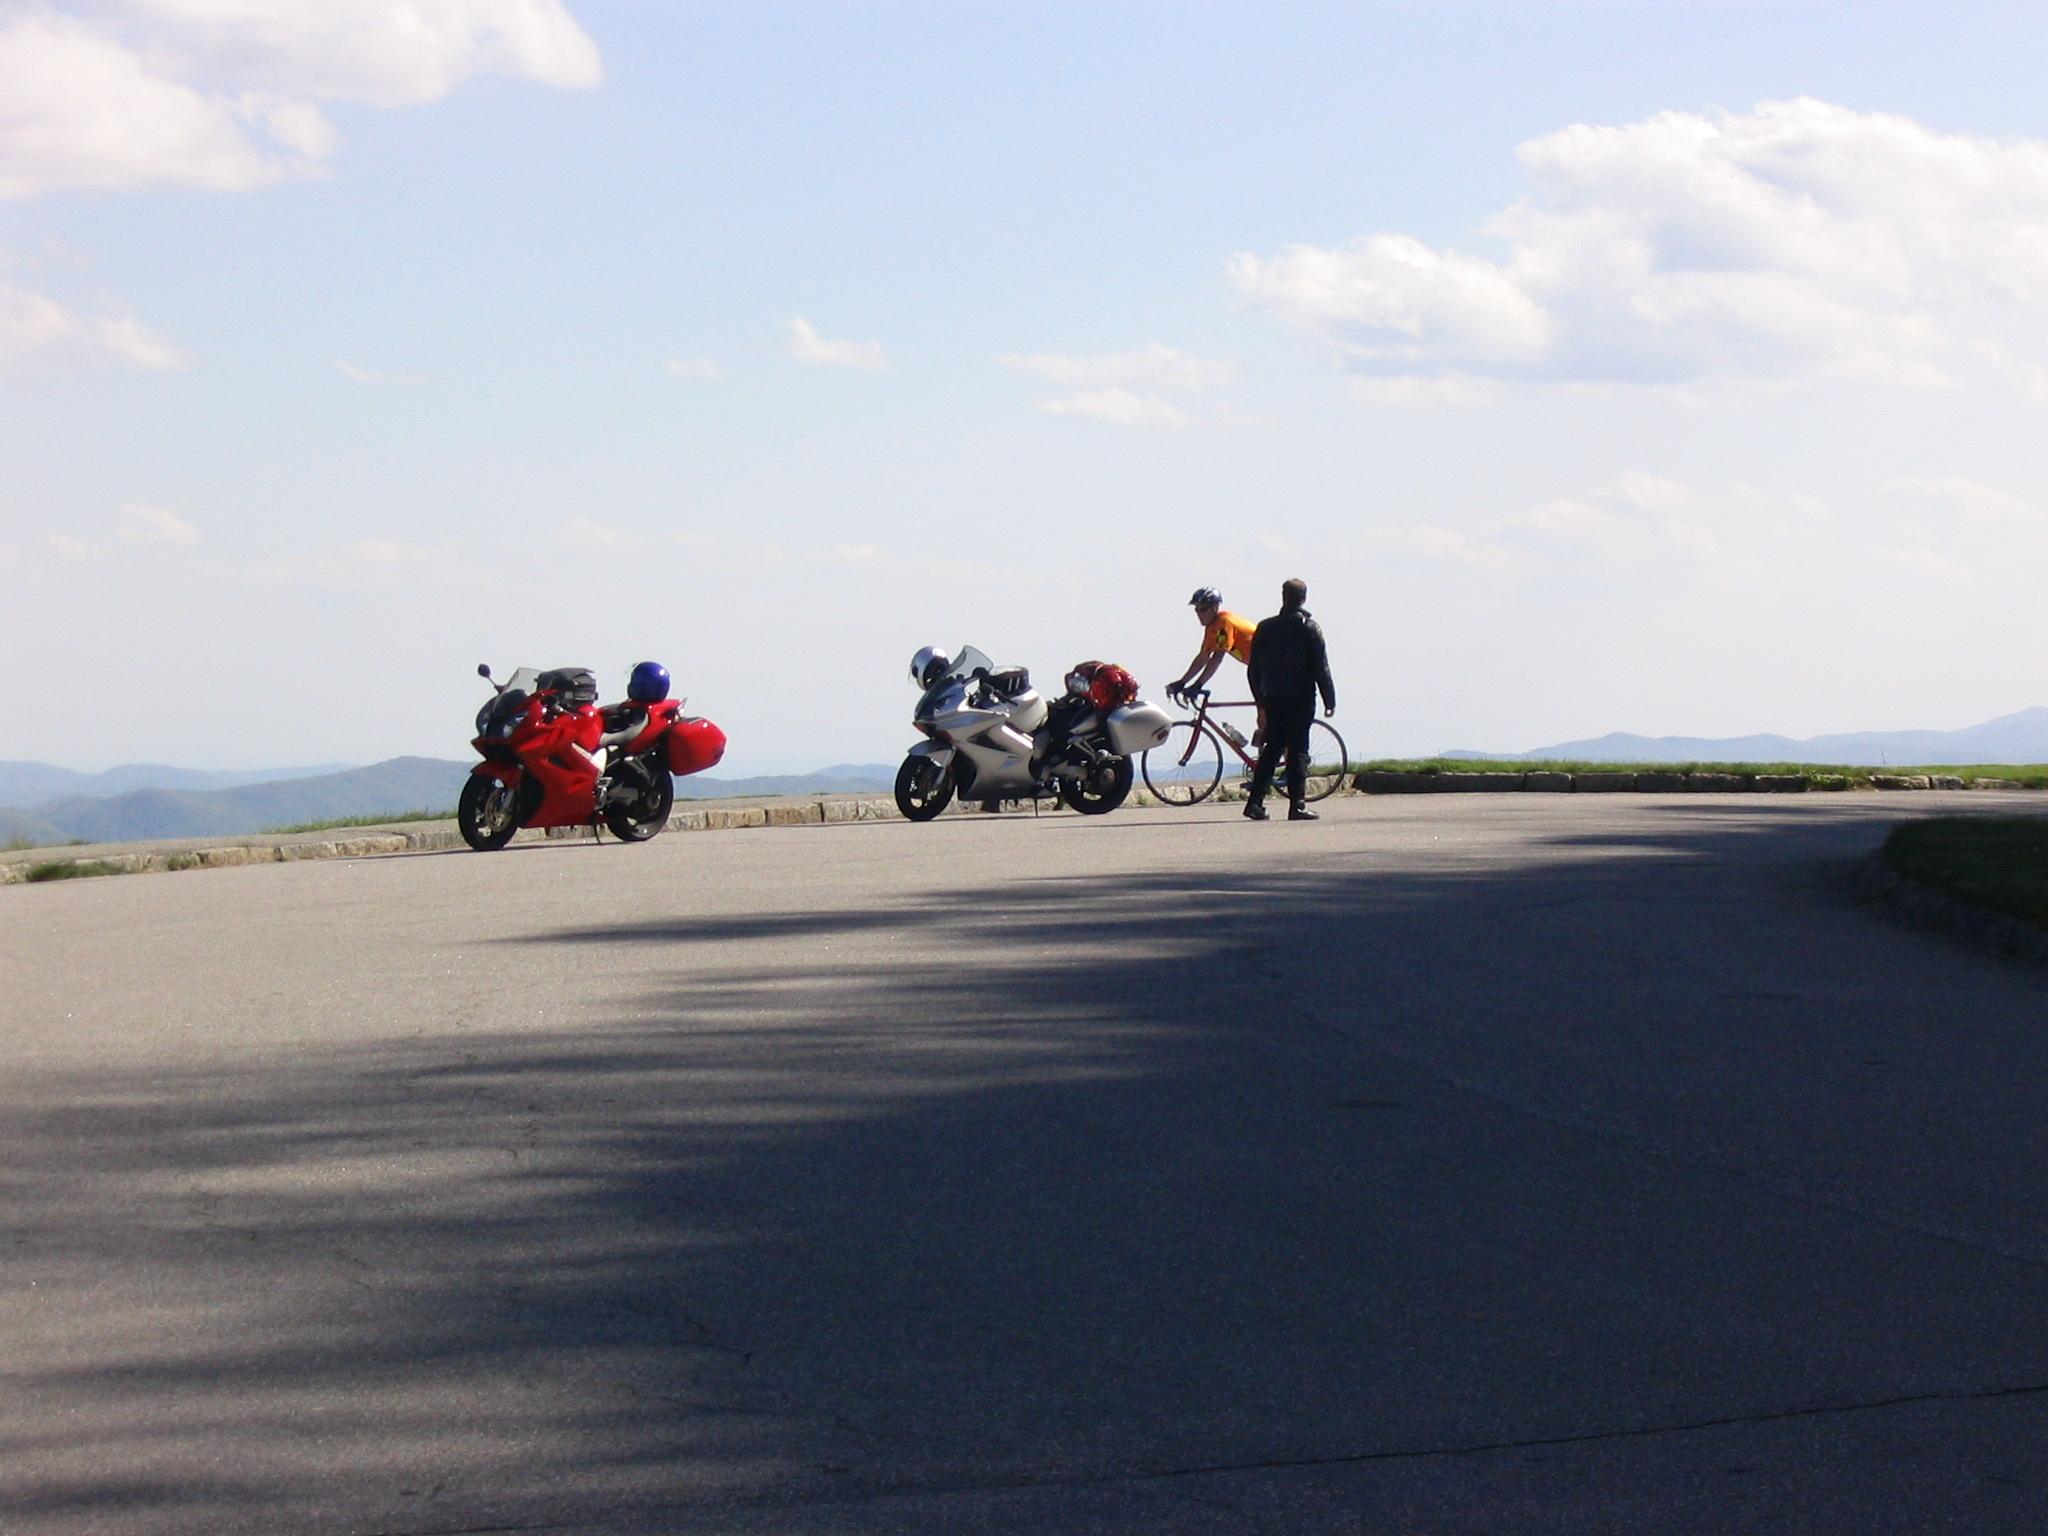
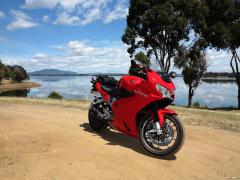
Ok Lorne, you got me sucked into this topic. May 2006, my riding buddy Markus chatting it up as usual with another two-wheel enthusiast at about 4000 ft near Asheville on the BRP. 6th gens, my red and his silver. I've always really liked this photo.
1 point
-
I had the same problem and it also happened to 2 other nuts on the fuel pump housing. I got a professional welder to fix it. he did a great job for €50. He welded new bolt heads in, its been fine since with a new gasket & o-ring used on install. Its not something you want leaking.1 point
-
Me too but it does highlight just how good even an ageing VFR can be.1 point
-
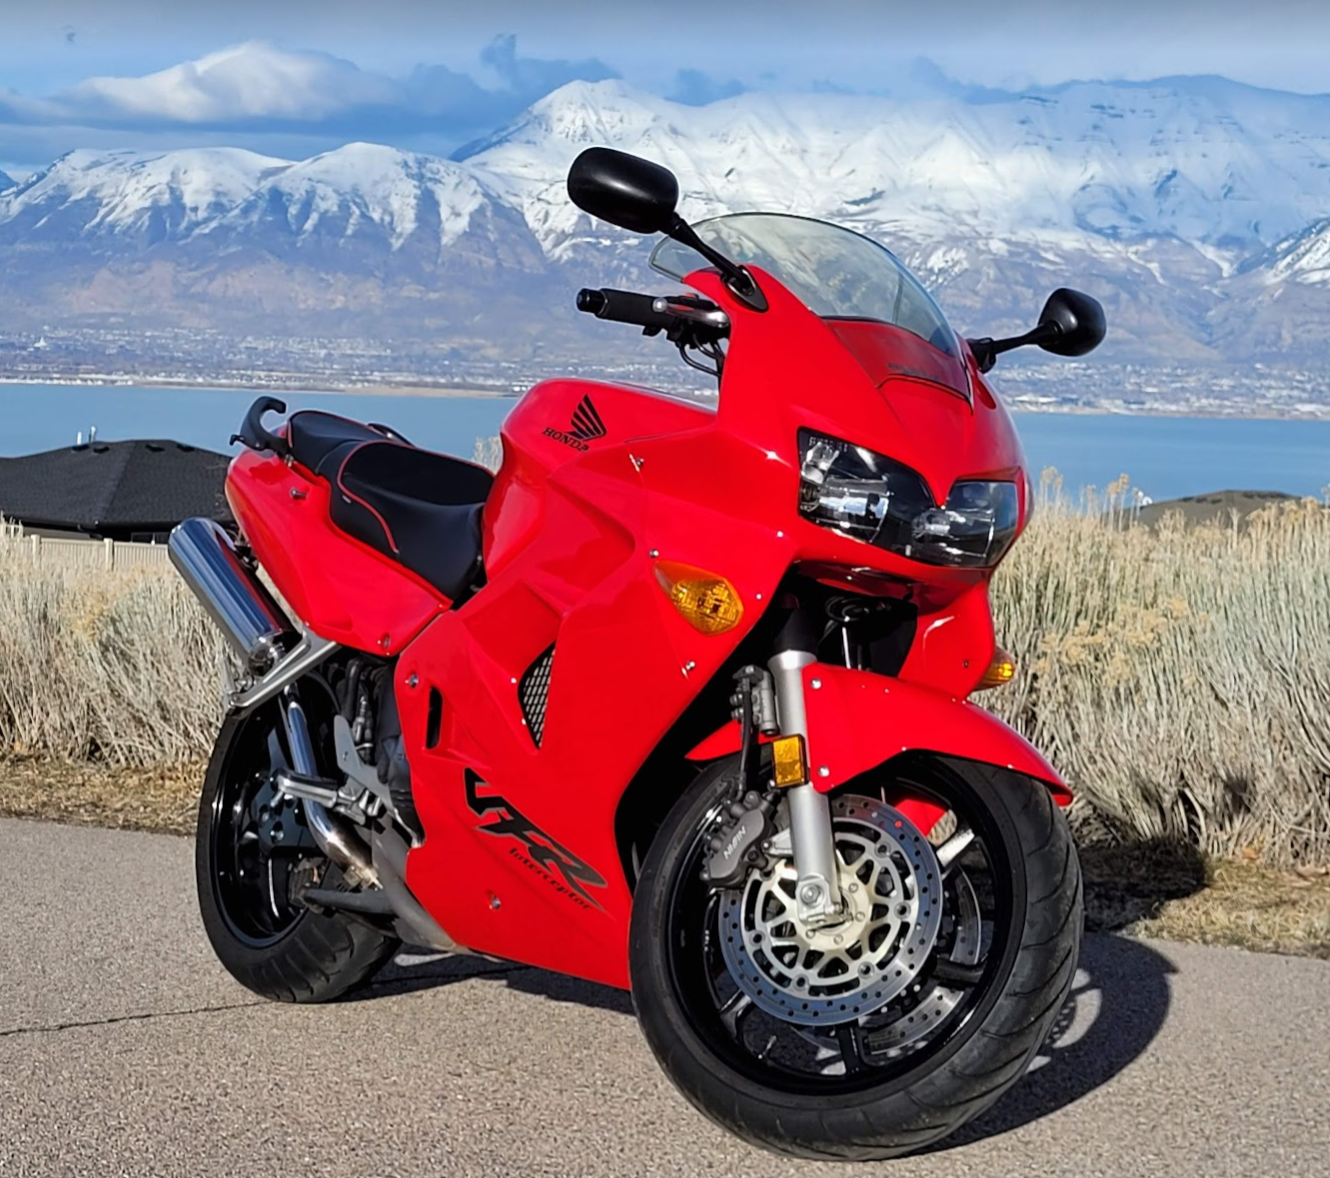
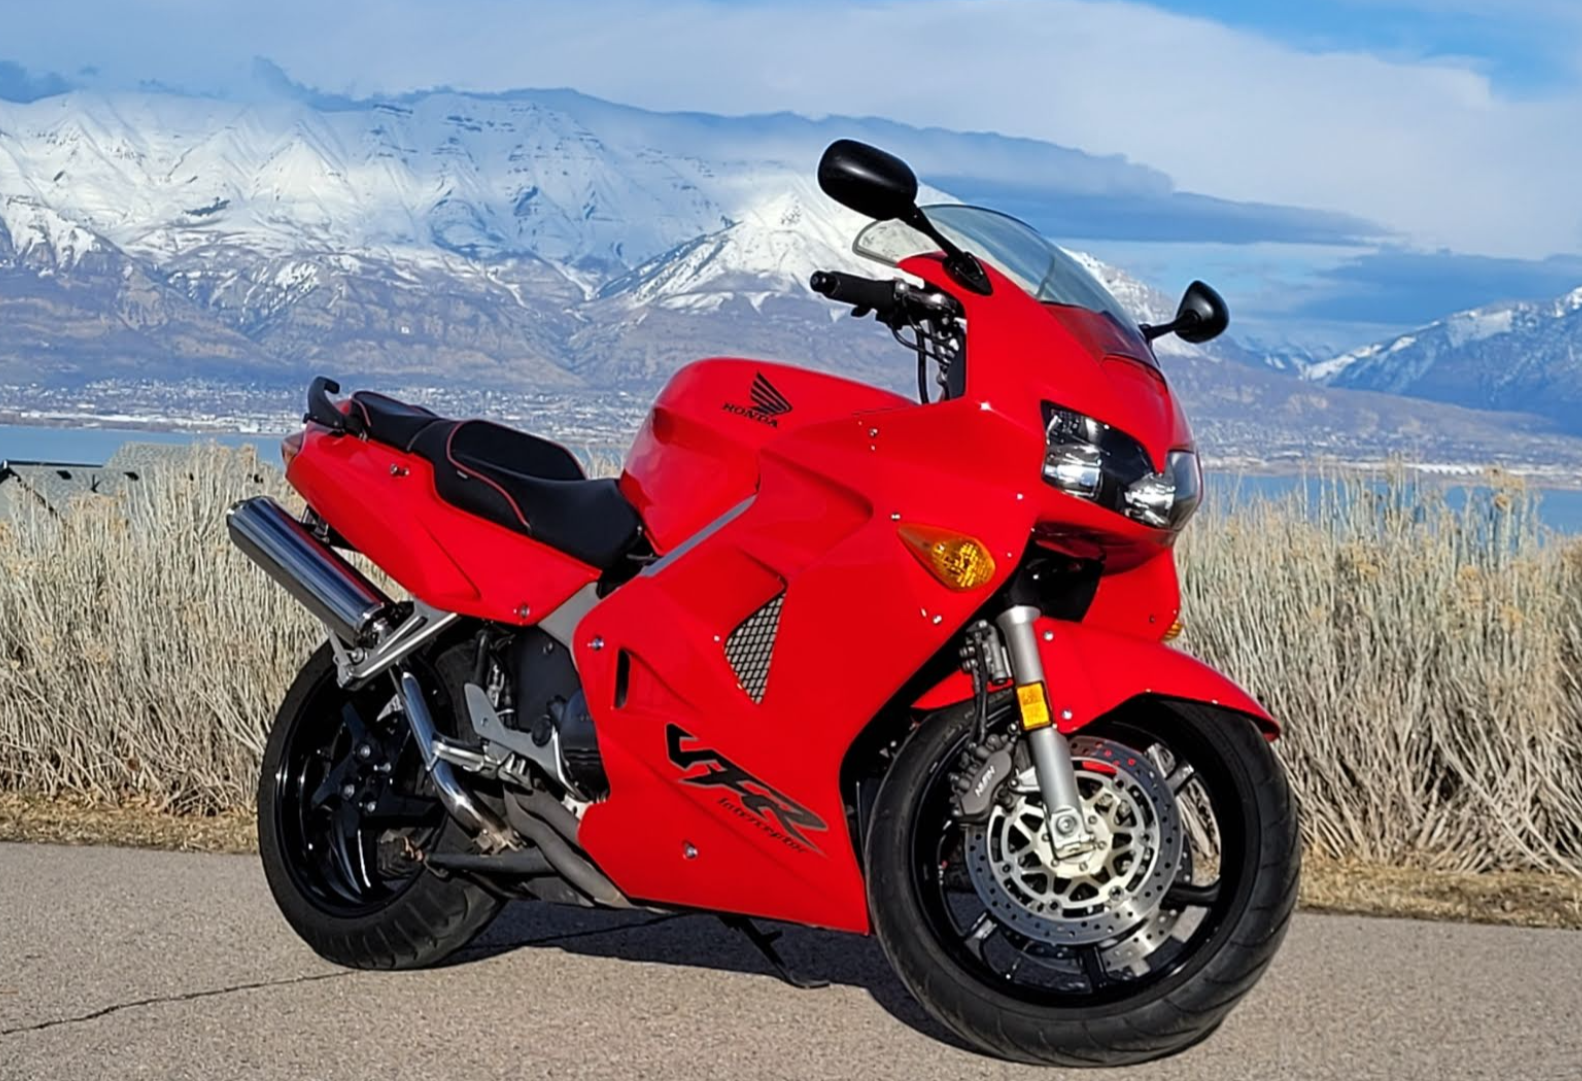
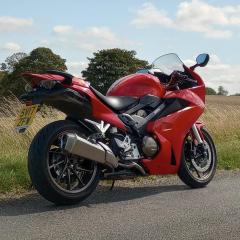
Gentlemen, I give you VIN# 00089. Looking nearly as good as the day I brought her home from the dealer back in May 2001. She's not perfect, but I'd say the time spent in the garage has paid off nicely. Cheers, Justin
1 point
-
I would view the below as mileage items: Brake pads Chain and sprockets (keep lubed to ward off surface rust) Valve check - changes due to heat cycles and movement Time related: Oil Coolant Brake fluid Fork oil - 5 years? Clean electrical connectors - corrosion can still happen over time even without riding. Petrol tank - keep full to ward off rust and use fuel stabiliser. Injectors - can't hurt to use an injector cleaner to help keep them clean when riding. Tyres - after using 7 year old tyres I wouldn't again. Fit something sporty that will wear out before 5 years is reached. Get your moneys worth! Keep on stands to avoid flat spots. Battery - tender or swap in a battery from one of the others when you want to drive it, saves buying a battery that sits on a tender for most of its life. Mice protection - may not affect you, plug exhaust and airbox. Bodywork - keep covered with a soft cover even garaged. Detail and polish as the urge grabs you. ACF on metal fittings and fixings. Hoses - over time will get old and hard. Buy replacements now and hoard for later. Rear hub - may be prudent to strip and regrease and then move periodically to stop it seizing, grease gumming up (?) That's all I can think of right now but good advance thinking 👍1 point
-
1 point