Leaderboard


Popular Content
Showing content with the highest reputation on 03/04/2021 in all areas
-

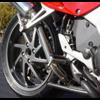
From the album: 1998 VFR800
© ©vfdiscussion.com
2 points -
You find a TL1000 with that kind of milage, stick it in a big suitcase and I'll shout you a trip to NZ. Yeah, did a m/c license test in California years ago on a GS750. The guy rolled his eyes when he saw the bike, but couple of minutes into the slow speed stuff he flagged the rest and said "so, you're already pretty familiar with bikes". Sold my R90/6 in Miami after a trip from Ca to Alaska north of the polar circle & back, then x-country via the south. Flew to England, bought a K100, did Europe & Turkey return, then shipped it to NZ. Many miles on it here before heading around Oz on a TransAlp. Then back to Europe and grabbed another TransAlp for a round trip of Africa. Unfortunately covid put that idea on hold at the Moroccan-Mauritania border. Couple of months there locked down before I could get back to Europe and then head back to NZ - for another couple of weeks in isolation before getting turned loose on the latest acquisition.1 point
-
If the carb fuel pipe O rings do not need replaced...this first part is not really necessary for your case. Just the removal of the tank, plastic air box lid, filter and lower plastic section. ***AND while youre at it..if you have a reuseable air filter...clean it PROPERLY and re oil it. DO not blast compressed air into it trapping dirt in the foam. Usually the oil is special and there is a special soap sold to wash the oil out of it. DO not blast it dry with high air pressure. tap it gently and allow it to air dry. Soak it well with oil and blot out any excess. You will need to remove the rubber hoses( make sure you KNOW were to replace them afterward) from the airbox and be careful with the front large plastic pipes, one broke on my airbox front and needed reglued. It may not even be necessary to remove the plastic surround box other than the top and the air filter. ***WHILE YOU ARE WORKING ON THE CARBS.... ITIS EASIER TO HAVE AN EMPTY GAS TANK ....AND DO NOT FILL IT WHEN CHECKING IT OUT AFTERWARD. IT IS MUCH EASIER TO HANDLE without damaging anything IF IT IS NOT FULL. DRAIN EXTRA GAS INTO A GAS CAN USING A HOSE AND THE PETCOCK OUTLET NOZZLE. The entire 4 carb bank comes out much easier than I imagined... in one big hunk. ***Allow yourself a couple of cans of carb cleaner and at least 2 hours to clean the bank of 4 carbs up and lubricate the linkages. An air compressor with a Harbor Freight small air nozzle is necessary to make sure the carb jet openings are clear. You will need to remove the fuel and air lines before removing the carbs. ***Make a diagram before removing them. There is one hose that remains open to the air. Tag it! Get confused here and you will have a devil of a time. *** Labelling the lines and where they go to is crucial. Even the Honda VFR Factory manual is not really clear on this detail. You can document also with a digital camera. You need to loosen the hose clamps on the carbs and you will NEED to have the factory service manual to see how to position the hose clamp adjustment screws ..upon reassembly. ***OR.... make yourself a diagram BEFORE loosening the hose clamps and rubber carb boots....Insure you have a guide to exactly where the upper and lower clamps are positioned for each carb. This is crucial to be able to reach those screws from under the carbs and from behind them above. Take note of how far the idle cable is screwed into the carb linkage.( It sticks about 1/8 in past the threaded opening to lift the throttle linkage by that amount.) Use the idle adjustment knob to UNSCREW the adjustment cable from the bottom of the left rear carb. keep a hand close to catch the washer and spring that is at the end of the cable. Keep a magnet pickup tool handy ( Harbor Freight) You will need to remove the choke cable from the FRONT of the carbs. There is a cable clamp screw. watch how far it is clamping the cable end before you loosen it Try to put it back the same amount .Easy. if unsure you can always actuate the choke lever and set it to full enrichment and slack at no choke. You will also need to remove the throttle cables once you unseat the 4 carb assembly from their intake rubber boots. Mark which throttle cable is top and which is bottom with a tag. One pushes and one pulls. Then remove the throttle mounting bracket held with 2 screws from the side of the carbs. Once this is loose you can easily get the cable ends out of the round wheel they are mounted into. *** You might need to wedge something carefully to get some upward leverage to prise the carbs from their boots. Be very careful with what you pry against. do not break anything. Go gently and lift at the same time. Once you have done this you will have the 4 carbs resting as one unit in your hands. Make sure the gas is safely drained before proceeding. There are drain screws on each float bowl. Turn the carbs over to make sure any other gas drains out. When working on the carb assembly, Have an old towel on a table to catch any screws that accidently fall. Use some carb cleaner to remove any grease on the linkage and bottoms and from the hose clamps and intake boots. Wipe and clean everything off. Use some spray lube on the linkages afterward so everything moves clean and freely. Loosen each float bowl one at a time and clean each bowl out of any brown residues. A phillips screwdriver may not work so well on these screws. Use a socket and ratchet. There is about a 1/4 inch by 1 in spring nestled on the throttle linkage on the rear section in the middle between the carbs. It can get knocked loose, especially if the carbs are seperated..which you shouldnt need to do. Make absolutely sure the float bowl drain screws are retightened after cleaning. With the float bowl of one carb removed... carefully unscrew the main jet from the underside of the carb with a suitable screwdriver. Clean it with compressed air and carb cleaner spray. You must be able to see a point of light THROUGH the jet and also through each tiny opening on its sides. Blow some carb cleaner spray through the opening from where you removed the jet and follow with compressed air. Reinsert the main jet tube. Do the very same with each other jet ..one at a time. If you do not change any of the screw settings your carbs should keep their same adjustments from previous running. YOU will want to remove the pin axle for the float hinge pulling it free from the unhindered side. You will need to give it a start from its boxed in end with something like a jewelers screwdriver or something tiny and pointed. The float will come off..and the float valve will come out of its seat. Watch how the valve hooks into the receptacle on the float hinge. And also observe the float orientation. It will go on wrong upside down. Once the valve is out squirt some cleaner into the hole and follow with compressed air. This will clean out a filter screen you cannot see. CLosely examine the rubber Tip on the float needle. Replace if worn. After the float/ valve/ pin is reassembled, replace the bottom bowl with the 4 screws. Follow this same routine with each float bowl removal. Blowing every jet out so you can see through every tiny opening in the jets before reinstalling them. You may want to look at the rubber water lines UNDER the 4 carbs and replace them NOW..while you have such wonderful access. I think they are a standard ¾ in water hose.Mine came from NAPA. Allow yourself about 1 hr to replace the hoses. You might need to loosen some bracketted parts to get the necessary clearance on the hoses. You wont loose much coolant if you use a coat hanger to keep up the radiator hose lifted up to the handlebar. You will need someone to assist and hold fingers over the housing openings while you slide on the new rubber with clamps already placed on them. Then just quickly push the hose over the housing and tighten. Reinstall any brackets removed for access. Make sure you install the rubber carb boots on their intakes securely before trying to set the 4 carbs down in them. . Tighten the hose clamps on the lower bands positioning the rubber boots and clamps correctly ....first. Use some lube on the top inside of the boots to make insertion easier. The carb bank should go back in with some downward pressure. First one side then the other. Tighten up hose clamps. Do not over tighten. It will distort the working of the clamping screw and twist the band awry. Once I reconnected the cables and hoses and installed the filter and lid, connected the gas tank lines, and fresh gas, It ran as perfectly as it always did. Make sure you do not readjust any of the cables in any way other than they originally were or you may find the throttle to pick up speed at full lock turn of the handlebars. Check FOR this before mounting down the gas tank. THIS IS ALSO THE VERY BEST TIME TO LUBE ALL YOUR MECHANICAL LINKAGES TO THE CHOKE MECHANISMS AND THE CABLE wire ENDS. It sounds worse than it is. If you go carefully taking your time you can get it done in about 3 1/2 hrs. DOnt lose any hardware! keep a magnet handy and put old towels on the floor and table to catch anything **** Goodwill stores often sell pillow cases full of towels for $2. Wash any cleaner and gas off your hands quickly. Kerosene makes a good grease cutter using an old toothbrush or small paint brush. This will loosen most grunge so it will quickly spray off with cleaner. I have found that if you don't remove the slow jet screws and blast cleaner/air though the carb bodies. Then most likely you wasted your time pulling and cleaning the rest of the carbs. The little holes in the carb throat are what typically clog up before the actual jets, and that is the only way to get them clean. Count the number of turns to seated before removing the screws. Though I've found Honda's are typically 2 3/4 turns out, but 3 turns is usually better since the factory sets them lean. Ed Tman1 point