Leaderboard

.thumb.jpg.e25635faf3d19c5c806399bf7f087432.jpg)


Popular Content
Showing content with the highest reputation on 05/13/2019 in all areas
-
 featured1 point
 -
If it weren't prime riding weather, I might consider pulling the Leo's off and sending them in return for a slight discount on the header...😉 ...but it's WAY too nice out to have the bike out of commission!1 point
-
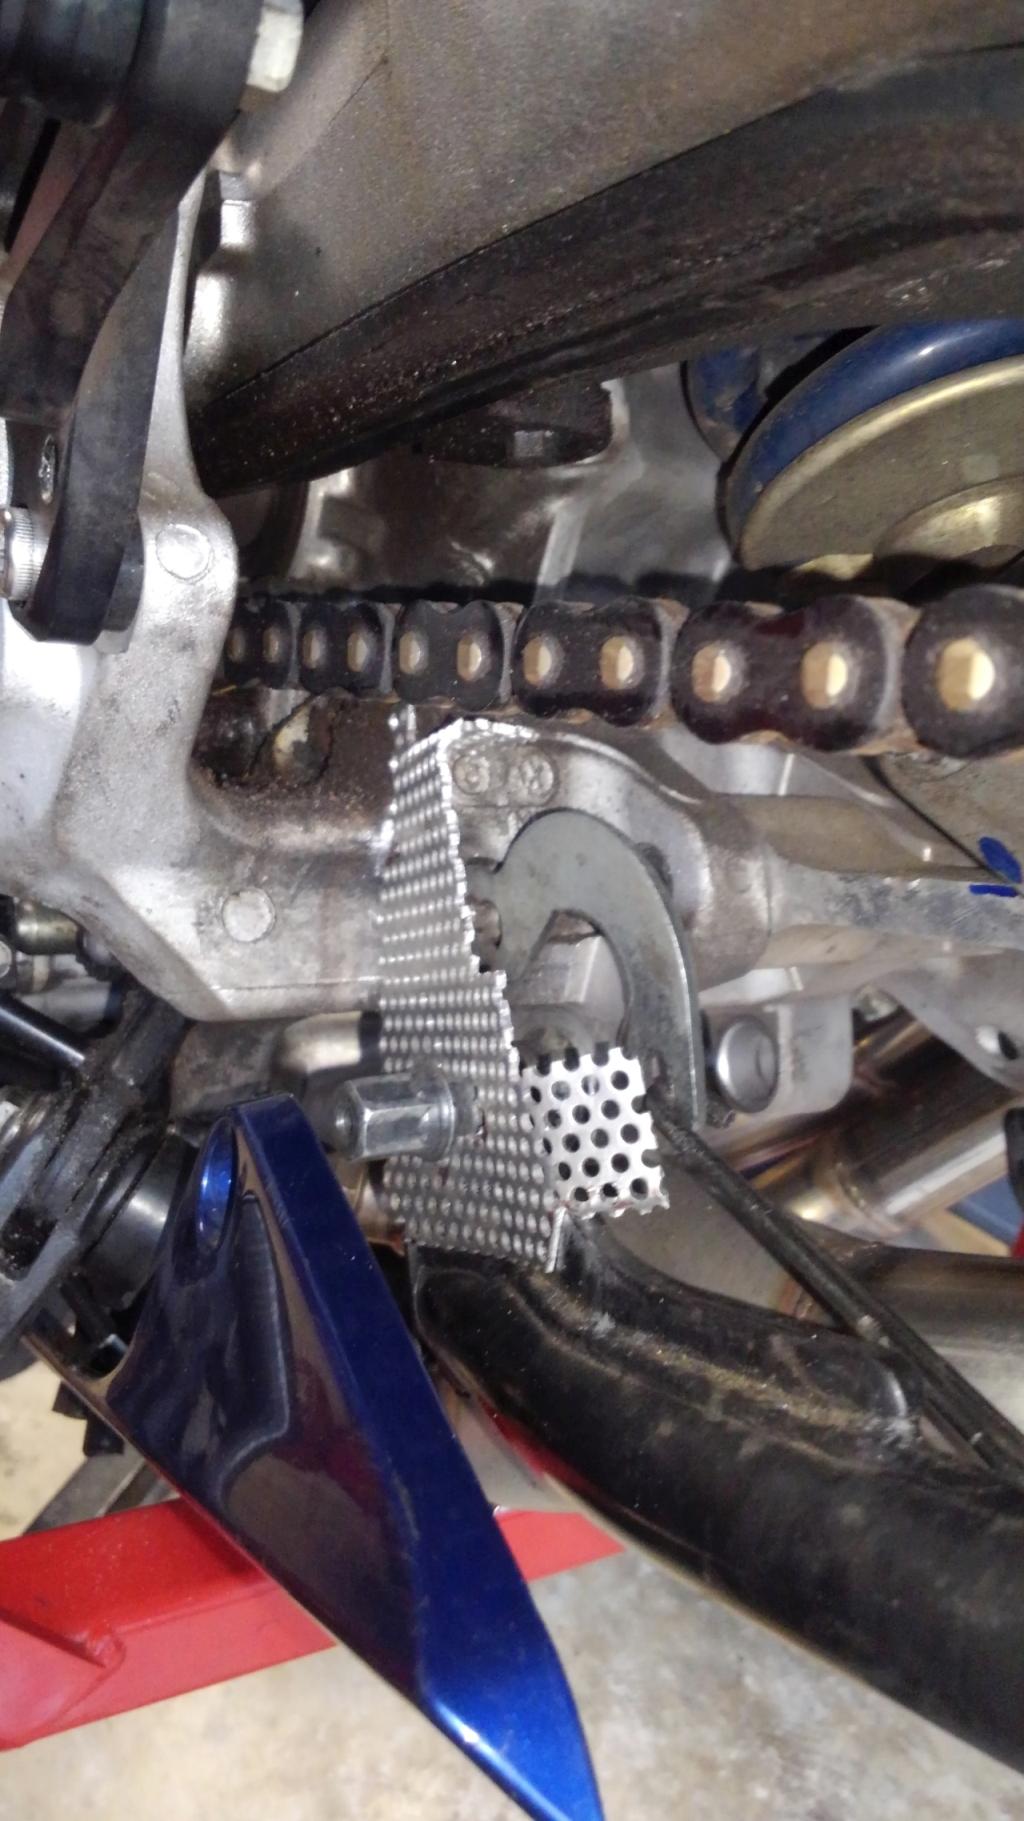
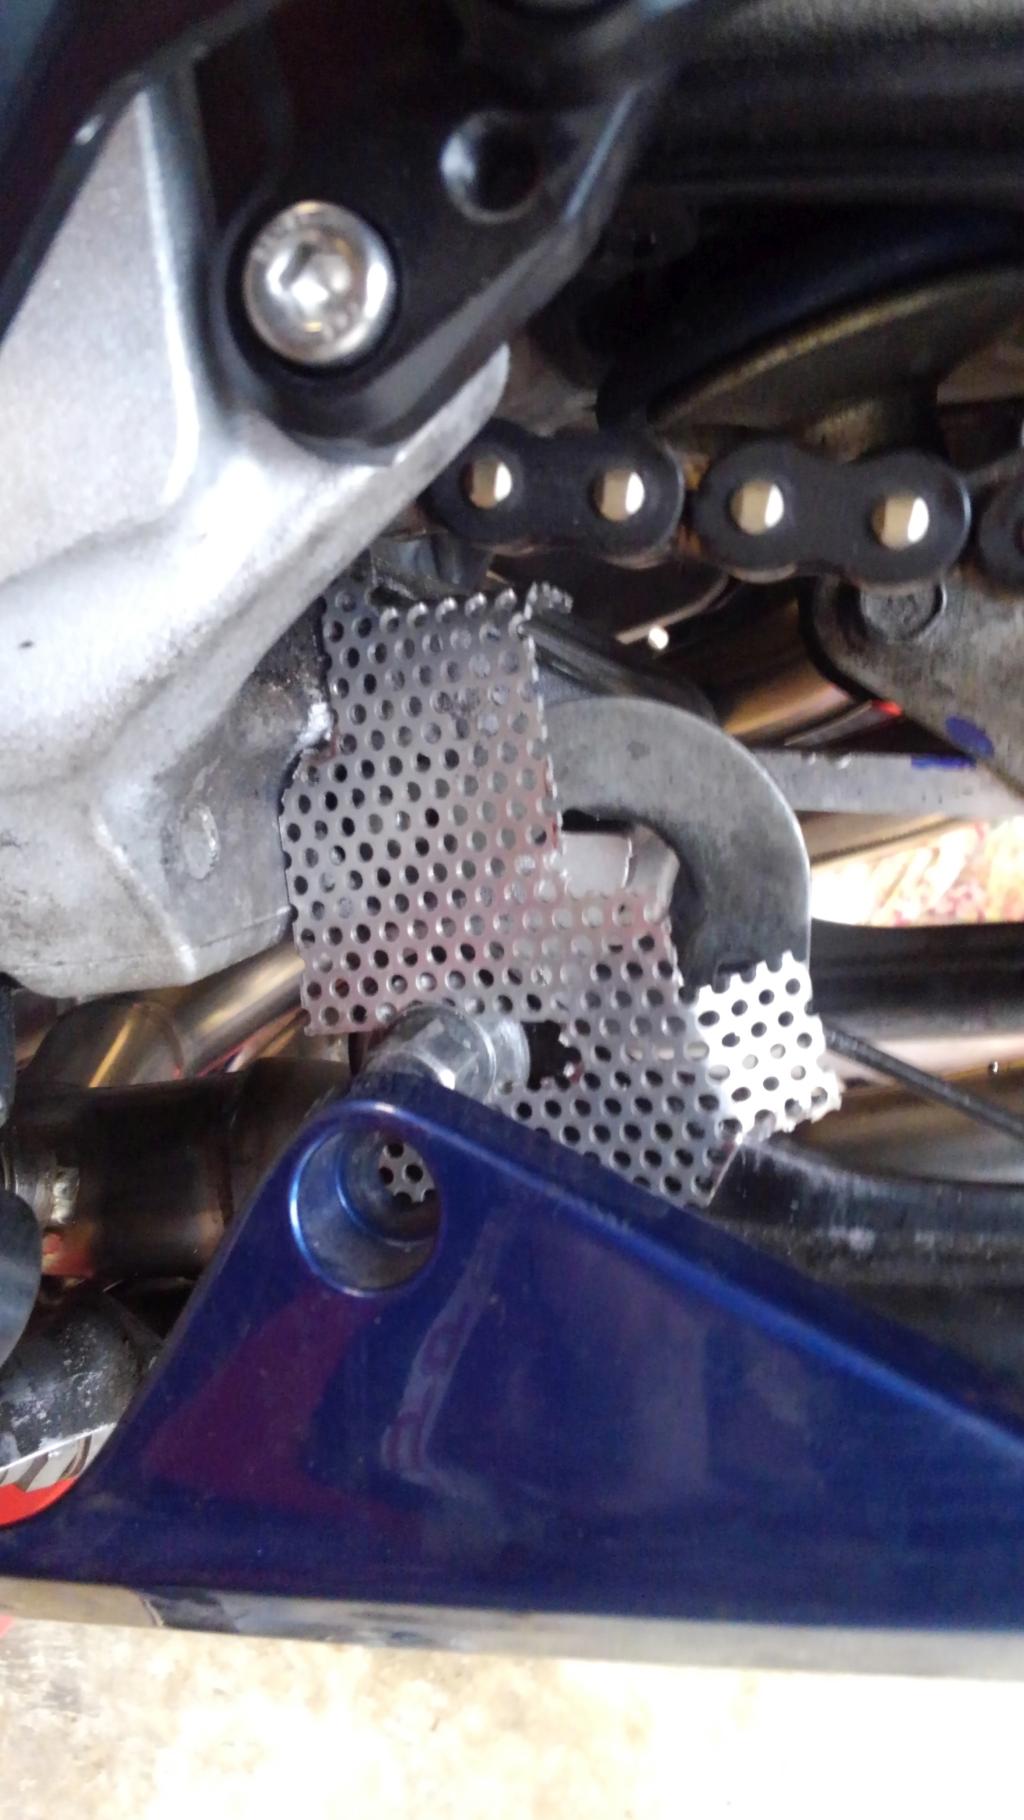
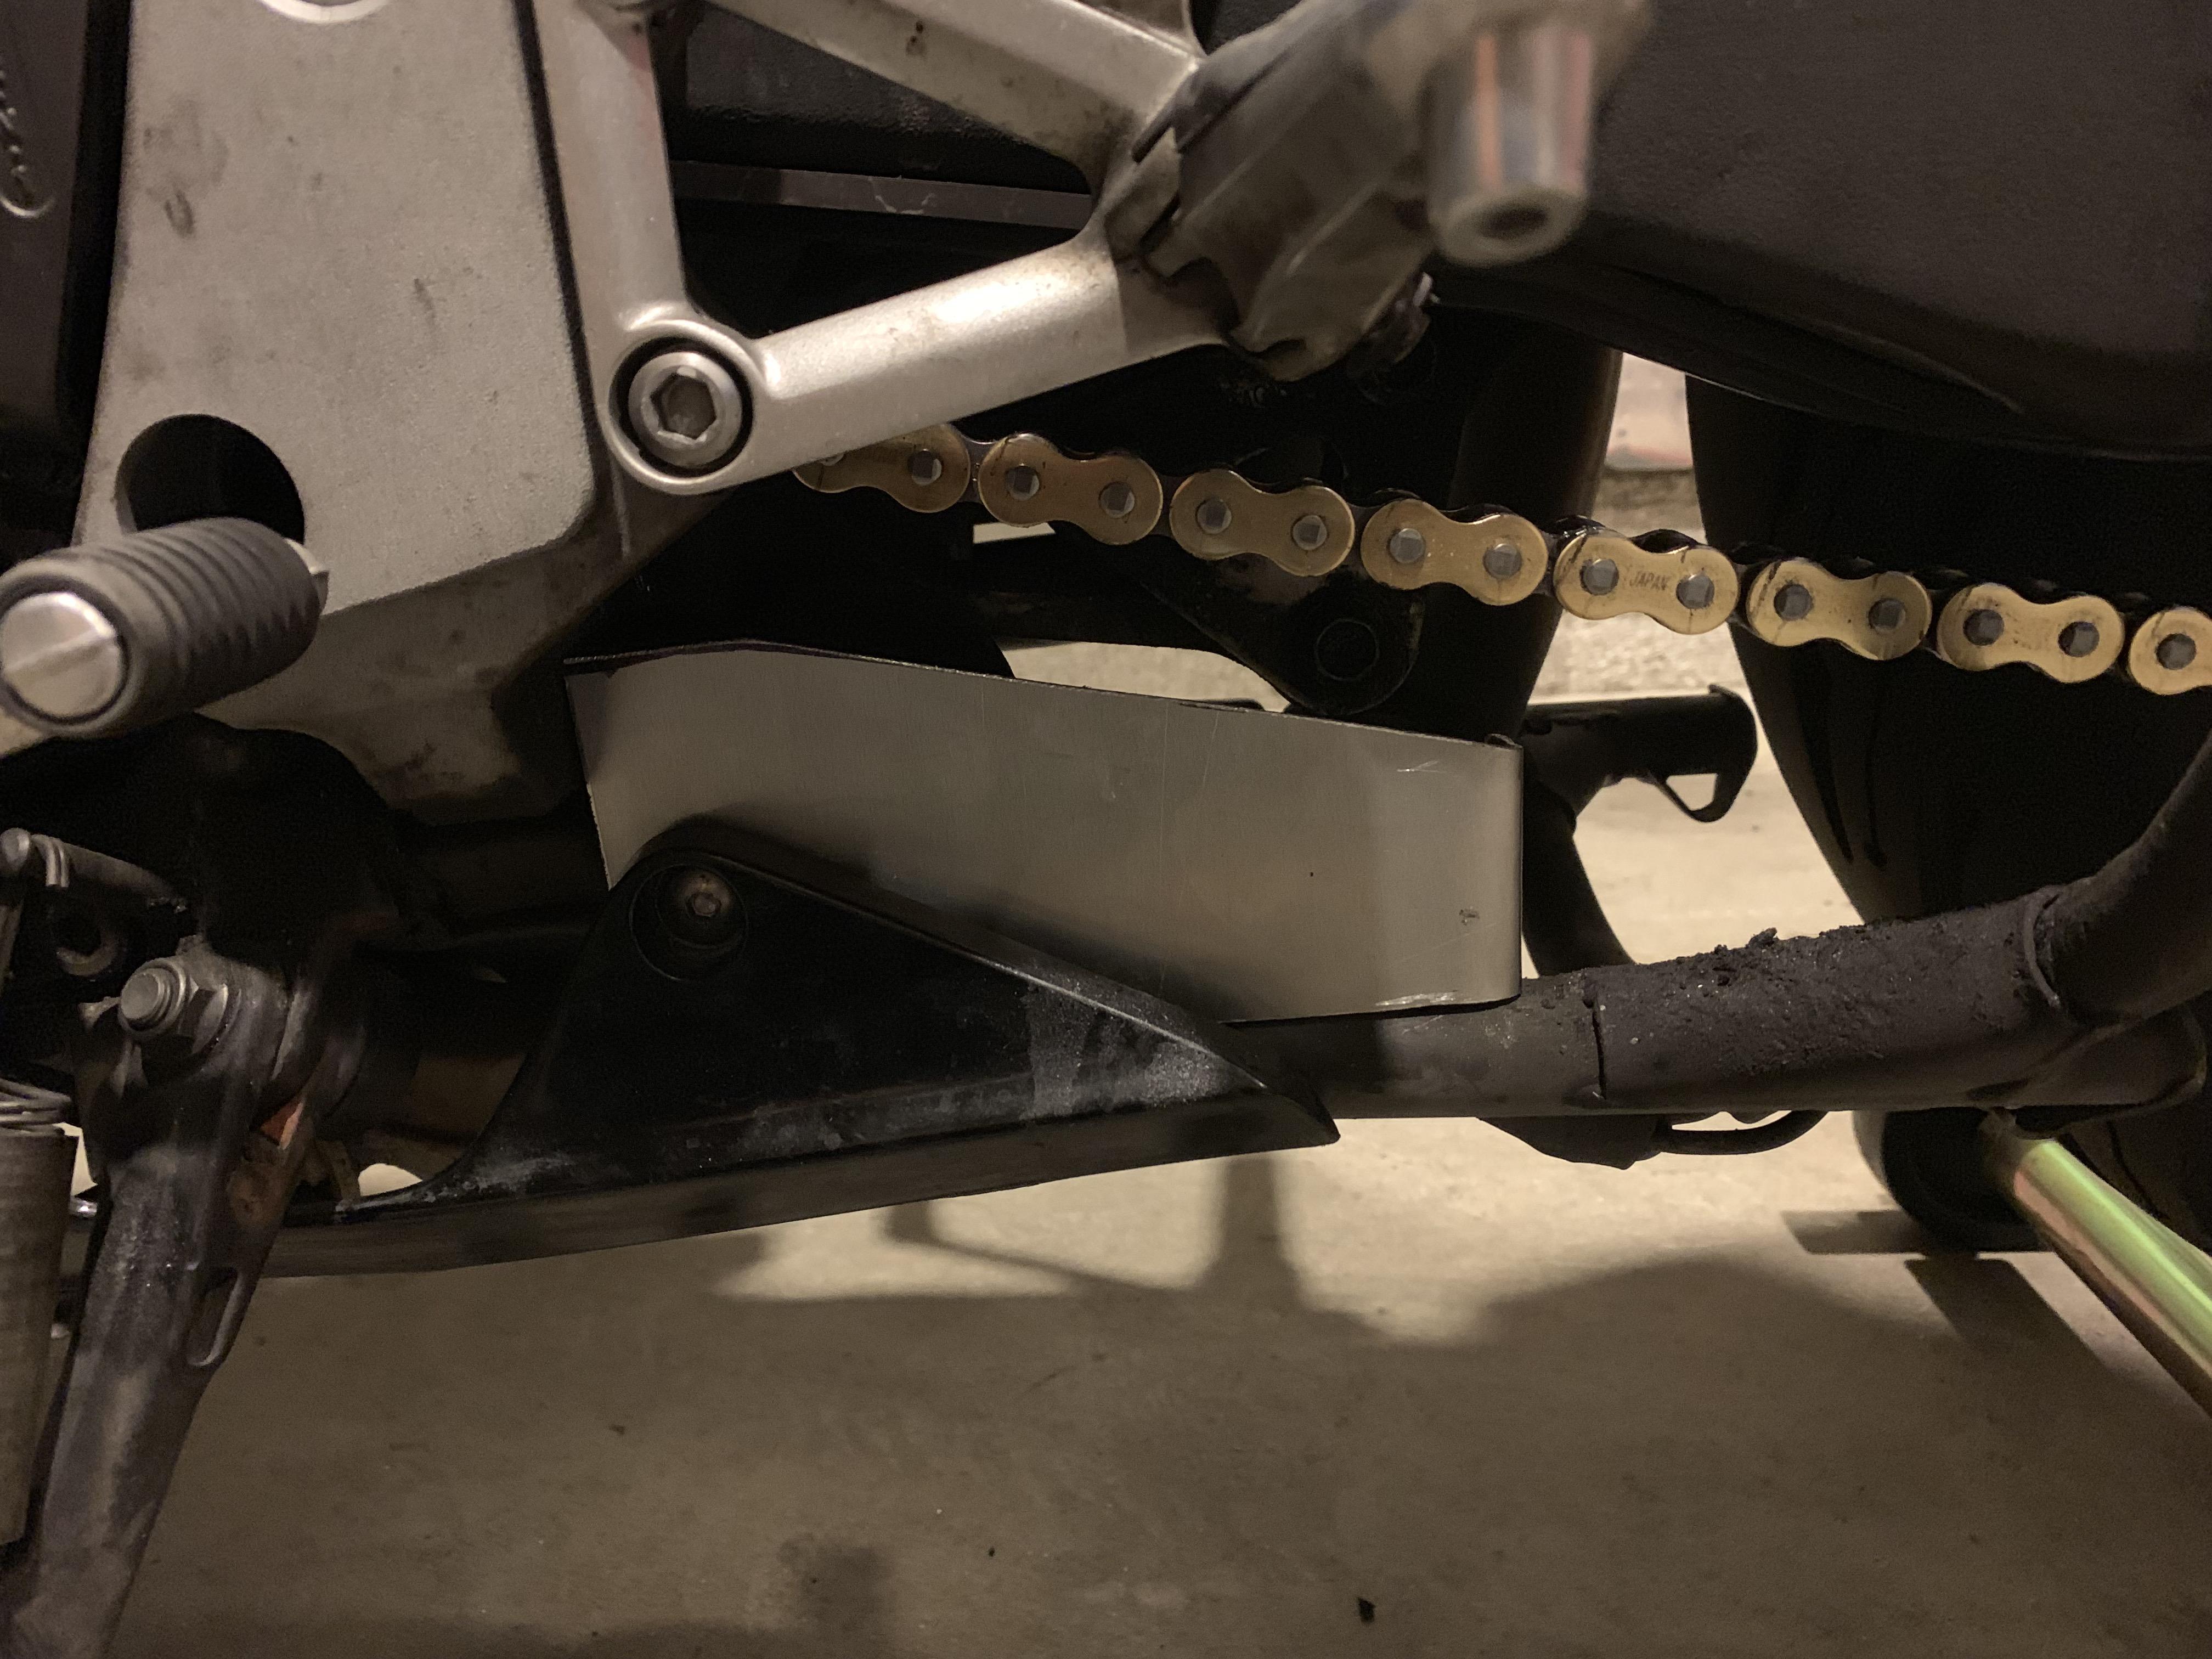
After spending the afternoon looking at ideas for a center stand stop (here and my own), and realizing they weren't suitable for me, I took inspiration from pics that Duc2V4 posted earlier. Made a mockup out of some perforated aluminum that's easy to bend/cut. This is working and holding the center stand where I want it. Now I need to use this template to cut/bend some thicker aluminum I have that's a somewhat bendable alloy. Or I may just get some sheet steel from the local hardware store, might be easier to work with. In no way will this look as good as the stuff many folks on this forum are capable of producing, but once finished and painted matte black, the piece should fade into the background and not be very noticeable. I may also put a piece of rubber on the end where the stand makes contact, we'll see. I need to make sure I put the hole for the bolt in the right spot to eliminate, or at least minimize, pivot movement. Even with the slot, it's pretty solid now, but over time a slot wouldn't work. One could get carried away and add an additional bend, drill a hole for the spring post, giving the piece another spot to jam up against. For me, that's more work than I want to do, and my fabrication skills are minimal. Maybe this helps, maybe it amuses, either way I felt the urge to post 😄. ACE
 1 point
 -
Not sure what you mean by "match." I can tell you that I noted a very slight difference in the diameter of the New Header mid-pipe exit. The New Header exit is just a tiny bit larger than the original 5th Gen exit. When I had my Vance&HinesS4 mounted on the original 5th Gen exhaust I was able to slip it onto the exit using the standard Honda OEM carbon+mesh gasket. When I installed the new header I discovered that due to the New Exhaust's ever-so-slightly-larger exit there was no way to use the Honda OEM carbon+mesh gasket, there just wasn't enough room (the carbon+mesh gasket is pretty delicate so you can't force it into a space that's too small without destroying it). So I ended up using a do-it-yourself custom sized wrap of high-temp aluminum tape (stuff that's good to about 700 degrees F). I don't know if I'll stick with this solution, I had the aluminum tape available at the moment and I wanted to take the bike out on a ride to hear what the New Exhaust + Vance&HinesS4 combo sounded like. Let me know how your install goes, and if you can think up something that's a better substitute for the Honda OEM carbon+mesh gasket.1 point
-
 This is a rider with their priorities in order. 🙂1 point
 -
This is my new standard... all ideas shall be measured relative to this.1 point
-
I just finished the final install of the header, it's midnight here in Denver but I went ahead and rolled the bike outdoors to run it. The install is a success, no leaks, sounds great. I let the bike idle up to about 170 degrees on the temp gauge then shut it down and pushed it back into its parking spot in my garage. In the end I decided to use the 41mm copper gaskets from Delkevic. They are just a little less than twice as fat as the 42mm copper gaskets that Delkevic sells. Because they are fatter I knew that during the installation "crush" they would probably end up spreading inward to about the same inner diameter as the original Honda OEM gaskets. I didn't like how much the OEM gasket protruded into the exhaust flow and wanted my install to be better than that, so I decided to experiment a little. I purchased 8 of the 41mm copper gaskets directly from Delkevic at their location in Littleton, CO. Got to meet and chat with Matt (at Delkevic), he was very friendly and helpful. I modified the 41mm gaskets by "pre-pinching" them inward, only by a little bit around the outside perimeter and then by as much as possible around the inner perimeter. I did this so that when the crush of the install occurred the gasket would have a smaller starting point from which to spread. The results were pretty good. I practiced installing a couple of my "pre-pinched" 41mm copper gaskets on the front cylinders and after the crush they ended up with an inner diameter that was noticeably wider than the original Honda gaskets (although they do protrude slightly above the inner edges of the exhaust ports). So I'm satisfied, the modified 41mm gaskets provide a very good, generous footing for the end of the header to bed into and their inner diameter is better (wider) than the OEM gaskets. Good enough for me. On to other maintenance items...1 point
-
Just an opinion from the cheap seats... It looks to me like #2 would have sealed fine and #1 would have worked if it were torqued. #3 and #4 failed mostly because of the seams... Take a look at the fit in this post... It's your money, but after spending that kind of dough on a performance header, I'd really hesitate to create a restriction with an exhaust gasket! Just my 2 cents... it always seems easier when you're not the guy on hands and knees cussing the parts that don't want to fit like you think they should.1 point
-
I've just finished removing the exhaust system from yesterday's trial-fitting. Here are pictures of the installation crush results with the 42mm copper gaskets from Delkevic. (NOTE: I didn't fully torque-to-spec on the rear cylinders so I believe the front cylinders (#2 and #4) are the best representation of the install results with the 42mm copper gaskets. And, obviously, I wasn't watching closely when I was pressing the gaskets into the ports, otherwise I would have installed all of them with the seam facing inward which is what I intend to do for the final assembly) Here is Cylinder #2: Here is Cylinder #4: Here is Cylinder #3: Here is Cylinder #1:1 point
-
42mm. Mine did that, too. They're exactly as large as they can be, and one was even difficult to get in there, but they worked like a charm. I had to cram them into the ports, but the headers pushed them into place and I'm leak free, first try.1 point
-
What size are the copper gaskets for the headers? I remember reading that it's recommended that we purchase a particular size of the copper gaskets from Delkevic. I skimmed back through this forum thread but couldn't find the exact size in millimeters or a serial number or product SKU. I ask this question because I thought the correct size was 42mm in copper. I ordered a set of these gaskets (42mm size in copper) from Delkevic. Today I was trying to install the header and discovered that on my '99 5th Gen VFR these 42mm copper gaskets do not fit. When I try to press-fit these 42mm gaskets into the header ports the gaskets end up going "out of round" because the diameter of the gasket is just too large.1 point
-
This was my center stand stop solution.
1 point
-
Haven’t got round to mine yet and will be a while as I’m basically ticking off several boxes (R/R, VFRness, Ohlins, Headers, Staintune, PC3 & solo tail box mount)... but I’d expect a fair bit of fiddling to get a proper header installed. Rubber mallet and 2x4s are your friends. Sent from my iPhone using Tapatalk1 point
-
I'm not picking on your prototype. I do my fair share of brakeless sheet metal bending as well, and there's only so much you can do with a vice and a hammer. That one's a perfect proof of concept. I was just sort of thinking as I typed. Since it buts up against he case there it is going to have no problem rotating with just one mounting bolt is what I was thinking about. I don't know what Seb's shop has for brakes, though, but he's good enough at solving problems I'm confident he will come up with something that he can produce out of this.1 point
-
Does that push against the frame? So it has a nice hard stop? This might be a great solution. One more bend for rigidity, a bump stop, and it'd be pretty elegant. Paint it black and I bet it just sort of disappears into the frame, visually. Nobody would pay attention who wasn't specifically looking for it. This is a nice proof of concept/hand tool prototype. I love clever little things like this.1 point
-
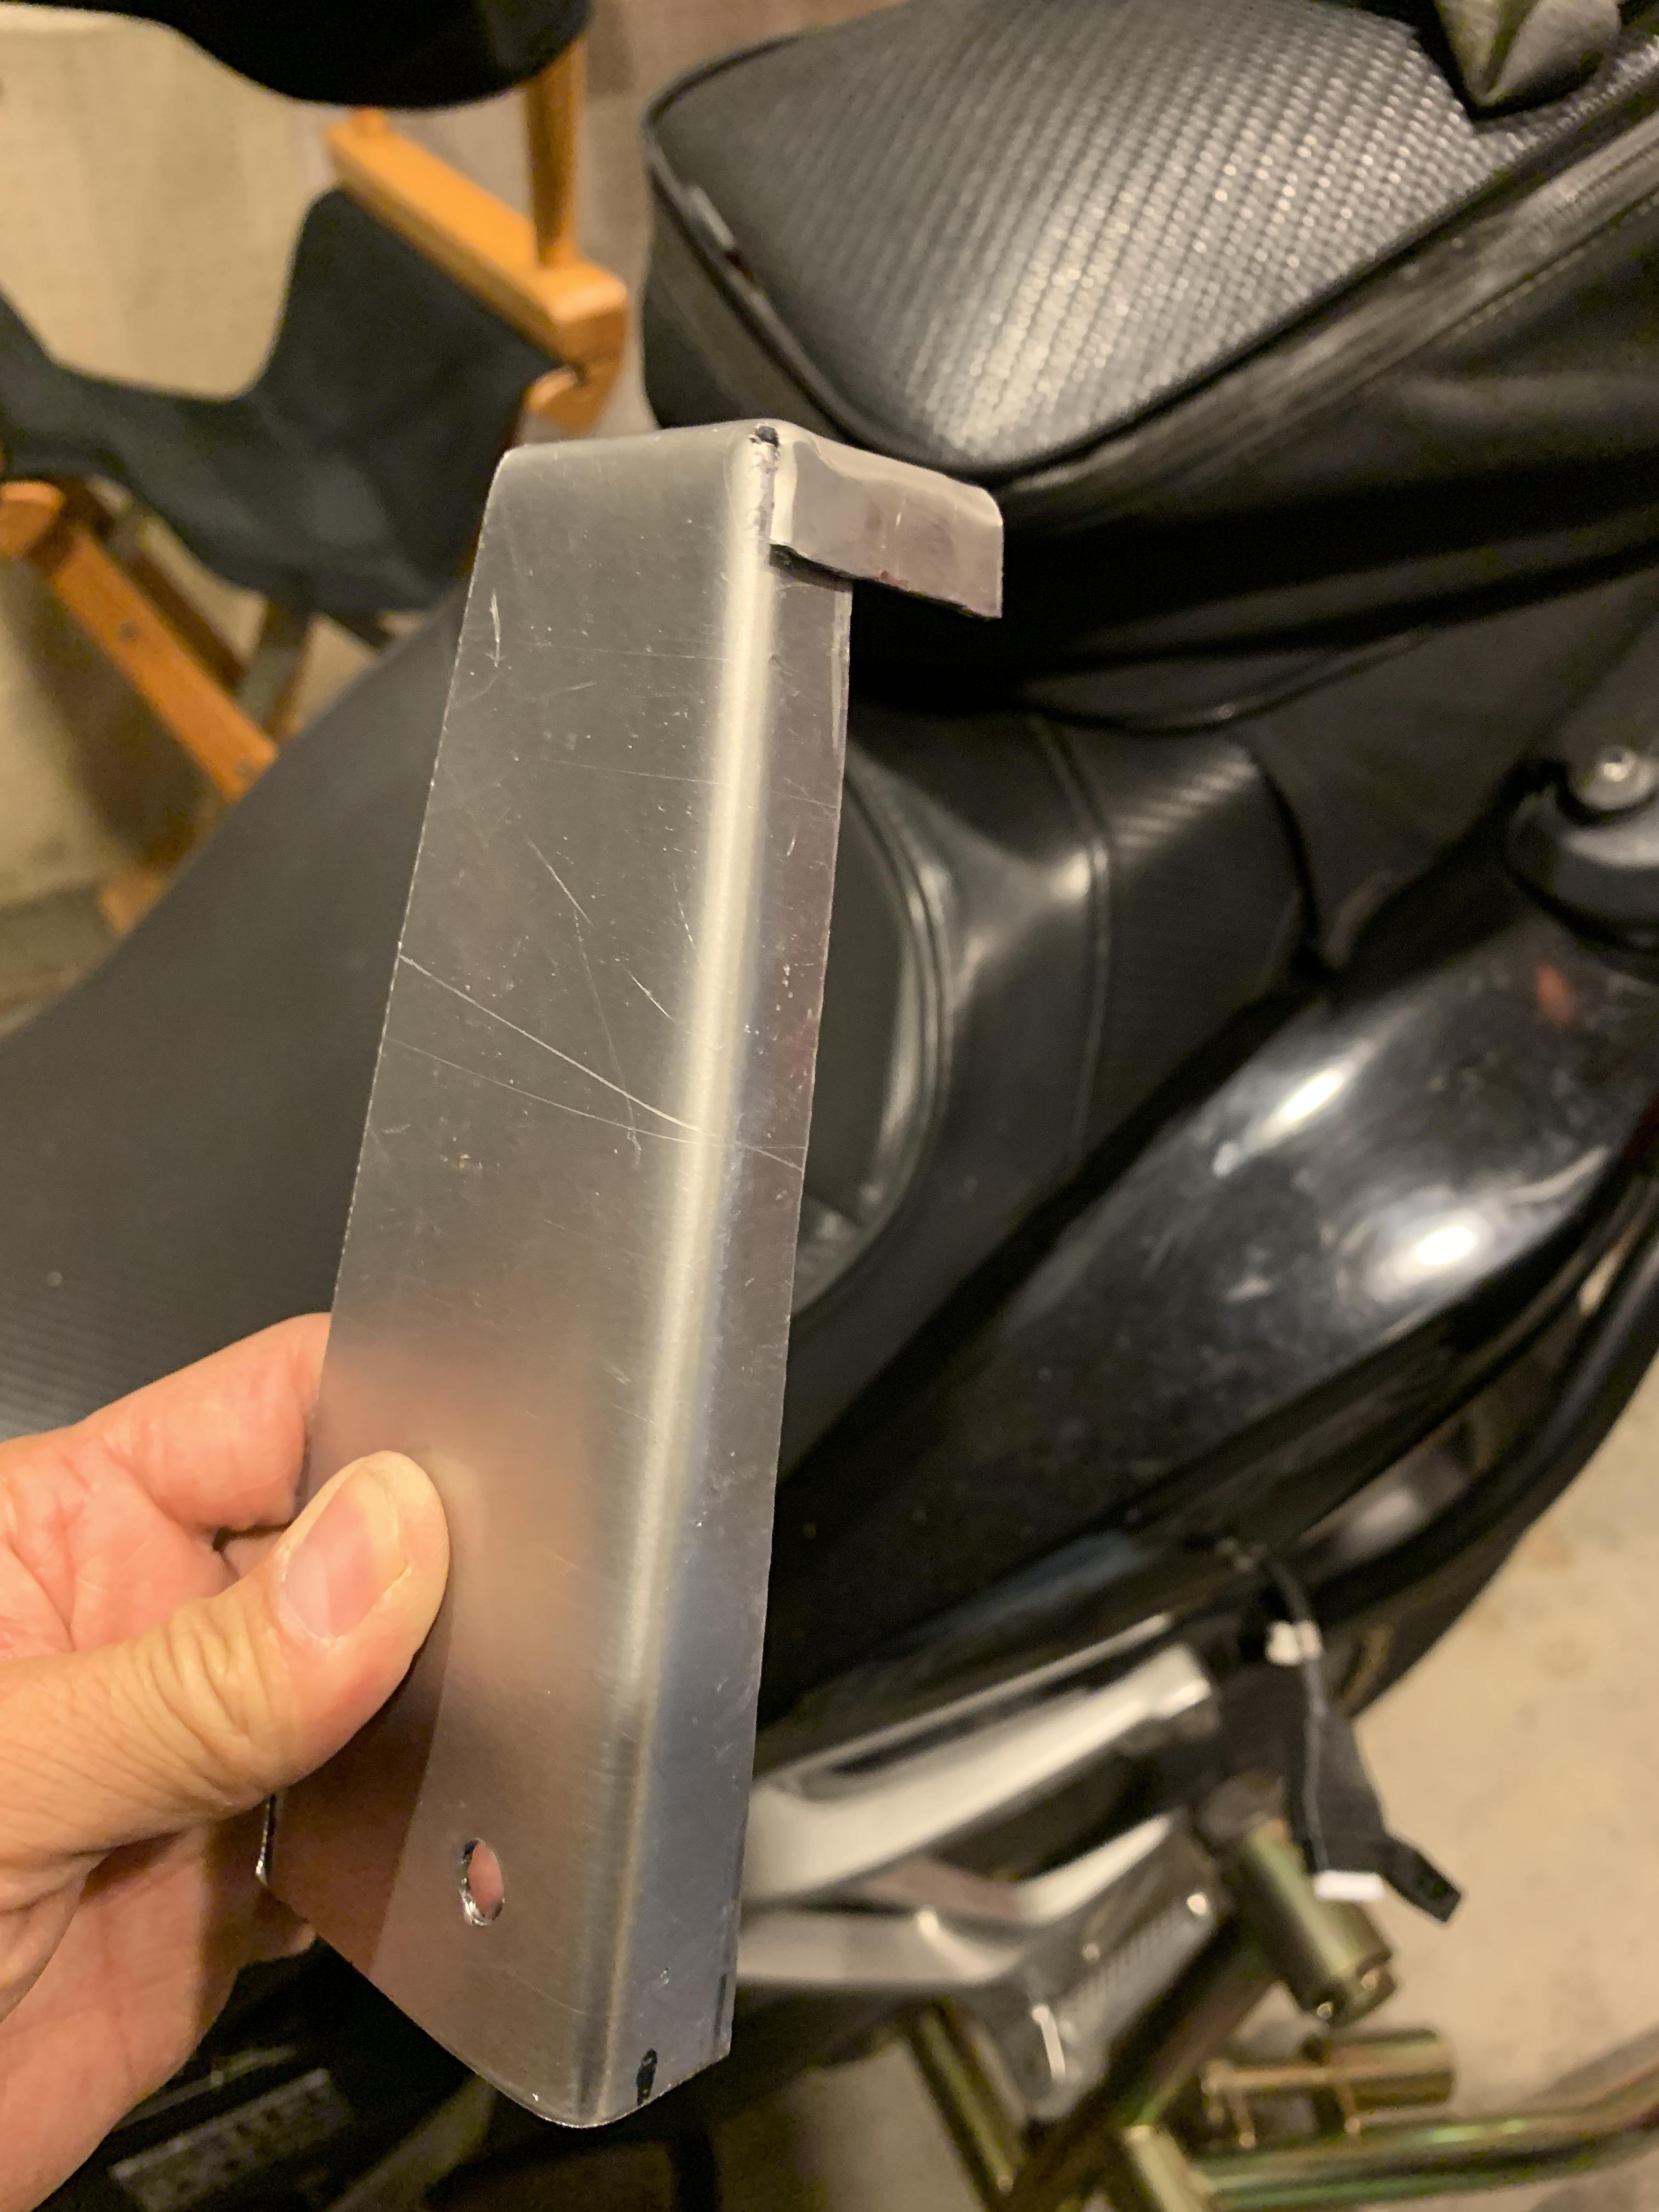
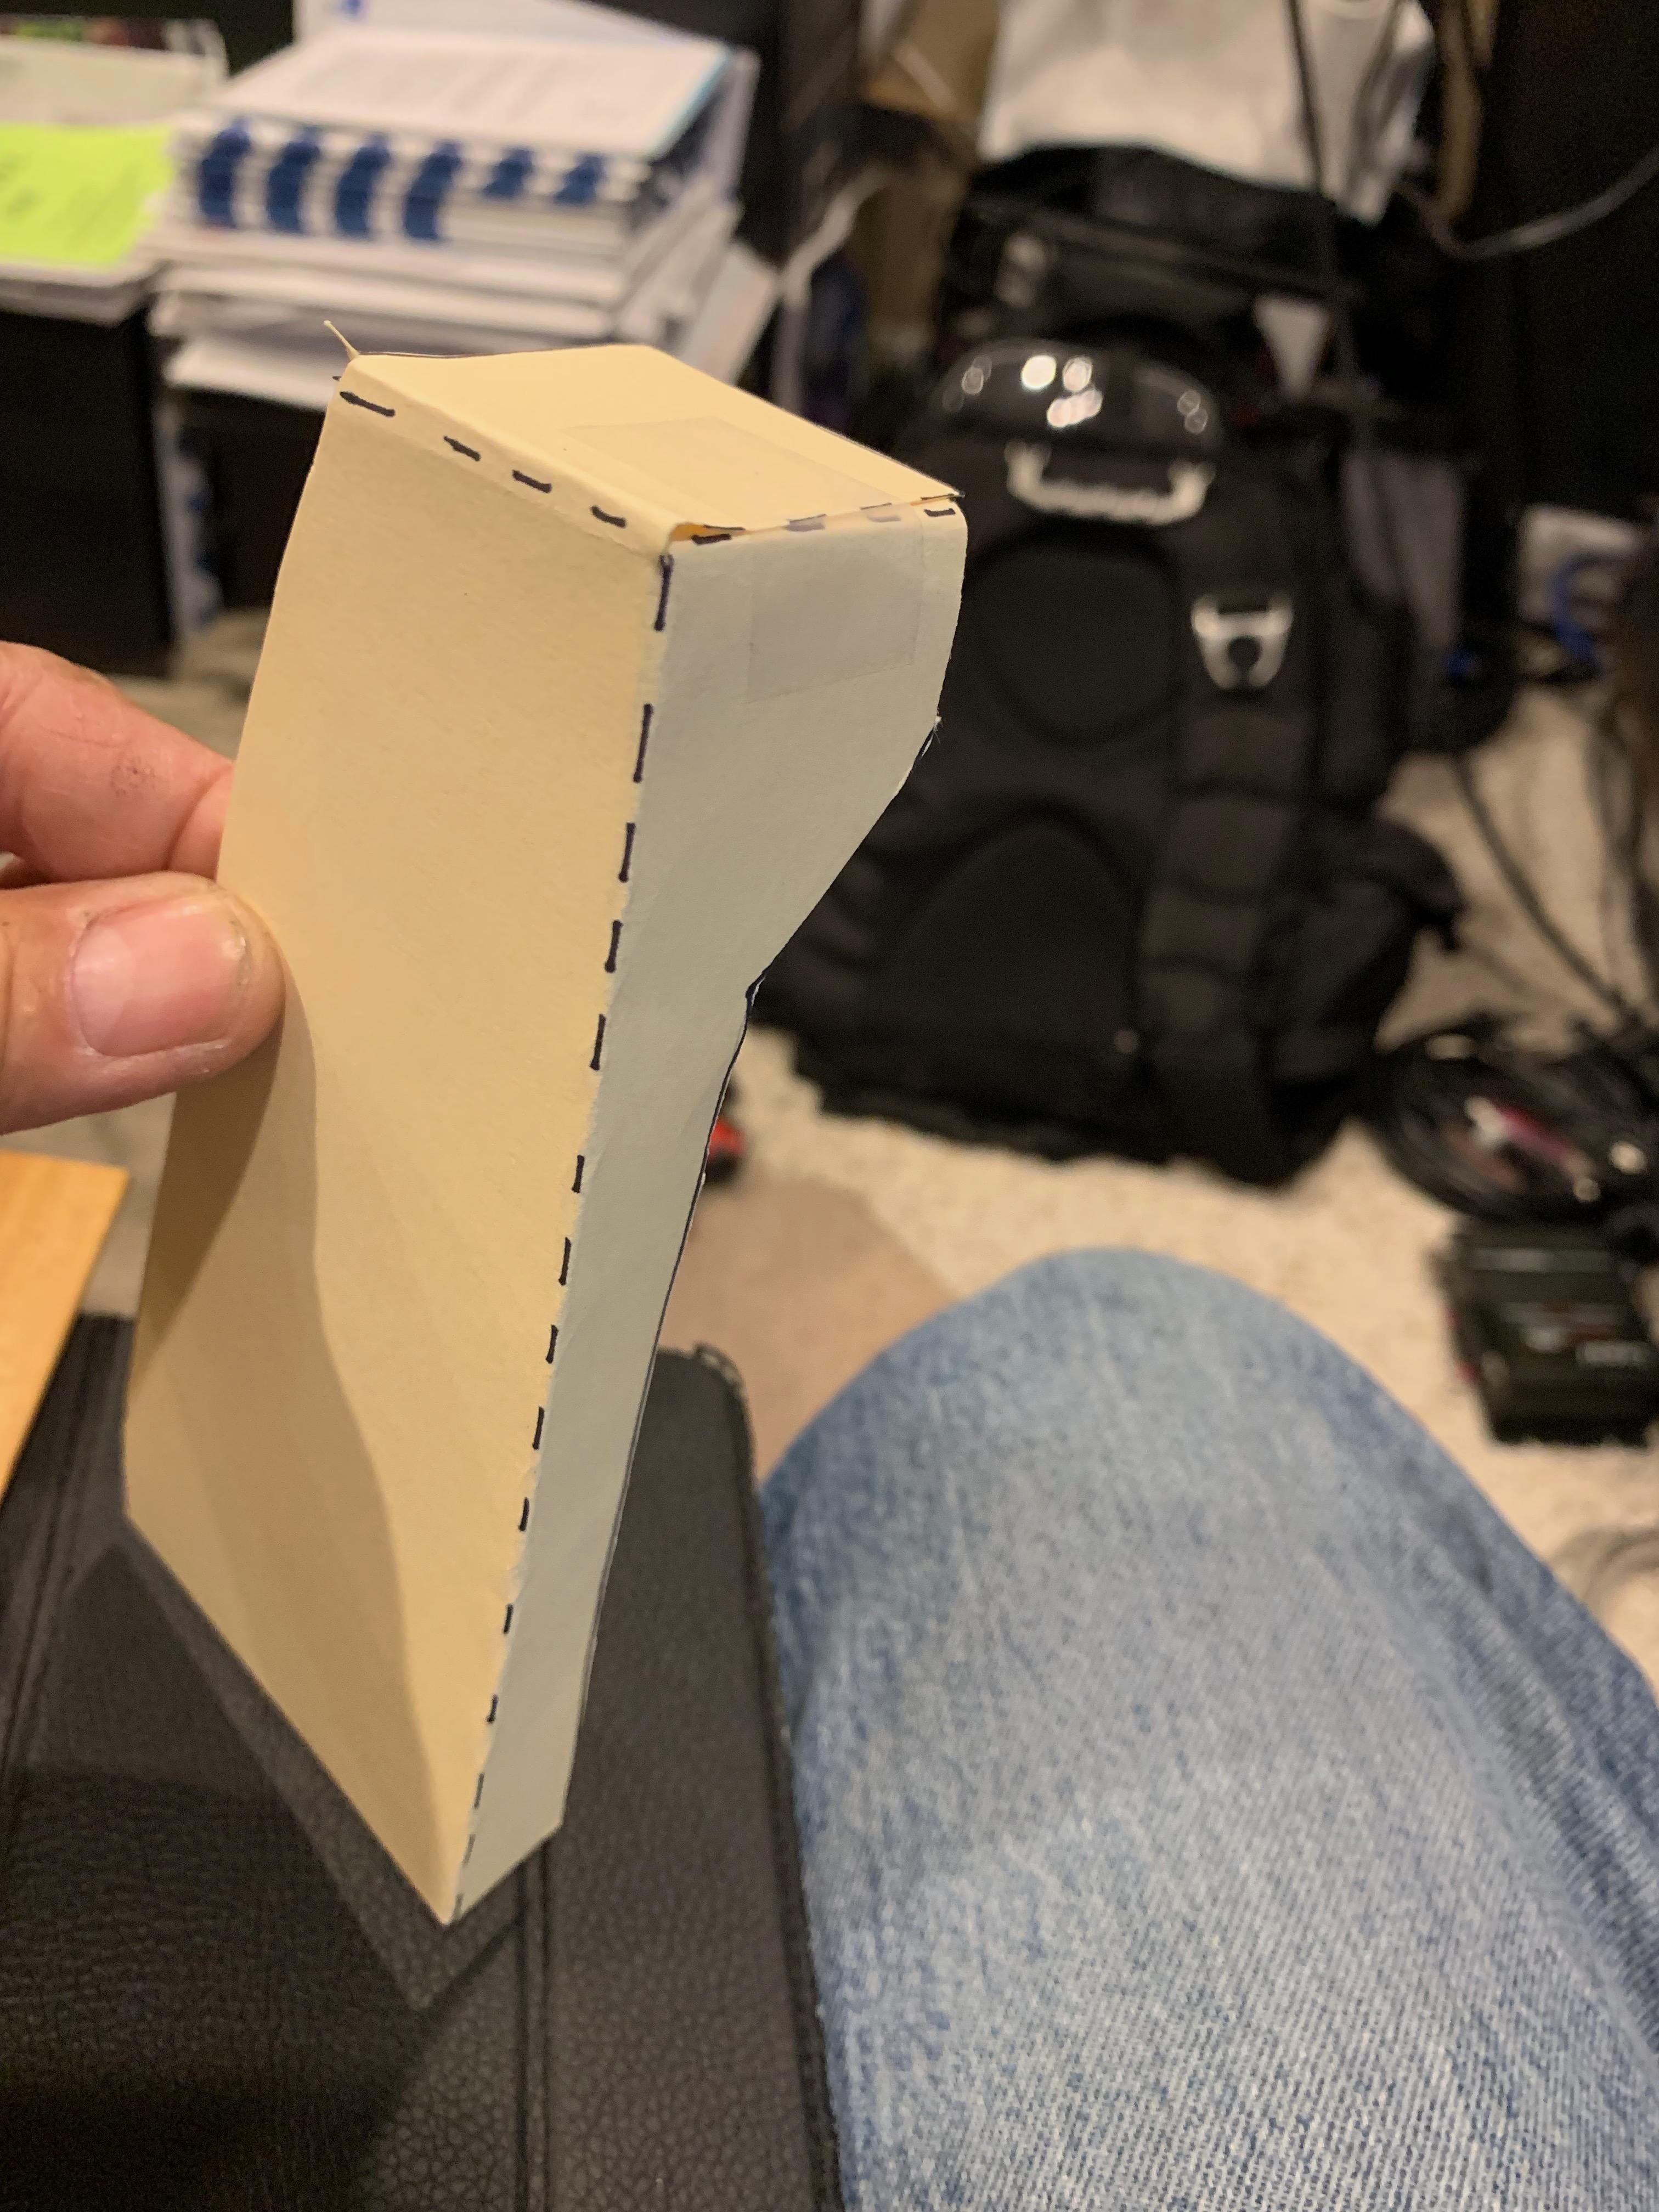
BTW, here is what I did last night and is what I had forwarded to Seb (via pictures). Hopefully I am on the right track but I'm sure Seb's talent could easily surpass mine! I added a little twist to the V&N solution and put a little bend in the vertical section to give it a little more strength. Pay no mind to the looks, I did this with simple hand tools and a small vice. For my template, I added a bigger section on the bottom so a hole could be added to use the OEM rubber stop. Let's see if Seb finds this viable or if he can improve on it or come up with something even better.
1 point
-
Note that we have just reached out to Sebspeed to see if he can make a more elegant solution, so if you're still wanting something more than a temporary solution, please stand by. As for your your setup. The only concern I have is the rubber stop sitting directly against the mid-pipe. Have you tested it under normal riding conditions? Not sure how much heat transfers to the stop in the OEM condition but would imagine much less than with direct contact. Perhaps mounting the stop to the mid-pipe would alleviate any potential melting issues.1 point
-
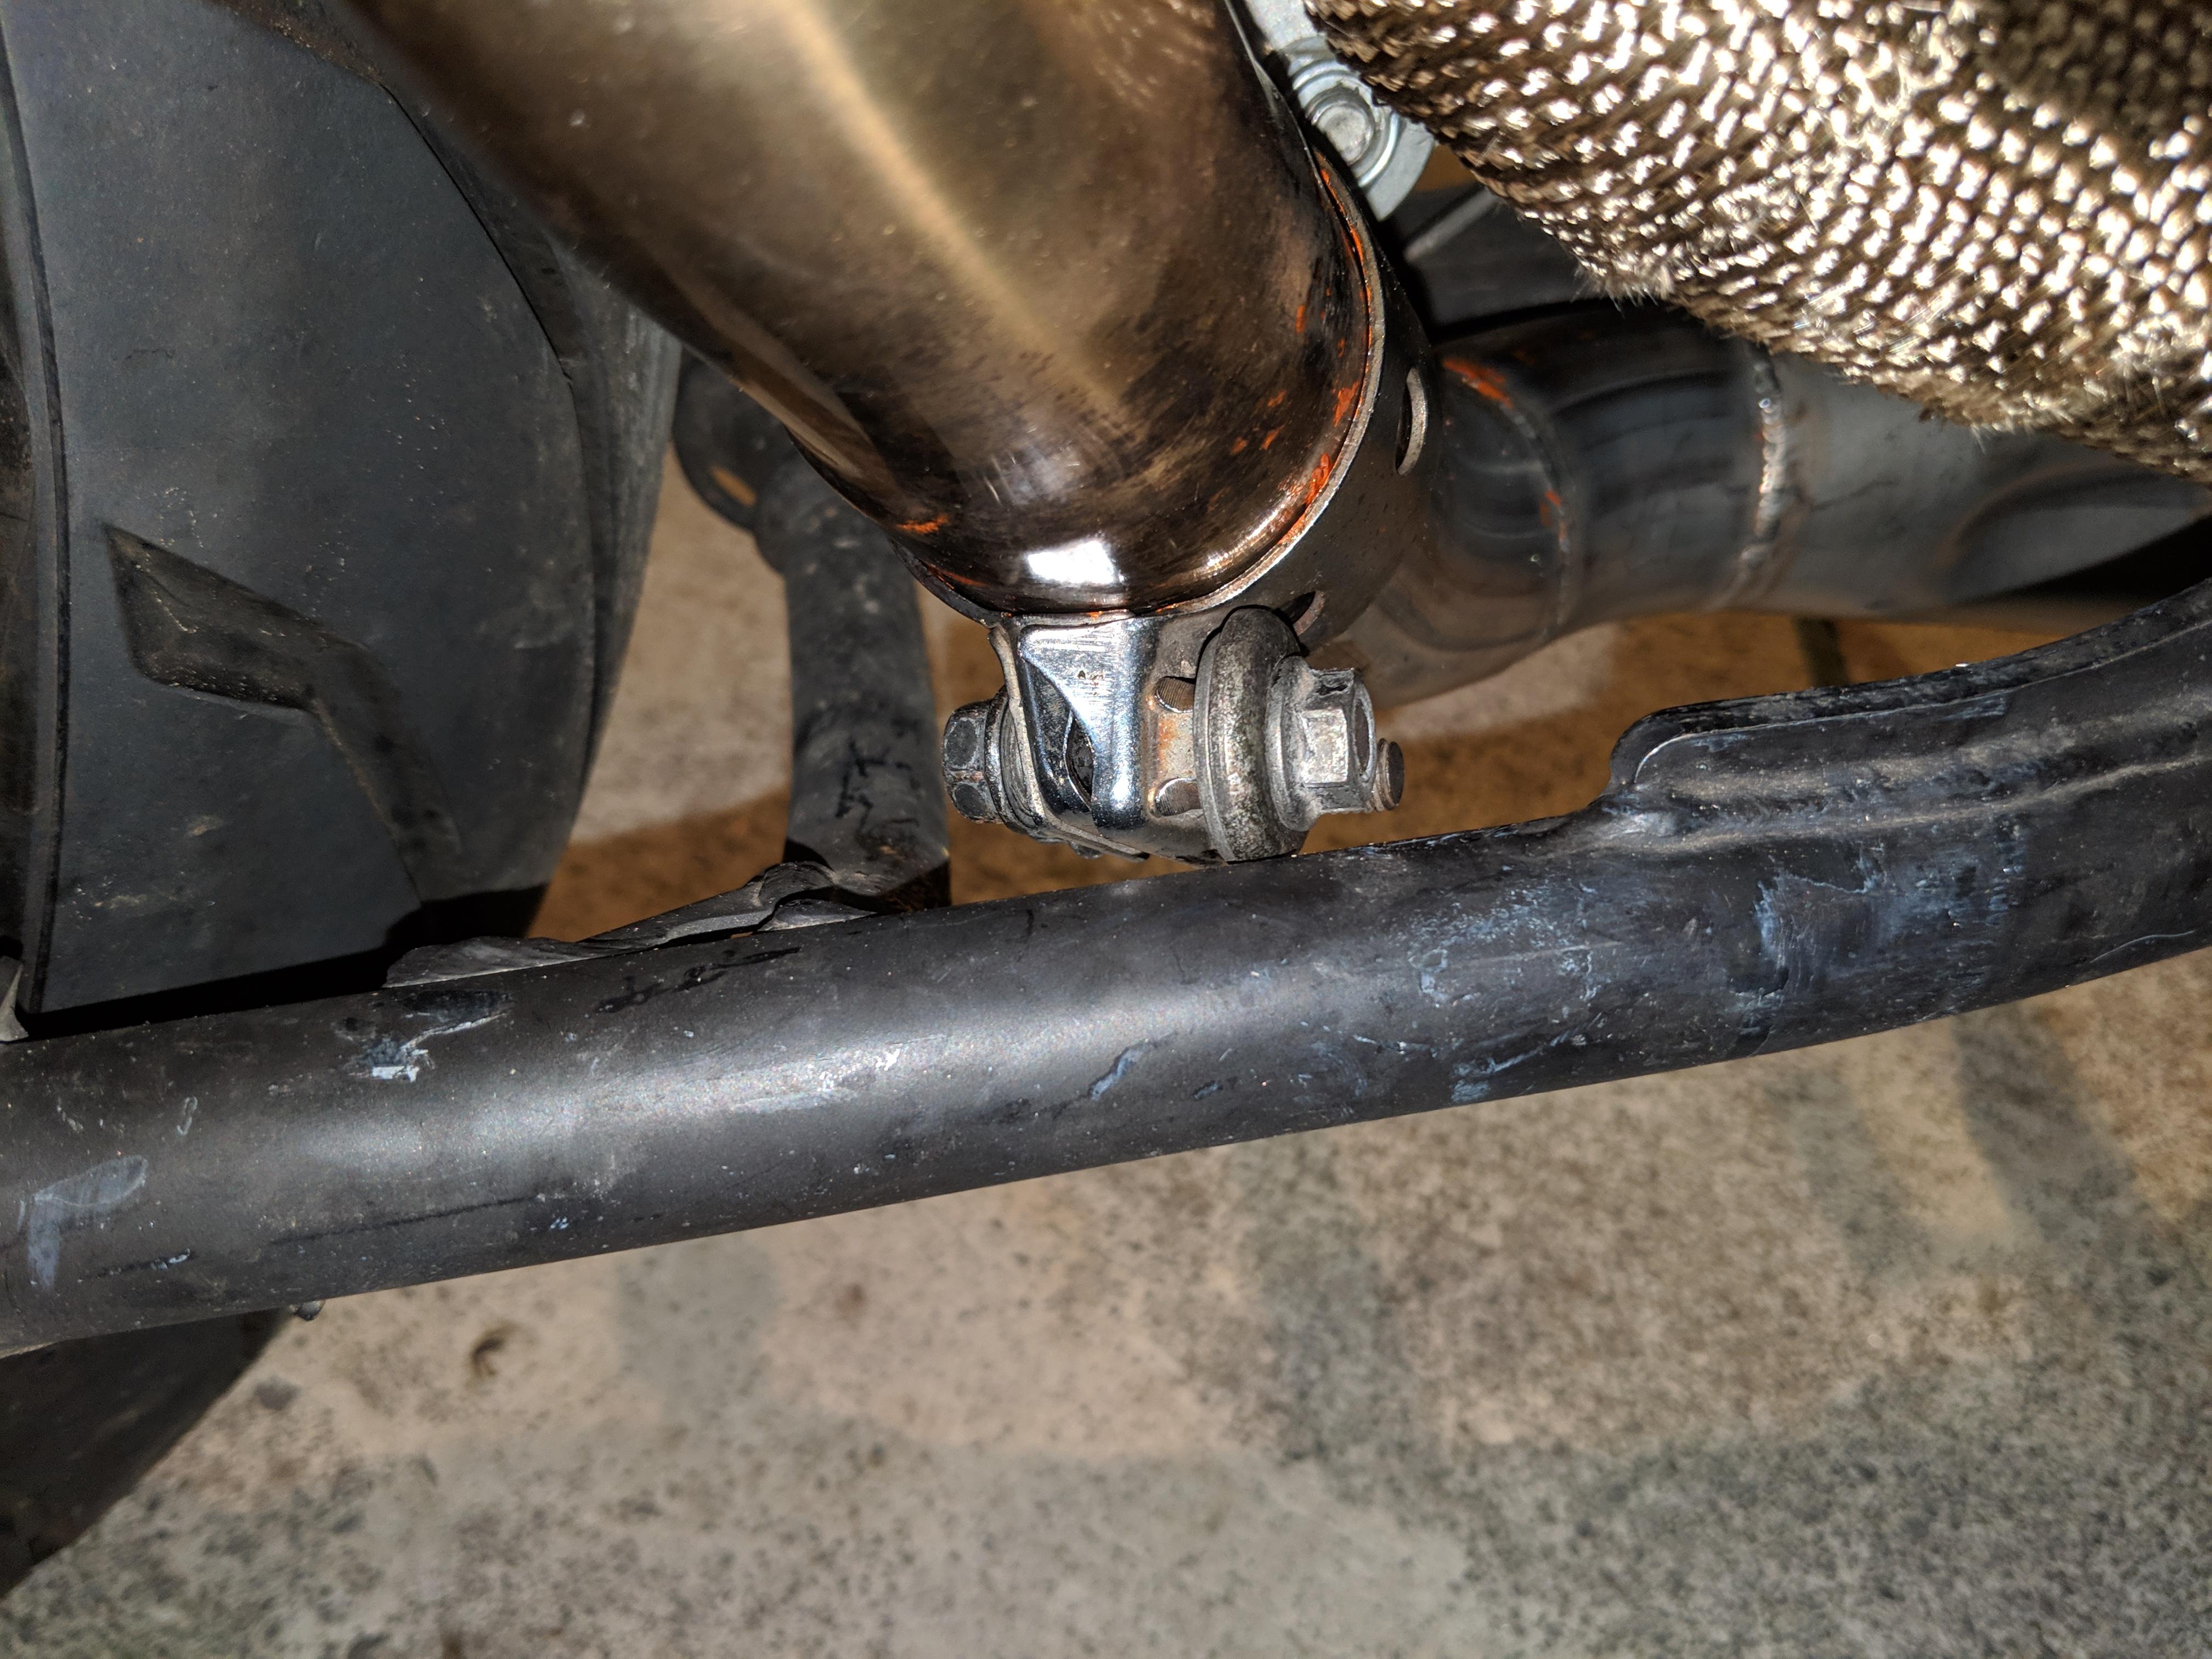
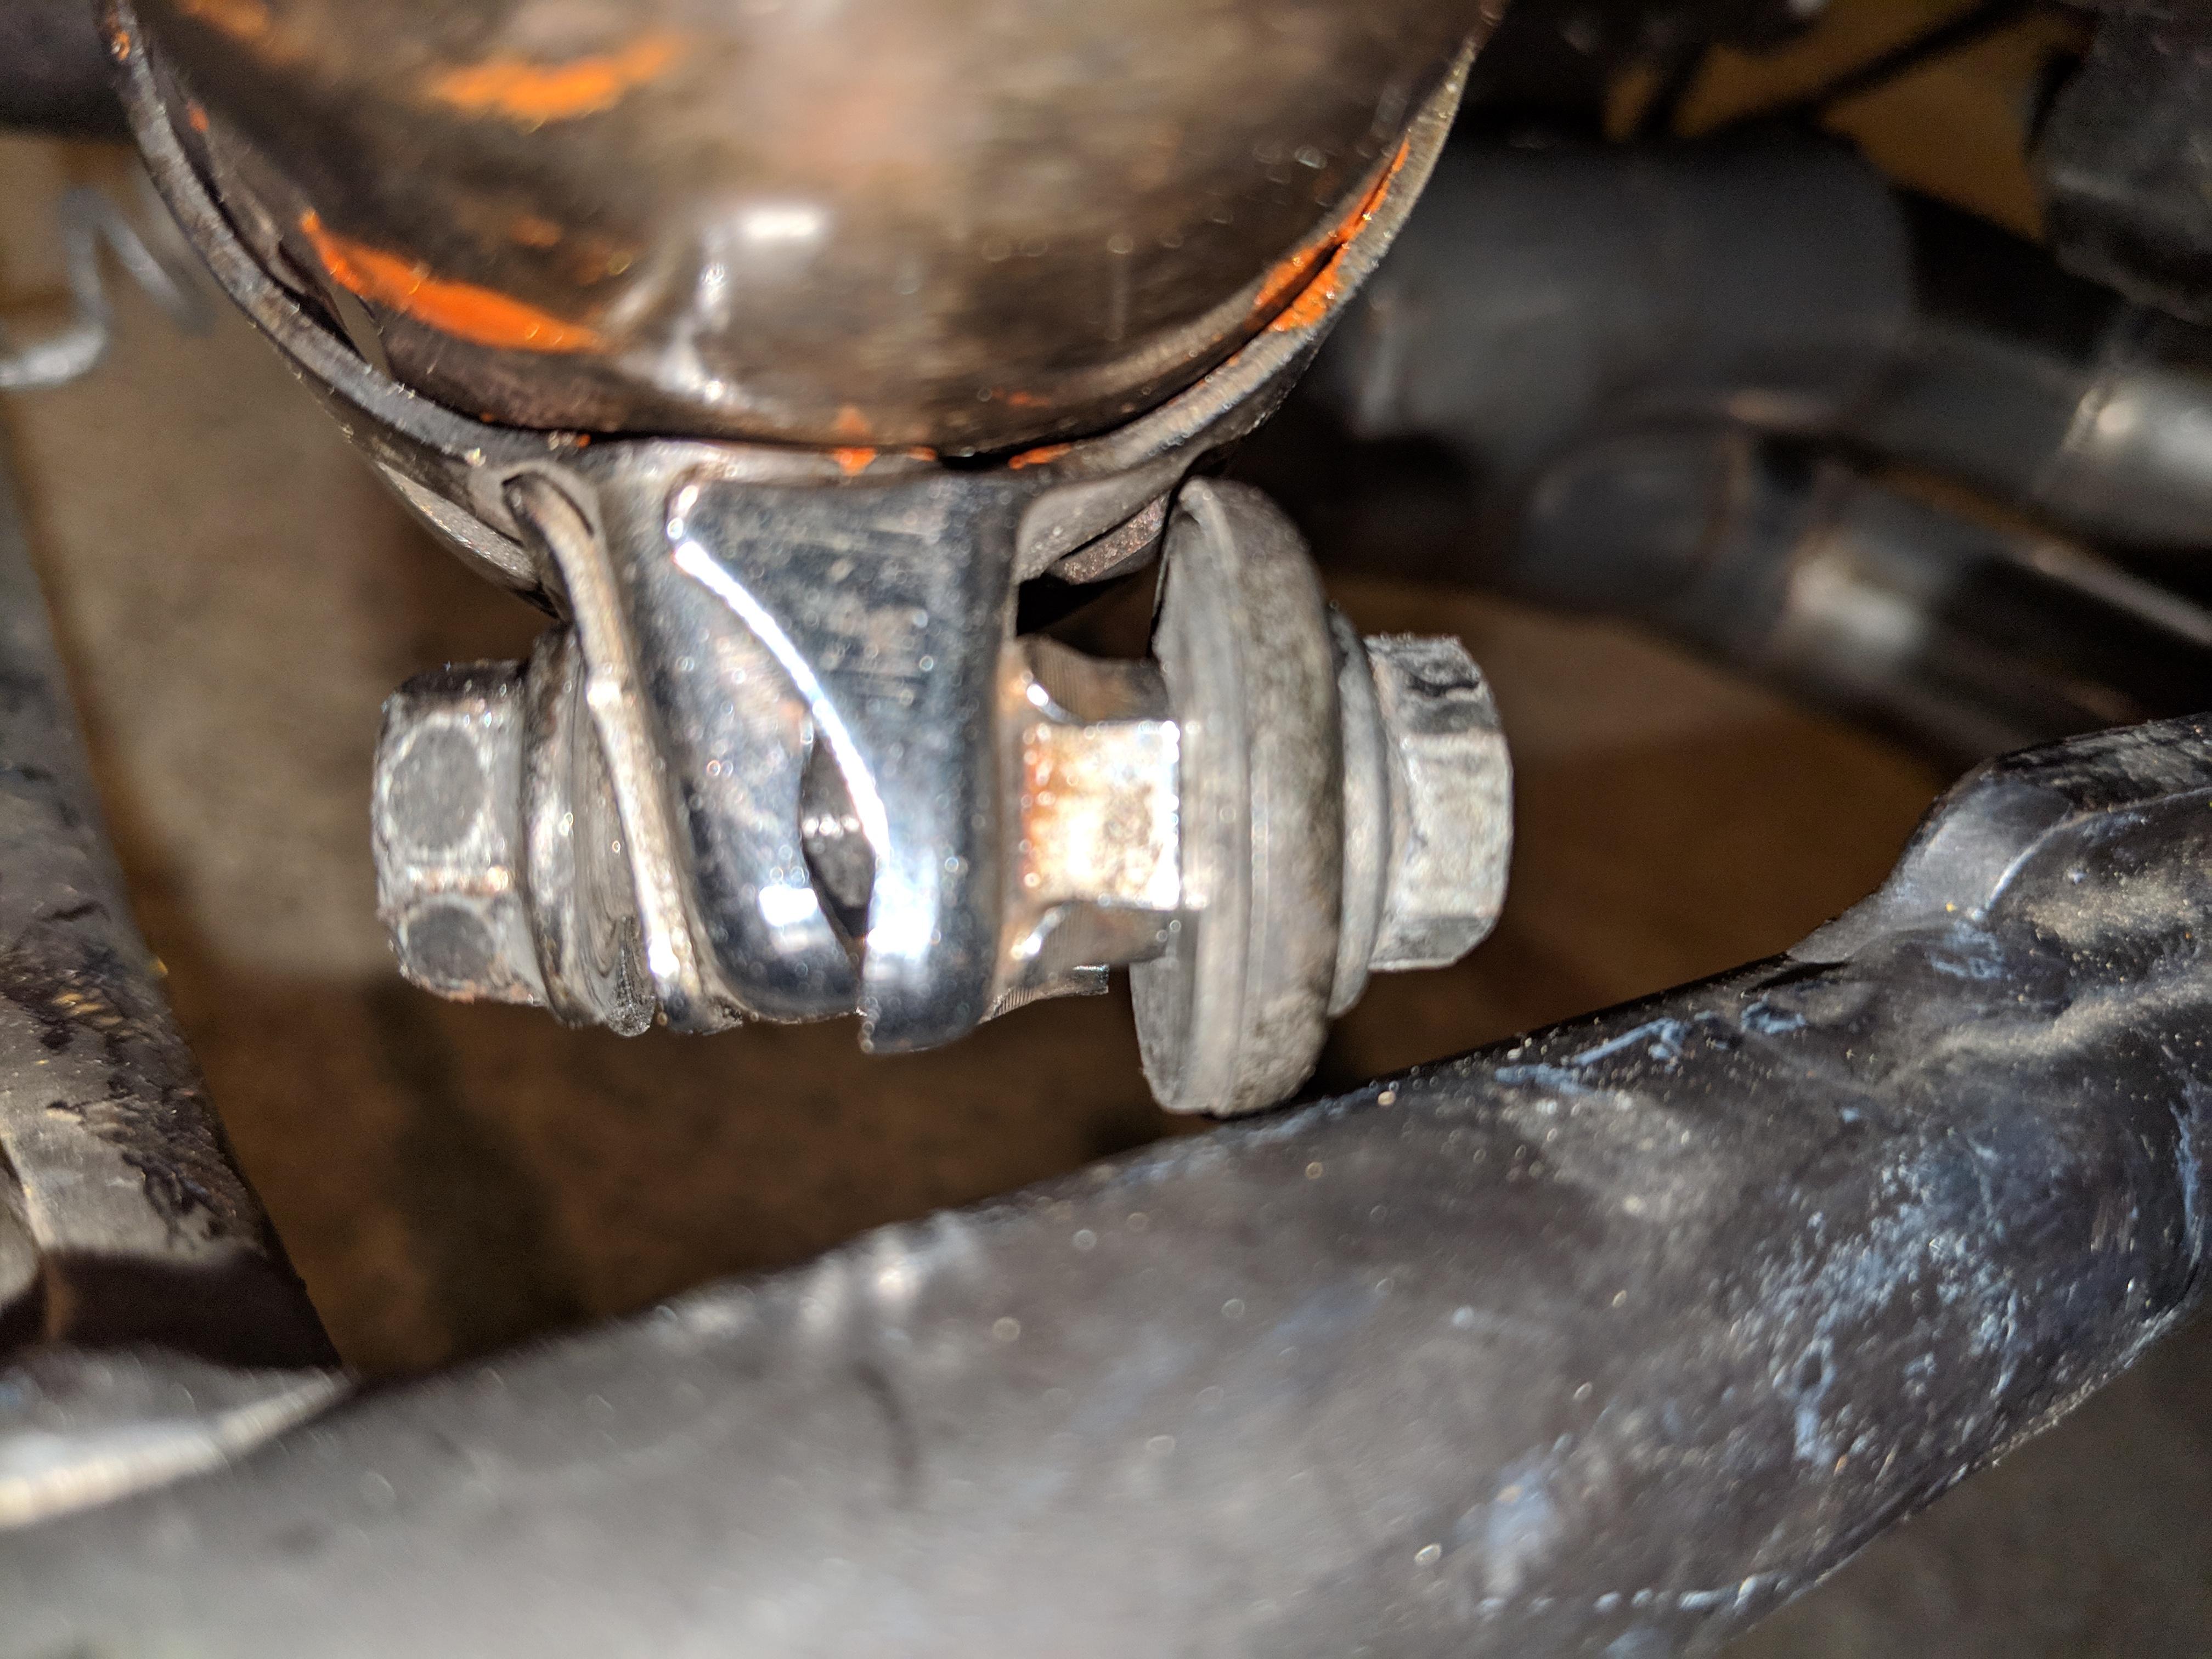
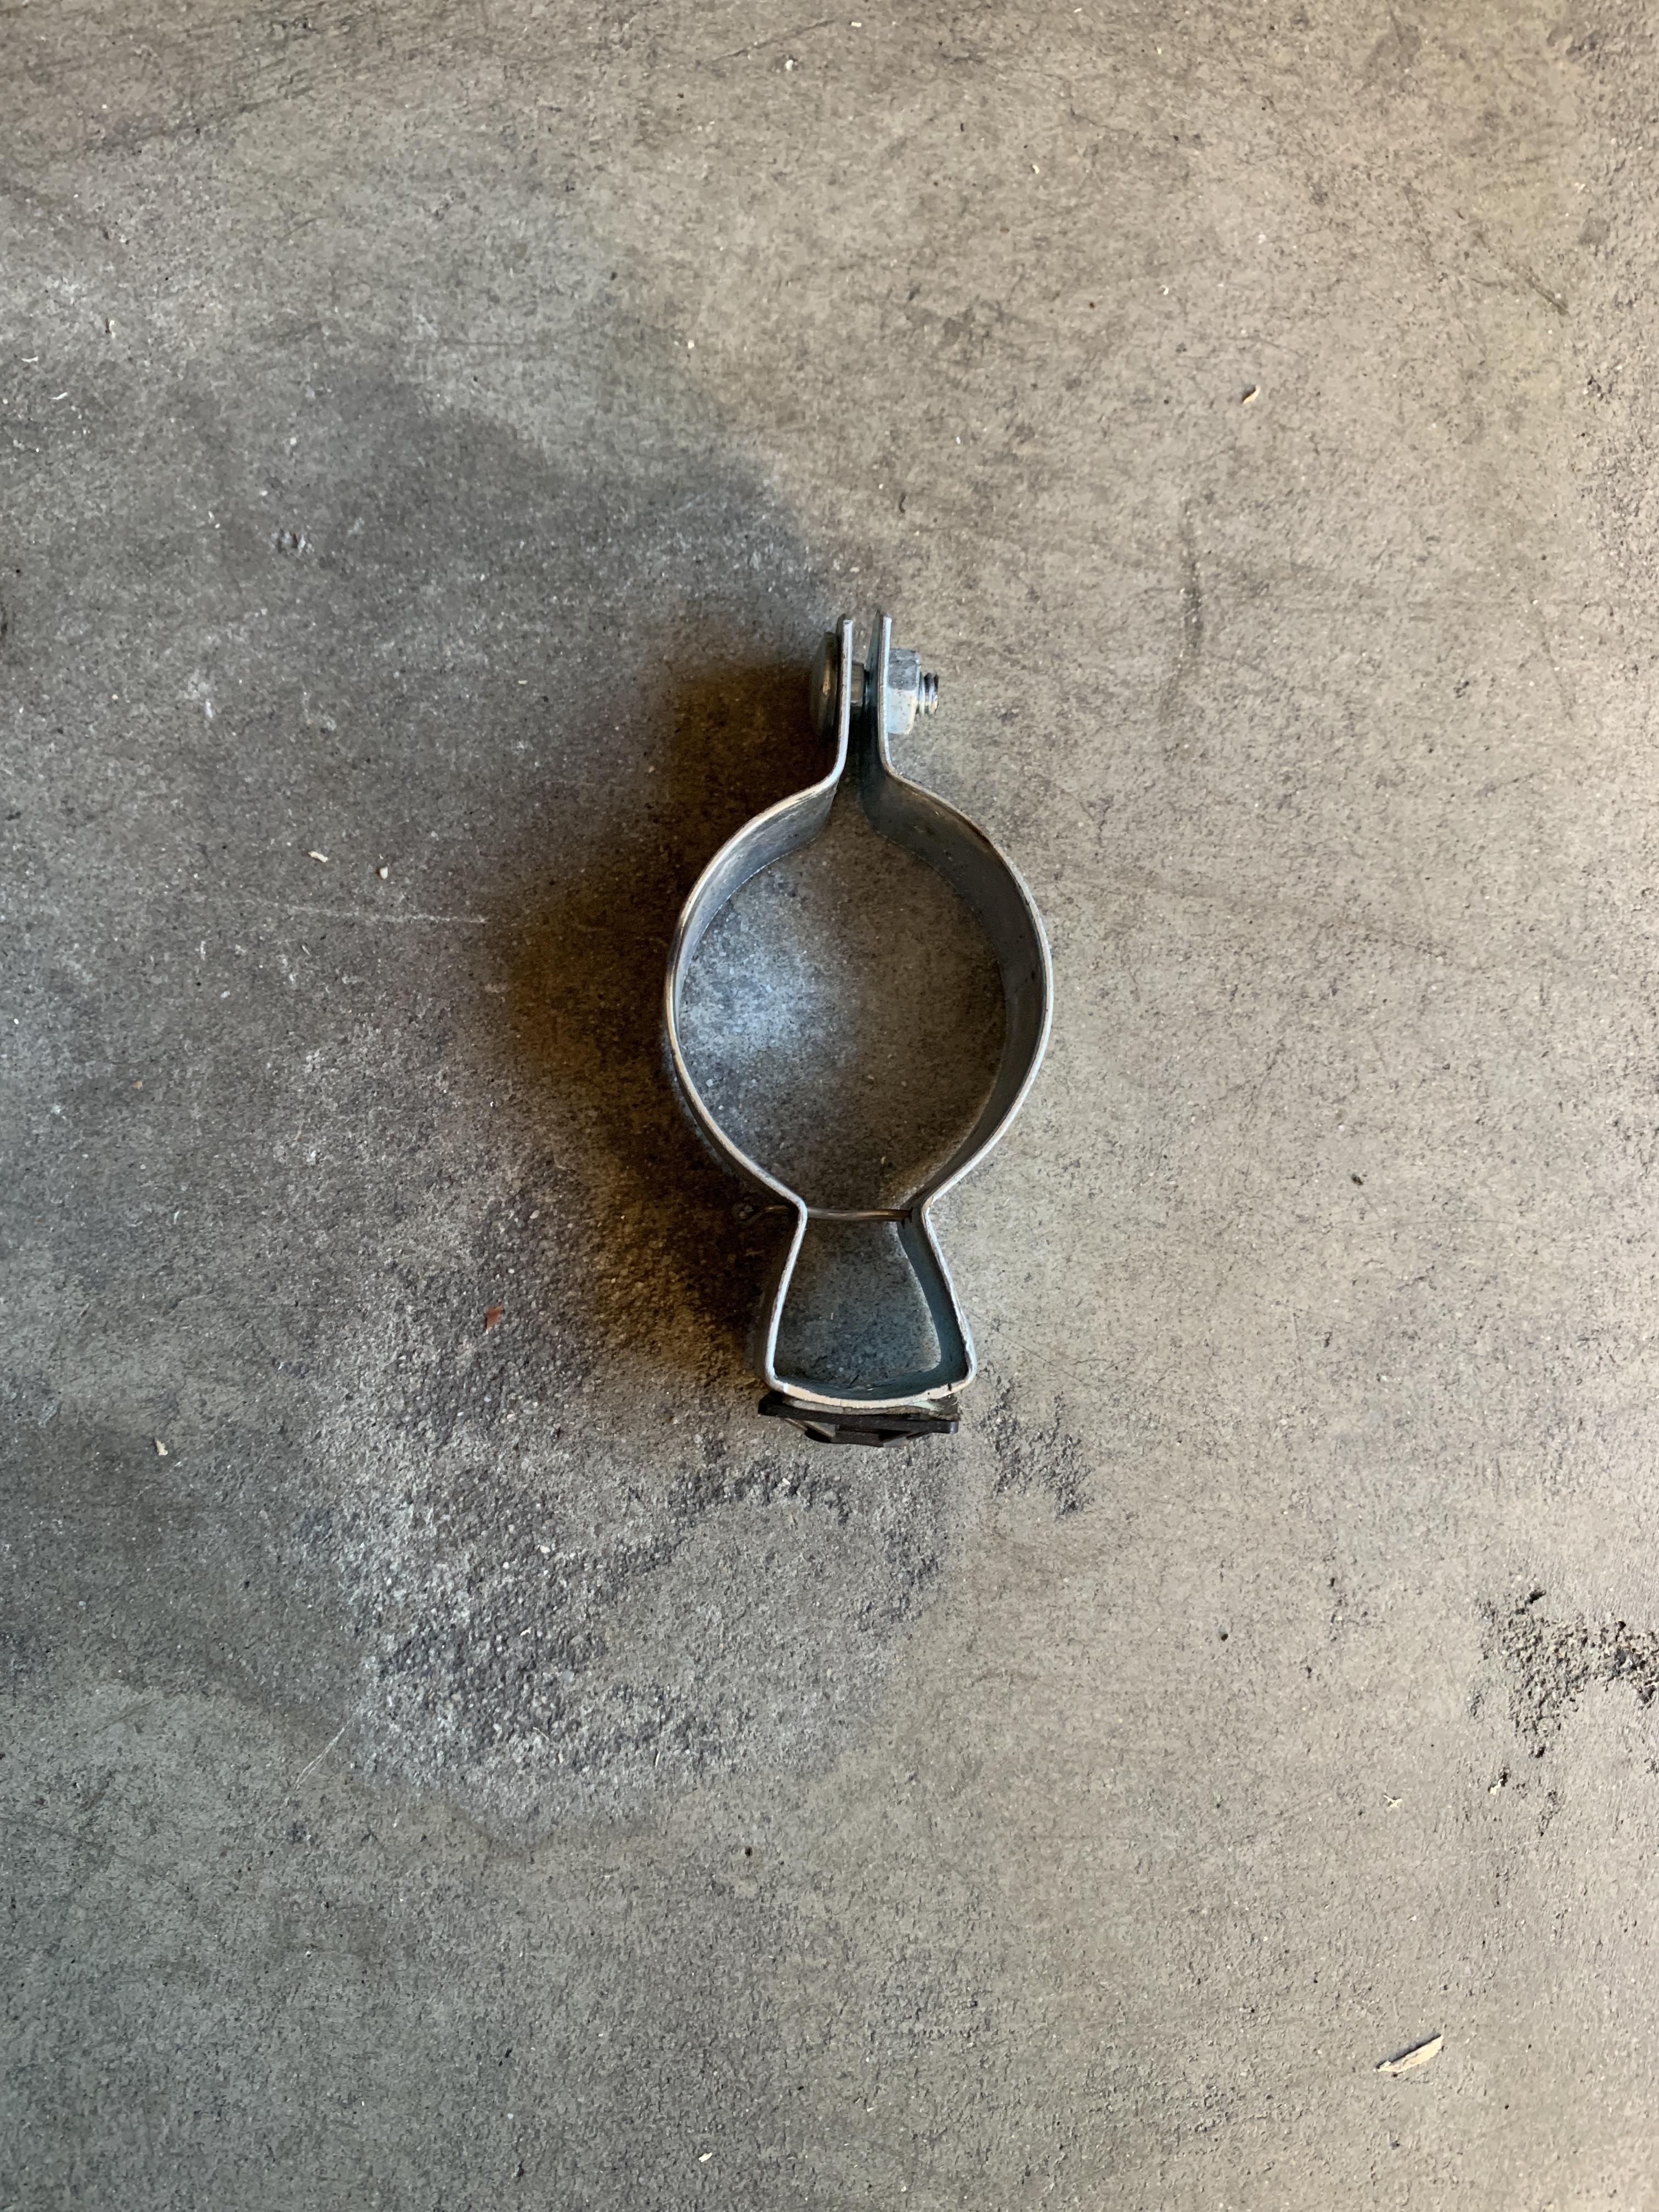
Here's a simple solution for the center stand stopper guys. All I did is I took one of the old header clamps (2nd pic), flattened it out and removed the threaded end of the clamp. I then dropped out the hole in the one end slightly bigger so I could place the OEM rubber stopper in the factory headers into the hole, then I simply just secured it to the center stand with hose clamps! Sent from my XT1710-02 using Tapatalk1 point
-
I've tried that, but those guys with the lights on top of their cars get really mad at me...1 point
-
Hey I mean if heat’s an issue just ride faster [emoji41] Sent from my iPhone using Tapatalk1 point
-
For my purposes, it's entirely about heat management. These bikes, especially the 6th gen, are known to run on the hot side and have electrical issues. Since the radiators, R/R, electrical connections, etc... would all be happier in a cooler environment, the idea of keeping every bit of heat inside the pipe you can seems like a good one to me. I've considered getting my stock 6th gen header coated for just these reasons. Anyhow, it was mentioned earlier in the thread, but was recommended against by the fabricator. I'm sure he has his reasons, and from his point of view they are probably very good reasons. If I had put the work into a set of pipes that he obviously has here, I wouldn't be eager to recommend that Billy Bob cover them with goo he bought off the interweb. Anyhow, I apologize if this was perceived as a thread hijacking. I've said my piece and believe my reasoning to be sound.1 point
-
I've been running Titanium exhaust wrap on my 99 catless header and have seen a significant improvement to bike temp. someone had mentioned earlier in this thread that you "shouldn't" wrap SS headers so I contacted the manufacturer of the titanium wrap and they said it won't cause any issues with a SS header.1 point
-
That's why I researched it. I'm still trying to figure out why my bike runs so hot and what can be done about it. I chimed in because I don't think you can properly ceramic coat these on the inside, so there's a potential risk compared to leaving the SS on its own (which we know will last).1 point
-
Or temperature mitigation. Sent from my iPhone using Tapatalk1 point
-
Maybe someone wants to coat their exhaust for aesthetics?1 point
-
What is your reasoning for coating the headers? They are stainless steel and consider the oldest Gen 6's around with their standard pipes! Still in one piece I'd expect. Not like the older mild steel pipes that Honda should never have used.1 point
-
(I feel like the clueless kid at the back of class) Can I ask why? Exactly why are we talking about exhaust coatings here in this forum thread? I have to know, is there a specific reason or concern or flaw (in these new stainless steel headers) that has caused the discussion to be re-directed onto the topic of header coatings?1 point
-
Cracking due to thermal fatigue would be the damage mechanism here... so they wouldn't rot the like mild steel pipes, but garbage nonetheless. Incidentally, 304 stainless is theoretically rated for 1600°F, though thermal fatigue is more prevalent when there is a large thermal gradient. I know there are blasting nozzles that are designed for 360° use inside pipe, but I would be curious to understand their application methods before pulling the trigger.1 point
-
I don't have enough experience to know if the SS tube would be compromised by retaining higher temperatures, but it doesn't look like our headers could be completely coated on the inside. This is from Swaintech: http://swaintech.com/race-coatings/race-coating-descriptions/white-lightning-exhaust-coatings/ If you look at the spec sheet on Jet Hot's exhaust coating page it says the same thing: https://www.jet-hot.com/thermal-barrier/ Maybe there's another way to do it, but if the entire inside can't be internally coated, I'm not sure I want to take the risk of having these headers rot out like my current ones.1 point
-
So, not to beat a dead horse here, but I guess I'm a little dubious of the total dismissal of ceramic. I'll admit, you'd be better off without than having a poor job done, so maybe he's protecting himself from poor workmanship from a 3rd party - which is understandable. With ceramic, like all coatings, there is a lot in proper application, and there are definitely some shady types in the business. The reputable shop in my area routinely coats headers both inside and out. A properly applied coating inside the header seems likely to make up the difference in retained heat and the potential to drop the external temperature of the headers by 600 degrees has got to be worth considering... that's a lot of heat that is now flowing out the pipes and no longer trapped inside your fairings! If nothing else, your R/R may thank you at the next red light you sit through! Quote from Hotrod.com Note: Admittedly, probably not the most impartial source you could find, but if they were really trying to sell the snake oil, they would have managed to find some magical horsepower in there somewhere... Take it for what it's worth (talk is cheap, comments on the internet are cheaper...) but if I decide I feel rich enough to spring for the headers, mine will probably get coated as well.1 point
-
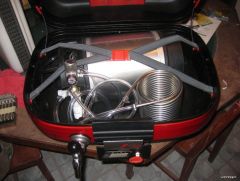
When i bought the Vance & Hines titanium pipe it came with a piece that works as a centerstand stop. It wouldn't be difficult to fabricate. Here's a photo or two. U can see why I ordered new headers! Sent from my SM-G955U using Tapatalk1 point
-
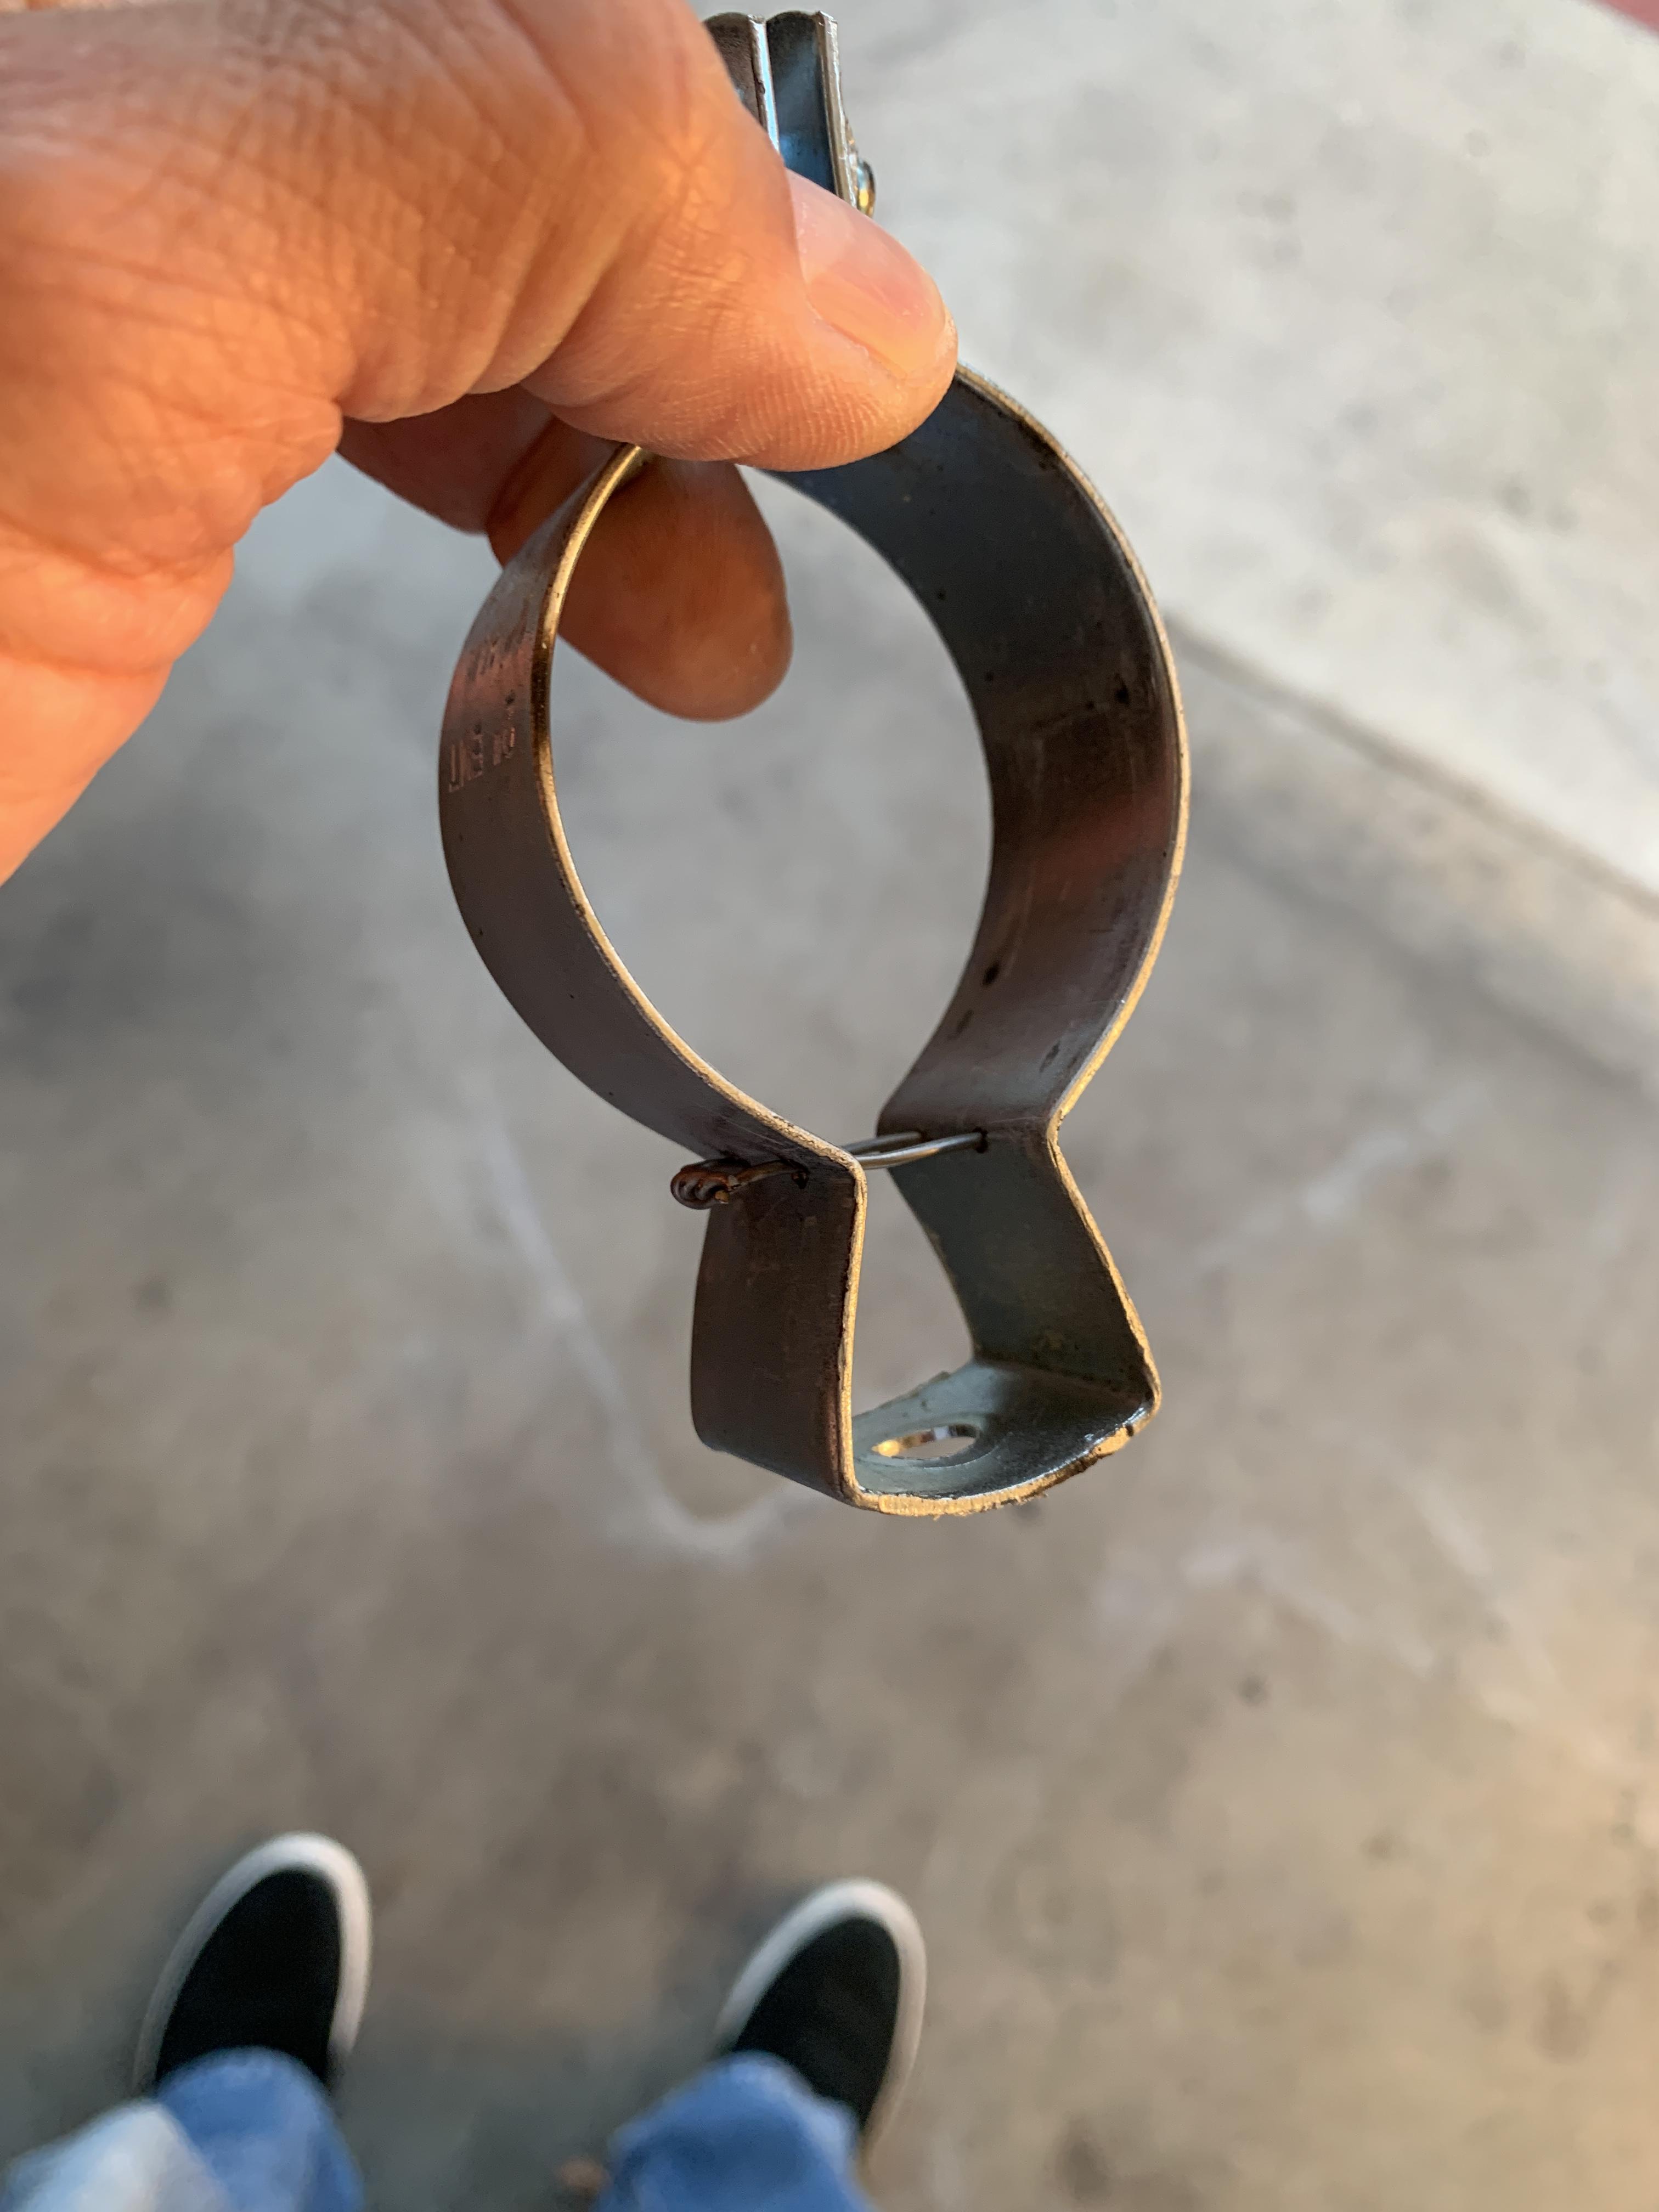
Although I am going to put my set on m y 5 Gen, sans center stand, I am on the waiting list for Center Stand Stop for my 6 Gen. When I put a set of 98-99 cat-less headers on my 6 Gen, I had to come up with a solution. I came up with a temporary one. I went to Home Depot and bought a conduit hanger and did a little adjustment to it. In order to keep the tension of the clamp, I drilled 4 holes in the bend and looped some safety wire through it. Instead of a rubber bumper, I ended up putting a zip tie mount on the bottom. It worked great but wanted something a little more elegant, hence being on the waiting list for a new one.
1 point