WackenSS Posted May 4, 2022 Author Share Posted May 4, 2022 51 minutes ago, SEBSPEED said: What do you have cooking? I'm interested to hear your findings. I am aware that the newer iteration of the C15 does not use a shaft oil seal, and so all the oil needs to be located below the centerline of the shaft. I've taken that into account with my current installation. I've also added an oil cooler for the Rotrex oil. I'll post my findings when i am sure everything is repairable and quoted. The "gen2" rotrex C15 explicitly states that oil reservoir can not stay in Dan's location. The reason for this is that the rotrex is a dry-sump with scavenging pump and it will start sending oil out behind the impeller. Did you fab something nice already? Quote Link to comment Share on other sites More sharing options...
SEBSPEED Posted May 5, 2022 Share Posted May 5, 2022 11 hours ago, WackenSS said: I'll post my findings when i am sure everything is repairable and quoted. The "gen2" rotrex C15 explicitly states that oil reservoir can not stay in Dan's location. The reason for this is that the rotrex is a dry-sump with scavenging pump and it will start sending oil out behind the impeller. Did you fab something nice already? I did, I mounted a new tank on the right side behind the fairing. I also reconstructed the cooling system with a different radiator configuration so I could add a cooler for the Rotrex oil. 1 Quote Link to comment Share on other sites More sharing options...
Member Contributer Dutchy Posted May 5, 2022 Member Contributer Share Posted May 5, 2022 3 hours ago, SEBSPEED said: I did, I mounted a new tank on the right side behind the fairing. I also reconstructed the cooling system with a different radiator configuration so I could add a cooler for the Rotrex oil. 2 Quote Link to comment Share on other sites More sharing options...
WackenSS Posted May 5, 2022 Author Share Posted May 5, 2022 9 hours ago, SEBSPEED said: I did, I mounted a new tank on the right side behind the fairing. I also reconstructed the cooling system with a different radiator configuration so I could add a cooler for the Rotrex oil. I'm pretty sure the oil temps are ok, but that's a guess based on the climate i live in. I'll make a temp sensor thing this year just to confirm. Do you have the gen2 version? Pictures should be a must from what I've seen of your fab skills before. In other news I've decided to do this the hard way. I'll put everything together, rotrex fixed and unmodified, stock headers, no rapidbike, brakes and suspension and put in on the Dyno for fun and find the weight numbers before i start the diet and all-around upgrades. This should go rather quickly - then for the upgrades, and it will also include a billet impeller either before or after the headers/rapidbike. Quote Link to comment Share on other sites More sharing options...
SEBSPEED Posted May 5, 2022 Share Posted May 5, 2022 4 hours ago, WackenSS said: I'm pretty sure the oil temps are ok, but that's a guess based on the climate i live in. I'll make a temp sensor thing this year just to confirm. Do you have the gen2 version? Pictures should be a must from what I've seen of your fab skills before. In other news I've decided to do this the hard way. I'll put everything together, rotrex fixed and unmodified, stock headers, no rapidbike, brakes and suspension and put in on the Dyno for fun and find the weight numbers before i start the diet and all-around upgrades. This should go rather quickly - then for the upgrades, and it will also include a billet impeller either before or after the headers/rapidbike. I have an earlier model Rotrex from the original Toro production run. I did the oil relocation to save time in the future in case it's needed, and because I was re-plumbing the system to add the cooler anyway. Rotrex states in their texts that an oil cooler is mandatory on installation, so I figured it can't hurt. I have been taking pics along the way, I'll post them later when I get the bike done and I can relax a little. Do you have someone that can balance the rebuilt rotating assembly for you? Quote Link to comment Share on other sites More sharing options...
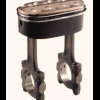
WackenSS Posted May 5, 2022 Author Share Posted May 5, 2022 2 hours ago, SEBSPEED said: I have an earlier model Rotrex from the original Toro production run. I did the oil relocation to save time in the future in case it's needed, and because I was re-plumbing the system to add the cooler anyway. Rotrex states in their texts that an oil cooler is mandatory on installation, so I figured it can't hurt. I have been taking pics along the way, I'll post them later when I get the bike done and I can relax a little. Do you have someone that can balance the rebuilt rotating assembly for you? There is no need to balance this assembly. The shaft is supported on 3 large rollers and is machined as a single part so this is naturally balanced. The impeller is cast OEM and balanced 2 ways alone before it is put on the shaft and fixed with a steel nut on the first versions and aluminium nut on the later gen1's Your setup certainly needs pics 🙂 I guessing this is not the warbird? Quote Link to comment Share on other sites More sharing options...
SEBSPEED Posted May 5, 2022 Share Posted May 5, 2022 2 hours ago, WackenSS said: There is no need to balance this assembly. The shaft is supported on 3 large rollers and is machined as a single part so this is naturally balanced. The impeller is cast OEM and balanced 2 ways alone before it is put on the shaft and fixed with a steel nut on the first versions and aluminium nut on the later gen1's Your setup certainly needs pics 🙂 I guessing this is not the warbird? Nice that you don't have to balance it. I am installing on my 2005 VTEC which still has fairings. I had been collecting parts for about 10 years and I got the itch to put them all on it at once 1 Quote Link to comment Share on other sites More sharing options...
WackenSS Posted May 9, 2022 Author Share Posted May 9, 2022 Valve cover cleaned up nicely, radiators even more so. I even found som hidden developing issues needed sorting. The last pictures are just for fun. Rsv4 water pump housing vs the VFR. RC51 Left radiator vs VFR Therese parts i have lying around just to see if there is any possibility of fabricating something already accessible to me. Quote Link to comment Share on other sites More sharing options...
SEBSPEED Posted May 11, 2022 Share Posted May 11, 2022 A pic from the other day. I have since installed the upper cowl with lights and am just waiting to get in the paint booth to finish the right side panel, then it will be done. 7 Quote Link to comment Share on other sites More sharing options...
Member Contributer Cogswell Posted May 11, 2022 Member Contributer Share Posted May 11, 2022 3 hours ago, SEBSPEED said: A pic from the other day. I have since installed the upper cowl with lights and am just waiting to get in the paint booth to finish the right side panel, then it will be done. Is the lower chin fairing in the "V" going to fit over the 8th gen rad? Mods for that in store? Quote Link to comment Share on other sites More sharing options...
SEBSPEED Posted May 12, 2022 Share Posted May 12, 2022 4 hours ago, Cogswell said: Is the lower chin fairing in the "V" going to fit over the 8th gen rad? Mods for that in store? Mods in store and done, along with a rock guard. Quote Link to comment Share on other sites More sharing options...
WackenSS Posted May 15, 2022 Author Share Posted May 15, 2022 On 5/11/2022 at 8:33 PM, SEBSPEED said: A pic from the other day. I have since installed the upper cowl with lights and am just waiting to get in the paint booth to finish the right side panel, then it will be done. Looking good as usual! So you will have access to the dipstick through a hole in the right panel right? You said you have been gathering parts for ages, but you had the complete SC kit minus the cooler or am I wrong? No outboard support bearing on the rotrex? Did you fab the toothed pulleys or are they the last revision from Dan? Where did you put the rectifier? Could we get a look under the hood Please 🙂😳 1 Quote Link to comment Share on other sites More sharing options...
WackenSS Posted May 15, 2022 Author Share Posted May 15, 2022 Parts have arrived and i am pretty confident this will be a good working unit again. A small change in plans. It is not possible to change the impeller without a total teardown of the rotrex, while interesting enough it's not something I want to do again just to change the impeller. Cast out, CNC in! 3 Quote Link to comment Share on other sites More sharing options...
SEBSPEED Posted May 20, 2022 Share Posted May 20, 2022 On 5/15/2022 at 3:23 PM, WackenSS said: Looking good as usual! So you will have access to the dipstick through a hole in the right panel right? You said you have been gathering parts for ages, but you had the complete SC kit minus the cooler or am I wrong? No outboard support bearing on the rotrex? Did you fab the toothed pulleys or are they the last revision from Dan? Where did you put the rectifier? Could we get a look under the hood Please 🙂😳 No dipstick, I added a clear tube to indicate oil level I bought a complete used A&A kit, one of the original 6g kits. I made the oil cooler from a 6g radiator. New larger SH847 rr is mounted on the left side of the frame now. I didn't get a chance to make a thread for my rebuild before leaving on a trip, but I plan to make a list of mods with pics when I return. 3 Quote Link to comment Share on other sites More sharing options...
SEBSPEED Posted May 1, 2023 Share Posted May 1, 2023 @WackenSS do you have any updates to share on your bike? Quote Link to comment Share on other sites More sharing options...
WackenSS Posted January 25 Author Share Posted January 25 On 5/1/2023 at 4:41 PM, SEBSPEED said: @WackenSS do you have any updates to share on your bike? Yes! As you might have guessed, im re-starting this adventure again. Updates will now follow semi-regurlaly again. Im sorry for the silence, but i seem to loose more and more of my free time as age progresses. Cheers to those who have helped keeping this forum alive and to the man himself! I was sure i had to start a new thread on vfrworld... 9 Quote Link to comment Share on other sites More sharing options...
SEBSPEED Posted January 25 Share Posted January 25 Cool. I see some new clutch springs there, what is the pressure rating on them? I am using the Barnett 100lb springs that Toecutter on VFRWorld used. I have had absolutely zero slip. ALL of the torque makes it to the road... my rear tires and wallet can confirm! 1 Quote Link to comment Share on other sites More sharing options...
rc24dk Posted January 28 Share Posted January 28 I even see a single plastic bag with a Honda parts label 😁 1 Quote Link to comment Share on other sites More sharing options...
WackenSS Posted January 31 Author Share Posted January 31 On 1/26/2024 at 12:59 AM, SEBSPEED said: Cool. I see some new clutch springs there, what is the pressure rating on them? I am using the Barnett 100lb springs that Toecutter on VFRWorld used. I have had absolutely zero slip. ALL of the torque makes it to the road... my rear tires and wallet can confirm! I have the springs Dan supplied and I don't suspect them to be done for but I'll just change them while I'm in there. I seem to remember some slippage wich I never could replicate so I'm going total refreshon the system as a whole! Barnett as the www seem to aggree that this is top shelf. Also time to inspect the slave! Still waiting for 4 more plates as they are on backorder. The springs are "+15% stiffer than oem" ebc - no specs mentioned and to make it impossible to understand they also have another kit wich is just stronger with a different part# 🤷 I'll compare with Dan's. Quote Link to comment Share on other sites More sharing options...
WackenSS Posted January 31 Author Share Posted January 31 On 1/28/2024 at 10:14 AM, rc24dk said: I even see a single plastic bag with a Honda parts label 😁 I effin love OEM parts! They just do what they are designed for and last forever. These are the plastic rings on top of the lower front suspension. Debris stoppers 😅 A big part of my bike are now from usa mostly because used bike parts are not a big business here, but also because of the availability of super wierd parts where i live is off the shelf in usa. All brake components are ebay oem used and rebuilt. Quote Link to comment Share on other sites More sharing options...
SEBSPEED Posted January 31 Share Posted January 31 1 hour ago, WackenSS said: I have the springs Dan supplied and I don't suspect them to be done for but I'll just change them while I'm in there. I seem to remember some slippage wich I never could replicate so I'm going total refreshon the system as a whole! Barnett as the www seem to aggree that this is top shelf. Also time to inspect the slave! Still waiting for 4 more plates as they are on backorder. The springs are "+15% stiffer than oem" ebc - no specs mentioned and to make it impossible to understand they also have another kit wich is just stronger with a different part# 🤷 I'll compare with Dan's. Some additional (anecdotal) information re: spring pressures here: Quote Link to comment Share on other sites More sharing options...
WackenSS Posted February 3 Author Share Posted February 3 Interesting and nerdy read. I'll check it when I start that part. Quote Link to comment Share on other sites More sharing options...
WackenSS Posted February 3 Author Share Posted February 3 Let's start! I'm jumping a bit back and forth to get an overview as to what is lacking and what needs attention other than what I already know. Let's start suspension and exhaust. Matris suspension upgrade done, no issues. I'm sure this will cure the seasickness that comes with a 24 year old bike! Vtr1000 lowers replaced the vfr's and cbr954 brake setup will be put in its place. Not to mention springs are now Viking sized instead of Japanese lightweights. Both suspension and brakes will be a "temporary" upgrade while figuring which way I want to go later. There is a pic of one alternative I have collected last year at the bottom. The headers installation was not that straight forward ( pun coming) There could be more straightness (pun inserted) added to this project. Every piece of pipe/flange had to be forced in place. I wonder how that jig was produced... The welds are not that great (looking) and it has NOT been purged while welding. A great upgrade to flow and longevity - but could have flowed better with purging. You can clearly see how intrusive the old gaskets are on flow. Great to get rid of! One of my priorities on this round is to save weight on every piece i touch and remove unwanted features. I cut all i could of the centerstand/shock Mount and binned the center stand. I never used it and never will. 1.95 kg gone - I wish it was almost 2 kg removed from higher up on the bike but it's hp/kg focus. More numbers will follow as the Winter diet continues! 2 1 Quote Link to comment Share on other sites More sharing options...
WackenSS Posted February 23 Author Share Posted February 23 A tiny big update. I wanted to do this for a long time but there is not alot of options for keeping this priced within my budget - untill I realized this was something you could buy as bolt on mod for ducatis. So one week later my panigale bolt on cover arrived and it turned out perfect. I wanted make this as low profile as possible so I had to move the filler neck inwards. The ring is welded on the outside and the neck from the inside. This makes me able to inspect the clutch and watch it rotate with ease! You see it's kind of a hassle to remove the clutch cover as the supercharger pulley is glued, the belt needs tensioning and of course the right fairing needs to come of. Now it's a 10 minute job to change the clutch. If someone know how to remove the text on the anodized ring id like to know how without having to re-anodize the whole ring. It's not engraved and it's on top of the anodozing. 5 Quote Link to comment Share on other sites More sharing options...
WackenSS Posted March 18 Author Share Posted March 18 (edited) So mowing forward. Rapidbike, youtube with LSU.4.9x2, Series regulator with homemade mounting plate, rewired with 40a fuse and lithium battery is now in its final location. I only have to fabricate a mount for the rapidbike ECU but I could not resist firing up and see what could be done to the MAP. After guesstimating some fuel cells based on my custom PCIII map and what Dan sent me as test maps before the custom one, sadly as I suspected all along, the rapidbike does not allow big enough numbers! Negative 10 or positive 30 fuel trim is all I'm allowed to adjust. This results in afr 13.2:1 on idle and reving send it down in the 11 area. Before putting -10 in the 0 column i had AFR 12.1 on idle! This is no good so I am inspecting what can be done. I am certain that the youtune will not be able to add another positive 40ish to already maxed columns. Also, and did this not occur to me before now (huge facepalm) rapidbike has linked 1-4 and 2-3 which is great for the vfrd headers but my plan was running front and rear on separate MAP for obvious reason. Darn it... Should have gone 4 bungs in production. But it's good to hear her fire again 😁 The PCIII trim are negative 40's and positive 80's as reference. is there room for the RSV4 1100 engine? Edited March 18 by WackenSS Typo/misspellings 1 Quote Link to comment Share on other sites More sharing options...

Recommended Posts
Join the conversation
You can post now and register later. If you have an account, sign in now to post with your account.