Member Contributer Willy Posted December 19, 2017 Author Member Contributer Share Posted December 19, 2017 22 hours ago, Woodie said: I've got 4 and a half... If I buy any More SWiMBO might notice.I've only gotten away with it so far as they are all the same colour.. Now that's hilarious.. Although if it works... Hmmmm.. Link to comment Share on other sites More sharing options...
Member Contributer Willy Posted December 21, 2017 Author Member Contributer Share Posted December 21, 2017 She's finally off blocks and back on her own two feet. The DMR fork cartridges went in - thanks to great support from Jamie. Rear CCT done. TB exhaust and heat shield installed. Rear sets and foot controls on. Forks on, wheels and tires. Handle bar controls in progress - I stopped last night when the throttle side rubber handgrip kept fighting with me. I still have front calipers to rebuild, and install. Then some loose plumbing, add fluids, etc... Maybe hit the start button in 2018. Thanks for al the help! Link to comment Share on other sites More sharing options...
Urbanengineer Posted December 21, 2017 Share Posted December 21, 2017 Spray hairspray, push and spin forwards. Best of luck with that. Have you put the bike’s value into it in parts so far? It’ll hopefully run like new. Link to comment Share on other sites More sharing options...
Member Contributer Willy Posted December 21, 2017 Author Member Contributer Share Posted December 21, 2017 Been using soap and worked fine on the clutch side. Throttle side grip has a thinner wall thickness and is rather flimsy. Hairspray? I'll give that a try. I'm sure the cashier at the drugstore will wonder why I'm buying hairspray given my hair's about 1/4 inch long. :-) And yes, I've exceeded the bike's purchase price and approaching resale value. Exhaust, suspension, and electrical were the most expensive components. Tires, a new windshield also not cheap. Smaller elements like gaskets, hardware, etc are of course cheaper but are much more numerous. Found a replacement OEM seat chap on eBay. It all adds up. I would have been better off buying a bike not needing all this attention, but then I'd not have so much fun working on it. Cheers! Link to comment Share on other sites More sharing options...
Urbanengineer Posted December 27, 2017 Share Posted December 27, 2017 Isn't it sad that we enjoy this work! I did have to take mine to the dealer to fix the braking issue, but hey, I did everything else :). It all does really add up. Just make sure to keep an excel sheet to prove the bike's value in the end. Most bikes are NOT maintained at all, so a maintained one with records is worth its weight in gold :). Link to comment Share on other sites More sharing options...
Sweeper Posted December 28, 2017 Share Posted December 28, 2017 I use a small nozzle to shoot compressed air under the grip until its on. Works great!Sent from my iPhone using Tapatalk Link to comment Share on other sites More sharing options...
Member Contributer Marvelicious Posted December 28, 2017 Member Contributer Share Posted December 28, 2017 17 hours ago, Sweeper said: I use a small nozzle to shoot compressed air under the grip until its on. Works great! Sent from my iPhone using Tapatalk Best way by far if you have a compressor. Link to comment Share on other sites More sharing options...
Member Contributer Willy Posted January 3, 2018 Author Member Contributer Share Posted January 3, 2018 On 12/27/2017 at 3:12 PM, Urbanengineer said: Isn't it sad that we enjoy this work! I did have to take mine to the dealer to fix the braking issue, but hey, I did everything else :). It all does really add up. Just make sure to keep an excel sheet to prove the bike's value in the end. Most bikes are NOT maintained at all, so a maintained one with records is worth its weight in gold :). Very good idea. So far I have just been piling up receipts on the garage bench... Link to comment Share on other sites More sharing options...
Member Contributer Willy Posted January 3, 2018 Author Member Contributer Share Posted January 3, 2018 On 12/27/2017 at 6:42 PM, Sweeper said: I use a small nozzle to shoot compressed air under the grip until its on. Works great! Sent from my iPhone using Tapatalk The grips I bought are open ended. I tried to use a compressor but the opening is too large to get any pressure built up inside the grip. I've been away for a couple weeks and have not gotten back to the pesky grip. This weekend I hope to get restarted.... Cheers! Link to comment Share on other sites More sharing options...
Sweeper Posted January 3, 2018 Share Posted January 3, 2018 1 hour ago, Willy said: The grips I bought are open ended. I tried to use a compressor but the opening is too large to get any pressure built up inside the grip. I've been away for a couple weeks and have not gotten back to the pesky grip. This weekend I hope to get restarted.... Cheers! Grab the grip on the inside with your thumb and index finger just enough to restrict air flow. While blowing air in the outside edge slide the grip on. Mine blow up enough that they slide right on even over a layer of rubber. Link to comment Share on other sites More sharing options...
Member Contributer Cogswell Posted January 4, 2018 Member Contributer Share Posted January 4, 2018 Once the grip is started, I work the tip of the nozzle between the grip and throttle tube. With enough psi and flow that seems to give it enough to slide it on. I've never used soap, spray or any type of lube to mount grips - love the compressed air method. The build is looking really good - like a new bike. Wrenching over the winter can be good therapy and very satisfying. Link to comment Share on other sites More sharing options...
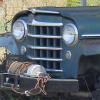
Member Contributer Willy Posted January 8, 2018 Author Member Contributer Share Posted January 8, 2018 A little more therapy progress this weekend. This bike must have been stored outside as the paint had a very rough feel to it. It "looked OK" but when I ran a finger across it felt rough and it sounded like running your finger across sandpaper. I tried a name brand cleaner/polish and wax. No real improvement. I had heard of using clay before but had never tried it. WOW! this stuff works and works well. The paint now is glass smooth. Here's a picture of the clay after a few swipes across the surface of the gas tank (after I had already used a cleaner on it). I was amazed at the amount of grit that the clay pulled out of the paint. Anyway I guess this is a plug for clay if you have some paint that needs attention. I still need to follow up with a quality hand polish, wax, and sealer, which I will do once it's all assembled and running. And on that note I had to reroute the throttle cables. Apparently when I put the new cables on I misrouted them and they were binding at full lock in both directions. While I had the throttle assembly off again, I warmed the new throttle grip in hot water and then soaped it up and it slid right on. All good. Thanks all for the advice on that topic. I now have the front cowl on. I fully disassembled it, cleaned it, used the clay bar on it. Reassembled with new Silverstar bulbs because those things are a pain in the butt to change with the cowl on. Here's a pic of where it stands; I need to finally get to the front calipers. Not looking forward to all the bleeding needed but we'll get it done. Once I get the brakes sorted, I have some minor plumbing to route and secure. Then add fluids and see if she starts up. I'm expecting that a starter valve sync will be needed as well. Lots of therapy still to go! Cheers! Link to comment Share on other sites More sharing options...
Rogue_Biker Posted January 8, 2018 Share Posted January 8, 2018 It's definitely looking a whole lot better now. I could tell from the first set of photo's that the bike didn't get much love from all the PO's. Link to comment Share on other sites More sharing options...
Member Contributer Africord Posted January 9, 2018 Member Contributer Share Posted January 9, 2018 6 hours ago, Willy said: And on that note I had to reroute the throttle cables. Apparently when I put the new cables on I misrouted them and they were binding at full lock in both directions. While I had the throttle assembly off again, I warmed the new throttle grip in hot water and then soaped it up and it slid right on. All good. Thanks all for the advice on that topic. I now have the front cowl on. I fully disassembled it, cleaned it, used the clay bar on it. Reassembled with new Silverstar bulbs because those things are a pain in the butt to change with the cowl on. Here's a pic of where it stands; I need to finally get to the front calipers. Not looking forward to all the bleeding needed but we'll get it done. Once I get the brakes sorted, I have some minor plumbing to route and secure. Then add fluids and see if she starts up. I'm expecting that a starter valve sync will be needed as well. Lots of therapy still to go! Cheers! 2 I didn't see the conclusion on the rotors. I recently replaced mine with EBC https://www.summitracing.com/parts/ebp-md1157x/applications. The Honda OEMs were too rich for me. I have about 54,000 on my 02. Link to comment Share on other sites More sharing options...
Member Contributer Willy Posted January 9, 2018 Author Member Contributer Share Posted January 9, 2018 4 hours ago, Rogue_Biker said: It's definitely looking a whole lot better now. I could tell from the first set of photo's that the bike didn't get much love from all the PO's. Thanks Rogue. It is actually shaping up pretty well. Working on front calipers as we speak. If all goes well I will hit the starter button on Friday afternoon. If it starts a cigar is in order. Link to comment Share on other sites More sharing options...
Member Contributer Willy Posted January 9, 2018 Author Member Contributer Share Posted January 9, 2018 37 minutes ago, Africord said: I didn't see the conclusion on the rotors. I recently replaced mine with EBC https://www.summitracing.com/parts/ebp-md1157x/applications. The Honda OEMs were too rich for me. I have about 54,000 on my 02. I used a micrometer and measured both rotors in several places. They are within spec but worn about 50% (48,000 miles). New rotors were just out of the question cost wise right now. So I used a block and some emery cloth and solvent and honed them best I could to take the glaze off them. When I test ride this, I'll see how that worked out. I may need to replace them anyway. When I rode the bike home on the day of purchase the brakes were "OK" but certainly not as good as they can be. So we'll see if rebuilt calipers, new pads, new fluid is enough to restore braking to where I want it. One step at a time.... Link to comment Share on other sites More sharing options...
Member Contributer RobF Posted January 9, 2018 Member Contributer Share Posted January 9, 2018 Love this thread! 7 hours ago, Willy said: I need to finally get to the front calipers. Not looking forward to all the bleeding needed but we'll get it done. Once I get the brakes sorted, I have some minor plumbing to route and secure. Then add fluids and see if she starts up. I'm expecting that a starter valve sync will be needed as well. When you get to the brakes, if you haven't seen it already, jay-d posted the definitive 6th Gen brake bleeding guide here: http://www.vfrdiscussion.com/index.php/topic/70842-bleedingfluid-replacement-on-linked-brakes-wabs-on-6th-generation-the-ultimate-guide Link to comment Share on other sites More sharing options...
Member Contributer RobF Posted January 9, 2018 Member Contributer Share Posted January 9, 2018 9 minutes ago, Willy said: So I used a block and some emery cloth and solvent and honed them best I could to take the glaze off them. There is a persistent line of thinking among some knowledgeable folks that new (or re-surfaced) pads and/or rotors should be properly "bedded". I've always been about 30% suspicious that the practice is pure voodoo, but if I had to place a final wager, I guess on balance I believe it. The thinking is that the rotor's coefficient of friction is improved by receiving a coating of material from the pads. See here: http://brakeperformance.com/bedding-in-rotors.php https://www.youtube.com/watch?v=6-dyTsrMMhA Link to comment Share on other sites More sharing options...
Member Contributer Willy Posted January 9, 2018 Author Member Contributer Share Posted January 9, 2018 1 hour ago, RobF said: Love this thread! When you get to the brakes, if you haven't seen it already, jay-d posted the definitive 6th Gen brake bleeding guide here: http://www.vfrdiscussion.com/index.php/topic/70842-bleedingfluid-replacement-on-linked-brakes-wabs-on-6th-generation-the-ultimate-guide Yep that's a great thread thank you. I bled the lines on my last VFR with linked brakes and its doable - just not my idea of fun. I'll follow the proper sequence and see how it goes. I expect that first pass will be less than hoped for and a second and third pass likely needed. Eventually I'll get it right. I plan to delink this thing at some point but for now will go through the trials of bleeding the linked system. Link to comment Share on other sites More sharing options...
Urbanengineer Posted January 9, 2018 Share Posted January 9, 2018 Gee thanks... glad someone posted to MY thread... Fuckin paid the dealer $200 to store my bike and bleed it (total cost). Link to comment Share on other sites More sharing options...
Rogue_Biker Posted January 9, 2018 Share Posted January 9, 2018 You could have done it for the cost of the brake fluid. But yeah it's time consuming and not at all intiuitive to bleed the 6th Gen brakes. But once you understand how the linked brakes work, you'll get why it's done a certain way. Link to comment Share on other sites More sharing options...
Member Contributer Willy Posted January 14, 2018 Author Member Contributer Share Posted January 14, 2018 Someday I'll share a not so funny story about trying to swap in nice shiny gold calipers for my crusty black ones. Nevermind they were ABS calipers - save this for another day.... Thanks to the thread referenced on VFRD, and a very helpful neighbor, the brakes are all bled and have good feel on them. I expect I'll need to burp them one more time in a week or so once all the foamy bubbles collect. Still it all feels good in the garage. Need to ride it to be sure. It only takes time and a few tools. Pay no attention to the special fluid in the brown bottle that followed bleeding..... Link to comment Share on other sites More sharing options...
Member Contributer Willy Posted January 14, 2018 Author Member Contributer Share Posted January 14, 2018 I've never tried to upload a video clip. But here goes. Not the best sound quality but it makes the point - that I'm a lucky bugger IT ACTUALLY STARTED! Miguel, if I'm hogging disc space feel free to delete this. I kept it short.... DSCN1384.MOV Still need to clean up the side cowls and reinstall. And my LED flashers do not work despite changing out the flasher relay for one advertised as one that is LED compatible... And my OEM seat that I bought on eBay will not fully latch down. So minor stuff to sort out. Weather here in Boise is actually good enough to ride. Hopefully a short one on Sunday afternoon or Monday before next storm. So many thanks to all you guys for your help! Link to comment Share on other sites More sharing options...
Member Contributer RRM Posted January 16, 2018 Member Contributer Share Posted January 16, 2018 On 1/13/2018 at 7:46 PM, Willy said: Someday I'll share a not so funny story about trying to swap in nice shiny gold calipers for my crusty black ones. Nevermind they were ABS calipers - save this for another day.... Thanks to the thread referenced on VFRD, and a very helpful neighbor, the brakes are all bled and have good feel on them. I expect I'll need to burp them one more time in a week or so once all the foamy bubbles collect. Still it all feels good in the garage. Need to ride it to be sure. It only takes time and a few tools. Pay no attention to the special fluid in the brown bottle that followed bleeding..... I agree...India Pale Ale (in limited quantity) does help with the procedure. Cheers, R. Link to comment Share on other sites More sharing options...
Member Contributer Willy Posted January 21, 2018 Author Member Contributer Share Posted January 21, 2018 Officially done. Its been several months of free time to go through every major system of this bike. Weather was mild enough here yesterday that I was able to get out for a short 40 miles "test ride". I couldn't be happier with the result. I forgot how much fun it was to ride a VFR. Yahoo! This one with 48,000 miles runs better than my first VFR when I sold it with half the mileage. Butter smooth. All systems go. Thank you to VFRD for all your advice and info along the way. Cheers! Link to comment Share on other sites More sharing options...

Recommended Posts
Archived
This topic is now archived and is closed to further replies.